![- 2 cups all-purpose flour - 1/2 cup packed brown sugar - 1 tablespoon baking powder - 1/2 teaspoon baking soda - 1/2 teaspoon fine sea salt - 1 teaspoon ground cinnamon - 1/2 teaspoon ground ginger - 1/4 teaspoon ground nutmeg - 1/2 cup unsalted butter, cold and cut into small cubes - 1/2 cup canned pumpkin puree - 1/4 cup heavy cream - 1 large egg, lightly beaten - 1 teaspoon vanilla extract - 1 cup powdered sugar (for glaze) - 2 tablespoons pure maple syrup Gathering the right ingredients is key to making these delicious maple glazed pumpkin scones. You will need basic items like flour and sugar. The pumpkin puree gives the scones a warm flavor and moist texture. The spices, like cinnamon and nutmeg, add that cozy fall feeling. - Mixing bowls - Whisk or fork - Pastry cutter (optional) - Knife or biscuit cutter - Baking sheet - Parchment paper You will need a few tools to make this recipe easy. Mixing bowls help combine the dry and wet ingredients. A whisk or fork mixes them well. A baking sheet lined with parchment paper keeps the scones from sticking. Each scone has about 200 calories. They contain about 10 grams of fat and 28 grams of carbs. These scones are a tasty treat but should be enjoyed in moderation. For a full breakdown, check the [Full Recipe]. Using fresh ingredients makes a big difference. When you bake, you want everything to taste great. Enjoy the process and have fun in the kitchen! - Preheat oven to 400°F (200°C) - Line the baking sheet with parchment paper First, you need to get the oven hot. Preheating is key for the best texture. While it heats, prepare your baking sheet. Parchment paper helps keep the scones from sticking. This simple step makes cleanup easier too. - Combine flour, sugar, baking powder, baking soda, salt, and spices In a big bowl, mix together the dry ingredients. Use a whisk to blend them well. You’ll need flour, brown sugar, baking powder, baking soda, salt, and spices like cinnamon and nutmeg. This mix gives the scones their lovely flavor. The spices bring warmth, perfect for fall. - Blend cold butter into the dry mixture until crumbly Next, it’s time for the butter. Cut cold butter into small cubes. Add it to the dry mix. Use your fingers or a pastry cutter to blend until it looks crumbly. You want little bits of butter to stay. This makes the scones flaky and tender. - Mix pumpkin puree, heavy cream, egg, and vanilla separately Now, grab another bowl. Combine pumpkin puree, heavy cream, an egg, and vanilla extract. This mix adds moisture and flavor. Stir until everything is well blended. The pumpkin gives a lovely color and taste to the scones. - Combine wet and dry ingredients, avoiding overmixing - Shape dough into a disc and cut into wedges Pour the wet mixture into the dry mix. Use a spatula to fold them together. Be gentle; don’t overmix. You want a soft dough, not tough scones. Once combined, turn the dough onto a floured surface. Shape it into a disc about one inch thick. Cut it into wedges for that classic scone look. - Transfer to baking sheet and bake for 15-18 minutes Place the scone wedges on the baking sheet. Make sure there’s space between them. Bake in the preheated oven for 15-18 minutes. Look for a light golden color on top. This means they're done! - Whisk powdered sugar and maple syrup together While the scones bake, let’s make the glaze. In a small bowl, whisk together powdered sugar and pure maple syrup. Mix until it’s smooth. This glaze adds sweetness and that lovely maple flavor. - Drizzle glaze over scones once cooled Once the scones are out of the oven, let them cool on a wire rack. When they are cool but still warm, drizzle the maple glaze over the top. This adds a sweet finish, making each bite a delight. You can find the full recipe for more detailed steps! To get the best texture, you must avoid overmixing the dough. When making scones, mix just until the dry and wet ingredients blend. Overmixing makes scones tough. You want them light and fluffy. Gently fold the mixture with a spatula. This keeps air in the dough, making your scones tender and soft. You can add even more flavor to your scones! Try mixing in chocolate chips or nuts for a tasty twist. Chopped pecans or walnuts give a nice crunch. If you love spice, add more cinnamon or a hint of cardamom. This can give your scones a unique taste that surprises everyone. Don't be shy to experiment with different ingredients! For the best experience, serve your scones with warm drinks. Coffee or tea pairs perfectly with the sweet glaze. A pumpkin spice latte or a chai tea can enhance the fall vibe. You can also enjoy them with a dollop of whipped cream. This makes for a cozy treat on a chilly morning. Set the scene with a lovely plate and a sprinkle of cinnamon for a touch of charm. {{image_4}} You can customize your scones by adding more spices. Try using cloves or allspice for extra warmth. You can even add flavored extracts like almond or orange. These small changes can create a whole new flavor profile. I like to play with these to find my favorite mix. If you want gluten-free scones, swap regular flour for a gluten-free blend. Look for blends that include rice flour, almond flour, or oat flour. These will help keep the texture light and fluffy. Just remember, using a gluten-free mix can change how the scones rise. To make vegan scones, replace the butter with coconut oil or vegan butter. Use a flax egg by mixing one tablespoon of flaxseed meal with three tablespoons of water. Let it sit until it thickens. Instead of heavy cream, you can use almond milk or coconut cream. These swaps keep the scones delicious and friendly for everyone! For the full recipe, check out the detailed instructions above. To keep your scones fresh, store them in an airtight container. This will prevent them from drying out. If you want to keep them for a few days, place a paper towel inside. This helps absorb moisture. Keep the container at room temperature, away from direct sunlight. The scones should stay good for about three days. If you want to save scones for later, freezing is a great option. Wrap each scone in plastic wrap. Then place them in a freezer-safe bag or container. Make sure to remove any air from the bag to prevent freezer burn. The scones can last up to three months in the freezer. When you're ready to eat, let them thaw in the fridge overnight. To enjoy your scones warm, you can reheat them in several ways. For a quick option, use the microwave for about 15-20 seconds. If you want a crispier texture, use the oven. Preheat it to 350°F (175°C) and heat the scones for about 10 minutes. This will bring back their fresh-baked feel. For the best taste, drizzle some extra maple glaze on top after reheating. Maple glazed pumpkin scones stay fresh for about 2 to 3 days. Keep them in an airtight container. This way, they won't dry out. If you want them to last longer, you can freeze them. Just wrap each scone well in plastic wrap before freezing. Yes, you can make these scones ahead of time. Prepare the dough and shape it into wedges. Then, wrap the scones in plastic wrap and chill them in the fridge. Bake them the next morning for fresh scones. This saves time and gives you hot scones for breakfast. If you don't have pumpkin puree, you can use sweet potato puree. Mashed butternut squash also works well. Both options give a similar flavor and texture. You can even use applesauce for a sweeter take on the scones. Yes, you can use other syrups for the glaze. Honey or agave syrup can be great alternatives. They both add sweetness, but the flavor will change a bit. If you want a richer taste, try using caramel sauce instead. Absolutely! Adding nuts like chopped pecans or walnuts gives a nice crunch. You can also mix in chocolate chips for sweetness. Just be careful not to add too much. Adding too many mix-ins can change the scone's texture. It's best to keep it balanced for the perfect bite. Making these pumpkin scones is fun and rewarding. You combine simple ingredients, bake them, and enjoy a tasty treat. Remember to handle the dough gently to keep it light and tender. Whether you stick to the main recipe or play with flavors, you’ll create something delicious. Follow the tips for storage and variations for the best results. I hope you try this recipe and enjoy it as much as I do!](https://spoonfulsavory.com/wp-content/uploads/2025/07/2aa31eea-b5c9-442e-a754-1df1765876a6-768x768.webp)
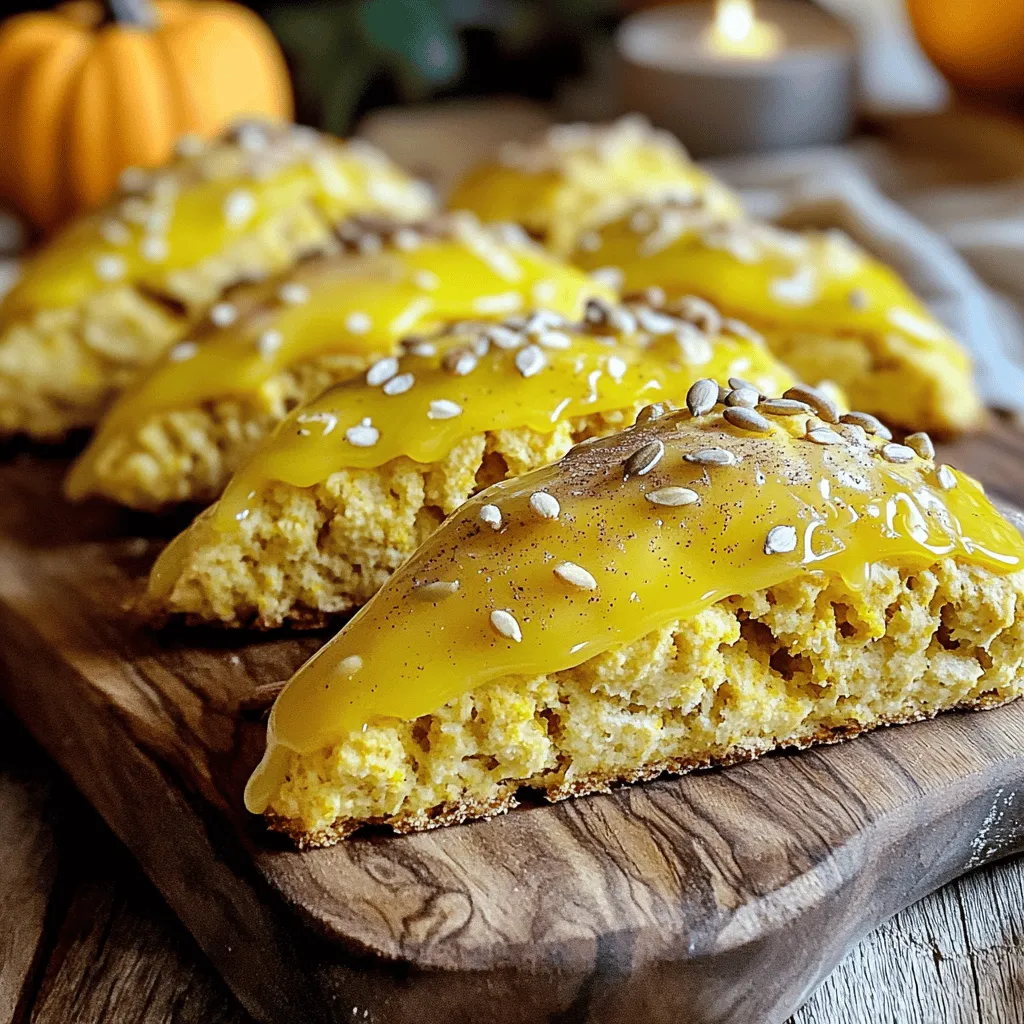
Fall mornings call for a special treat, and these maple glazed pumpkin scones fit the bill perfectly. With their warm spices and sweet glaze, they bring comfort with every bite. Plus, making them is simple! In this blog post, I’ll guide you through an easy step-by-step recipe, share tips for the best texture, and explore fun variations. Get ready to enjoy a delightful autumn breakfast that will impress everyone!
Ingredients
List of Ingredients
– 2 cups all-purpose flour
– 1/2 cup packed brown sugar
– 1 tablespoon baking powder
– 1/2 teaspoon baking soda
– 1/2 teaspoon fine sea salt
– 1 teaspoon ground cinnamon
– 1/2 teaspoon ground ginger
– 1/4 teaspoon ground nutmeg
– 1/2 cup unsalted butter, cold and cut into small cubes
– 1/2 cup canned pumpkin puree
– 1/4 cup heavy cream
– 1 large egg, lightly beaten
– 1 teaspoon vanilla extract
– 1 cup powdered sugar (for glaze)
– 2 tablespoons pure maple syrup
Gathering the right ingredients is key to making these delicious maple glazed pumpkin scones. You will need basic items like flour and sugar. The pumpkin puree gives the scones a warm flavor and moist texture. The spices, like cinnamon and nutmeg, add that cozy fall feeling.
Equipment Needed
– Mixing bowls
– Whisk or fork
– Pastry cutter (optional)
– Knife or biscuit cutter
– Baking sheet
– Parchment paper
You will need a few tools to make this recipe easy. Mixing bowls help combine the dry and wet ingredients. A whisk or fork mixes them well. A baking sheet lined with parchment paper keeps the scones from sticking.
Nutritional Information
Each scone has about 200 calories. They contain about 10 grams of fat and 28 grams of carbs. These scones are a tasty treat but should be enjoyed in moderation.
Using fresh ingredients makes a big difference. When you bake, you want everything to taste great. Enjoy the process and have fun in the kitchen!
Step-by-Step Instructions
Preheating and Preparing
– Preheat oven to 400°F (200°C)
– Line the baking sheet with parchment paper
First, you need to get the oven hot. Preheating is key for the best texture. While it heats, prepare your baking sheet. Parchment paper helps keep the scones from sticking. This simple step makes cleanup easier too.
Mixing Dry Ingredients
– Combine flour, sugar, baking powder, baking soda, salt, and spices
In a big bowl, mix together the dry ingredients. Use a whisk to blend them well. You’ll need flour, brown sugar, baking powder, baking soda, salt, and spices like cinnamon and nutmeg. This mix gives the scones their lovely flavor. The spices bring warmth, perfect for fall.
Incorporating Butter
– Blend cold butter into the dry mixture until crumbly
Next, it’s time for the butter. Cut cold butter into small cubes. Add it to the dry mix. Use your fingers or a pastry cutter to blend until it looks crumbly. You want little bits of butter to stay. This makes the scones flaky and tender.
Combining Wet Ingredients
– Mix pumpkin puree, heavy cream, egg, and vanilla separately
Now, grab another bowl. Combine pumpkin puree, heavy cream, an egg, and vanilla extract. This mix adds moisture and flavor. Stir until everything is well blended. The pumpkin gives a lovely color and taste to the scones.
Forming the Dough
– Combine wet and dry ingredients, avoiding overmixing
– Shape dough into a disc and cut into wedges
Pour the wet mixture into the dry mix. Use a spatula to fold them together. Be gentle; don’t overmix. You want a soft dough, not tough scones. Once combined, turn the dough onto a floured surface. Shape it into a disc about one inch thick. Cut it into wedges for that classic scone look.
Baking the Scones
– Transfer to baking sheet and bake for 15-18 minutes
Place the scone wedges on the baking sheet. Make sure there’s space between them. Bake in the preheated oven for 15-18 minutes. Look for a light golden color on top. This means they’re done!
Preparing Maple Glaze
– Whisk powdered sugar and maple syrup together
While the scones bake, let’s make the glaze. In a small bowl, whisk together powdered sugar and pure maple syrup. Mix until it’s smooth. This glaze adds sweetness and that lovely maple flavor.
Glazing and Cooling
– Drizzle glaze over scones once cooled
Once the scones are out of the oven, let them cool on a wire rack. When they are cool but still warm, drizzle the maple glaze over the top. This adds a sweet finish, making each bite a delight.
Tips & Tricks
Perfecting the Scone Texture
To get the best texture, you must avoid overmixing the dough. When making scones, mix just until the dry and wet ingredients blend. Overmixing makes scones tough. You want them light and fluffy. Gently fold the mixture with a spatula. This keeps air in the dough, making your scones tender and soft.
Flavor Enhancements
You can add even more flavor to your scones! Try mixing in chocolate chips or nuts for a tasty twist. Chopped pecans or walnuts give a nice crunch. If you love spice, add more cinnamon or a hint of cardamom. This can give your scones a unique taste that surprises everyone. Don’t be shy to experiment with different ingredients!
Serving Suggestions
For the best experience, serve your scones with warm drinks. Coffee or tea pairs perfectly with the sweet glaze. A pumpkin spice latte or a chai tea can enhance the fall vibe. You can also enjoy them with a dollop of whipped cream. This makes for a cozy treat on a chilly morning. Set the scene with a lovely plate and a sprinkle of cinnamon for a touch of charm.
Variations
Pumpkin Spice Variations
You can customize your scones by adding more spices. Try using cloves or allspice for extra warmth. You can even add flavored extracts like almond or orange. These small changes can create a whole new flavor profile. I like to play with these to find my favorite mix.
Gluten-Free Options
If you want gluten-free scones, swap regular flour for a gluten-free blend. Look for blends that include rice flour, almond flour, or oat flour. These will help keep the texture light and fluffy. Just remember, using a gluten-free mix can change how the scones rise.
Vegan Alternatives
To make vegan scones, replace the butter with coconut oil or vegan butter. Use a flax egg by mixing one tablespoon of flaxseed meal with three tablespoons of water. Let it sit until it thickens. Instead of heavy cream, you can use almond milk or coconut cream. These swaps keep the scones delicious and friendly for everyone!
Storage Info
Storing Leftover Scones
To keep your scones fresh, store them in an airtight container. This will prevent them from drying out. If you want to keep them for a few days, place a paper towel inside. This helps absorb moisture. Keep the container at room temperature, away from direct sunlight. The scones should stay good for about three days.
Freezing Instructions
If you want to save scones for later, freezing is a great option. Wrap each scone in plastic wrap. Then place them in a freezer-safe bag or container. Make sure to remove any air from the bag to prevent freezer burn. The scones can last up to three months in the freezer. When you’re ready to eat, let them thaw in the fridge overnight.
Reheating Options
To enjoy your scones warm, you can reheat them in several ways. For a quick option, use the microwave for about 15-20 seconds. If you want a crispier texture, use the oven. Preheat it to 350°F (175°C) and heat the scones for about 10 minutes. This will bring back their fresh-baked feel. For the best taste, drizzle some extra maple glaze on top after reheating.
FAQs
How long do maple glazed pumpkin scones last?
Maple glazed pumpkin scones stay fresh for about 2 to 3 days. Keep them in an airtight container. This way, they won’t dry out. If you want them to last longer, you can freeze them. Just wrap each scone well in plastic wrap before freezing.
Can I make these scones ahead of time?
Yes, you can make these scones ahead of time. Prepare the dough and shape it into wedges. Then, wrap the scones in plastic wrap and chill them in the fridge. Bake them the next morning for fresh scones. This saves time and gives you hot scones for breakfast.
What can I substitute for pumpkin puree?
If you don’t have pumpkin puree, you can use sweet potato puree. Mashed butternut squash also works well. Both options give a similar flavor and texture. You can even use applesauce for a sweeter take on the scones.
Can I use other types of syrup for glazing?
Yes, you can use other syrups for the glaze. Honey or agave syrup can be great alternatives. They both add sweetness, but the flavor will change a bit. If you want a richer taste, try using caramel sauce instead.
Can I add nuts or chocolate to the dough?
Absolutely! Adding nuts like chopped pecans or walnuts gives a nice crunch. You can also mix in chocolate chips for sweetness. Just be careful not to add too much. Adding too many mix-ins can change the scone’s texture. It’s best to keep it balanced for the perfect bite.
Making these pumpkin scones is fun and rewarding. You combine simple ingredients, bake them, and enjoy a tasty treat. Remember to handle the dough gently to keep it light and tender. Whether you stick to the main recipe or play with flavors, you’ll create something delicious. Follow the tips for storage and variations for the best results. I hope you try this recipe and enjoy it as much as I do!
![- 2 cups all-purpose flour - 1/2 cup packed brown sugar - 1 tablespoon baking powder - 1/2 teaspoon baking soda - 1/2 teaspoon fine sea salt - 1 teaspoon ground cinnamon - 1/2 teaspoon ground ginger - 1/4 teaspoon ground nutmeg - 1/2 cup unsalted butter, cold and cut into small cubes - 1/2 cup canned pumpkin puree - 1/4 cup heavy cream - 1 large egg, lightly beaten - 1 teaspoon vanilla extract - 1 cup powdered sugar (for glaze) - 2 tablespoons pure maple syrup Gathering the right ingredients is key to making these delicious maple glazed pumpkin scones. You will need basic items like flour and sugar. The pumpkin puree gives the scones a warm flavor and moist texture. The spices, like cinnamon and nutmeg, add that cozy fall feeling. - Mixing bowls - Whisk or fork - Pastry cutter (optional) - Knife or biscuit cutter - Baking sheet - Parchment paper You will need a few tools to make this recipe easy. Mixing bowls help combine the dry and wet ingredients. A whisk or fork mixes them well. A baking sheet lined with parchment paper keeps the scones from sticking. Each scone has about 200 calories. They contain about 10 grams of fat and 28 grams of carbs. These scones are a tasty treat but should be enjoyed in moderation. For a full breakdown, check the [Full Recipe]. Using fresh ingredients makes a big difference. When you bake, you want everything to taste great. Enjoy the process and have fun in the kitchen! - Preheat oven to 400°F (200°C) - Line the baking sheet with parchment paper First, you need to get the oven hot. Preheating is key for the best texture. While it heats, prepare your baking sheet. Parchment paper helps keep the scones from sticking. This simple step makes cleanup easier too. - Combine flour, sugar, baking powder, baking soda, salt, and spices In a big bowl, mix together the dry ingredients. Use a whisk to blend them well. You’ll need flour, brown sugar, baking powder, baking soda, salt, and spices like cinnamon and nutmeg. This mix gives the scones their lovely flavor. The spices bring warmth, perfect for fall. - Blend cold butter into the dry mixture until crumbly Next, it’s time for the butter. Cut cold butter into small cubes. Add it to the dry mix. Use your fingers or a pastry cutter to blend until it looks crumbly. You want little bits of butter to stay. This makes the scones flaky and tender. - Mix pumpkin puree, heavy cream, egg, and vanilla separately Now, grab another bowl. Combine pumpkin puree, heavy cream, an egg, and vanilla extract. This mix adds moisture and flavor. Stir until everything is well blended. The pumpkin gives a lovely color and taste to the scones. - Combine wet and dry ingredients, avoiding overmixing - Shape dough into a disc and cut into wedges Pour the wet mixture into the dry mix. Use a spatula to fold them together. Be gentle; don’t overmix. You want a soft dough, not tough scones. Once combined, turn the dough onto a floured surface. Shape it into a disc about one inch thick. Cut it into wedges for that classic scone look. - Transfer to baking sheet and bake for 15-18 minutes Place the scone wedges on the baking sheet. Make sure there’s space between them. Bake in the preheated oven for 15-18 minutes. Look for a light golden color on top. This means they're done! - Whisk powdered sugar and maple syrup together While the scones bake, let’s make the glaze. In a small bowl, whisk together powdered sugar and pure maple syrup. Mix until it’s smooth. This glaze adds sweetness and that lovely maple flavor. - Drizzle glaze over scones once cooled Once the scones are out of the oven, let them cool on a wire rack. When they are cool but still warm, drizzle the maple glaze over the top. This adds a sweet finish, making each bite a delight. You can find the full recipe for more detailed steps! To get the best texture, you must avoid overmixing the dough. When making scones, mix just until the dry and wet ingredients blend. Overmixing makes scones tough. You want them light and fluffy. Gently fold the mixture with a spatula. This keeps air in the dough, making your scones tender and soft. You can add even more flavor to your scones! Try mixing in chocolate chips or nuts for a tasty twist. Chopped pecans or walnuts give a nice crunch. If you love spice, add more cinnamon or a hint of cardamom. This can give your scones a unique taste that surprises everyone. Don't be shy to experiment with different ingredients! For the best experience, serve your scones with warm drinks. Coffee or tea pairs perfectly with the sweet glaze. A pumpkin spice latte or a chai tea can enhance the fall vibe. You can also enjoy them with a dollop of whipped cream. This makes for a cozy treat on a chilly morning. Set the scene with a lovely plate and a sprinkle of cinnamon for a touch of charm. {{image_4}} You can customize your scones by adding more spices. Try using cloves or allspice for extra warmth. You can even add flavored extracts like almond or orange. These small changes can create a whole new flavor profile. I like to play with these to find my favorite mix. If you want gluten-free scones, swap regular flour for a gluten-free blend. Look for blends that include rice flour, almond flour, or oat flour. These will help keep the texture light and fluffy. Just remember, using a gluten-free mix can change how the scones rise. To make vegan scones, replace the butter with coconut oil or vegan butter. Use a flax egg by mixing one tablespoon of flaxseed meal with three tablespoons of water. Let it sit until it thickens. Instead of heavy cream, you can use almond milk or coconut cream. These swaps keep the scones delicious and friendly for everyone! For the full recipe, check out the detailed instructions above. To keep your scones fresh, store them in an airtight container. This will prevent them from drying out. If you want to keep them for a few days, place a paper towel inside. This helps absorb moisture. Keep the container at room temperature, away from direct sunlight. The scones should stay good for about three days. If you want to save scones for later, freezing is a great option. Wrap each scone in plastic wrap. Then place them in a freezer-safe bag or container. Make sure to remove any air from the bag to prevent freezer burn. The scones can last up to three months in the freezer. When you're ready to eat, let them thaw in the fridge overnight. To enjoy your scones warm, you can reheat them in several ways. For a quick option, use the microwave for about 15-20 seconds. If you want a crispier texture, use the oven. Preheat it to 350°F (175°C) and heat the scones for about 10 minutes. This will bring back their fresh-baked feel. For the best taste, drizzle some extra maple glaze on top after reheating. Maple glazed pumpkin scones stay fresh for about 2 to 3 days. Keep them in an airtight container. This way, they won't dry out. If you want them to last longer, you can freeze them. Just wrap each scone well in plastic wrap before freezing. Yes, you can make these scones ahead of time. Prepare the dough and shape it into wedges. Then, wrap the scones in plastic wrap and chill them in the fridge. Bake them the next morning for fresh scones. This saves time and gives you hot scones for breakfast. If you don't have pumpkin puree, you can use sweet potato puree. Mashed butternut squash also works well. Both options give a similar flavor and texture. You can even use applesauce for a sweeter take on the scones. Yes, you can use other syrups for the glaze. Honey or agave syrup can be great alternatives. They both add sweetness, but the flavor will change a bit. If you want a richer taste, try using caramel sauce instead. Absolutely! Adding nuts like chopped pecans or walnuts gives a nice crunch. You can also mix in chocolate chips for sweetness. Just be careful not to add too much. Adding too many mix-ins can change the scone's texture. It's best to keep it balanced for the perfect bite. Making these pumpkin scones is fun and rewarding. You combine simple ingredients, bake them, and enjoy a tasty treat. Remember to handle the dough gently to keep it light and tender. Whether you stick to the main recipe or play with flavors, you’ll create something delicious. Follow the tips for storage and variations for the best results. I hope you try this recipe and enjoy it as much as I do!](https://spoonfulsavory.com/wp-content/uploads/2025/07/2aa31eea-b5c9-442e-a754-1df1765876a6-250x250.webp)
