 with all the details to make it easy! 1. Start by blending the berry mixture. - Add 1 cup of mixed berries and 2 tablespoons of honey or maple syrup into a blender. - Blend until smooth. Leave some berry bits for texture if you like. 2. Next, prepare the yogurt mixture. - In a bowl, mix 2 cups of Greek yogurt with 1 teaspoon of pure vanilla extract and a pinch of salt. - Stir until creamy and well combined. 3. Now, layer the mixtures in popsicle molds. - Take half of the berry blend and fold it gently into the yogurt. - This creates a lovely marbled look. - Use a spoon to alternate layers of yogurt and the remaining berry puree in your molds. - Freeze the popsicles for about 4 to 6 hours. - For the best results, let them freeze until they are solid. - To remove popsicles from molds easily, run warm water over the outside for a few seconds. - This trick will help loosen them for a smooth pull. For the full recipe, visit the recipe section above! Enjoy your berry yogurt popsicles! To make your popsicles just right, you can adjust the sweetness. If you like it sweeter, add more honey or maple syrup. For a less sweet treat, use less sweetener. This gives you control over the flavor. When it comes to texture, you have options. You can blend the berry mixture until smooth for a creamy popsicle. If you prefer some berry chunks, blend it less. This adds a fun texture to each bite. Presentation matters too! Serve your popsicles on a bright platter. You can add fresh mint leaves and whole berries around them. This makes your treats look inviting and fresh. The visual appeal enhances the tasting experience. Enjoy your beautiful creation! For the full recipe, be sure to check the detail above! {{image_4}} You can get creative with berry yogurt popsicles. Try mixing different berries like strawberries, blueberries, and raspberries. These berries bring sweet and tart notes. You can also add bananas or peaches for a twist. Bananas add creaminess, while peaches add a light, juicy flavor. If you want to enjoy these pops without dairy, use coconut or almond yogurt. These give a nice taste and a creamy texture. For those watching their sugar, you can cut back. Use less honey or maple syrup. You can also try stevia or monk fruit sweetener for a low-calorie option. If you want a vegan treat, swap Greek yogurt for a plant-based yogurt. Look for options made from almond, soy, or coconut. These keep the pops creamy and delicious. Make these berry yogurt popsicles your own! You can use the [Full Recipe] as a guide and experiment with flavors that you love. To keep your Berry Yogurt Popsicles fresh, store them in airtight containers or freezer bags. This helps prevent ice crystals from forming. Label each container with the date you made them. You can keep these popsicles in the freezer for up to 2 months without losing flavor. After this time, they might taste a bit bland. When you’re ready to enjoy your popsicles, you should thaw them gently. The best way is to let them sit at room temperature for about 5 minutes. If you’re in a hurry, run warm water over the outside of the molds for a few seconds. This will help loosen the popsicles for easy removal. Enjoy your treat when it’s nice and soft! How long do homemade popsicles last in the freezer? Homemade popsicles can last about 2 to 3 months in the freezer. They stay tasty and safe to eat during this time. After that, they might lose some flavor or texture. Can I use other types of yogurt for this recipe? Yes, you can. You can use regular yogurt, plant-based yogurt, or even flavored yogurt. Just keep in mind that flavored yogurt will change the taste. Greek yogurt gives a nice creamy texture. What to do if my popsicles are too hard? If your popsicles are too hard, try letting them sit at room temperature for a few minutes. This will help them soften up. You can also run warm water over the molds to loosen them. Can I make these popsicles without molds? Yes, you can! You can use small cups or ice cube trays instead. Just stick a popsicle stick in the center before they freeze. This way, you enjoy delicious popsicles without special molds. In this guide, we explored how to make berry yogurt popsicles from scratch. You learned about choosing the right ingredients, preparing the mixtures, and layering them in molds. I shared tips for perfecting flavor and texture. Now you’re ready to make popsicles that please your taste buds. Enjoy experimenting with flavors and share your creations. Simple steps lead to delicious results. Happy popsicle making!](https://spoonfulsavory.com/wp-content/uploads/2025/07/b04561c9-2f6d-49be-99cb-75228f3b2286-768x768.webp)
Looking for a cool treat this summer? Berry yogurt popsicles are simple, tasty, and perfect for hot days. With creamy Greek yogurt and fresh berries, these popsicles deliver great flavor and nutrition. I’ll guide you through easy steps, fun variations, and handy tips to make your popsicles a hit. Get ready to enjoy a refreshing treat that you can feel good about! Let’s dive into the details of making berry yogurt popsicles!
Ingredients
Detailed List of Ingredients
– Greek yogurt options: You can use plain or vanilla Greek yogurt. Plain gives a tangy taste, while vanilla adds sweetness.
– Types of berries: For the best flavor, use a mix of strawberries, blueberries, and raspberries. Each berry brings its own taste and color.
– Sweeteners: Honey or maple syrup work well. You can adjust the amount to fit your taste.
– Additional flavor enhancers: A teaspoon of pure vanilla extract adds depth. A pinch of salt enhances the flavors too.
These ingredients come together for a refreshing treat. The blend of yogurt and berries makes a perfect popsicle.
Step-by-Step Instructions
Preparation Steps
1. Start by blending the berry mixture.
– Add 1 cup of mixed berries and 2 tablespoons of honey or maple syrup into a blender.
– Blend until smooth. Leave some berry bits for texture if you like.
2. Next, prepare the yogurt mixture.
– In a bowl, mix 2 cups of Greek yogurt with 1 teaspoon of pure vanilla extract and a pinch of salt.
– Stir until creamy and well combined.
3. Now, layer the mixtures in popsicle molds.
– Take half of the berry blend and fold it gently into the yogurt.
– This creates a lovely marbled look.
– Use a spoon to alternate layers of yogurt and the remaining berry puree in your molds.
Freezing Process
– Freeze the popsicles for about 4 to 6 hours.
– For the best results, let them freeze until they are solid.
– To remove popsicles from molds easily, run warm water over the outside for a few seconds.
– This trick will help loosen them for a smooth pull.Enjoy your berry yogurt popsicles!
Tips & Tricks
Perfecting the Popsicles
To make your popsicles just right, you can adjust the sweetness. If you like it sweeter, add more honey or maple syrup. For a less sweet treat, use less sweetener. This gives you control over the flavor.
When it comes to texture, you have options. You can blend the berry mixture until smooth for a creamy popsicle. If you prefer some berry chunks, blend it less. This adds a fun texture to each bite.
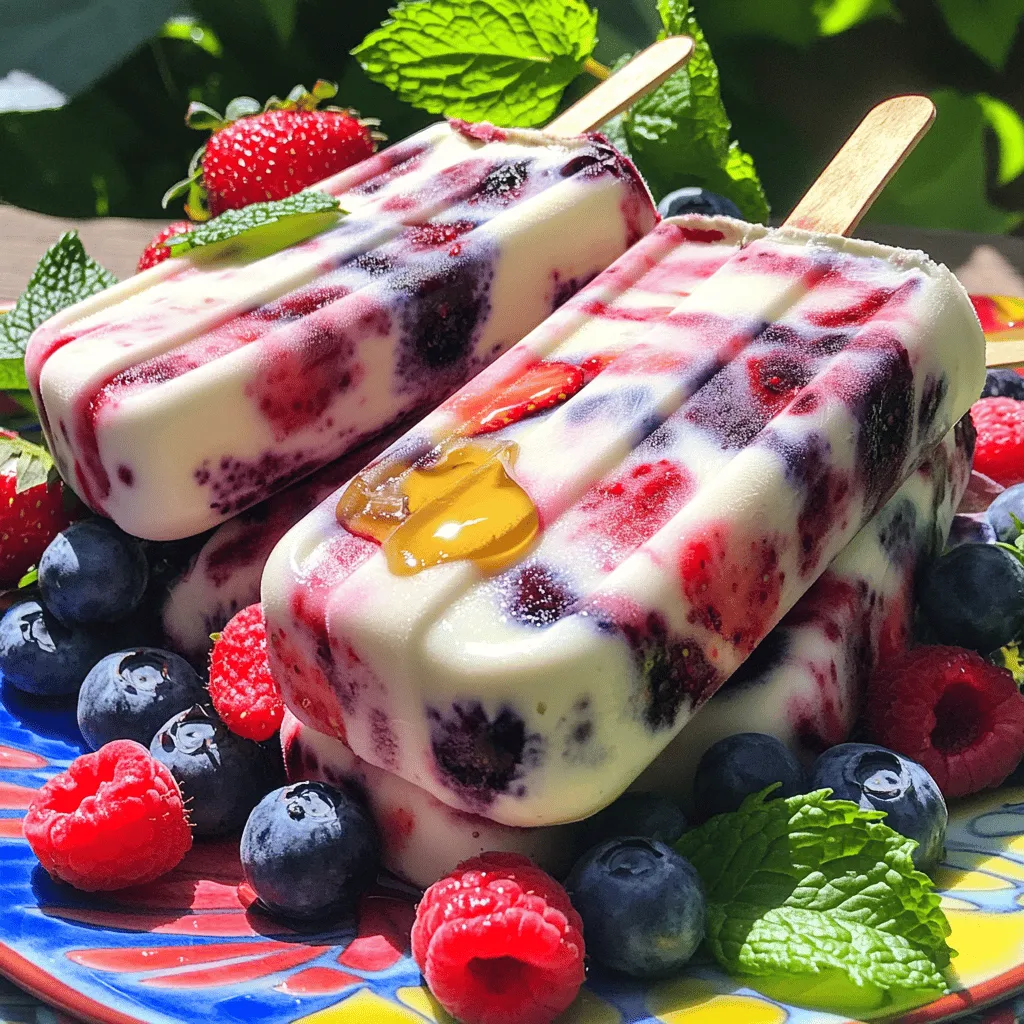
Presentation matters too! Serve your popsicles on a bright platter. You can add fresh mint leaves and whole berries around them. This makes your treats look inviting and fresh. The visual appeal enhances the tasting experience. Enjoy your beautiful creation!
Variations
Flavor Combinations
You can get creative with berry yogurt popsicles. Try mixing different berries like strawberries, blueberries, and raspberries. These berries bring sweet and tart notes. You can also add bananas or peaches for a twist. Bananas add creaminess, while peaches add a light, juicy flavor. If you want to enjoy these pops without dairy, use coconut or almond yogurt. These give a nice taste and a creamy texture.
Dietary Adjustments
For those watching their sugar, you can cut back. Use less honey or maple syrup. You can also try stevia or monk fruit sweetener for a low-calorie option. If you want a vegan treat, swap Greek yogurt for a plant-based yogurt. Look for options made from almond, soy, or coconut. These keep the pops creamy and delicious.
Make these berry yogurt popsicles your own!
Storage Information
Best Practices for Freezing
To keep your Berry Yogurt Popsicles fresh, store them in airtight containers or freezer bags. This helps prevent ice crystals from forming. Label each container with the date you made them. You can keep these popsicles in the freezer for up to 2 months without losing flavor. After this time, they might taste a bit bland.
Thawing Tips
When you’re ready to enjoy your popsicles, you should thaw them gently. The best way is to let them sit at room temperature for about 5 minutes. If you’re in a hurry, run warm water over the outside of the molds for a few seconds. This will help loosen the popsicles for easy removal. Enjoy your treat when it’s nice and soft!
FAQs
Common Questions About Berry Yogurt Popsicles
How long do homemade popsicles last in the freezer?
Homemade popsicles can last about 2 to 3 months in the freezer. They stay tasty and safe to eat during this time. After that, they might lose some flavor or texture.
Can I use other types of yogurt for this recipe?
Yes, you can. You can use regular yogurt, plant-based yogurt, or even flavored yogurt. Just keep in mind that flavored yogurt will change the taste. Greek yogurt gives a nice creamy texture.
What to do if my popsicles are too hard?
If your popsicles are too hard, try letting them sit at room temperature for a few minutes. This will help them soften up. You can also run warm water over the molds to loosen them.
Can I make these popsicles without molds?
Yes, you can! You can use small cups or ice cube trays instead. Just stick a popsicle stick in the center before they freeze. This way, you enjoy delicious popsicles without special molds.
In this guide, we explored how to make berry yogurt popsicles from scratch. You learned about choosing the right ingredients, preparing the mixtures, and layering them in molds. I shared tips for perfecting flavor and texture.
Now you’re ready to make popsicles that please your taste buds. Enjoy experimenting with flavors and share your creations. Simple steps lead to delicious results. Happy popsicle making!
 with all the details to make it easy! 1. Start by blending the berry mixture. - Add 1 cup of mixed berries and 2 tablespoons of honey or maple syrup into a blender. - Blend until smooth. Leave some berry bits for texture if you like. 2. Next, prepare the yogurt mixture. - In a bowl, mix 2 cups of Greek yogurt with 1 teaspoon of pure vanilla extract and a pinch of salt. - Stir until creamy and well combined. 3. Now, layer the mixtures in popsicle molds. - Take half of the berry blend and fold it gently into the yogurt. - This creates a lovely marbled look. - Use a spoon to alternate layers of yogurt and the remaining berry puree in your molds. - Freeze the popsicles for about 4 to 6 hours. - For the best results, let them freeze until they are solid. - To remove popsicles from molds easily, run warm water over the outside for a few seconds. - This trick will help loosen them for a smooth pull. For the full recipe, visit the recipe section above! Enjoy your berry yogurt popsicles! To make your popsicles just right, you can adjust the sweetness. If you like it sweeter, add more honey or maple syrup. For a less sweet treat, use less sweetener. This gives you control over the flavor. When it comes to texture, you have options. You can blend the berry mixture until smooth for a creamy popsicle. If you prefer some berry chunks, blend it less. This adds a fun texture to each bite. Presentation matters too! Serve your popsicles on a bright platter. You can add fresh mint leaves and whole berries around them. This makes your treats look inviting and fresh. The visual appeal enhances the tasting experience. Enjoy your beautiful creation! For the full recipe, be sure to check the detail above! {{image_4}} You can get creative with berry yogurt popsicles. Try mixing different berries like strawberries, blueberries, and raspberries. These berries bring sweet and tart notes. You can also add bananas or peaches for a twist. Bananas add creaminess, while peaches add a light, juicy flavor. If you want to enjoy these pops without dairy, use coconut or almond yogurt. These give a nice taste and a creamy texture. For those watching their sugar, you can cut back. Use less honey or maple syrup. You can also try stevia or monk fruit sweetener for a low-calorie option. If you want a vegan treat, swap Greek yogurt for a plant-based yogurt. Look for options made from almond, soy, or coconut. These keep the pops creamy and delicious. Make these berry yogurt popsicles your own! You can use the [Full Recipe] as a guide and experiment with flavors that you love. To keep your Berry Yogurt Popsicles fresh, store them in airtight containers or freezer bags. This helps prevent ice crystals from forming. Label each container with the date you made them. You can keep these popsicles in the freezer for up to 2 months without losing flavor. After this time, they might taste a bit bland. When you’re ready to enjoy your popsicles, you should thaw them gently. The best way is to let them sit at room temperature for about 5 minutes. If you’re in a hurry, run warm water over the outside of the molds for a few seconds. This will help loosen the popsicles for easy removal. Enjoy your treat when it’s nice and soft! How long do homemade popsicles last in the freezer? Homemade popsicles can last about 2 to 3 months in the freezer. They stay tasty and safe to eat during this time. After that, they might lose some flavor or texture. Can I use other types of yogurt for this recipe? Yes, you can. You can use regular yogurt, plant-based yogurt, or even flavored yogurt. Just keep in mind that flavored yogurt will change the taste. Greek yogurt gives a nice creamy texture. What to do if my popsicles are too hard? If your popsicles are too hard, try letting them sit at room temperature for a few minutes. This will help them soften up. You can also run warm water over the molds to loosen them. Can I make these popsicles without molds? Yes, you can! You can use small cups or ice cube trays instead. Just stick a popsicle stick in the center before they freeze. This way, you enjoy delicious popsicles without special molds. In this guide, we explored how to make berry yogurt popsicles from scratch. You learned about choosing the right ingredients, preparing the mixtures, and layering them in molds. I shared tips for perfecting flavor and texture. Now you’re ready to make popsicles that please your taste buds. Enjoy experimenting with flavors and share your creations. Simple steps lead to delicious results. Happy popsicle making!](https://spoonfulsavory.com/wp-content/uploads/2025/07/b04561c9-2f6d-49be-99cb-75228f3b2286-250x250.webp)
