Lemon Herb Grilled Chicken Kabobs Flavorful Delight
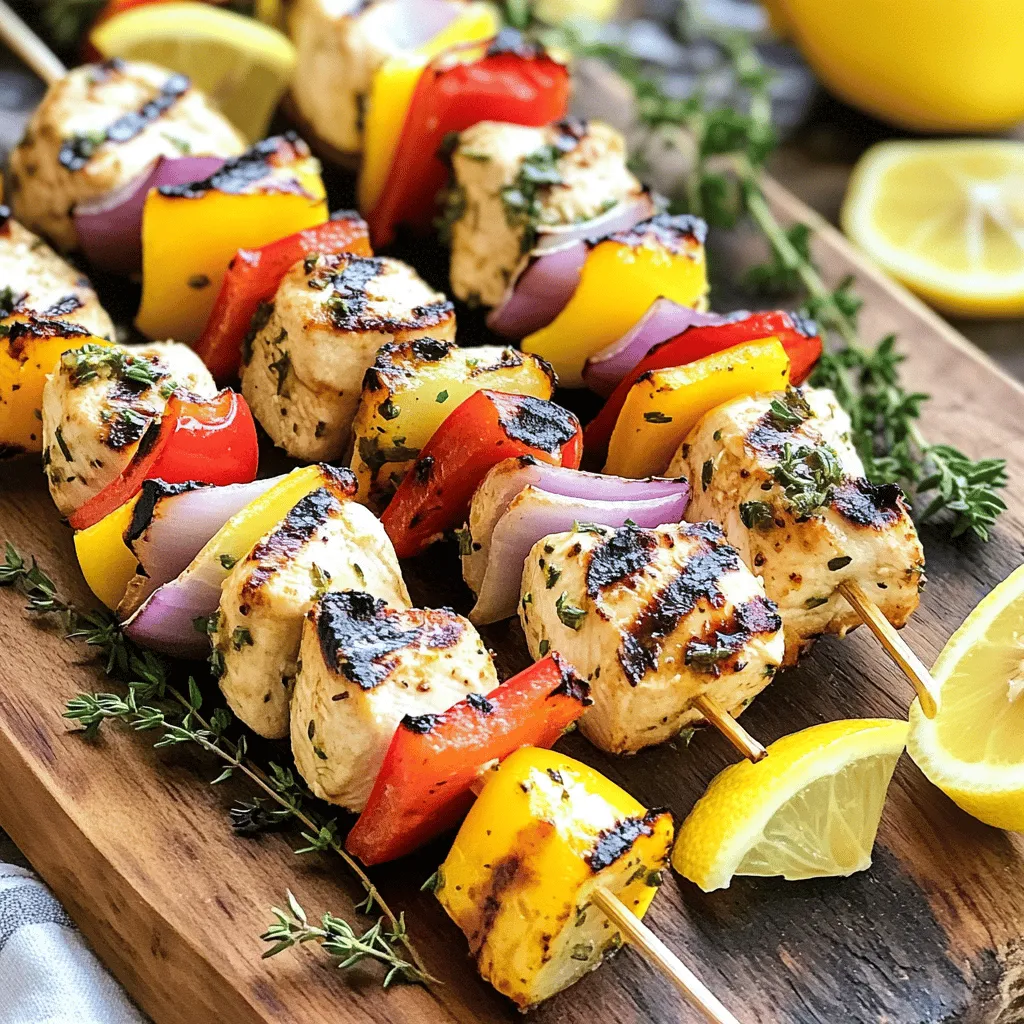
Are you ready to spice up your grilling game? My Lemon Herb Grilled Chicken Kabobs are a flavorful delight that
Are you ready to spice up your grilling game? My Lemon Herb Grilled Chicken Kabobs are a flavorful delight that
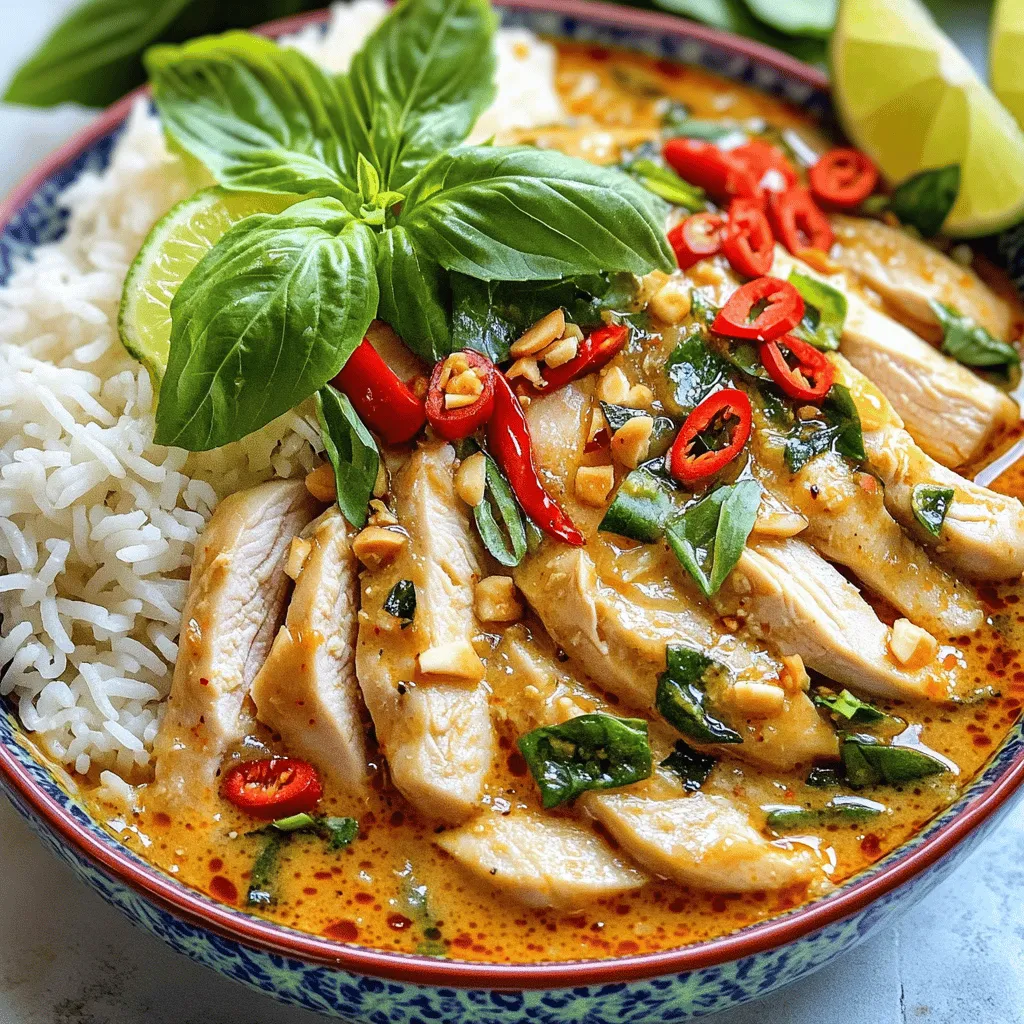
If you crave a dish that packs a punch, you need to try Spicy Thai Basil Chicken! This recipe combines
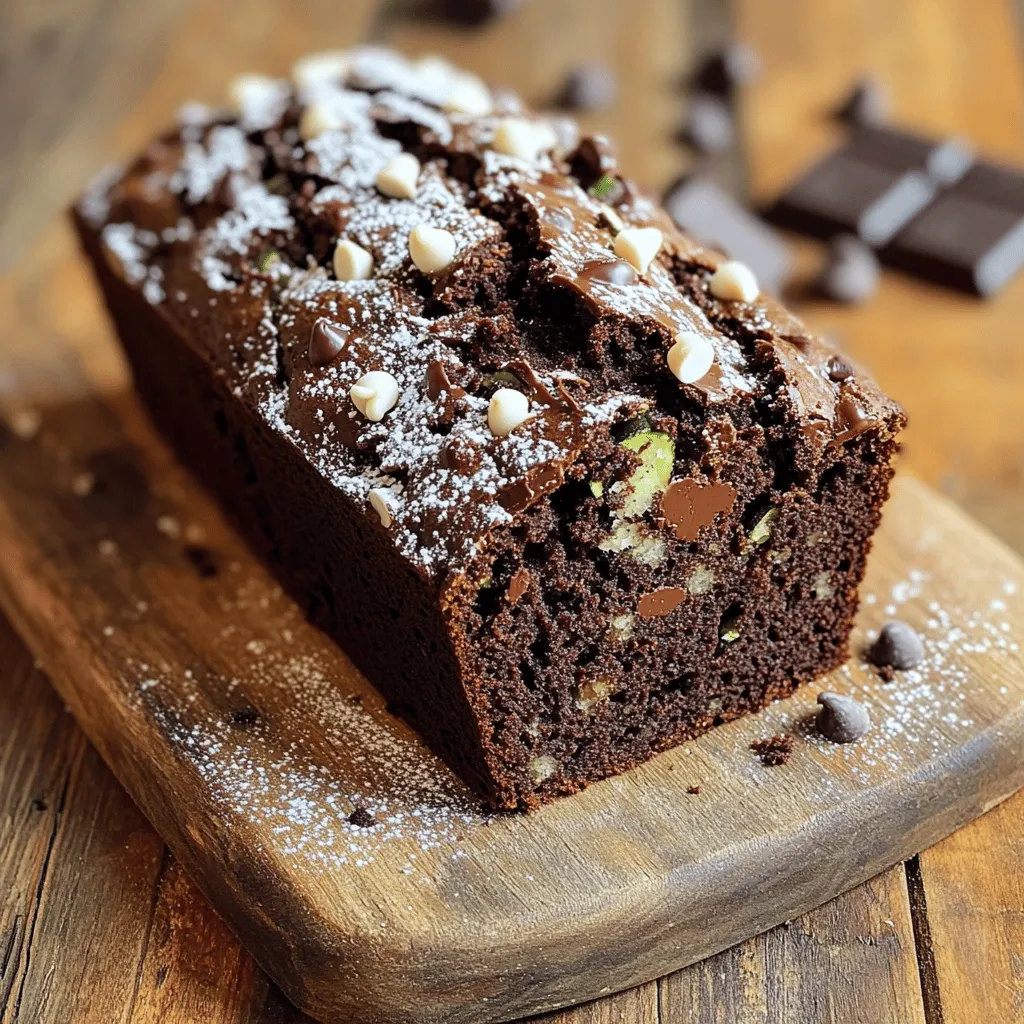
Are you ready to transform your zucchini into a sweet treat? This Triple Chocolate Zucchini Bread recipe will delight your
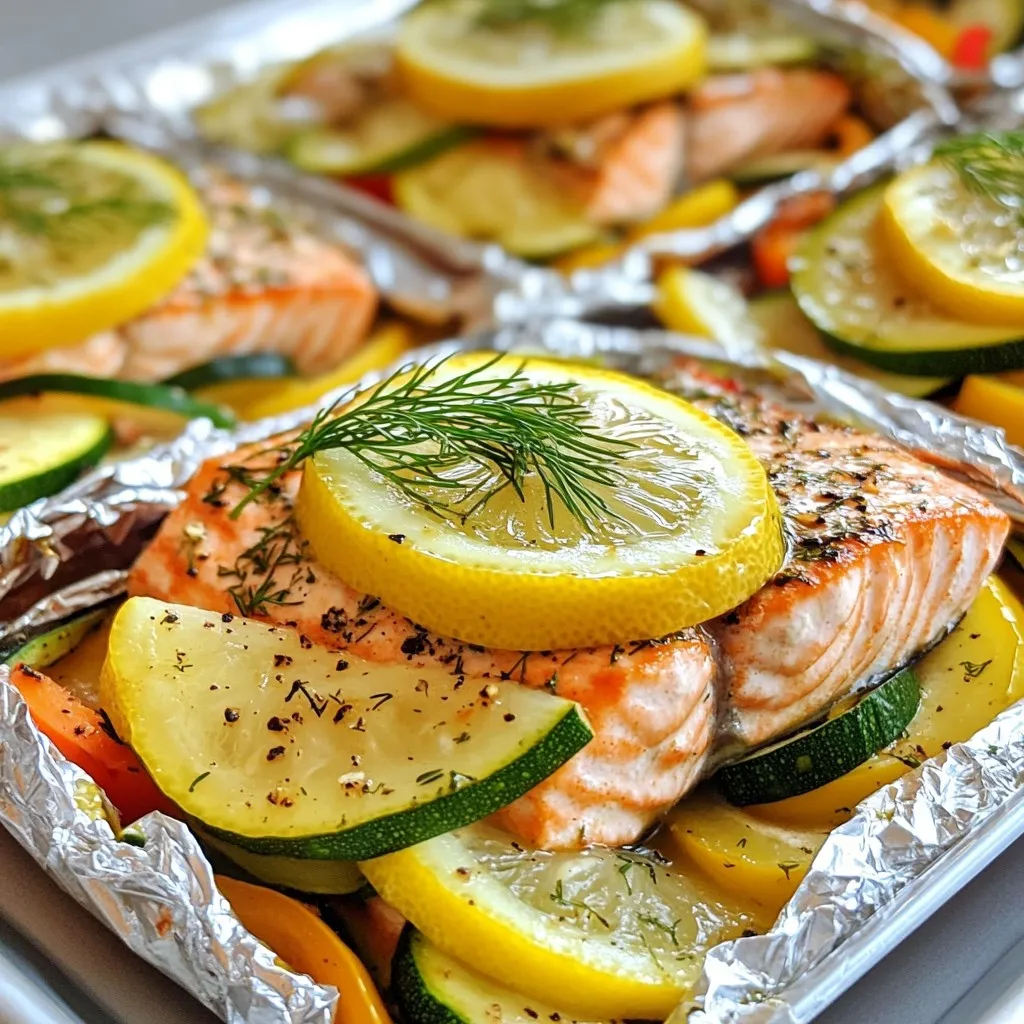
If you love fresh flavors and easy cooking, you’ll adore these Grilled Lemon Dill Salmon Packets. This dish combines succulent
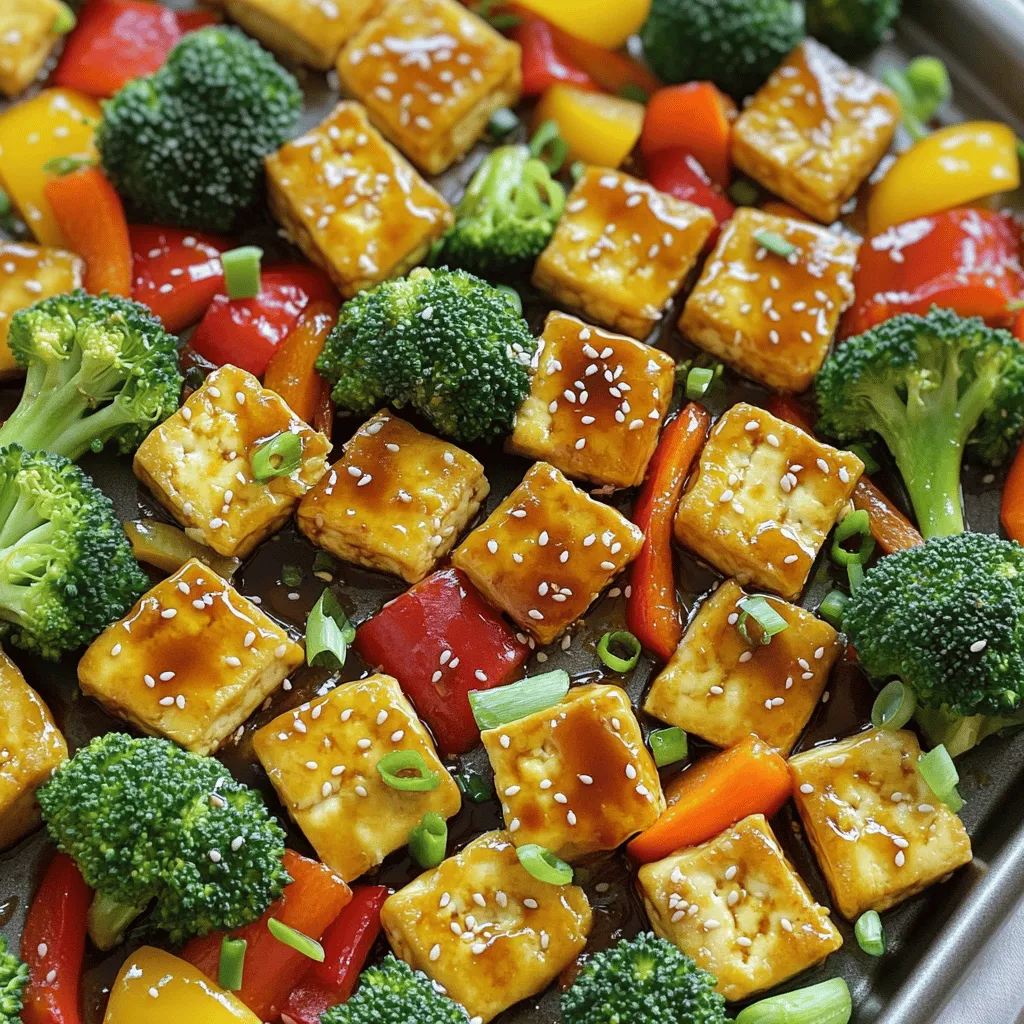
Are you ready to spice up your weeknight dinners? This Savory Sheet Pan Teriyaki Tofu & Veggies recipe makes cooking
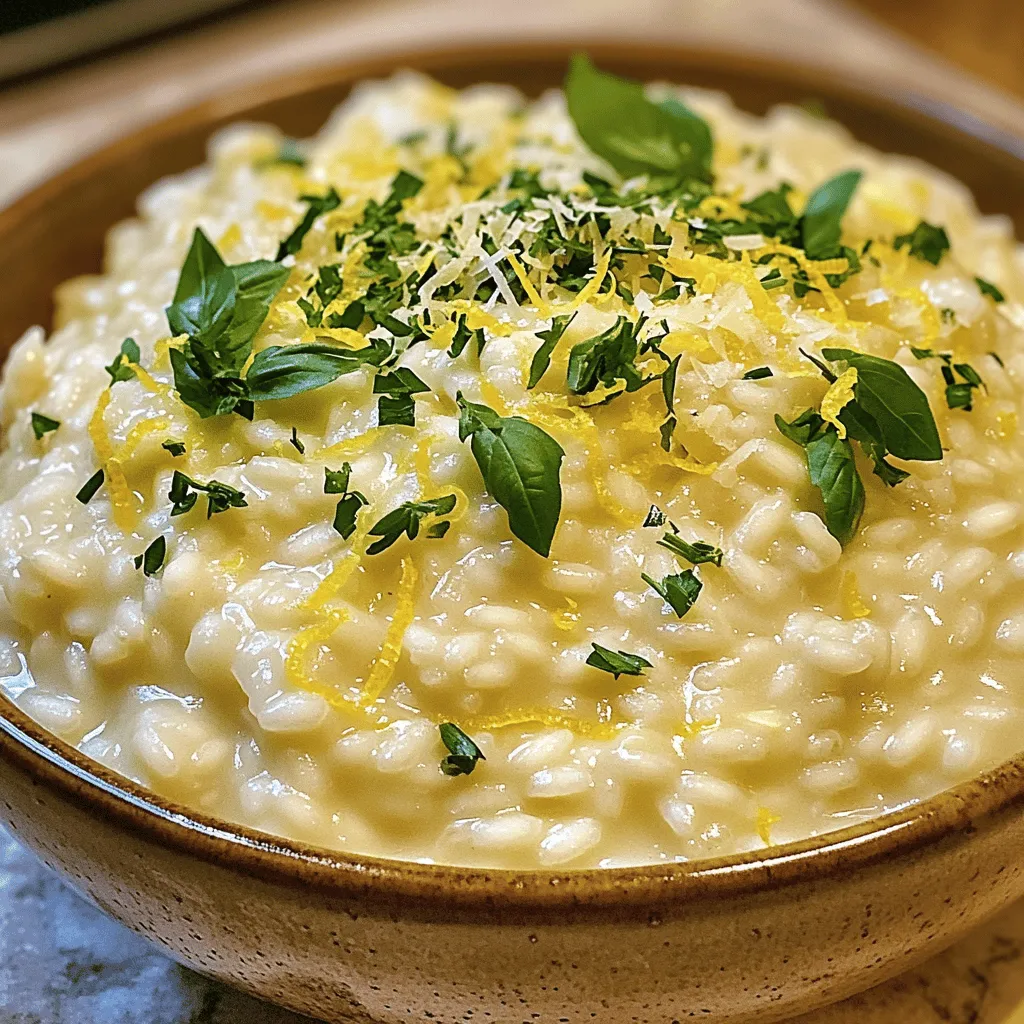
Are you ready to elevate your dinner game with a bowl of creamy lemon herb risotto? This simple and delicious
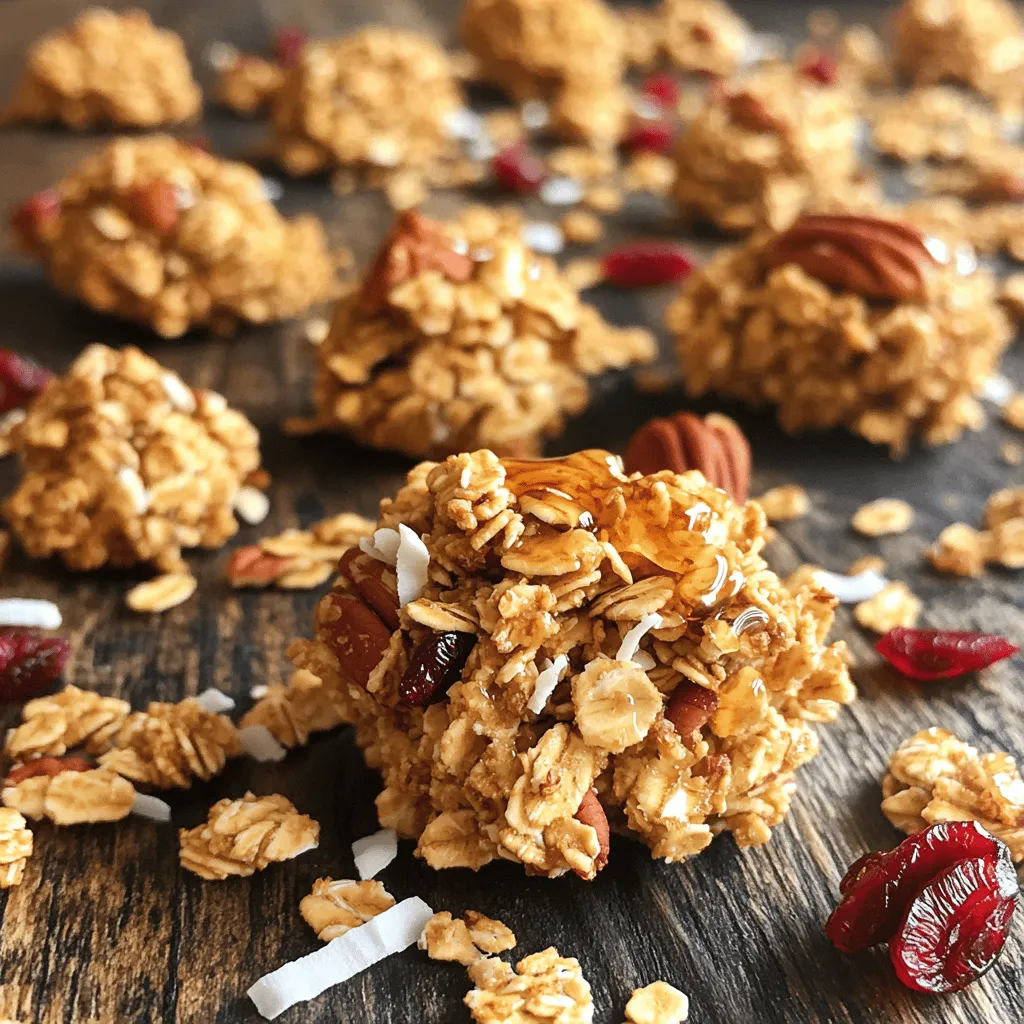
Looking for a tasty way to boost your snacking? Maple Pecan Granola Clusters are here to save the day! These
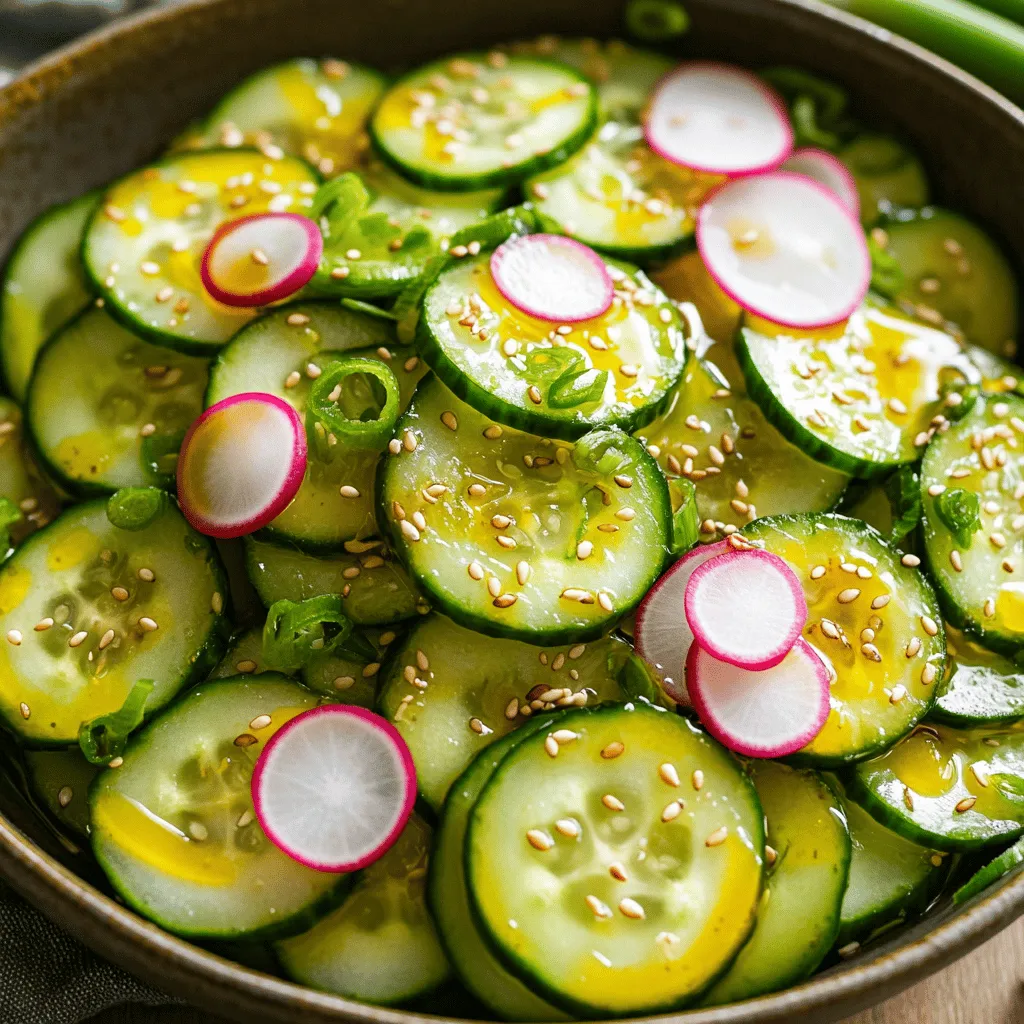
If you’re looking for a refreshing dish that’s quick and easy, try my Asian Sesame Cucumber Salad. This simple salad
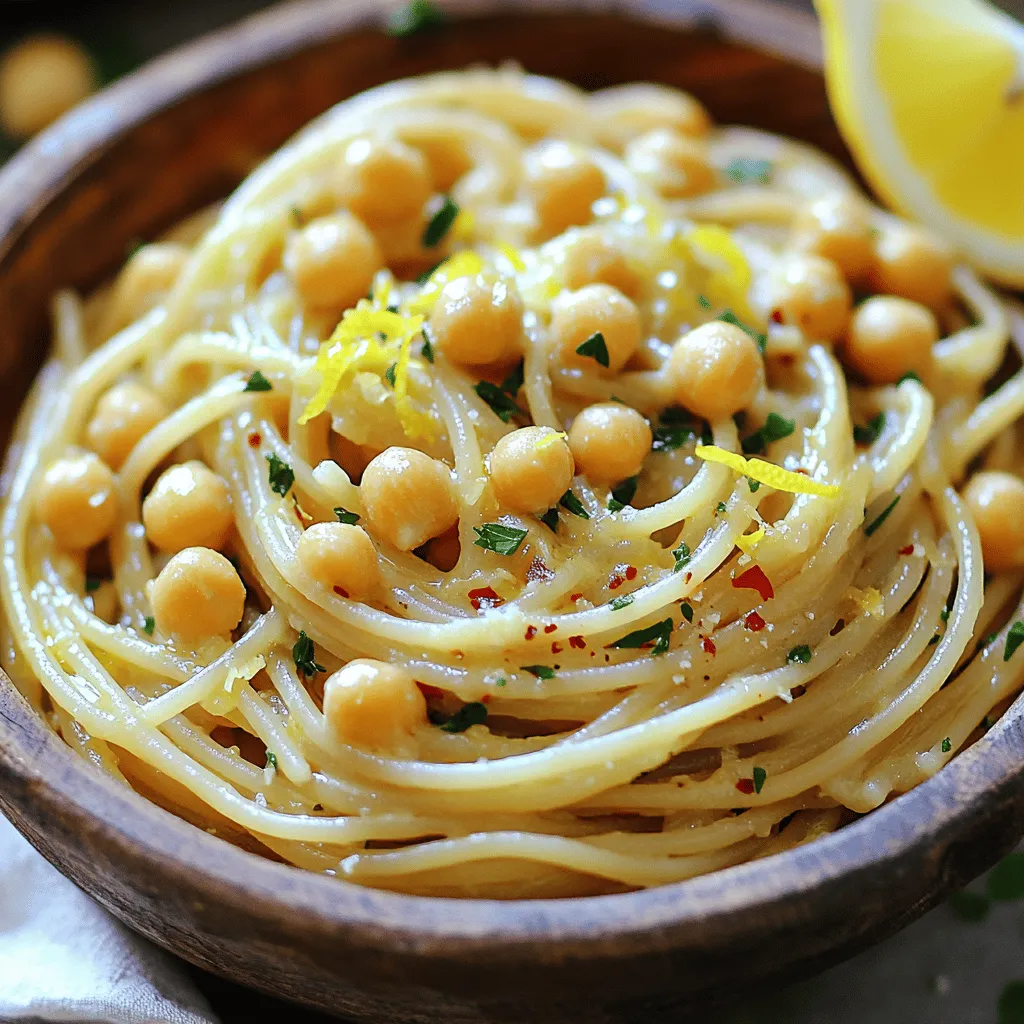
If you crave a quick and tasty meal, try my Lemon Garlic Chickpea Pasta. In just 15 minutes, you can

Are you looking for a quick, delicious treat that’s packed with protein? Look no further! In this post, I will
