Spicy Thai Peanut Noodles Flavorful and Easy Recipe
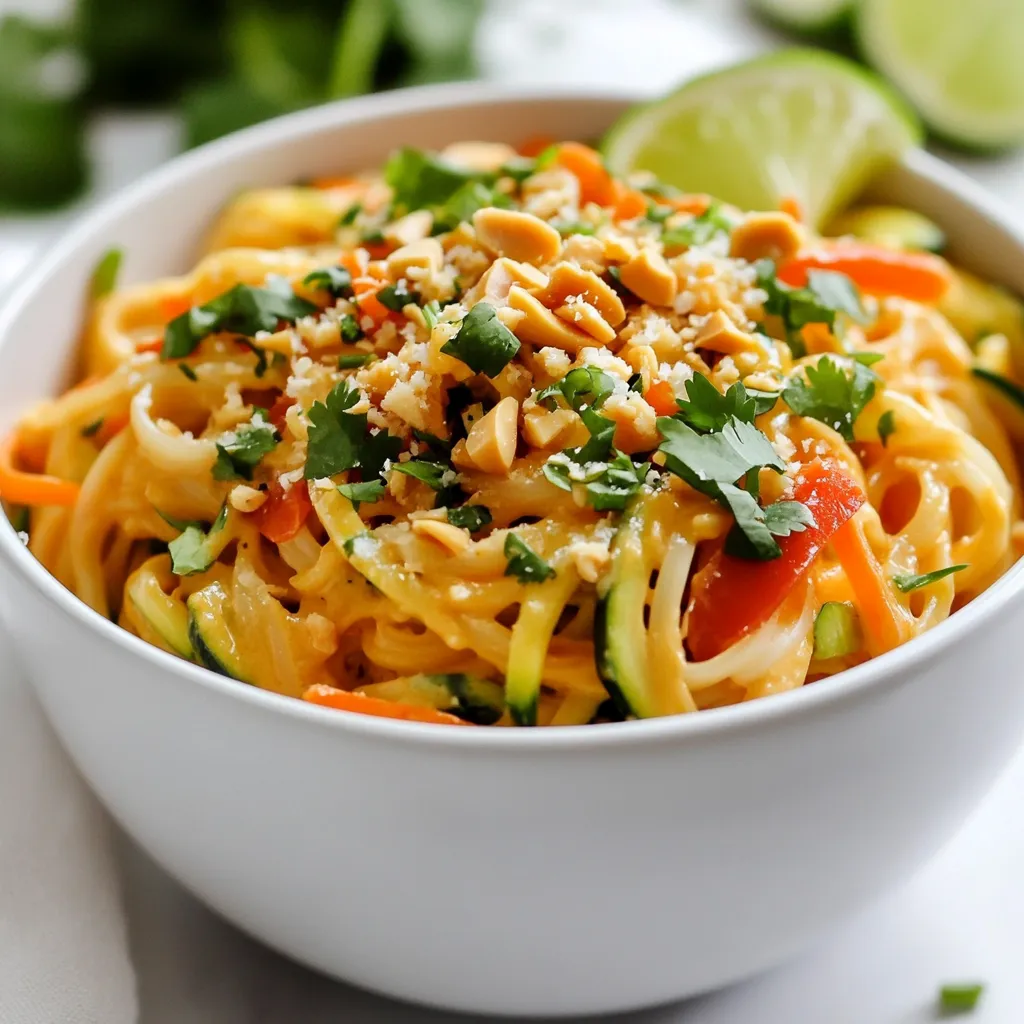
Looking for a quick and tasty meal? You’ve found it! My Spicy Thai Peanut Noodles are bursting with flavor and
Looking for a quick and tasty meal? You’ve found it! My Spicy Thai Peanut Noodles are bursting with flavor and
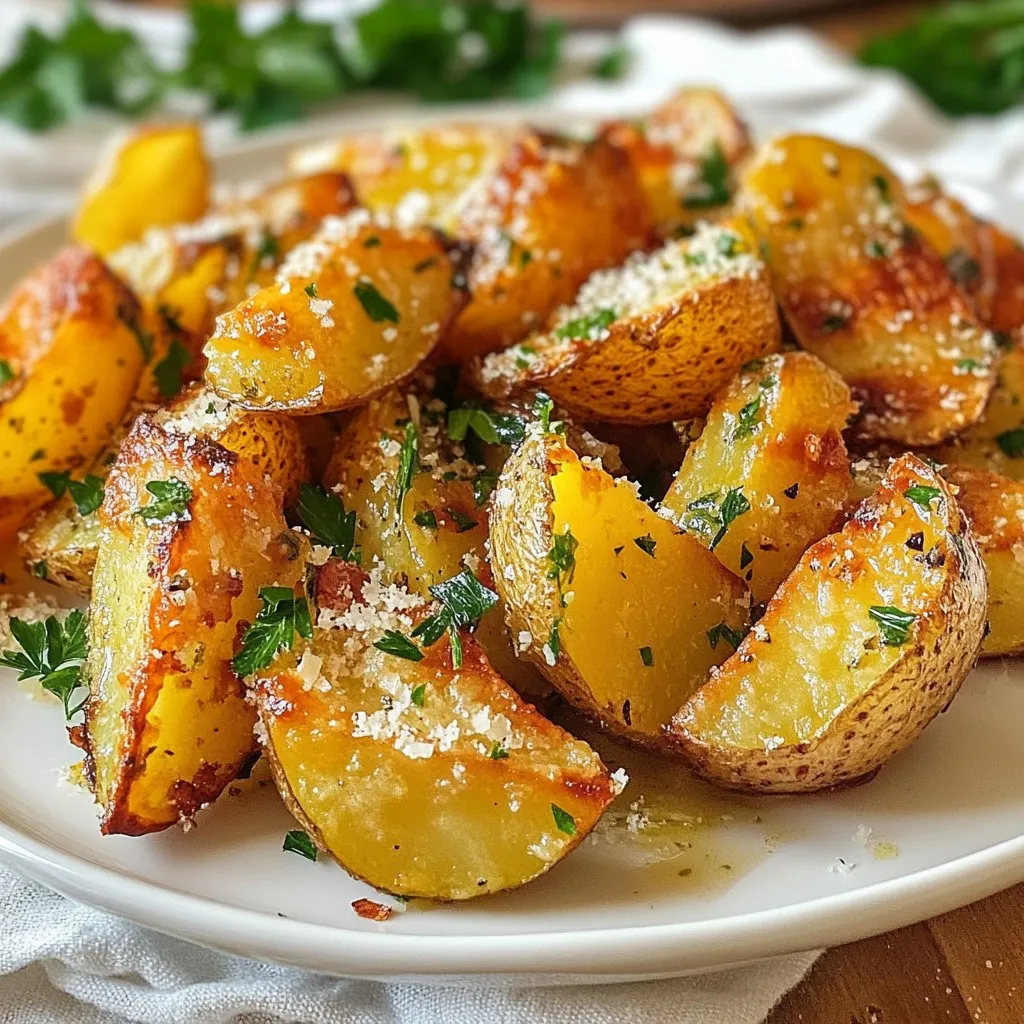
Craving a snack that’s both crispy and full of flavor? You’ve found it! Garlic Parmesan Potato Wedges are the perfect
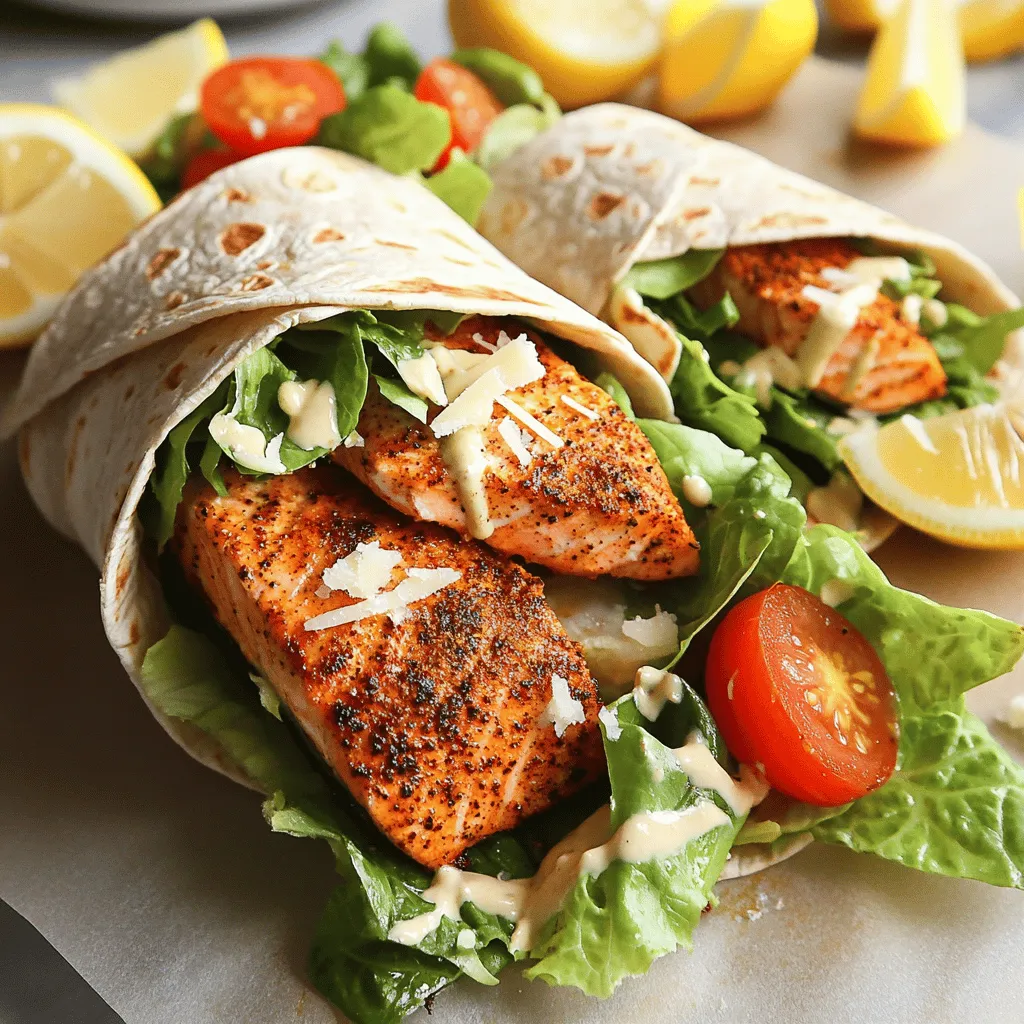
If you’re looking for a quick and tasty meal, try Minute Blackened Salmon Caesar Wraps. This dish is not only

Get ready to elevate your dinner game with Savory Air Fryer Mozzarella Stuffed Chicken Meatballs! These juicy, cheesy meatballs are
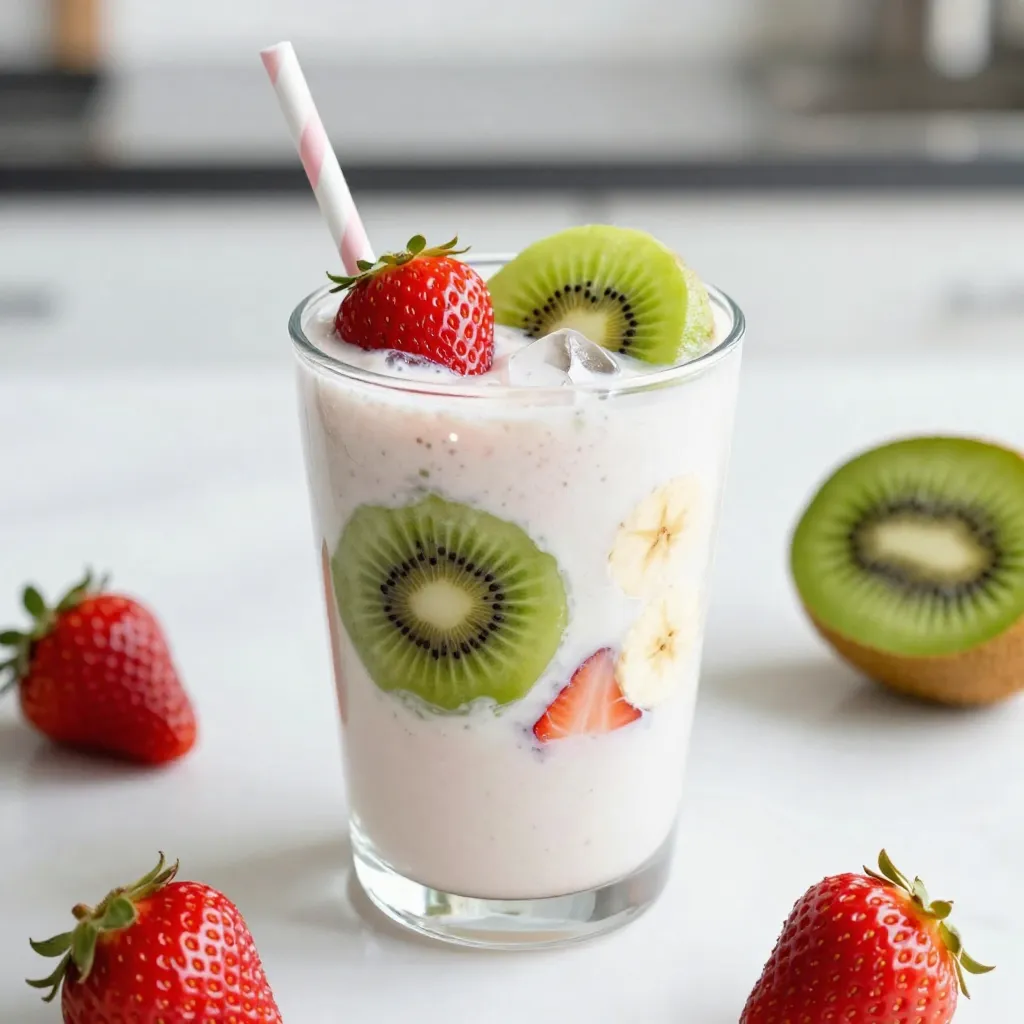
The Strawberry Kiwi Smoothie is a simple treat. It’s refreshing, healthy, and packed with flavor. You’ll love how quick it
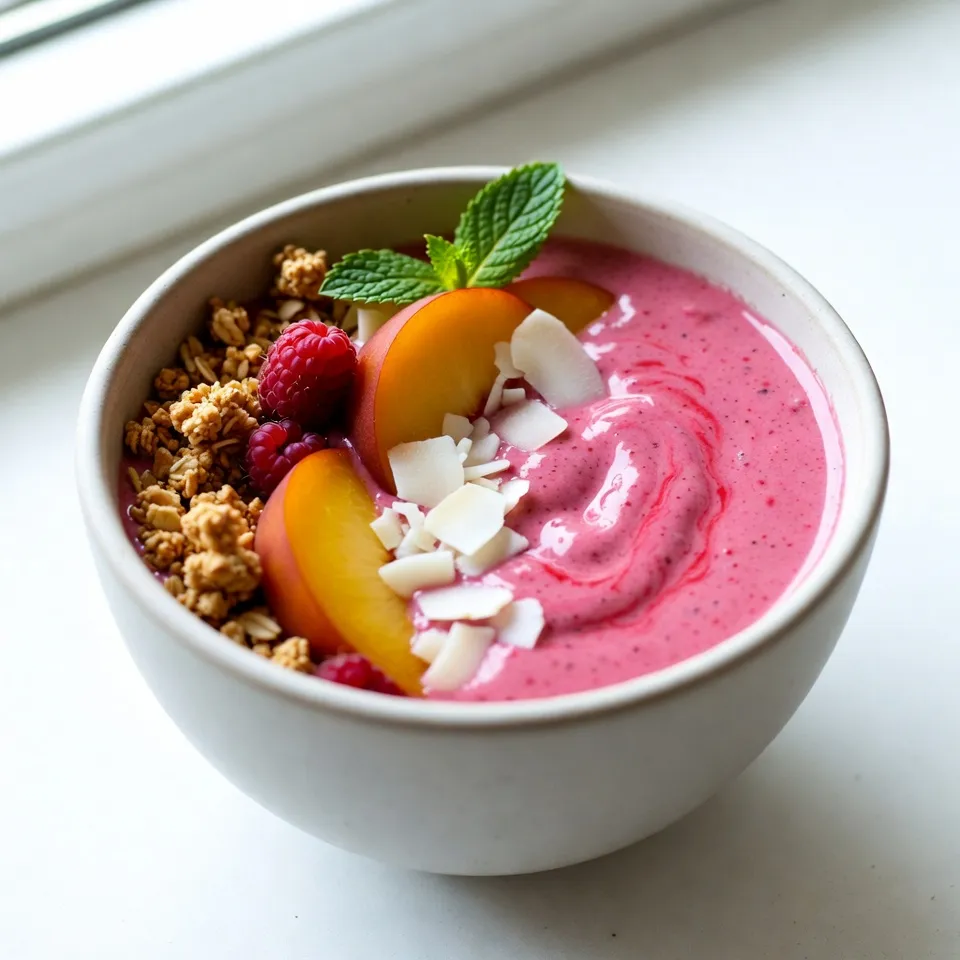
Are you ready to spice up your breakfast routine? Dive into the world of the Raspberry Peach Smoothie Bowl! Packed

Looking for a tasty, simple dish? Lemon Herb Chicken Meatballs might just be what you need. These meatballs burst with
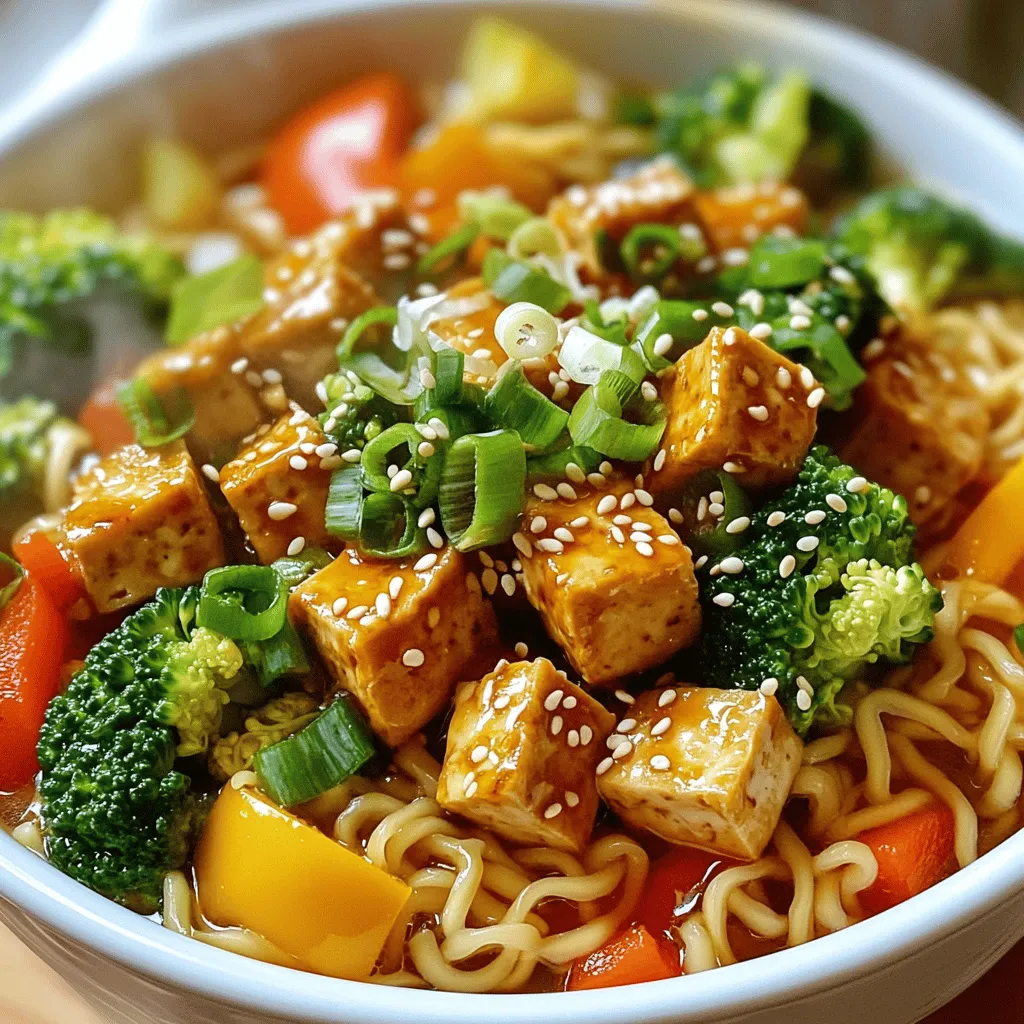
Craving a warm and spicy bowl of ramen? My Spicy Sesame Tofu Ramen is just the thing! This dish is
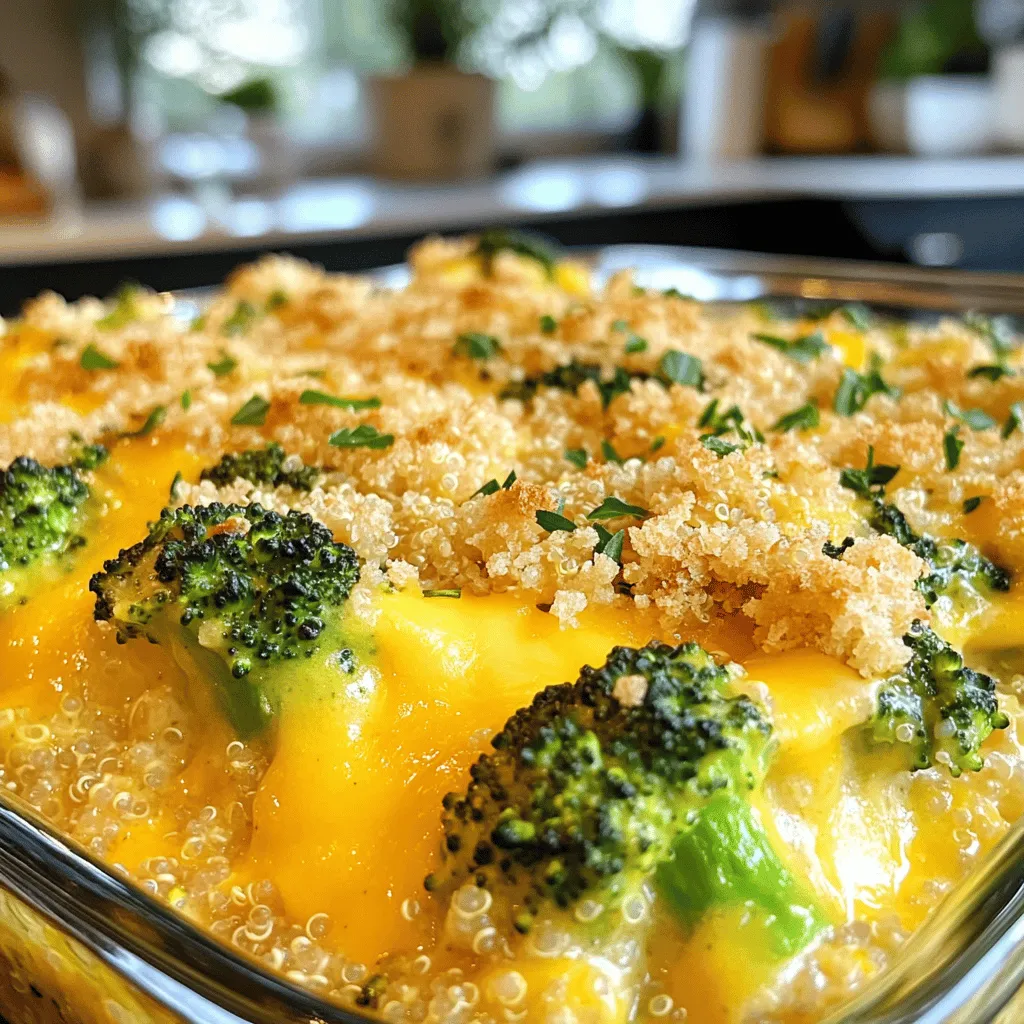
Welcome to my kitchen! Today, we’re diving into a warm and cheesy dish: Creamy Broccoli Cheddar Quinoa Casserole. This dish

Looking for a tasty yet nutritious snack? You’re in the right place! My Chocolate Chip Banana Protein Muffins are packed
