Skip to content
DisclaimerTerms Of UseGDPR PolicyCookie Policy

spoonfulsavory

  • Home
  • Drinks
  • Appetizers
  • Dinner
  • Dessert
  • About
  • Contact
  • Privacy Policy
DisclaimerTerms Of UseGDPR PolicyCookie Policy

Sarah

- 1 cup creamy peanut butter - 1/2 cup unsalted butter, melted - 1/2 cup packed brown sugar - 1/2 cup granulated sugar - 1 teaspoon pure vanilla extract - 1 1/2 cups graham cracker crumbs - 1/8 teaspoon fine sea salt - 1/2 cup salted caramel sauce (store-bought or homemade) - 1/2 cup semi-sweet chocolate chips - Flaky sea salt for topping You can swap creamy peanut butter for crunchy peanut butter. This gives your bars extra texture. If you need a dairy-free option, use coconut oil instead of unsalted butter. Maple syrup can replace brown sugar for a different flavor. You can also use almond flour instead of graham cracker crumbs for a gluten-free bar. Use creamy peanut butter for a smooth mix. It blends well with the other ingredients. When choosing your caramel sauce, go for high-quality brands for the best taste. Flaky sea salt adds a lovely contrast to the sweet bars. Always melt your chocolate in short bursts to avoid burning. This keeps it smooth and easy to drizzle. First, set your oven to 350°F (175°C). This helps the bars bake evenly. Take an 8x8 inch baking pan and grease it lightly. You can also line it with parchment paper. This way, your bars will come out easily once they cool. In a large bowl, combine 1/2 cup of melted unsalted butter and 1 cup of creamy peanut butter. Add in 1/2 cup of packed brown sugar and 1/2 cup of granulated sugar. Don’t forget to add 1 teaspoon of pure vanilla extract. Mix everything until it is smooth and well combined. You want a nice, creamy texture for the base. Gradually add 1 1/2 cups of graham cracker crumbs and 1/8 teaspoon of fine sea salt into the peanut butter mixture. Stir until you have a thick, cohesive mix. Next, pour half of this mix into your prepared pan. Press it down firmly to form the base layer. Now, drizzle half of the 1/2 cup of salted caramel sauce over the base. Use a spoon to spread it evenly. Then, add the remaining peanut butter mix over the caramel. Press it down again to smooth it out. In a small bowl, add 1/2 cup of semi-sweet chocolate chips. Microwave them in 30-second bursts. Stir between each burst until the chocolate is fully melted. Drizzle this melted chocolate over the top layer of the bars. For a fun effect, gently swirl it with a spatula to mix it with the caramel below. Bake your bars in the preheated oven for 25-30 minutes. Look for golden edges and a set center. Once done, take the pan out and let it cool completely. This makes slicing easier. After cooling, cut your bars into equal squares. Enjoy your delicious creation! To make your Salted Caramel Peanut Butter Bars perfect, follow these steps: - Use fresh ingredients. Fresh peanut butter and butter give the best flavor. - Measure accurately. Use a proper measuring cup for both liquid and dry ingredients. - Mix well. Ensure your peanut butter mixture is smooth for a perfect texture. - Press firmly. When layering, press down the mixture to avoid crumbling. - Cool completely. Allow bars to cool fully before cutting to maintain shape. You may face some issues while making these bars. Here are solutions: - Bars are too crumbly. This may happen if you did not mix well. Add a bit more melted butter. - Too sweet. If your bars taste too sweet, reduce the amount of sugar next time. - Chocolate not melting smoothly. Heat in shorter bursts and stir often to avoid burning. - Caramel sauce is too runny. Let it cool slightly before drizzling on the bars. Serve these bars in fun ways. Here are some ideas: - Plate them nicely. Cut bars into squares and use a decorative platter. - Add extra toppings. Drizzle more caramel or chocolate for a gourmet touch. - Garnish with nuts. Chopped peanuts add crunch and enhance the flavor. - Pair with drinks. Enjoy with a glass of milk or a hot cup of coffee. These tips will help you create delicious Salted Caramel Peanut Butter Bars every time! {{image_4}} You can add nuts to make these bars even better. Chopped peanuts or almonds work great. Just mix in 1/2 cup of your chosen nuts with the peanut butter mixture. This extra crunch adds texture and a nice nutty flavor. If you prefer, you can also use walnuts or pecans. These options will give your bars a lovely twist. Switching up the caramel sauce can change the whole taste. Try butterscotch or chocolate caramel for a fun twist. You can also use flavored caramel, like sea salt or espresso. Each sauce brings its own flair. Just make sure the sauce is thick enough to layer well. To make these bars gluten-free, replace graham cracker crumbs with gluten-free options. Almond flour or gluten-free cookies can work as good substitutes. Just ensure they match the texture of regular crumbs. This way, everyone can enjoy the bars, no matter their dietary needs. After making these tasty bars, let them cool completely. Cut them into squares and place them in an airtight container. Store the bars at room temperature for up to three days. If you want them to last longer, refrigerate them. They will stay fresh for about a week when stored properly. To freeze these delicious bars, cut them into individual pieces first. Wrap each piece tightly in plastic wrap. Then, place the wrapped bars in a freezer-safe bag or container. They can stay in the freezer for up to three months. When you want to enjoy them, let them thaw in the fridge or at room temperature. These bars taste best when served fresh, but they still shine after some time. For the best flavor, serve them within the first few days. If you freeze them, allow a bit of time to thaw. This way, the caramel and peanut butter flavors come alive again, making every bite a treat. Yes, you can use natural peanut butter. It gives a unique taste. Just keep in mind, natural peanut butter can be runnier. You may want to chill it before use. This helps it hold its shape better in the bars. Making salted caramel sauce is simple. Start by melting 1 cup of sugar in a saucepan. Stir it until it turns a deep amber color. Next, add 1/2 cup of heavy cream carefully. Mix well until smooth. Finally, add 1 teaspoon of flaky sea salt. Let it cool before using. You can use crushed cookies like Oreos or vanilla wafers. Almond flour or crushed nuts also work well. Just make sure the texture matches graham cracker crumbs. This keeps the bars firm and tasty. These bars last up to a week when stored properly. Keep them in an airtight container. If you want to keep them longer, try freezing them. They can last up to three months in the freezer. Yes, you can make vegan salted caramel peanut butter bars. Use vegan butter instead of regular butter. Choose a vegan chocolate for the topping. For the caramel, use coconut cream instead of heavy cream for a rich taste. You learned how to make delicious bars with simple steps and tips. Start with the right ingredients, and don’t be afraid to try substitutes. Follow the step-by-step guide for a great texture and taste. Mix your flavors with fun variations, like nuts or different sauces. Remember to store leftovers properly and enjoy your bars fresh. With these ideas, you can create amazing treats that everyone will love. Get started today, and enjoy the process!

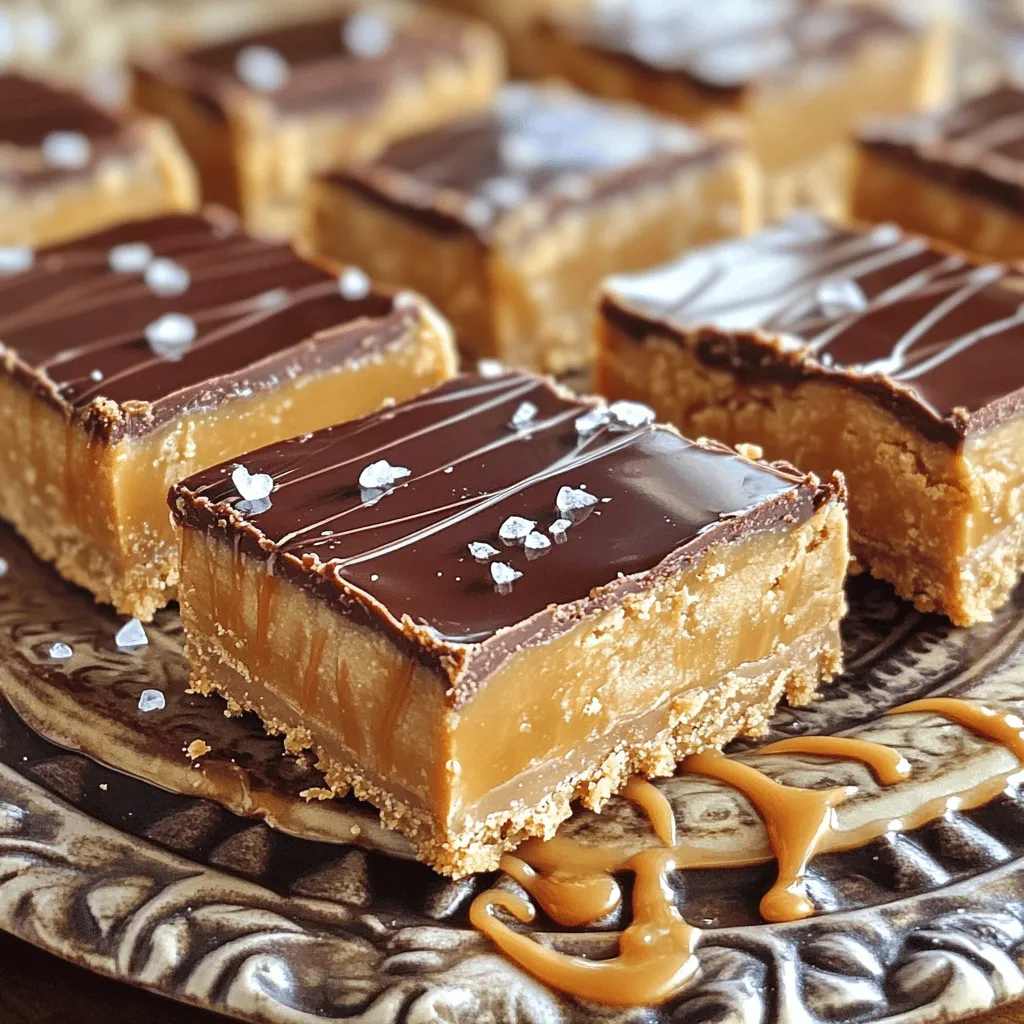
Salted Caramel Peanut Butter Bars Irresistible Treat

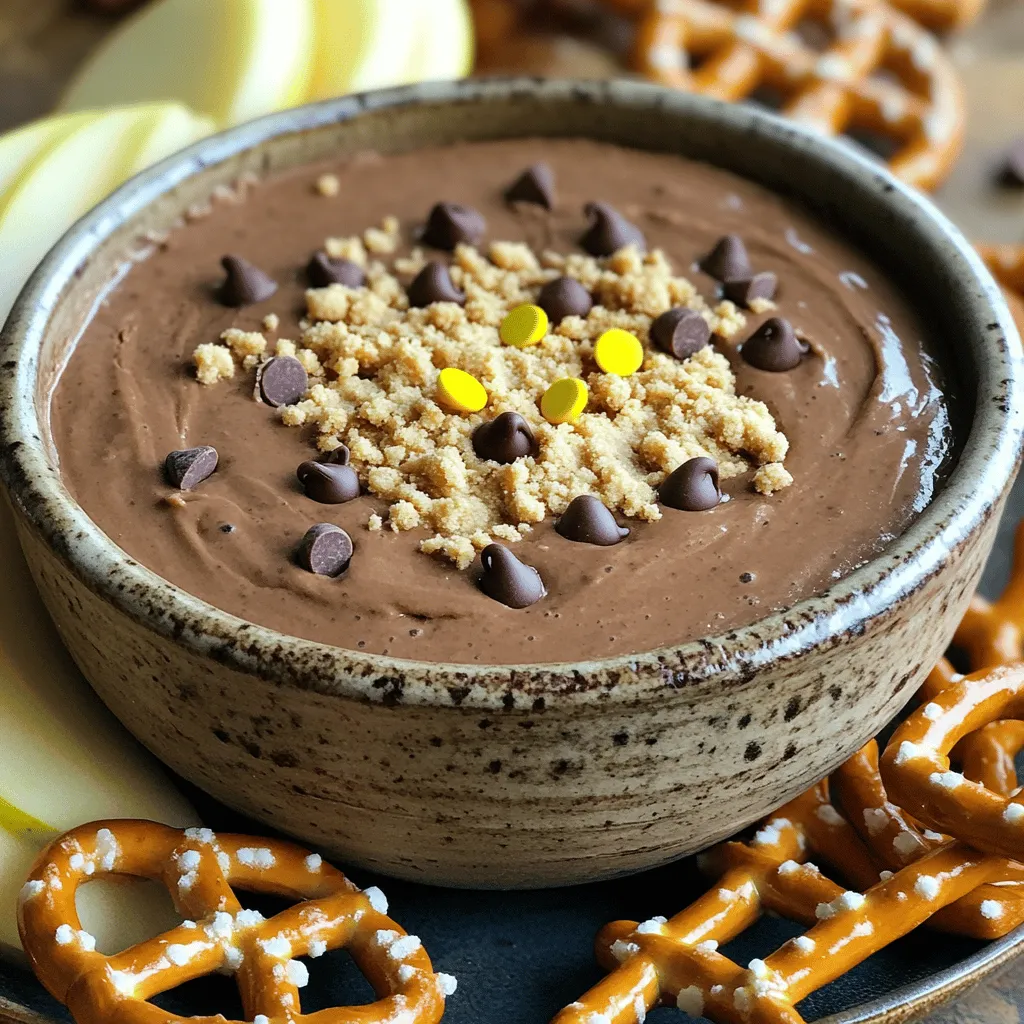
Are you ready to make a treat that’s hard to resist? These Salted Caramel Peanut Butter Bars combine creamy peanut

- 1 cup quinoa, thoroughly rinsed and drained - 2 cups coconut water - 1 cup cherry tomatoes, halved - 1 medium cucumber, diced - 1 red bell pepper, diced - 1 cup corn (freshly cooked or canned and drained) - 1/2 cup red onion, finely chopped - 1/4 cup fresh cilantro, chopped The star of this salad is quinoa. It is a gluten-free grain packed with protein. Coconut water adds a sweet, tropical flair. Fresh veggies like cherry tomatoes, cucumbers, and bell peppers give color and crunch. Corn brings a lovely sweetness, while red onion adds a nice bite. Don't forget the cilantro; it gives a fresh taste. - Zest and juice of 2 limes - 1 tablespoon high-quality olive oil - Salt and black pepper to taste The dressing is simple yet bright. Lime zest and juice add tangy flavor. Olive oil brings richness. A pinch of salt and black pepper rounds it all out. Mixing these ingredients creates a vibrant dressing that makes the salad shine. - Diced avocado - Additional herbs Want to make the salad even creamier? Add diced avocado just before serving. Fresh herbs like mint or parsley can elevate the flavor. These add-ins are all about personal taste, so feel free to get creative. To start, combine 1 cup of rinsed quinoa with 2 cups of coconut water in a medium pot. This mix gives the quinoa a light, sweet flavor. Place the pot on medium-high heat and bring it to a strong boil. Once boiling, lower the heat to a gentle simmer. Cover the pot and let it cook for about 15 minutes. The quinoa will absorb the coconut water and become fluffy. After 15 minutes, take it off the heat and let it sit, covered, for 5 more minutes. Finally, fluff it with a fork to separate the grains. While the quinoa cooks, chop your fresh veggies. Use 1 cup of halved cherry tomatoes, 1 diced cucumber, and 1 diced red bell pepper. Add 1 cup of corn, either fresh or canned and drained. Next, use 1/2 cup of finely chopped red onion and 1/4 cup of fresh cilantro. When cutting, try to make even pieces for a nice look and easy eating. Toss all the chopped veggies together in a big bowl. In a small bowl, whisk together the zest and juice of 2 limes, 1 tablespoon of olive oil, and a good pinch of salt and black pepper. This dressing adds brightness to the salad. Taste it, and if you want, adjust the flavors. You can add more lime juice or salt to suit your taste. Once ready, drizzle the dressing over the quinoa salad and mix gently. If you like, fold in diced avocado for extra creaminess just before serving. To get the best quinoa, rinse it well. Rinsing removes bitter saponins. Place quinoa in a fine-mesh strainer. Run cold water over it for about two minutes. This simple step makes a big difference. Next, fluff the quinoa after cooking. Once the quinoa is done, let it sit covered for five minutes. Then, use a fork to fluff it gently. This separates the grains and keeps it light. When serving your salad, use a colorful bowl. A bright bowl makes the salad pop. For individual servings, use small dishes. Top each serving with fresh cilantro and lime wedges. This adds color and freshness. Pair the salad with grilled chicken or shrimp for protein. It also goes great with fish tacos or a veggie wrap. These options complement the salad's bright flavors. Store any leftovers in an airtight container. This keeps the salad fresh for up to three days. If you have avocado in the salad, eat it soon. The avocado can brown quickly. To keep the quinoa from getting mushy, keep dressing separate. Store the dressing in a small jar. Drizzle it over the salad just before serving. This helps maintain the salad's crispness and flavor. {{image_4}} You can easily swap some ingredients in this salad. If you want a change from quinoa, try rice or barley. Both work well and give a different taste. You can also mix in different veggies. For example, try adding diced carrots or chopped kale. Fresh herbs like mint or parsley can add new flavor. This salad is great for many diets. It's already vegan and gluten-free. If you want more protein, add beans or grilled chicken. Chickpeas are a tasty choice too. They add a nice crunch and are filling. Adjust this salad to fit the seasons. In summer, toss in fresh berries or peaches for a sweet touch. In fall, add roasted butternut squash or Brussels sprouts. You can also change the dressing. In winter, use a bit of maple syrup for warmth. This keeps the salad fresh and exciting all year long! Benefits of quinoa Quinoa is a superfood packed with protein. It contains all nine essential amino acids. This makes it a complete protein choice for vegans and vegetarians. Quinoa is also rich in fiber, which aids digestion and helps keep you full longer. It has antioxidants that fight free radicals, supporting overall health. Nutritional value of coconut water Coconut water is low in calories and high in potassium. It helps keep you hydrated. This drink also has natural sugars that give you energy. It is a good source of electrolytes, making it perfect for post-workout recovery. Plus, it adds a hint of sweetness to the salad. Calories per serving Each serving of this salad has about 220 calories. This makes it a light yet satisfying meal. It’s perfect for lunch or a side dish at dinner. Macro and micronutrients - Protein: 6 grams - Carbohydrates: 36 grams - Fiber: 5 grams - Fats: 7 grams - Vitamin C: 15% of the daily value - Iron: 10% of the daily value This nutrient mix supports energy and helps your body function well. Lower-calorie dressing options You can swap the olive oil for a splash of lime juice or vinegar. This change keeps the dressing flavorful while cutting calories. You may also use yogurt for a creamy, tangy dressing without added fats. Ways to boost nutrition Add more veggies like spinach or kale for extra vitamins. You can also toss in some beans for added protein. For a crunch, sprinkle some nuts or seeds on top. These changes make the salad even more nutritious and tasty. Quinoa is a tiny, round grain. It is gluten-free and packed with protein. It cooks fast and has a light, fluffy texture. To cook quinoa, rinse one cup of quinoa under cold water. This step removes its bitter coating. Then, combine it with two cups of coconut water in a saucepan. Bring it to a boil over medium-high heat. Once boiling, reduce the heat to low, cover, and simmer for about 15 minutes. After that, let it sit for five minutes covered. Finally, fluff it with a fork for the best texture. Yes, you can prepare Coconut Lime Quinoa Salad in advance. This salad stays fresh in the fridge. Store it in an airtight container. I recommend making the salad a day ahead. The flavors blend well overnight. If you add avocado, wait until serving to prevent browning. Coconut Lime Quinoa Salad pairs well with many dishes. You can serve it with grilled chicken or fish for protein. It also goes great with a fresh fruit salad. For drinks, I suggest coconut water or a light iced tea. These options enhance the tropical flavor. Enjoy your meal with bright colors and tasty combinations! This blog covered how to make a fresh Coconut Lime Quinoa Salad. We talked about key ingredients like quinoa, coconut water, and fresh vegetables. I shared tips for cooking quinoa and making the dressing. You learned about variations, nutritional benefits, and serving suggestions. Remember, this salad is easy to customize and perfect for any meal. Try it out and enjoy a healthy dish that tastes great! Keep experimenting to find your favorite flavors and ingredients!

Coconut Lime Quinoa Salad Refreshing and Nutrient-Packed

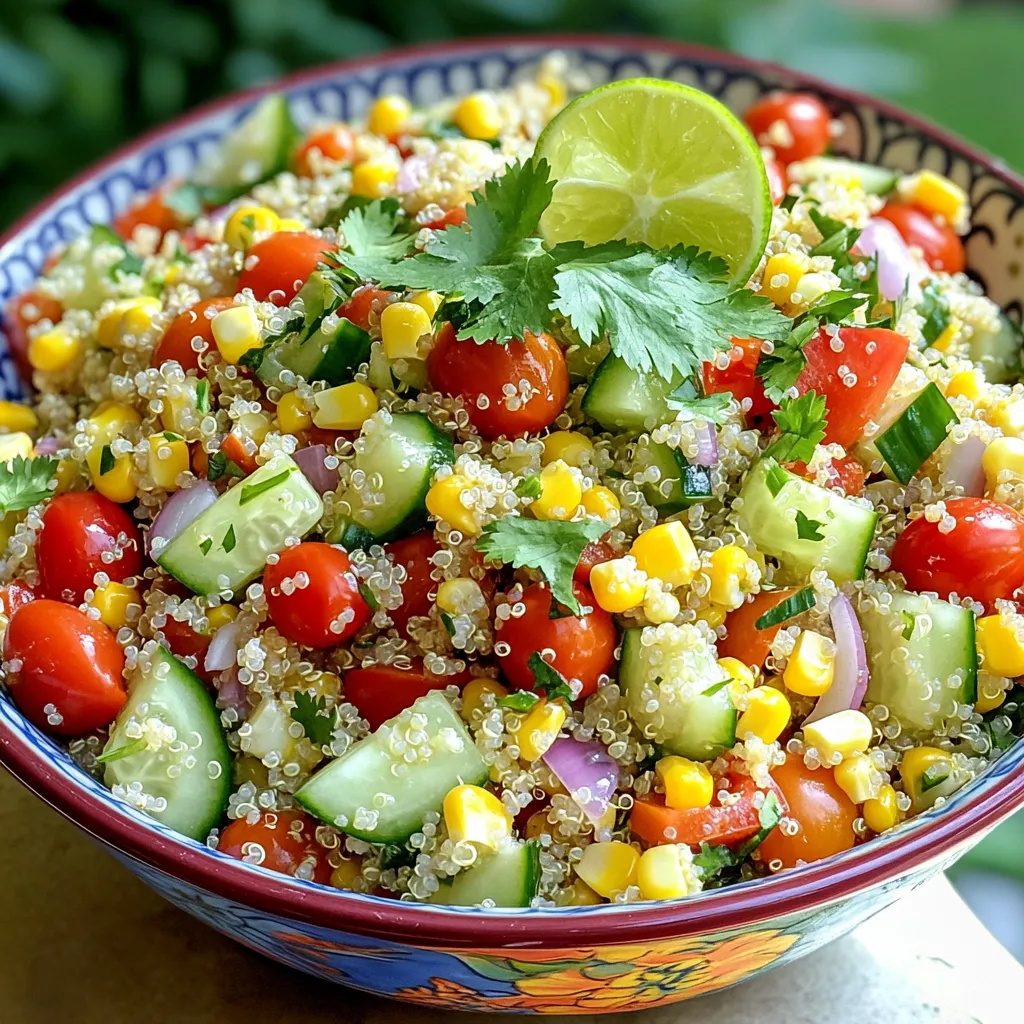
Ready for a dish that’s both refreshing and packed with nutrients? This Coconut Lime Quinoa Salad checks all the boxes!

- 8 slices of thick bread (challah or brioche are best) - 4 oz cream cheese, softened - 1 cup fresh strawberries, hulled and thinly sliced - 2 tablespoons powdered sugar (plus extra for dusting) - 4 large eggs, at room temperature - 1 cup whole milk for creaminess - 1 teaspoon pure vanilla extract for flavor - 1 teaspoon ground cinnamon for warmth - 2 tablespoons butter, for frying - Maple syrup, for serving To start, you need to make the cream cheese filling. Grab a medium mixing bowl. In it, combine 4 oz of softened cream cheese and 2 tablespoons of powdered sugar. Use a hand mixer or a whisk. Blend until the mixture is smooth and creamy. Once that is done, gently fold in the sliced strawberries. This adds a sweet and fruity flavor. Set this delightful filling aside for later. Next, let’s make the egg mixture. Take a large bowl and whisk together 4 large eggs, 1 cup of whole milk, 1 teaspoon of pure vanilla extract, and 1 teaspoon of ground cinnamon. Mix until the ingredients are well combined. You want a frothy texture, which helps coat the bread nicely. Now, it’s time to assemble the sandwiches. Take one slice of thick bread. Spread a generous amount of the strawberry cream cheese mixture on one side. Then, place a second slice of bread on top to complete the sandwich. Repeat this process for all the slices until you have four stuffed sandwiches. Heat a large skillet or griddle over medium heat. Add 1 tablespoon of butter and let it melt. This helps create a nice, golden crust. Carefully dip each stuffed sandwich into the egg mixture. Make sure both sides are coated, but don’t soak them too long. Place the soaked sandwiches onto the hot skillet. Cook for about 3-4 minutes on each side until they turn golden brown. If you want, add more butter to the skillet between batches. Once cooked, remove the sandwiches and place them on a serving plate. Dust the tops lightly with extra powdered sugar. Enjoy your warm strawberry cream cheese French toast right away! To cook the best French toast, set your skillet to medium heat. This helps the toast cook evenly. If it’s too hot, the outside burns while the inside stays raw. Avoid soggy bread by keeping the bread in the egg mix for a short time. Just dip it quickly on each side. This way, your toast keeps its shape and texture. For a richer taste, add a bit of lemon zest to the cream cheese filling. This brightens the flavor and pairs well with strawberries. You can also mix in some chopped nuts for crunch. When serving, consider toppings like whipped cream, a sprinkle of cinnamon, or a drizzle of honey. These add extra flavor and make the dish even more special. For a beautiful stack, place one piece slightly off-center on top of the others. This creates height and looks inviting. Garnish with fresh strawberry slices and a light dusting of powdered sugar. This adds color and makes your French toast dish pop visually. {{image_4}} You can change the fruit filling in this recipe. Try using blueberries or bananas. They add a new twist to your French toast. These fruits pair well with cream cheese. You can also use different spreads. Nutella provides a rich chocolate flavor. Mascarpone gives a creamy and slightly tangy taste. Feel free to mix and match for your perfect bite! If you need gluten-free options, look for gluten-free bread. Many brands offer tasty alternatives. You won’t miss the regular bread at all! For dairy-free choices, use vegan cream cheese. These swaps keep the recipe delicious and friendly for all diets. Enjoy this French toast, no matter your needs! You can bake this French toast instead of frying it. Preheat your oven to 350°F. Arrange the sandwiches on a baking sheet. Bake for about 20 minutes, flipping halfway. This method makes it easier to cook a larger batch. Another option is using an air fryer. Set your air fryer to 350°F. Cook each stuffed sandwich for about 8-10 minutes. The air fryer gives you a lighter version while keeping that crispy texture. These methods help you enjoy this treat in different ways! To store leftover French toast, let it cool down first. Place the slices in an airtight container. You can keep it in the fridge for up to three days. This way, you preserve the taste and texture. For the strawberry cream cheese, keep it in a separate container. It stays fresh for about two days. Make sure to cover it well to avoid drying out. You can reheat French toast in two main ways: the microwave or the oven. The microwave is quick but may make the toast soggy. For better results, use the oven. Preheat it to 350°F (175°C). Place the French toast on a baking sheet. Heat for about 10 minutes. This method keeps the toast crispy and warm. Add a little butter to enhance the flavor. To freeze stuffed French toast, wrap each slice in plastic wrap. Then, place them in a freezer bag. Make sure to remove as much air as possible. You can freeze them for up to two months. When ready to eat, thaw in the fridge overnight. Once thawed, reheat in the oven for best results. This way, you maintain the texture and taste. The French toast is done when it turns a perfect golden brown color. Look for a crisp outside and a soft inside. The edges should be firm, but the center will remain tender. You can also check if it is lightly puffed up. This shows that the egg mixture has cooked properly. Yes, you can prep this recipe ahead of time. Make the cream cheese filling and store it in the fridge for up to two days. You can also assemble the sandwiches a few hours before cooking. Just keep them covered so they don’t dry out. When ready, dip and cook them fresh for the best taste. If you need an alternative for cream cheese, consider using mascarpone or ricotta. Greek yogurt is also a good choice for a lighter option. Each will give a unique flavor, but they still work great in this recipe. Just be sure to mix in some powdered sugar for sweetness. This blog post covered how to create a delicious strawberry cream cheese stuffed French toast. We explored main ingredients, including thick bread and fresh strawberries. I shared step-by-step instructions and helpful tips to ensure perfect cooking. You can modify the recipe for various dietary needs, and I offered storage advice for leftovers. In conclusion, this dish is a tasty way to start your day. Try it out, and you may find a new favorite breakfast!

Strawberry Cream Cheese French Toast Delightful Recipe

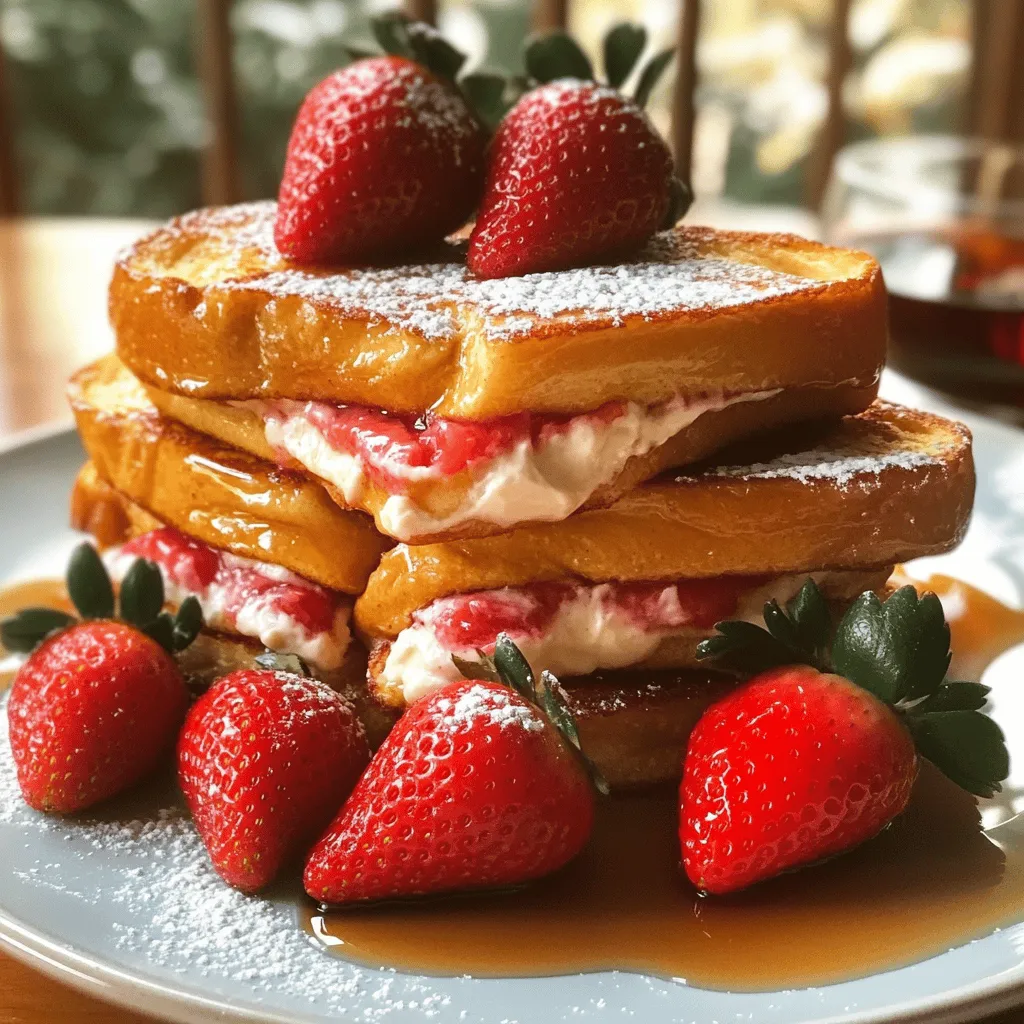
Are you ready to indulge in a treat that makes breakfast feel like dessert? This Strawberry Cream Cheese French Toast

To make One-Pot Cajun Jambalaya Pasta, gather these ingredients: - 12 oz penne pasta - 1 tablespoon olive oil - 1 medium onion, finely diced - 1 bell pepper (red or green), diced - 2 cloves garlic, minced - 1 cup diced tomatoes (fresh or canned) - 1 cup chicken broth (low sodium recommended) - 1 cup heavy cream - 1 ½ teaspoons Cajun seasoning - 1 teaspoon smoked paprika - 1 cup cooked shrimp, peeled and deveined - 1 cup andouille sausage, sliced - 1 cup okra, sliced (can use fresh or frozen) - 2 green onions, thinly sliced (for garnish) - 1 tablespoon fresh parsley, chopped (for garnish) - Salt and pepper, to taste Using good-quality ingredients makes a big difference. I recommend: - Pasta: Barilla is a solid choice for penne pasta. - Olive Oil: Extra virgin olive oil adds great flavor. Look for brands like California Olive Ranch. - Cajun Seasoning: Tony Chachere's is a popular brand. It packs a lot of flavor. - Shrimp: Wild-caught shrimp often taste better than farmed. Look for shrimp that is fresh or frozen. Always check labels for freshness and quality. Fresh vegetables bring out the best in the dish. If you don’t have all the ingredients, here are some easy swaps: - Pasta: Any short pasta works, like rotini or fusilli. - Andouille Sausage: You can use kielbasa or turkey sausage for a lighter option. - Shrimp: Replace with chicken breast, cut into small pieces. - Okra: If you can't find okra, use diced zucchini or bell peppers instead. - Heavy Cream: Substitute with half-and-half for a lighter sauce. These swaps keep the dish tasty and fun to make! Start by gathering all your ingredients. You need 12 ounces of penne pasta, olive oil, onion, bell pepper, garlic, diced tomatoes, chicken broth, heavy cream, Cajun seasoning, smoked paprika, shrimp, andouille sausage, okra, green onions, and parsley. Chop the onion, bell pepper, and garlic. Slice the sausage and okra if needed. This will make cooking easier. 1. Heat one tablespoon of olive oil in a large pot over medium heat. Wait until it shimmers. 2. Add the chopped onion and bell pepper. Sauté for about 3-4 minutes until they soften and turn clear. 3. Stir in the minced garlic. Cook for one more minute. This will add a great aroma. 4. Next, pour in the diced tomatoes, chicken broth, and heavy cream. Mix in the Cajun seasoning and smoked paprika. 5. Bring the mixture to a gentle simmer. Once it bubbles, add the penne pasta. Stir well to coat it in the sauce. 6. Lower the heat and cover the pot. Cook for 12-15 minutes, stirring occasionally. The pasta will absorb the sauce and get tender. 7. After 12-15 minutes, remove the lid. Fold in the cooked shrimp, sliced sausage, and okra. Cook for another 3-5 minutes until everything is hot. 8. Taste the dish and add salt and pepper as needed. 9. Turn off the heat and let it sit for a few minutes. This helps the sauce thicken. 10. Serve hot in bowls. Garnish with sliced green onions and parsley for a fresh touch. To get the best pasta, follow these tips: - Stir the pasta often while it cooks. This helps it not stick. - Cook the pasta until it is just al dente. It will keep cooking in the sauce. - If the sauce gets too thick, add a splash of chicken broth or water. - Let it rest after cooking. This will improve the consistency. These steps will help you create a delicious one-pot Cajun jambalaya pasta that everyone will enjoy! To boost the flavor of your One-Pot Cajun Jambalaya Pasta, start with fresh ingredients. Use ripe, juicy tomatoes and high-quality Cajun seasoning. When you sauté the onion and bell pepper, let them cook until they are soft and sweet. This adds a rich base. You can also add a splash of hot sauce to give it a kick. For extra depth, try using homemade chicken broth instead of store-bought. It makes a big difference! One common mistake is not stirring the pasta enough while it cooks. If you don’t stir, the pasta can stick to the bottom. Also, be careful not to overcook the shrimp. They cook quickly and can turn tough. Lastly, don’t skip the resting time before serving. Letting the dish sit for a few minutes helps it thicken and lets the flavors blend. For this recipe, a large pot or Dutch oven is best. It helps cook the pasta evenly. You’ll also need a good knife for chopping the veggies. A wooden spoon is great for stirring, as it won’t scratch your pot. Finally, have measuring cups and spoons on hand to keep your ingredients precise. These tools will help you create a perfect One-Pot Cajun Jambalaya Pasta. {{image_4}} You can easily make this jambalaya pasta vegetarian or vegan. Start by swapping the shrimp and sausage with veggies. Use mushrooms, zucchini, or eggplant for great texture. For a vegan option, replace heavy cream with coconut milk or a cashew cream. Add more spices for extra flavor. You can also include beans like black beans or chickpeas for protein. If you want to change up the proteins, consider chicken or turkey. Both work well in this dish. You can also try plant-based sausage for a meat-free option. Just make sure to cook it according to the package instructions before adding it to the pot. This keeps the dish balanced and tasty. You can control the heat in your jambalaya pasta. For mild flavor, reduce the Cajun seasoning to one teaspoon. If you like it spicy, add more seasoning or a pinch of cayenne pepper. You can also toss in sliced jalapeños or red pepper flakes for an added kick. Taste as you go to find your perfect heat level. To keep your One-Pot Cajun Jambalaya Pasta fresh, store it in the fridge. Use an airtight container for the best results. Make sure to let it cool to room temperature before sealing it. This helps prevent moisture buildup. The dish will stay good for about 3 to 4 days in the fridge. If you think you won't finish it in that time, consider freezing it. When you're ready to enjoy leftovers, there are easy ways to reheat them. Use the microwave for quick heating. Place your pasta in a microwave-safe bowl. Add a splash of water or broth to keep it moist. Heat in short bursts, stirring in between, until heated through. You can also reheat on the stove. Just add the pasta to a pan over medium heat. Stir in a little broth or cream to bring back the creamy texture. Freezing Cajun Jambalaya Pasta is a great option for meal prep. First, cool the dish completely. Then, transfer it to a freezer-safe container. Make sure to leave some space at the top, as the pasta may expand when frozen. For best quality, eat it within 2 to 3 months. When you're ready to eat, thaw it in the fridge overnight. Reheat as mentioned above for a tasty meal that feels freshly made. Yes, you can use different types. Options like fusilli, farfalle, or even spaghetti work well. Just make sure to adjust the cooking time based on the pasta shape. Each type has its own time to cook. Penne holds the sauce well, but other shapes can add fun textures. To make this recipe gluten-free, use gluten-free pasta. Many brands offer great options that mimic regular pasta. You can also check the Cajun seasoning for gluten. Most are safe, but it’s wise to read labels. This way, everyone can enjoy the dish without worry. Cajun Jambalaya Pasta pairs well with a fresh green salad. A simple side salad with lemon vinaigrette complements the flavors nicely. You can also serve it with crusty bread to soak up the sauce. For drinks, try iced tea or a light beer. These options bring out the best in the dish. We explored the key ingredients for making Cajun Jambalaya Pasta, noting essential brands and tips. You learned how to prepare and cook it perfectly with simple steps. We shared tricks to enhance flavor and avoid common mistakes. Plus, you discovered fun variations like vegetarian adaptations. Lastly, I provided storage tips for leftovers and answered your questions. With these insights, you can create a delicious dish that satisfies everyone. Enjoy your cooking adventure!

One-Pot Cajun Jambalaya Pasta Flavorful and Easy Cook

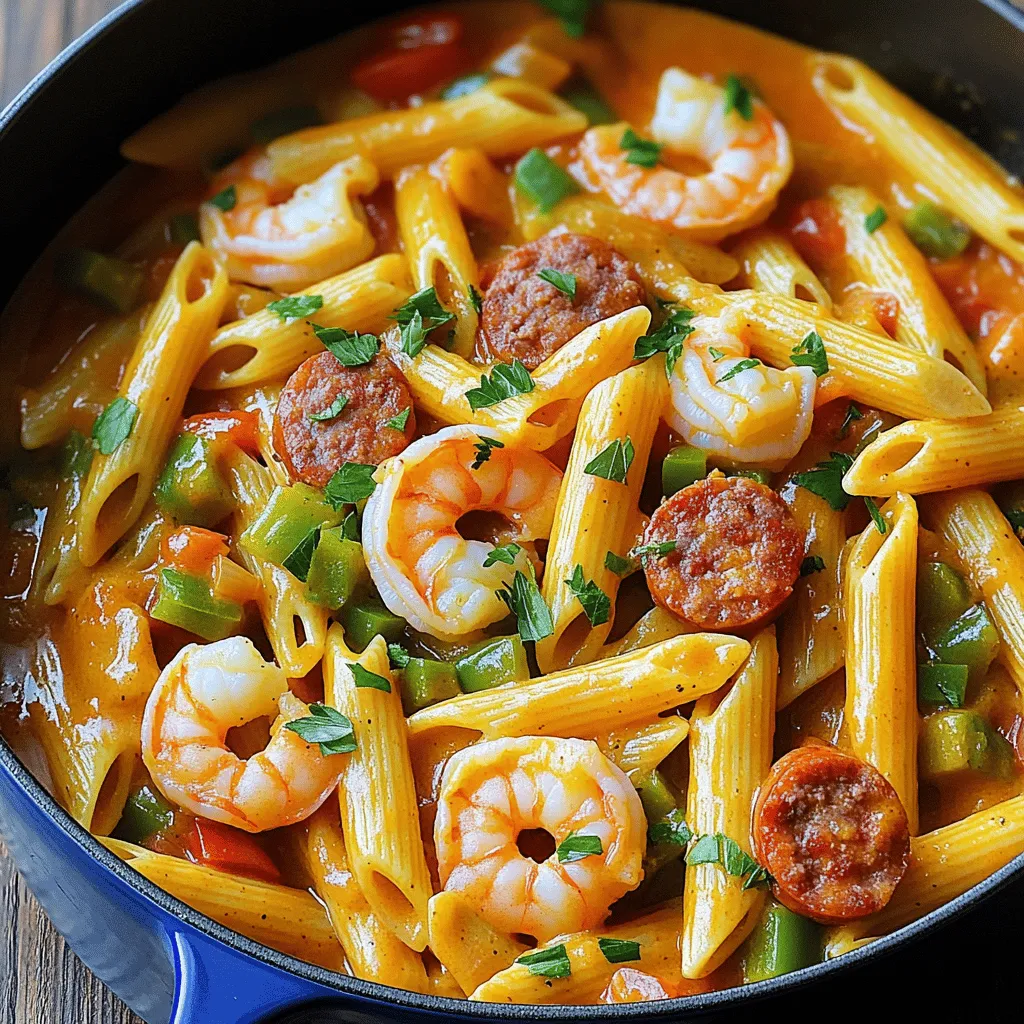
Are you ready to spice up your dinner routine? This One-Pot Cajun Jambalaya Pasta packs bold flavors and is super

- 1 pound large shrimp, peeled and deveined - 3 tablespoons extra virgin olive oil - 4 cloves garlic, finely minced - Zest and juice from 1 large fresh lemon - 1 teaspoon smoked paprika - 1 teaspoon dried oregano - Salt and freshly cracked black pepper to taste - Fresh parsley, finely chopped (for garnish) - Lemon wedges (for serving alongside) These ingredients create a bright and zesty flavor that makes the dish come alive. The fresh lemon juice and garlic work together to enhance the shrimp's natural taste. You can customize the marinade for even more flavors. Consider adding: - A dash of red pepper flakes for heat - A splash of soy sauce for umami - Fresh herbs like thyme or basil for extra aroma These additions can change the dish's character and make it even more exciting. Once you grill the skewers, serve them hot off the grill. Here are some ideas: - Pair the skewers with a fresh green salad for a light meal. - Serve with rice or quinoa to soak up the juices. - Add grilled vegetables for color and nutrition. These options can transform your meal into a feast that everyone will love. To start, grab a large mixing bowl. Add 3 tablespoons of extra virgin olive oil. Next, toss in 4 cloves of finely minced garlic. Then, add the zest and juice from one large lemon. This mix brings a bright flavor to your dish. Now, sprinkle in 1 teaspoon of smoked paprika and 1 teaspoon of dried oregano. Finish with salt and freshly cracked black pepper to taste. Whisk everything well until combined. You’ll smell the fresh and zesty aroma as you mix. Now, it’s time to add the shrimp. Use 1 pound of large shrimp, peeled and deveined. Toss the shrimp in the marinade gently. Make sure each shrimp gets coated well. This is key for great taste. Once coated, cover the bowl with plastic wrap. Place it in the fridge for at least 30 minutes. This lets the shrimp soak up all those tasty flavors. While the shrimp marinates, preheat your grill to medium-high heat. If you use wooden skewers, soak them in water for 30 minutes. This step keeps them from burning. After marinating, take the shrimp and thread them onto the skewers. Aim for 4-5 shrimp per skewer, but don’t pack them too tightly. This ensures even cooking. When your grill is hot, place the skewers on it. Grill the shrimp for 2-3 minutes on each side. Watch them closely as they cook. The shrimp will turn opaque and have nice grill marks when done. Avoid overcooking, or they will become tough. After grilling, remove the skewers and let them rest for a minute. This helps the juices to set. Finally, sprinkle with fresh parsley and serve with lemon wedges for a burst of flavor. When skewering shrimp, choose large shrimp. They hold up well on the grill. Always peel and devein them first. This keeps the shrimp clean and tasty. For wooden skewers, soak them in water for 30 minutes. This prevents burning while grilling. When threading shrimp, use a gentle hand. Aim for 4-5 shrimp on each skewer. Leave space between them for even cooking. Shrimp cook fast. Grill them for just 2-3 minutes on each side. Watch their color change from gray to opaque. This means they are ready. Remove them from the heat as soon as they are done. Overcooked shrimp can be tough and chewy. Use a timer if needed. It helps keep track of cooking time. To serve, arrange skewers on a rustic wooden platter. This adds charm to your meal. Nestle lemon wedges around the skewers for color. Sprinkle fresh parsley on top for a pop of green. This makes the dish look fresh and inviting. Serve with extra lemon wedges on the side. They add a zesty touch and enhance flavor. Enjoy your beautiful creation! {{image_4}} You can swap shrimp for other proteins. Chicken works well with the same marinade. Cut chicken into bite-sized pieces, and make sure to cook it fully. Salmon also tastes great when grilled. Just ensure it stays moist. For a quick option, use firm fish like swordfish. It holds up well on the grill and has a nice flavor. Try adding different herbs and spices to change the taste. Fresh basil adds a sweet note. Cilantro gives a fresh twist. You can also use thyme or rosemary for a woodsy flavor. For heat, add red pepper flakes or cayenne pepper. This will give your skewers a nice kick. Don’t be afraid to experiment with flavors you love! For a vegetarian or vegan twist, use mushrooms or bell peppers. Both can soak up the marinade nicely. Zucchini and eggplant also grill well and taste great. Just cut them into pieces for easy skewering. Tofu is another good choice. Use firm tofu and marinate it just like the shrimp. These options keep the meal fresh and lively while catering to different diets. After you enjoy the skewers, store any leftovers right away. Place them in an airtight container. Make sure they cool to room temperature before sealing. This helps keep them fresh. The skewers can last in the fridge for up to three days. If you want to save them longer, freezing is a great option. To reheat shrimp skewers, use a skillet on medium heat. Add a splash of olive oil to the pan. Cook the skewers for about two to three minutes, flipping them once. This warms them up and keeps them tender. You can also microwave them. Cover the skewers with a damp paper towel. Heat in 30-second bursts until warm. You can freeze your shrimp skewers for later use. Wrap each skewer tightly in plastic wrap. Then, place them in a freezer bag. Remove as much air as possible before sealing. When ready to eat, thaw in the fridge overnight. Cook them on the grill or stovetop when thawed for the best flavor. You should marinate shrimp for at least 30 minutes. This time allows the shrimp to soak in the lemon and garlic flavors. If you have more time, you can marinate for up to 2 hours. Just be careful not to go too long, or the shrimp can turn mushy. Yes, you can use frozen shrimp. Just make sure to thaw them completely before marinating. Place them in a bowl of cold water for about 15-20 minutes. Once thawed, remove the shells and devein if needed. The flavor will stay just as good! Lemon garlic shrimp skewers pair well with many sides. A fresh green salad works great. You can also serve them with rice or quinoa for a filling meal. Garlic bread adds a nice touch too. Enjoying them with grilled veggies can boost the flavor and colors on your plate! In this blog post, we explored the essentials for perfect shrimp skewers. You learned about key ingredients and optional marinades to boost flavor. I shared step-by-step instructions for making and grilling shrimp. We also discussed tips for skewering, cooking, and presenting your dish. Lastly, I covered variations, storage, and answered common questions. Remember, with a few simple steps, you can create a tasty meal. Enjoy making your shrimp skewers delicious and fun!

Lemon Garlic Shrimp Skewers Fresh and Flavorful Dish

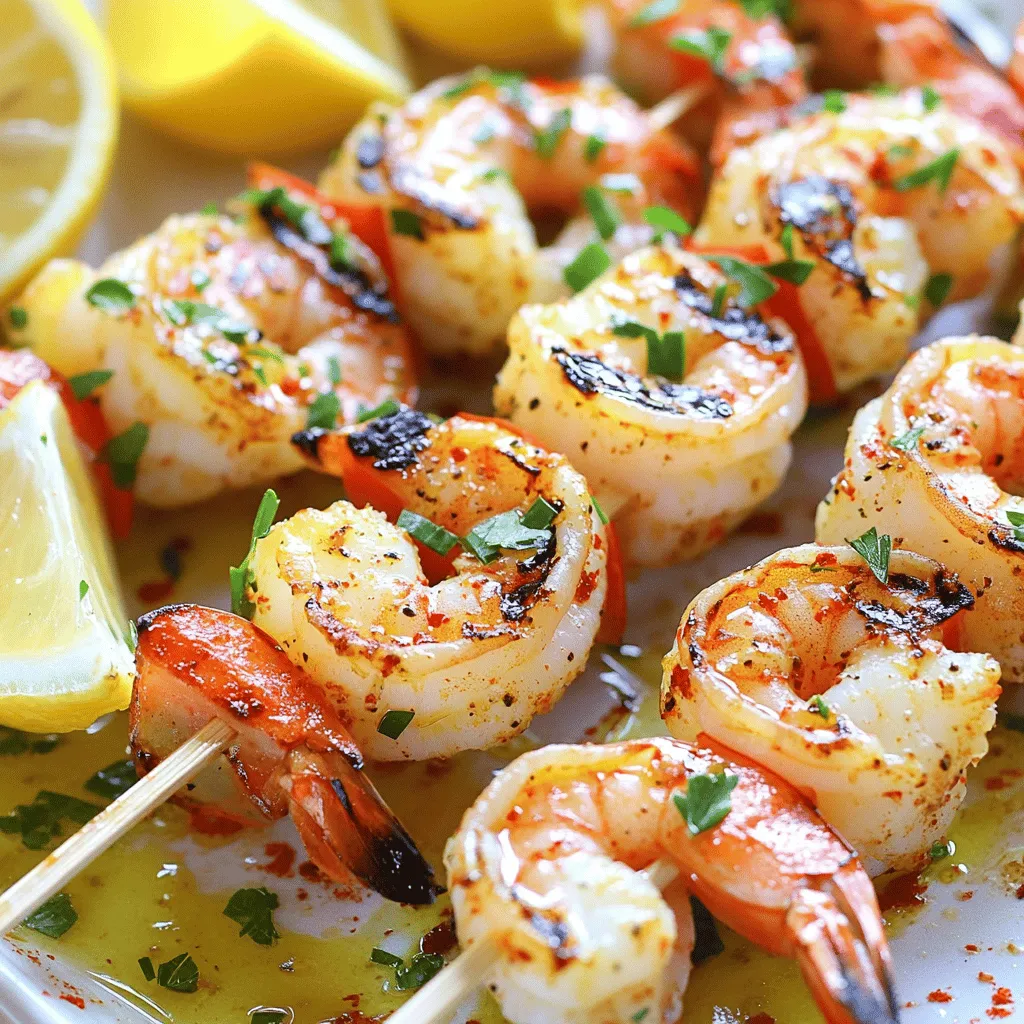
Are you ready to elevate your grilling game? Lemon Garlic Shrimp Skewers are a burst of fresh flavor that will

When making Chocolate Chip Cookie Dough Dip, you'll want to gather these simple ingredients: - 1 cup cream cheese, softened - 1/2 cup unsalted butter, softened - 3/4 cup brown sugar, firmly packed - 1/2 cup granulated sugar - 1 teaspoon pure vanilla extract - 1 cup all-purpose flour (heat-treated for safety) - 1/2 teaspoon fine sea salt - 1 cup mini chocolate chips - 1/2 cup crushed graham crackers - Assorted dippers (apple slices, pretzels, cookie pieces) Each ingredient plays a key role. The cream cheese and butter create a creamy base. The sugars add sweetness, while the heat-treated flour gives it that doughy texture. Mini chocolate chips bring chocolatey goodness, and graham crackers add crunch. Use fresh fruits or pretzels to dip for a fun twist! Start by taking a medium bowl. Add 1 cup of softened cream cheese and 1/2 cup of softened unsalted butter. Use an electric mixer on medium speed. Mix until the blend is smooth and creamy. There should be no lumps left. Next, gradually add both sugars: 3/4 cup of brown sugar and 1/2 cup of granulated sugar. Keep mixing until all sugars are well combined. Finally, add 1 teaspoon of pure vanilla extract and mix until it’s fully blended. Now it’s time to fold in the dry ingredients. Take 1 cup of heat-treated all-purpose flour and sprinkle in 1/2 teaspoon of fine sea salt. (Heat-treating is easy! Microwave the flour for 1 minute or bake it at 350°F for 5 minutes.) Gently fold these into your creamy mixture until it forms a dough-like consistency. After that, add 1 cup of mini chocolate chips. Make sure they are spread evenly throughout the dip. Spoon your cookie dough dip into a serving bowl. Use a spatula to smooth the top for a nice finish. For a fun crunch, sprinkle 1/2 cup of crushed graham crackers on top. This adds texture and makes it look great. Serve your dip with assorted dippers. Fresh apple slices, crunchy pretzels, or bite-sized cookie pieces work well. Enjoy this sweet treat! To make your dip shine, start with room-temperature cream cheese and butter. This helps create a smooth mix. If they are cold, lumps will form. Let them sit out for about 30 minutes before mixing. When mixing, use an electric mixer at medium speed. Begin with the cream cheese and butter together. Beat until it looks creamy. Then, add the sugars slowly. This method helps blend everything well. Get creative with your dippers! Fresh apple slices lend a crisp bite. Crunchy pretzels add a salty twist. You can even use bite-sized cookie pieces for a fun touch. For a beautiful display, arrange your dippers around the dip bowl. This makes it easy for friends to grab their favorites. For added fun, use small cups for individual servings. This way, everyone can enjoy their dippers without mess. {{image_4}} You can make this dip your own by adding fun mix-ins. Here are some ideas: - Nuts: Chopped walnuts or pecans add a nice crunch. They bring a rich flavor that pairs well with chocolate. - Other Mix-ins: Try adding shredded coconut or mini marshmallows. These will give your dip a unique twist. You can also play with different types of chocolate chips. Here are some tasty options: - Dark Chocolate Chips: They add a bold flavor and a touch of richness. - White Chocolate Chips: For a sweeter, creamier taste, use white chocolate. - Peanut Butter Chips: These give a delicious nutty flavor that blends well with the cookie dough. If you have specific dietary needs, you can still enjoy this dip. Here are some easy swaps: - Gluten-free options: Use gluten-free flour instead of all-purpose flour. Make sure to check for heat-treated options to keep it safe. - Vegan substitutes: For a vegan dip, swap cream cheese for a vegan cream cheese. Use coconut oil instead of butter, and ensure your sugars are vegan. These variations help you customize the dip to your taste and dietary needs. Enjoy experimenting! To store leftovers of your cookie dough dip, place it in an airtight container. This keeps the dip fresh and tasty. Store it in the fridge. It will last about three to four days. If you notice any change in smell or texture, it's best to throw it out. You can freeze the dip for longer storage. To do this, scoop the dip into a freezer-safe container. Make sure to leave some space at the top for expansion. Seal it tightly. It can last up to three months in the freezer. When you are ready to enjoy it, thaw the dip in the fridge overnight. This keeps it from getting too watery. If you want it to be extra smooth, beat it again with a mixer after thawing. This will help restore its creamy texture. Can I make this dip ahead of time? Yes, you can make this dip ahead of time. Store it in the fridge for up to three days. Just keep it in an airtight container. This way, it stays fresh and ready to serve when you need it. Is the flour safe to eat? The flour is safe to eat when heat-treated. Heat it in the microwave for one minute or bake it at 350°F for five minutes. This process kills any harmful bacteria, making it safe for your dip. What can I substitute for cream cheese? You can use Greek yogurt as a cream cheese substitute. It has a similar texture, but it will change the flavor slightly. Mascarpone cheese is another great option. Origin and popularity of chocolate chip cookie dough dip Chocolate chip cookie dough dip has roots in classic cookie recipes. It became popular as a fun dessert for parties. Many love it for its nostalgic taste. It mixes the joy of cookie dough with easy dipping fun. Best occasions to serve this dessert dip Serve this dip at gatherings, game nights, or birthday parties. It's perfect for family movie nights or casual get-togethers. People love its sweet taste and creamy texture. Plus, it’s easy to make and share! This blog post shared a fun recipe for chocolate chip cookie dough dip. It covered ingredients, mixing steps, and serving tips. You can add your twist with various flavors and dietary options. Remember to store leftovers properly to keep the dip fresh. Making this dip is easy and enjoyable, perfect for any gathering. Try it out, and see how it makes your snack time special. Enjoy creating, and don’t forget to have fun with your dippers!

Chocolate Chip Cookie Dough Dip Irresistible Delight

Are you ready to indulge in a sweet treat that combines all your favorite flavors? This Chocolate Chip Cookie Dough

- 4 boneless, skinless chicken breasts - 1 cup fresh spinach, finely chopped - 1 can (14 oz) artichoke hearts, well-drained and coarsely chopped - 1 cup cream cheese, softened at room temperature - 1/2 cup sour cream - 1 cup shredded mozzarella cheese - 1/2 cup grated parmesan cheese - 3 cloves garlic, minced - 1 teaspoon onion powder - 1 teaspoon garlic powder - Salt and freshly ground black pepper, to taste - 2 tablespoons olive oil - Fresh herbs like basil or thyme can add extra flavor. - A splash of lemon juice brightens the dish. - Add crushed red pepper for a spicy kick. - Use Greek yogurt instead of sour cream for a tangy twist. - Swap chicken breasts for thighs for more moisture. - Low-fat cream cheese can help cut calories without losing creaminess. - If you're out of artichokes, try using chopped mushrooms or sun-dried tomatoes. {{ingredient_image_2}} 1. Preheat the oven. Set your oven to 375°F (190°C). This makes sure your meal bakes well. 2. Mix the creamy filling. In a big bowl, combine: - 1 cup cream cheese (softened) - 1/2 cup sour cream - 1 cup shredded mozzarella cheese - 1/2 cup grated parmesan cheese - 1 cup fresh spinach (finely chopped) - 1 can (14 oz) artichoke hearts (drained and chopped) - 3 cloves garlic (minced) - 1 teaspoon onion powder - 1 teaspoon garlic powder - Salt and pepper to taste. Stir until it’s smooth. Set it aside. 1. Heat the skillet. Pour 2 tablespoons of olive oil into a large, oven-safe skillet. Heat it over medium heat. 2. Season the chicken. Sprinkle salt and pepper on both sides of 4 boneless, skinless chicken breasts. This adds great flavor. 3. Cook the chicken. Place the chicken in the hot skillet. Cook for 5-7 minutes on each side. Look for a nice golden color. The chicken should reach an internal temperature of 165°F (75°C). 1. Add the creamy mix. Remove the skillet from the heat. Spoon the creamy spinach and artichoke mixture over each piece of chicken. Make sure they are well covered. 2. Bake the dish. Carefully place the skillet in your preheated oven. Bake for 20-25 minutes. The topping should be bubbly and slightly golden. 3. Rest before serving. Once baked, take the skillet out and let it sit for about 5 minutes. This helps the flavors blend together. Your creamy spinach artichoke chicken is now ready to enjoy! For the best results, preheat your oven to 375°F (190°C). This helps the chicken cook evenly. You want the chicken to reach an internal temperature of 165°F (75°C). Cook each side for 5-7 minutes in the skillet. This gives you a nice golden crust. After adding the creamy sauce, bake for 20-25 minutes. The topping should be bubbly and slightly golden. To get that smooth and creamy sauce, mix the softened cream cheese and sour cream well. You want no lumps. Add the cheeses, spinach, artichokes, and spices slowly. This ensures every bite is packed with flavor. If the sauce feels too thick, add a splash of milk or broth. This will help create the perfect consistency. For a stunning look, serve the chicken on a bed of quinoa or rice. This adds texture and helps soak up the sauce. A sprinkle of fresh parsley on top adds color and flavor. Pair it with roasted veggies for a complete meal. This not only makes your dish look great but also adds nutrition. Pro Tips Choose the Right Chicken: Opt for high-quality, organic chicken breasts for better flavor and tenderness. Enhance the Creaminess: For an extra creamy texture, consider adding a splash of heavy cream to the spinach-artichoke mixture. Customize the Cheese: Feel free to mix in different cheeses like gouda or cheddar for a unique flavor twist. Rest Before Serving: Allowing the dish to rest for a few minutes after baking helps the flavors to develop even more! {{image_4}} You can easily make this dish gluten-free. Use gluten-free cream cheese and sour cream. Ensure any added cheeses are also gluten-free. This way, you keep all the creamy goodness without the gluten. For a tasty vegetarian version, swap out the chicken. Use hearty vegetables like portobello mushrooms or eggplant. You can grill or roast them first for extra flavor. Top with the creamy spinach-artichoke mix and bake as usual. Want to boost the flavor? Add chopped sun-dried tomatoes to the cream mixture. A squeeze of fresh lemon juice brightens up the dish. For some heat, mix in red pepper flakes. Each choice gives a new twist to this classic recipe. Once you finish your meal, let the chicken cool down to room temperature. Place any leftover creamy spinach artichoke chicken in a shallow container. Cover it tightly with a lid or plastic wrap. This dish stays fresh for up to three days in the fridge. Always check for any signs of spoilage before eating. To freeze this dish, first, cool it completely. Then, place the chicken in an airtight container or a freezer bag. Remove as much air as possible to avoid freezer burn. You can freeze it for up to three months. Make sure to label the container with the date so you know how long it has been stored. When you’re ready to eat, take out the amount you want. You can reheat it in the oven or the microwave. If using the oven, preheat it to 350°F (175°C). Place the chicken in an oven-safe dish and cover it with foil. Heat for about 20 minutes or until it is warm throughout. If using the microwave, place the chicken on a microwave-safe plate. Heat in short bursts of 1-2 minutes, checking often. Enjoy your meal again! Yes, you can prepare this dish ahead. Simply make the creamy filling and cook the chicken. Store them separately in the fridge. When ready to eat, just assemble and bake. This saves time on busy nights! I suggest pairing this chicken with: - Quinoa - Steamed rice - Roasted vegetables - Mashed potatoes - A fresh green salad These sides bring out the dish's rich flavors and create a balanced meal. To change the spice level, add: - Red pepper flakes for heat - Fresh herbs for flavor without heat - Black pepper for a mild kick You can start small and increase as needed. Taste often to find your perfect balance! In this blog post, we covered the key ingredients and steps to make Creamy Spinach Artichoke Chicken. You learned how to prep, cook, and bake this dish while presenting it beautifully. We explored variations for gluten-free and vegetarian options. You also found tips for storage and reheating. Remember, cooking is about fun and making it your own. With these tips, you can enjoy your perfect meal. Happy cooking!

Creamy Spinach Artichoke Chicken Delicious Weeknight Meal

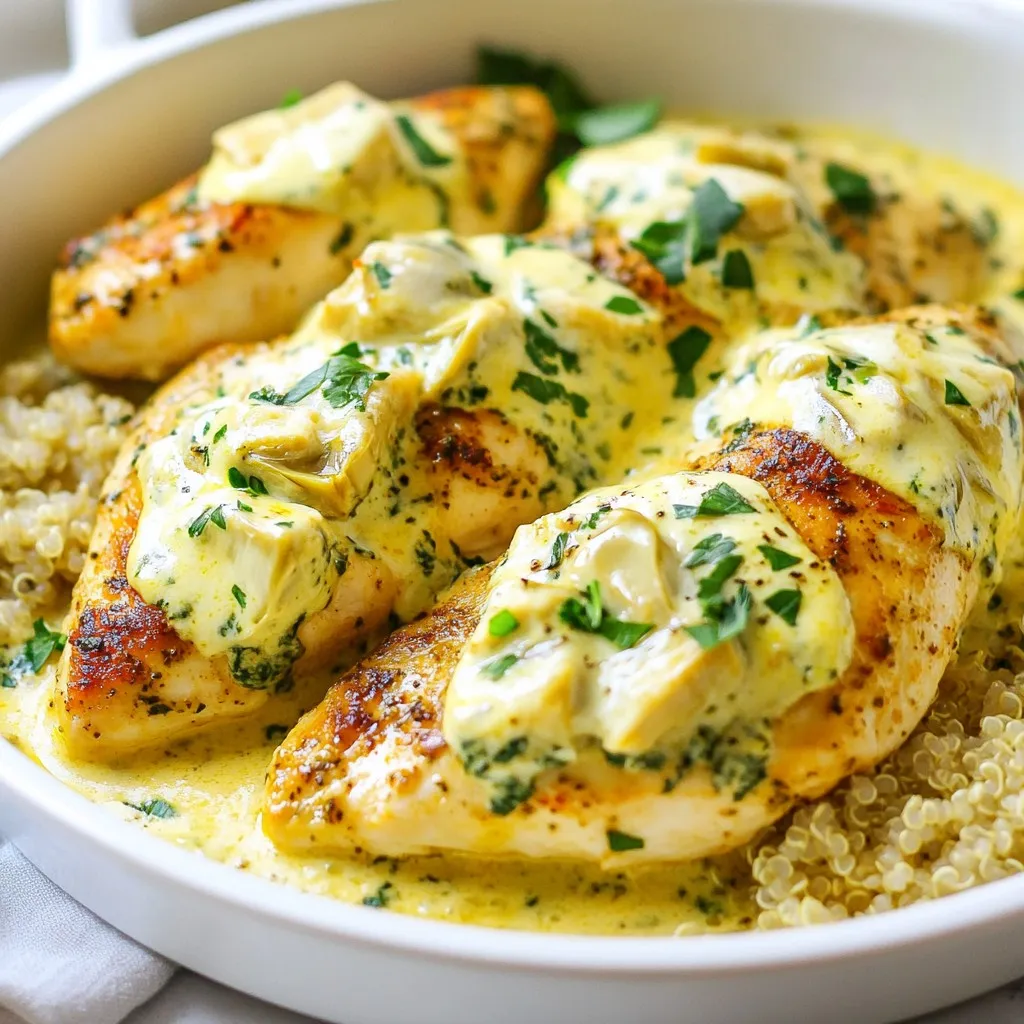
Are you looking for a simple yet delicious weeknight meal? I’ve got just the recipe for you: Creamy Spinach Artichoke

In this recipe, you will need a few simple ingredients to create a burst of flavor. Here’s what you will need: - 4 fresh ears of corn, husked - 2 tablespoons olive oil - 1 teaspoon chili powder - 1/2 teaspoon smoked paprika - Zest and juice of 2 limes - 1/4 cup cotija cheese, crumbled - 1/4 cup fresh cilantro, finely chopped - Salt to taste - Lime wedges for serving Each ingredient plays a key role. The fresh corn brings sweetness and crunch. Olive oil adds richness while helping spices stick. Chili powder and smoked paprika deliver heat and depth. Lime zest and juice brighten the dish. Cotija cheese gives a creamy, salty touch. Fresh cilantro adds a pop of color and flavor. Seasoning with salt enhances all tastes. Finally, lime wedges let you customize the citrus kick. With these ingredients, you set the stage for a delicious chili lime grilled corn that will impress anyone at your table. {{ingredient_image_2}} 1. Preheat the grill: Start by turning on your grill to medium-high heat. You want it hot to get a nice char on the corn. This step is key for flavor. 2. Prepare the chili lime marinade: In a small bowl, mix together 2 tablespoons of olive oil, 1 teaspoon of chili powder, 1/2 teaspoon of smoked paprika, the zest of 2 limes, and the juice from those limes. Stir it well. This marinade gives the corn its tasty kick. 3. Brush corn with marinade: Take 4 fresh ears of corn and husk them. Use a brush or your hands to coat each ear with the chili lime marinade. Make sure to cover all sides for the best flavor. 1. Placement and cooking time on grill: Place your marinated corn directly on the grill grates. Grill the corn for about 10-15 minutes. 2. Turning for even grilling: Turn the corn every few minutes. This helps it cook evenly and develop those beautiful grill marks. The corn will get tender and caramelized as it cooks. 1. Cooling and garnishing the corn: After grilling, carefully take the corn off the grill. Let it cool for a few minutes. This makes it safer to handle. 2. Serving suggestions with lime wedges: Once cooled, sprinkle 1/4 cup of crumbled cotija cheese and 1/4 cup of finely chopped fresh cilantro on the corn. Add salt to taste. For more zing, squeeze extra lime juice over the top. Serve the corn warm, with lime wedges on the side. Enjoy the bright flavors and fresh aromas! To get the perfect char on your corn, heat your grill to medium-high. This helps create those nice grill marks. Watch your corn closely while grilling. It should cook for about 10 to 15 minutes. Turn it every few minutes. You want it tender and slightly caramelized. You can try extra toppings for even more flavor. A sprinkle of chili flakes or a dash of hot sauce can bring out a spicy kick. If you're not a fan of cotija cheese, try feta or goat cheese instead. Both options add creaminess and taste. For a vegan choice, use nutritional yeast. It gives a cheesy flavor without dairy. Enjoy experimenting with flavors! Pro Tips Use Fresh Corn: The flavor of your grilled corn will be significantly better if you use fresh, in-season corn. Look for ears that are bright green and tightly wrapped, with plump kernels. Marinate Longer: For enhanced flavor, consider letting the corn marinate in the chili-lime mixture for at least 30 minutes before grilling. This allows the spices to penetrate deeper. Grill in Foil: If you prefer a more tender corn, wrap the ears in aluminum foil after applying the marinade. This will steam the corn while it grills, keeping it juicy. Experiment with Toppings: Feel free to get creative with toppings! Avocado, hot sauce, or even a sprinkle of lime-infused salt can elevate the flavor profile. {{image_4}} You can change the spices to create new flavors. Instead of chili powder, try using cumin or cayenne for more heat. If you prefer a sweeter touch, add a pinch of sugar or use smoked paprika. Each spice gives a unique twist to the corn. For those who want a vegan option, skip the cotija cheese. Instead, use nutritional yeast for a cheesy flavor that is dairy-free. Another choice is to use vegan feta cheese. It adds a nice crumbly texture without animal products. This grilled corn pairs well with many dishes. Serve it alongside grilled chicken or fish for a complete meal. It also goes great with tacos or burritos, adding a fresh, zesty kick. When hosting a party, get creative with your presentation. Arrange the corn on a colorful platter with lime wedges. You can also sprinkle extra cilantro on top for a bright look. For a fun touch, serve the corn on skewers for easy eating. Everyone will love the look and taste! To store leftover chili lime grilled corn, let it cool down. Wrap each ear in plastic wrap. You can also place corn in an airtight container. Make sure it is sealed well. This helps keep it fresh and tasty. You can store it in the fridge for up to three days. To reheat grilled corn, use a grill or stovetop pan. Heat it on medium heat for a few minutes. This helps bring back its great flavor. You can also microwave it briefly. Wrap corn in a damp paper towel to keep it moist. For the best taste, add a sprinkle of lime juice after reheating. This keeps the corn zesty and fresh. Enjoy your delicious leftovers! Yes, you can use frozen corn. It cooks faster than fresh corn. Thaw it first for best results. Frozen corn offers a sweet taste. However, fresh corn gives a better texture and flavor when grilled. The best corn for grilling is sweet corn. Look for ears that feel firm and heavy. They should have bright green husks. Sweet corn has a natural sweetness that shines when grilled. You will love the juicy kernels! To adjust for more servings, add more corn. You can use one ear per person. Simply multiply the other ingredients as needed. For example, if you serve eight, double the olive oil and spices. This will keep the flavors balanced. This blog post covered how to grill fresh corn perfectly. We explored ingredients, preparation steps, and grilling techniques. I shared helpful tips for flavor and variations to keep your meals exciting. Grilled corn is a delicious treat for any gathering. Experiment with spices and toppings to find your favorites. Storing and reheating tips ensure you enjoy leftovers too. Grilling corn can be fun and simple—get ready to impress your family and friends!

Chili Lime Grilled Corn Flavorful Summer Delight

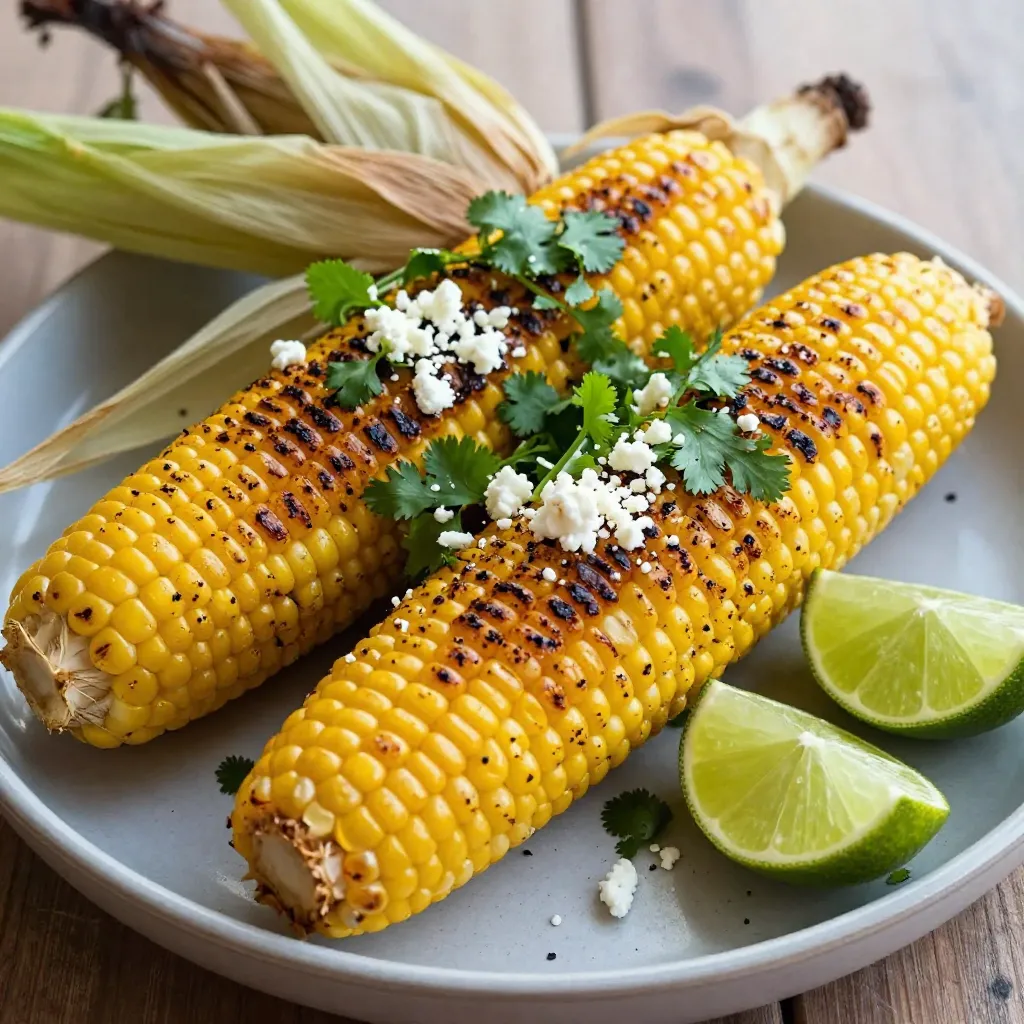
Summer and grilling go hand in hand, and there’s nothing quite like Chili Lime Grilled Corn to elevate your cookout!

To make this delightful dish, gather the following ingredients: - 1 loaf of challah or brioche bread, cut into 1-inch cubes - 1 cup canned pumpkin puree - 4 large eggs - 1 cup milk (whole or your preferred type) - 1 teaspoon vanilla extract - 1 teaspoon ground cinnamon - 1/2 teaspoon ground nutmeg - 1/2 teaspoon ground ginger - 1/4 teaspoon salt - 1/2 cup packed brown sugar - 1/2 cup pecans, chopped (optional for extra texture) - Maple syrup for serving Measuring ingredients correctly is key for a great bake. Use dry measuring cups for solids like brown sugar. For liquids, use a liquid measuring cup for milk. Eggs should be large for the best results. - When measuring pumpkin puree, use a standard cup to ensure the right amount. - Spices should be leveled off with a knife for accuracy. If you want to customize your bake, consider these fun add-ins: - Chopped apples: Add diced apples for a fruity twist. - Chocolate chips: Mix in semi-sweet chocolate chips for a sweet surprise. - Dried fruits: Raisins or cranberries can add a chewy texture. - Extra nuts: Walnuts or almonds can enhance the crunch. These options can make your Pumpkin Spice French Toast Bake even more special! {{ingredient_image_2}} Start by preheating your oven to 350°F (175°C). This step sets the stage for perfect baking. Next, grab a 9x13-inch baking dish. Grease it well. This helps prevent sticking. You want every delicious bite to come out smoothly. In a large mixing bowl, combine the canned pumpkin puree, eggs, and milk. Add one teaspoon of vanilla extract for a nice touch. Sprinkle in the ground cinnamon, nutmeg, ginger, and salt. Finally, mix in half a cup of brown sugar. Use a whisk to blend until smooth. This pumpkin base is the heart of your bake, so make it nice and creamy. Now, gently add the cubed bread to your pumpkin mixture. Use a spatula or wooden spoon to fold the bread in. You want every piece to be coated well. If you like, fold in half a cup of chopped pecans for crunch. This adds a nice texture and flavor. Pour your bread and pumpkin mixture into the prepared baking dish. Spread it evenly. Cover the dish with aluminum foil. This keeps moisture in while baking. Bake for 25 minutes. After that, carefully remove the foil. Continue to bake for another 15 to 20 minutes. The top should be golden brown and the center should not jiggle. Once baked, take the dish out of the oven. Let it cool for about 10 minutes. This helps it firm up. Serve warm with a generous drizzle of maple syrup. You can add extra pecans or a dollop of whipped cream on top for a lovely finish. Enjoy this tasty treat! When picking bread for your bake, use challah or brioche. These breads are soft and sweet. They soak up the pumpkin mixture well. You want bread that holds its shape but still gets soft. Avoid using dry or crusty bread. If you can, buy fresh bread the day you plan to bake. This keeps the texture perfect. Do you like strong flavors? You can add more spice! Increase the cinnamon or nutmeg for a bolder taste. If you prefer a milder flavor, cut back a bit. You can also try adding a pinch of cloves or allspice. This gives the dish a unique twist. Always taste the mixture before baking. That way, you can adjust it to suit your palate. Serve your French toast bake warm for the best taste. It’s delicious right out of the oven! To make it even better, drizzle maple syrup on top. You can also add whipped cream for a creamy touch. Chopped pecans add texture and crunch. Fresh fruit like berries or banana slices can brighten the dish. Feel free to mix and match your toppings! Pro Tips Use Day-Old Bread: Stale bread absorbs the custard mixture better, resulting in a creamier texture. Experiment with Spices: Feel free to adjust the spices according to your taste. A pinch of cloves or allspice can add depth. Make Ahead: Prepare the dish the night before, cover it, and let it sit in the fridge. Bake it in the morning for a quick breakfast. Presentation Matters: Dust with powdered sugar before serving for a beautiful touch, and pair with fresh fruit for added color. {{image_4}} You can make this dish dairy-free with some simple swaps. Use almond milk, coconut milk, or oat milk instead of regular milk. These options will keep the creamy texture. For the eggs, try using a mix of flaxseed meal and water. Mix one tablespoon of flaxseed meal with three tablespoons of water for each egg. Let it sit for five minutes to thicken. This mix works well in baked goods and keeps your bake moist. If you need a gluten-free version, choose gluten-free bread. Look for brands that use a mix of flours, like almond or rice flour. Make sure the bread is fresh for better texture. You can also make your own gluten-free bread at home if you prefer. Just replace the regular bread in the recipe with your gluten-free option, and you’re good to go. Want to jazz it up? Add chocolate chips or chunks to the mix. They melt and create sweet pockets in each bite. Use dark chocolate for a deeper taste, or try white chocolate for a sweeter twist. Dried fruits like cranberries or raisins can also add a nice chewiness. Toss in about half a cup of your choice to the pumpkin mixture for an extra flavor boost. To store leftovers, let the Pumpkin Spice French Toast Bake cool completely. Cut it into squares and place them in an airtight container. You can keep it in the fridge for up to three days. This keeps it fresh and tasty. When you want to enjoy it again, take a square out of the fridge. Place it on a plate and cover it with a damp paper towel. Microwave it for about 30 seconds, or until warm. You can also reheat it in the oven. Preheat the oven to 350°F (175°C), place the square in a baking dish, and heat for about 10 minutes. If you want to store it longer, freezing works well. Cut the bake into squares and wrap each piece in plastic wrap. Place the wrapped pieces into a freezer bag. They can stay in the freezer for up to three months. When you're ready to eat, thaw it in the fridge overnight and reheat as mentioned above. This method keeps the flavor and texture intact. Yes, you can prepare this bake ahead of time. Mix the pumpkin base and bread together. Pour it into your baking dish, cover it, and place it in the fridge. This makes it easy for a busy morning. Bake it the next day. Just add an extra few minutes to the baking time if it is cold from the fridge. If you don’t have pecans, you can use walnuts or almonds. Both add a nice crunch. You can also skip nuts altogether if you want. The bake will still taste great without them. Try adding some chocolate chips or raisins for a sweet twist! You will know the bake is done when the top is golden brown. Gently shake the dish; the center should not jiggle. It may take 40 to 45 minutes of total baking time. Let it cool for about 10 minutes before serving. This helps it set nicely for cutting. This blog post covered the key steps to make a tasty Pumpkin Spice French Toast Bake. We reviewed ingredients, cooking methods, and helpful tips. You learned about add-ins and variations, plus how to store leftovers. In closing, this dish offers warm, rich flavors perfect for any time of year. Don’t be afraid to personalize it to your taste! Enjoy your baking journey and surprise your friends with this delicious meal.

Pumpkin Spice French Toast Bake Irresistible Delight

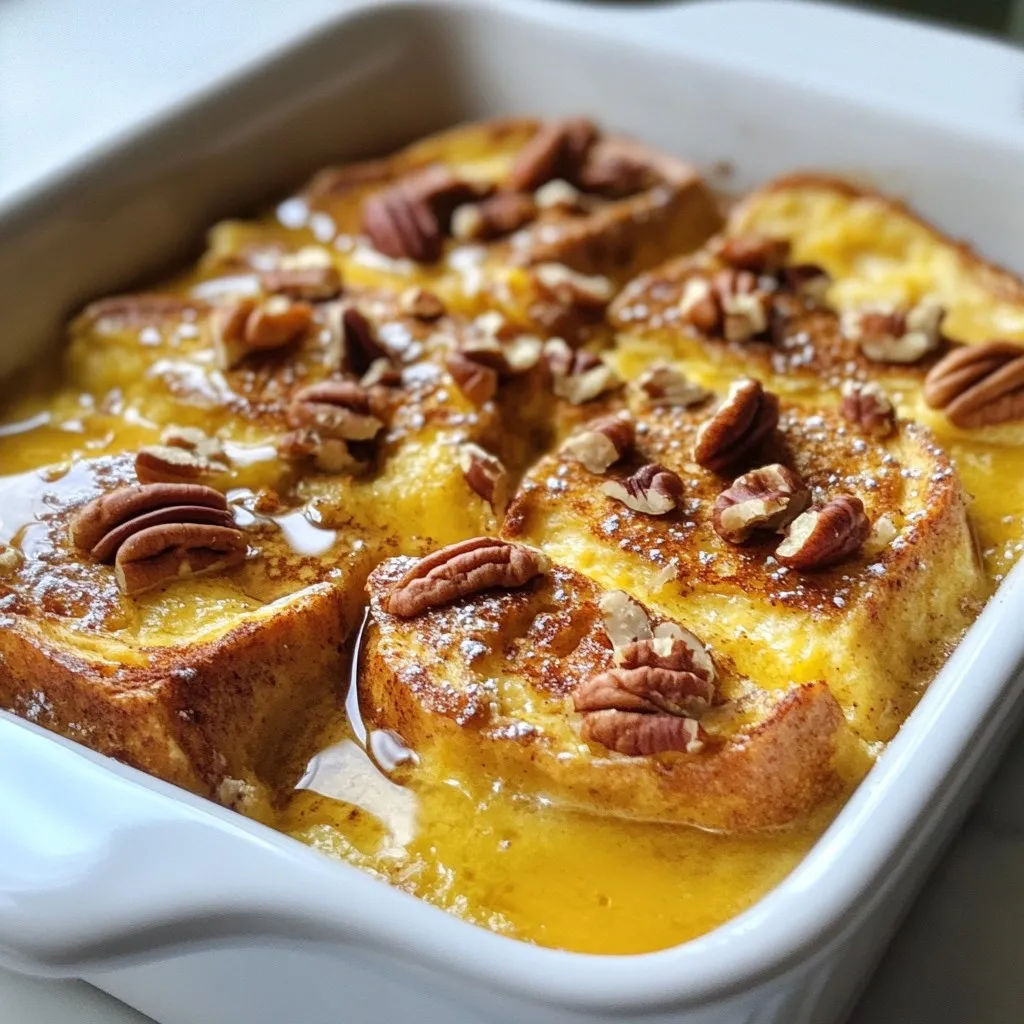
Are you ready to make breakfast unforgettable? My Pumpkin Spice French Toast Bake is a warm, delicious treat that pairs

To make Mango Habanero Salsa, gather these fresh ingredients: - 1 ripe mango, peeled and diced into small cubes - 1-2 habanero peppers, seeds removed and finely chopped - 1/2 medium red onion, finely diced - 1/2 bell pepper, diced (red or yellow) - 2 tablespoons freshly squeezed lime juice - 1/4 cup fresh cilantro, finely chopped - Salt, to taste - Optional: 1/2 teaspoon honey Each ingredient plays a key role in creating a balanced flavor. The sweetness of the mango contrasts with the heat of the habanero. The onion adds depth while the lime juice gives a zesty kick. The star of this salsa is the mango. A ripe mango is sweet and juicy. It brings a refreshing taste that lightens the heat from the habanero. When selecting mangoes, look for ones that are slightly soft to the touch. They should have a fruity aroma. Habanero peppers provide the heat. Their spicy flavor can be intense. Start with one pepper if you prefer less heat. Always remove the seeds, as they carry most of the spice. Wearing gloves can help avoid skin irritation while handling them. You can enhance your salsa with a few optional ingredients. A touch of honey adds sweetness. This balances the heat from the peppers. If you want more texture, consider adding diced avocado. For a tangy twist, a splash of apple cider vinegar works well. You can also add chopped jalapeños for extra spice. Feel free to mix and match based on your taste! To start, you need a ripe mango. First, peel the mango carefully. Watch out for the large pit inside. After peeling, dice the mango into small cubes. Aim for uniform pieces for even mixing. Once diced, place the mango cubes in a mixing bowl. The mango adds sweetness to the salsa. Habanero peppers pack a punch! To handle them safely, wear gloves. This keeps the oils off your skin. Slice the habanero peppers lengthwise. Remove the seeds for less heat if you want. Finely chop the peppers and add them to the mango bowl. If you love spicy food, add more peppers for extra heat. Now it’s time to mix! Add the finely diced red onion and bell pepper to the bowl. Then, squeeze fresh lime juice over everything. This adds brightness and helps blend the flavors. Toss in the chopped cilantro and salt. If you like, you can add honey for a hint of sweetness. Gently stir the mixture. Be careful not to mash the mango. Let the salsa rest for 15-30 minutes. This resting time lets the flavors meld together beautifully. Enjoy the vibrant colors and fresh taste! To make your mango habanero salsa just right, adjust the heat to your taste. Start with one habanero for a mild kick. If you like it hotter, add more. Remove the seeds and ribs for less heat. Always taste as you go. This helps you find the balance you enjoy best. Mango habanero salsa shines with crispy tortilla chips. It also pairs well with grilled chicken or fish. Try it on tacos for a fresh twist. You can even mix it into a salad for extra flavor. Serve it in a bright bowl, and garnish with cilantro for a fun look. Store leftover salsa in an airtight container. It will keep in the fridge for up to three days. The flavors will get better as it sits. If it gets too watery, drain some liquid before serving again. Always give it a gentle stir to mix the flavors back together. {{image_4}} You can make your mango habanero salsa even more fun by adding other fruits. Try diced pineapple, kiwi, or papaya. These fruits add sweetness and texture. Each fruit brings a unique flavor that complements the mango. Mixing fruits gives a fresh twist to the salsa. You can also use berries for a pop of color. Just remember to keep the fruit pieces small for a nice blend. You can control the heat of your salsa by adjusting the habanero peppers. If you want a milder salsa, use just one pepper. You can also remove all the seeds to lessen the heat. For more spice, add extra chopped habanero. You could even mix in jalapeños for a different kick. Always taste the salsa as you go. This way, you can get the heat just right for your taste. This salsa is naturally vegan and gluten-free, making it a great choice for everyone. You can enjoy it with chips, on tacos, or as a topping for grilled meats. If you want to add protein, consider black beans or chickpeas. These additions enhance the flavor while keeping it healthy. Always check that any chips or tortillas you use are gluten-free if needed. This salsa is versatile and fits many diets. Mangoes are sweet and full of nutrients. They contain vitamins A and C, which help keep your skin healthy. Mangoes also have fiber, which aids digestion. Habanero peppers add a spicy kick. They contain capsaicin, which may boost metabolism and help reduce pain. Together, these ingredients make a tasty and healthy dip. Each serving of mango habanero salsa has about 50 calories. This number can change based on the amount of honey you add. The mango and veggies provide most of the calories. This salsa is low in calories, making it a great choice for snacks. - Vitamin C: Supports your immune system. - Vitamin A: Good for your eyesight. - Fiber: Helps your digestion. - Capsaicin: May help you burn fat. This salsa is not just tasty; it’s also packed with good-for-you nutrients. Enjoy it with your favorite chips or as a topping! To lower the heat, remove the seeds from the habanero peppers. Use fewer peppers or try a milder pepper, like a jalapeño. Adding more mango or bell pepper can also help. These ingredients will balance the heat and keep the flavor bright. Yes, you can make mango habanero salsa ahead. It tastes even better after resting. Just cover it and store it in the fridge for up to two days. The flavors will meld and create a zesty dip for your next gathering. This salsa goes well with many dishes. It’s great with tortilla chips for dipping. You can also use it as a topping for grilled chicken, fish, or tacos. The bright flavor adds a fun twist to any meal, making it a crowd-pleaser. In this blog post, we explored the vibrant world of Mango Habanero Salsa. We started with fresh ingredients, highlighting the star players: mango and habanero. Then, I shared step-by-step instructions for preparation and mixing, along with tips to balance heat. We looked at tasty variations, health benefits, and common questions. This salsa can elevate any meal. Get creative and adjust it to your taste. Enjoy the bursts of flavor while keeping it healthy!

Mango Habanero Salsa Zesty and Flavorful Dip

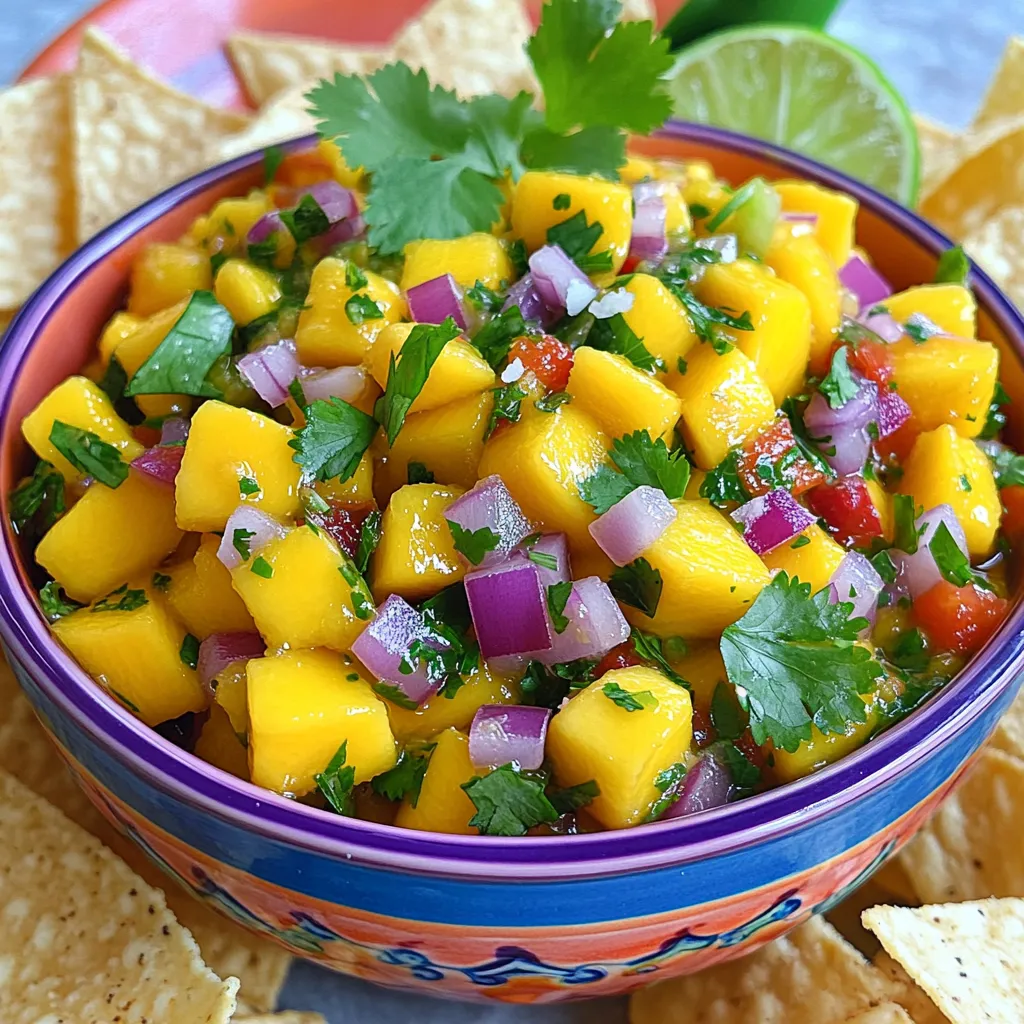
Looking for a dip that packs a punch? Mango Habanero Salsa is your answer! This zesty and flavorful blend combines

Older posts
Newer posts
← Previous Page1 … Page18 Page19 Page20 … Page113 Next →

dsad

© 2025 spoonfulsavory • Built with GeneratePress

Our Policies

  • Copyright Policy
  • Cookie Policy
  • GDPR Policy
  • Privacy Policy
  • Disclaimer
  • Terms Of Use

More Information

  • Home
  • About
  • Contact
  • Appetizers
  • Dessert
  • Dinner
  • Drinks
©2025, spoonfulsavory About Back To Top