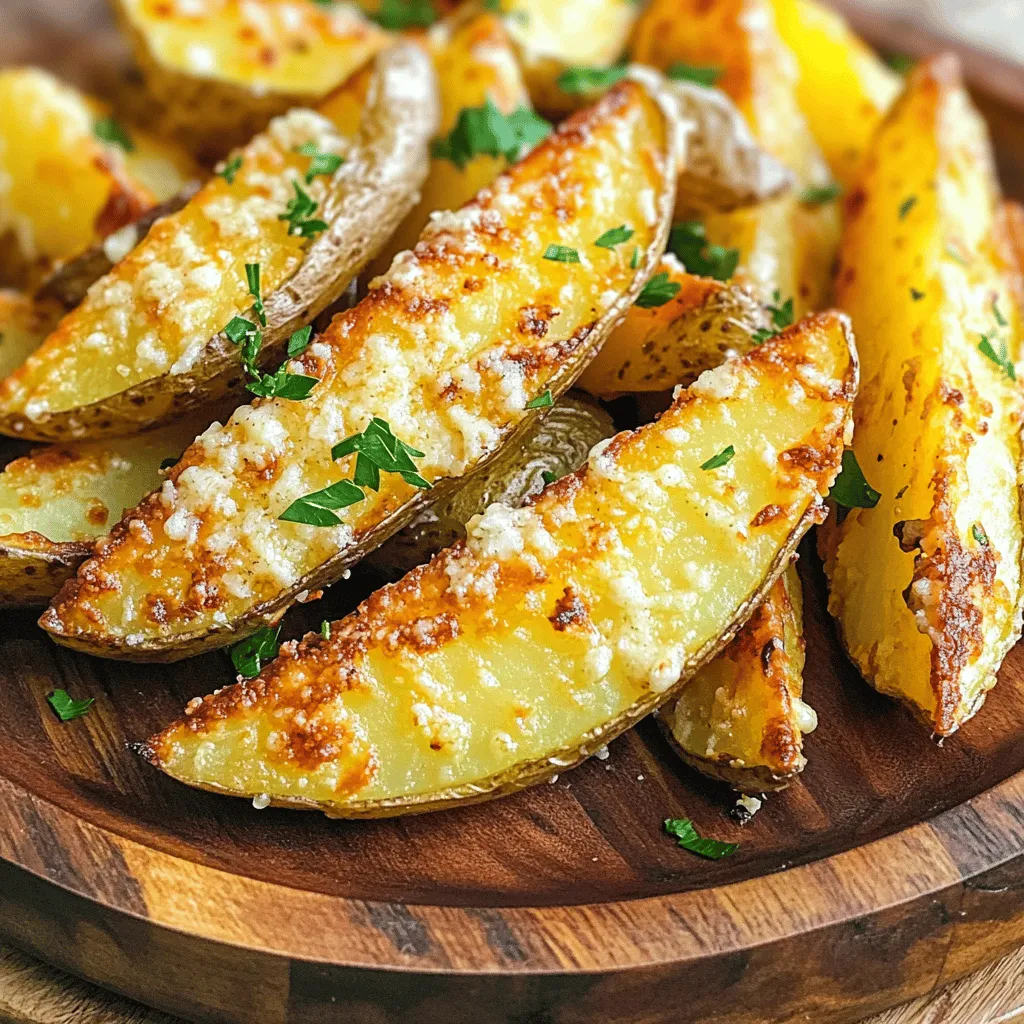
![To make crispy garlic herb potato wedges, you need simple and fresh ingredients. Here’s what you will need: - 4 large russet potatoes - 3 tablespoons extra virgin olive oil - 4 cloves of garlic - 1 teaspoon dried oregano - 1 teaspoon dried thyme - 1 teaspoon smoked paprika - ½ teaspoon sea salt - ½ teaspoon freshly cracked black pepper - Fresh parsley (for garnish) - Grated Parmesan cheese (optional) These ingredients come together to create a dish that is not only crispy but also packed with flavor. The russet potatoes provide a fluffy inside while the garlic and herbs give a tasty kick. Using fresh garlic ensures a strong and aromatic flavor. The olive oil helps to crisp up the wedges, making them golden and irresistible. Don't forget the optional Parmesan cheese for a savory finish! For the full recipe, check out the detailed instructions. - Step 1: Preheat the oven and prepare your baking sheet Set your oven to 425°F (220°C). Line a large baking sheet with parchment paper. This makes cleanup easy. - Step 2: Make the garlic-herb mixture In a big bowl, mix 3 tablespoons of olive oil with 4 minced garlic cloves, 1 teaspoon of oregano, 1 teaspoon of thyme, 1 teaspoon of smoked paprika, ½ teaspoon of sea salt, and ½ teaspoon of black pepper. This mixture smells amazing! - Step 3: Coat the potato wedges with the mixture Add 4 large russet potato wedges to the bowl. Toss them gently to coat each wedge in the garlic-herb blend. Make sure every wedge is covered well. - Step 4: Arrange the wedges and prepare for baking Place the coated wedges in a single layer on the baking sheet. Leave space between each wedge. This helps them crisp up nicely. - Step 5: Bake and flip for maximum crispiness Put the baking sheet in the oven. Bake for 25-30 minutes. Flip the wedges halfway through. This ensures they get golden brown on both sides. - Step 6: Garnish before serving When the wedges are crispy and golden, take them out. If you like, sprinkle grated Parmesan cheese on top. Finish with chopped parsley for a pop of color. For the full recipe, check out the detailed instructions. Enjoy your crispy garlic herb potato wedges! To get your potato wedges super crispy, start by spacing them out on the baking sheet. This helps hot air move around each wedge, making them golden. If they touch, they steam, and that won’t give you the crunch you want. Flipping the wedges halfway through cooking is key. It helps both sides brown evenly for that perfect crispiness. I like to set a timer to remind me. Using parchment paper helps too. It prevents sticking and makes cleaning easier. If you bake directly on the pan, you might lose some crunch. To make these wedges even tastier, try adding other spices or herbs. A pinch of cayenne pepper can add heat. You could also use rosemary for a lovely aroma. When it comes to salt, sea salt gives a different flavor than regular salt. Sea salt has larger crystals, which make a nice crunch. Try it next time for an upgrade. Dipping sauces take these wedges to another level. I recommend creamy garlic aioli or classic ketchup for a nice contrast. If you’re feeling fancy, try a spicy sriracha mayo. For presentation, serve the wedges in a rustic basket lined with parchment paper. It looks great and makes for easy sharing. Don’t forget to pair it with a small bowl of your favorite dip! {{image_4}} You can easily change up the flavors in your crispy garlic herb potato wedges. Here are a few fun ideas: - Cheesy Twist: Add grated cheese, like Parmesan or cheddar, for a creamy touch. - Spicy Kick: Mix in a pinch of cayenne or chili powder for heat. - Fresh Herbs: Swap dried herbs for fresh ones. Use basil or rosemary for a different taste. If you want to try something new, use sweet potatoes instead of russet potatoes. They add a lovely sweetness and beautiful color. Just follow the same steps in the recipe. The result will be just as crispy and delicious! You can also use other methods to cook these tasty wedges. Here are two great options: - Air Fryer: For a quicker version, toss your seasoned wedges in the air fryer. Cook them at 400°F for about 15-20 minutes. Shake the basket halfway through for even crispiness. - Grilling: If it’s summer, grill your potato wedges for a smoky flavor. Preheat the grill and place wedges on a grill pan. Cook for about 20 minutes, flipping often. This method adds a nice char and enhances the taste. Feel free to explore these variations and cooking methods. They can make your crispy garlic herb potato wedges even more fun! For the complete cooking process, check out the Full Recipe. To keep your crispy garlic herb potato wedges fresh, store them in an airtight container. Allow them to cool completely before sealing to avoid steam buildup. This helps maintain their crispiness. Keep the container in the fridge for up to three days. If you have extra wedges, consider separating them with parchment paper. This prevents them from sticking together. Reheating is key to enjoying your potato wedges again. Use the oven for the best results. Preheat your oven to 400°F (200°C). Spread the wedges on a baking sheet. Bake for about 10-15 minutes until they are hot and crispy again. Avoid the microwave if you can. It can make them soggy. If you must use it, heat them in short bursts. Check often to prevent overcooking. For the best flavor and texture, stick to the oven method. For the full recipe, check the detailed cooking steps and tips. These potato wedges take about 25 to 30 minutes to cook. You will want to flip them halfway through to ensure they cook evenly and get nice and crispy. Yes, you can prepare the potato wedges ahead of time. Cut and coat them in the garlic-herb mix. Store them in the fridge for up to 24 hours. Just remember to bake them fresh for the best texture. The best type of potato for wedges is the russet potato. They have a high starch content. This makes them crispy on the outside and fluffy on the inside when cooked. To make these potato wedges vegan-friendly, skip the Parmesan cheese. You can still enjoy the rich flavors from the garlic and herbs without any animal products. Yes, you can freeze these potato wedges. After baking, let them cool completely. Place them in an airtight container and freeze. When ready to eat, reheat them in the oven for a crispy finish. For the full recipe, check out the detailed instructions above. Crispy garlic herb potato wedges are a simple and tasty dish. You can make them in about 40 minutes. The steps are easy to follow, and you’ll enjoy a crunchy treat. Start by preheating your oven to 425°F (220°C). Mix the olive oil, garlic, and spices in a bowl. Then, coat the potato wedges in this mix. Lay them out on a baking sheet with space between them. Bake for 25-30 minutes, flipping halfway for even crispiness. For detailed instructions and tips, check the [Full Recipe]. Enjoy these crunchy wedges as a snack or side! In this blog post, we covered how to make crispy garlic herb potato wedges. You learned about the key ingredients, step-by-step cooking instructions, and tips for perfecting taste and texture. Remember, spacing and flipping the wedges are key for crispiness. You can also try different seasonings or even sweet potatoes for variety. Enjoy your delicious potato wedges with your favorite dips. This easy recipe satisfies cravings and adds fun to any meal!](https://spoonfulsavory.com/wp-content/uploads/2025/07/dd962bca-b4e4-4223-a082-d22742269e03.webp)
Crispy Garlic Herb Potato Wedges Irresistible Treat
Ready to elevate your snack game? These Crispy Garlic Herb Potato Wedges are packed with flavor and texture that will
Ready to elevate your snack game? These Crispy Garlic Herb Potato Wedges are packed with flavor and texture that will

Craving a treat that bursts with wholesome flavor? You’ve found it! These Lemon Ricotta Blueberry Muffins are easy, delicious, and
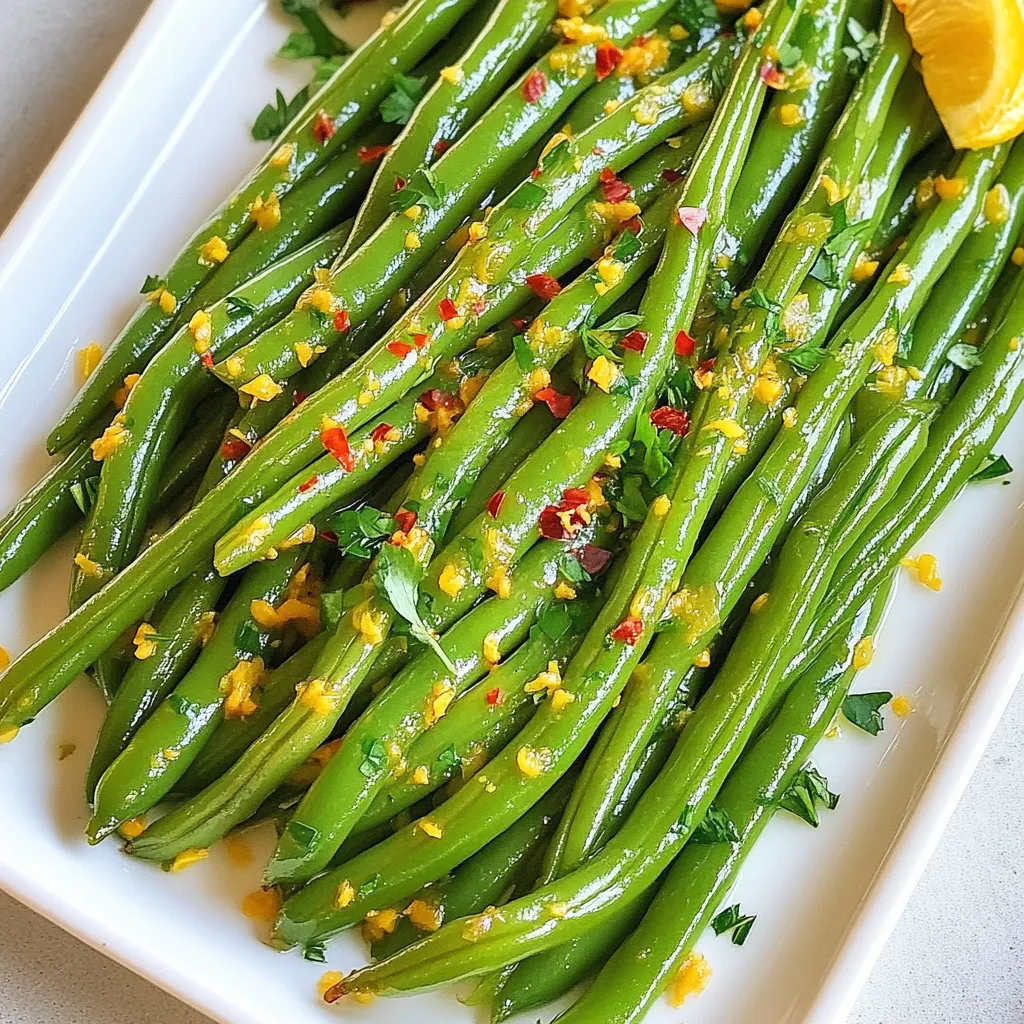
Looking for a side dish that packs a punch? My Spicy Garlic Butter Green Beans are easy to make and
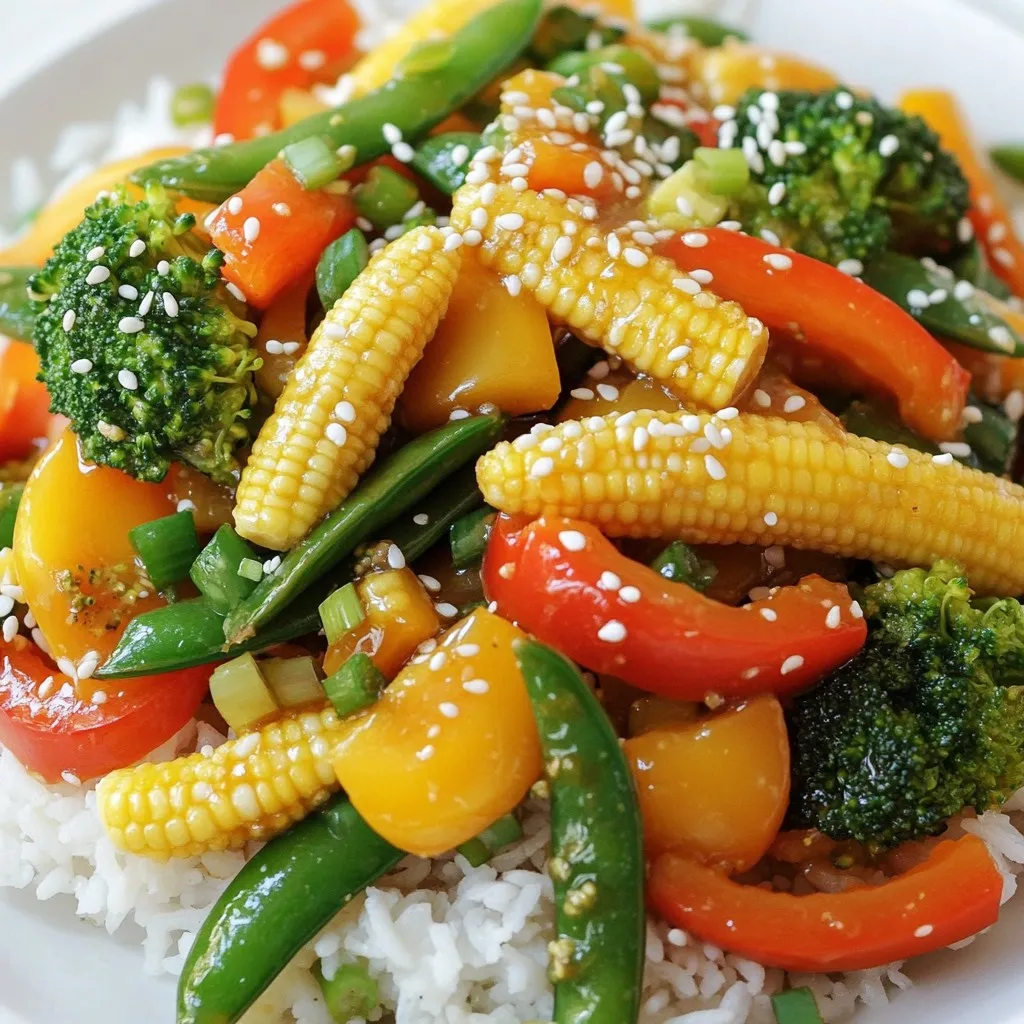
If you’re looking for a quick and tasty meal, this Honey Garlic Veggie Stir Fry fits the bill. Packed with
 that details each step. Happy cooking! To start, grab a medium mixing bowl. In this bowl, whisk together the honey, minced garlic, soy sauce, apple cider vinegar, grated ginger, sesame oil, cornstarch, and a pinch of salt and pepper. Mix until all the ingredients blend well. Aim for a smooth and shiny mixture. Next, take a large bowl and place the chicken pieces inside. Pour your marinade over the chicken. Gently toss the pieces to coat them evenly in the sauce. Let the chicken sit for at least 30 minutes at room temperature, or pop it in the fridge for up to 2 hours. This helps the flavors soak in. Now, let’s get the oven ready. Preheat it to 400°F (200°C). Line a baking sheet with parchment paper to prevent sticking. Spread the marinated chicken bites on the sheet in one layer. Make sure they don’t touch each other for even cooking. Bake for 15 to 20 minutes. Flip the pieces halfway through to ensure they cook well. Your chicken is done when it hits 165°F (75°C) and looks beautifully caramelized. For the full recipe, see above. Enjoy your cooking! To make your honey garlic chicken bites even better, allow a longer marination time. Marinate the chicken for at least 30 minutes. If you can, let it sit for up to 2 hours. This extra time gives the chicken more flavor. You can also try adding spices like paprika or chili powder. These spices boost the taste and make the dish unique. You want your chicken to be tender and juicy. To ensure even cooking, spread the chicken pieces out on the baking sheet. They should not touch each other. This helps them cook well. Using a meat thermometer is a great idea. Check for an internal temperature of 165°F (75°C). This ensures your chicken is fully cooked and still moist. When serving, place the chicken bites on a platter. This makes for a nice presentation. Drizzle some extra marinade over the top for added flavor. Pair the chicken with fresh vegetable sticks, like carrots and cucumbers. A light salad also works well. These sides add color and crunch to your meal. For the full recipe, check out the instructions above. {{image_4}} You can easily swap chicken for other proteins. Shrimp works great in this recipe. It cooks fast and absorbs the honey garlic flavor. Tofu is also a good option. It’s perfect for a plant-based meal. Just make sure to press it well to remove extra water. This helps the tofu soak up the marinade better. Not a fan of honey? You can use agave or maple syrup instead. Both offer a sweet touch without losing flavor. If you want some heat, add chili flakes to the sauce. This gives your chicken bites a spicy kick. Adjust the amount to your taste. Try grilling or pan-frying for a new texture. Grilling adds a smoky flavor, while pan-frying gives a nice crispy edge. If you choose to bake smaller or larger pieces, adjust the baking time. Smaller pieces will cook faster, while larger ones may need extra time. Always check for an internal temperature of 165°F (75°C) to ensure they are fully cooked. Store any leftover honey garlic chicken bites in an airtight container. This keeps them fresh and tasty. You should eat them within 3-4 days for the best flavor and texture. If you want to save time later, freeze the chicken bites before baking. This way, you can prep a batch and have it ready for a quick meal. Just remember to reheat them properly after thawing to keep them juicy and flavorful. To get the best texture when reheating, use your oven. Preheat it to 350°F (175°C), then let the chicken bites warm up for about 10-15 minutes. This keeps them crispy. Avoid using the microwave. It can make them soggy and less enjoyable. Feel free to check out the Full Recipe for more tips and tricks! You can use coconut aminos or tamari. Both options give a similar flavor. Coconut aminos is a tasty soy-free choice. Tamari is great if you need gluten-free. Both work well in the marinade, keeping it flavorful. Yes, you can use frozen chicken. Just remember to adjust marination and cooking times. Thaw the chicken before marinating. It helps the flavor soak in better. Cook the chicken a bit longer. Always check the internal temperature to ensure it's safe to eat. If you need a substitute for honey, try agave syrup or brown sugar. Agave syrup is sweet and has a great consistency. Brown sugar adds a nice caramel flavor. Both work well in the recipe while keeping it sweet. This post covered how to create tasty honey garlic chicken bites. We discussed main and additional ingredients, step-by-step instructions, and tips for the best taste and texture. Don’t forget about variations and smart storage options to keep your bites fresh. You can even swap proteins or try new sauces. Enjoy making this dish, and remember to get creative in your kitchen. It’s all about fun and flavor!](https://spoonfulsavory.com/wp-content/uploads/2025/07/cc19b7a6-7ca3-4f60-8df2-7c3ccca026ef.webp)
Looking for a taste of sweet and savory goodness? You’ll love these Honey Garlic Chicken Bites! This simple recipe combines
![- 2 cups rolled oats - 1 cup nuts (such as walnuts or pecans), roughly chopped - 1/2 cup unsweetened coconut flakes - 1/2 cup pure maple syrup - 1/4 cup coconut oil, melted - 1 teaspoon ground cinnamon - 1/2 teaspoon vanilla extract - 1/2 teaspoon sea salt - 1 cup dried apples, diced - 1/2 cup raisins or dried cranberries The base of this granola starts with rolled oats. They provide great texture and are a healthy choice. I love using walnuts or pecans for added crunch and flavor. They also bring healthy fats. Unsweetened coconut flakes add a tropical taste, making each bite special. Maple syrup sweetens the mix naturally. It pairs perfectly with the warm cinnamon. Coconut oil adds richness and helps the granola bake to a golden color. I always use pure vanilla extract for depth of flavor, while sea salt balances the sweetness. Dried apples give a fun chewiness, while raisins or dried cranberries add a burst of sweetness. This mix of flavors and textures creates a delicious granola. You can find the full recipe to make it at home. - Best brands for rolled oats: Bob's Red Mill, Quaker - Quality nuts selection: Diamond, Planters - Preferred coconut flakes: Sweetened Coconut, Let’s Do Organic Choosing the right brands can make a big difference. Bob's Red Mill and Quaker offer top-quality oats. For nuts, I trust Diamond and Planters for their freshness. When it comes to coconut flakes, I recommend Let’s Do Organic. They provide the best flavor and texture. - Gluten-free options: Look for certified gluten-free oats - Nut alternatives for allergies: Use sunflower seeds or pumpkin seeds If you need gluten-free options, be sure to pick certified gluten-free oats. They taste great and keep the recipe safe for those with gluten issues. For nut allergies, sunflower or pumpkin seeds work well as substitutes. They still provide crunch and nutrition without the risk. - Preheat the oven to 300°F (150°C). - Prepare a baking sheet with parchment paper. - Combine 2 cups rolled oats, 1 cup chopped nuts, and 1/2 cup coconut flakes in a large bowl. Mix well with a spatula. This blend gives the granola its crunchy base. - In a small bowl, whisk together 1/2 cup maple syrup, 1/4 cup melted coconut oil, 1 teaspoon cinnamon, 1/2 teaspoon vanilla, and 1/2 teaspoon sea salt. This mixture adds sweetness and flavor. - Pour the wet mixture over the dry ingredients. Stir until everything is coated. - Spread the mixture on the baking sheet. Flatten it out with a spatula. - Bake in the oven for 20-25 minutes. Stir halfway through for even baking. - When golden and fragrant, take it out and let it cool. This cooling time makes it crispy. - Once cooled, add 1 cup diced dried apples and 1/2 cup raisins or cranberries. Stir gently. You can find the detailed recipe [Full Recipe]. To get your granola nice and crunchy, follow these tips: - Baking time recommendations: Bake your granola for 20 to 25 minutes. Keep an eye on it. You want it golden, not burnt. - Stirring method during baking: Stir the mixture halfway through baking. This helps it bake evenly and avoids clumping. You can boost the flavor of your granola with simple changes: - Additional spices to consider: Try adding nutmeg or ginger for a warm taste. A pinch of allspice can also add depth. - Sweetener substitutions: If you want a change, use honey or agave syrup instead of maple syrup. Each will give a different flavor. This granola is great on its own, but pairing it adds more fun: - How to pair with yogurt and fruits: Serve granola over yogurt with fresh berries. This adds creaminess and a burst of flavor. - Ideas for smoothie bowl toppings: Use granola as a crunchy topping on smoothie bowls. It adds texture and makes your bowls more appealing. For the full recipe, check out the detailed instructions above. Enjoy your homemade Maple Cinnamon Apple Granola! {{image_4}} If you want a nut-free granola, you can easily swap out the nuts. Use seeds like pumpkin or sunflower seeds instead. They add crunch and nutrition without the nut allergy risk. You can also use extra coconut flakes for texture. Just remember, the nutty flavor will change, but it will still taste great! You can mix up the dried fruits in your granola. Try using dried cherries or apricots for a different twist. These fruits give a nice tartness that pairs well with the sweetness of maple. For a fresh kick, add some chopped apples or pears right before serving. They add juiciness and a nice crunch! Want to spice things up? Try adding a pinch of nutmeg or ginger to the mix. These spices give a warm flavor that is perfect for fall. You can also use seasonal spices, like pumpkin spice, for a festive touch during the holidays. It will make your kitchen smell amazing while it bakes! To keep your Maple Cinnamon Apple Granola fresh, use an airtight container. This helps lock in crispness. Glass jars or plastic bins work well. Store it at room temperature for the best taste. Avoid storing it in the fridge as it can make the granola soggy. When stored correctly, your granola stays fresh for about two weeks. Check for any signs of spoilage. If you see moisture or a strange smell, it’s time to toss it. Fresh granola should smell sweet and nutty. If you want to keep granola longer, freezing is a great option. Spread it on a baking sheet and freeze it for about an hour. Then, transfer it to a freezer-safe bag or container. When you want to eat it, just let it thaw at room temperature. To maintain its crunch, avoid microwaving or reheating it. For the best texture, use it within three months of freezing. Yes, you can easily make this granola vegan. Simply replace the honey with maple syrup. Also, use a plant-based oil instead of coconut oil. This keeps the flavor while making it vegan-friendly. To get those crunchy clusters, use more sweetener. Sticky ingredients like honey or maple syrup help hold the oats together. Press the granola firm on the baking sheet before baking. This creates nice chunks as it bakes. Absolutely! You can add seeds like pumpkin or sunflower seeds. They add a nice crunch and boost nutrition. Pumpkin seeds are high in protein, while sunflower seeds give healthy fats. Feel free to mix in your favorites! You can easily change the sweetness. If you want it less sweet, reduce the maple syrup. If you like it sweeter, add more maple syrup or sprinkle in some brown sugar. Adjust to fit your taste! This blog post covered how to make tasty granola, from key ingredients to storage tips. You learned the best brands for oats and nuts. I shared ways to make nut-free or vegan options. Remember, small tweaks can change the flavor completely. The right baking time gives you that perfect crunch. By following this guide, you can enjoy your granola in many ways! Now, get ready to create your own delicious batches and enjoy every bite.](https://spoonfulsavory.com/wp-content/uploads/2025/07/64cc44e6-42e9-4cc6-9b65-501a19a86a61.webp)
Are you ready to crunch into a deliciously hearty breakfast? My Maple Cinnamon Apple Granola is a warm blend of
![To make tasty vegan sweet potato black bean burritos, you need: - 2 medium sweet potatoes, peeled and diced into ½-inch cubes - 1 can (15 oz) black beans, rinsed and drained thoroughly - 1 cup cooked quinoa, preferably cooled - 1 red bell pepper, diced - 1 small red onion, diced finely - 2 cloves garlic, minced - 1 teaspoon ground cumin - 1 teaspoon smoked paprika - ½ teaspoon chili powder - Juice of 1 lime (approximately 2 tablespoons) - Salt and freshly ground pepper to taste - 4 large whole wheat tortillas - Fresh cilantro, chopped (for garnish) - Ripe avocado, sliced (for serving) - Salsa (for serving) Each serving of these burritos has about 400 calories. The macronutrients are roughly: - Protein: 12g - Carbohydrates: 65g - Fat: 10g This makes them a filling and balanced meal. These burritos can easily fit into many diets. They are naturally: - Gluten-free if you use gluten-free tortillas. - Nut-free, making them safe for most allergen concerns. Always check the labels of your ingredients to ensure they meet your dietary needs. For more details, refer to the Full Recipe. First, preheat your oven to 400°F (200°C). This temperature helps the sweet potatoes cook evenly. Next, peel and dice your sweet potatoes into ½-inch cubes. Toss them on a baking sheet with a little olive oil. Make sure to season with salt and pepper. Spread the cubes out in one layer. Roast them for about 20-25 minutes. Stir halfway through to ensure they cook well. They should be tender and golden brown when done. While the sweet potatoes roast, grab a large skillet. Heat a tablespoon of olive oil over medium heat. Once hot, add the diced red onion and red bell pepper. Sauté these veggies for 4-5 minutes until they soften. Then, add minced garlic and cook for one more minute. The garlic should smell good and be lightly golden. Now, add your roasted sweet potatoes to the skillet. Mix in the rinsed black beans, cooked quinoa, ground cumin, smoked paprika, chili powder, and lime juice. Season with salt and pepper. Stir everything well and heat it for 3-5 minutes until warm. Now it’s time to assemble your burritos! Lay out the whole wheat tortillas on a flat surface. Spoon a good amount of the sweet potato and black bean mix into the center of each tortilla. Be careful not to overfill. To fold, lift the bottom edge of the tortilla over the filling. Then, fold in the sides. Finally, roll tightly from the bottom up to close the burrito. Repeat this with the remaining tortillas and filling until all are wrapped. If you want extra crispiness, heat a skillet over medium heat. Add the burritos seam-side down for 2-3 minutes on each side until golden brown. Enjoy your delicious Vegan Sweet Potato Black Bean Burritos with fresh cilantro, sliced avocado, and salsa! For the full recipe, follow the instructions above. To get sweet potatoes just right, roast them at 400°F (200°C). Cut them into ½-inch cubes for even cooking. Toss with olive oil, salt, and pepper. Spread them in a single layer on a baking sheet. This helps them brown well. Roast for 20-25 minutes. Stir halfway to ensure they cook evenly. You want them tender and golden. This caramelization boosts the flavor. Add spices to make the filling pop. Use ground cumin for warmth and a smoky taste. Smoked paprika adds depth, while chili powder gives a kick. You can also add fresh herbs like cilantro. Lime juice brightens the dish, balancing the sweetness of the potatoes. Experiment with your favorite spices to find your perfect mix! Make your burritos appealing by slicing them in half. This shows off the colorful filling. Garnish with fresh cilantro for a pop of green. Serve with avocado slices on the side. A dollop of salsa enhances flavor and adds a fun touch. These little details make your meal look great and taste even better. For the full recipe, check out the complete guide to making these delicious burritos! {{image_4}} You can change the sweet potatoes or black beans if you want. Try using butternut squash or chickpeas. Both add great flavor and nutrition. You can also mix in other veggies like spinach or corn for extra texture and taste. The more colorful your filling, the more fun it looks! Want to spice it up? You can turn these burritos into different styles. For a Mexican twist, add some jalapeños and fresh cilantro. For a Southwest vibe, mix in some corn and a touch of chipotle. You can even experiment with Asian flavors by adding ginger and soy sauce. The options are endless! Pair your burritos with tasty dips and sides. Guacamole makes everything better. You can also serve them with a fresh salad or some salsa for a zesty kick. If you want to keep it simple, a side of rice works well too. Enjoy your meal with friends for a fun dinner! For the full recipe, check the details above. To store leftover burritos, wrap each one in foil or plastic wrap. Place them in an airtight container or a resealable bag. This helps keep them fresh and prevents drying out. Store the burritos in the fridge for up to four days. When you're ready to eat, just reheat them in the microwave or oven until hot. To freeze your burritos, wrap each one tightly in plastic wrap. Then, place them in a freezer-safe bag or container. This keeps out air and prevents freezer burn. You can freeze burritos for up to three months. To reheat, thaw them in the fridge overnight. Then, heat them in the microwave, or bake them in the oven at 350°F (175°C) for about 20 minutes. When stored properly, these burritos stay fresh for four days in the fridge. In the freezer, they can last up to three months while keeping their taste and quality. Always check for signs of spoilage, like strange odors or discoloration, before eating. Enjoy your vegan sweet potato black bean burritos anytime! You can find the complete recipe [Full Recipe]. To make these burritos gluten-free, use gluten-free tortillas. Many brands offer these in stores. Look for options made from brown rice or corn. Check the label to ensure they are certified gluten-free. This will help you enjoy the same great taste without gluten. Yes, you can make these burritos ahead of time! Prepare the filling and let it cool. Then, wrap the burritos in plastic wrap or foil. Store them in the fridge for up to three days. For reheating, place them in a skillet over medium heat. Cook each side for about five minutes until warm. You can also microwave them for about 2-3 minutes, but this may make the tortilla soft. Toppings can make your burritos even better! Here are some great ideas: - Fresh salsa for a zesty kick - Sliced avocado or guacamole for creaminess - Chopped cilantro for a fresh flavor - Dairy-free sour cream or yogurt for richness - Hot sauce for those who love spice Feel free to mix and match these toppings to find your favorite combination! For the full recipe, check out the Vegan Sweet Potato Black Bean Burritos. In this blog post, we explored how to make delicious burritos using sweet potatoes, black beans, and quinoa. I provided step-by-step instructions for cooking and assembling them, plus tips for perfect flavor and presentation. We also discussed variations, storage options, and common questions. Burritos can be fun, healthy meals that fit various diets. By mixing ingredients and flavors, you can create a dish that everyone will enjoy. Try these ideas and enjoy your tasty creations!](https://spoonfulsavory.com/wp-content/uploads/2025/07/397fd26e-df6b-4b66-ad14-2a436765f25b.webp)
Looking for a tasty, filling, and easy meal? You’re in the right place! These Vegan Sweet Potato Black Bean Burritos

Fall is the perfect time to indulge in a delicious treat, and these No Bake Pumpkin Cheesecake Cups are just
Looking for a tasty snack that’s easy to make? Air Fryer Parmesan Potato Wedges are your answer! They are crispy,
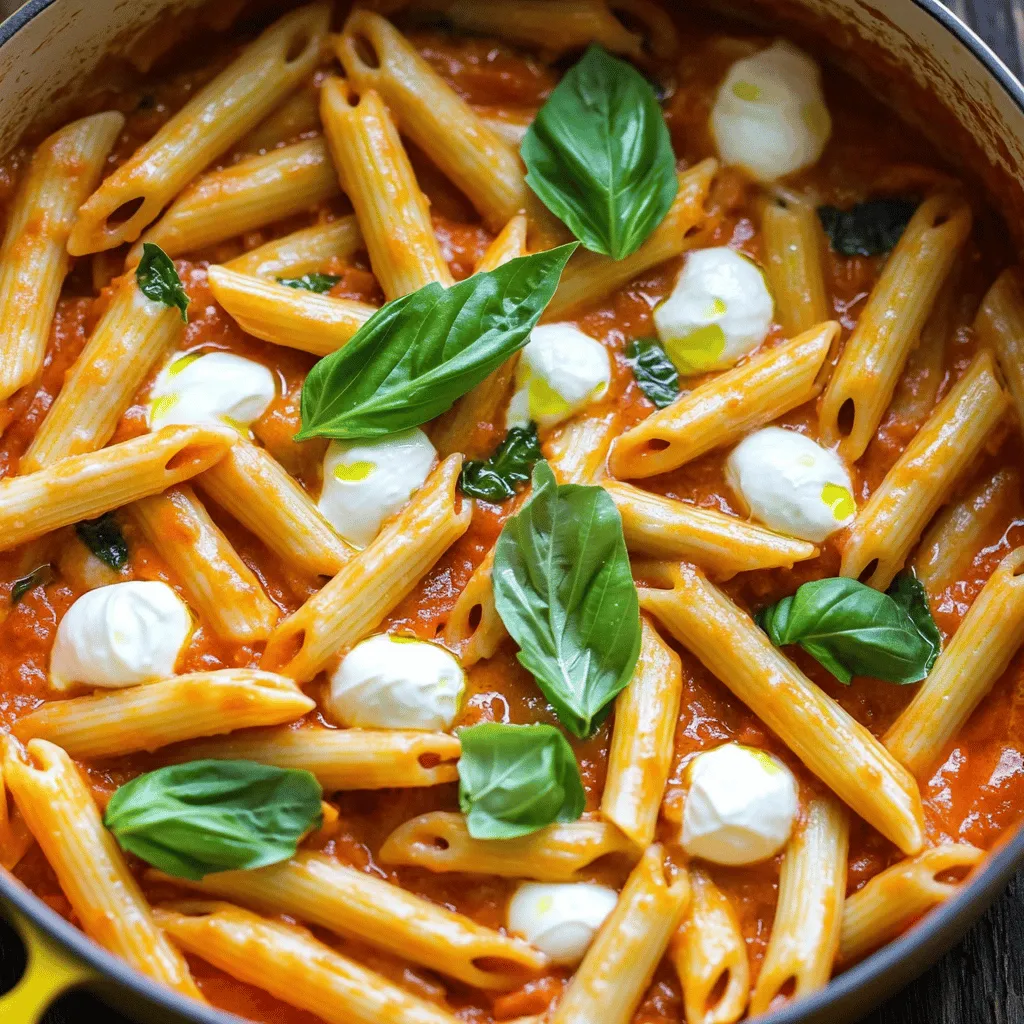
Are you ready for a quick and tasty meal that takes just one pot? My One Pot Creamy Tomato Basil
