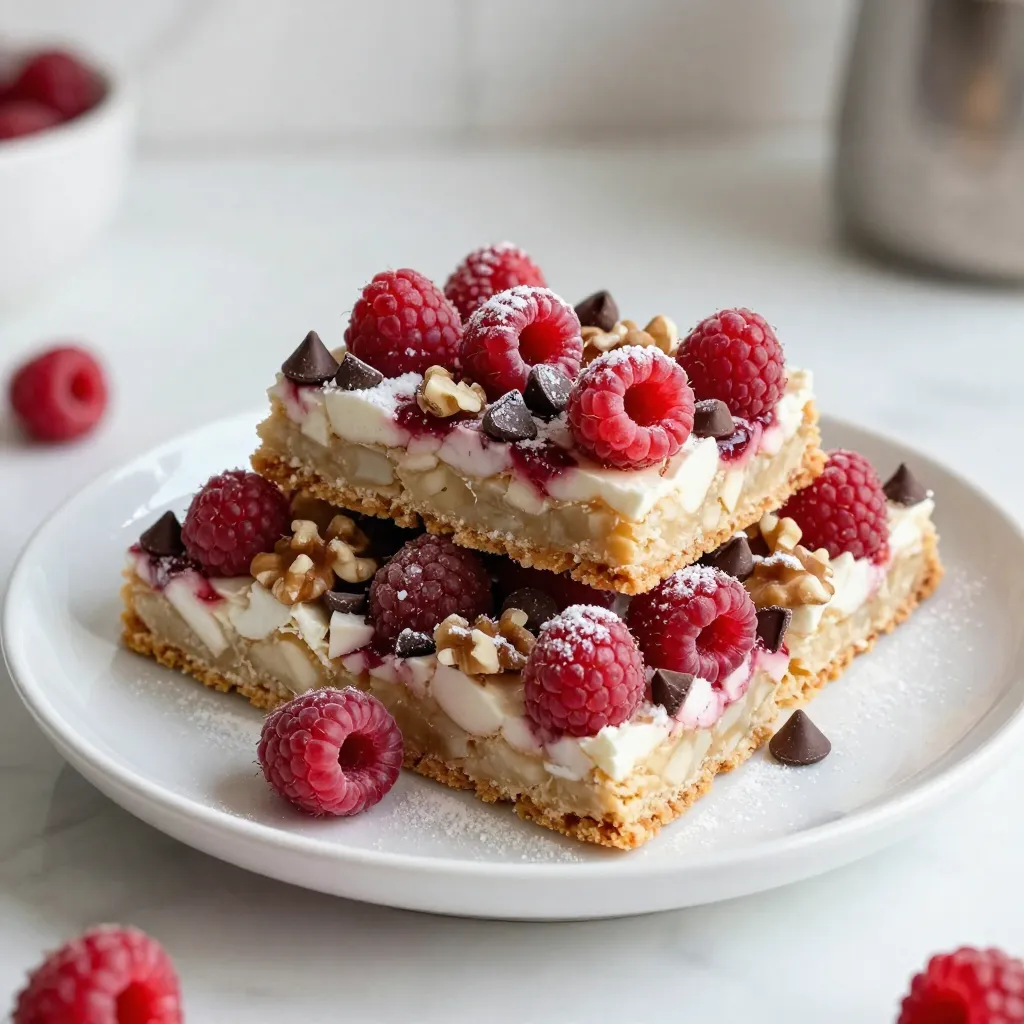
Raspberry Coconut Magic Bars Irresistible Treat Recipe
Do you crave a treat that bursts with flavor and is easy to make? Look no further! My Raspberry Coconut
Do you crave a treat that bursts with flavor and is easy to make? Look no further! My Raspberry Coconut
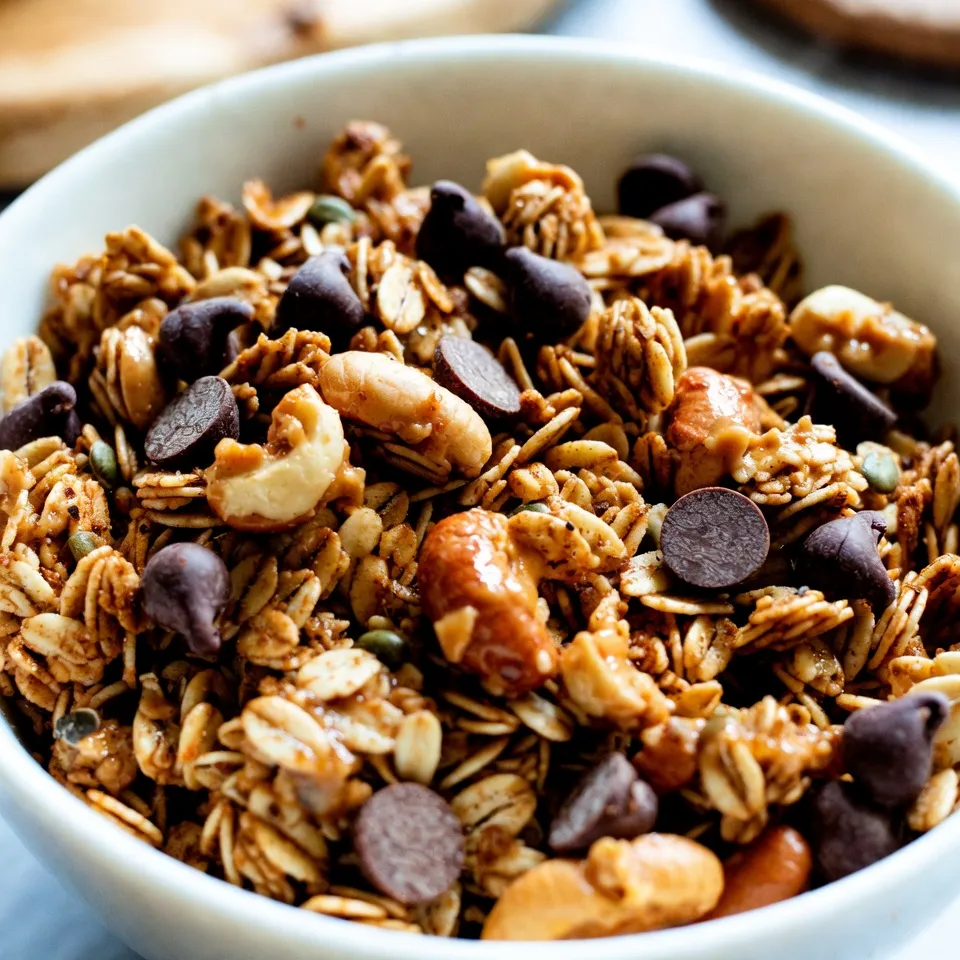
Looking for a tasty and healthy snack? My Peanut Butter Chocolate Chip Granola is just what you need! Packed with

If you’re craving a delightful treat, look no further! This Blueberry Lemon Sweet Rolls recipe combines the juicy burst of
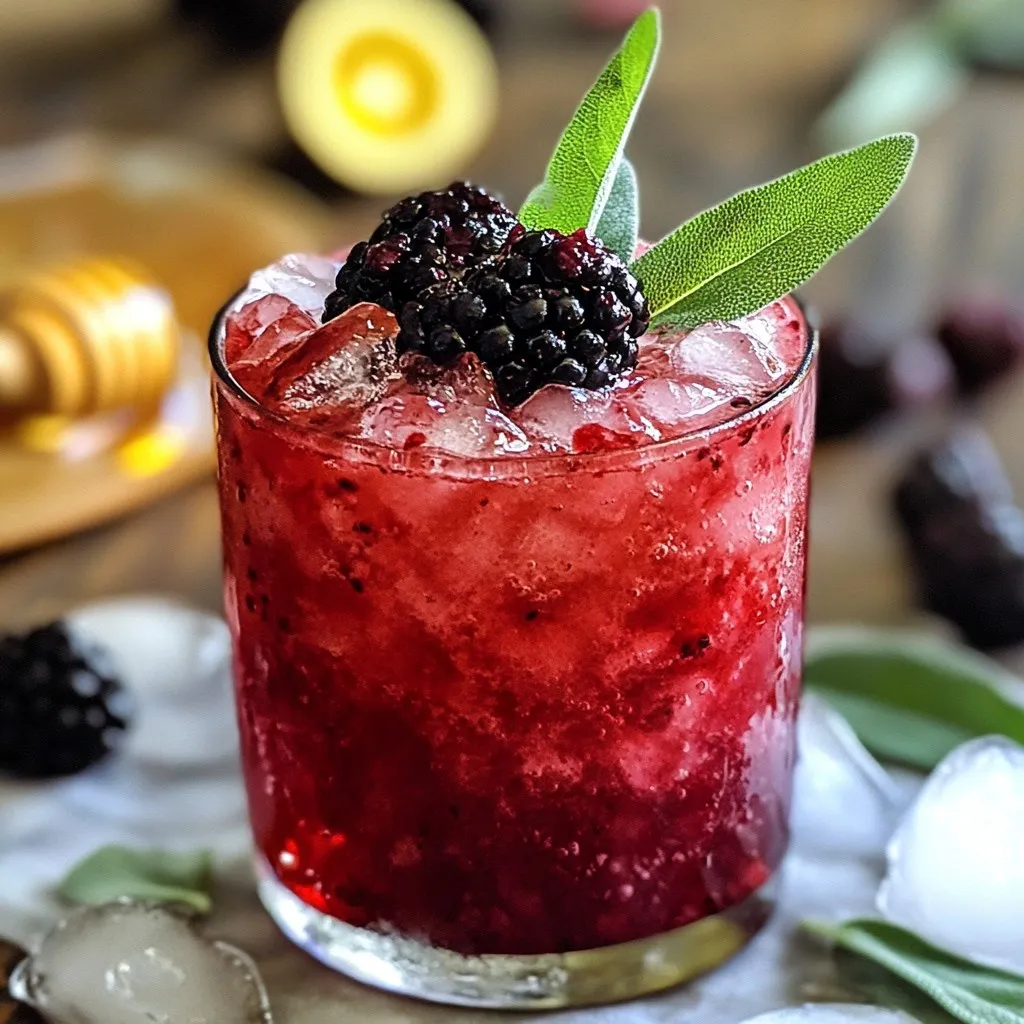
Looking for a refreshing drink that’s fun and easy to make? The Blackberry Sage Smash Mocktail is a perfect choice!
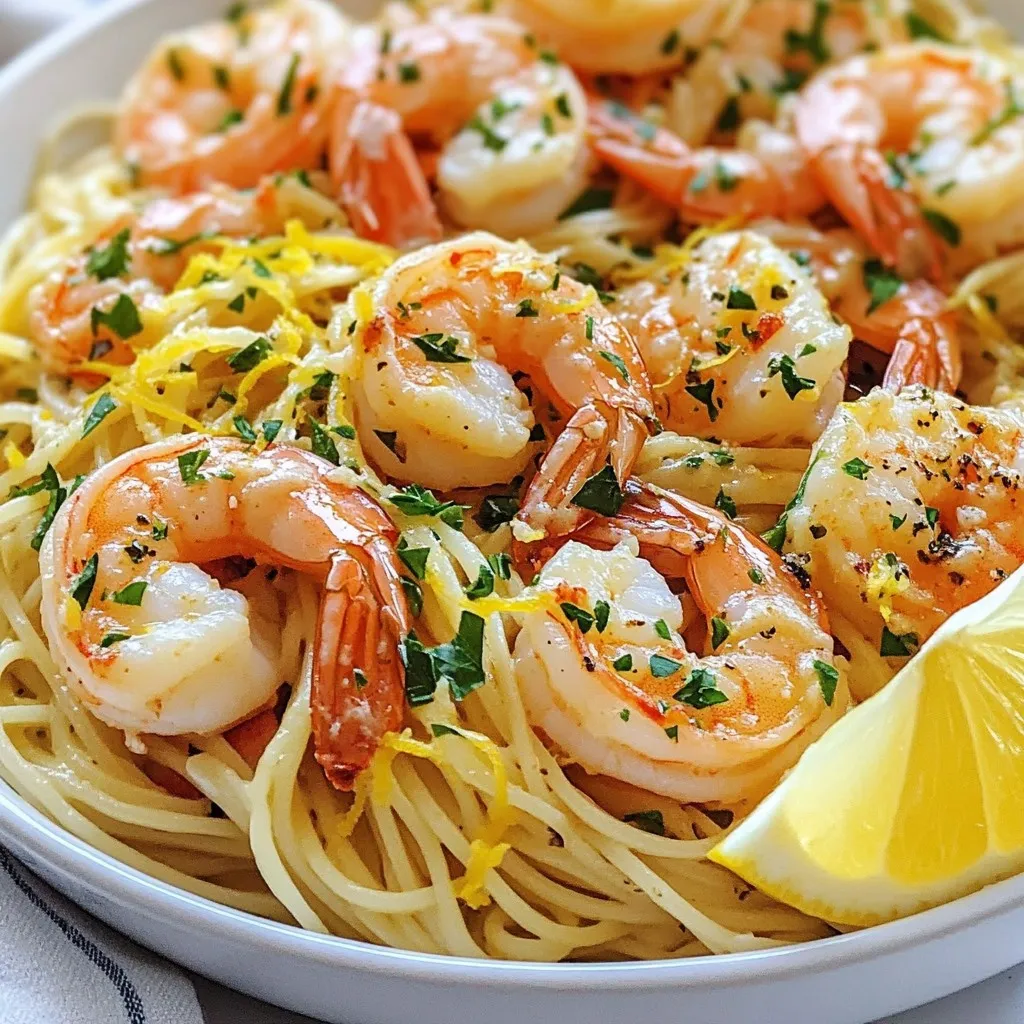
Are you craving a quick and tasty meal? My Garlic Butter Shrimp Scampi is just the dish for you! This
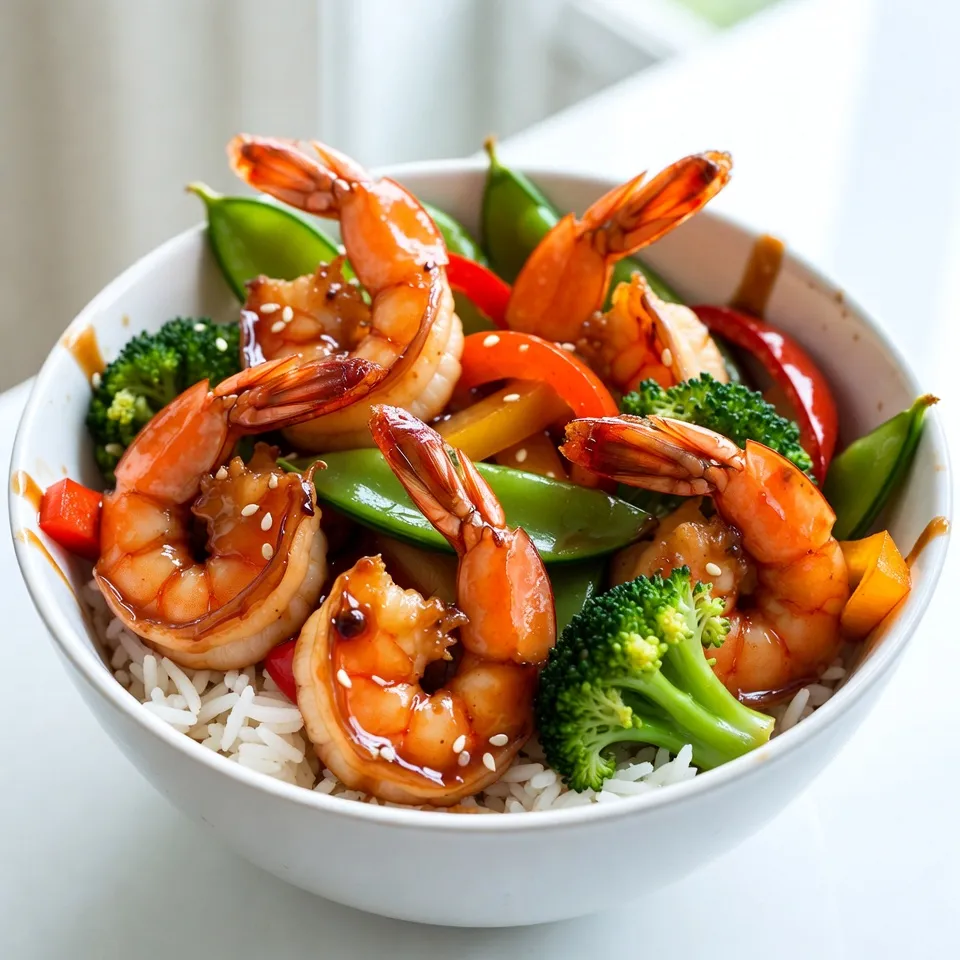
Looking for a delicious and quick meal? I have the perfect answer: Honey Garlic Shrimp Stir Fry. This recipe is
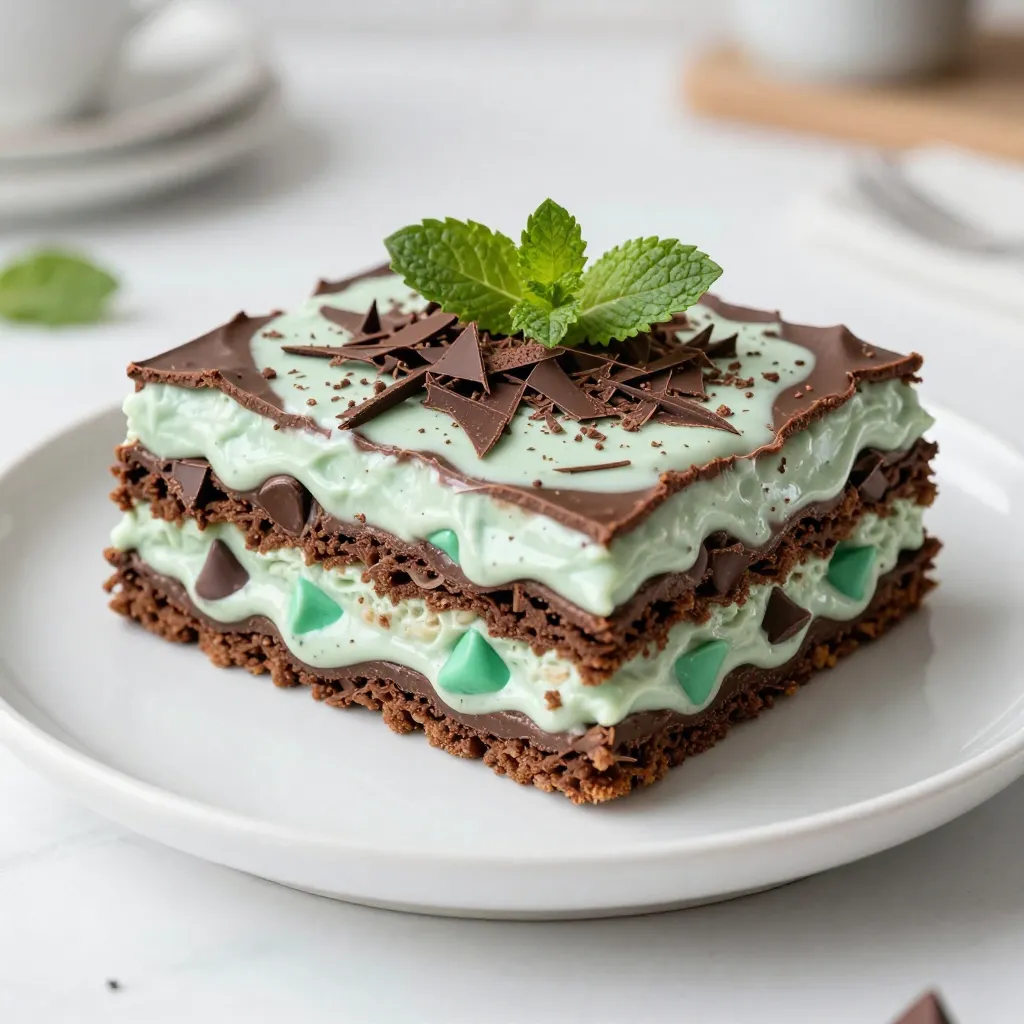
Are you ready to treat yourself to a delicious No-Bake Mint Chocolate Lasagna? This dessert is easy to make and

Craving a sweet snack that’s both quick and delicious? You’ll love these Chocolate Peanut Butter Brownie Bites! This easy treat
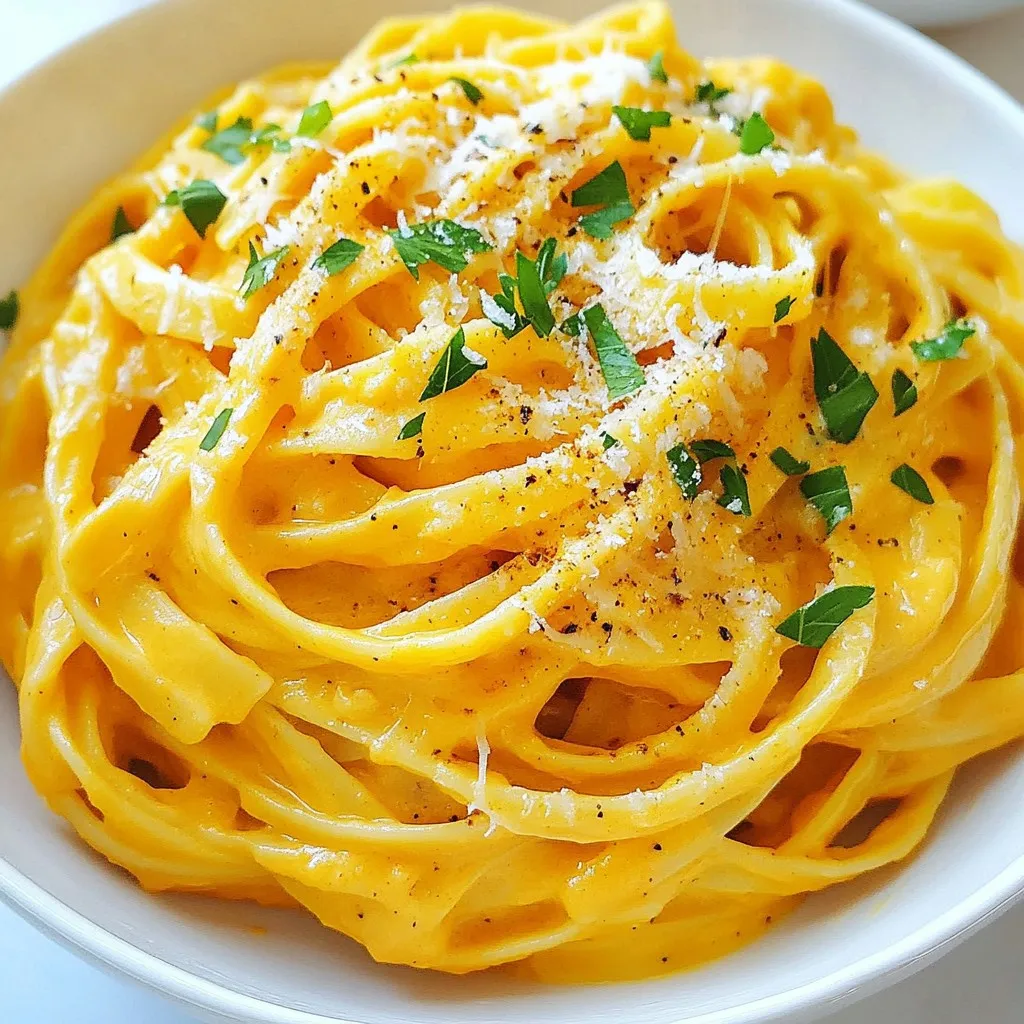
Ready to dive into a delicious fall dish? Creamy Pumpkin Alfredo Pasta is a perfect blend of flavors. With rich
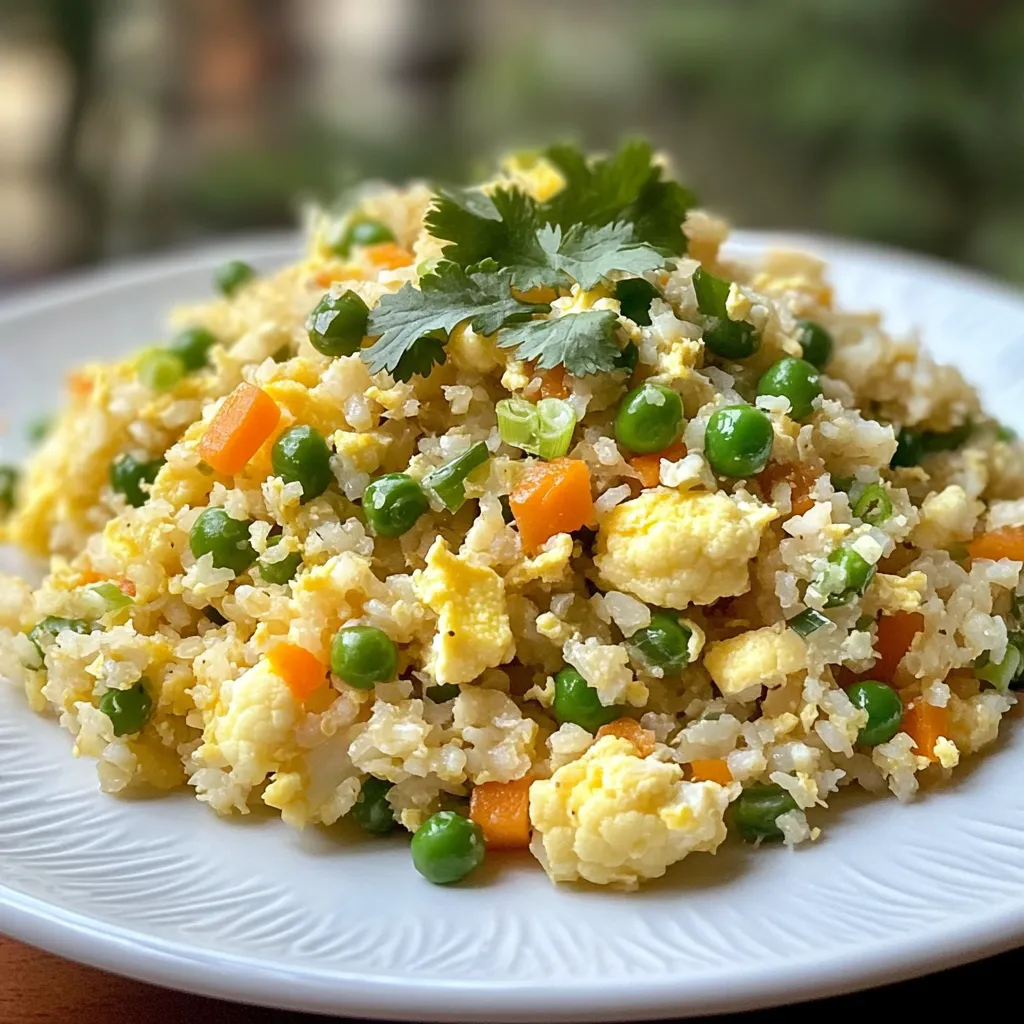
Looking for a delicious and healthy meal? You’re in the right place! Cauliflower fried rice is not only quick to
