![- 2 medium sweet potatoes, peeled and diced into bite-sized cubes - 1 cup quinoa, thoroughly rinsed under cold water - 2 cups vegetable broth (or water) for cooking quinoa - 1 cup cherry tomatoes, halved for freshness - 1/2 red onion, finely diced for a sweet crunch - 1 cup black beans, rinsed and drained for protein - 1 ripe avocado, diced for creaminess - 1/4 cup fresh cilantro, finely chopped for a burst of flavor - 3 tablespoons olive oil, divided for roasting and dressing - 2 tablespoons fresh lime juice for zesty notes - 1 teaspoon cumin powder for a warm spice - Salt and pepper to taste This dish shines with its vibrant ingredients. The sweet potatoes add natural sweetness. Quinoa brings a nutty flavor and great texture. Black beans pack protein, making this salad filling. Fresh tomatoes and avocado add color and creaminess. You can also customize it. Consider adding crumbled feta or sliced almonds for extra taste. For a spicy kick, toss in some jalapeños or hot sauce. Nutritionally, this salad is a powerhouse. Sweet potatoes are high in vitamins A and C. Quinoa is a complete protein, which is rare for plant foods. Black beans offer fiber, which is important for digestion. Overall, this salad is healthy, tasty, and satisfying. For the complete dish, follow the [Full Recipe]. To start, preheat your oven to 400°F (200°C). This heat is perfect for roasting. Next, rinse 1 cup of quinoa under cold water and set it aside. Rinsing removes a bitter coating called saponin. While you wait for the oven, you can chop your sweet potatoes. Peel and dice 2 medium sweet potatoes into bite-sized cubes. Now, on a large baking sheet, spread out the diced sweet potatoes evenly. Drizzle 2 tablespoons of olive oil over them. Sprinkle with salt, pepper, and 1 teaspoon of cumin powder. Toss everything well to coat the sweet potatoes. Roast them in the oven for 25-30 minutes. They should get tender and caramelized, giving a sweet flavor. While the sweet potatoes roast, cook the quinoa. In a medium saucepan, bring 2 cups of vegetable broth (or water) to a gentle boil. Add the rinsed quinoa once boiling. Reduce the heat to low, cover, and let it simmer for 15 minutes. After cooking, fluff the quinoa with a fork and let it cool. In a large mixing bowl, combine 1 cup of halved cherry tomatoes, 1/2 finely diced red onion, and 1 cup of rinsed black beans. Add 1 ripe diced avocado and 1/4 cup of chopped cilantro. This colorful mix brings fresh flavors to your salad. Once the sweet potatoes are cool, gently fold them into the bowl with the other ingredients. This helps them stay intact without mashing. For serving, arrange your salad in large bowls or on a platter. Aim for a colorful display. It’s best to serve the salad chilled or at room temperature. Just before serving, drizzle some extra lime juice on top. You can also sprinkle more chopped cilantro for a fresh touch. Enjoy this delightful salad that pairs well with any meal. For the complete recipe, check out the Full Recipe section. How to avoid overcooking quinoa: To avoid mushy quinoa, rinse it well before cooking. Use a ratio of 1 cup quinoa to 2 cups water or broth. Bring it to a boil, then reduce heat, cover, and simmer for 15 minutes. Remove from heat and let it sit for 5 minutes. Fluff it with a fork for perfect grains. Achieving the perfect roast on sweet potatoes: Cut sweet potatoes into even-sized cubes. This ensures they cook uniformly. Preheat your oven to 400°F (200°C). Toss the cubes with olive oil, salt, pepper, and cumin. Roast for 25-30 minutes until they are golden and tender. Keep an eye on them to avoid burning. Flavor enhancements with spices and herbs: Try adding garlic powder or smoked paprika to the sweet potatoes for extra flavor. Fresh herbs like thyme or rosemary can also add depth. For the salad, squeeze in fresh lime juice and add chopped cilantro. These will brighten the dish beautifully. Ensuring even distribution of flavors: When mixing the salad, add the roasted sweet potatoes last. This helps keep them intact. Gently fold them into the other ingredients. This way, every bite gets a bit of everything. Timing for dressing the salad: Dress the salad right before serving. This keeps the salad fresh and prevents wilting. Use a light hand with the dressing to avoid overpowering the flavors. How to prevent ingredients from getting soggy: Keep the dressing separate until serving. Store leftover ingredients in airtight containers. This way, you can enjoy the salad later without sogginess. {{image_4}} You can switch quinoa for other grains. Brown rice or farro work well. These grains add unique flavors and textures. You can also change beans or legumes. Try chickpeas or kidney beans for a twist. Seasonal veggies can bring fresh taste. Use roasted Brussels sprouts in fall or ripe zucchini in summer. Making your own dressing is easy and fun. Try mixing olive oil with lemon juice for a light taste. Add some honey for sweetness or garlic for a kick. Explore spicy options by using chili flakes or chipotle. For a tangy flavor, use balsamic vinegar. You can create vegan and gluten-free dressings too. Just avoid honey and use maple syrup instead. For more details, check the Full Recipe for Roasted Sweet Potato Quinoa Salad. To keep your Roasted Sweet Potato Quinoa Salad fresh, follow these steps: - Store the salad in an airtight container. - Place the container in the fridge right after serving. - This helps maintain flavor and texture. For maximum shelf life, use glass containers. They don’t absorb odors and are easy to clean. If you need to reheat it, do so gently. Use the microwave in short bursts. Stir it occasionally to evenly heat. Can you freeze Roasted Sweet Potato Quinoa Salad? Yes, you can! However, some ingredients may change in texture. To freeze, follow these steps: - Portion the salad into freezer-safe bags or containers. - Remove as much air as possible before sealing. - Label the bags with the date for easy tracking. To thaw, place the salad in the fridge overnight. This keeps it safe and tasty. You can also use the microwave. Just make sure to check it often to prevent overcooking. Enjoy your salad later with a fresh taste! How long does it take to make Roasted Sweet Potato Quinoa Salad? It takes about 50 minutes to make this salad. You spend 15 minutes prepping and 35 minutes cooking. Can I make this salad in advance? Yes, you can make this salad a day ahead. Just keep it in the fridge. Is the salad suitable for meal prep? Absolutely! This salad works great for meal prep. You can make it and pack it for lunches. Is this recipe gluten-free? Yes, this recipe is gluten-free. Quinoa is a safe grain for those avoiding gluten. Vegetarian and vegan suitability This salad is both vegetarian and vegan. It contains no animal products, making it suitable for all diets. Nutritional information per serving and health benefits Each serving has about 300 calories. This salad is high in fiber, vitamins, and healthy fats. Sweet potatoes provide beta-carotene and antioxidants. Quinoa adds protein, making it a balanced meal. This blog post covers the key ingredients, step-by-step instructions, and helpful tips for making Roasted Sweet Potato Quinoa Salad. You learned about ingredient choices and how to prepare and store the salad properly. My final thought is that this recipe is flexible. You can substitute ingredients based on your taste or what you have at home. With the right preparation, you’ll enjoy a fresh, tasty dish that is good for you. Enjoy your salad-making adventure!](https://spoonfulsavory.com/wp-content/uploads/2025/06/f9577686-c77e-48f5-89d6-ed4e341d1ee9.webp)
Roasted Sweet Potato Quinoa Salad Fresh and Tasty Dish
Looking for a fresh and tasty dish? My Roasted Sweet Potato Quinoa Salad is just what you need! It brings
Looking for a fresh and tasty dish? My Roasted Sweet Potato Quinoa Salad is just what you need! It brings

Start your day right with easy veggie egg muffins, a quick and healthy breakfast option! Packed with flavor and nutrition,
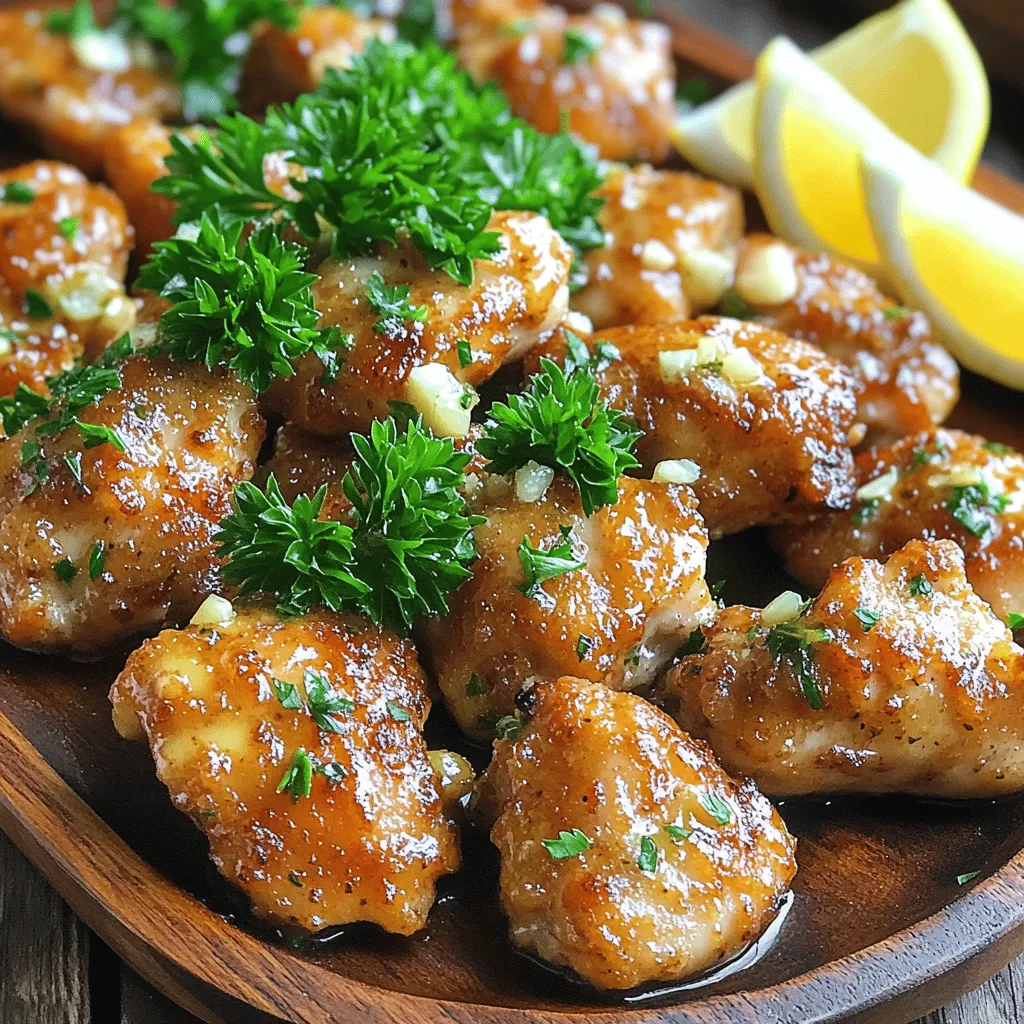
Looking for a quick and tasty dinner idea? My Garlic Butter Chicken Bites recipe is your solution! With just a
![- 1 can (15 oz) chickpeas, thoroughly drained and rinsed - 2 tablespoons extra virgin olive oil - 1 teaspoon garlic powder - 1 teaspoon smoked paprika - Freshly cracked salt and pepper to taste - 4 cups fresh romaine lettuce, roughly chopped - ¼ cup finely grated Parmesan cheese (substitute with nutritional yeast for a vegan option) - ½ cup cherry tomatoes, halved - ¼ cup Caesar dressing (can be store-bought or homemade) - Croutons (store-bought or homemade) for garnish - Fresh lemon wedges for serving Gather these ingredients before you start. Each element brings unique flavors and textures. The chickpeas add protein and crunch. The olive oil helps them roast perfectly. Garlic powder and smoked paprika give a savory touch. Fresh romaine lettuce offers a crisp base. The Parmesan cheese adds richness, while cherry tomatoes brighten the dish. The Caesar dressing ties it all together. Croutons give extra crunch, and lemon wedges add a zesty finish. For a full recipe, check the section on preparation steps. 1. Preheat the oven to 425°F (220°C). This step warms up the oven for roasting the chickpeas. 2. Prepare the chickpeas and season them. Take one can of chickpeas, drain and rinse them well. Spread the chickpeas on a baking sheet in a single layer. 3. Drizzle two tablespoons of extra virgin olive oil over the chickpeas. 4. Sprinkle one teaspoon of garlic powder and one teaspoon of smoked paprika on top. Add freshly cracked salt and pepper to taste. 5. Toss the chickpeas gently to coat them evenly with the oil and spices. 1. Place the baking sheet in the preheated oven. 2. Roast the chickpeas for 20 to 25 minutes. They should turn golden brown and crispy. 3. Shake the pan halfway through roasting. This helps them crisp evenly. 1. While the chickpeas roast, grab a large salad bowl. 2. Combine four cups of chopped romaine lettuce, ¼ cup of grated Parmesan cheese (or nutritional yeast for a vegan option), and ½ cup of halved cherry tomatoes in the bowl. 3. Toss the salad ingredients gently to mix them well. 4. Drizzle ¼ cup of your favorite Caesar dressing over the salad. 5. Toss the mixture with tongs or salad servers. Make sure the greens are evenly coated. 6. Once the chickpeas are done roasting, let them cool for a few minutes. 7. Add the crispy chickpeas and croutons to the salad. Toss very lightly. 8. Serve the salad in individual bowls. Don't forget to add lemon wedges on the side for a burst of flavor. For the full recipe, check out the details above. Enjoy your healthy and tasty meal! To make crispy chickpeas, roast them at 425°F (220°C). This high heat helps them crisp up nicely. Roast for 20-25 minutes until they are golden brown. Halfway through cooking, shake the pan. This step keeps them from burning and helps them cook evenly. To avoid soft chickpeas, dry them well after rinsing. Any moisture will make them soggy. Use a paper towel to pat them dry before roasting. The drier they are, the better they will crisp. You can use store-bought or homemade Caesar dressing. Homemade dressing often tastes fresher and lets you control the ingredients. If you prefer something quick, many brands offer tasty options. For a vegan alternative, try tahini or a cashew-based dressing. These options offer creaminess without dairy. Nutritional yeast can also give a cheesy flavor to your salad. This salad works well with many toppings. Add grilled chicken for protein or avocado for creaminess. You can also toss in crunchy nuts or seeds for extra texture. For a twist, consider adding fruits like apples or pears. Fresh herbs like parsley or basil can brighten up the dish. Serve with lemon wedges for an extra zesty kick. Check the [Full Recipe] to see how to put it all together! {{image_4}} To make a vegan version, swap the cheese for nutritional yeast. Nutritional yeast gives a cheesy taste without dairy. Use a plant-based Caesar dressing instead of traditional dressing. This keeps your salad creamy and delicious while being fully vegan. Want more protein? You can add grilled chicken or shrimp. Tofu is a great option for a plant-based choice. Simply cook it how you like, then toss it into the salad. This addition makes the salad filling and adds extra flavor. You can also change the salad with seasonal veggies or fruits. In summer, add fresh corn or peaches for sweetness. In fall, try roasted squash or apples for a warm touch. Seasonal ingredients keep the salad fresh and exciting all year. For the full recipe, check it out! To keep your crispy chickpea Caesar salad fresh, store it in the fridge. Use an airtight container. Make sure to separate the crispy chickpeas from the lettuce. This way, the chickpeas stay crunchy. If you mix everything, the salad may get soggy. Your salad will taste best if eaten within two days. If you have leftover chickpeas, you can reheat them. Place them on a baking sheet. Heat them in the oven at 350°F (175°C) for about 10 minutes. This will help them regain their crunch. Avoid using the microwave, as it can make them soft. The salad's components last different amounts of time. Here’s a quick guide: - Chickpeas: Up to 4 days when stored properly. - Romaine lettuce: Best within 3 days for freshness. - Parmesan cheese: Lasts about a week in the fridge. - Caesar dressing: Check the label, but it can last 1-2 weeks after opening. - Cherry tomatoes: Best eaten within 3-5 days for optimal flavor. For the full recipe, check out the Crispy Chickpea Caesar Salad details. Enjoy your cooking! To make chickpeas crispy, start with dried chickpeas or canned ones. If using canned, drain and rinse them well. Pat them dry with a towel. This step is key. The less moisture, the better they will crisp up. Toss them in olive oil and spices like garlic powder and smoked paprika. Spread them on a baking sheet. Roast them in a preheated oven at 425°F (220°C) for about 20-25 minutes. Shake the pan halfway through to ensure even roasting. The goal is a golden brown color and a crunchy texture. Yes, you can make the salad ahead of time. However, keep the crispy chickpeas separate until you are ready to serve. This helps them stay crunchy. You can prepare the salad base, including romaine, cheese, and tomatoes, and store it in the fridge. Add the dressing just before serving to keep everything fresh. This way, your salad will taste great and look good. If you don’t have Caesar dressing, there are many options. You can use a simple vinaigrette made of olive oil, lemon juice, salt, and pepper. For a creamy option, try a yogurt-based dressing. You can also make your own Caesar dressing at home by blending garlic, lemon juice, Dijon mustard, and olive oil. To keep it vegan, use tahini or cashew cream as a base. This recipe yields about 4 servings. Each serving is a hearty portion. If you want to serve more people, you can easily double the ingredients. Just make sure you have enough space in your oven to roast all the chickpeas at once. Crispy Chickpea Caesar Salad is packed with nutrients. Each serving contains around 350 calories. You gain protein from chickpeas and cheese. It has about 15 grams of protein per serving. The salad is also rich in fiber, which is great for digestion. Plus, you'll get healthy fats from olive oil and a variety of vitamins from the fresh veggies. For more detailed nutrition info, check out the full recipe. This post detailed how to make a Crispy Chickpea Caesar Salad. You learned about the key ingredients, preparation steps, and tips for achieving the perfect texture. We discussed variations, storage advice, and answered common questions. I hope you feel inspired to make this salad! It’s a tasty and healthy choice for any meal. Enjoy the crunch of roasted chickpeas mixed with fresh veggies and tasty dressing. You can always customize it to fit your taste.](https://spoonfulsavory.com/wp-content/uploads/2025/06/fd93cfb8-8d6f-49b0-ab05-f9db69be1197.webp)
Looking to enjoy a fresh twist on a classic dish? This Crispy Chickpea Caesar Salad is both easy and healthy!

Are you ready to taste the tropics with a delightful Tropical Acai Bowl? This fresh and colorful recipe combines the

If you’re craving pizza but want a healthier twist, try Buffalo Cauliflower Pizza! This dish swaps traditional crust for a

Are you ready to elevate your snack game? This Zesty Avocado Lime Dip is fresh, flavorful, and super easy to
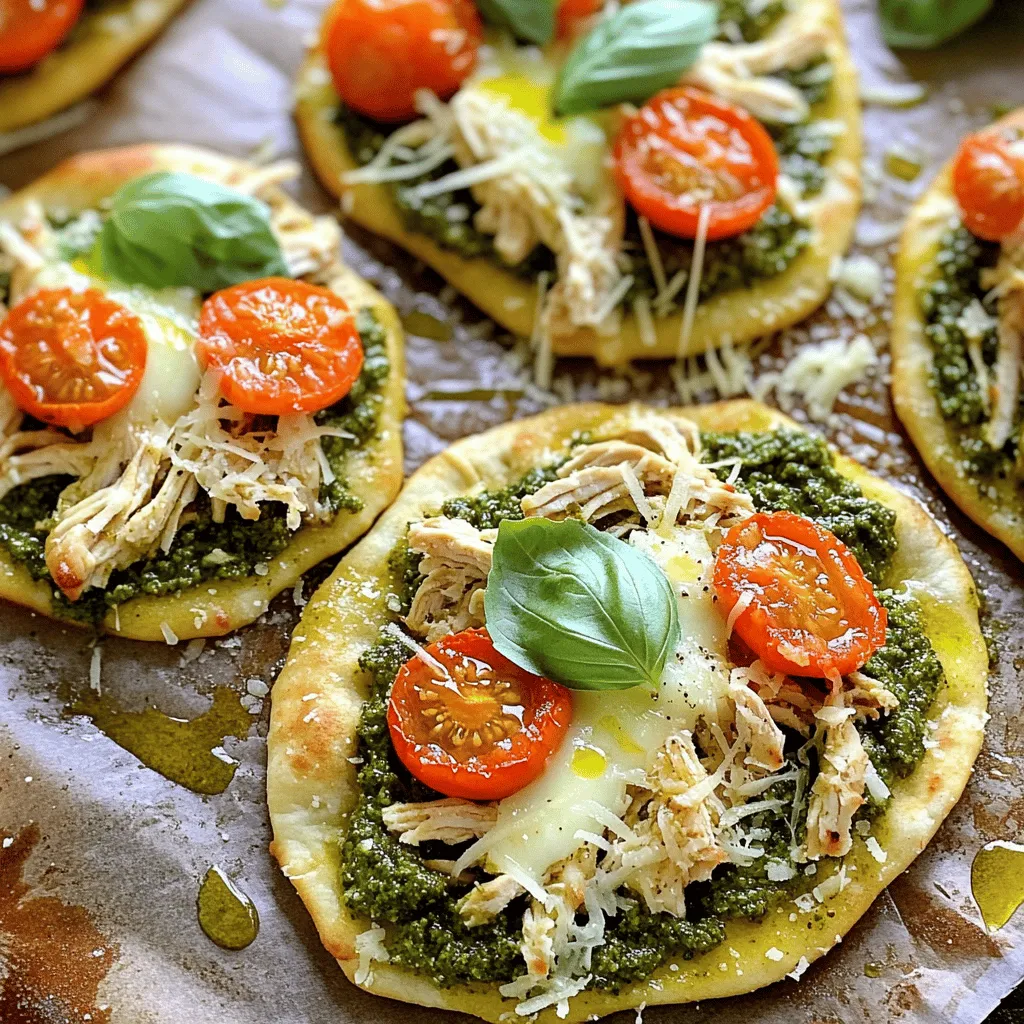
Looking for a quick and tasty meal? Look no further! My Easy Chicken Pesto Flatbread recipe is a winner for
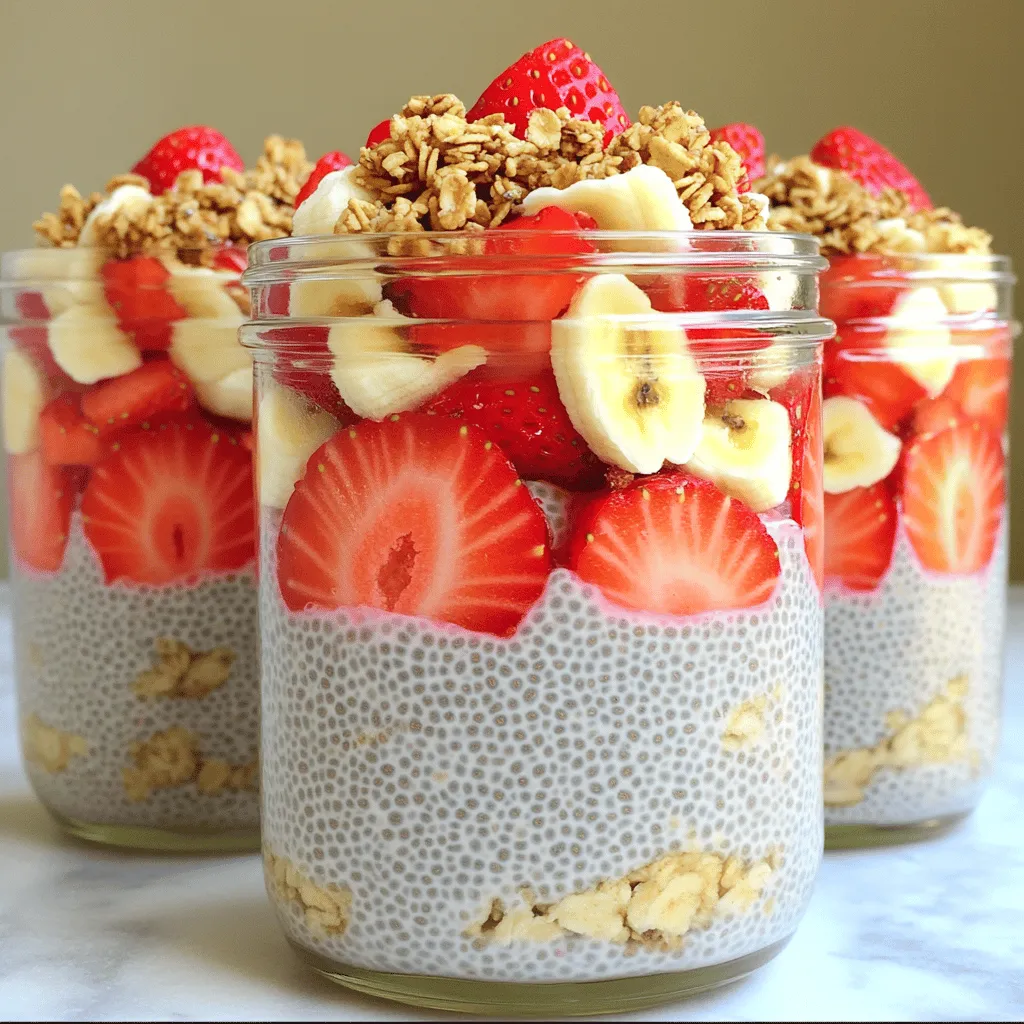
If you’re looking for a tasty and healthy treat, you’ve found it! Strawberry Banana Chia Pudding is simple to make
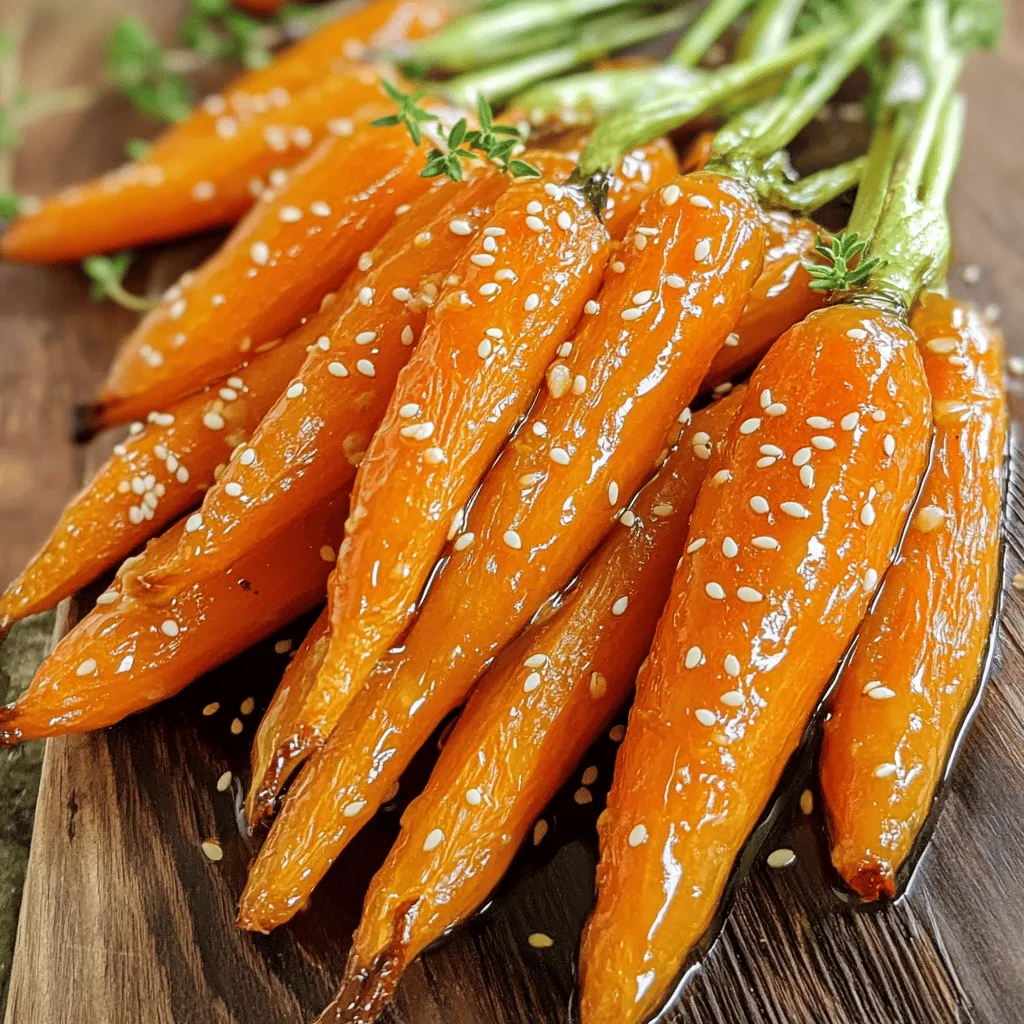
Looking for a simple yet delicious side dish? Honey Garlic Roasted Carrots are here to impress! With just a handful
