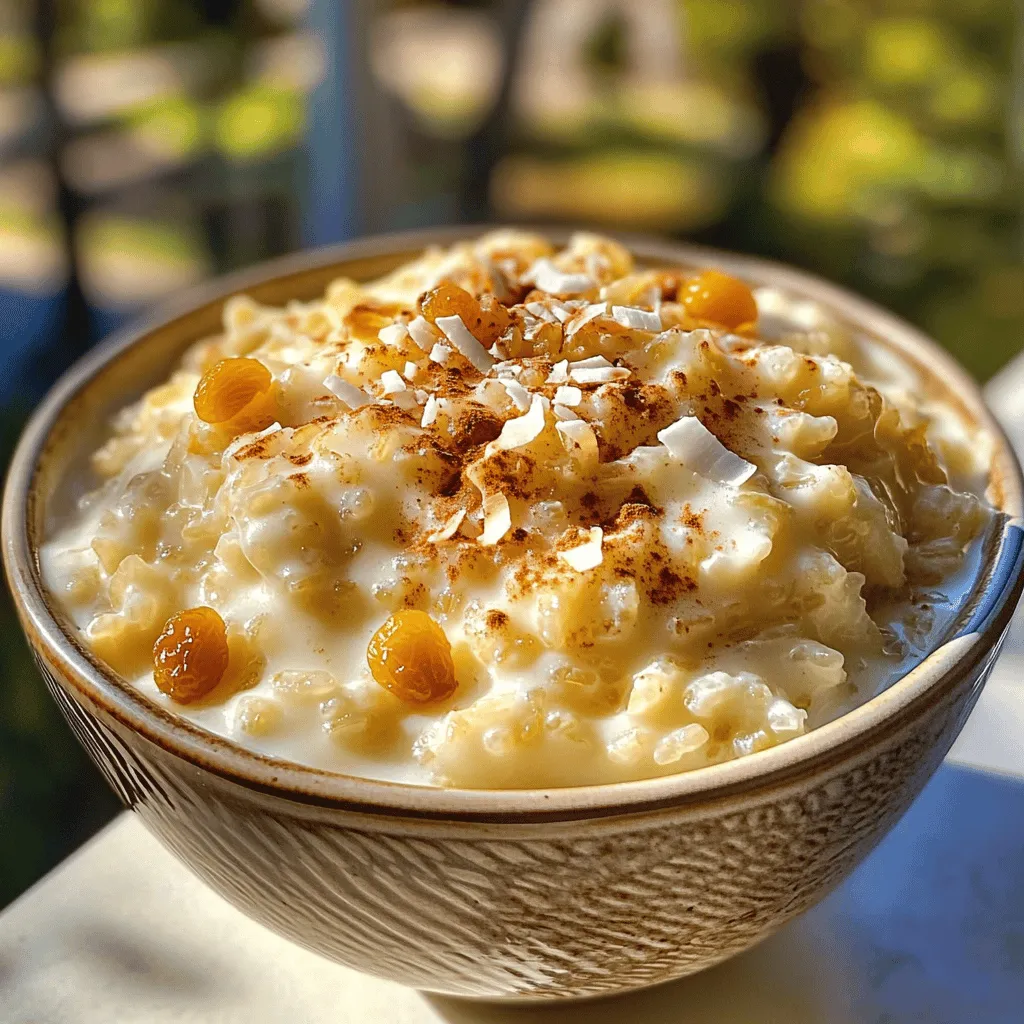
Coconut Milk Rice Pudding Creamy Dessert Delight
Welcome to the world of Coconut Milk Rice Pudding! This creamy dessert is made with simple ingredients that bring joy
Welcome to the world of Coconut Milk Rice Pudding! This creamy dessert is made with simple ingredients that bring joy
Zucchini noodles with pesto offer a bright, fresh meal perfect for any day. If you crave a tasty dish that’s
![To make these delicious banana oatmeal cookies, you need a few simple ingredients. Here’s what you should gather: - 2 ripe bananas, thoroughly mashed - 1 cup rolled oats - 1/2 cup almond flour - 1/4 cup honey or maple syrup - 1/4 cup unsweetened applesauce - 1 teaspoon pure vanilla extract - 1/2 teaspoon baking soda - 1/2 teaspoon ground cinnamon - 1/4 cup dark chocolate chips (optional) - 1/4 cup chopped walnuts or pecans (optional) - Pinch of sea salt Using ripe bananas is key. They add natural sweetness and moisture. If you want a nutty flavor, almond flour works great. Honey or maple syrup can sweeten your cookies. You can choose based on what you like. Applesauce keeps the cookies soft and adds flavor. Baking soda helps the cookies rise. Cinnamon gives a warm spice note that pairs perfectly with bananas. You can add chocolate chips or nuts for extra yum. This mix of ingredients creates a cookie that is both healthy and tasty. If you want the full details, check out the Full Recipe. - Preheat your oven to 350°F (175°C). - Line a baking sheet with parchment paper. - In a large bowl, combine two ripe bananas, 1/4 cup honey or maple syrup, 1/4 cup applesauce, and 1 teaspoon vanilla extract. - Use a fork to mash the bananas and mix until smooth. - In another bowl, whisk together 1 cup rolled oats, 1/2 cup almond flour, 1/2 teaspoon baking soda, 1/2 teaspoon cinnamon, and a pinch of salt. - Make sure everything is mixed well. - Gently fold the dry ingredients into the wet mixture. - If you want, add 1/4 cup chocolate chips or 1/4 cup chopped nuts for extra flavor. - Use a spoon or cookie scoop to drop dough onto the baking sheet. - Space the dough about 2 inches apart for even baking. - Bake for 12 to 15 minutes. - The cookies should be lightly golden brown and firm around the edges. - Let them cool on the baking sheet for 5 minutes, then transfer to a wire rack. For the complete recipe, check the Full Recipe section. To get the best texture in your cookies, avoid overmixing the dough. When you mix too much, the cookies can turn tough. Gently stir until just combined. Use ripe bananas for natural sweetness. The riper the banana, the sweeter and softer the cookies will be. Using a cookie scoop helps create cookies of uniform size. This step ensures your cookies bake evenly. Also, make sure to space them about two inches apart on the baking sheet. This gives them room to spread while baking. For a lovely display, serve your cookies on a rustic wooden board. This adds charm to your treat. You can also add a few fresh banana slices or a light sprinkle of oats for visual appeal. A beautiful presentation makes your cookies even more inviting and fun to eat. {{image_4}} You can easily make these cookies vegan. Just substitute honey or maple syrup with agave syrup. This swap works well and keeps the cookies sweet. Agave syrup has a mild flavor. It blends nicely into the mix. You still get that soft and moist texture. For a gluten-free version, use certified gluten-free oats and almond flour. This keeps your cookies tasty without any gluten. Ensure that your oats are truly gluten-free. Many brands offer this option now. Almond flour adds a nice nutty flavor and helps bind the cookies well. To give your cookies a unique twist, try adding spices like nutmeg or cardamom. These spices bring warmth and depth. Just a pinch can change the whole taste. You can also incorporate dried fruits like cranberries or raisins. They add sweetness and chewiness. Mix and match to find your favorite combo. For the full recipe, check out the [Full Recipe]. Store your cookies in an airtight container at room temperature. They will stay fresh for up to 3 days. This way, you can enjoy them without worrying about them going stale. For longer storage, freeze your cookies. Place them in a single layer on a baking sheet. Once frozen, transfer them to a ziplock bag. They will last for up to 3 months in the freezer. This method keeps them tasty for later snacking. When you're ready to enjoy a cookie, reheat it for the best taste. You can do this in the oven or microwave. If using the oven, set it to 350°F (175°C) for a few minutes. In the microwave, heat for about 10-15 seconds. This makes the cookie warm and soft, just like fresh-baked. For the full recipe of these delightful cookies, check out the [Full Recipe]. Yes, you can! If you want to skip oats, try using ground almonds or coconut flour. You can also use quinoa flakes for a different texture. These options change the taste a bit but still work well. Just remember that the texture might differ from the classic cookie. To make these cookies less sweet, you can cut back on honey or maple syrup. Start by reducing the amount by half and taste the dough. You can also skip the added chocolate chips. This way, the natural sweetness of bananas shines through without being too sugary. One cookie has about 100 calories. They have about 5 grams of sugar, mainly from bananas and honey. These cookies are rich in fiber from oats and healthy fats from almond flour. Plus, they provide vitamins and minerals, making them a great snack! Yes, you can add protein powder! Use about 1/4 cup of your favorite protein powder. This addition will not affect the cookie's texture if you adjust the other dry ingredients a bit. It’s a great way to boost the protein content without losing taste. You can tell these cookies are done when they turn light golden brown at the edges. They should feel set but soft in the middle. Let them cool for a few minutes, and they will firm up. If you want extra crispiness, leave them in a minute longer. You now have all you need to make delicious banana oatmeal cookies. You learned the required ingredients, step-by-step instructions, and tips for the best texture. Remember to store them properly to keep them fresh. These cookies are easy to customize for your needs. You can make them vegan or gluten-free. Add spices or dried fruits for extra flavor. Enjoy your baking and share these tasty treats with friends and family!](https://spoonfulsavory.com/wp-content/uploads/2025/05/6de47e0b-4408-43bb-8fc4-a1e5dda8df32.webp)
Looking for a quick and tasty snack? These Banana Oatmeal Cookies are your answer! With just a handful of simple

Craving something quick and tasty? This Teriyaki Beef Stir Fry is your answer! With tender beef and colorful veggies, it’s

Looking for a quick, tasty meal? My Air Fryer Chicken Parmesan recipe is just what you need. It’s simple, fun,

If you’re looking for a fresh and tasty dish, you’re in the right spot! Caprese Stuffed Avocados bring bright flavors

Looking for a quick and tasty side dish? I’ve got the perfect recipe for you—Lemon Garlic Roasted Asparagus. This simple
![To make Pumpkin Spice Overnight Oats, gather these key ingredients: - 1 cup rolled oats - 1 cup almond milk (or your preferred milk) - 1/2 cup pure pumpkin puree - 1 tablespoon pure maple syrup (adjust according to your taste) - 1 teaspoon pumpkin pie spice - 1/2 teaspoon vanilla extract - 1/4 teaspoon salt These ingredients blend well to create a creamy and flavorful breakfast. The rolled oats soak up the almond milk overnight, making them soft and tasty. The pumpkin puree adds a rich flavor, while the spices bring warmth to every bite. You can elevate your oats with these fun toppings: - Chopped walnuts or pecans (for topping) - Dried cranberries or raisins (for garnish) These add crunch and sweetness. You can also try drizzling extra maple syrup over the top for a sweet finish. A sprinkle of pumpkin pie spice gives a nice touch of flavor. If you need to swap some ingredients, here are great options: - Use coconut milk or oat milk instead of almond milk for a different taste. - Swap maple syrup with honey or agave syrup for sweetness. - If you don’t have pumpkin pie spice, a mix of cinnamon and nutmeg works well too. These substitutions keep the recipe flexible and tasty. Enjoy your Pumpkin Spice Overnight Oats made just the way you like! For the complete recipe, check out the Full Recipe. To make pumpkin spice overnight oats, gather all your ingredients first. This makes it easy to mix everything well. The main ingredients are rolled oats, almond milk, and pumpkin puree. You will also need maple syrup, pumpkin pie spice, vanilla extract, and salt. 1. In a medium bowl, add your rolled oats and almond milk. 2. Next, add the pumpkin puree and maple syrup. 3. Sprinkle in the pumpkin pie spice, vanilla extract, and salt. 4. Use a whisk to mix everything together. Make sure the oats get well coated in the pumpkin mixture. 5. Once mixed, divide the mixture into two jars or airtight containers. 6. Ensure each jar has a similar amount of oats. Seal the jars tightly. Then, place them in the refrigerator overnight. This step is key. It allows the oats to soak up all the delicious flavors. You can also leave them in the fridge for at least four hours. The next morning, stir the oats well. If you want them creamier, add a splash of milk and mix again. Enjoy! To get the right texture, use rolled oats. They soak well and become soft. If your oats seem too thick the next day, just add a splash of milk. Give them a good stir. This will help you reach a creamier mix. If you like a firmer bite, use less liquid. For a richer taste, try adding a pinch of nutmeg or ginger. These spices boost the pumpkin flavor. You can also mix in some peanut butter for creaminess. A scoop of yogurt makes it tangy and rich. Don't forget to adjust the maple syrup based on your taste. These oats are perfect for meal prep. Make a big batch and store them in jars. You can keep them in the fridge for up to five days. This way, you have breakfast ready when you need it. Each morning, just grab a jar, stir, and enjoy. For a quick option, prepare them on Sunday night for the week ahead. Check the full recipe for more tips! {{image_4}} You can easily make pumpkin spice overnight oats dairy-free and vegan. Use almond milk, coconut milk, or oat milk instead of regular milk. These options keep the oats creamy and tasty. The recipe is still delicious, and you will not miss the dairy. This way, everyone can enjoy this breakfast treat! Want to switch things up? Try flavor variations like apple cinnamon or chocolate. For apple cinnamon, add chopped apples and a sprinkle of cinnamon. This gives a sweet and fruity taste. For a chocolate version, mix in cocoa powder or chocolate chips. Both options offer new flavors while keeping the pumpkin spice vibe. For those watching sugar, reduce the maple syrup or use a sugar substitute. You can also skip the nuts and dried fruits for a lighter option. If you need gluten-free oats, make sure to choose certified gluten-free rolled oats. These changes make the overnight oats fit your health goals while still being tasty. To keep your pumpkin spice overnight oats fresh, store them in airtight jars. This prevents air from getting in, which can spoil the oats. Make sure the jars are sealed tightly. Keep the jars in the fridge for up to four days. If you notice any change in smell or color, it’s best to toss them out. You can freeze pumpkin spice overnight oats for later use. Use freezer-safe containers or jars that can handle low temperatures. Leave some space at the top for the oats to expand as they freeze. When you’re ready to eat, thaw them in the fridge overnight. You can also heat them in the microwave, but be careful not to overheat. Pumpkin spice overnight oats last about four days in the fridge. If they sit longer, check for signs of spoilage. Look for: - An off smell - A change in color - A watery layer on top If you see any of these signs, it’s safer to discard the oats. Always trust your senses when it comes to food! Yes, you can use steel-cut oats. However, they need more time to soak. Steel-cut oats are chewier and take longer to soften. If you choose them, soak overnight for best results. You can store these oats for up to five days in the fridge. Make sure to keep them in airtight containers. This makes it easy to grab a quick breakfast each morning. Absolutely! You can add more or less maple syrup to suit your taste. Try starting with one tablespoon. Then, adjust based on how sweet you like it. Honey or agave syrup are great alternatives too. Feel free to get creative with toppings! Here are some ideas: - Fresh fruit like sliced bananas or apples - Yogurt for creaminess - Nut butter for added flavor - Seeds like chia or flaxseeds for crunch - Dark chocolate chips for a sweet touch For the complete recipe, check the [Full Recipe] section. In this post, we covered how to make Pumpkin Spice Overnight Oats. We discussed key ingredients, optional toppings, and substitutions, providing easy steps for preparation and overnight refrigeration. I shared tips to reach the perfect consistency and suggested variations to fit different diets. Lastly, we reviewed storage methods and answered common questions. With these insights, you can create a delicious, versatile breakfast. Enjoy your cooking and personal touch in every bowl!](https://spoonfulsavory.com/wp-content/uploads/2025/05/bff58aa2-7a25-41ba-a0e5-b6baedc52c45.webp)
If you love fall flavors but want a quick breakfast, you’ve come to the right place! Pumpkin Spice Overnight Oats
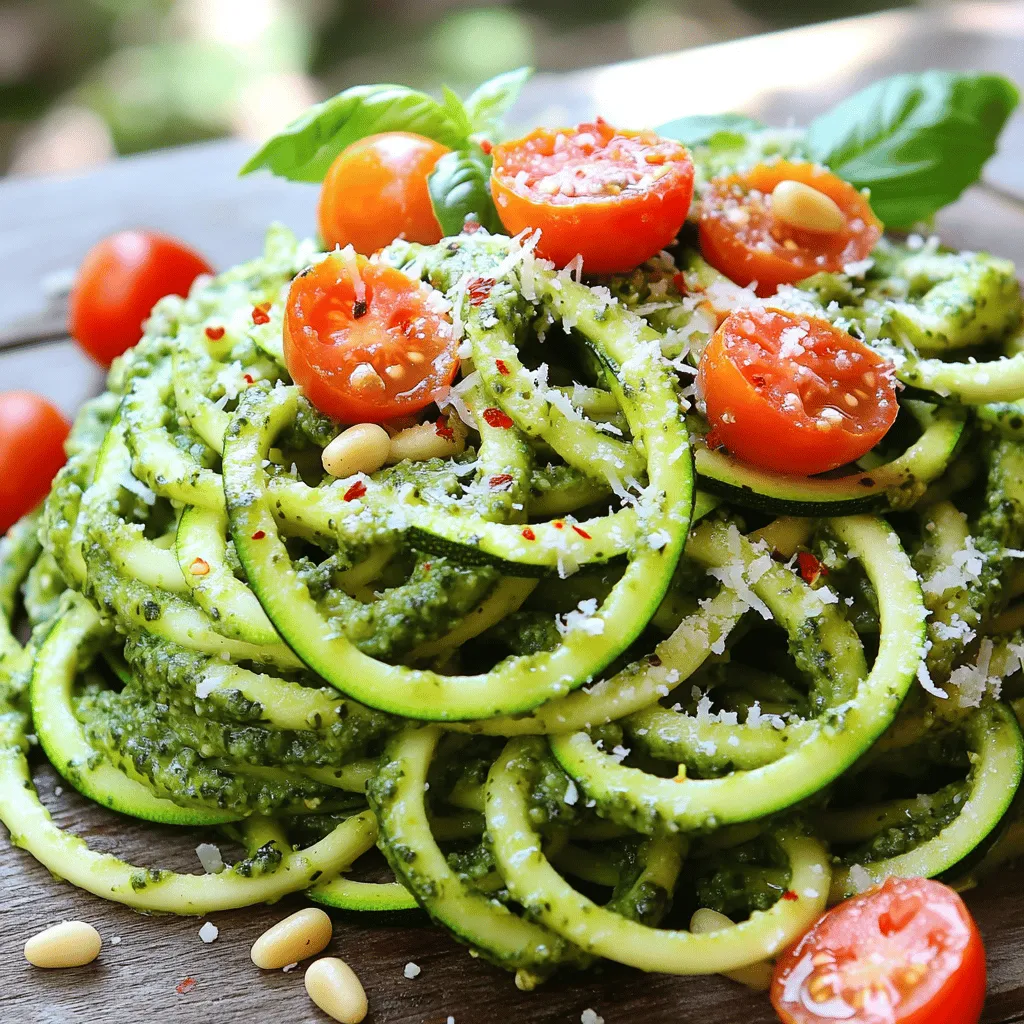
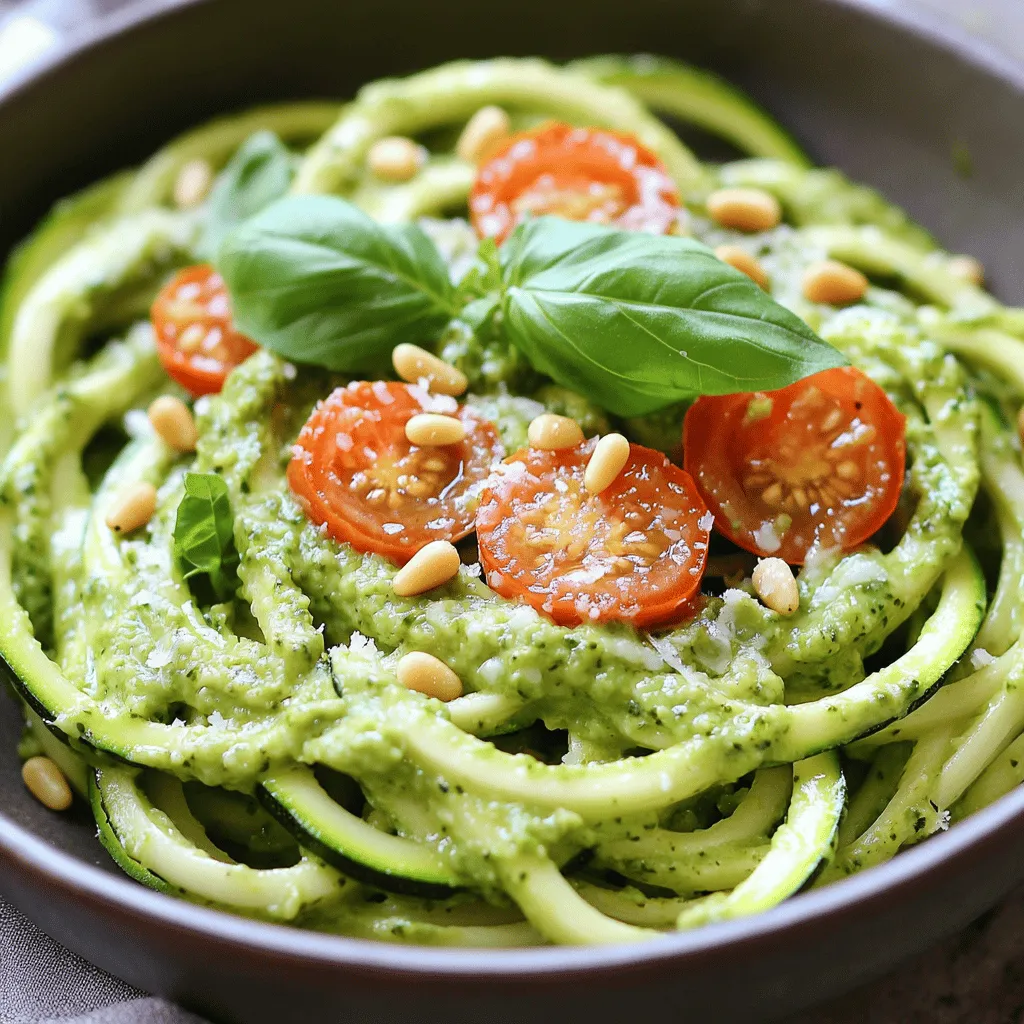
Looking for a quick, healthy meal? My Zucchini Noodles with Pesto is your answer! This simple recipe combines fresh flavors

If you love sweet treats, you’ll adore these Coconut Cream Pie Bars! This recipe is easy and packed with flavor.
