![- 1 medium head of cauliflower (approximately 4 cups when riced) - 1 cup carrots, julienned - 1 cup bell peppers, thinly sliced - 1 cup snap peas, trimmed - 3 green onions, finely chopped - 2 cloves garlic, minced - 1-inch piece of fresh ginger, grated - 2 tablespoons soy sauce or tamari - 1 tablespoon rice vinegar - 1 teaspoon sriracha (optional) - 1 tablespoon sesame oil - Sesame seeds for garnish - Fresh cilantro for garnish To make this dish come alive, I focus on fresh, colorful ingredients. Cauliflower serves as the base. It’s light and healthy. I like ricing it myself. Just break it into florets and pulse until it resembles rice. You can also use a box grater if you don’t have a food processor. I love to add vibrant veggies. Carrots, bell peppers, and snap peas bring crunch and color. Green onions add a nice finish. They give the dish a pop of flavor. Flavor is key. Garlic and ginger boost the taste. They create a warm aroma. Soy sauce or tamari adds saltiness. Rice vinegar gives a tangy kick. If you like spice, add sriracha for heat. Don’t forget the sesame oil! It adds a nutty flavor. I always garnish my stir-fry with sesame seeds and fresh cilantro. They add texture and freshness. For the full recipe, check out the [Full Recipe]. - First, remove the leaves and thick stem from the cauliflower. - Next, rice the cauliflower using a food processor or box grater. This gives you small, rice-like pieces. - Heat sesame oil in a non-stick skillet or wok over medium-high heat. - Sauté minced garlic and grated ginger for 30 seconds. This adds a lovely aroma. - Add the carrots, bell peppers, and snap peas to the skillet. - Stir-fry these vegetables for 3-4 minutes. They should be tender but still crisp. After that, add the riced cauliflower. - Drizzle soy sauce, rice vinegar, and sriracha over the stir-fry. Cook for another 2 minutes to blend flavors. - Finally, fold in the chopped green onions before serving. This adds freshness and color to your dish. For more detailed steps, you can check the Full Recipe. To make cauliflower rice, start with a whole head of cauliflower. First, remove the leaves and thick stem. Then break it into florets. If you have a food processor, pulse the florets until they look like rice. If not, grab a box grater. Just grate until you achieve small, rice-sized pieces. This method works well too. For the best texture, watch the cooking time. If you like your cauliflower rice soft, stir-fry it longer. If you want some crunch, keep it a bit firmer. Want to boost the flavor? Try adding spices or herbs like cumin or basil. Fresh herbs work great here. You can also adjust the heat level. If you love spice, add more sriracha or chili flakes. Start small and taste as you go, so you can find your perfect heat. Make your stir-fry look good! Garnish with sesame seeds or fresh cilantro. This adds a nice touch and makes it pop. For serving, think about adding protein. Chicken, shrimp, or tofu pair well and make the meal more filling. {{image_4}} You can add protein to your stir-fry to make it heartier. Chicken, shrimp, and tofu are great options. If you choose chicken, cut it into small pieces and cook it for about 5-7 minutes before adding the vegetables. For shrimp, cook them for about 3-4 minutes until they turn pink. If you prefer tofu, use firm tofu, cut into cubes, and stir-fry for 5-6 minutes until golden. Adjust your cooking time to ensure everything cooks evenly. Feel free to swap out the vegetables based on what you have. Seasonal veggies like zucchini, broccoli, or asparagus work well too. You can also add leafy greens like spinach or kale for extra nutrients. Customize your stir-fry based on your tastes or any dietary needs. If you need it to be vegan, just stick to veggies and tofu. You can change the flavors with different sauces. Teriyaki or oyster sauce gives a nice twist. If you want crunch, add nuts like cashews or seeds like sunflower seeds. These options add texture and flavor to your meal. Mix and match to find your favorite combination. Enjoy creating a dish that feels personal and satisfying! To keep your leftover cauliflower rice stir-fry fresh, store it in an airtight container. This helps prevent moisture loss and keeps flavors intact. You can safely refrigerate it for up to 3 days. Always let it cool down to room temperature before sealing it in the container. Freezing is a great way to save your stir-fry for later. First, allow it to cool completely. Then, pack it in a freezer-safe container or bag, removing as much air as possible. This method keeps it fresh for up to 3 months. When you're ready to enjoy it, place it in the fridge overnight to thaw. Reheating should be gentle to maintain texture. Use a skillet over low heat and add a splash of water to create steam. This method helps keep the rice tender. If you want to boost flavors, try adding a little extra soy sauce or a dash of sesame oil while reheating. This simple trick brings the dish back to life! For more details, check out the Full Recipe. Yes, you can make this dish ahead. Cook the stir-fry and let it cool. Place it in an airtight container. Store it in the fridge for up to three days. For best taste, reheat it on the stove or in the microwave before serving. You can pair this stir-fry with many foods. Try grilled chicken, shrimp, or tofu for protein. A side of steamed broccoli or a fresh salad works well too. You can even serve it with a simple dipping sauce for extra flavor. Cauliflower rice is very healthy. It has fewer carbs and calories than regular rice. It's also high in vitamins C and K. Plus, it provides fiber, which helps digestion. Using cauliflower rice can be a great choice for a low-carb diet. Yes, frozen cauliflower rice is a great option. It cooks quickly and saves time. Just add it to the pan straight from the freezer. You may need to cook it a bit longer to remove excess moisture. This way, you still get that perfect texture. Cauliflower rice stir-fry is simple and fun to make. You can use fresh or frozen cauliflower and customize it with your favorite veggies and proteins. Remember to adjust the cooking time based on what you add. Don't forget to keep it fresh with herbs and enjoy it warm! By using these tips and tricks, you can create a dish that not only tastes good but is also healthy. You now have a delicious recipe to try, so get started!](https://spoonfulsavory.com/wp-content/uploads/2025/05/98dc0da0-0232-4353-bada-87c7db5b0928.webp)
Cauliflower Rice Stir-Fry Flavorful and Quick Meal
Looking for a meal that’s both quick and tasty? This Cauliflower Rice Stir-Fry is your answer! Packed with fresh veggies
Looking for a meal that’s both quick and tasty? This Cauliflower Rice Stir-Fry is your answer! Packed with fresh veggies
![To make Cheesy Spinach Stuffed Shells, you need the following items: - 20 jumbo pasta shells - 2 cups ricotta cheese - 1 cup shredded mozzarella cheese, divided - 1/2 cup grated Parmesan cheese - 2 cups fresh spinach, finely chopped - 1/2 teaspoon garlic powder - 1/2 teaspoon onion powder - 1/4 teaspoon nutmeg - Salt and pepper to taste - 2 cups marinara sauce - Fresh basil leaves for garnish You can swap some ingredients for others. Here are some ideas: - Use cottage cheese instead of ricotta for a lighter option. - Swap mozzarella with provolone or gouda for a different flavor. - If you don’t have fresh spinach, frozen spinach works well. Just thaw and drain it first. - For a vegan version, use tofu or a plant-based cheese. Each serving of Cheesy Spinach Stuffed Shells offers a tasty balance of nutrients. Here’s a quick look: - Calories: About 400-450 per serving - Protein: 20g - Carbohydrates: 45g - Fat: 20g - Fiber: 4g - Calcium: Significant from cheese and spinach This meal gives you protein, vitamins, and a fulfilling taste. Check the full recipe for more details on serving sizes and preparation. First, preheat your oven to 375°F (190°C). This step warms up the oven so your stuffed shells bake evenly. Next, boil a large pot of salted water. Add 20 jumbo pasta shells and cook them until they are al dente. This usually takes about 8-10 minutes. Once ready, drain the shells and rinse them under cold water. This stops the cooking process and helps keep them from sticking. In a big mixing bowl, add 2 cups of ricotta cheese, 1 cup of shredded mozzarella (save some for later!), and 1/2 cup of grated Parmesan. Also, add 2 cups of finely chopped spinach, 1/2 teaspoon of garlic powder, 1/2 teaspoon of onion powder, and 1/4 teaspoon of nutmeg. Season with salt and pepper to taste. Mix everything together until it’s nice and creamy. Now it’s time to fill the shells! Use a spoon or a small spatula to carefully stuff each shell with the spinach mixture. Don’t overfill them; just make the filling level with the edge of the shell. Take a 9x13 inch baking dish and spread about 1 cup of marinara sauce on the bottom. Place the stuffed shells in a single layer on top of the sauce. Pour the rest of the marinara sauce over the shells. Lastly, sprinkle the remaining mozzarella cheese on top. This will make your dish extra cheesy. Cover the dish with aluminum foil and bake for 20 minutes. After that, take off the foil and bake for another 10-15 minutes. This will melt the cheese and give it a nice golden-brown top. Once done, let it cool for a few minutes. Garnish with fresh basil leaves for a pretty touch and serve! If you want the full recipe, check out the [Full Recipe]. To make perfect stuffed shells, start by cooking them just right. Use a large pot of salted water. Bring it to a boil before adding the shells. Cook them for about 8-10 minutes, or until they are al dente. This means they should still have a slight bite to them. After cooking, drain the shells. Rinse them under cold water to stop the cooking. This helps keep them firm and prevents them from breaking. Preventing the shells from sticking together is easy. After cooking, make sure to rinse them with cold water right away. You can also add a bit of oil to the water before cooking. This helps to keep the shells from clumping. If they still stick, try using a non-stick baking dish. This will help them slide out easily once baked. You can boost the flavor of your Cheesy Spinach Stuffed Shells in many ways. Adding fresh herbs like basil or parsley can brighten the dish. Feel free to mix in some red pepper flakes for a little heat. You can also try using different cheeses. A mix of feta or goat cheese can add a nice tang. For a richer taste, consider adding cooked sausage or ground meat to the filling. These simple changes can transform the dish into something special. {{image_4}} You can easily make Cheesy Spinach Stuffed Shells vegetarian-friendly. Just focus on fresh veggies. Try adding chopped mushrooms, bell peppers, or zucchini to the filling. These veggies add taste and texture. You can also swap out the marinara sauce for a creamy Alfredo sauce. This creates a rich flavor that pairs well with the cheese. If you want a heartier dish, consider adding meat. Ground beef, turkey, or sausage works great. Cook the meat before mixing it with the cheese and spinach. This gives the filling a savory depth. You can even use shredded rotisserie chicken for a quick option. Just make sure to adjust the seasoning to match the meat. For a gluten-free version, use gluten-free pasta shells. They are easy to find in most stores now. Be sure to check the label for gluten-free certification. You can also make your own pasta if you want to get creative. For the sauce, choose a gluten-free marinara. This way, you can enjoy your cheesy, delicious meal without any worries. These variations let you customize your dish to fit your taste. With these ideas, you can make Cheesy Spinach Stuffed Shells your own! For the full recipe, check out the details above. Store leftover cheesy spinach stuffed shells in an airtight container. They stay fresh for about 3 to 5 days in the fridge. Make sure to let them cool before sealing. This helps keep the shells firm. If you have extra marinara sauce, store it separately. To reheat, take the shells out of the fridge. Preheat your oven to 350°F (175°C). Place the shells in an oven-safe dish. Pour a little marinara sauce on top to keep them moist. Cover with foil and heat for about 20 minutes. Check that they are heated through before serving. You can freeze cheesy spinach stuffed shells if you want to save some for later. Assemble the dish but do not bake it. Wrap it tightly in plastic wrap and aluminum foil. It can stay in the freezer for up to 3 months. When ready to eat, thaw it overnight in the fridge. Bake as directed in the full recipe, adding a few extra minutes to the cooking time. You can prepare Cheesy Spinach Stuffed Shells a day in advance. Cook the pasta and make the filling. Stuff the shells and place them in your baking dish. Cover the dish with foil and store it in the fridge. When ready to bake, just add a few extra minutes to the cooking time. I love serving a fresh salad with Cheesy Spinach Stuffed Shells. A simple green salad with a light vinaigrette pairs nicely. Garlic bread also makes a great side. You can add roasted vegetables for a healthy touch. These sides balance the meal and add flavor. Absolutely! Feel free to mix and match cheeses. You can use goat cheese for a tangy taste. Cream cheese adds richness. Feta can give a Mediterranean twist. Just keep the overall texture in mind. You want a creamy filling that holds well in the shells. Your stuffed shells are done when the cheese is melted and bubbly. The top should be slightly golden. You can check by gently lifting a shell with a fork. If the filling is hot throughout, they are ready. Let them cool for a few minutes before serving. In this post, we explored ingredients, cooking steps, tips, variations, and storage for Cheesy Spinach Stuffed Shells. You now know how to choose the right ingredients and avoid common mistakes. These delicious shells can fit many diets, too. With these insights, you’re ready to impress your family and friends. I hope your cooking brings joy and good meals to your table. Enjoy every bite!](https://spoonfulsavory.com/wp-content/uploads/2025/05/a8c29889-0bf7-4269-83ec-16c3836f215d.webp)
If you’re looking for a simple, tasty meal that packs a punch, you’ve found it! Cheesy spinach stuffed shells are
. Coconut lime shrimp offers a bright, bold flavor. This dish uses simple, fresh ingredients. You marinate shrimp, cook it quickly, and serve it with rice. You can make tacos or add veggies, too. Storing leftovers is easy, allowing flexibility for meals. Enjoy this recipe as a tasty addition to your meals. The steps are simple and fun. Flavor and creativity make cooking enjoyable, so try it out!](https://spoonfulsavory.com/wp-content/uploads/2025/05/75f07d76-42fd-4e6a-828b-90cbfbe4d3b0.webp)
Imagine a dish that transports you to a sunny beach with each bite. Our Coconut Lime Shrimp brings that tropical
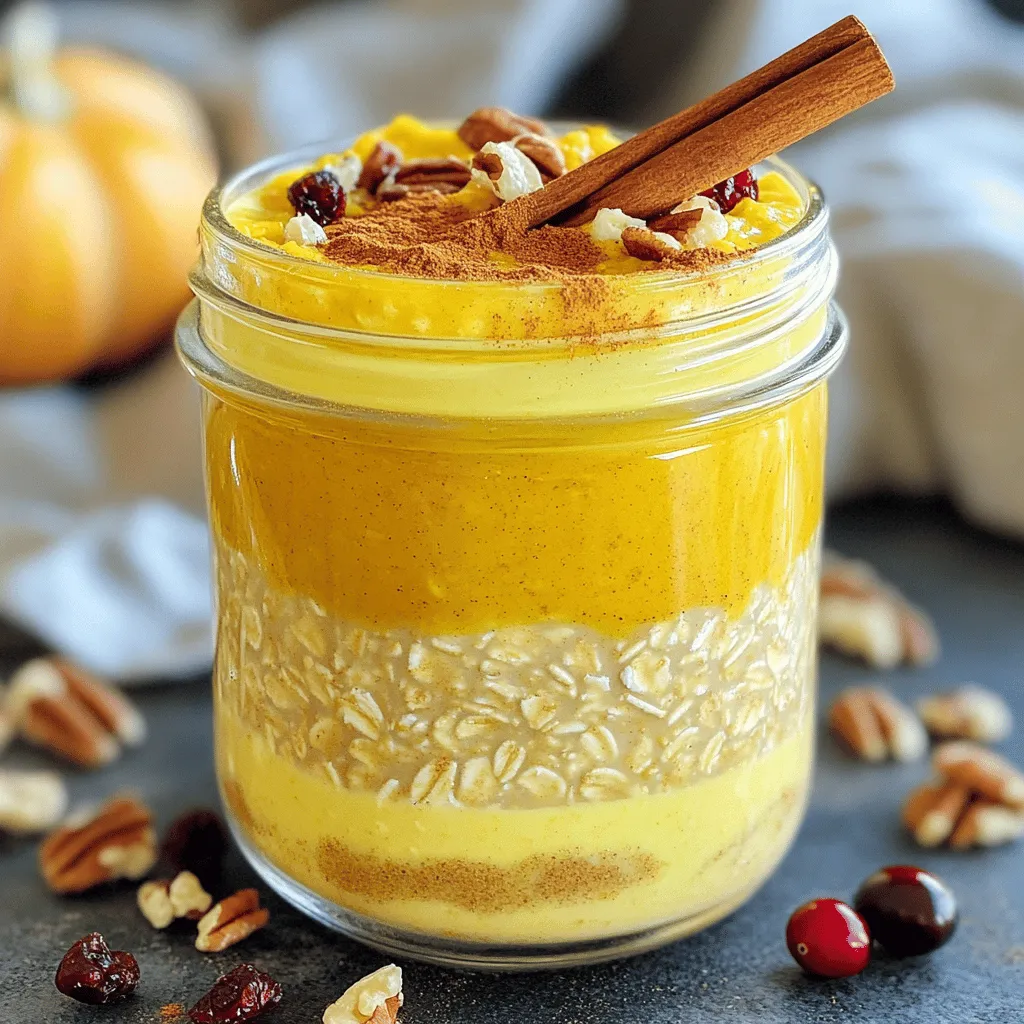
Looking for a healthy, filling meal that captures the cozy essence of fall? Pumpkin Spice Overnight Oats are your answer!
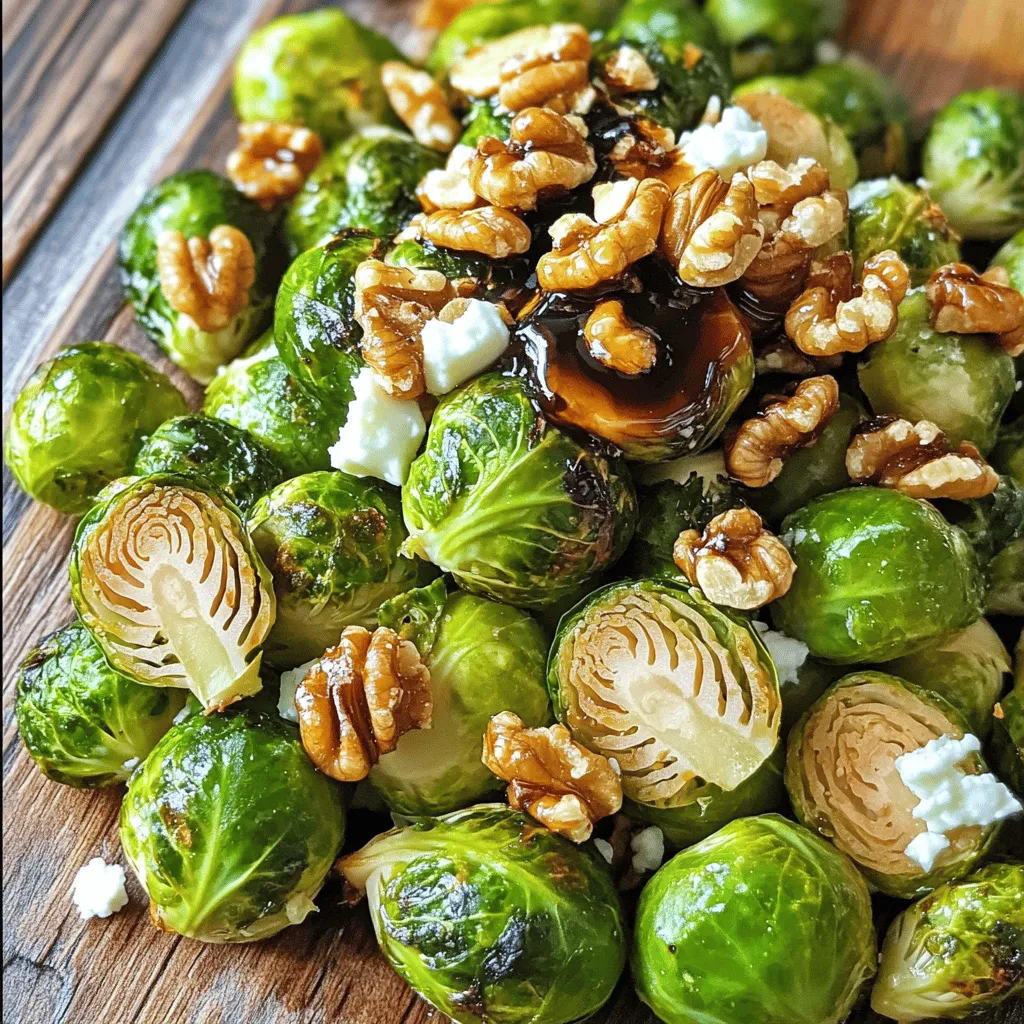
Looking for a delicious side dish that impresses? Balsamic glazed Brussels sprouts are here to elevate your meals! This flavorful

Are you craving a meal that’s both easy to make and bursting with flavor? Look no further! My Slow Cooker
![To make Spicy Thai Peanut Noodles, you'll need: - 8 oz rice noodles - 1 cup red bell pepper, sliced into thin strips - 1 cup carrots, julienned - 1 cup cucumber, julienned - 1 cup bean sprouts - 1/4 cup green onions, finely chopped - 1/4 cup fresh cilantro, roughly chopped - 1/2 cup creamy peanut butter - 1/4 cup low-sodium soy sauce - 2 tablespoons fresh lime juice - 1 tablespoon sriracha (adjust to taste for spiciness) - 1 tablespoon toasted sesame oil - 1 tablespoon honey or maple syrup - 1 tablespoon crushed peanuts (for garnish) - Optional: sesame seeds for garnish These ingredients create a colorful, tasty bowl of noodles that bursts with flavor. Sometimes you may not have all the ingredients. Here are some swaps: - Use almond butter instead of peanut butter for a nutty twist. - Swap cucumber with zucchini for a different crunch. - Try sesame oil in place of another neutral oil for added flavor. - If you lack fresh veggies, use frozen ones; just thaw them before use. These substitutions keep the dish delicious while making it easier to prepare. Each serving of Spicy Thai Peanut Noodles has about: - Calories: 450 - Protein: 12g - Carbohydrates: 60g - Fat: 20g The key ingredients offer great health benefits. Peanut butter provides protein and healthy fats. Fresh veggies add vitamins and fiber to your meal. The lime juice also gives a nice boost of vitamin C. Enjoying this dish not only tastes good but also supports a balanced diet. To cook the rice noodles, start by boiling a large pot of water. Add the noodles and cook them as the package says. You want them al dente, which means they should be chewy but not hard. Once they are done, drain them in a colander. Rinse the noodles under cold running water. This stops the cooking and keeps them from sticking together. Set the noodles aside to cool. In a medium bowl, combine the creamy peanut butter, soy sauce, fresh lime juice, sriracha, toasted sesame oil, and honey or maple syrup. Use a whisk to mix these ingredients well. You want a smooth and creamy sauce. If the sauce looks too thick, add a tablespoon of warm water. Mix again until you reach your desired thickness. This sauce should coat your noodles nicely. In a large bowl, mix your sliced red bell pepper, julienned carrots, cucumber, bean sprouts, chopped green onions, and cilantro. Gently toss the vegetables together until they are mixed well. Next, add the cooked noodles to the vegetables. Pour the peanut sauce over everything. Using tongs or two forks, gently mix until all the noodles and vegetables are coated in the sauce. Taste your dish and adjust the flavors if needed. You can add more sriracha for spice or more lime juice for a sour kick. Enjoy your Spicy Thai Peanut Noodles! For the full recipe, check the earlier sections. When making spicy Thai peanut noodles, balance is key. Adjust the sweetness with honey or maple syrup. If you want more tang, add lime juice. For heat, use sriracha. Remember to taste as you cook. This step helps you find the right mix of flavors. You can always add more, but it’s hard to take away. Trust your taste buds! To make your dish pop, garnish with crushed peanuts and sesame seeds. Place a lime wedge on the side for a bright touch. Use deep, colorful bowls to serve the noodles. Layer the vibrant veggies on top. This not only looks great but makes the dish even more appetizing. A well-presented meal always tastes better! Making a larger batch of spicy Thai peanut noodles is smart for meal prep. You can easily double the recipe. Store leftovers in airtight containers to keep them fresh. When serving, reheat gently in a pan or microwave. Add a splash of water if the noodles seem dry. This keeps them chewy and tasty. Enjoy your meals throughout the week without the fuss! {{image_4}} You can boost the protein in your spicy Thai peanut noodles easily. Chicken, shrimp, or tofu are great choices. - Chicken: Use boneless, skinless chicken breasts. Cut them into bite-sized pieces. Sauté in a hot pan for 5-7 minutes until cooked through. - Shrimp: Use fresh or frozen shrimp. Cook them for about 3-4 minutes until they turn pink and opaque. - Tofu: For a vegetarian option, firm tofu works well. Cut it into cubes and pan-fry until golden brown, about 6-8 minutes. Making this dish vegetarian or vegan is simple. Just swap out any animal products. - Peanut Butter: Most peanut butter is vegan, but check for added ingredients. - Honey: Use maple syrup or agave syrup instead of honey for a vegan sweetener. - Soy Sauce: Ensure you use a gluten-free or vegan soy sauce if needed. Avoid adding any meat or dairy products to keep it plant-based. You can enjoy this dish cold as a refreshing salad. - How to Serve Cold: After cooking the noodles, rinse them under cold water. Let them chill in the fridge for about 30 minutes. - Flavor Adjustments: Add more lime juice and sriracha for a zesty kick. You might also want to mix in additional veggies like shredded cabbage or snap peas for crunch. This cold version is perfect for hot days or picnics. Just follow the [Full Recipe] for all the steps! To keep your spicy Thai peanut noodles fresh, store them in an airtight container. This helps prevent drying out. If you want to keep them longer, you can freeze the dish. Just make sure to separate the noodles from the vegetables and sauce. This keeps everything tasting fresh. When reheating, use a pan on low heat. Add a splash of water to keep the noodles moist. Stir gently until everything heats up. In the fridge, spicy Thai peanut noodles last about three to four days. After that, they may spoil. Signs of spoilage include an off smell, a change in color, or a slimy texture. If you notice any of these signs, throw the dish away. It's always better to be safe when it comes to food. For meal prep, store each component separately. Keep noodles in one container and vegetables in another. This way, they stay fresh and crunchy. You can mix them together when you're ready to eat. This method saves time during busy weeks. Just grab your components and assemble your meal in no time! For more details, check out the Full Recipe. Yes, you can use different noodles in this dish. Soba noodles are a great option. They have a nutty flavor and a nice texture. Whole wheat noodles also work well. They add fiber and a bit more heartiness. Just cook them according to package directions. Remember to rinse them to stop the cooking. To make your dish less spicy, cut back on the sriracha. Use just a teaspoon if you want a milder taste. You can also swap it for a milder sauce, like sweet chili sauce. Mixing in some extra peanut butter can help tone down the heat too. This recipe can be gluten-free, but check your ingredients. Use gluten-free soy sauce instead of regular soy sauce. Rice noodles are naturally gluten-free, but always read the labels. Some sauces may contain gluten, so be careful with those. Yes, you can prepare this dish ahead of time. Cook the noodles and store them separately from the sauce and veggies. Keep everything in airtight containers in the fridge. When you're ready to eat, just combine them. This way, the noodles stay firm and do not get mushy. You can serve these noodles with many sides. A fresh cucumber salad pairs nicely. It adds crunch and freshness. You can also try spring rolls for a fun appetizer. Grilled chicken or shrimp are great protein options to serve alongside. In this post, we covered how to make Spicy Thai Peanut Noodles. You learned about key ingredients, substitutions, and their health benefits. I shared step-by-step cooking instructions and tips to enhance flavor and presentation. We also explored variations, storage, and answered common questions. These noodles can be a fun dish to make and enjoy. With practice, you will impress yourself and others with your skills in the kitchen.](https://spoonfulsavory.com/wp-content/uploads/2025/05/14783c3c-fd4d-4fb1-afcf-6b1d1b72616c.webp)
Are you ready to spice up your weeknight dinners? This Spicy Thai Peanut Noodles recipe is not only delicious but
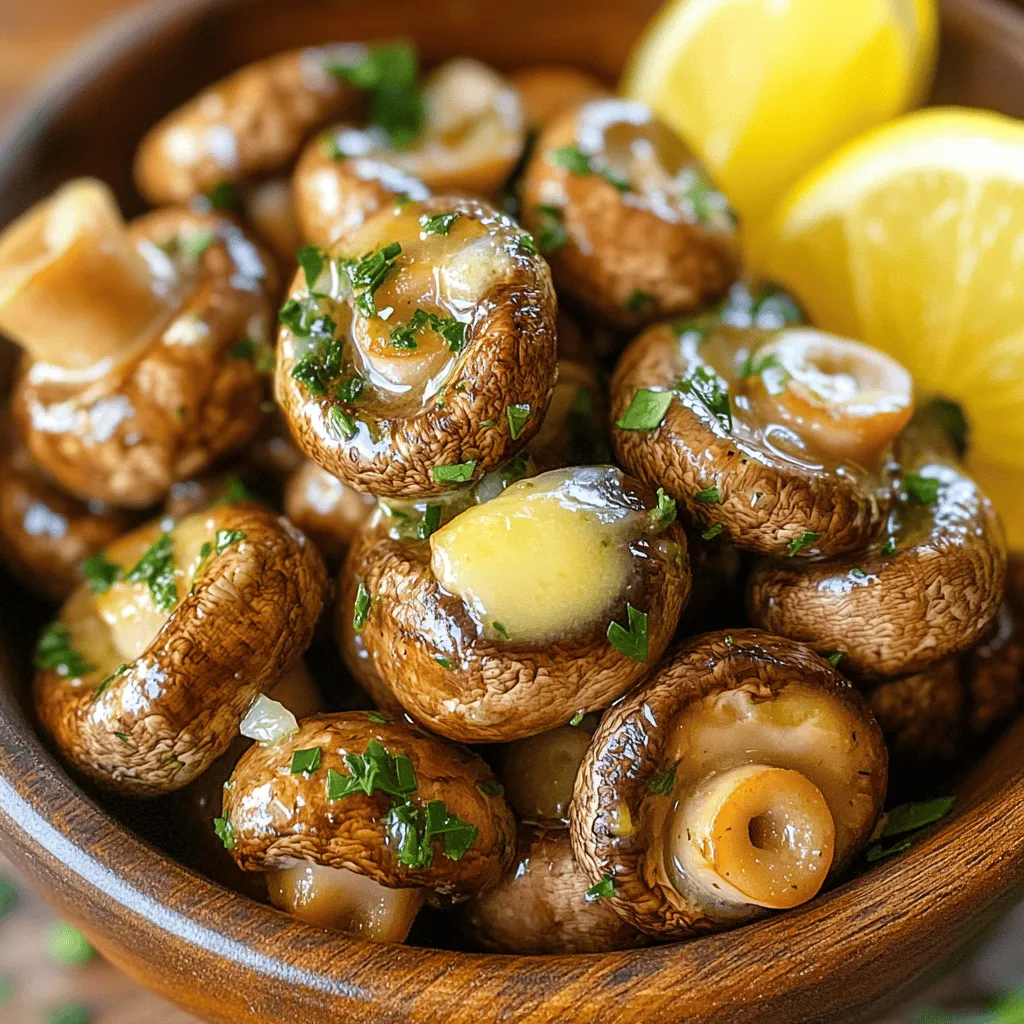
If you’re craving a dish that’s packed with flavor yet easy to make, I have you covered! Herbed Garlic Butter
![For the best Tandoori Chicken Skewers, you need a few key items. Here’s what you’ll need: - 1 lb (450g) boneless chicken thighs, cut into bite-sized pieces - 1 cup plain yogurt (preferably full-fat for creaminess) - 2 tablespoons vegetable oil (or any neutral oil) - 2 tablespoons fresh lemon juice (about half a lemon) - 2 cloves garlic, minced finely - 1 tablespoon ginger, freshly grated - 1 tablespoon tandoori masala (store-bought or homemade for authentic flavor) - 1 teaspoon turmeric powder - 1 teaspoon ground cumin - 1 teaspoon smoked paprika (for added depth) - Salt to taste - Skewers (use metal or soak wooden skewers in water for at least 30 minutes to prevent burning) - Fresh cilantro leaves for garnish - Lemon wedges for serving These ingredients come together to create a rich and spicy flavor that makes these skewers stand out. Want to take your skewers to the next level? Here are some optional ingredients you can add: - A pinch of cayenne pepper for heat - Bell peppers or onions, cut into chunks for added color and crunch - A drizzle of honey for a touch of sweetness - A sprinkle of garam masala for extra spice Adding these can change the flavor and texture, making the dish even more exciting. Don’t have all the ingredients? No problem! Here are some smart swaps: - Use chicken breast instead of thighs for a leaner option. - Swap plain yogurt for Greek yogurt if you prefer a thicker marinade. - Lemon juice can be replaced with lime juice for a different citrus zing. - Any neutral oil works if you don’t have vegetable oil. These substitutions keep the dish delicious while making it easier to prepare with what you have at home. For the full recipe, refer to [Full Recipe]. To start, you need to make the marinade. In a bowl, mix these ingredients: - 1 cup plain yogurt - 2 tablespoons vegetable oil - 2 tablespoons fresh lemon juice - 2 cloves garlic, minced - 1 tablespoon ginger, grated - 1 tablespoon tandoori masala - 1 teaspoon turmeric powder - 1 teaspoon ground cumin - 1 teaspoon smoked paprika - Salt to taste Whisk everything together until smooth. The yogurt gives a creamy base, while the spices add flavor. Now, let's add the chicken. Cut 1 pound of boneless chicken thighs into bite-sized pieces. Toss these pieces in the marinade until well-coated. Cover the bowl with plastic wrap. Refrigerate for at least 2 hours. If you can, let it marinate overnight for the best taste. When you’re ready to cook, preheat your grill to medium-high or your oven to 400°F (200°C). If using wooden skewers, soak them in water for 30 minutes to avoid burning. Next, thread the marinated chicken onto the skewers. Leave a small space between pieces for even cooking. Place the skewers on the grill or a baking sheet lined with parchment paper. Cook for 15-20 minutes, turning occasionally. The chicken should reach an internal temperature of 165°F (75°C). After cooking, let the skewers rest for a few minutes. This helps keep the chicken juicy. Serve with fresh cilantro and lemon wedges for a burst of flavor. For the Full Recipe, check out the full details above. Marinating is key to tasty tandoori chicken skewers. Use plain yogurt for a creamy base. It helps tenderize the chicken. Add lemon juice for tang and freshness. For the best flavor, marinate overnight. If you're short on time, two hours will still work. Make sure to coat every piece well. Use a plastic wrap to cover the bowl during marination. This keeps the flavors locked in. When cooking, preheat your grill or oven. A high heat helps achieve a nice char. If using wooden skewers, soak them in water for 30 minutes. This prevents burning. Space the chicken pieces slightly on the skewer. This allows even cooking. Cook for about 15-20 minutes. Turn them occasionally for even browning. Always check that the chicken reaches 165°F for safety. Serve your skewers on a large platter. This makes for a stunning centerpiece. Garnish with fresh cilantro leaves for a pop of color. Add lemon wedges for a zesty squeeze. You can also include a bowl of yogurt or mint chutney for dipping. For more crunch, serve colorful slices of onion or cucumber. This adds a refreshing touch to each bite. For more ideas, check out the Full Recipe for tips on sides and pairings. {{image_4}} You can make tandoori skewers with veggies or tofu. Use the same marinade as the chicken. For veggies, try bell peppers, zucchini, and mushrooms. If you want to use tofu, press it first to remove water. Then cut it into cubes. Marinate the tofu just like chicken. These options taste great and are fun to eat. While the classic tandoori flavor is amazing, you can mix it up. Try adding mango puree for sweetness. You can also use a spicy chili paste for more heat. For a smoky taste, include smoked paprika or liquid smoke. Each twist can create a new dish. Experiment and find your favorite flavor! Tandoori chicken skewers shine with good sides. Serve them with naan, rice, or salads. You can also add yogurt sauce or mint chutney for dipping. Fresh veggies like cucumber or onion add crunch. Pair with lemon wedges for a zesty finish. These sides make your meal colorful and tasty. For the full recipe, check out the complete guide on Tandoori Chicken Skewers! To keep your leftover Tandoori chicken skewers fresh, let them cool first. Place them in an airtight container. Make sure to seal it well to lock in the flavors. Store the container in the fridge for up to three days. If you want to keep them longer, consider freezing them. When you're ready to enjoy the skewers again, you have a few options. The best way to reheat is in the oven. Preheat your oven to 350°F (175°C). Place the skewers on a baking sheet and heat for about 10-15 minutes. This method helps retain their juicy flavor. You can also use a microwave. Just heat in short bursts, checking frequently. This method is faster, but it may dry them out. For freezing, wrap each skewer in plastic wrap. Then, place them in a freezer-safe bag. Try to remove as much air as possible to prevent freezer burn. You can keep them in the freezer for up to three months. When you want to eat them, thaw in the fridge overnight. Then, reheat as mentioned above. Enjoy your tasty leftovers! Tandoori masala is a spice mix used in Indian cooking. It gives dishes a rich flavor and vibrant color. Common spices in tandoori masala include cumin, coriander, turmeric, and paprika. You can make your own mix by combining these spices. Here’s a simple way to create it: - 2 tablespoons ground cumin - 2 tablespoons ground coriander - 1 tablespoon turmeric powder - 1 tablespoon smoked paprika - 1 teaspoon garam masala - 1 teaspoon chili powder - Salt to taste Mix these spices together in a bowl. This homemade tandoori masala is fresh and tasty. Use it in your marinade for Tandoori Chicken Skewers or any other dish you love. Yes, you can use chicken breast for Tandoori Chicken Skewers. However, chicken thighs are juicier and more flavorful. If you choose chicken breast, make sure not to overcook it. This meat can dry out quickly. Cut the chicken into similar sizes for even cooking. Marinate it just like you would with thighs to keep it moist. Tandoori Chicken Skewers are great on their own, but side dishes can enhance the meal. Here are some ideas: - Cucumber Raita: A cucumber yogurt dip that cools the palate. - Naan or Roti: Soft Indian bread to enjoy with the skewers. - Salad: A fresh salad with tomatoes and onions adds crunch. - Rice: Serve with basmati rice or flavored rice for completeness. These sides bring balance to the meal and add more flavors. Enjoy your Tandoori Chicken Skewers with these tasty options! For the full recipe, check out the earlier section. Tandoori chicken skewers are a tasty delight. We covered the key ingredients, steps, and tips to make them perfectly. Whether marinating, grilling, or serving, each detail matters. Remember that variations exist for different diets. You can store, reheat, or freeze leftovers with ease. Explore FAQs to deepen your understanding. Enjoy experimenting with flavors and presentations. With practice, you're sure to impress your friends and family. Your journey to perfect tandoori skewers starts now.](https://spoonfulsavory.com/wp-content/uploads/2025/05/5e132a95-3af0-4a74-9866-4ffcceb63064.webp)
Are you ready to spice up your grilling game? These Tandoori Chicken Skewers are not only flavorful but also easy
![- 2 ripe avocados, pitted and peeled - 300g pasta of your choice (spaghetti or fettuccine works great) - 2 cloves garlic, finely minced - 1/4 cup fresh basil leaves, packed - 1/4 cup Greek yogurt, plain - 2 tablespoons freshly squeezed lemon juice - 1/4 cup high-quality extra virgin olive oil - Sea salt and freshly cracked black pepper, to taste - Handful of cherry tomatoes, halved (for garnish) - Extra basil leaves, whole (for garnish) Using the right amount of pasta is key. For this recipe, I suggest 75g of pasta per person. This ensures you have enough creamy sauce to coat every strand. Always remember to salt your water. A pinch of sea salt will enhance the pasta's taste. This creamy avocado pasta packs a punch of nutrients. Each serving contains about: - Calories: 400 - Protein: 10g - Carbohydrates: 55g - Fats: 20g Avocados provide healthy fats. Greek yogurt adds protein and creaminess. Each bite is not just tasty; it's also good for you! Start by filling a large pot with water. Add a generous pinch of salt. Bring the water to a rolling boil. Next, toss in your pasta of choice. I love using spaghetti or fettuccine for this dish. Cook the pasta based on the package instructions, usually about 8 to 10 minutes. You want it to be al dente. Before you drain the pasta, save about 1/2 cup of the cooking water. This water helps to adjust the sauce later. Drain the pasta in a colander and set it aside. While your pasta cooks, you can make the creamy avocado sauce. Grab a blender or a food processor. Add the ripe avocados, minced garlic, and fresh basil leaves. Then, add the Greek yogurt, lemon juice, and olive oil. Blend everything on high speed until the mixture is smooth and creamy. If the sauce feels too thick, add a few tablespoons of the reserved pasta water. Blend again until you reach the perfect consistency. Now it’s time to combine the pasta and sauce. In a large mixing bowl, add the drained pasta. Pour the creamy avocado sauce over the pasta. Toss gently to coat each strand in the sauce. Taste your dish and add sea salt and freshly cracked black pepper to enhance the flavors. If the sauce is still too thick, mix in more reserved pasta water. Finally, serve the creamy avocado pasta in bowls. Garnish with halved cherry tomatoes and fresh basil leaves for a pop of color. Enjoy your delicious meal! You can find the full recipe for this creamy delight above. When choosing avocados, look for ones that feel soft but not too mushy. A ripe avocado yields gently when you press it with your fingers. Avoid avocados with dark spots or dents. These can indicate overripeness. If you can’t find ripe avocados, buy firm ones and let them ripen at room temperature for a few days. Cook your pasta until it is al dente, which means it should have a slight bite. This will help it hold up against the creamy sauce. Remember to save some pasta water before draining. This starchy water adds flavor and helps the sauce stick. If your sauce is too thick, add a bit of the reserved water. This tip keeps your dish creamy and smooth. You can easily make this dish your own. Add red pepper flakes for some heat. Toss in sautéed spinach or roasted cherry tomatoes for more flavor. A sprinkle of grated cheese can also enhance the taste. If you want a vegan option, replace Greek yogurt with silken tofu. Get creative and mix in your favorite herbs or spices for a unique twist. For the full recipe, check out [Full Recipe]. {{image_4}} You can use many types of pasta for creamy avocado pasta. Spaghetti and fettuccine are great options. You might also try penne or rotini. Each type gives a unique bite and texture. Whole grain or chickpea pasta adds more fiber and protein. Gluten-free pasta works well too. Just remember to cook it according to the package directions. If you want a vegan dish, skip the Greek yogurt. You can replace it with silken tofu or more avocado for creaminess. For gluten-free options, choose gluten-free pasta. The rest of the recipe stays the same. This way, you can enjoy creamy avocado pasta without any worries. Adding protein makes your dish more filling. Grilled chicken, shrimp, or chickpeas work well. You can also toss in some veggies. Spinach, zucchini, or peas add color and nutrients. Feel free to mix and match. The creamy sauce pairs with many flavors. For the full recipe, check the detailed instructions above. To store creamy avocado pasta, place it in an airtight container. This keeps the pasta fresh. You can keep it in the fridge for up to three days. When you're ready to eat, check for any browning on the avocado. If you see some, just give it a good stir. The flavor will still be great! Freezing this pasta is not ideal. The avocado sauce may change texture when thawed. If you want to freeze it, separate the sauce from the pasta. You can freeze the sauce for up to three months. When you want to eat it, thaw it in the fridge overnight. Reheat on low heat in a pan. Add a little pasta water to help bring back the creaminess. To keep your creamy avocado pasta fresh, avoid mixing in all the sauce at once. Instead, add just enough sauce for one meal. Store the extra sauce separately in the fridge. This method helps keep the pasta from getting mushy. You can also add a splash of lemon juice to the sauce before storing. This helps prevent browning and keeps the avocado bright green. For the full recipe, check out Creamy Avocado Pasta Delight! Yes, you can make this recipe ahead of time. Cook the pasta and store it in an airtight container. Keep the avocado sauce separate in another container. This way, the sauce stays fresh and green. When you're ready to eat, just combine them. Reheat the pasta gently and mix in the sauce. This will save you time during busy days. To make the sauce smoother, blend it longer. If it’s still thick, add some reserved pasta water. Start with a tablespoon and blend again. Keep adding until it reaches the creaminess you like. Using a high-speed blender also helps achieve that silky texture. Remember, the key is to blend well and adjust slowly. If you need a substitute for Greek yogurt, you can use sour cream. It has a similar flavor and texture. Another option is silken tofu, which works well for a dairy-free choice. Just blend it until smooth. You can also use cashew cream for a rich, creamy effect. Each will give a unique taste, so choose what suits you best. This blog post covered how to create a tasty avocado pasta dish. We discussed the key ingredients, perfect pasta measurements, and how to cook it well. You learned to make a creamy avocado sauce and tips to enhance flavors. We also explored pasta variations and storage tips to keep leftovers fresh. In the end, this dish is simple and fun. You can enjoy it in many ways, so get creative!](https://spoonfulsavory.com/wp-content/uploads/2025/05/9b374f6e-6cb4-49f4-852e-47a32112d126.webp)
Looking for a quick and tasty meal? You’ll love this creamy avocado pasta! It’s easy to make and packed with
