Skip to content
DisclaimerTerms Of UseGDPR PolicyCookie Policy

spoonfulsavory

  • Home
  • Drinks
  • Appetizers
  • Dinner
  • Dessert
  • About
  • Contact
  • Privacy Policy
DisclaimerTerms Of UseGDPR PolicyCookie Policy

Sarah

To make savory oatmeal with egg, you will need: - 1 cup rolled oats - 2 cups vegetable broth (or water) - 1 tablespoon olive oil - 1 clove garlic, finely minced - 1 cup fresh spinach, coarsely chopped - 1 medium ripe tomato, diced - 1 teaspoon soy sauce or tamari - 1 teaspoon sesame oil - Salt and freshly ground black pepper, to taste - 2 large eggs These ingredients work together to create a hearty dish. The rolled oats serve as the base, while vegetable broth adds depth. Olive oil and garlic bring flavor, and the spinach and tomato provide freshness. For a little extra touch, consider these garnishes: - Chopped green onions - Crumbled feta cheese (optional) Green onions add a nice crunch and brightness. Feta cheese can give a creamy finish and extra flavor. Savory oatmeal with egg is not just tasty; it is also nutritious. Each serving offers: - High fiber from oats and vegetables - Protein from eggs - Healthy fats from olive oil - Vitamins and minerals from spinach and tomato This meal is balanced and can fit into any diet. It gives you energy and helps keep you full. For the full recipe, you can explore detailed instructions and tips. To start, I heat 2 cups of vegetable broth in a medium saucepan. You can also use water if you prefer. Once it boils, I stir in 1 cup of rolled oats. I lower the heat and let the oats simmer for about 5 minutes. I stir them occasionally to keep them creamy and smooth. While the oats cook, I grab a separate skillet and heat 1 tablespoon of olive oil over medium heat. I add 1 clove of minced garlic and sauté it for 1 minute. The smell is amazing! Next, I toss in 1 cup of chopped spinach and 1 diced tomato. I keep stirring for 2 to 3 minutes until the spinach wilts and the tomato softens. Now, I mix the soy sauce and sesame oil into the spinach and tomato. I season with salt and black pepper to taste. Once the oats finish cooking, I fold this colorful mixture into the oats. It looks and smells great! In the same skillet, I crack 2 large eggs and cook them sunny-side up. You can cook them as you like. I ladle the savory oatmeal into bowls. I top each bowl with a fried egg, making sure it sits right on the oats. For a final touch, I sprinkle chopped green onions on top. If you like, you can also add crumbled feta cheese for creaminess. This dish is not only tasty but also packed with nutrients. For the full recipe, check out the earlier section. To make oatmeal creamy, start with vegetable broth or water. Use 2 cups for 1 cup of oats. This helps the oats absorb more flavor. Stir the oats often while they cook. A gentle mix helps break them apart. Cook them on low heat for about 5 minutes. This keeps them soft and smooth. You can also add a splash of milk at the end for extra creaminess. For the best eggs, crack them into a hot, greased skillet. Cook them sunny-side up for a runny yolk. If you prefer firm yolks, flip them for over-easy eggs. Another option is poaching the eggs. To poach, simmer water with a splash of vinegar. Gently slide the eggs in and cook for 3-4 minutes. This method keeps them tender and light. Seasonings can make your savory oatmeal shine. Add garlic and onion for a strong base flavor. A splash of soy sauce boosts umami taste. Don't forget fresh herbs! Chopped green onions or parsley add freshness. A sprinkle of salt and black pepper rounds out the taste. If you like a bit of heat, add red pepper flakes. These small tweaks can elevate your bowl to a gourmet level. {{image_4}} To make this dish vegan, swap the eggs for tofu. Use firm tofu and crumble it into the pan. Sauté it just like you would the eggs. You can also add a sprinkle of turmeric for color. Nutritional yeast can add cheesy flavor to your tofu. If you need a gluten-free meal, you can use gluten-free oats. Make sure to check the label to confirm. This way, you can enjoy your savory oatmeal without worry. The rest of the recipe stays the same, so it’s easy to adapt. You can mix up the flavors in your savory oatmeal. Try adding different vegetables or spices. Some great options include: - Mushrooms for earthiness - Bell peppers for sweetness - Avocado for creaminess - Fresh herbs like basil or cilantro for a fresh kick Experimenting with flavors makes cooking fun. You can also switch up the broth or add hot sauce for heat. Each variation can give you a new taste experience. For more ideas, check out the Full Recipe for inspiration! After you enjoy your savory oatmeal, you may have some left. To keep it fresh, let the oatmeal cool. Then, place it in an airtight container. Store it in the fridge for up to three days. This way, it stays tasty and safe to eat. When you are ready to eat your leftovers, take them out of the fridge. You can reheat savory oatmeal in the microwave or on the stove. For the microwave, place it in a bowl and cover it with a damp paper towel. Heat for one to two minutes, stirring halfway. If using the stove, add a splash of broth or water in a pan. Heat it over low heat, stirring often until warm. You can also freeze savory oatmeal for later. Once it cools completely, put it in a freezer-safe container. It can last up to three months in the freezer. When you're ready to eat it, thaw it in the fridge overnight. Reheat as mentioned above. This makes meal prep easy and fun! Don't forget to check the full recipe for more tips! Yes, you can use instant oats. They cook faster than rolled oats. Just reduce the cooking time to about 1-2 minutes. Instant oats will give a softer texture, which some people enjoy. If you like a chewier bite, stick with rolled oats. You can add many vegetables to savory oatmeal. Try mushrooms, bell peppers, or zucchini. Kale and broccoli also work well. These add flavor and nutrients to your meal. Mix and match based on what you have on hand. Meal prepping savory oatmeal is easy. Cook a large batch on the weekend. Store it in individual containers. Keep the eggs separate until you're ready to eat. You can reheat the oatmeal in the microwave or on the stove. Add fresh toppings when serving. This method saves time and helps you enjoy a healthy meal all week. For the full recipe, check out the Savory Oatmeal Delight with Egg. Savory oatmeal is a versatile dish with many options for flavor and nutrition. We explored key ingredients, cooking steps, and tips for success. Keeping variations in mind, you can tailor this meal to fit any diet. Proper storage helps you enjoy your creation later. Use what you learned to make oatmeal exciting and tasty. Have fun experimenting with your ingredients and flavors. With a little practice, you will master savory oatmeal!

Savory Oatmeal with Egg Delicious and Nutritious Meal

Looking for a tasty and healthy meal? Savory oatmeal with egg is your answer! This dish brings warmth and comfort

To make a rich and creamy chocolate avocado mousse, gather these simple ingredients: - 2 ripe avocados - 1/2 cup unsweetened cocoa powder - 1/3 cup maple syrup (or honey for non-vegan) - 1/4 cup almond milk (or your preferred milk) - 1 teaspoon vanilla extract - A pinch of sea salt - 1/4 cup dark chocolate chips (optional dairy-free) - Fresh berries (such as raspberries or strawberries) for garnish (optional) Each ingredient plays a key role. The ripe avocados provide a smooth texture and healthy fats. Unsweetened cocoa powder adds rich chocolate flavor. Maple syrup or honey sweetens the mousse, while almond milk keeps it creamy. Vanilla extract gives depth, and sea salt enhances all the flavors. Dark chocolate chips can add a touch of elegance. Fresh berries not only look great but also add a pop of flavor. For the full recipe, check the detailed steps above. - Halve and pit the avocados. - Scoop flesh into a food processor. First, you need ripe avocados. They should feel soft but not too mushy. Cut each avocado in half. Remove the pit carefully with a spoon. Next, use a spoon to scoop the creamy green flesh into your food processor. This step is key for a smooth mousse. - Add cocoa powder and sweetener. - Include almond milk, vanilla, and salt. - Blend until smooth. Once the avocados are in, add half a cup of unsweetened cocoa powder. This gives the mousse its rich chocolate flavor. Next, add one-third cup of maple syrup or honey to sweeten it. Pour in a quarter cup of almond milk, a teaspoon of vanilla extract, and a pinch of sea salt. Blend everything on high speed. Stop to scrape down the sides as needed. Keep blending until your mixture is velvety and smooth. - Adjust sweetness as needed. - Spoon into serving bowls. - Chill in the refrigerator. After blending, taste your mousse. If it needs more sweetness, add a little more syrup. Blend again to mix it well. Now, spoon the mousse into serving bowls. Cover each bowl with plastic wrap. Chill them in the fridge for at least thirty minutes. This cooling time helps the mousse set nicely. For the full recipe, be sure to check the detailed instructions provided earlier. To make your mousse smooth, blend well. Use a strong food processor for best results. It breaks down the avocado and cocoa powder perfectly. Always use room temperature ingredients. Cold ingredients may not blend as well, leading to lumps. Taste your mousse as you go. Start with less sweetener and add more if needed. You can use maple syrup, honey, or even agave nectar. Each option gives a different flavor. So, find what you like best. Garnish your mousse for a beautiful look. A drizzle of melted chocolate makes it fancy. Fresh berries add color and flavor. Place a mint leaf on top for freshness. You can serve it in small bowls or fancy glasses. Both options make it special. {{image_4}} You can easily make this mousse vegan. Use maple syrup for sweetness. Instead of regular milk, swap in almond milk or any plant-based milk you like. For garnish, try using dairy-free dark chocolate chips. They add a nice touch without dairy. Want to spice things up? Try adding a pinch of cinnamon or espresso. These flavors blend well with chocolate. You can also swap cocoa powder for carob powder if you want a different taste. Carob adds a mild sweetness and a unique flavor. Pair this mousse with fresh fruits like bananas or berries. Strawberries and raspberries add a burst of flavor and color. You can also enjoy the mousse with a cookie or a crisp for a special treat. The crunch balances the creamy texture perfectly. To keep your chocolate avocado mousse fresh, place it in the fridge. Use airtight containers for best results. This will help prevent the mousse from absorbing any odors. If you don’t have an airtight container, cover each bowl tightly with plastic wrap. This keeps the air out and helps the mousse stay creamy. Your mousse will stay fresh for about 3 to 5 days in the refrigerator. Look for signs of spoilage, like an off smell or a change in color. If you see brown spots or it feels watery, it’s best to toss it out. Freshness matters when it comes to enjoying this rich and creamy delight. You can freeze chocolate avocado mousse for up to a month. To freeze, scoop it into a container, leaving some space at the top for expansion. When ready to eat, thaw it in the fridge overnight. Keep in mind that the texture may change after freezing, becoming a bit grainy. A quick blend can help restore some creaminess. Enjoy your luscious treat whenever you crave it! Yes, Chocolate Avocado Mousse is quite healthy. Avocados are rich in good fats, vitamins, and minerals. They contain monounsaturated fats, which help heart health. They also provide potassium, which helps to balance fluids in the body. Plus, avocados are high in fiber, aiding digestion and keeping you full longer. This mousse packs a tasty punch without all the guilt! You can definitely make this mousse ahead of time. In fact, it tastes better after chilling for a while. Prepare it a day or two in advance. Once made, store it in an airtight container in the fridge. Just remember to cover it well to keep it fresh. When you’re ready to serve, just add your favorite toppings. If you want alternatives to maple syrup, you have options. Honey works well if you’re not vegan. Agave syrup is a good vegan choice. You can also use coconut sugar or date syrup. Each sweetener will give a slightly different taste, so feel free to experiment. For the full recipe, refer to detailed instruction steps. In this blog post, I covered how to make a delicious chocolate avocado mousse. You learned about the key ingredients, step-by-step instructions, and tips for achieving the perfect texture. I also shared storage advice and answered common questions about this tasty treat. This mousse is not only simple to make but also healthy. Experiment with flavors and garnishes to make it your own. Enjoy this guilt-free dessert that impresses everyone!

Chocolate Avocado Mousse Rich and Creamy Delight

If you’re craving a dessert that’s both rich and healthy, look no further than chocolate avocado mousse. This creamy delight

- 1 medium zucchini, sliced into thick rounds - 1 yellow bell pepper, cut into 1-inch pieces - 1 red onion, cut into wedges - 1 cup cherry tomatoes, halved - 1 small eggplant, cubed - 1 cup button mushrooms, rinsed - Extra-virgin olive oil - Balsamic vinegar - Garlic powder - Smoked paprika - Salt and freshly cracked pepper For grilled vegetable skewers, the main ingredients are colorful and fresh. Each vegetable brings its unique taste and texture. Zucchini and eggplant are tender, while bell pepper and onion add crunch. Cherry tomatoes burst with flavor when grilled. To enhance these veggies, I love to use extra-virgin olive oil, balsamic vinegar, and spices. - Recommended herbs: thyme, rosemary, and oregano - Alternative marinade options: lemon juice, soy sauce, or yogurt Using the right seasonings makes a big difference. I often use garlic powder and smoked paprika for a smoky kick. You can also try fresh herbs like thyme or rosemary for a bright touch. If you want a different taste, consider lemon juice or soy sauce as marinades. They add zest and depth. - Fresh basil leaves - Other herb options: parsley or cilantro Garnishing adds the final touch to your skewers. I like using fresh basil leaves for their aroma and color. You can also use parsley or cilantro for a different look. Just sprinkle them over the skewers after grilling to impress your guests. For the full recipe, check out the details above! First, let’s get our veggies ready. For this recipe, you will slice and dice various vegetables. Start with the zucchini. Cut it into thick rounds. Then, chop the yellow bell pepper into 1-inch pieces. Next, cut the red onion into wedges. Halve the cherry tomatoes for easier handling. Cube the eggplant into 1-inch pieces. Finally, rinse and trim the button mushrooms. Once all your veggies are ready, we need to marinate them. In a large bowl, mix the vegetables. In another bowl, whisk together extra-virgin olive oil, balsamic vinegar, garlic powder, smoked paprika, salt, and pepper. Drizzle this mixture over your veggies. Toss them well to coat every piece. Let them marinate for at least 15 minutes. This step makes the flavors pop. You can find the full recipe for complete details. Now, let’s talk about the skewers. If you use wooden skewers, soak them in water for at least 20-30 minutes. This step is crucial. Soaking prevents the skewers from burning on the grill. If you don’t have wooden skewers, you can use metal ones. Metal skewers don’t need soaking and are reusable. Next, we prepare the grill. Preheat it to medium-high heat, around 400°F (200°C). You can also use a grill pan on the stovetop if that’s easier. Once hot, place your vegetable skewers on the grill. Cook them for about 8-10 minutes. Turn them occasionally. This helps achieve a nice char while keeping the veggies tender. Enjoy the aroma as they cook! - Overcrowding skewers: When you pack too many veggies, they don't cook well. Leave space between them. This helps heat flow and makes all sides get that nice char. - Incorrect cooking time: Each vegetable cooks at a different speed. Check them often. Aim for tender veggies with a bit of a bite, not mush. - Rotating skewers during grilling: Turn the skewers every few minutes. This ensures even cooking on all sides. It helps avoid burning any one part and gives you a great char. - Optimal grill settings: Preheat your grill to medium-high heat. This is about 400°F or 200°C. A hot grill sears the veggies quickly, locking in flavors. - Flavor pairing suggestions: Try mixing sweet veggies like bell peppers with savory ones like mushrooms. This combo gives great taste and color. You can also add herbs like thyme or rosemary for more depth. - Suggestions for marinading duration: Let your veggies marinate for at least 15 minutes. If time allows, a few hours will boost flavors even more. Just don’t marinate too long; the veggies can get mushy. For the complete recipe, check the [Full Recipe]. {{image_4}} You can mix and match your veggies. Try seasonal choices like bell peppers in summer or squash in fall. - Use fresh corn on the cob for a sweet crunch. - Substitute asparagus for a new twist. - Add colorful carrots for extra flair. You can also explore unique ingredients. Try marinated artichokes or even pineapple for a sweet touch. Want to make your skewers heartier? Add some protein! - Tofu works great for a vegan option. - Chicken pieces add a nice flavor if you prefer meat. You can also sprinkle some cheese on top. Feta or mozzarella can give a creamy taste. These skewers fit many diets. For vegan or vegetarian options, just skip the meat and add more veggies or tofu. - Use plant-based cheese to keep it vegan. For gluten-free eaters, stick to fresh veggies and skip any marinades with soy sauce. You can find the full recipe for a delicious grilling experience. To keep your grilled vegetable skewers fresh, let them cool down first. Then, place them in an airtight container. This helps keep the flavors locked in. You can store them in the fridge for up to three days. Use glass or BPA-free plastic containers. They work best for storing food safely. If you want to save skewers for later, freezing is a great option. First, let the skewers cool completely. Then, wrap them tightly in foil or plastic wrap. Place them in a freezer-safe bag. They can last up to three months in the freezer. When you’re ready to eat, thaw them in the fridge overnight. Reheat them in a hot oven or on a grill. This helps retain their taste and texture. Grilled vegetable skewers can last in the fridge for about three days. If you freeze them, they last longer. You can use leftovers in many dishes. Chop them up for salads or mix them into pasta. You can even add them to sandwiches or wraps for extra flavor. They are versatile and can make any meal more exciting! For grilling, choose vegetables that hold up well to heat. My top picks are: - Zucchini - Bell peppers - Red onion - Cherry tomatoes - Eggplant - Button mushrooms These veggies have great texture and flavor when grilled. Each one brings a unique taste to your skewers. Yes, you can! Pre-marinating your vegetables makes them more flavorful. Here’s how: - Cut your veggies and place them in a bowl. - Mix olive oil, balsamic vinegar, garlic powder, and spices. - Pour the marinade over the vegetables and toss well. - Cover and refrigerate for up to 24 hours. This saves time and lets the flavors blend beautifully. Grilled vegetable skewers pair well with many dishes. I recommend serving them with: - Tzatziki or hummus for dipping - Quinoa or couscous for a hearty side - Grilled bread for a tasty addition These sides enhance the meal and create a colorful spread. To stop veggies from sticking, use these techniques: - Preheat the grill to medium-high heat. - Brush the grill grates with oil. - Soak wooden skewers in water for 20-30 minutes. These steps help you achieve those perfect grill marks without a mess. Grilled vegetable skewers are a tasty and fun way to enjoy healthy veggies. We covered the best ingredients, marinades, and grilling tips to make your skewers shine. Remember, avoid overcrowding and always soak your skewers for the best results. You can mix it up with seasonal veggies or protein options. Storage tips help you keep leftovers fresh and tasty. Enjoy your grilling journey and explore all the flavors you can create with these simple steps!

Grilled Vegetable Skewers Flavorful and Easy Recipe

Ready to elevate your summer cookouts? Grilled vegetable skewers are not only flavorful but also easy to make! In this

- 2 cups edamame in pods (fresh or frozen) - 3 tablespoons high-quality olive oil - 4 cloves garlic, finely minced - 1 teaspoon red pepper flakes - 1 tablespoon soy sauce - 1 tablespoon toasted sesame oil - 1 teaspoon freshly squeezed lime juice - Sea salt to taste - Toasted sesame seeds and chopped green onions for garnish When I make spicy garlic edamame, I love using fresh edamame. It adds a nice crunch. If you're short on time, frozen edamame works just as well. It’s easy to find in most grocery stores. The garlic is key. I always use fresh garlic, finely minced. It gives the dish a rich flavor. Red pepper flakes add the heat. You can adjust the amount based on your taste. The olive oil is my favorite part. I use high-quality oil for flavor. The soy sauce and sesame oil bring depth. A squeeze of lime juice brightens everything up. Don’t forget sea salt! It enhances the flavors. Finally, for garnish, use toasted sesame seeds and chopped green onions. They add color and a nice crunch. For the full recipe, check out Spicy Garlic Edamame Delight. Enjoy making this tasty dish! - If you use frozen edamame, cook it as the package says. Usually, this means boiling it for about 5-6 minutes until it’s tender. - If you have fresh edamame, rinse the pods well under cold water. This cleans them and makes them ready to cook. - In a large non-stick skillet, pour in the olive oil. Heat it over medium flame until it shimmers. Be careful; you don’t want it to smoke. - Next, add the minced garlic to the hot oil. Stir it for about 1-2 minutes. It should become fragrant and golden. Don’t let it brown; that can make it taste bitter. - Now, add the red pepper flakes to the skillet. Sauté for another 30 seconds to let the spice flavor the oil. - Carefully toss in the cooked edamame. Mix it gently with the garlic and oil until every pod is well-coated. - Drizzle the soy sauce and sesame oil over the edamame. Toss again to ensure every pod gets that tasty flavor. - Finally, squeeze fresh lime juice over the mix and sprinkle with sea salt. Stir gently to blend all the flavors. For the full recipe, check out the Spicy Garlic Edamame Delight. To get the best flavor from your garlic, sauté it for 1-2 minutes. You want it golden, not brown. Brown garlic can taste bitter. If you like heat, add red pepper flakes. Start with 1 teaspoon and add more if you want it spicier. Serve your spicy garlic edamame warm. Use a rustic bowl to make it look nice. Add lime wedges on the side. They give a fresh pop of flavor. For a colorful touch, sprinkle with toasted sesame seeds and chopped green onions. Edamame is packed with protein and fiber. It helps keep you full. A serving has about 17 grams of protein. It also has antioxidants that can help lower the risk of disease. Adding edamame to your diet can boost your health. {{image_4}} You can switch up the oils in this dish. Try using coconut aminos instead of soy sauce. This swap adds a sweet touch while keeping it gluten-free. You can also play with oils like sesame oil for a deeper flavor. Herbs and spices can also enhance your edamame. Consider adding fresh basil or cilantro for a fresh kick. A dash of smoked paprika or cumin can bring a unique twist too. You have options when cooking edamame. Grilling gives a smoky flavor. Just toss the pods on the grill until they get nice char marks. Sautéing is quicker and keeps the edamame tender. Oven-roasting is another great method. Toss the pods in oil and spices, then bake until crispy. This technique adds a crunchy texture that is hard to resist. Spicy garlic edamame works well as a side dish. It pairs nicely with grilled chicken or tofu. You can also serve it as an appetizer at parties. Mixing edamame into salads or grain bowls can add protein and flavor. Consider a quinoa bowl with edamame, veggies, and a light dressing. This makes a healthy and filling meal. For the full recipe, refer to the Spicy Garlic Edamame Delight section. After making spicy garlic edamame, let it cool to room temp. Place it in an airtight container. This keeps it fresh. Store it in the fridge for up to three days. When you're ready to eat, reheat it gently in a skillet. This helps maintain its flavor and texture. To freeze your spicy garlic edamame, cool it completely. Spread it in a single layer on a baking sheet. Freeze for one to two hours. Once frozen, transfer it to a freezer-safe bag. Remove as much air as you can. This way, it lasts for up to three months. When you want to enjoy it again, take out the desired amount. Thaw it overnight in the fridge. For a quick option, you can also microwave it directly. Reheat on low until warm. This keeps the flavors intact. For the best taste, add a splash of lime juice before serving. You can find the full recipe for spicy garlic edamame earlier in this article. Enjoy! Cooking edamame is quick and easy. For frozen edamame, it usually takes about 5-6 minutes to boil. Just follow the package instructions. Fresh edamame needs a quick rinse and can be boiled for about 3-5 minutes. You want them tender but not mushy. Yes, you can easily change the spice level! If you like it mild, use less red pepper flakes. For more heat, add more flakes or even some hot sauce. You can also try fresh chopped chili peppers for an extra kick. Spicy garlic edamame pairs well with many dishes. Consider serving it with rice or noodles. It also complements grilled meats or fish nicely. You can even have it as a starter with drinks. For a full meal, add a fresh salad or some stir-fried veggies. Try the full recipe for a delightful experience! In summary, this blog post detailed how to create spicy garlic edamame. You learned about the main and additional ingredients, step-by-step cooking instructions, and helpful tips. We also explored variations and storage methods to enjoy your dish later. Edamame is nutritious and versatile, making it a great addition to your meals. Whether as a snack or side, you can make it your own. Enjoy your cooking adventure with spicy garlic edamame!

Spicy Garlic Edamame Irresistible Flavor Boost

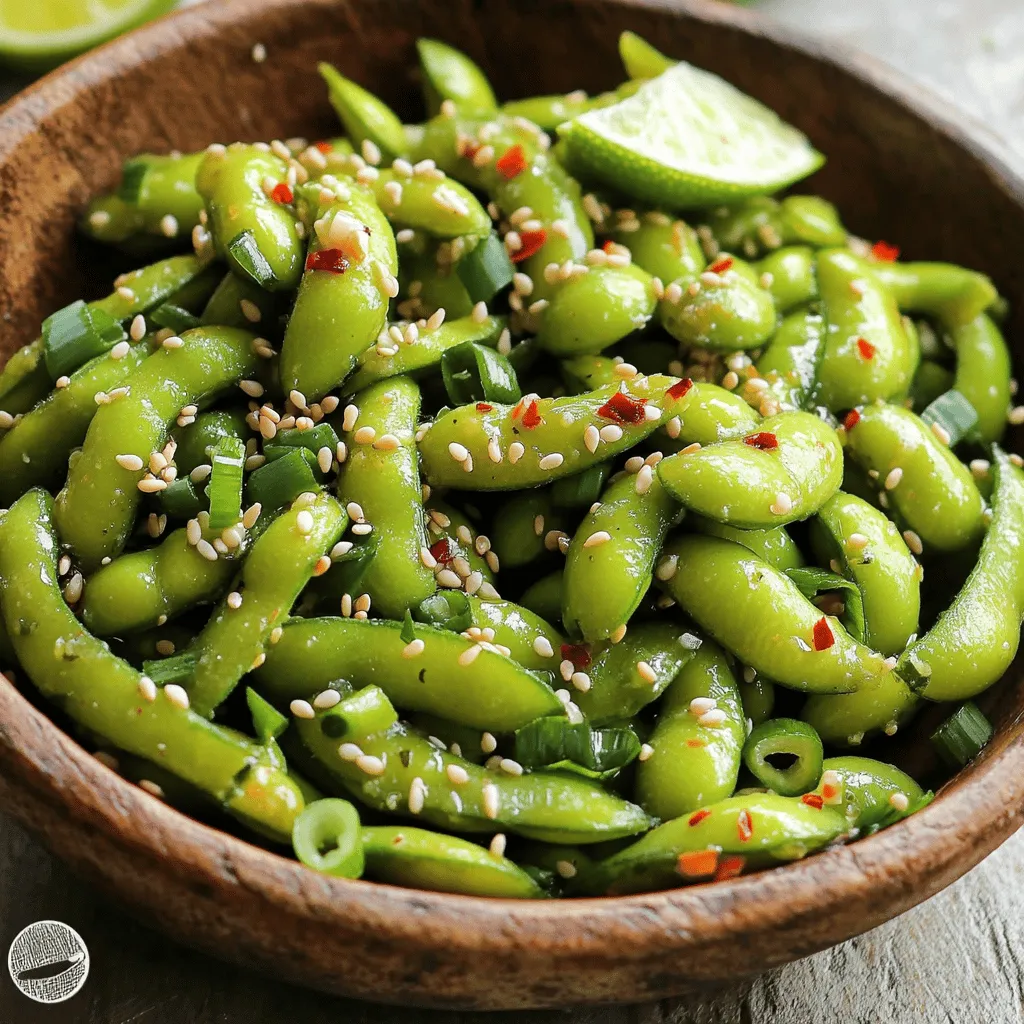
Looking for a tasty snack that’s quick to make and packed with flavor? Try Spicy Garlic Edamame! This simple dish

To make Nutella stuffed pancakes, you need these main ingredients: - 1 cup all-purpose flour - 2 tablespoons granulated sugar - 1 tablespoon baking powder - 1/2 teaspoon salt - 1 cup milk (or your favorite plant-based alternative) - 1 large egg - 2 tablespoons melted butter (or coconut oil for a vegan option) - 1 teaspoon pure vanilla extract - 1/2 cup Nutella - Butter or oil for greasing the skillet These ingredients create a soft, fluffy pancake that hides a rich Nutella surprise. You can make your pancakes even better with these optional toppings: - Sliced bananas - Fresh strawberries - A dollop of whipped cream - A dusting of powdered sugar These toppings add color and flavor, making your breakfast more fun and delicious. Want to make a healthier version? Here are some smart swaps: - Use whole wheat flour instead of all-purpose flour. - Replace granulated sugar with honey or maple syrup. - Try almond milk or oat milk for a plant-based choice. - Use applesauce instead of melted butter for less fat. These substitutions keep the taste while adding more nutrition. You can enjoy your Nutella stuffed pancakes guilt-free! To start, gather your ingredients. You need flour, sugar, baking powder, salt, milk, an egg, melted butter, and vanilla. Combine the dry ingredients in a large bowl. Use a whisk to mix them well. Make sure there are no lumps. Next, in another bowl, whisk together the milk, egg, melted butter, and vanilla. Pour this wet mixture into the dry ingredients. Stir gently until just combined. Remember, a few lumps are okay. Overmixing can make your pancakes tough. Now it's time to heat the skillet. Place a non-stick skillet over medium heat. Lightly grease it with butter or oil to stop the pancakes from sticking. Pour about 1/4 cup of batter onto the skillet. Cook until bubbles form on the surface. This should take around 2-3 minutes. Watch carefully; you don't want to burn them! When you see bubbles, it's time for the Nutella. Use a spoon to add 1 tablespoon of Nutella to the center of the pancake. Quickly pour another 1/4 cup of batter over the Nutella. This will cover it completely. Carefully flip the pancake with a spatula. Cook for another 2-3 minutes until both sides are golden brown. Once done, remove the pancake from the skillet. Keep it warm on a plate. Repeat with the remaining batter and Nutella. Serve these delicious pancakes warm. Enjoy them with sliced bananas, fresh strawberries, or whipped cream. For the full recipe, check out the details above. To get fluffy pancakes, mix the batter gently. You want some lumps for soft texture. Overmixing makes them tough, so mix just until combined. Let the batter rest for a few minutes. This helps the gluten relax, making your pancakes light and airy. Flipping pancakes can be tricky. Use a wide spatula to get under the pancake. Wait until bubbles form on the surface before flipping. This shows they are ready. With a swift motion, flip the pancake. If it sticks, gently wiggle the spatula to loosen it. Serve your Nutella stuffed pancakes warm. Stack them high for a fun look. Top with sliced bananas or fresh strawberries for color. A dollop of whipped cream adds creaminess. Finish with a dusting of powdered sugar for sweetness. For extra flair, drizzle chocolate sauce on top. This makes your breakfast a true treat! For the complete recipe, check the Full Recipe. {{image_4}} You can change up the filling to suit your taste. Here are some fun ideas: - Peanut Butter: Swap Nutella for creamy peanut butter. - Fruit Preserves: Use raspberry or strawberry jam for a fruity twist. - Chocolate Chips: Add semi-sweet or dark chocolate chips for extra rich flavor. - Cream Cheese: Mix cream cheese with a little sugar for a tangy filling. These options let you explore different flavors and find your favorite. If you need vegan or gluten-free pancakes, I have great tips. - Vegan Pancakes: Use almond milk instead of regular milk. Replace the egg with a flax egg or applesauce. Use coconut oil instead of butter. - Gluten-Free Flour: Replace all-purpose flour with a gluten-free blend. This works best for pancakes, keeping them fluffy and delicious. These options let everyone enjoy Nutella stuffed pancakes, no matter their diet. Want to add more flavor to your pancakes? Here are some ideas: - Cinnamon: Add a teaspoon of cinnamon to the batter for warmth. - Cocoa Powder: Mix in a little cocoa powder for double chocolate pancakes. - Zest: Add lemon or orange zest for a fresh, bright flavor. These creative additions make your pancakes unique and even more delicious. For the full recipe, check out the details above! After enjoying your Nutella stuffed pancakes, you may have some leftovers. To keep them fresh, stack the cooled pancakes in an airtight container. You can place parchment paper between the pancakes to prevent sticking. Store them in the fridge for up to three days. This method helps maintain their soft texture and rich flavor. When it’s time to enjoy your leftover pancakes, reheating them is simple. You can use a microwave or skillet: - Microwave: Place pancakes on a microwave-safe plate. Heat for about 20-30 seconds. Check if they are warm enough. - Skillet: Heat a non-stick skillet on low. Add a tiny bit of butter or oil. Warm the pancakes for 1-2 minutes each side. This method helps bring back their fluffy texture. If you want to save pancakes for later, freezing is a great option. First, let the pancakes cool completely. Then, stack them with parchment paper in between. Place the stack in a freezer-safe bag or container. You can freeze them for up to two months. When you're ready to eat, just reheat them as noted above. This way, you can enjoy your Nutella stuffed pancakes any time! Yes, you can make Nutella stuffed pancakes ahead. Cook and cool them first. Then stack them with parchment paper in between to prevent sticking. Store in an airtight container in the fridge for up to three days. To reheat, pop them in the microwave for about 30 seconds or warm them briefly on a skillet. This way, you can enjoy a tasty breakfast even on busy mornings. If you want a change from Nutella, many options exist. You can use peanut butter, almond butter, or cookie butter. Each will give a unique flavor. Try using different spreads like chocolate hazelnut spread or fruit jams for a tasty twist. These alternatives can make the pancakes fun and new each time you make them. To check if the pancakes are fully cooked, look for bubbles. When you see bubbles forming on the surface, it is time to flip them. After flipping, cook until both sides turn golden brown. A quick poke in the center helps too. If it springs back, they are done. If not, give them a little more time on the skillet. Enjoy your fluffy, delicious Nutella stuffed pancakes! Nutella stuffed pancakes are delicious and fun to make. We covered the main ingredients, tasty toppings, and even healthy swaps. I shared step-by-step instructions to help you cook perfect pancakes with Nutella filling. Tips helped you get the right texture and flip without mess. Explore variations like different fillings and dietary options to enjoy. Lastly, learn how to store and reheat your pancakes. Now you have all you need to make these yummy treats anytime!

Nutella Stuffed Pancakes Irresistible Breakfast Treat

Are you ready to elevate your breakfast game? Nutella stuffed pancakes are a sweet, gooey delight that will make your

- 1 cup rolled oats - 1 ½ cups almond milk (or any milk of your choice) - 1 large carrot, finely grated Carrot Cake Overnight Oats start with simple, wholesome ingredients. Rolled oats form the base, providing fiber and energy. Almond milk adds creaminess without dairy. Grated carrot gives a sweet, fresh flavor that mimics classic carrot cake. - 1 tablespoon maple syrup (or honey) - 1 teaspoon vanilla extract - ½ teaspoon ground cinnamon - ¼ teaspoon nutmeg These flavor enhancers take your oats to the next level. Maple syrup or honey adds natural sweetness. Vanilla extract gives warmth. Ground cinnamon and nutmeg bring that cozy, spiced flavor we love in carrot cake. - 2 tablespoons chopped walnuts - 2 tablespoons raisins - Greek yogurt (for topping) - Extra walnuts and carrot shavings (for garnish) Add-ins are where you can get creative! Chopped walnuts give a nice crunch. Raisins add chewy sweetness. Greek yogurt on top makes it creamy and rich. Garnish with walnuts and carrot shavings for a pretty finish. For the full recipe, check out the section above. - Combine oats, carrot, almond milk, and sweeteners in a bowl. - Stir thoroughly until well blended. To start, grab a medium-sized mixing bowl. You will mix your oats, carrot, almond milk, maple syrup, vanilla, cinnamon, nutmeg, and a pinch of salt. Make sure to use a spoon to mix everything well. This step is important because it ensures all flavors blend nicely. - Gently fold in walnuts and raisins. If you want a crunch, now’s the time to add walnuts and raisins. Gently fold them into the mixture. This extra step adds both texture and flavor. The nuts and raisins give your oats a lovely bite. - Distribute the mixture into jars and refrigerate overnight for optimal flavor. Next, it's time to portion out the mixture. Use two jars or airtight containers. Make sure to divide the mixture evenly. After sealing the jars, place them in the fridge. Let them chill overnight, or for at least four hours. This soaking time helps the oats absorb the almond milk. In the morning, your oats will be soft and ready to eat. You can also add a splash of milk if you want a thinner texture. Enjoy them directly from the jar or serve in a bowl topped with Greek yogurt. You can find the full recipe with more details included. To get the best texture for your carrot cake overnight oats, adjust the milk. If you like a thicker mix, use less milk. For a creamier feel, add more milk. It all comes down to your taste! Want to amp up the flavor? Toast the walnuts before you mix them in. This simple step brings out their rich taste. It can really make a difference in your dish. If you have any oats left, store them in the fridge. Use an airtight container to keep them fresh. They can last up to three days. Before you eat them, stir them well. If they seem too thick, add a splash of milk. Enjoy your tasty creation later! {{image_4}} You can make yummy carrot cake overnight oats nut-free by skipping walnuts. Use seeds like sunflower seeds or pumpkin seeds instead for crunch. For a dairy-free option, stick with almond milk or coconut milk. These choices keep the dish light and tasty. Feel free to play with flavors! Adding ginger gives a nice kick. You can also mix in coconut flakes for a tropical twist. Try different spices like cardamom or allspice to change things up. Each addition can create a new taste adventure. Serving this dish can be fun! Layer the oats in a glass for a parfait look. Add Greek yogurt, fruit, and nuts in between layers. You can also turn it into a smoothie bowl. Blend the oats with extra milk and top with slices of fruit and more nuts. This makes breakfast creative and colorful. You can store your carrot cake overnight oats in the fridge for up to five days. This makes it easy to enjoy a quick breakfast all week. Just make sure to keep them in airtight containers to maintain freshness. If you notice any change in smell or texture, it’s best to discard them. If you want to save some for later, you can freeze the mixture. Portion the oats into freezer-safe containers or bags. Be sure to leave some space at the top for expansion. They can be frozen for up to three months. This is a great way to have a tasty breakfast ready in advance. To enjoy your frozen oats, move them to the fridge 24 hours before eating. This will help them thaw slowly. You can also microwave them for a quick option. Just add a splash of milk to refresh their texture. Stir well before eating to mix everything together nicely. Enjoy every bite of your delicious carrot cake overnight oats! Yes, you can use quick oats. Quick oats cook faster, so they absorb liquid differently. They may make your oats creamier, but they can also become mushy. Rolled oats give a better texture, staying chewy and hearty. For the best carrot cake overnight oats, I recommend sticking with rolled oats. You can keep carrot cake overnight oats in the fridge for up to five days. They taste best when fresh, but they will still be good after a few days. Just make sure to store them in airtight containers. This keeps them from drying out. Absolutely! Meal prepping is a great idea. You can make several jars at once. Just follow the full recipe and divide it into multiple jars. This way, you have healthy breakfasts ready to go each day. Just grab a jar from the fridge and enjoy! In this post, we explored how to make tasty carrot cake overnight oats. We covered the main ingredients, flavor enhancers, and optional add-ins. You learned easy steps to prepare, store, and even customize your oats. Remember, adjusting the milk gives you the thickness you like. With so many variations, you can make this recipe your own. Now, enjoy the nutritious and sweet start to your day with these simple, delicious oats!

Carrot Cake Overnight Oats Tasty and Nutritious Dish

Start your day with Carrot Cake Overnight Oats—a tasty and nutritious twist on breakfast! In just minutes, you can whip

- 2 slices of whole grain bread - 1 ripe avocado - 1 cup radishes, thinly sliced - 1 tablespoon freshly squeezed lemon juice - 1 teaspoon extra virgin olive oil - Sea salt and freshly ground black pepper to taste - 1 tablespoon sesame seeds (optional) - A handful of fresh microgreens or peppery arugula for garnish Each ingredient in this recipe offers great health benefits: - Whole grain bread: Provides fiber and essential nutrients. It helps with digestion and keeps you full. - Avocado: Packed with healthy fats, it supports heart health and gives energy. It also has vitamins like E and K. - Radishes: Low in calories, radishes add crunch and are rich in vitamin C. They boost your immune system and improve digestion. - Lemon juice: Adds flavor and vitamin C. It helps keep the avocado from browning and aids in iron absorption. - Olive oil: A source of healthy fats, it can lower bad cholesterol and is good for your skin. - Sesame seeds: They add crunch and provide calcium, magnesium, and protein. - Microgreens/arugula: These greens are high in vitamins and antioxidants, enhancing your meal's nutrition and flavor. If you need different options, consider these: - Bread: Try sourdough or gluten-free bread for a different flavor or texture. - Avocado: For those allergic to avocados, use hummus for a creamy spread. - Radishes: Use thinly sliced cucumbers or bell peppers for a crunchy topping. - Lemon juice: Lime juice works well if you want a different citrus flavor. - Olive oil: Avocado oil is a good substitute, offering similar health benefits. - Sesame seeds: Chia seeds or sunflower seeds can add a different crunch. - Microgreens/arugula: Spinach or baby kale can also provide a fresh touch. This recipe for avocado toast with radish is simple yet packed with flavor and nutrition. You can find the [Full Recipe] for a step-by-step guide to make this dish. First, gather all your ingredients for the avocado toast. You will need two slices of whole grain bread, one ripe avocado, and one cup of radishes. Don't forget lemon juice, olive oil, sea salt, and pepper. The radishes add a nice crunch. Next, cut your ripe avocado in half. Remove the pit with a spoon or knife. Scoop the green flesh into a bowl. This is where the magic begins! For perfect toast, you can use a toaster or a grill. Place the slices of bread in the toaster. Toast them until they are golden brown. This usually takes about 3-5 minutes. If you use a grill, keep an eye on them. You want them crispy but not burnt. The toasted bread gives a great base for your toppings. It adds flavor and texture to every bite. To mash the avocado, grab a fork. Press down on the avocado and mix until it is creamy. You can leave some chunks if you like texture. Stir in one tablespoon of lemon juice and one teaspoon of olive oil. The lemon juice keeps the avocado green and adds flavor. Now, season your avocado mixture with sea salt and black pepper to taste. Mix again. The result should be a smooth and creamy spread. This will be the heart of your avocado toast. For the full recipe, check the section above. Enjoy your cooking! Add a burst of flavor to your avocado toast by using simple seasonings. I suggest using sea salt and freshly ground black pepper. These enhance the taste of the avocado. Consider adding a pinch of chili flakes for heat. A sprinkle of garlic powder brings depth. You can also try fresh herbs like cilantro or basil for a fresh twist. Presentation matters when serving avocado toast. Start with a slice of toasted bread as your canvas. Spread the avocado mixture evenly across the top. Neatly arrange the radish slices in a circle for a pretty look. Finish with sesame seeds on top for crunch. A few microgreens or arugula adds color and freshness. This makes your dish not just tasty, but beautiful too. Avoid these common mistakes for the best avocado toast. First, don’t use unripe avocados. They won’t mash well and taste bitter. Next, be careful not to over-toast the bread. It should be crisp but not burnt. Also, mix the avocado too much can lead to a mushy texture. Lastly, serve your toast right away. It tastes best fresh and warm. {{image_4}} You can switch up your avocado toast in fun ways. Try adding sliced tomatoes for a fresh taste. A sprinkle of feta cheese adds a salty kick. If you like spice, add crushed red pepper flakes. For a sweet touch, drizzle honey or balsamic glaze on top. Each option creates a new flavor experience. Bread choice can change your toast game. Whole grain bread is classic and healthy. Try sourdough for a tangy taste. Rye bread brings a hearty flavor. You can even use gluten-free bread if you prefer. Each type of bread adds its own unique texture and taste to your dish. Toppings can make your avocado toast shine. Consider adding a poached egg for protein. Sliced cucumbers add crunch and freshness. For a nutty flavor, sprinkle some sunflower seeds on top. Fresh herbs like cilantro or basil can brighten the dish. Each topping brings a new element to your meal. For the full recipe, check the section above. To store your leftover avocado mixture, place it in an airtight container. Add a layer of plastic wrap directly on the surface to limit air contact. This helps keep the color bright and fresh. Store it in the fridge for up to two days. The lemon juice also helps prevent browning. If you notice any browning, you can simply scrape off the top layer to reveal the green avocado beneath. Once you toast your bread, serve it right away. If you have leftover toast, wrap it in a clean kitchen towel. This keeps it from getting too soggy. However, toasted bread is best eaten fresh. If you must store it, place it in a paper bag at room temperature. Avoid plastic bags, as they trap moisture and make the toast limp. If you want to reheat your toast, use a toaster or an oven. Set the toaster to a medium setting and toast until crisp again. If you use an oven, preheat it to 350°F (175°C). Place the toast directly on the rack for about 5 minutes. This method restores the crunch without making it chewy. Always add fresh avocado mixture after reheating to keep it creamy and flavorful. Remember to enjoy your tasty avocado toast while it's fresh for the best flavor! You can find the full recipe to make this delicious dish. To make the best avocado toast, start with fresh ingredients. Use ripe avocados for a creamy texture. Toast whole grain bread until golden brown for a crunchy base. Mash the avocado with a fork, mixing in lemon juice and olive oil. This adds flavor and keeps the avocado bright. Spread the mixture on the warm toast. Top with thinly sliced radishes for crunch and color. Finish with salt, pepper, and optional sesame seeds. Enjoy while fresh! You can prepare some parts ahead. Toast the bread in advance and store it in a sealed bag. However, avoid spreading the avocado mixture on the bread until you're ready to eat. The avocado can turn brown when exposed to air. You can prepare the avocado mix and keep it in an airtight container with lemon juice on top. Use it within one day for the best taste. Many healthy toppings can enhance your avocado toast. Consider adding: - Sliced tomatoes - Cucumber ribbons - Microgreens or arugula - Crumbled feta cheese - Poached eggs - Chopped nuts for crunch These toppings add flavor, texture, and extra nutrients to your meal. For the full recipe, refer to the section above. Follow the steps to create a tasty and healthy avocado toast topped with radish. It’s simple and perfect for a quick meal! Avocado toast with radish is tasty and healthy. We covered the best ingredients, their benefits, and simple steps to make it. Also, we explored fun variations and tips for perfecting your toast. Remember, you can always mix ingredients to fit your taste. Use fresh toppings and unique breads to make your dish stand out. Enjoy your delicious avocado toast, and have fun creating your own versions!

Savory Avocado Toast with Radish for Healthy Eating

Are you ready to elevate your lunch game? My savory avocado toast with radish is not just a treat for

- 4 ripe peaches, sliced into wedges - 8 ounces fresh mozzarella cheese, sliced - 1 cup fresh basil leaves, gently torn - 2 tablespoons balsamic glaze - 1 tablespoon extra virgin olive oil - Salt and freshly ground black pepper, to taste This recipe serves four people. Each serving offers a burst of flavor and nutrition. Peaches are rich in vitamins A and C. They help with skin health and boost your immune system. Fresh mozzarella provides protein and calcium, which are great for your bones. Basil adds antioxidants and has anti-inflammatory properties. The olive oil in the dressing gives you healthy fats. This salad is light yet satisfying, making it perfect for warm days or special gatherings. For the full experience, enjoy this Peach Caprese salad right after you make it. Start by washing the peaches under running water. Make sure to scrub gently to remove any dirt. Next, slice each peach in half and remove the pit. Cut each half into wedges or rounds. For a beautiful look, arrange these cheerful slices in a circle on a large, flat serving plate. This makes the salad eye-catching and fun. Now, take the fresh mozzarella cheese. Slice it to match the thickness of the peach wedges. This helps with balance in both look and texture. Layer the mozzarella slices over the peach wedges. Alternate the slices to create a pretty pattern. This showcases both ingredients and makes your salad more appealing. Next, gently tuck the fresh basil leaves between the peach and mozzarella layers. This adds a pop of color and a lovely aroma. Now, drizzle balsamic glaze over the salad. Make sure each peach and cheese slice gets some of that sweet-tangy richness. Then, add a drizzle of extra virgin olive oil for more depth. Lastly, season with a sprinkle of salt and freshly ground black pepper. This will enhance all the flavors beautifully. Enjoy making this fresh Peach Caprese Salad Delight! For the full recipe, check out the details above. For a stunning Peach Caprese Salad, choose a large white platter. This makes the bright colors pop. Arrange peach slices in a circle for beauty. Layer mozzarella slices in between. This creates a lovely pattern. Tuck fresh basil leaves around the edges. This adds a nice touch of green. For a special finish, drizzle balsamic glaze over the top. You can swirl it for style. To balance flavors, focus on sweet and tangy. The peaches bring sweetness, while balsamic adds tang. Adjust the seasoning carefully. Start with a light sprinkle of salt and pepper. Taste and add more if needed. This ensures the flavors shine without overpowering each other. Serve the salad right after making it. This keeps the flavors fresh and bright. If you need to wait, chill it for ten minutes. This allows the flavors to blend. Pair this salad with grilled chicken or fish. A glass of chilled white wine complements it well. Enjoy how the flavors work together in every bite. {{image_4}} Depending on the season, you can change the fruit in your Peach Caprese salad. Try using ripe strawberries or figs when peaches are out of season. Both fruits pair well with cheese and basil. Strawberries add a sweet touch, while figs provide a unique, rich flavor. You can also switch up the cheese. Burrata is a great choice. It’s creamy and adds a different texture. It melts slightly and enhances the overall taste. Using a mix of cheeses can create a more complex flavor palette. If you want a dairy-free option, use a plant-based cheese. Look for brands that mimic mozzarella. They offer a similar texture and flavor. You can also try a nut-based cheese for a richer taste. For those on low-carb or keto diets, skip the cheese or use a smaller amount. You can add avocado slices for creaminess. This keeps the salad satisfying while lowering carbs. You can also add more greens to bulk up the salad without the carbs. To give your salad a crunch, add nuts or seeds. Sliced almonds or toasted pine nuts work well. They add texture and a nutty flavor. You can also make the salad heartier with grains. Quinoa or farro can be added to the mix. They provide protein and fiber, making the salad more filling. This is a great twist for a light lunch or picnic. For the full recipe, check out the Peach Caprese Salad Delight. To keep your Peach Caprese Salad fresh, store it in the fridge. Place it in an airtight container. This helps prevent the salad from wilting or absorbing other odors. The salad can last in the fridge for about 1 to 2 days. However, the peaches may soften over time. Enjoy it sooner for the best taste and texture. You can prepare the ingredients ahead of time. Wash and slice the peaches, cheese, and basil. Store each item in separate containers. This way, the flavors stay fresh. Assemble the salad just before you serve it. This keeps the basil vibrant and the cheese creamy. You can freeze some components, but not the whole salad. Slice peaches can be frozen for smoothies. Mozzarella does not freeze well. If you freeze it, the texture may change. To thaw, leave the peaches in the fridge overnight. Use them in a smoothie or as a topping. For best results, enjoy your Peach Caprese Salad fresh! Caprese salad comes from Italy. It is named after the island of Capri. This salad showcases fresh tomatoes, mozzarella, and basil. It celebrates the colors of the Italian flag: red, white, and green. The salad is simple yet full of flavor. It has roots in Italian culture and cuisine. Over time, variations emerged, adding different ingredients like peaches for a sweet twist. Yes, you can prepare Peach Caprese Salad ahead of time. Slice the peaches and mozzarella and store them separately. Keep them in airtight containers in the fridge. You can combine them just before serving. This helps to keep the salad fresh and crunchy. Drizzle the balsamic glaze and olive oil right before serving. This keeps the flavors vibrant. You can add many toppings to Peach Caprese Salad. Here are some ideas: - Crumbled feta cheese for a salty taste. - Toasted pine nuts for crunch. - Arugula for a peppery kick. - Slices of prosciutto for a savory touch. These toppings enhance flavors and make the salad more exciting. Yes, you can make Peach Caprese Salad vegan. Simply replace the mozzarella cheese with a plant-based alternative. Look for cashew cheese or tofu for a creamy texture. This way, you can enjoy the salad without dairy. It still tastes great and keeps that fresh flavor. In this blog post, we explored the vibrant Peach Caprese Salad. We covered fresh ingredients, essential condiments, and serving sizes. I shared step-by-step instructions for preparing and assembling the salad. You also learned tips for presentation and flavor, plus variations to suit your taste. This tasty dish is easy to prepare and full of nutrition. Enjoy experimenting with ingredients to make it your own!

Peach Caprese Salad Fresh and Flavorful Delight

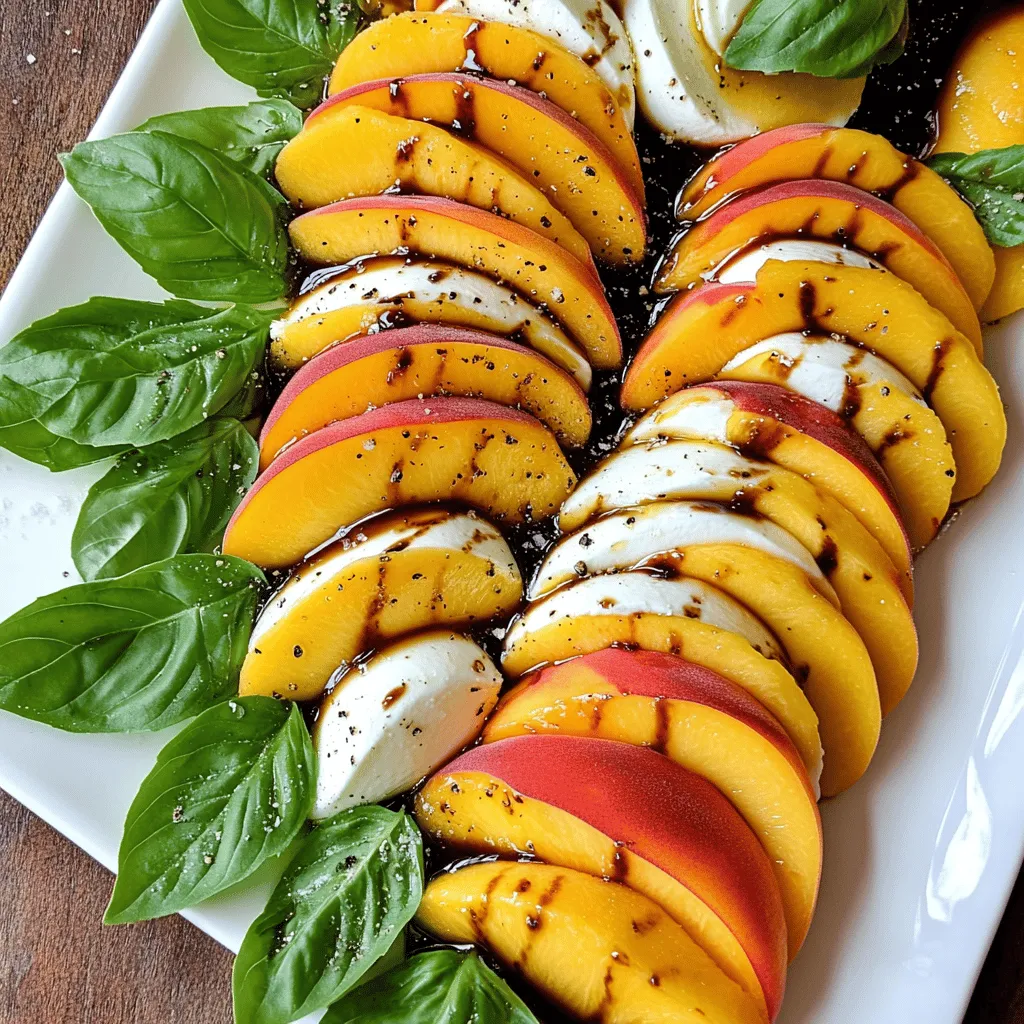
Welcome to a taste sensation that brightens any meal: Peach Caprese Salad! Perfectly ripe peaches, smooth mozzarella, and fresh basil

- 3 medium-sized apples (recommendations: honeycrisp or Fuji) - 2 tablespoons granulated sugar - 1 teaspoon ground cinnamon - 1 tablespoon fresh lemon juice - Optional: pinch of sea salt The star of this recipe is the apple. I love using honeycrisp or Fuji apples. They are sweet and crisp, which makes them perfect for chips. You can use any apple you like, but these two really shine. Next, we need sugar and cinnamon. The sugar adds sweetness, while cinnamon gives that warm, cozy flavor. A pinch of sea salt is optional, but it really brings out the sweetness. Don’t forget the lemon juice! It helps keep the apples fresh and bright. It also adds a nice tang to the chips. - Mandoline slicer or sharp knife - Baking sheet - Parchment paper For this recipe, using a mandoline slicer is best. It helps you cut the apples evenly. If you don’t have one, a sharp knife works too, but be careful! You’ll also need a baking sheet. Lining it with parchment paper keeps the chips from sticking. This makes clean-up easy and allows the chips to cook evenly. Using these tools will help you make the best cinnamon sugar apple chips. Check the Full Recipe for more details! - Preheat your oven to 225°F (110°C). - Rinse the apples under cool water and dry them well. To slice apples evenly, use a mandoline slicer or a sharp knife. Aim for thin rounds, about 1/8-inch thick. Consistent thickness is vital. It helps the chips bake evenly, ensuring some do not burn while others remain soft. In a medium bowl, mix 2 tablespoons of granulated sugar with 1 teaspoon of ground cinnamon. If you want, add a pinch of sea salt to enhance the sweet flavor. Once mixed, add the apple slices. Drizzle 1 tablespoon of fresh lemon juice over the slices. Toss gently to coat each piece in the cinnamon sugar mixture. Layer the apple slices in a single row on a baking sheet lined with parchment paper. Avoid overlapping the slices. This step ensures even cooking and maximum crispiness. Place the baking sheet in the preheated oven. Bake for about 1.5 to 2 hours. Halfway through, flip the apple slices for even crispness. Keep an eye on them; they should turn golden and crunchy. Once baked, allow the chips to cool completely on the sheet. They will get crisper as they cool. For the full recipe, check the detailed instructions above. To make the best cinnamon sugar apple chips, the way you lay them out matters. Don't overlap the apple slices on the baking sheet. If they touch, they won’t get crispy. Each slice needs space to bake evenly. Different apple types bake differently. For instance, honeycrisp apples tend to get crispier than softer varieties. Adjust your baking time if you choose apples like Gala or McIntosh. They may need less time in the oven. Adding a pinch of sea salt can make a big difference. It enhances the sweetness of the cinnamon and sugar. This small touch takes your snack to the next level. Feel free to play with other spices too. Nutmeg brings a warm note that pairs nicely with apples. Allspice can add a hint of complexity. Experiment with these spices to find your perfect blend. For the full recipe, check out the section above. {{image_4}} You can change the taste of your apple chips by using different sweeteners. Instead of granulated sugar, try brown sugar. It gives a richer flavor. Maple syrup is another great option. It adds a nice, warm sweetness. Just remember, if you use a liquid sweetener like maple syrup, reduce the amount of lemon juice slightly. The type of apple you use makes a big difference. Honeycrisp apples are sweet and crunchy. They hold their shape well when baked. Fuji apples are also sweet and juicy. They work perfectly for this recipe. If you want a tart flavor, use Granny Smith apples. Their sharp taste adds a nice contrast to the sweet cinnamon. Don't be afraid to get creative with spices! While cinnamon is classic, you can try pumpkin spice for a fall twist. It pairs well with apple. A dash of vanilla can also enhance the flavor. Just sprinkle a little into your cinnamon sugar mix. Your apple chips will taste even better with these simple changes. To keep your apple chips fresh, use airtight containers. They help seal in the crunch. You can also use resealable bags if you don't have containers. Make sure to squeeze out as much air as possible before sealing. This step helps keep moisture out. For maximum crispiness, store your chips in a cool, dry place. Avoid leaving them in warm spots, like near the stove. Check the container regularly. If you feel any moisture, dry the chips in the oven for a bit. This will help them stay crunchy. Cinnamon sugar apple chips can last up to two weeks when stored correctly. After that, they may lose their crispness. If your chips become stale, don’t worry. You can crush them and use them as a topping for yogurt or oatmeal. They also make a fun addition to granola. Just mix the crushed chips with your favorite grains and nuts for a tasty snack. Cinnamon sugar apple chips can last about one to two weeks. Store them in an airtight container at room temperature. This keeps them fresh and crunchy. If you notice any moisture, they may become soft. Always check for any signs of spoilage before enjoying them. Yes, you can use a dehydrator to make apple chips. Here’s how: 1. Slice the apples as you would for the oven method. 2. Mix the cinnamon and sugar. 3. Toss the apple slices in lemon juice, then coat them with the cinnamon sugar mix. 4. Lay the slices on the dehydrator trays in a single layer. 5. Set the dehydrator to 135°F (57°C) and dry for about 6 to 8 hours. 6. Check for crispness and store them once cooled. Yes, you can find pre-packaged cinnamon sugar apple chips. Brands like Bare Snacks and Apple Crisps offer tasty options. Look for them in grocery stores or online. Check the ingredient list for added sugars or preservatives. Absolutely! You can make chips from other fruits like pears and bananas. For pears, follow the same method as apples. For bananas, slice them thin and coat with lemon juice to prevent browning. Feel free to experiment with flavors and spices to find your favorite! Making cinnamon sugar apple chips is fun and easy. You learned about key ingredients like apples, sugar, and cinnamon, plus the right equipment. I shared step-by-step instructions from prep to baking, ensuring you get crispy chips every time. You also discovered tips to customize your flavors and storage methods for freshness. Try these apple chips as a snack or topping. Each bite offers a mix of sweet and spicy goodness. Enjoy experimenting with different ingredients to create your perfect chip!

Cinnamon Sugar Apple Chips Crunchy and Sweet Snack

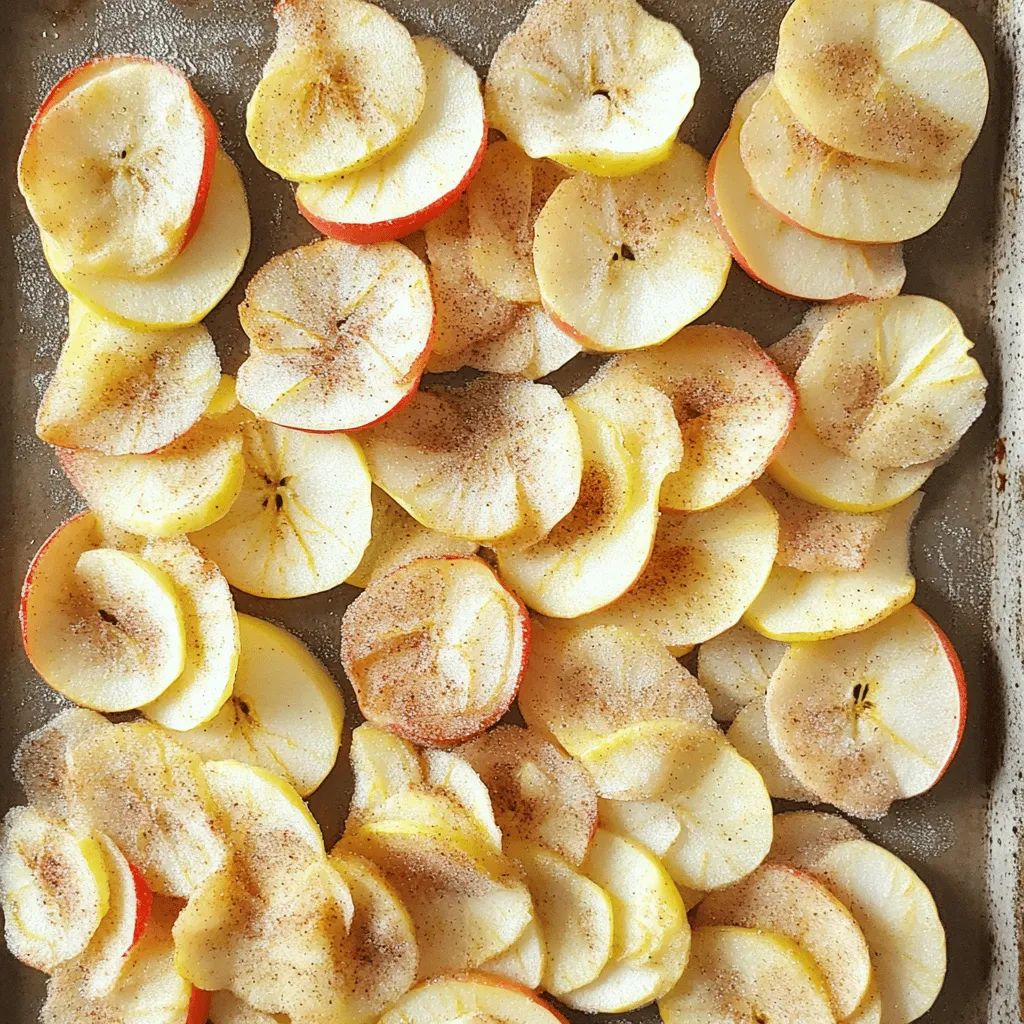
Looking for a sweet and crunchy snack that’s easy to make? You’re in the right place! These Cinnamon Sugar Apple

To make Teriyaki Beef Udon, you need a few key items. Here's what you'll need: - 8 oz udon noodles - 1 lb beef sirloin, thinly sliced - 2 tablespoons vegetable oil - 1 bell pepper, sliced (your choice of color) - 1 cup broccoli florets - 3 green onions, sliced - 3 cloves garlic, minced - 1 tablespoon fresh ginger, minced - 1/4 cup soy sauce - 2 tablespoons honey - 1 tablespoon sesame oil - 1 tablespoon rice vinegar - Sesame seeds, for garnish You can easily change this dish to fit your taste. Here are some fun options: - Carrots, julienned for extra crunch - Snap peas for a fresh pop - Mushrooms for an earthy flavor - Chili flakes for heat - Cilantro for a fresh herb taste If you can't find an ingredient, don't worry! Here are some swaps you can try: - Chicken or tofu instead of beef for different protein - Tamari for gluten-free soy sauce - Maple syrup instead of honey for a vegan option - Any other vegetable you enjoy, like zucchini or bok choy Feel free to mix and match! Your Teriyaki Beef Udon can be as unique as you want. Enjoy creating your perfect bowl! {{ingredient_image_2}} To cook the udon noodles, start by boiling a large pot of salted water. Once it bubbles, add the 8 oz of udon noodles. Follow the package instructions for cooking time, usually around 5-8 minutes. When they are tender, drain the noodles and set them aside. Next, we need to make the teriyaki sauce. Grab a small bowl and add 1/4 cup of soy sauce, 2 tablespoons of honey, 1 tablespoon of sesame oil, and 1 tablespoon of rice vinegar. Whisk these ingredients together until they blend well. This sauce will add great flavor to our dish. Now, let’s cook the beef. Heat 1 tablespoon of vegetable oil in a large skillet or wok over medium-high heat. Once the oil is hot, add your 1 lb of thinly sliced beef sirloin. Stir-fry for 3-4 minutes until the beef is browned and fully cooked. When done, transfer the beef to a plate and set it aside. In the same skillet, add another tablespoon of vegetable oil. Toss in 3 cloves of minced garlic and 1 tablespoon of minced ginger. Stir for about 30 seconds until fragrant. Add the sliced bell pepper and 1 cup of broccoli florets next. Stir-fry these veggies for 4-5 minutes until they are bright and tender-crisp. Now it's time to mix everything. Return the cooked beef to the skillet with the veggies. Add the drained udon noodles, then pour the teriyaki sauce over everything. Toss gently until all ingredients are well-coated. Stir-fry for another 2-3 minutes to heat through and blend the flavors. To serve, remove the skillet from heat. Plate the noodles in deep bowls to hold the sauce. Top with sliced green onions and sprinkle sesame seeds over the dish. For extra flair, add a lime wedge on the side. Enjoy your Sizzling Teriyaki Beef Udon! To cook udon noodles just right, start with a big pot of salted water. Bring it to a boil. Add the noodles and follow the package guide. Usually, it takes about 8-10 minutes. Stir them gently to prevent sticking. When they are soft, drain them and rinse with cold water. This stops the cooking and keeps them firm. When stir-frying beef, use a hot skillet or wok. Heat one tablespoon of vegetable oil until it shimmers. Add thinly sliced beef sirloin in a single layer. Don't overcrowd the pan; this helps the beef brown well. Stir-fry for 3-4 minutes until the beef is brown and cooked through. Remove the beef and set it aside to keep it juicy. To enhance your teriyaki sauce, use fresh ingredients. Blend soy sauce, honey, sesame oil, and rice vinegar in a bowl. For added depth, try adding minced garlic or ginger. You can also mix in a splash of orange juice for a fruity twist. Taste the sauce and adjust sweetness or saltiness to your liking. Presentation makes your dish pop! Serve the udon in deep bowls to catch the sauce. Top with sliced green onions and sesame seeds for crunch. You can also add a lime wedge for a fresh burst of flavor. Consider some chili flakes for heat if you like spice. This will make your dish look and taste amazing! Pro Tips Use Fresh Ingredients: Fresh vegetables and high-quality beef will enhance the flavor and texture of your dish. Try to use seasonal produce for the best taste. Don’t Overcook the Noodles: Udon noodles can become mushy if overcooked. Follow package instructions closely and rinse them with cold water after cooking to stop the cooking process. Customize the Vegetables: Feel free to add or substitute other vegetables like snap peas, carrots, or mushrooms based on your preference or what you have on hand. Make It Spicy: If you enjoy heat, add some sriracha or chili flakes to the teriyaki sauce for an extra kick that complements the sweetness beautifully. {{image_4}} You can make a tasty vegetarian version of teriyaki udon. Replace the beef with tofu or tempeh. Both options soak up the teriyaki sauce well. Use extra firm tofu for a nice texture. You can also add more vegetables like mushrooms, carrots, or snap peas. These add flavor and color to the dish. If you want to switch things up, consider using chicken or shrimp instead of beef. Chicken thighs work well with the teriyaki sauce. Shrimp cooks quickly and adds a sweet taste. Just be careful not to overcook them. You can also try pork for a rich flavor. Each protein brings its unique twist to this dish. Using seasonal vegetables makes your dish fresh and vibrant. In spring, asparagus and snap peas shine. In summer, zucchini and bell peppers add a great crunch. In fall, think about adding butternut squash or mushrooms. Winter brings hearty greens like kale or bok choy. Adjust your veggies based on what’s in season for a colorful and tasty meal. Store leftover teriyaki beef udon in an airtight container. Let it cool to room temperature first. Place it in the fridge for up to three days. Make sure to keep the sauce with the noodles for extra flavor. When reheating, use the microwave or a skillet. If using a microwave, add a splash of water. Cover the dish, then heat for about two minutes. If using a skillet, add a little oil and stir-fry over medium heat. This helps keep the noodles from sticking. You can freeze teriyaki beef udon. Use a freezer-safe container for storage. It can last for up to three months. To thaw, place it in the fridge overnight. Reheat it following the tips above for the best taste. Teriyaki Beef Udon is a tasty noodle dish. It features thick udon noodles, tender beef, and vibrant veggies. The beef gets marinated in a sweet and salty teriyaki sauce, which adds depth. You can enjoy it as a main course or a hearty meal. Yes, you can prepare Teriyaki Beef Udon ahead of time. Cook the noodles and stir-fry the beef and veggies. Store them separately in airtight containers. When ready to eat, reheat and combine them with the sauce. This saves time on busy nights. Pair Teriyaki Beef Udon with simple sides for a complete meal. Here are some great options: - Edamame - Miso soup - Seaweed salad - Pickled vegetables These sides add variety and enhance the meal’s flavor. No, Teriyaki Beef Udon is not spicy. The dish has a sweet and savory taste. If you like heat, you can add chili flakes or sriracha. This way, you can customize your meal to fit your taste. You can find Teriyaki Beef Udon in many Asian restaurants. Look for places that serve Japanese or fusion cuisine. Some sushi bars also offer this dish. Check their menus or ask the staff for recommendations. In this blog post, we explored how to make delicious Teriyaki Beef Udon. We covered the key ingredients, step-by-step instructions, and helpful tips for cooking. You learned about variations and how to store your leftovers. Teriyaki Beef Udon is easy to customize and a treat to eat. Remember, practice makes perfect. Enjoy your cooking journey and impress your friends with your new skills!

Teriyaki Beef Udon Flavorful and Easy Meal Guide

Are you ready to whip up a delightful meal? Teriyaki Beef Udon is easy to make, bursting with flavor, and

Older posts
Newer posts
← Previous Page1 … Page64 Page65 Page66 … Page88 Next →

dsad

© 2025 spoonfulsavory • Built with GeneratePress

Our Policies

  • Copyright Policy
  • Cookie Policy
  • GDPR Policy
  • Privacy Policy
  • Disclaimer
  • Terms Of Use

More Information

  • Home
  • About
  • Contact
  • Appetizers
  • Dessert
  • Dinner
  • Drinks
©2025, spoonfulsavory About Back To Top