Skip to content
DisclaimerTerms Of UseGDPR PolicyCookie Policy

spoonfulsavory

  • Home
  • Drinks
  • Appetizers
  • Dinner
  • Dessert
  • About
  • Contact
  • Privacy Policy
DisclaimerTerms Of UseGDPR PolicyCookie Policy

Sarah

To make savory cheesy zucchini fritters, start with these simple ingredients: - 2 medium zucchinis, grated - 1 teaspoon salt - 1 cup all-purpose flour - 1/2 cup grated Parmesan cheese - 1/2 cup shredded mozzarella cheese - 2 large eggs - 3 green onions, finely chopped - 1 garlic clove, minced - 1 teaspoon dried oregano - 1/2 teaspoon black pepper - Olive oil, for frying Each ingredient plays a key role. The zucchinis bring moisture and flavor, while the cheeses add richness. The eggs act like glue to hold everything together. Green onions and garlic add a nice kick. Oregano and black pepper give a depth of flavor. This mix of ingredients creates a tasty and fun meal. Using fresh zucchinis makes a big difference in taste. I like to select firm zucchinis with bright skin. The salt helps draw out water, ensuring the fritters are not soggy. You can find all these ingredients at your local grocery store. If you want the full recipe, check the section titled Full Recipe. You'll find detailed steps to bring these fritters to life. Start by grating the zucchinis. Use the coarse side of a grater for best results. Place the grated zucchini in a large bowl and sprinkle it with one teaspoon of salt. Let it sit for about ten minutes. This step helps draw out excess moisture. After ten minutes, take a clean dish towel and place the zucchini inside. Twist the towel and squeeze to remove moisture. Return the dried zucchini to the mixing bowl. In the bowl with the drained zucchini, add the following ingredients: - 1 cup all-purpose flour - 1/2 cup grated Parmesan cheese - 1/2 cup shredded mozzarella cheese - 2 large eggs - 3 green onions, finely chopped - 1 garlic clove, minced - 1 teaspoon dried oregano - 1/2 teaspoon black pepper Stir the mixture thoroughly with a spoon. Make sure all ingredients are well combined. You want a cohesive mixture to form. Heat olive oil in a non-stick skillet. Use about 1/4 inch of oil for frying. Set the heat to medium. Once the oil is hot, scoop about two tablespoons of the zucchini mixture. Gently place it in the skillet and flatten it a bit. Cook the fritters for three to four minutes on each side. Look for a golden brown color and a crispy exterior. Keep an eye on the heat to avoid burning. When done, transfer the fritters to a plate lined with paper towels. This helps absorb any extra oil. Repeat with the rest of the mixture, adding more oil as needed. For the full recipe, check the main article. - Optimal frying temperature and oil depth: Heat olive oil in your skillet to medium. Aim for about 1/4 inch of oil. This depth ensures even cooking. If the oil is too hot, the fritters burn. If it's too low, they absorb oil and become soggy. - Checking for doneness: Cook fritters for 3-4 minutes on each side. Look for a golden brown color. You can also gently press the fritters with a spatula. If they are firm, they are ready to flip. - Suggested seasonings or spices: Feel free to get creative! Add a pinch of cayenne for heat or some fresh herbs for zest. Chopped basil or parsley works great. A touch of smoked paprika adds depth too. - Suggested dips or sauces: Try serving the fritters with sour cream or yogurt. A zesty lemon aioli also pairs well. For a kick, mix in some hot sauce or sriracha. These dips enhance the flavors nicely. For the full recipe, check out the detailed instructions above. Enjoy your cooking! {{image_4}} If you want to make these fritters suit your needs, you can easily swap some ingredients. Here are two popular options: - Gluten-free flour alternatives: You can use almond flour or coconut flour. Both work well and keep the fritters tasty. Just remember, these flours absorb more moisture. You might need to add extra eggs to get the right texture. - Dairy-free cheese options: If you are avoiding dairy, try using vegan cheese. Look for brands that melt well, like a cashew or coconut-based cheese. They can add a creamy taste without the dairy. Serving these fritters can be fun, and you have many choices. Here are some ideas: - Serving suggestions: These fritters shine as appetizers or side dishes. Serve them at parties with a spicy dip or alone with a fresh salad. They also pair well with grilled meats for a full meal. - Incorporating vegetables or herbs: Feel free to add more veggies. Carrots, bell peppers, or spinach can boost nutrition and flavor. Fresh herbs like basil or cilantro can add a nice touch. Just chop them finely and mix them into the batter before frying. For the full recipe, check out the details above! To store leftovers in the fridge, let the fritters cool first. Place them in an airtight container. You can stack them in layers, but put parchment paper between each layer. This keeps them from sticking together. Store them in the fridge for up to three days. I recommend using glass or plastic containers with a tight seal. These containers help maintain freshness and keep odors out. You can also use a zip-top bag if you have no other option. Just make sure to squeeze out as much air as possible before sealing. You can freeze fritters for later use. First, let them cool completely. Then, place them in a single layer on a baking sheet. Freeze them for about an hour until solid. After that, transfer them to a freezer-safe bag or container. This method prevents them from sticking together. When you're ready to eat, thaw the fritters in the fridge overnight. For reheating, use an oven or skillet. Reheat them at 350°F until warm, about 10 minutes in the oven. You can also use a skillet over medium heat for about 5 minutes on each side. This will keep them crispy and delicious. Enjoy your savory cheesy zucchini fritters fresh! To make your fritters crispier, focus on moisture control. After grating the zucchini, always salt it and let it sit. This helps draw out water. Squeeze out as much moisture as you can. You can also use less batter when forming the fritters. Thin fritters fry better and get crispier. A hot skillet with enough oil is key. Frying in small batches keeps the temperature up. Yes, you can bake these fritters for a healthier option! Preheat your oven to 400°F (200°C). Line a baking sheet with parchment paper. Form the fritters and place them on the sheet. Brush a little olive oil on top for crispness. Bake for about 20 minutes, flipping halfway through. They might not be as crispy as fried ones, but they will still taste great! These fritters pair well with many sides! For a fresh touch, serve them with a simple salad. You can also add a dollop of sour cream or Greek yogurt. A sprinkle of fresh herbs adds flavor. Lemon wedges give a zesty contrast. For dipping, try a garlic aioli or a spicy salsa. Each option enhances the taste and makes for a great meal! These savory cheesy zucchini fritters are easy and fun to make. We covered the key ingredients, preparation steps, and cooking tips. Use the storage advice to keep leftovers fresh. Experiment with variations and substitutes to fit your taste. If you want extra crunch, try different spices or dips. Enjoy these fritters as a snack or side dish. You'll love how tasty and simple they are! Make this recipe part of your cooking routine. Happy cooking!

Savory Cheesy Zucchini Fritters Easy and Delicious Meal

Looking for a quick and tasty meal? Savory Cheesy Zucchini Fritters are your answer! They’re easy to make and full

- Spinach - Artichoke Hearts - Cream Cheese - Sour Cream - Mayonnaise - Shredded Mozzarella Cheese - Grated Parmesan Cheese - Garlic - Onion Powder - Red Pepper Flakes - Salt and Pepper To make the best creamy spinach and artichoke dip, gather these ingredients. Each one plays a key role in the taste and texture. Spinach adds color and nutrients. Artichoke hearts bring a unique, mild flavor. Cream cheese gives that rich creaminess. Sour cream adds a nice tang, while mayonnaise helps with the dip’s smoothness. Shredded mozzarella cheese melts beautifully, and grated Parmesan cheese adds depth. Garlic and onion powder boost the flavor, while red pepper flakes add a tiny kick. Don't forget to season with salt and pepper! - Cream Cheese Alternatives: You can use Greek yogurt for a tangy twist. - Low-Fat Options: Neufchâtel cheese is a great option for less fat. - Dairy-Free Variations: Try cashew cream or silken tofu for a vegan dip. If you want to swap some ingredients, there are great options. For cream cheese, Greek yogurt works well and adds a nice tang. Neufchâtel cheese lowers the fat while still keeping creaminess. For a dairy-free dip, cashew cream or silken tofu can make a tasty base. - Choosing Fresh Ingredients: Always pick fresh spinach and artichokes for the best flavor. - Importance of Room Temperature Ingredients: Let cream cheese sit out to blend better. - Impact of Cheese Quality: Use good quality cheese for a rich flavor. Using fresh ingredients makes a big difference in taste. Choose bright green spinach and tender artichoke hearts. When using cream cheese, it’s best to let it warm up a bit. This helps it blend smoothly with the other ingredients. Good quality cheese also elevates the dip. It can really enhance the overall flavor of your dish. For the full recipe, check out the instructions above! - Thawing Spinach and Squeezing Moisture Start with one cup of frozen spinach. Thaw it completely before use. I prefer to microwave it for a few minutes. Once thawed, use a clean kitchen towel to squeeze out excess water. This step is key to avoid a watery dip. - Chopping Artichoke Hearts Take one cup of canned artichoke hearts. Drain them well to remove any liquid. Use a knife to roughly chop them. This helps them blend nicely into the dip. - Blending Cream Cheese, Sour Cream, and Mayonnaise In a large bowl, combine one cup of cream cheese, half a cup of sour cream, and half a cup of mayonnaise. Use a hand mixer or spatula to mix until the blend is smooth. Ensure no lumps remain for a creamy texture. - Incorporating Spinach and Artichokes Gently add the thawed spinach and chopped artichokes into the creamy mixture. Fold in one cup of shredded mozzarella cheese and half a cup of grated Parmesan cheese. Stir until all ingredients are well mixed. - Preheating the Oven Preheat your oven to 350°F (175°C). This ensures even baking for the perfect dip. - Baking Time and Indicators Spread the mixture evenly in a greased baking dish. Bake for 25-30 minutes. Look for a bubbly top that turns lightly golden brown. This shows that the dip is hot throughout and ready to enjoy. For the full recipe, visit the original guide! - Achieving a Creamy Consistency: Start with room temperature cream cheese. This helps mix it well. Blend the cream cheese, sour cream, and mayonnaise until smooth. No lumps should remain. This will make your dip rich and creamy. - Avoiding Overmixing: Once you add the spinach and artichokes, mix gently. Overmixing can make the dip too runny. You want to keep some texture. Fold in the ingredients carefully to maintain their shape. - Best Dipping Options: Serve this dip warm with tortilla chips. Crispy veggies like carrots and celery also work well. Toasted baguette slices add a nice crunch. Choose what you enjoy most! - Pairing with Beverages: A chilled white wine pairs nicely with the dip. If you prefer something non-alcoholic, try sparkling water with lemon. Both options enhance the flavors and keep things refreshing. - Adding Herbs for Flavor: Fresh herbs, like parsley or basil, can brighten the dip. Chop them finely and mix them in. This adds a fresh taste that balances the creaminess. - Spice Level Adjustments: If you like heat, add more red pepper flakes. You can also mix in jalapeños for a spicy kick. Taste as you go, so you get the right level for your palate. For the full recipe, check out the detailed steps to make the Creamy Spinach and Artichoke Delight. {{image_4}} You can spice up this dip in many ways. Adding jalapeños gives a great kick. Just chop them finely and mix them in. The heat balances well with the creamy texture. For a Mediterranean twist, try adding feta cheese. Its salty flavor pairs nicely with the dip. You can crumble feta on top or mix it in while blending. It makes the dip taste fresh and bright. Want a crunchy top? Use breadcrumbs! Sprinkle them on before baking. This adds a nice contrast to the creamy dip. You can mix in some herbs with the breadcrumbs for extra taste. You can also play with different cheeses. Swap mozzarella for gouda or cheddar. Each cheese brings a unique flavor. Experimenting with cheese makes it fun and exciting! Serving style can change the whole vibe. Individual dishes are great for parties. Use small ramekins for each guest. This makes it easy to serve and adds a personal touch. If you're in the mood for something different, try a cold version. Mix the dip and chill it in the fridge. Serve it with fresh veggies or pita chips for a cool treat. You can enjoy the same great flavors in a new way. - Store your dip in an air-tight container. - This prevents the dip from drying out. - It will stay fresh for about 3 to 5 days. - To freeze, place the dip in a freezer-safe container. - Leave space at the top for expansion. - Thaw it overnight in the fridge before use. - For best texture, avoid freezing more than a month. - You can reheat in the oven or microwave. - For the oven, heat at 350°F (175°C) for about 15 minutes. - In the microwave, use short bursts to warm it slowly. - Stir often to keep the creaminess intact. - Add a splash of cream if it seems too thick. It takes about 15 minutes to prep and 25-30 minutes to cook. You can enjoy this dip in 45 minutes total. This quick time makes it perfect for parties or a cozy night in. Yes, you can prep this dip a day ahead. Just mix all the ingredients and store it in the fridge. When you’re ready, bake it for warm, creamy goodness. Making it ahead saves time and stress. You can serve it with various tasty options. Crispy tortilla chips are a classic choice. Toasted baguette slices add a nice crunch. Fresh veggie sticks like carrots and celery also pair well. Each option adds fun to your dip experience. For the full recipe, check out the details above. Creamy Spinach and Artichoke Dip is a tasty treat. We covered its key ingredients, like fresh spinach and artichokes, along with substitutes. Choosing good quality ingredients, especially cheeses, helps boost flavor. After listing preparation steps, baking tips, and storage advice, you can enjoy this dip for any event. Whether served warm or cold, it’s sure to impress! Experiment with flavors and share it with friends for a delightful experience. Your perfect dip awaits!

Creamy Spinach and Artichoke Dip Flavorful Delight

Are you ready to wow your taste buds? This Creamy Spinach and Artichoke Dip is a flavorful delight that everyone

- 3 overripe bananas, thoroughly mashed - 1/3 cup unsalted butter, melted - 1 teaspoon baking soda - A pinch of sea salt - 3/4 cup granulated sugar - 1 large egg, lightly beaten - 1 teaspoon pure vanilla extract - 1 1/2 cups all-purpose flour - 1/2 cup Nutella - Optional: 1/2 cup chocolate chips or chopped hazelnuts for added texture When I make Nutella-stuffed banana bread, I always choose overripe bananas. They are sweeter and softer. This helps create a moist bread. I melt unsalted butter for richness. Baking soda gives the bread lift. The pinch of sea salt balances the sweetness. Granulated sugar adds the right amount of sweetness. I beat one large egg to help bind the mixture. Pure vanilla extract adds a warm flavor. All-purpose flour brings everything together into a lovely batter. Nutella is the star of this recipe. It creates a rich, gooey center. You can add chocolate chips or chopped hazelnuts for extra crunch. These ingredients come together to create a treat that's hard to resist. When you mix them just right, you get a delightful blend of flavors and textures. If you want to dive deeper into the steps, check out the full recipe for Nutella-stuffed banana bread. Set your oven to 350°F (175°C) and prepare the loaf pan. Grease it well with butter or cooking spray. This step helps the bread slide out easily. In a mixing bowl, mash the bananas until smooth. Then, add the melted butter. Use a fork or a whisk to mix them together. This creates a creamy base for your bread. Now, sprinkle in the baking soda and a pinch of salt. Mix these dry ingredients well. Then, add the granulated sugar, beaten egg, and vanilla extract. Stir everything until it blends nicely. Slowly add the all-purpose flour. Use a spatula or wooden spoon to fold it in. Mix until you see no dry flour. It’s okay to leave a few lumps; this keeps the bread tender. Pour half of the batter into the prepared pan. Spread it evenly across the bottom. Next, scoop dollops of Nutella on top. Use a knife to swirl it gently through the batter. Be careful not to mix it too much! Pour the rest of the batter over the Nutella layer. Smooth it out gently. Bake the bread for 60-70 minutes. Check if it’s done by inserting a toothpick. If it comes out clean, your bread is ready! Let it cool in the pan for about 10 minutes. After that, move it to a wire rack to cool completely. Now, you’re ready to slice and enjoy this tasty treat! For the full recipe, please refer to the detailed instructions above. To make tender banana bread, start with overripe bananas. They bring natural sweetness and moisture. Mash them well for a smooth mix. Use melted butter instead of oil for richness. Be gentle when mixing in the flour. Over-mixing can lead to a tough loaf. Leave some lumps in the batter to keep it soft and fluffy. You can boost the flavor of your banana bread. Try adding a pinch of cinnamon or nutmeg for warmth. Vanilla extract is a must, but you might add almond extract for a twist. If you want some crunch, toss in chopped walnuts or pecans. For extra sweetness, fold in chocolate chips or hazelnuts. When it comes to serving, slice the banana bread while it is warm. This makes it inviting and easy to enjoy. You can drizzle more Nutella on top for extra indulgence. Pair it with a scoop of vanilla ice cream for a delightful treat. A dollop of whipped cream or fresh berries can also brighten the plate. {{image_4}} If you want to skip Nutella, you have options. Try using almond butter or sunflower seed spread. These choices give a creamy texture and rich taste. You can also use a mix of peanut butter and chocolate spread. Each option adds its own twist to the flavor. For a lighter version, reduce sugar to half a cup. You can use honey or maple syrup instead. Incorporate whole wheat flour to add fiber. If you want to skip some fat, use applesauce in place of half the butter. These swaps keep your banana bread tasty and a bit healthier. Want to spice things up? Add a teaspoon of cinnamon for warmth. A tablespoon of cocoa powder can give it a chocolatey depth. You can even mix in some vanilla or almond extract for a fragrant touch. These small changes can make your banana bread extra special. For the full recipe, check out the detailed instructions above. To keep your banana bread fresh, wrap it well. Use plastic wrap or foil. Store it at room temperature for up to three days. If you live in a humid area, put it in an airtight container. This helps it stay moist and tasty. Always check for any mold before eating. If you see any, it's time to toss it. Freezing is a great way to save extra slices. First, let the banana bread cool completely. Wrap each slice in plastic wrap. Then, place them in a freezer-safe bag. Remove as much air as possible before sealing. You can freeze it for up to three months. When you're ready, just thaw it in the fridge overnight. To reheat banana bread, slice off a piece. Place it on a microwave-safe plate. Heat it for 10-15 seconds. If you want it warm but not dry, check often. You can also toast it in a toaster oven for a nice crisp. Enjoy it warm for the best taste! Yes, you can use frozen bananas. Just thaw them first. Drain any extra liquid. Then, mash them well. Frozen bananas work great in banana bread. They add sweetness and moisture. Look for a golden-brown top. A toothpick inserted in the center should come out clean. If it has wet batter, bake a bit longer. The bread should spring back when pressed lightly. You can toast it for breakfast. Spread some butter or more Nutella on top. You can also make banana bread French toast. Just dip slices in egg mixture and cook on a skillet. You can find the full recipe for Nutella-Stuffed Banana Bread by following the link provided. This recipe guides you step-by-step for a delightful treat. This blog post details how to make Nutella-Stuffed Banana Bread using simple ingredients and easy steps. You learned how to prepare, bake, and store this tasty treat. Don’t forget to try the tips for perfect texture and flavor. You can even explore variations to suit your taste. Enjoy your baking, and have fun experimenting with this recipe! You’ll create a delightful loaf that everyone will love. Happy baking!

Nutella-Stuffed Banana Bread Irresistible Delight

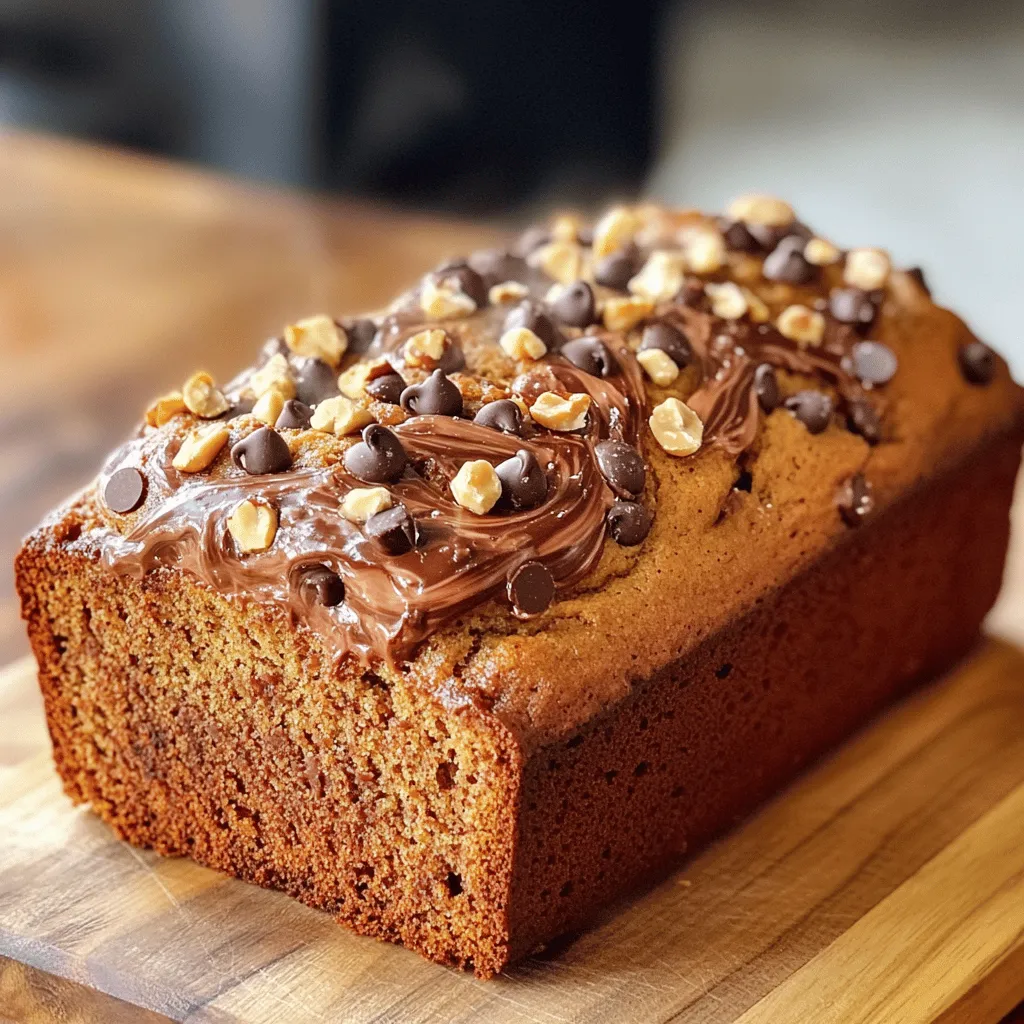
Are you ready to take your banana bread to a new level? With Nutella-Stuffed Banana Bread, every bite offers a

Here’s everything you need for the zesty lemon garlic shrimp: - 1 pound large shrimp, peeled and deveined - 4 cloves garlic, finely minced - 2 tablespoons extra-virgin olive oil - 1 tablespoon unsalted butter - Zest of 1 large lemon - Fresh juice of 2 lemons - 1 teaspoon red pepper flakes - 1 teaspoon dried oregano - Sea salt and freshly ground black pepper, to taste - Fresh parsley, finely chopped, for garnish To create this dish, gather these tools: - Large skillet - Cooking utensils (spatula or wooden spoon) - Measuring spoons For a pop of color and flavor, consider these garnishes: - Lemon wedges - Extra parsley This list helps you get ready for a quick cooking adventure. You can find the full recipe above to guide you through each step! First, get your ingredients ready. Peel the shrimp and set them aside. Mince the garlic into small pieces. This adds great flavor. In a large skillet, heat the olive oil and butter over medium heat. Wait until the butter melts and gets frothy. Now, add the minced garlic to the skillet. Sauté it for about 1 minute. You want the garlic to smell good and turn slightly golden. Be careful not to let it burn! Next, add the red pepper flakes and dried oregano to the skillet. Stir these spices for 30 seconds. This helps bring out their flavors. Once the spices are ready, place the shrimp in a single layer in the skillet. Let them cook for 2-3 minutes. They should turn pink on one side. After that, flip each shrimp over. Right away, add the lemon zest and juice. Cook for another 2-3 minutes until the shrimp are fully cooked and opaque. Now, it’s time to season. Taste the dish, then add sea salt and black pepper as needed. Gently toss the shrimp so they are coated in the zesty sauce. Finally, take the skillet off the heat. Garnish with fresh parsley before serving. This adds a nice touch and color to the dish. For the full recipe, check the complete instructions above. To get the best texture, cook shrimp for about 2-3 minutes on each side. Look for a nice pink color. Overcooking shrimp can make them tough. To avoid this, keep an eye on them. As soon as they turn pink and opaque, take them off the heat. Adjusting seasoning can elevate your dish. If you want more heat, add extra red pepper flakes. For a bolder lemon flavor, squeeze in more lemon juice. You can also add a bit more lemon zest for freshness. Play around until it tastes just right for you. Presentation makes a difference. Serve the shrimp on a large platter. Drizzle any extra sauce on top for a glossy look. Garnish with lemon wedges and fresh parsley for color. Pair your dish with a light salad or rice to make it a meal. These touches add visual appeal and flavor! For the full recipe, check out the Zesty Lemon Garlic Shrimp details above. {{image_4}} You can easily switch things up in your zesty lemon garlic shrimp. Adding other seafood makes it fun. Try scallops or calamari for a mixed bowl of ocean flavors. These additions cook fast, just like shrimp. You can also make this dish gluten-free. Use gluten-free pasta or serve it over rice. Both options taste great with the shrimp and sauce. Want some heat? Add chili peppers to give it a spicy kick. You can sprinkle them in when cooking the garlic. If you prefer a creamy sauce, mix in some heavy cream. This change adds a rich texture and keeps the lemon flavor. Both options let you enjoy the dish your way. Get inspired by the Mediterranean! Adding olives, capers, or sun-dried tomatoes can brighten the dish. These ingredients blend well with lemon and garlic. For an Italian twist, use fresh basil and serve the shrimp with pasta. This combination takes the dish to a new level. You can explore these variations to find your favorite flavor. For the full recipe, check out the details above. To keep your zesty lemon garlic shrimp fresh, store it in the fridge. Use airtight containers. This helps prevent odors and keeps it tasty. Let the shrimp cool before sealing. You can store it for up to three days. When you reheat shrimp, you want to do it gently. The best way is to use a skillet. Add a splash of water or broth to keep it moist. Heat over low heat for about five minutes. This method avoids that rubbery texture. You can also use the microwave. Place it in a bowl with a lid. Heat in short bursts, checking often. Meal prep makes busy days easier. You can cook the shrimp in advance and store it. Portion it into meal-sized containers for quick lunches. If you want to freeze it, be sure to cool it first. Use freezer-safe bags or containers. It can last for up to three months in the freezer. When you’re ready to eat, thaw it in the fridge overnight. This way, you have a quick, tasty meal ready to go! The best way to thaw frozen shrimp is to place them in the fridge overnight. If you need them faster, put shrimp in a sealed bag and soak in cold water for about 20-30 minutes. This keeps the shrimp firm and tasty. Yes, you can use frozen shrimp for zesty lemon garlic shrimp. Just make sure to thaw them first. Frozen shrimp can be just as good as fresh shrimp when cooked right. You can tell shrimp is cooked when it turns pink and opaque. Perfectly cooked shrimp curl into a C shape. If they form an O shape, they are likely overcooked. Zesty lemon garlic shrimp pairs well with many sides. You can serve it with rice, pasta, or a fresh salad. Crusty bread also helps soak up the zesty sauce. To make this dish vegan-friendly, swap shrimp with firm tofu or chickpeas. Use vegan butter and olive oil. Adjust spices to keep the flavor fresh and zesty. Check out the Full Recipe for more ideas. In this blog post, we explored how to make zesty lemon garlic shrimp. We covered the key ingredients and necessary tools, along with step-by-step cooking instructions. I shared tips for perfecting the shrimp's texture and variations to enhance the dish. Storing leftovers and meal prep ideas were also included. Overall, with these guidelines, you can create a delicious meal. Enjoy the cooking process and have fun with your flavors!

Zesty Lemon Garlic Shrimp Quick and Tasty Delight

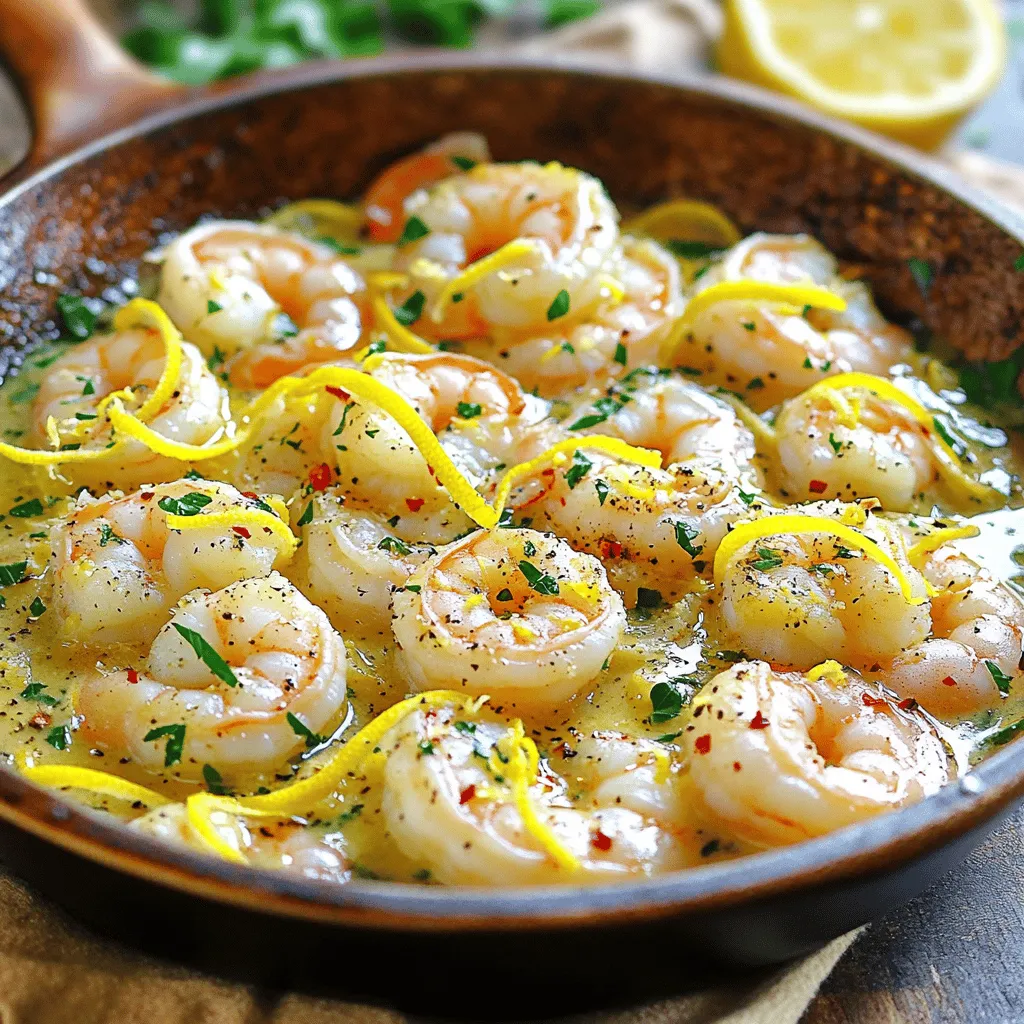
Are you ready for a burst of flavor in your weeknight meals? Zesty Lemon Garlic Shrimp is quick, tasty, and

- 2 cups all-purpose flour - 2 tablespoons granulated sugar - 1 teaspoon instant yeast - 1/2 teaspoon salt - 3/4 cup warm milk (approximately 110°F or 43°C) - 3 tablespoons unsalted butter, melted - 1/2 cup Biscoff cookie butter - 2 tablespoons brown sugar - 1 teaspoon ground cinnamon - 1/2 cup powdered sugar (for frosting) - 2 tablespoons milk (for frosting) - 1/4 teaspoon vanilla extract (for frosting) You can use alternative flours like whole wheat or gluten-free blends. For dairy-free options, try coconut oil instead of butter and almond or oat milk instead of regular milk. You can swap granulated sugar with coconut sugar or a sugar substitute to reduce calories. Using fresh yeast is key for the best rise in your rolls. Choose whole milk or buttermilk for a rich flavor. The quality of Biscoff cookie butter matters too. Look for the smooth, creamy kind that has a strong flavor. This will ensure your rolls are sweet and delightful. To start, I activate the yeast. In a large bowl, I mix warm milk, granulated sugar, and instant yeast. I let this sit for about five minutes. It should look frothy when ready. Next, I mix the dry ingredients. I whisk together all-purpose flour and salt in a separate bowl. Once mixed, I slowly add this to the yeast mixture. Finally, I pour in melted butter. I stir until a dough starts to form. Now comes the kneading. I turn the dough out onto a floured surface. I knead it for five to seven minutes until smooth and elastic. If the dough sticks, I sprinkle a little more flour. Once kneaded, I shape the dough into a ball. I place it in a greased bowl and cover it with a kitchen towel. I let it rise in a warm spot for about one hour. The dough should double in size. After the first rise, I gently punch down the dough. I transfer it to a floured surface and roll it into a rectangle, about 1/4 inch thick. Next, I spread the Biscoff filling evenly on top, leaving a small border. Then, I tightly roll the dough from one edge to the other. I pinch the seam to seal it well. I slice the log into twelve even pieces. For the second rise, I place the rolls in a greased baking dish. I keep them close together and cover them. I let them rise for another 30 to 45 minutes until puffed. Meanwhile, I preheat the oven to 350°F (175°C). Once risen, I bake the rolls for 20 to 25 minutes. They should be golden brown and fluffy. For the full recipe, check out the details above! Getting the dough right is key. You want a soft, smooth feel. Mix warm milk, sugar, and yeast first. After it foams, add flour, salt, and butter. Knead the dough for about 5 to 7 minutes. It should be elastic and not stick to your hands. - If it’s too sticky, add a little flour. - If it’s too dry, add a touch of warm water. Keep adjusting until you find the right balance. To bake your rolls evenly, set your oven to 350°F (175°C). Use an oven thermometer for accuracy. This step helps avoid undercooked centers. - Check for doneness by inserting a toothpick into the center. It should come out clean. - Look for a golden brown color on top. These signs mean your rolls are ready to enjoy. Making the frosting is simple. Mix powdered sugar, milk, and vanilla extract in a bowl. Whisk it until smooth. - If you want to add flavors, try a pinch of cinnamon or a splash of almond extract. - Drizzle the frosting over the warm rolls. This way, it melts into every roll, creating a gooey delight. For a thicker glaze, use less milk, and for a thinner glaze, add more milk. For the complete experience, check out the Full Recipe. {{image_4}} You can make Biscoff cookie butter cinnamon rolls more exciting. Try adding spices like nutmeg or cardamom for warmth. They give a nice twist to the flavor. You can also mix in chopped nuts or chocolate chips. These additions add texture and richness to each bite. Experiment and see what you enjoy the most! If you have dietary needs, you can still enjoy these rolls. For a gluten-free version, use gluten-free flour blends. Many brands work well in baking. If you want a vegan option, replace the milk with almond or oat milk. You can swap the butter with coconut oil or vegan butter. Use flax eggs or applesauce instead of regular eggs. These swaps keep the rolls soft and tasty. Make your rolls stand out with different presentations. After baking, drizzle them with a caramel or chocolate glaze instead of the usual frosting. This adds sweetness and richness. You can also top them with fresh fruits or citrus zest. Try adding sliced bananas or orange zest for a burst of flavor. The colorful toppings make the rolls look even more inviting! For the complete recipe, check the [Full Recipe]. To keep your Biscoff cookie butter cinnamon rolls fresh, store them in an airtight container. This prevents them from drying out. If you have leftovers, place the rolls in the fridge. They can last for up to five days this way. For best taste, enjoy them within the first two days. You can freeze both unbaked and baked rolls. For unbaked rolls, place them in a greased pan, cover tightly, and freeze. When ready to bake, let them thaw in the fridge overnight, then rise for about 30 minutes before baking. For baked rolls, allow them to cool completely. Wrap them well in plastic wrap and foil before freezing. Thaw overnight in the fridge before reheating. To reheat your cinnamon rolls, preheat the oven to 350°F (175°C). Place the rolls on a baking sheet and cover with foil. Heat for about 10-15 minutes. This keeps them warm and fluffy. You can also microwave individual rolls for about 20 seconds. Just be careful not to overheat them, or they will dry out. Enjoy your warm and gooey cinnamon rolls with a drizzle of frosting! To make Biscoff cookie butter cinnamon rolls, follow these steps: 1. Activate the Yeast: Mix warm milk, sugar, and yeast in a bowl. Let it sit for 5 minutes until foamy. 2. Mix Dry Ingredients: In another bowl, whisk flour and salt. Gradually add this to the yeast mix with melted butter. 3. Knead the Dough: Transfer the dough to a floured surface. Knead for 5-7 minutes until smooth. 4. First Rise: Shape the dough into a ball. Place it in a greased bowl. Cover and let it rise for about 1 hour until doubled. 5. Prepare the Filling: In a small bowl, mix Biscoff cookie butter, brown sugar, and cinnamon. 6. Roll Out the Dough: Punch down the dough and roll it out into a rectangle. 7. Spread the Filling: Evenly spread the Biscoff filling over the dough, leaving edges clear. 8. Form the Rolls: Roll the dough tightly from one long edge. Slice into 12 pieces. 9. Second Rise: Place rolls in a greased dish. Cover and let them rise for another 30-45 minutes. 10. Bake: Preheat the oven to 350°F. Bake rolls for 20-25 minutes until golden. 11. Make the Frosting: Whisk powdered sugar, milk, and vanilla. Drizzle over warm rolls. This process creates soft, sweet rolls that everyone loves. For the full recipe, see the earlier section. Yes, you can try many different fillings! Some common options include: - Nutella: A rich chocolate spread. - Fruit Preserves: Strawberry or raspberry adds a fruity twist. - Cream Cheese: Mix with sugar and vanilla for a tangy taste. - Maple Syrup: For a sweet, sticky roll. Feel free to mix and match these fillings to suit your taste. Get creative! If your dough isn’t rising, it could be due to several reasons: - Old Yeast: Check the expiration date on your yeast. If it's expired, it may not activate. - Incorrect Temperature: Warm milk should be about 110°F. If it's too hot, it can kill the yeast. - Too Much Salt: Salt can inhibit yeast growth. Make sure you measure it accurately. To troubleshoot, ensure your yeast is fresh and that you follow the instructions. If the dough is still not rising, you can try moving it to a warmer spot. Baked cinnamon rolls typically last: - Room Temperature: About 2-3 days in an airtight container. - Refrigerator: Up to a week if stored properly. - Freezer: They can be frozen for up to 3 months. Look for signs of spoilage, like a dry texture or off smell. Always check before eating! In this blog post, we covered how to make Biscoff cookie butter cinnamon rolls. We explored the key ingredients, suggested substitutes, and shared tips for quality. The step-by-step instructions guided you through preparing the dough, kneading, and baking. We also highlighted variations and storage tips to keep your rolls fresh. In my view, baking is both an art and science. With these tips, you can create delicious rolls that impress. Enjoy your baking journey, and remember, practice makes perfect!

Biscoff Cookie Butter Cinnamon Rolls Delightful Treat

If you love sweet treats as much as I do, get ready to dive into the world of Biscoff Cookie

- 1 medium head of cauliflower - 1 cup all-purpose flour - 1 cup unsweetened almond milk - 1 cup buffalo sauce - Fresh parsley for garnish - 1 teaspoon garlic powder - 1 teaspoon onion powder - 1 teaspoon smoked paprika - ½ teaspoon sea salt - ½ teaspoon black pepper - Celery sticks - Carrot sticks - Optional dipping sauces (ranch or blue cheese) Buffalo cauliflower bites are fun to make and eat. They have a crispy outside and a soft inside. The key to their success lies in the ingredients. You start with a medium head of cauliflower. Break it into bite-sized florets. This helps them cook evenly and makes them easy to eat. Next, you need a cup of all-purpose flour. This creates a nice batter that sticks well. Use unsweetened almond milk for a creamy texture, or feel free to use any non-dairy milk you like. The flavors come alive with buffalo sauce. I recommend using your favorite brand or making your own for more control over the heat. You also need fresh parsley to garnish your bites. It adds color and a fresh taste. For added flavor, include garlic powder, onion powder, smoked paprika, sea salt, and black pepper. These spices enhance the bites' taste and give them depth. Finally, think about what to serve with your bites. Crunchy celery and carrot sticks are perfect for dipping. You can also serve ranch or blue cheese dressing on the side. These add a creamy contrast to the spicy bites. For the full recipe, check out the details provided earlier. Enjoy your cooking adventure! - Preheat the oven to 450°F (230°C) - Line a baking sheet with parchment paper To start making your buffalo cauliflower bites, first, preheat your oven. Set it to 450°F, which helps crisp the bites perfectly. Next, take a baking sheet and line it with parchment paper. This step makes cleanup easy and prevents sticking. - Combine dry ingredients in a large bowl - Gradually whisk in almond milk Now, grab a large bowl. In this bowl, combine the all-purpose flour, garlic powder, onion powder, smoked paprika, sea salt, and black pepper. Use a whisk to mix these dry ingredients well. Slowly pour in the almond milk while you whisk. Keep whisking until your batter is smooth and lump-free. - Dip florets in the batter - Arrange on the baking sheet and oil Take your cauliflower florets and dip them into the batter. Make sure each floret gets a nice coating. After dipping, shake off any extra batter. Place the coated florets on the lined baking sheet. Once they are all laid out, drizzle some olive oil over them. Use your hands to toss the florets gently to coat them evenly. - Bake for 20-25 minutes until golden - Prepare buffalo sauce mixture Now, put your baking sheet in the hot oven. Bake the cauliflower bites for 20 to 25 minutes. Keep an eye on them until they turn golden brown and crispy. While they bake, mix your buffalo sauce in a bowl. You can add any leftover batter to the sauce for extra thickness. - Toss cooked florets in buffalo sauce - Bake for an additional 10 minutes Once the bites are done, take them out of the oven. Immediately toss them in the buffalo sauce mixture. Make sure each piece is well coated. Then, return the sauced florets to the baking sheet. Pop them back in the oven for another 10 minutes. This final bake gives them extra flavor and crunch. Enjoy making these buffalo cauliflower bites! For the full recipe, check the details above. To get that perfect crunch, start by using a high oven temperature of 450°F. This helps the cauliflower develop a golden crust. Also, make sure to arrange the cauliflower in a single layer on the baking sheet. This way, each piece gets equal heat and air flow, which is key to crispiness. Don't be afraid to shake things up! Try different buffalo sauces to find your favorite flavor. You can also add extra spices to the batter. A pinch of cayenne could kick it up a notch. Mixing in some smoked paprika can add depth and warmth too. When it comes to serving, remember that looks matter. Use fresh herbs, like parsley, to garnish your bites. They add a nice pop of color. Pair your buffalo cauliflower bites with vibrant veggie sides, like celery and carrot sticks, for a refreshing contrast. This not only makes your dish tasty but also visually appealing. {{image_4}} If you need a gluten-free snack, you can swap all-purpose flour for almond flour or gluten-free flour. This change keeps the texture light and crispy. Many people enjoy this option, especially those with gluten sensitivities. For those who love heat, I suggest adding cayenne pepper to the batter. Start with 1/4 teaspoon and adjust to your taste. This small tweak gives the Buffalo cauliflower bites an extra kick. It makes them even more exciting to eat. To make a tasty vegan blue cheese dip, blend soaked cashews, lemon juice, and nutritional yeast. Add some garlic powder and a splash of non-dairy milk for creaminess. Blend until smooth and creamy. This sauce pairs perfectly with your Buffalo cauliflower bites. It adds a rich flavor that enhances your snack experience. For the full recipe, check the complete instructions to create these delicious bites. To store your leftover buffalo cauliflower bites, place them in an airtight container. This helps keep them fresh. I recommend letting them cool first. Once cooled, transfer them to the container. You can store them in the fridge for up to three days. Just make sure to seal it tightly. This way, they retain their flavor and texture. If you want to keep them longer, freezing is a great option. First, let the bites cool completely. Then, place them in a freezer-safe bag or container. Try to remove as much air as possible. They can stay good in the freezer for up to three months. When you’re ready to eat, thaw them in the fridge overnight. Reheat in the oven for best results. This helps to keep them crispy. In the fridge, buffalo cauliflower bites stay fresh for about three days. After that, they may lose their crunch. To enjoy them at their best, eat them sooner rather than later. If you notice any off smells or changes in texture, it’s best to toss them. Remember, freshness is key for that crave-worthy taste! To add heat, you can mix cayenne pepper into the batter. Start with a half teaspoon and adjust to your taste. You can also choose a hotter buffalo sauce. Some brands offer extra spicy options that pack a punch. For more heat, try adding sliced jalapeños on top before baking. Yes, you can prep these bites ahead. Cut the cauliflower and mix the batter a day in advance. Store them in the fridge in separate containers. When ready to bake, just coat the florets and roast them. For best results, bake them fresh, but prepped ingredients save time. Buffalo cauliflower bites shine with tasty dips! Serve them with ranch or blue cheese dressing. A creamy avocado dip also works great. You can add celery and carrot sticks as fresh sides. They balance the heat and add a nice crunch. Check the bites after 20-25 minutes in the oven. They should look golden brown and crispy. You can test one by poking it with a fork. If it feels tender inside and crispy outside, they are ready. If they need more time, return them to the oven for a few minutes. Yes, you can use frozen cauliflower! Thaw it and pat it dry before battering. This helps the batter stick better. Follow the same cooking instructions. Just keep an eye on the time, as frozen florets may need a minute or two longer. Absolutely! Buffalo cauliflower bites are great for meal prep. Bake a large batch and store them in the fridge. They will last for up to four days. Reheat them in the oven or an air fryer for crispiness. Add them to salads, wraps, or enjoy as a snack. For the full recipe, check out the detailed instructions above. Buffalo Cauliflower Bites are simple to make and full of flavor. You start with basic ingredients, mix a tasty batter, and bake until golden. Tips for crispiness and variations like gluten-free options make this dish even better. If you want to impress at your next gathering, serve them with fresh veggies and dips. These bites offer a fun twist on a classic favorite. Enjoy experimenting and creating your perfect version. Your kitchen is now ready for delicious bites that everyone will love!

Buffalo Cauliflower Bites Crave-Worthy Snack Option

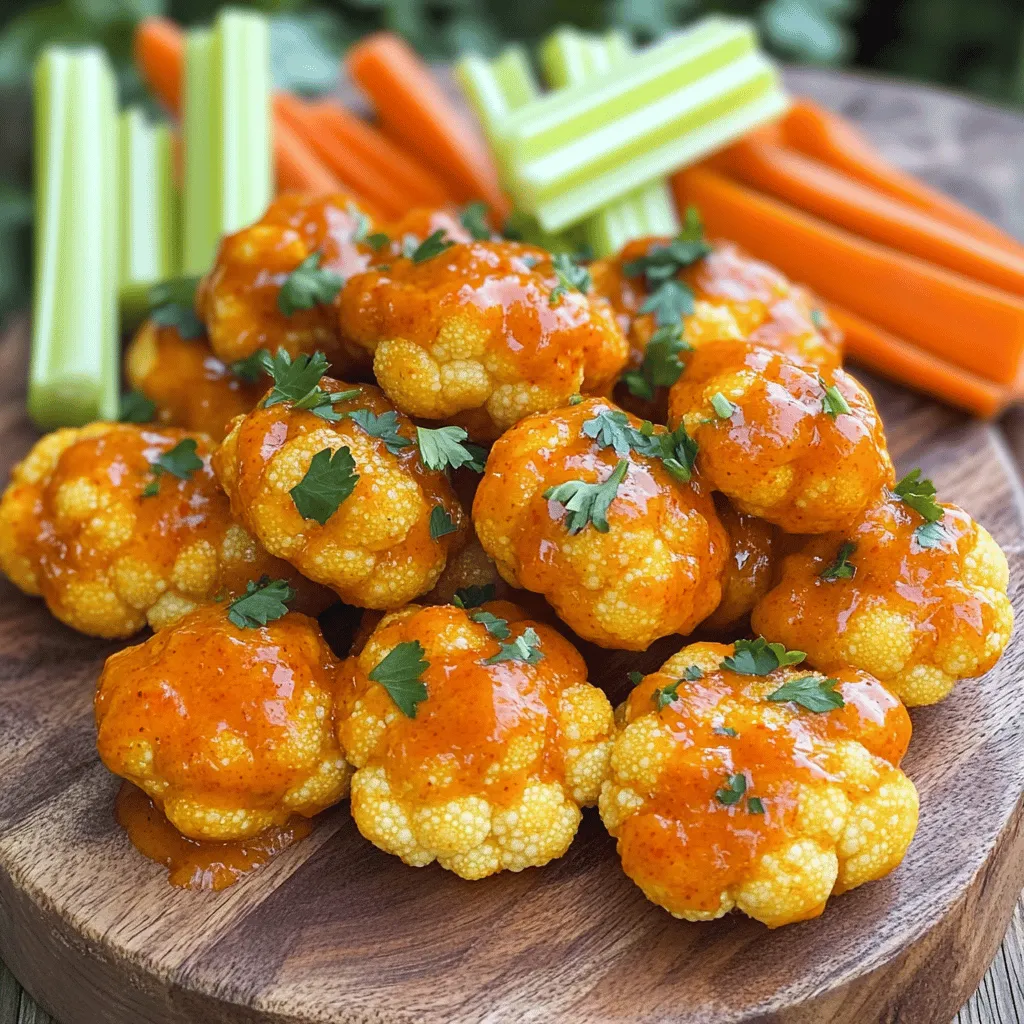
Are you ready for a snack that will blow your mind? Buffalo Cauliflower Bites are not just a tasty treat;

To make a tasty Savory Herb Roasted Chicken, you need these key ingredients: - 1 whole chicken (4-5 lbs), thoroughly cleaned - 3 tablespoons extra virgin olive oil - 2 tablespoons fresh rosemary, finely chopped - 2 tablespoons fresh thyme, finely chopped - 2 tablespoons fresh parsley, finely chopped - 4 cloves garlic, minced - Zest of 1 lemon and 1 lemon, quartered - Sea salt and freshly ground black pepper to taste - 1 medium onion, quartered - 3 medium carrots, cut into bite-sized chunks - 3 medium potatoes, diced into even pieces These simple ingredients create bold flavors that make your chicken shine. You can add more flavor with optional seasonings: - Paprika for a smoky taste - Crushed red pepper flakes for heat - Fresh sage for an earthy note - A splash of white wine for depth Feel free to mix and match these seasonings to make the dish your own. To cook your chicken perfectly, gather these tools: - A roasting pan for even cooking - A meat thermometer for checking doneness - A mixing bowl for the herb paste - A carving knife and cutting board for serving With these tools, you can easily prepare and serve a fantastic meal. For the full recipe, check the [Full Recipe]. Start by preheating your oven to 425°F (220°C). This temperature helps the chicken roast well. Next, pat the whole chicken dry with paper towels. Dry skin leads to crispy, golden skin. Carefully slip your fingers under the skin on the breast and thighs. This creates space for the herb paste. In a bowl, mix 3 tablespoons of olive oil with chopped rosemary, thyme, parsley, minced garlic, and lemon zest. Add sea salt and black pepper to taste. Stir until you create a fragrant herb paste. This paste is key to adding flavor. Gently apply it under the skin and over the chicken’s surface. Make sure to cover every part for the best taste. Place the chicken breast side up in a large roasting pan. Surround it with quartered onion, carrots, and diced potatoes. These veggies soak up flavor from the chicken. Roast for 1 hour and 15 minutes, or until the chicken reaches 165°F (75°C) in the thickest part. Halfway through, baste the chicken with the pan juices. This keeps it moist and adds extra flavor. After cooking, let the chicken rest for 10-15 minutes before carving. This helps the juices stay in the meat. For the full recipe, check the section above. To get that perfect crispy skin, start by drying the chicken. Use paper towels to remove excess moisture. This helps the skin crisp up nicely. Next, apply the herb paste under the skin. This not only adds flavor but also helps the skin crisp as it roasts. Roast your chicken at a high temperature of 425°F (220°C). This heat creates a lovely golden-brown crust. Baste the chicken with its juices halfway through cooking. This step keeps the skin moist and flavorful. Marinades can add a fantastic taste to your chicken. A simple blend of olive oil, herbs, and lemon zest works wonders. Mix the marinade and let the chicken soak for at least 30 minutes. For deeper flavor, marinate overnight in the fridge. This allows the herbs to penetrate the meat. You can also try adding honey or mustard for a sweet twist. Just remember, balance is key. Resting the chicken after cooking is very important. Once you take it out of the oven, let it sit for 10-15 minutes. This helps the juices settle throughout the meat. Carving too soon can lead to dry chicken. Use a sharp knife when you carve, as this keeps the pieces neat. Try to serve the chicken on a nice platter with the roasted veggies around it. For the best results, follow the Full Recipe for precise details. {{image_4}} You can switch up the herbs for new flavors. Instead of rosemary, try sage. Oregano adds a warm touch. For a spicy kick, use red pepper flakes. Fresh herbs bring brightness, while dried herbs add depth. Experimenting with herbs keeps the meal fresh and exciting. Grilling the chicken gives it a smoky flavor. Use indirect heat to keep it juicy. Slow cooking is another great option. It makes the meat tender and flavorful. Just set your slow cooker and let it work its magic. Each method offers a unique taste and texture. Serve your herb roasted chicken with a light salad. A fresh green salad with a lemon vinaigrette works well. You can also pair it with crusty bread to soak up the juices. For a heartier meal, add mashed potatoes or rice. Roasted vegetables make a colorful side. Enjoy this meal with your favorite wine for a perfect dinner. For the full recipe, check out the details above! After enjoying your savory herb roasted chicken, store any leftovers in an airtight container. This keeps the chicken juicy and fresh. Place it in the fridge within two hours of serving. Leftover chicken stays tasty for up to four days. If you plan to keep it longer, consider freezing it. To reheat your chicken, preheat the oven to 350°F (175°C). Place the chicken in an oven-safe dish. Add a splash of chicken broth or water to keep it moist. Cover it with foil to prevent drying out. Heat for about 20 minutes, or until warmed through. You can also use a microwave if you’re short on time. Just cover the chicken and heat it in short bursts until hot. For future meals, freezing is a great option. Wrap the chicken tightly in plastic wrap, then place it in a freezer bag. Make sure to remove all air to avoid freezer burn. It can last up to three months in the freezer. When you're ready to eat, thaw it in the fridge overnight. Then, follow the reheating instructions to enjoy your delicious chicken again. For the full recipe, check out the complete guide. You should cook a 5 lb chicken for about 1 hour and 15 minutes. This time works well at 425°F (220°C). For best results, always check the internal temperature. It should reach 165°F (75°C) in the thickest part of the thigh. Cooking times can vary based on your oven, so watch it closely. Yes, you can use dried herbs instead of fresh. Just remember that dried herbs are stronger. Use only one-third of the amount. For example, if the recipe calls for 2 tablespoons of fresh herbs, use about 2 to 3 teaspoons of dried herbs. Mix them well into the oil for great flavor. You can roast many vegetables with chicken. Some great options include: - Carrots - Potatoes - Onions - Bell peppers - Zucchini - Brussels sprouts Feel free to mix and match based on your taste. These veggies soak up the chicken flavors and add color to your dish. The best way to check if your chicken is fully cooked is by using a meat thermometer. Insert it into the thigh without touching the bone. When it reads 165°F (75°C), the chicken is ready. You can also check if the juices run clear when you cut into it. If the juices are pink, cook it a bit longer. This article covered how to make a tasty herb roasted chicken. We discussed essential ingredients, tools, and step-by-step cooking instructions. I shared tips for crispy skin and flavor boosts, plus variations and how to store leftovers. Remember, you can play with herbs and cooking methods for your unique dish. Enjoy your cooking journey! Your perfect roasted chicken awaits.

Savory Herb Roasted Chicken Flavorful Dinner Delight

Get ready to savor the rich flavors of my Savory Herb Roasted Chicken! This dish is perfect for dinners that

To make this delicious dip, gather these ingredients: - 1 cup all-purpose flour (heat-treated for safety) - 1/2 cup packed brown sugar - 1/2 cup granulated sugar - 1/2 cup unsalted butter, softened at room temperature - 2 teaspoons pure vanilla extract - 1/4 teaspoon fine sea salt - 1/2 cup mini chocolate chips - 1/2 cup cream cheese, softened, at room temperature - 1/2 cup powdered sugar - Optional: 1 cup whipped topping (for a light and airy texture) Using heat-treated flour is key for safety. Raw flour can have harmful germs. Heat-treating kills these germs, making it safe to eat. You can heat-treat flour by baking it. Spread flour on a baking sheet and bake at 350°F for 5-7 minutes. Let it cool before using. This step keeps your dip safe and tasty. You can add a few optional ingredients to enhance your dip. Consider using: - 1 cup whipped topping for a fluffy texture - A pinch of cinnamon for warmth - Chopped nuts like walnuts for crunch These extras can make your dip even more delightful. You can mix and match based on what you like! To make this dip, start with a large mixing bowl. Add the softened butter, brown sugar, granulated sugar, and cream cheese. Use a hand mixer to blend until smooth and creamy. It should be free of lumps. Next, pour in the vanilla extract and add the fine sea salt. Mix until both are well combined. Now, it’s time for the flour. Gradually sift in the heat-treated flour. Use a spatula to stir gently. Keep mixing until you achieve a cookie dough-like texture. This step is key for getting the right consistency. Finally, fold in the mini chocolate chips. This ensures they spread evenly throughout the dip. If you want a lighter texture, mix in whipped topping. Do this gently to keep the airiness intact. For the best texture, always start with softened ingredients. This makes mixing easier and gives a smoother finish. When adding the flour, do it slowly. This prevents clumps and helps you control the texture better. When folding in chocolate chips or whipped topping, use a spatula. This technique helps maintain the lightness of the mixture. Avoid over-mixing after adding these ingredients. You want to keep the dip fluffy and fun. After mixing, transfer the dip to a serving bowl. Use a spatula to smooth the top and make it look nice. Cover the bowl with plastic wrap and refrigerate for at least 30 minutes. Chilling allows the flavors to blend and grow more delicious. Serving this dip cold enhances its taste. It makes each bite more refreshing and enjoyable. So, do not skip this step! Enjoy your delightful creation with your favorite dippers. For the full recipe, check out the details above! To get a creamy dip, start with room-temperature butter and cream cheese. This helps them blend smoothly. Use a hand mixer for best results. Mix until all the lumps are gone. If the dip seems too thick, add a bit of milk. This will help you achieve that dreamy texture. Want to kick up the flavor? Try adding a pinch of cinnamon or a splash of almond extract. If you like nuts, mix in chopped walnuts or pecans. You can also switch the mini chocolate chips for white chocolate or dark chocolate pieces. This gives a fun twist to the dip! For a great presentation, serve the dip in a pretty bowl. Add some fun dippers around it. Think graham crackers, pretzels, or fresh fruit slices. You can even use mini cookies for an extra treat. Before serving, sprinkle extra mini chocolate chips on top. This makes it look yummy and inviting! {{image_4}} You can easily change the flavor of your Chocolate Chip Cookie Dough Dip. Here are some fun ideas: - Peanut Butter: Add 1/3 cup of creamy peanut butter to the mix. This gives a rich, nutty taste. - Brownie Batter: Use cocoa powder instead of half of the flour. This will create a chocolatey twist. - Mint Chocolate Chip: Stir in some peppermint extract and green food coloring. This adds a fresh flavor for mint lovers. - S'mores: Mix in crushed graham crackers and mini marshmallows. It brings the campfire treat to your dip. You can make this dip a bit healthier with simple swaps. Here are some options: - Greek Yogurt: Replace cream cheese with Greek yogurt for a protein boost. - Coconut Sugar: Use coconut sugar instead of brown and granulated sugar. It has a lower glycemic index. - Nut Butters: Substitute butter with almond or cashew butter. This adds healthy fats and flavor. - Stevia or Monk Fruit: For a low-calorie sweetener, try stevia or monk fruit instead of sugar. This dip can fit different diets with some tweaks: - Gluten-Free: Use gluten-free flour instead of all-purpose flour. Ensure all other ingredients are gluten-free. - Vegan: Swap butter and cream cheese for plant-based alternatives. Use a vegan whipped topping too. - Nut-Free: Choose seed butter instead of nut butter for those with nut allergies. By mixing and matching these ideas, you can create a dip that suits your taste and dietary needs. Enjoy the endless possibilities! For the full recipe, check the earlier section. To keep your chocolate chip cookie dough dip fresh, store it in an airtight container. This helps prevent it from drying out. Make sure to press plastic wrap directly onto the dip's surface before sealing the container. This extra step reduces air exposure and keeps the dip creamy. You can store it in the fridge for up to five days. Freezing the dip is an excellent option if you want to save some for later. First, scoop the dip into a freezer-safe container. Leave some space at the top, as the dip may expand when frozen. Seal the container tightly and label it with the date. You can freeze it for up to three months. When you're ready to enjoy your frozen dip, take it out of the freezer and move it to the fridge. Let it thaw overnight. If you need it sooner, you can thaw it at room temperature for about two hours. After thawing, mix it well to restore its creamy texture. If it seems too thick, add a touch of cream cheese or whipped topping to make it smooth again. No, you should not use regular flour. Regular flour may contain harmful bacteria. Heat-treated flour is safe to eat raw. You can heat it in the oven for five minutes at 350°F to make it safe. This step is very important for your health. You can store the dip for about five days. Just keep it in an airtight container. Make sure to cover it well so it stays fresh. If you notice any change in smell or color, it’s best to throw it out. Some great dippers include: - Graham crackers - Pretzels - Crisp apple slices - Mini cookies - Vanilla wafers These dippers pair well with the sweet and creamy dip. Feel free to mix and match your favorites! For a fun twist, try using different flavored dippers to create new tastes. Enjoy exploring different options! You can find the full recipe for this delicious dip to get started. You learned about the joy of making Chocolate Chip Cookie Dough Dip. We covered key ingredients, ensuring safety with heat-treated flour. I shared simple steps to create the dip with the best texture. You got tips for creaminess and flavor boosts. Variations let you try new flavors or healthier options. I also included storage advice to enjoy leftovers. Now, you have everything needed to make this fun treat.

Chocolate Chip Cookie Dough Dip Delicious and Easy

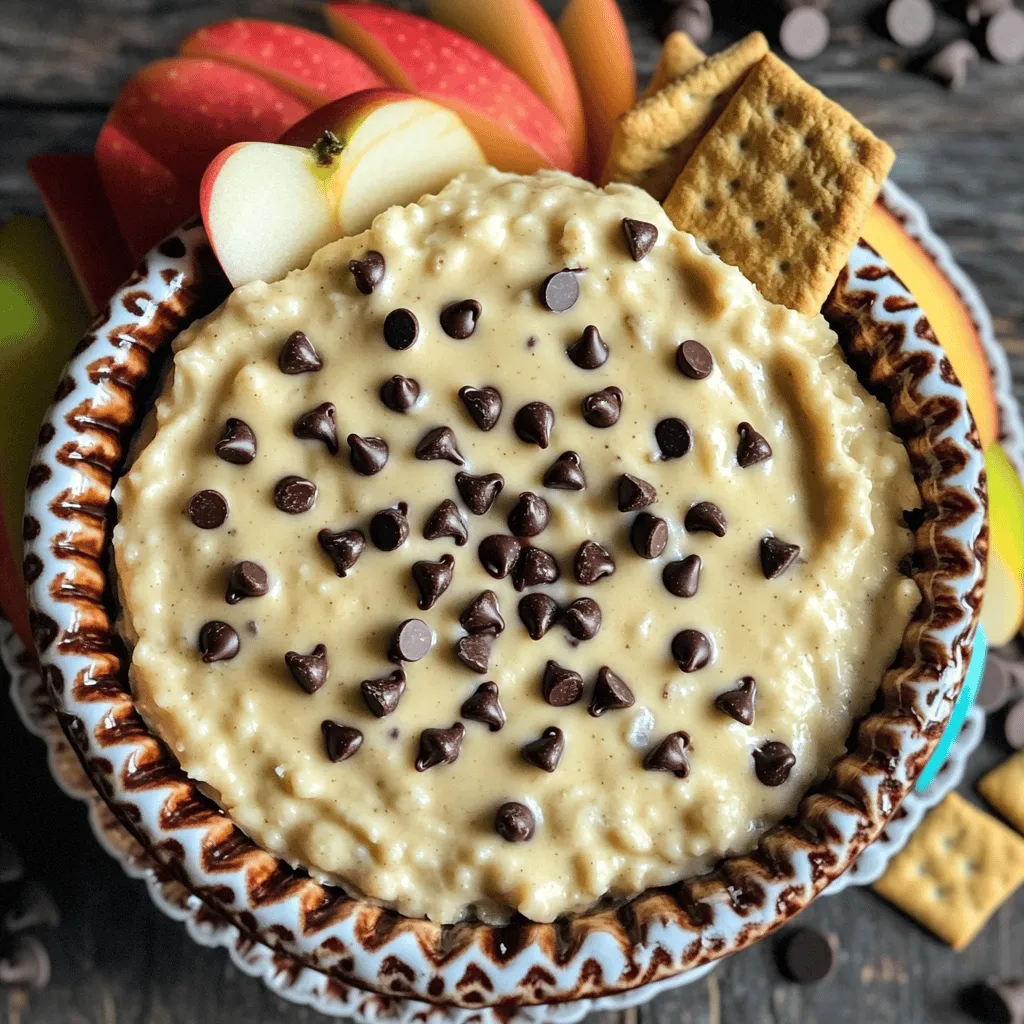
Are you ready to treat your taste buds? This Chocolate Chip Cookie Dough Dip is both delicious and easy to

- Shrimp and Marinade Components - 1 lb large shrimp, peeled and deveined - 3 tablespoons extra virgin olive oil - 4 cloves garlic, finely minced - Juice and zest from 2 bright lemons - 1 teaspoon smoked paprika - 1 teaspoon ground cumin - Salt and freshly cracked black pepper to taste - Tortilla and Toppings Ingredients - 8 small, soft corn tortillas - 1 cup finely shredded red cabbage - 1 ripe avocado, thinly sliced - Optional Garnishes - Fresh cilantro leaves for garnish - Lime wedges, for serving The shrimp and marinade come first. Use large shrimp for the best texture. The marinade has olive oil, garlic, lemon juice, zest, smoked paprika, ground cumin, salt, and pepper. This blend gives your shrimp a zesty flavor. Next, pick soft corn tortillas. They wrap the shrimp well and add a nice touch. For toppings, use shredded red cabbage for crunch and avocado for creaminess. You can also add garnishes. Fresh cilantro adds a pop of flavor. Lime wedges give a nice zesty kick. This recipe is a great way to enjoy fresh, flavorful tacos. For the full recipe, check the complete details above. Start by getting a medium bowl. Add the shrimp to the bowl. Pour in the olive oil and squeeze the juice from two lemons. Add the minced garlic, smoked paprika, ground cumin, salt, and pepper. Mix it all well until the shrimp are covered in tasty marinade. Let the shrimp sit for 15 minutes. This step helps the flavors soak in. Next, heat a large skillet on medium-high heat. Once it's hot, add the marinated shrimp in a single layer. Cook them for about 2-3 minutes on each side. You want them to turn pink and look opaque. When they are done, take the skillet off the heat. The shrimp should be juicy and full of flavor. Now, grab another dry skillet. Heat it on low. Place the corn tortillas in the skillet and warm each side for about 30 seconds. You want them to be soft and a little toasty. This makes them easier to fold and adds a nice touch. It's time to build your tacos! Take a warm tortilla and add a good amount of cooked shrimp on top. Next, pile on some shredded red cabbage for a nice crunch. Add a few slices of creamy avocado to balance the flavors. Finally, sprinkle fresh cilantro leaves on top of each taco. This adds a burst of flavor. Serve your tacos right away with lime wedges on the side. The lime gives a nice zesty kick in every bite. Enjoy your Zesty Lemon Garlic Shrimp Tacos! For the full recipe, check out the earlier section. To get the best shrimp, start with large, fresh shrimp. They cook faster and stay juicy. Marinating them for 15 minutes makes a big difference. The lemon juice adds zing and helps tenderize the shrimp. When cooking, keep an eye on the time. Cook for 2-3 minutes per side. Remove them once they turn pink and opaque. Overcooking makes shrimp tough and chewy. Warming your tortillas is key for tasty tacos. Use a dry skillet on low heat. Warm each tortilla for about 30 seconds on each side. This makes them soft and flexible. You can also wrap them in foil and heat them in the oven. This method keeps them warm if you are cooking for a crowd. To boost flavor, try adding toppings like fresh salsa or pickled onions. You can swap red cabbage for crunchy lettuce or slaw. A drizzle of creamy sauce adds richness. Experiment with spices like chili powder for heat. Fresh herbs like cilantro or parsley brighten the dish. For a twist, add a squeeze of lime juice right before serving. For the complete guide, check the Full Recipe. {{image_4}} You can swap shrimp for other seafood, like scallops or fish. Chicken or tofu works well, too. Just ensure you adjust the cooking time. For chicken, cook until the inside reaches 165°F. For tofu, sauté until golden brown. Toppings can change your taco game. Try adding diced tomatoes or pickled onions for zest. You might enjoy fresh mango salsa or crunchy radishes. For a creamy touch, drizzle with yogurt or a spicy mayo. Mix up the spices in the marinade for fun flavors. Add chili powder for heat or coriander for a fresh taste. If you love smokiness, use chipotle powder instead of smoked paprika. Explore different spices to find your favorite combo. For the full recipe, check out the details above! After enjoying your zesty lemon garlic shrimp tacos, you may have some left. To store them, place the leftover tacos in an airtight container. Keep them in the fridge for up to two days. The shrimp may lose some texture but will still taste great. When you're ready to enjoy your tacos again, avoid the microwave. It can make the shrimp rubbery. Instead, heat a skillet over medium heat. Add the tacos to the skillet for about two minutes on each side. This method keeps the shrimp tender and warms the tortillas nicely. If you want to save the tacos for later, freezing is an option. First, separate the shrimp from the tortillas and toppings. Place the shrimp in a freezer-safe bag, removing as much air as possible. You can freeze them for up to three months. When ready to eat, thaw them in the fridge overnight. Reheat as mentioned above. Enjoy your delicious meal whenever you like! For the full recipe, refer back to the complete instructions earlier in this article. To prevent shrimp from becoming rubbery, avoid overcooking them. Cook the shrimp just until they turn pink and opaque. This usually takes about 2-3 minutes per side. Marinating the shrimp helps keep them tender and flavorful. You can also use fresh shrimp instead of frozen for the best texture. Yes, you can use other types of tortillas. Flour tortillas, whole wheat, or even lettuce wraps work great. Each type adds a unique taste and texture to your tacos. Just make sure to warm them up to enhance the flavor, as I do with corn tortillas in the Full Recipe. Zesty Lemon Garlic Shrimp Tacos pair well with several side dishes. Try a fresh corn salad or a simple avocado salad. You might also enjoy some chips and salsa for crunch. A light lime rice or black beans can balance the meal nicely. For meal prep, cook the shrimp in advance and store them in an airtight container. Keep the tortillas and toppings separate. This way, you can reheat the shrimp quickly when ready to eat. Make sure to pack the toppings so they stay fresh and crunchy. This method makes it easy to enjoy your tacos throughout the week! In this post, we covered all you need for Zesty Lemon Garlic Shrimp Tacos. We discussed ingredients, marinating, cooking, and garnishing. Remember, shrimp should be tender, and tortillas warm. Try different proteins and toppings for fun twists. Proper storage keeps leftovers fresh for later. Enjoy making these tacos your own! Cooking is simple and can be tasty, so dive in and create a delicious meal.

Zesty Lemon Garlic Shrimp Tacos Fresh and Flavorful

Get ready to bring a burst of flavor to your dinner table with my Zesty Lemon Garlic Shrimp Tacos! These

To make Easy Spinach Artichoke Dip, you need a few simple, tasty items. Here’s what you'll need: - 1 cup fresh spinach, finely chopped - 1 cup canned artichoke hearts, well-drained and roughly chopped - 1 cup cream cheese, at room temperature for easy mixing - 1/2 cup sour cream, creamy and tangy - 1/2 cup mayonnaise, for richness - 1 cup shredded mozzarella cheese, plus a little extra for topping - 1/4 cup grated Parmesan cheese, for salty depth - 2 cloves garlic, finely minced - 1 teaspoon onion powder, for a hint of sweetness - 1/2 teaspoon salt, adjust to taste - 1/4 teaspoon black pepper, freshly ground for warmth - 1/4 teaspoon crushed red pepper flakes (optional, for a spicy kick) Each ingredient adds its own flavor, making your dip creamy and delicious. The fresh spinach and artichoke hearts provide a nice texture. Cream cheese and sour cream give it a smooth base. The garlic and spices bring out the dip's full taste. For the full recipe, check out the instructions that follow. Enjoy making this snack! 1. Preheat the oven: Start by setting your oven to 350°F (175°C). This step is key. It makes sure your dip cooks evenly and gets bubbly. 2. Mix cream cheese, sour cream, and mayonnaise: In a large bowl, take your room-temperature cream cheese, sour cream, and mayonnaise. Use a hand mixer or a spatula to blend them until smooth. This creates a creamy base for your dip. 3. Fold in spinach, artichokes, and seasonings: Now, add in the finely chopped spinach and artichoke hearts. Also, include the shredded mozzarella, grated Parmesan, minced garlic, onion powder, salt, black pepper, and crushed red pepper flakes if you want some heat. Gently mix until everything is well combined. This step is where all the flavors come together. 4. Transfer to a baking dish: Take the creamy mixture and pour it into a medium-sized baking dish. Spread it out evenly. This helps it bake perfectly. 1. Recommended baking time: Place the baking dish in your preheated oven. Bake for 25 to 30 minutes. This will give you a warm, bubbly dip. 2. Indicators of doneness: Your dip is ready when it bubbles and the edges turn lightly golden. This shows that it’s hot and ready to serve. You can find the full recipe to guide you through all the steps. To make the best spinach artichoke dip, start with room-temperature ingredients. If your cream cheese is cold, it won't mix well. Soft cream cheese blends better with sour cream and mayonnaise. This makes your dip smooth and creamy. Creaminess is key. You want a texture that is thick yet spreadable. The right balance of cream cheese, sour cream, and mayonnaise helps achieve this. Don't skip the mozzarella and Parmesan; they add richness and flavor. For the best experience, serve your dip warm. It pairs well with crispy tortilla chips, toasted baguette slices, or fresh veggies like carrots and celery. You can also use pita chips for a different crunch. Presentation matters too. Serve the dip in a colorful bowl. Top it with extra cheese or fresh herbs for a nice touch. This makes your dip look inviting at parties. For even more fun, set up a dipping station with various options. This way, guests can choose their favorite! For a full recipe, check out the Charming Spinach Artichoke Dip. Enjoy every bite! {{image_4}} You can easily change the recipe to fit your needs. For a healthier dip, swap out sour cream and mayonnaise with Greek yogurt. This keeps it creamy while cutting down on fat. If you want a vegan option, use plant-based cream cheese and sour cream. You can also try using cashew cream for a nutty flavor. These swaps keep the dip rich and tasty without dairy. You can make this dip your own by adding different flavors. Try mixing in a blend of cheeses. Cheddar or gouda can add a sharp taste. For a bit of fun, sprinkle in some herbs or spices. Fresh basil or dill can lift the flavor. A dash of smoked paprika gives it a warm, smoky note. Experiment with what you love. Each tweak can make your dip unique and exciting. To store your Easy Spinach Artichoke Dip, let it cool first. Place it in an airtight container. This keeps it fresh longer. You can store it in the fridge for up to four days. If you have leftovers, it's best to use them soon. The dip tastes best when fresh. When you want to enjoy the dip again, reheating is easy. You can use the microwave or oven. If using the microwave, heat it in short intervals. Stir it after each interval to keep it even. If you prefer the oven, preheat it to 350°F (175°C). Bake the dip for 15 minutes. This warms it without drying it out. This way, you keep the creamy texture and great flavor. For the full recipe, check out the charming Spinach Artichoke Dip! How long does it take to prepare Easy Spinach Artichoke Dip? It takes about 10 minutes to prep and 30 minutes to bake. So, you can enjoy this dip in just 40 minutes! Can I make it ahead of time? Yes! You can prepare the dip a day in advance. Just mix the ingredients and store it in the fridge. When you're ready, bake it for a warm treat. What are the best dipping options for spinach artichoke dip? I love serving this dip with crispy tortilla chips, toasted baguette slices, or fresh veggie sticks. They all add great texture and flavor! For a fun twist, add a sprinkle of extra cheese on top before baking for a cheesy finish. Check out the Full Recipe for more details! This blog post covered how to make Easy Spinach Artichoke Dip from start to finish. We discussed necessary ingredients, preparation steps, baking tips, and ways to serve and store the dip. Remember, using room-temperature ingredients helps achieve the right creaminess. Don't shy away from personalizing the flavors to match your taste. With simple variations, you can make this dish your own. Make it for parties or enjoy it at home. Dive into this delicious recipe, and savor every bite!

Easy Spinach Artichoke Dip Creamy and Delicious Snack

Looking for a tasty snack that wows your guests? This Easy Spinach Artichoke Dip is creamy, delicious, and super simple

Older posts
Newer posts
← Previous Page1 … Page69 Page70 Page71 … Page88 Next →

dsad

© 2025 spoonfulsavory • Built with GeneratePress

Our Policies

  • Copyright Policy
  • Cookie Policy
  • GDPR Policy
  • Privacy Policy
  • Disclaimer
  • Terms Of Use

More Information

  • Home
  • About
  • Contact
  • Appetizers
  • Dessert
  • Dinner
  • Drinks
©2025, spoonfulsavory About Back To Top