Skip to content
DisclaimerTerms Of UseGDPR PolicyCookie Policy

spoonfulsavory

  • Home
  • Drinks
  • Appetizers
  • Dinner
  • Dessert
  • About
  • Contact
  • Privacy Policy
DisclaimerTerms Of UseGDPR PolicyCookie Policy

Sarah

- 1 lb (450g) ground beef - 1 lb (450g) russet potatoes, peeled and cubed - 1 cup shredded sharp cheddar cheese - 1/2 cup sour cream - 1/2 cup plain breadcrumbs - 1/4 cup green onions, finely chopped - 2 cloves garlic, minced - 1 large egg, beaten - 1 teaspoon Worcestershire sauce - 1 teaspoon salt - 1/2 teaspoon black pepper - 1/2 teaspoon smoked paprika - 1/2 cup ketchup (for topping) To make my Loaded Potato Meatloaf, I use fresh, simple ingredients. Ground beef gives a nice base. I choose russet potatoes for their creamy texture when mashed. Sharp cheddar adds a rich flavor. Sour cream makes the mash smooth. For the extra mix, I add breadcrumbs. They help hold the meatloaf together. Green onions add a nice touch of brightness. Garlic gives a lovely aroma and taste. I always include a beaten egg. It binds all the ingredients well. Then I add seasonings. Worcestershire sauce gives depth. Salt and black pepper enhance all the flavors. Smoked paprika adds a hint of warmth. Finally, ketchup on top creates a sweet glaze. You can find the Full Recipe for all the steps I take to create this dish. - Preheat the oven to 350°F (175°C). - Boil and mash the russet potatoes. Start by putting the cubed potatoes in a pot. Add enough water to cover them. Boil the water on medium-high heat. Cook the potatoes until they are soft, about 15 minutes. Drain the water and mash the potatoes in a bowl. Mix in sour cream, cheddar cheese, and half the green onions. Set this creamy mixture aside. - Combine ground beef with breadcrumbs and seasonings. In a large bowl, add the ground beef. Sprinkle in the breadcrumbs, Worcestershire sauce, salt, black pepper, and smoked paprika. - Mix in minced garlic and beaten egg. Use your hands or a fork to blend everything together. Make sure the mixture is well combined and smooth. - Form the meatloaf layers in a loaf pan. Take half of the meat mixture and press it firmly in the bottom of the loaf pan. - Spread the loaded mashed potato mixture on top of the meat layer. Use a spatula to smooth it out evenly. - Top with remaining meat mixture and ketchup glaze. Press the rest of the meat mixture over the potatoes. Seal the edges well to keep the filling inside. Generously spread ketchup on top to create a glaze. This process makes your Loaded Potato Meatloaf a hearty and tasty dish. For the full recipe, check the earlier section. Enjoy making this meal! Getting the right texture is key for a great meatloaf. The proportions of each ingredient matter a lot. Use equal parts of meat and potatoes for the best mix. When mashing potatoes, ensure they are smooth and creamy. Add sour cream and cheese while mashing for a richer taste. This blend makes the potatoes fluffy and adds moisture. You can switch up the flavor by using different cheeses. Try mozzarella for a milder taste or pepper jack for some heat. Fresh herbs like thyme or parsley can make it even better. Just chop them finely and mix them into the meat. This adds a nice freshness to each bite. Presentation matters when serving meatloaf. Slice it into thick pieces for a hearty look. Arrange the slices on a nice plate to impress your guests. You can garnish with fresh herbs, like parsley or basil. Sprinkle chopped green onions on top for a splash of color. This makes your dish not just tasty, but also beautiful. For the complete recipe, check out the Full Recipe section. {{image_4}} You can switch out ground beef for ground turkey or chicken. These meats are leaner and lower in fat. They still provide great taste and texture. Mix in some veggies like carrots or bell peppers into the meat mixture. This adds fiber and nutrients. You can also boost flavor while making it healthier. Try using different cheeses to change the flavor. Mozzarella gives a nice stretch. Pepper jack adds a spicy kick. If you want a dairy-free option, vegan cheese works well too. This makes the dish friendly for plant-based diets. Experimenting with cheese can make each meal unique. Get creative with sauces or toppings. You can drizzle barbecue sauce or ranch dressing on top. This adds a fun twist. For a spicy kick, add jalapeños to the meat mixture. They bring heat and flavor. Don’t be afraid to try new things. Each change can lead to a new family favorite! To store your loaded potato meatloaf, wrap it tightly. Use plastic wrap or foil. This keeps it fresh and moist. Place it in the fridge after it cools. It lasts about 3 to 4 days in the refrigerator. Before serving leftovers, check for any off smells or changes in texture. To freeze meatloaf, let it cool completely. Wrap it in plastic wrap, then foil. This prevents freezer burn. You can also slice it before freezing for easy servings. It stays good for about 2 to 3 months. For thawing, move it from the freezer to the fridge. Let it thaw overnight for the best results. Reheat meatloaf in the oven for the best texture. Preheat your oven to 350°F (175°C). Place the meatloaf in a dish and cover it with foil. Heat for about 20 to 30 minutes or until warm. You can use a microwave, too. Heat on medium power for about 3 to 5 minutes. Keep an eye on it to avoid drying out. You can check the meatloaf's internal temperature for safety. Use a meat thermometer. Insert it into the center of the meatloaf. It should read 160°F (70°C) when done. This ensures it is safe to eat. If you do not have a meat thermometer, look for no pink meat in the center. The juices should run clear. Yes, you can prepare Loaded Potato Meatloaf ahead of time. Mix the meat and potato layers and store them in a loaf pan. Cover with plastic wrap or foil. This keeps it fresh until you are ready to bake. You can also bake it, let it cool, then store it in the fridge. Reheat before serving. Many sides go well with Loaded Potato Meatloaf. Here are some ideas: - Roasted seasonal vegetables - Fresh mixed salad - Creamy coleslaw - Garlic bread - Mashed cauliflower These sides will complete the meal and add variety. Enjoy the flavor and color they bring! For the Full Recipe, check back to see how to make this delicious dish. Loaded Potato Meatloaf combines hearty ingredients like ground beef, potatoes, and cheese for a delicious meal. We shared step-by-step instructions for preparation and storage tips to keep your leftovers fresh. You can customize the dish with various cheeses or healthier substitutes like turkey. Remember, cooking is all about experimentation. Try different flavors, and have fun with it! With these tips, you'll create a dish that's not just tasty but also memorable. Enjoy your cooking journey!

Loaded Potato Meatloaf Hearty Family Dinner Delight

Are you ready to elevate your dinner game? Loaded Potato Meatloaf combines classic flavors with a twist that your family

To make the best mac and cheese, you need some key ingredients. Here’s what you’ll need: - 1 lb elbow macaroni - 4 cups sharp cheddar cheese, freshly grated - 1 cup mozzarella cheese, freshly grated - 1 cup parmesan cheese, freshly grated - 4 tablespoons unsalted butter - 1/4 cup all-purpose flour - 4 cups whole milk - 1 teaspoon garlic powder - 1 teaspoon onion powder - 1/2 teaspoon smoked paprika - Salt and black pepper to taste These ingredients create a creamy and rich base for your dish. Choosing the right cheese makes a big difference. I suggest using sharp cheddar for its bold taste. Mozzarella adds a lovely stretch, while parmesan gives a nutty flavor. You can mix and match, but these three work great together. Try using aged cheddar for a deeper flavor or gouda for a smokier profile. You can enhance your mac and cheese with some optional ingredients. Consider adding: - 1 cup breadcrumbs for a crunchy topping - 1/4 cup fresh parsley, finely chopped, for garnish - Cooked bacon, crumbled, for a savory kick - Fresh tomatoes, diced, for a pop of color and freshness These extras can elevate your dish from good to amazing. For the full recipe, check out The Ultimate Cheesy Mac & Cheese . To make the best mac and cheese, start with the right tools. Gather a large pot, a saucepan, and a baking dish. This will help you stay organized. 1. Preheat Oven: Set your oven to 350°F (175°C). This is key for a nice bake. 2. Cook Pasta: Boil salted water in a large pot. Add the elbow macaroni and cook for 1-2 minutes less than the package says. You want it al dente. Drain the pasta and set it aside. 3. Make Cheese Sauce: In a saucepan over medium heat, melt the unsalted butter. Whisk in the flour to create a roux. Stir for 1 minute to avoid browning. 4. Incorporate Milk: Gradually add the whole milk while whisking. Keep stirring until it thickens and bubbles, about 5-7 minutes. 5. Season & Add Cheese: Mix in garlic powder, onion powder, smoked paprika, and a pinch of salt and black pepper. Remove from heat and fold in the cheddar, mozzarella, and parmesan. The sauce should be creamy and smooth. 6. Combine with Pasta: Stir the cooked macaroni into the cheese sauce. Make sure every piece is well-coated. 7. Bake to Perfection: Transfer the mac and cheese to a greased baking dish. If you like a crunchy topping, sprinkle breadcrumbs on top. Bake for 20-25 minutes. Look for a golden brown top and bubbling edges. 8. Garnish & Serve: Take it out of the oven and let it cool for a few minutes. Garnish with fresh parsley for a nice touch. This step-by-step guide helps you create a creamy and flavorful delight. For more details, see the Full Recipe. To make a creamy cheese sauce, you need to create a smooth roux. Start by melting butter in a pan. Then, whisk in flour for about a minute. This step helps to thicken the sauce. Next, slowly add milk while you whisk. This keeps lumps from forming. Once it thickens, mix in your cheese. Use fresh cheese for the best flavor and texture. Sharp cheddar gives a nice bite, while mozzarella adds stretch. Cooking pasta is key for great mac and cheese. Always boil salted water for the pasta. This adds flavor to the noodles. Cook the elbow macaroni for just a bit less than the package says. Aim for al dente, which means it should be firm but not hard. Drain the pasta and set it aside. This keeps it from getting mushy in the cheese sauce. If you want a fun twist on mac and cheese, try adding extras. You can mix in cooked bacon or crispy pancetta for a salty kick. Veggies like broccoli or spinach can make it more wholesome. Even spices like cumin or chili powder can add depth. You can also use different cheese blends. For example, try gouda or pepper jack for a smoky flavor. These small changes can make your mac and cheese stand out. For the full recipe, check out The Ultimate Cheesy Mac & Cheese. {{image_4}} You can make your mac and cheese special with gourmet twists. Add cooked lobster or crab for a fancy touch. Truffle oil can give it a rich, earthy flavor. You might also try adding sautéed mushrooms or fresh herbs. A sprinkle of crispy bacon bits can add a savory crunch. For a vegetarian version, use vegetable broth instead of chicken broth. Swap regular cheese with aged vegan cheese for creamy goodness. Nutritional yeast adds a cheesy flavor without dairy. You can also replace butter with olive oil or coconut oil. Adding steamed broccoli or spinach boosts nutrition and color. Different regions have their own styles of mac and cheese. In the South, you might find a baked version with a crunchy topping. In New England, they often add breadcrumbs on top with a creamy sauce. In Italy, you might see a baked pasta dish called "pasta al forno," which has a similar cheesy appeal. Each style brings new flavors and textures to this classic dish. For the best mac and cheese recipe, check out the Full Recipe. To keep leftover mac and cheese fresh, let it cool first. Once cool, transfer it to an airtight container. This keeps moisture in and prevents it from drying out. Store it in the fridge for up to three days. If you want it to last longer, consider freezing it. When you are ready to enjoy your leftovers, reheating properly is key. You can use the oven or the microwave. For the oven, preheat it to 350°F (175°C). Place the mac and cheese in a baking dish. Add a splash of milk to help it stay creamy. Cover it with foil to keep it from drying out. Bake for 15-20 minutes until heated through. In the microwave, use a microwave-safe bowl. Heat in short bursts, stirring in between. This helps it warm evenly. If you want to freeze mac and cheese, follow these steps. First, let it cool completely. Then, portion it into freezer-safe containers. You can also use heavy-duty freezer bags for space-saving. Remove as much air as possible to prevent freezer burn. Label the bags with the date. Frozen mac and cheese can last for up to three months. When ready to eat, thaw it in the fridge overnight and reheat as mentioned above. The best cheese for mac and cheese is sharp cheddar. It melts well and gives a rich flavor. I also like to mix in mozzarella for creaminess and parmesan for a salty kick. Using fresh cheese makes a big difference. Avoid pre-shredded cheese, as it has additives that affect melting. Yes, you can make mac and cheese ahead of time. Just cook it, then store it in the fridge. Cover it with plastic wrap to keep it fresh. When ready to serve, you can bake it straight from the fridge. This saves time and still tastes great. You can store homemade mac and cheese in the fridge for about three to five days. Keep it in an airtight container to prevent drying out. If you want to keep it longer, freeze it. It can last up to three months in the freezer. To thicken your mac and cheese sauce, you can use more cheese or a bit of flour. If your sauce is too thin, mix a teaspoon of cornstarch with water and stir it in. Let it simmer until it thickens. This will give you that creamy texture you crave. This blog post covered the key steps for making amazing mac & cheese. We discussed essential ingredients, cheese types, and tasty variations. I shared tips for creamy sauces and proper cooking. You learned how to store leftovers and reheat them well. Keep trying new recipes to find your favorite. With practice, you will master this classic dish and impress everyone. Enjoy making, sharing, and savoring your mac & cheese!

The Best Mac & Cheese Creamy and Flavorful Delight

Who doesn’t love a warm bowl of mac and cheese? In this guide, I’ll share my secrets for crafting the

- 1 package of potato gnocchi (about 500g) - 2 cups cherry tomatoes, halved - 1 ball of burrata cheese (about 125g) - 2 tablespoons extra virgin olive oil - 3 cloves garlic, finely minced - 1 teaspoon red pepper flakes (adjust according to your spice preference) - Sea salt and freshly cracked black pepper to taste - Fresh basil leaves for garnish - Grated Parmesan cheese for serving (optional) - 1 cup fresh spinach (approximately one large handful) The main ingredients make this dish shine. Potato gnocchi offers a soft bite that pairs well with tomatoes. Cherry tomatoes add sweetness and a pop of color. Burrata cheese brings a creamy richness that ties the dish together. Extra virgin olive oil is key for sautéing. It adds flavor and helps the garlic become fragrant. Garlic and red pepper flakes give warmth and depth. Sea salt and black pepper enhance all the flavors, making them sing. You can also add fresh basil leaves to brighten up your plate. Grated Parmesan cheese is a nice touch if you want extra flavor. Fresh spinach not only adds color but also boosts nutrition. For the full recipe, check the details above. Enjoy crafting this delightful dish! Bringing Water to a Boil Fill a large pot with water and add a good amount of salt. Turn the heat to high. Wait for the water to bubble up. This step is key for the gnocchi. Cooking Duration and Signs of Doneness Once the water boils, add the potato gnocchi. Cook them for about 2-3 minutes. Watch closely. They are done when they float to the top. After cooking, drain them in a colander. Set them aside for later. Heating Olive Oil In a large skillet, pour in 2 tablespoons of extra virgin olive oil. Turn the heat to medium. Let the oil heat up for a minute. Adding Garlic and Red Pepper Flakes Next, add 3 cloves of finely minced garlic. Sprinkle in 1 teaspoon of red pepper flakes. Stir for about 30 seconds. You want the garlic to be fragrant and slightly golden. Be careful not to burn it. Incorporating Cherry Tomatoes Now, add 2 cups of halved cherry tomatoes to the skillet. Season them with sea salt and freshly cracked black pepper. Cook for 5-7 minutes. Stir occasionally. The tomatoes will soften and start to burst, making a tasty sauce. Seasoning and Cooking Time Make sure to keep the heat steady. This helps the flavors mix well. Once the tomatoes look good, you are ready for the next step. Adding Spinach Add 1 cup of fresh spinach to the skillet. Sauté it for about 2 minutes. The spinach should wilt and turn bright green. Combining Gnocchi and Burrata Carefully fold the drained gnocchi into the mix. Toss gently for about 2-3 minutes. This allows the gnocchi to soak up all those delicious flavors. Finally, take the skillet off the heat. Tear the burrata in half and let it fall over the gnocchi. The warmth will melt the cheese, mixing its creaminess with the dish. For the full recipe, check the provided details. Enjoy your cooking! How to Choose Quality Gnocchi When picking gnocchi, look for packages that say "fresh" or "made with potatoes." Quality matters, as it affects taste and texture. Check the ingredients; the best gnocchi has few additives. Avoid those with artificial flavors or preservatives. Tips for Cooking Gnocchi To cook gnocchi perfectly, start with a big pot of salted water. Bring it to a rolling boil. Add the gnocchi and watch closely. They are done when they float to the top, usually in 2-3 minutes. Drain them quickly to keep them from becoming mushy. Using Fresh Herbs Fresh herbs make a big difference in flavor. I love using basil in this dish. It adds a sweet and fragrant note that pairs well with tomatoes. Just tear the leaves and sprinkle them on top before serving. Balancing Spices and Seasonings Red pepper flakes add heat, but you can adjust them to your taste. Start with a small amount and add more if you want. Sea salt and freshly cracked black pepper are key for enhancing the dish's overall flavor. Taste as you go to find the right balance. Presentation Ideas Serving matters as much as taste. Use shallow bowls for a nice look. Drizzle a little extra virgin olive oil on top for a glossy finish. A light sprinkle of red pepper flakes adds color. Don’t forget the fresh basil leaves for an extra touch. Pairing with Sides or Wines Pair this gnocchi dish with a simple green salad for freshness. A light white wine, like Pinot Grigio, complements the flavors well. It’s refreshing and balances the richness of the burrata. Enjoy your meal with a delightful drink for the best experience. For the full recipe, check out the 30 Minute Tomato Gnocchi with Burrata Delight. {{image_4}} If you want to switch up the gnocchi, consider these options: - Gluten-Free Options: You can find gluten-free gnocchi made from rice or corn flour. Brands like Cappello's offer a tasty alternative. - Alternative Pasta Choices: If gnocchi isn't your thing, try using small pasta like orecchiette or farfalle. These shapes hold sauce well. Want to make your dish heartier? Here are a couple of ideas: - Adding Protein: Chicken or shrimp can add great flavor. Cook your protein in the skillet before adding garlic. This adds depth to the dish. - Incorporating Vegetables: Zucchini and bell peppers blend nicely with the sauce. Simply sauté them with the garlic for a healthy twist. You can easily make this dish plant-based: - Dairy Substitutes: Use cashew cream or coconut yogurt instead of burrata. They add creaminess without dairy. - Plant-Based Gnocchi Options: Look for gnocchi made from sweet potato or chickpeas. They can add a unique taste to your dish. For the full recipe, check out the details above. To keep your gnocchi fresh, store leftovers in an airtight container. Let the dish cool to room temperature first. Place the container in the fridge. The gnocchi will stay good for about 3 days. When you’re ready to eat, just reheat on the stove or in the microwave. Add a splash of water to keep it moist. If you want to freeze the gnocchi, follow these steps: - How to Freeze Leftover Dish: Allow the dish to cool completely. Then, place it in a freezer-friendly container. Make sure to leave some space at the top, as it may expand when frozen. - Thawing and Reheating the Gnocchi: To thaw, place the container in the fridge overnight. For reheating, add a bit of olive oil or water in a skillet over medium heat. Stir gently until heated through. This keeps the gnocchi soft. The estimated storage duration for your gnocchi is as follows: - Refrigerator: Up to 3 days - Freezer: Up to 2 months Signs of Spoilage: Check for an off smell or any mold. If you see either, it's best to toss the dish. Always trust your senses when it comes to food safety. This dish takes only 30 minutes to complete. Here's how: - Prep Time: 10 minutes for chopping and gathering ingredients. - Cooking Time: 20 minutes for cooking gnocchi and sautéing. Yes, you can use canned tomatoes. Here are the pros and cons: - Pros: Canned tomatoes save time and are often less expensive. They also have a long shelf life. - Cons: Fresh tomatoes have a brighter flavor. Canned tomatoes might be softer and less firm. Yes, you can prepare this dish ahead. Here are some tips: - Cook the gnocchi and sauce, then cool and store in the fridge. - Reheat gently on the stove, adding a splash of water if needed. There are several alternatives to burrata cheese. Consider these options: - Mozzarella: It gives a similar creaminess and texture. - Ricotta: Use fresh ricotta for a creamy, mild flavor. - Cream Cheese: Mix with a bit of milk for a smoother texture. For the full step-by-step recipe, check out the Full Recipe. This dish combines rich flavors and simple techniques. You learned about the key ingredients, from gnocchi to burrata. I shared step-by-step cooking instructions for perfect results every time. You also discovered ways to enhance flavors and presented suggestions to serve. Consider trying variations, such as adding proteins or making it vegan. Remember, proper storage keeps your leftovers fresh. Enjoying this dish is easy and rewarding! Dive in, experiment, and savor every bite. You’ll create a meal that impresses any guest.

30 Minute Tomato Gnocchi with Burrata Delight

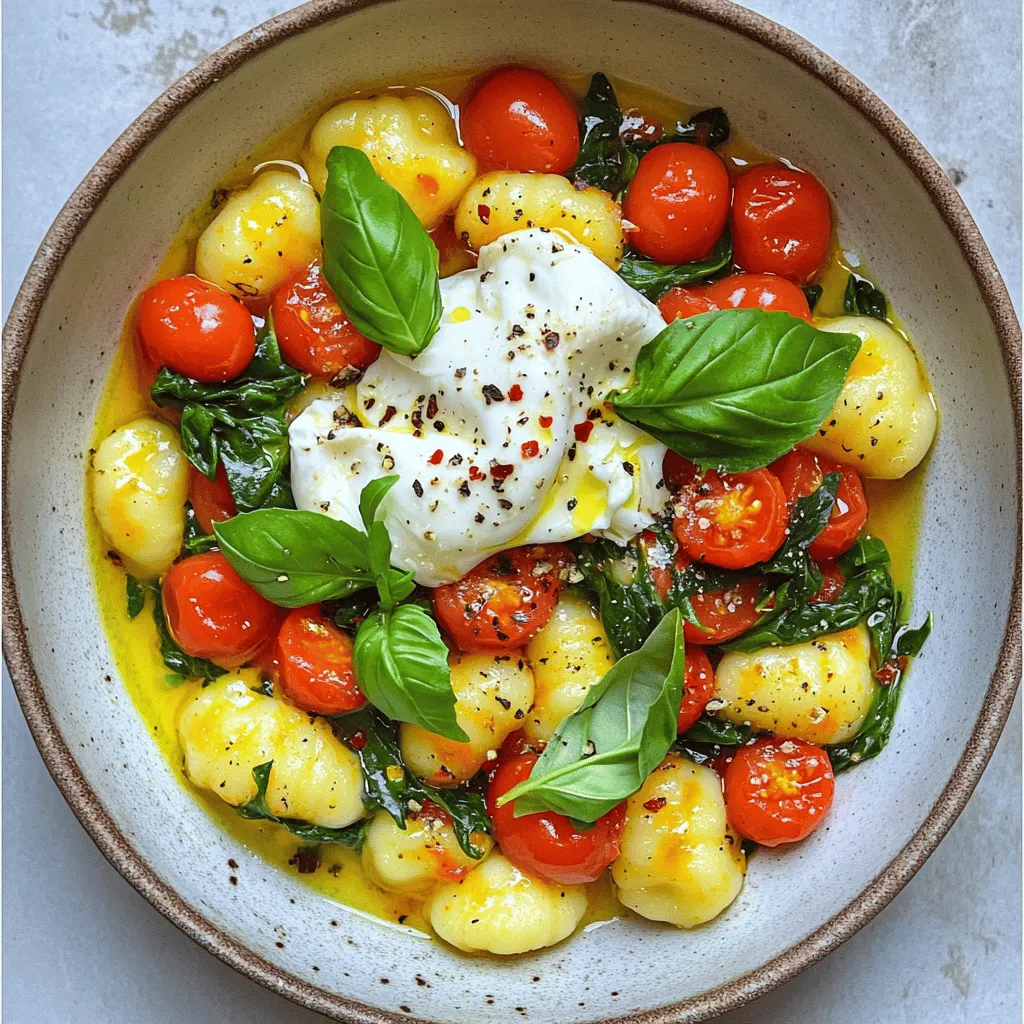
Craving a delicious dish that’s quick and easy? You’re in the right place! This 30 Minute Tomato Gnocchi with Burrata

- 1.5 lbs sirloin steak, cut into 1-inch cubes - 4 medium russet potatoes, peeled and diced - 1 cup sharp cheddar cheese, shredded (divided) - 1 cup sour cream - 1/2 cup green onions, chopped - 1/2 cup bacon bits (optional) - 2 cloves garlic, minced - 1 teaspoon smoked paprika - 1 teaspoon salt - 1/2 teaspoon black pepper - 1 cup beef broth For this recipe, you want fresh, quality ingredients. Start with the sirloin steak. Cut it into bite-sized cubes. Choose russet potatoes for their texture. Peel and dice them into even pieces. This helps them cook well. Use sharp cheddar cheese for a rich flavor. Next, gather your additional ingredients. Sour cream adds creaminess, while green onions bring a fresh crunch. Bacon bits are optional but add great taste. Chop everything finely to mix well. Now, move to seasoning. Mince the garlic so it spreads its flavor throughout the dish. Smoked paprika gives a nice, warm taste. Salt and black pepper will enhance all the flavors. Finally, the beef broth keeps everything moist while cooking. For the full recipe, refer to the link provided. - First, layer the diced potatoes in the crockpot. This forms a sturdy base. - Next, season the sirloin steak cubes with smoked paprika, salt, and black pepper. This adds great flavor. - Now, place the seasoned steak over the potatoes. This makes sure the flavors mix well. - Sprinkle minced garlic over the steak layer. The garlic will give it a nice taste. - Carefully pour beef broth over the entire mixture. This keeps everything moist while cooking. - Cover and cook on low for 6-8 hours or high for 3-4 hours. You want the steak tender and the potatoes soft. For the full recipe, check the instructions above. Enjoy cooking! - Cut the potatoes into similar sizes. This helps them cook evenly. - Add sour cream and cheese near the end of cooking. This keeps them creamy. - Top your dish with green onions and bacon bits for extra flavor. - Serve in bowls to show off the layers of this tasty meal. - Do not overcrowd the crockpot. This can change how long it cooks. - Make sure to season well. If you skip this step, the dish may taste bland. {{image_4}} You can change the protein in this dish. Use chicken or pork instead of steak. Both options give a new taste. For a lighter dish, swap Greek yogurt for sour cream. It still gives that creamy texture you want. If you need a gluten-free meal, use certified gluten-free beef broth. This simple switch keeps the dish safe for those with gluten issues. You can also omit the cheese for a lactose-free version. This keeps the flavors while making it friendly for more diets. If you have a high-efficiency crockpot, adjust the cooking time. It cooks food faster, so check after 4 hours on high. You can also use an Instant Pot for a quicker meal. This method can cut the time to about 30 minutes. Just make sure to follow the same layering and seasoning steps from the Full Recipe. To keep your Crockpot Loaded Steak and Potato Bake fresh, cool it completely first. Once cool, transfer it to an airtight container. This helps lock in flavors and moisture. Store it in the refrigerator for up to 3-4 days. Always label your container with the date to track freshness. If you want to save some for later, freezing is a great option. Portion the leftovers into individual containers. This way, you can enjoy easy meals later. When you are ready to eat, thaw the containers in the refrigerator overnight. This ensures even thawing and keeps the taste intact. To reheat your dish, you have a couple of easy options. Use the microwave or stovetop to heat until hot. If it seems a bit dry, add a splash of broth or water. This will help restore its creamy texture. Make sure it is heated all the way through before serving again. Yes, you can prepare the ingredients and refrigerate them before cooking. This way, you can save time on a busy day. Just layer the potatoes and steak in the crockpot, season them, and cover. When you're ready, just add the broth and cook. It makes meal prep simple and easy. Pair it with a side salad or some crusty bread for a complete meal. The fresh crunch of a salad balances the hearty flavors of the dish. A warm piece of bread is great for soaking up the tasty sauce. You can also try some roasted veggies for added color and nutrition. The steak should be tender and easily shredded with a fork when fully cooked. If it feels tough, it needs more time. Cooking on low for 6-8 hours usually achieves the best results. If short on time, cooking on high for 3-4 hours works too. Absolutely! It's great for meal prep and reheats well. You can store leftovers in the fridge for a few days. This means you can enjoy it multiple times without much fuss. Just reheat and enjoy! This blog post detailed a simple and delicious recipe for a Crockpot Loaded Steak and Potato Bake. We covered the main and additional ingredients, provided easy step-by-step cooking instructions, and shared tips for avoiding common mistakes. You can customize this dish by varying the protein or using dietary substitutes. Remember to store leftovers properly for later enjoyment. With these tips and instructions, you're ready to make a hearty meal that your family will love. Enjoy cooking and sharing this tasty dish!

Crockpot Loaded Steak and Potato Bake Simple Recipe

Looking for a cozy dinner idea? This Crockpot Loaded Steak and Potato Bake is perfect! Packed with tender sirloin steak,

- 4 large bell peppers (red, yellow, green, or orange) - 1 lb ground turkey - 1 cup cooked quinoa (preferably chilled) - 1 cup diced tomatoes (canned or freshly chopped) - 1 small onion, finely diced - 2 cloves garlic, minced - 1 teaspoon ground cumin - 1 teaspoon smoked paprika - ½ teaspoon cayenne pepper (adjust to taste) - Salt and freshly cracked black pepper, to taste - 1 cup shredded cheese (cheddar or mozzarella) - Fresh cilantro or parsley, roughly chopped for garnish To make these stuffed bell peppers pop, you need fresh and vibrant ingredients. I love using large bell peppers because they hold so much flavor and color. Ground turkey is a great choice for protein; it’s lean and absorbs spices well. I always recommend using chilled quinoa for the best texture, as it helps to keep the filling light and fluffy. The diced tomatoes, onions, and garlic add a depth of flavor. Onions bring sweetness, while garlic adds that aromatic touch we all crave. The spices—cumin, smoked paprika, and cayenne—are key for that signature savory kick. Adjust the cayenne to your liking; it can add just the right amount of heat! The cheese not only adds creaminess but also helps bind the filling together. Finally, a sprinkle of fresh herbs like cilantro or parsley brightens up the dish. You can find the full recipe linked above, which will guide you through each step to create these delicious stuffed bell peppers. - Preheat the oven to 375°F (190°C). - Slice the tops off the bell peppers and remove the seeds. First, I set the oven to preheat. This helps the peppers cook evenly. Then, I take each bell pepper and cut off the top. I make sure to scoop out the seeds and membranes inside. I like to stand them upright in a baking dish. This way, they are ready for stuffing. - Sauté onions and garlic in olive oil. - Brown the ground turkey in the skillet. - Mix in quinoa, tomatoes, spices, and half the cheese. Next, I heat a splash of olive oil in a skillet. I add diced onions and let them cook until they turn soft. This takes about three to four minutes. Then, I add minced garlic and stir for another minute. It smells so good! Now, I add the ground turkey to the skillet. I break it apart with a spatula and let it cook until it is brown. This usually takes about five to seven minutes. After that, I mix in cooked quinoa, diced tomatoes, spices, and half of the cheese. I stir it all together and let it cook for another few minutes. This blends the flavors nicely. - Fill each bell pepper with the turkey mixture. - Sprinkle remaining cheese on top. - Cover with foil and bake for 25 minutes, then uncover and bake for another 10 minutes. Now comes the fun part! I take the turkey mixture and fill each pepper. I pack it tightly to make sure they are full of flavor. After that, I sprinkle the rest of the cheese on top of each pepper. Next, I cover the baking dish with foil to keep the heat in. I bake them for 25 minutes. After that, I remove the foil and bake for another 10 minutes. I keep an eye on the cheese; it should be bubbly and golden. Once done, I let them rest for a few minutes before serving. This way, the flavors settle, and they taste even better. For the full recipe, check out the detailed list and instructions. Enjoy your cooking! - Adjust spices to taste for a personalized kick. - Use fresh herbs for better flavor. Fresh cilantro or parsley brightens up the dish. - Browning the turkey ensures more flavor. This step gives depth to your filling. - Ensure peppers are packed tightly for even cooking. This helps the flavors meld perfectly. - Use vibrant dishes for serving. A colorful plate makes the meal more appealing. - Garnish with fresh herbs for color. A sprinkle of cilantro or parsley adds freshness. {{image_4}} You can change the filling to suit your taste. Swap ground turkey for ground beef or chicken. This adds a different flavor. If you want more protein and fiber, add black beans to the mix. They boost nutrition and make the meal more filling. Cheese lovers can try feta or goat cheese. These options add a unique twist. If you prefer a dairy-free version, simply omit the cheese. The stuffed peppers will still taste great without it. For extra nutrients, include chopped spinach or zucchini in the filling. These veggies blend well with the other ingredients and add color. You can also experiment with different colored bell peppers. Each color brings a fun look and slight flavor change. After you enjoy your stuffed bell peppers, store any leftovers in an airtight container. Place the container in the refrigerator. When you're ready to eat, you can reheat the peppers either in the oven or the microwave. This keeps them tasty and safe to eat. If you want to save time later, freeze the stuffed peppers before baking them. This way, you’ll have easy meals ready to go. When you’re ready to cook, just thaw the peppers overnight in the refrigerator. This step makes sure they cook evenly. Refrigerated leftovers are best enjoyed within 3-4 days. This helps ensure they taste fresh and delicious. If you freeze your stuffed peppers, they can last up to 3 months. Make sure to label them with the date for easy tracking. You can tell when stuffed peppers are done by looking for bubbling cheese and fork-tender bell peppers. When the cheese melts and turns golden, it signals that the peppers are ready to eat. You want them soft enough to easily pierce with a fork, but not too mushy. This means the filling is hot and flavors are melded perfectly. Yes, you can prepare stuffed peppers ahead of time. Just prep and assemble the peppers, then either refrigerate them before baking or freeze for later use. If you refrigerate, bake them within a day or two for the best taste. If you freeze, remember to thaw them overnight in the fridge before cooking. This makes it easy to enjoy a quick, tasty meal on busy days. You can pair stuffed bell peppers with a simple salad or garlic bread for a complete meal. A fresh green salad adds crunch and balances the meal's flavors. Garlic bread brings a warm, buttery touch that complements the peppers well. These sides not only enhance your meal but also make it more colorful and appealing on the plate. Stuffed bell peppers are a tasty and easy meal. You learned the main ingredients, how to prepare the filling, and different ways to personalize your dish. Don’t forget to adjust spices for your taste! You can also store leftovers easily for later. These peppers are not just good for you; they also look great on your table. Try these tips and enjoy your cooking adventure!

Savory Stuffed Bell Peppers with Ground Turkey Recipe

Are you ready to elevate your weeknight dinners? My Savory Stuffed Bell Peppers with Ground Turkey recipe packs flavor and

To make creamy tomato basil soup, you need simple, fresh ingredients. Here’s what you will need: - 2 tablespoons extra virgin olive oil - 1 medium onion, finely diced - 3 cloves garlic, minced - 1 can (28 ounces) crushed tomatoes, preferably San Marzano for sweetness - 2 cups vegetable broth, low-sodium for better control of saltiness - 1 teaspoon granulated sugar (optional, to balance acidity) - Freshly ground salt and black pepper to taste - 1 cup heavy cream (or for a vegan alternative, use coconut cream) - 1/2 cup fresh basil leaves, roughly torn - Crunchy croutons and additional torn basil leaves for garnish These ingredients work together to create a rich and creamy soup. The crushed tomatoes give the soup a sweet and tangy base. The cream adds smoothness, while the basil gives it a fresh taste. You can add a few extra ingredients to enhance the flavor of your soup. Consider these options: - A pinch of red pepper flakes for heat - A squeeze of lemon juice for brightness - Parmesan cheese for a salty kick - A splash of balsamic vinegar for depth These options let you customize the soup to suit your taste. Try adding one or two to find your perfect flavor. You can swap some ingredients if you need to. Here are a few easy substitutions: - Use vegetable oil instead of olive oil if you prefer. - Swap out heavy cream for half-and-half or plain yogurt for a lighter option. - If you don’t have fresh basil, you can use dried basil. Just use less, as dried basil is stronger. These substitutions help you adapt the recipe to what you have on hand. Remember, cooking is all about being flexible. For the full recipe, check out the details provided above. Start by heating the olive oil in a large pot over medium heat. Once it shimmers, add the finely diced onion. Stir it for about five minutes until it turns soft and clear. This step builds a great flavor base. Next, add the minced garlic and stir for one to two minutes. Be careful not to brown it, as this can make the soup bitter. Pour in the crushed tomatoes and vegetable broth. If you want, add the teaspoon of sugar to balance the acidity. Mix all the ingredients well and raise the heat slightly. Bring the soup to a gentle simmer. Once it bubbles, turn the heat down and let it simmer uncovered for about 15 minutes. This helps the flavors blend perfectly. After simmering, it’s time to make the soup creamy. Use an immersion blender to puree the soup until it is smooth. If you don’t have one, carefully transfer the soup in batches to a countertop blender. Blend until it is silky and return it to the pot. The goal is a rich, creamy texture that feels luxurious in every spoonful. With the soup pureed, return it to low heat. Stir in the heavy cream or coconut cream and warm it for five additional minutes. Make sure to stir often, but do not let it boil. Season with salt and black pepper to taste. Adjust these to your liking. Finally, stir in the torn basil leaves right before serving. This keeps the basil fresh and aromatic. Serve hot, topped with crunchy croutons and extra basil for a lovely finishing touch. For the complete recipe, check [Full Recipe]. To get the best texture for your creamy tomato basil soup, smoothness is key. Use an immersion blender for easy blending. If you prefer a chunkier soup, blend just half. This gives you a mix of textures, which is fun. Always blend the soup after simmering. This step lets the flavors mix well. Seasoning is where the magic happens. I love adding salt and black pepper to enhance the taste. Start with a little and adjust to your liking. If it tastes too acidic, a pinch of sugar can balance it out. Fresh basil leaves add a bright flavor, so add them at the end for the best aroma. Serving your soup well makes it even more inviting. Use deep bowls for a cozy feel. I like to garnish with crunchy croutons and torn basil leaves. This adds crunch and color. Serve hot to enjoy the warmth and aroma fully. For an extra touch, drizzle a bit of cream on top for a lovely swirl. {{image_4}} To make a vegan version of creamy tomato basil soup, swap the heavy cream for coconut cream. This gives the soup a rich, creamy texture while keeping it plant-based. The coconut cream adds a hint of sweetness that blends well with the tomatoes. Just stir it in at the end, just like you would with heavy cream. This keeps the soup smooth and delicious. If you like heat, there are many ways to spice up your soup. You can add red pepper flakes while cooking. A teaspoon or two will brighten the flavor and bring warmth. For a bolder kick, try adding a dash of hot sauce. You can also blend in some diced jalapeños for a fresh, spicy twist. Adjust to your taste, and enjoy the heat! Fresh tomatoes can make your soup taste extra special. If you choose this route, use ripe and juicy tomatoes. About two pounds will do the trick. Start by roasting them for a richer flavor. After roasting, blend them into the soup. You will need to add a bit more broth to reach the right consistency. This method brings a bright taste to your creamy tomato basil soup. For the full recipe, check out the [Full Recipe]. After you enjoy your creamy tomato basil soup, store any leftovers in an airtight container. Let the soup cool to room temperature first. This helps avoid condensation that can make it watery. Place the container in the fridge. It will stay fresh for up to four days. If you want to keep the soup longer, freezing is a great option. Use freezer-safe containers or bags. Leave some space in the container for the soup to expand. The soup can last for up to three months in the freezer. When you're ready to eat, just thaw it overnight in the fridge. To reheat, pour the soup into a pot. Heat it over low to medium heat, stirring often. This helps it warm evenly. If the soup seems thick, add a splash of vegetable broth or water. This keeps it creamy and delicious. Avoid microwaving, as it may change the texture. For the best taste, add fresh basil right before serving. You can find the full recipe in the earlier section. Yes, you can make this soup ahead of time. Cook it as the recipe states and let it cool. Once cool, store it in an airtight container in the fridge. It stays fresh for up to three days. When you are ready to eat, just reheat it on the stove. Stir it well to bring back its creamy texture. You can enjoy this soup with many sides. Here are some great options: - Crunchy grilled cheese sandwiches - Fresh garden salad - Garlic bread - Crispy croutons on top These sides pair well and add fun textures and flavors to your meal. To make this soup gluten-free, simply check the vegetable broth. Some broths may contain gluten. Use a certified gluten-free broth to stay safe. All other ingredients in the recipe are gluten-free. Yes, you can use dried basil. Use only one teaspoon of dried basil for every half cup of fresh basil. Dried herbs are more concentrated, so a little goes a long way. Add the dried basil during cooking to let its flavor bloom. Creamy Tomato Basil Soup combines simple ingredients for rich flavor and comfort. We explored the main items needed, optional seasonings for bonus taste, and substitutions for flexibility. I shared easy steps for a smooth, creamy texture, plus tips for a delicious end result. You can try fun variations, store leftovers properly, and enjoy answers to common questions. Remember, this soup is not just a meal; it's a warm hug in a bowl. Happy cooking and enjoy every spoonful!

Creamy Tomato Basil Soup Simple and Delicious Recipe

Craving a warm, hearty meal? Look no further than my Creamy Tomato Basil Soup! This simple, delicious recipe combines the

- Ripe bananas - Unsweetened almond milk - Raw cocoa powder - Honey or maple syrup - Peanut butter or almond butter - Pure vanilla extract - Ground cinnamon - Ice cubes (optional) To make a great Chocolate Banana Smoothie, you need a few simple ingredients. Start with ripe bananas. They add natural sweetness and make the smoothie creamy. I always choose bananas that have a few brown spots. They taste sweeter and blend better. Next, grab unsweetened almond milk. It gives a nice creamy base without too many calories. If you prefer, you can choose any milk you like, such as oat or soy milk. Now, let’s add raw cocoa powder. This ingredient gives the smoothie its chocolate flavor. I use two tablespoons for a rich taste. If you want it sweeter, you can add honey or maple syrup. Start with one tablespoon and adjust it to your taste. For a nutty flavor, pick either peanut butter or almond butter. Just one tablespoon adds creaminess and protein. Don’t forget the pure vanilla extract! It enhances all the flavors. A teaspoon is enough. Lastly, a pinch of ground cinnamon gives warmth and depth. And if you want a colder, thicker drink, add ice cubes. You can use a handful or skip them based on your preference. With these ingredients in hand, you're ready to make a delicious Chocolate Banana Smoothie. For a detailed guide, check the Full Recipe. To make a delightful chocolate banana smoothie, follow these easy steps. - Start by peeling and preparing the bananas. Take two ripe bananas and peel them. Break the bananas into smaller chunks. This helps them blend well. - Blend the banana chunks with the remaining ingredients. In a blender, add the banana pieces. Pour in one cup of unsweetened almond milk. Next, add two tablespoons of raw cocoa powder. This gives the smoothie its rich chocolate taste. Then, include one tablespoon of honey or maple syrup. This sweetens the mix. Add one tablespoon of peanut butter or almond butter for a nutty flavor. Don't forget one teaspoon of pure vanilla extract. Finally, sprinkle in a pinch of ground cinnamon for warmth. - Adjust sweetness and blend again if needed. Blend all the ingredients on high speed. Stop to scrape down the sides of the blender if needed. Taste the smoothie when it looks creamy. If it needs more sweetness, add a bit more honey or maple syrup. Blend again to mix it well. - Serve immediately and enjoy. Pour the smoothie into two chilled glasses. You can garnish it with cocoa powder or a banana slice for fun. Enjoy this creamy treat right away for the best taste! For the full recipe, check out the section above. Choosing ripe bananas helps create a sweet taste. Look for bananas with brown spots. These spots show that the fruit is sweet and ready to use. Next, select the right milk alternative for your smoothie. Unsweetened almond milk is a great choice. It adds creaminess without added sugar. You can also use oat milk or coconut milk. Each option gives a different flavor. Blending time is key for a smooth texture. Blend your smoothie until it is creamy and free of lumps. This usually takes about 30 to 60 seconds. If you stop early, your smoothie may feel chunky. One common mistake is overloading the blender. If you add too many ingredients, it may not blend well. Stick to the recipe amounts for the best results. Not tasting before serving is another pitfall. Always take a quick sip to check sweetness. You can easily adjust it by adding more honey or maple syrup. Lastly, skipping the ice can leave your smoothie warm. Ice cubes help create a colder and thicker drink. Add a handful for a refreshing twist in every sip. For the full recipe for this Chocolate Banana Bliss Smoothie, check out the earlier section! {{image_4}} You can easily change up your chocolate banana smoothie. Here are some tasty ideas: - Adding spinach or kale: This adds a green twist. You won't taste the greens, but you’ll get extra nutrients. - Incorporating other fruits: Try adding strawberries, cherries, or even mango. Each fruit adds a new flavor to your smoothie. - Using flavored protein powders: If you want more protein, try chocolate or vanilla protein powder. This makes your smoothie even creamier. You can also make your smoothie fit different diets: - Making it vegan: Use plant-based sweeteners like agave syrup instead of honey. This keeps it sweet without animal products. - Nut-free alternatives: If you have nut allergies, swap nut butter for sunflower seed butter. It will still taste great without the nuts. To keep your chocolate banana smoothie fresh, use airtight containers. This helps seal in the taste and texture. If you store it in the fridge, it will last for up to 24 hours. After that, it may lose some creaminess. If you want to save some for later, you can freeze it. Pour the smoothie into ice cube trays or freezer-safe bags. This way, you can enjoy it later. Frozen smoothies can last up to three months in the freezer. To thaw a frozen smoothie, place it in the fridge overnight. You can also leave it on the counter for a few hours. If you need it faster, use the microwave. Heat it in short bursts until it softens. When you are ready to drink it, blend again. This helps mix the ingredients and restore the creamy texture. If it’s too thick, add a splash of milk and blend again. Enjoy your smooth and tasty treat! A chocolate banana smoothie lasts about 1 day in the fridge. After that, it may separate or lose its taste. I suggest you drink it fresh for the best flavor. If you need to store it, use a tight lid to keep it fresh longer. Yes, you can make this smoothie ahead of time. However, I recommend you drink it fresh. If you make it early, store it in the fridge. Just remember that it may not taste as good after a few hours. You can add many things for extra nutrition. Here are some options: - Spinach for iron and vitamins - Chia seeds for fiber and omega-3s - Greek yogurt for protein - Oats for added fiber and fullness These add-ins make your smoothie even healthier and tastier. Yes, you can make this smoothie without a blender. Use a fork to mash the bananas until smooth. Then, mix the other ingredients in a bowl. You can also use a whisk to blend everything well. It takes more effort, but it works! You have many great milk options for this recipe. Some good choices are: - Almond milk for a nutty flavor - Oat milk for creaminess - Coconut milk for a tropical twist - Soy milk for added protein Choose your favorite for the best taste! For the full recipe, check the list above. You learned how to make a delicious chocolate banana smoothie. You know the essential ingredients, like ripe bananas and almond milk. You also have clear steps for blending and tips to avoid common mistakes. Remember to be creative with flavors and adjust for dietary needs. Store any leftovers properly to enjoy later. This smoothie is fun and easy for everyone. Enjoy your tasty treat and share it with friends!

Chocolate Banana Smoothie Delightfully Creamy Treat

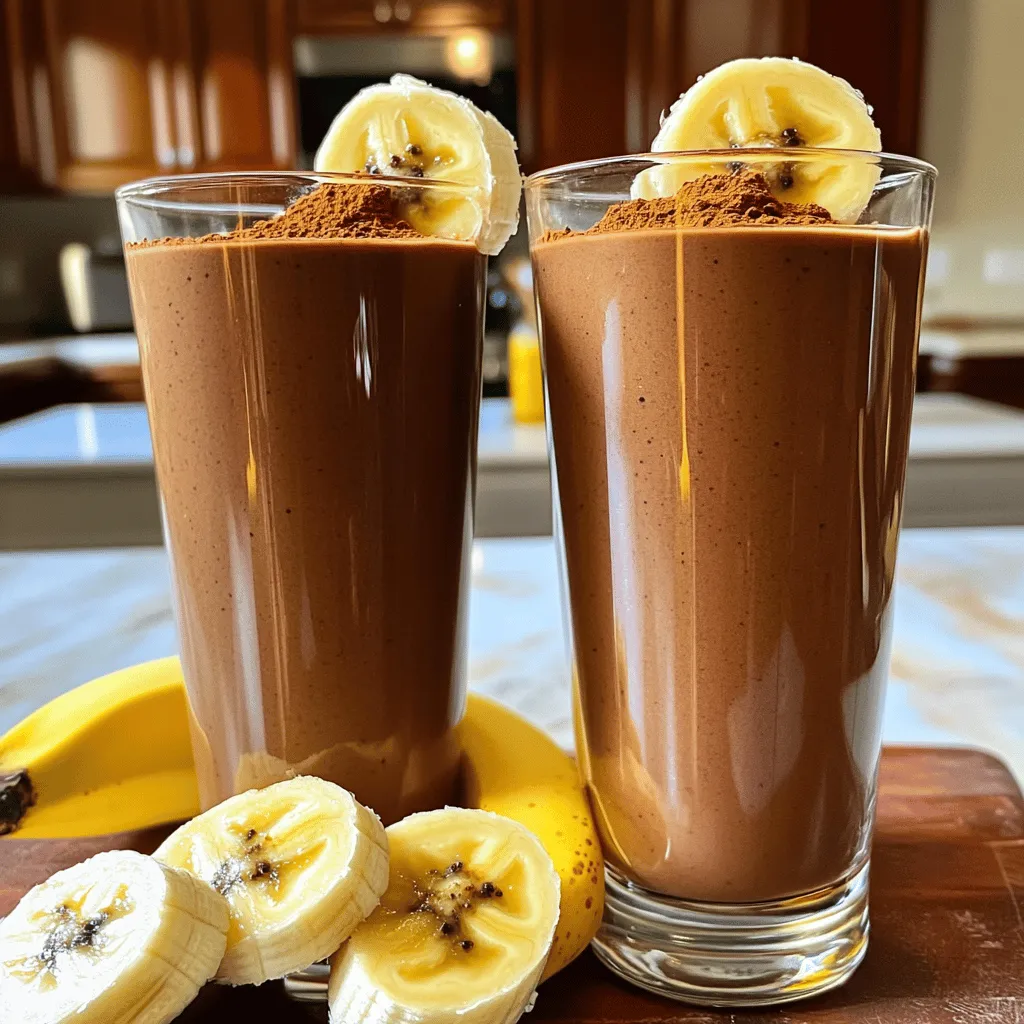
Do you crave a sweet treat that’s both delicious and healthy? Look no further than the Chocolate Banana Smoothie! This

To make a tasty Zucchini Noodle Pad Thai, you will need: - 2 medium zucchinis, spiralized into noodles - 1 cup firm tofu, cubed - 1 red bell pepper, sliced - 1 cup bean sprouts - 2 green onions, sliced - 3 garlic cloves, minced - 2 tablespoons tamari or soy sauce - 1 tablespoon natural peanut butter - 1 tablespoon lime juice - 1 tablespoon sesame oil - 1 tablespoon coconut sugar or brown sugar - Chopped peanuts and lime wedges for garnish These ingredients work well together to create a flavorful dish. The zucchini noodles are fresh and light. They soak up the sauce and give a nice crunch. You can customize your Pad Thai with these options: - Add carrots or bell peppers for more color. - Use cooked shrimp or chicken for added protein. - Swap tofu for tempeh if you like a different texture. - Try a different nut butter like almond for a twist. Feel free to mix and match based on your taste and what you have at home. This Zucchini Noodle Pad Thai is great if you follow a low-carb diet. Zucchini has fewer carbs than traditional noodles. It’s also gluten-free if you use tamari instead of soy sauce. This dish fits many diets while still being filling and delicious. You can enjoy it without guilt. To start, you need fresh zucchinis. Grab two medium-sized ones and spiralize them. This means you turn them into noodle shapes. After spiralizing, let the noodles sit. This helps them release extra moisture. Moisture can make your dish soggy. While they rest, you can prep the other ingredients. Grab a large pan or wok. Heat up some sesame oil over medium heat. Once hot, add the diced tofu. Cook the tofu for about 5 to 7 minutes. You want it golden brown on all sides. When done, remove the tofu from the pan and set it aside. In the same pan, add minced garlic and sliced red bell pepper. Stir-fry them for 2 to 3 minutes. The pepper should soften a bit. Then, add the zucchini noodles to the pan. Mix everything well and cook for another 2 to 3 minutes. You want the noodles tender but still crunchy. In a small bowl, mix tamari or soy sauce, peanut butter, lime juice, and coconut sugar. Stir until smooth. Pour this sauce over the cooked noodles and veggies in the pan. Add the cooked tofu back in along with bean sprouts and sliced green onions. Stir everything for another 1 to 2 minutes. This lets the sauce coat all the ingredients. Your Zucchini Noodle Pad Thai is now ready to serve! For the full recipe, refer to the previous sections. To make great zoodles, use fresh, firm zucchini. Spiralize them just before cooking. This keeps them crisp. Let the zoodles sit for a bit. This helps remove some water. Pat them dry with a towel. When cooking, don't overdo it. Just a few minutes on the heat keeps them crunchy. You can boost the taste of your Zucchini Noodle Pad Thai. Add a pinch of chili flakes for spice. Fresh herbs like cilantro bring freshness. For a tangy kick, squeeze more lime juice on top. If you like nuts, try cashews or peanuts. They add crunch and flavor. Meal prep makes cooking easy. Spiralize your zucchini ahead of time. Store it in the fridge in a sealed bag. Cook your tofu and veggies in advance. Keep them in separate containers. When ready to eat, mix it all together with the sauce. This way, you have a quick and healthy meal ready to go. For the full recipe, check the main article. {{image_4}} If you want a vegan twist, use firm tofu or tempeh. Both options add protein without meat. You can also swap the Tamari for a gluten-free version. Try adding more veggies, like bok choy or snap peas. They give a fresh crunch and flavor. For a heartier meal, add chicken or shrimp. If using chicken, cut it into bite-sized pieces. Cook it first until golden, then set aside. Shrimp cooks quickly, so add it for the last few minutes. This gives you a tasty protein boost. To keep it low carb, focus on the zucchini noodles. You can skip the sugar or use a keto sweetener. Coconut aminos work well as a soy sauce substitute. This keeps the dish flavorful while keeping carbs low. Enjoy your healthy Pad Thai without guilt! For more details, check the Full Recipe for Zucchini Noodle Pad Thai. To store your Zucchini Noodle Pad Thai, let it cool down. Place it in an airtight container. This keeps it fresh for later meals. You can store it in the fridge for up to three days. If you want it to last longer, consider freezing it. When you're ready to eat, take your leftovers out. You can reheat them on the stove or in the microwave. If using the stove, warm it over low heat. Stir it often to heat evenly. In the microwave, heat in short bursts, stirring in between. This helps avoid overcooking the zoodles. If you choose to freeze your Zucchini Noodle Pad Thai, do it right away. Make sure to use a freezer-safe container. It can last up to three months in the freezer. When you want to eat it, thaw it overnight in the fridge. Then, reheat as mentioned above. However, note that the texture may change after freezing. The zoodles may become softer, but the flavors will still shine. Yes, you can use regular noodles if you prefer. Traditional Pad Thai uses rice noodles. However, zucchini noodles are a great low-carb option. They add a fresh crunch and cut calories. To prevent soggy zucchini noodles, start by spiraling the zucchini and letting it sit in a colander. This helps drain excess moisture. Cook the noodles briefly, just until tender, not mushy. If you need a substitute, coconut aminos work well. They are soy-free and have a mild taste. You can also use a mix of balsamic vinegar and water for a different flavor. For the full details, check the Full Recipe. Zucchini noodle Pad Thai is a fun, healthy dish. We covered its main and optional ingredients. The step-by-step guide shows how to prepare zoodles and cook them well. Tips help you master your zoodles and add great flavors. Variations let you cater to your diet, whether vegan or low carb. Plus, I shared storage info for leftovers. This dish is easy and delicious. You can enjoy it any time you want a fresh meal. Embrace the zoodle life!

Zucchini Noodle Pad Thai Flavorful and Healthy Dish

Are you ready to enjoy a tasty twist on a classic dish? My Zucchini Noodle Pad Thai offers all the

- 1 lb (450g) boneless, skinless chicken breast, sliced into thin strips - 2 tablespoons honey - 3 cloves garlic, minced (about 1 tablespoon) - 1 tablespoon soy sauce (or low-sodium alternative) - 1 tablespoon sesame oil - 1 bell pepper (any color), sliced into thin strips - 1 cup broccoli florets (about 1 medium head) - 1 cup snap peas (fresh or frozen) - 2 tablespoons vegetable oil - Salt and freshly ground black pepper, to taste - Cooked rice or noodles, for serving - Sesame seeds, for garnish - Chopped green onions, for garnish You can add more layers of taste with these extras: - Fresh ginger, minced for a spicy kick - Chili flakes for heat - Cashews or peanuts for crunch - Baby corn or mushrooms for more veggies To round out your meal, consider these sides: - Steamed jasmine rice for a soft base - Noodles for a filling alternative - A fresh green salad for a crisp bite - Egg rolls for a fun crunch This recipe is a great way to bring the flavors together. Check out the Full Recipe for detailed steps to make this dish shine! Start by making the sauce. In a small bowl, mix two tablespoons of honey, three minced garlic cloves, one tablespoon of soy sauce, and one tablespoon of sesame oil. Whisk them together until they blend well. This sauce gives the chicken a sweet and savory taste. Next, heat two tablespoons of vegetable oil in a large skillet or wok. Use medium-high heat until the oil shimmers. Add one pound of thinly sliced chicken breast to the pan. Season it with salt and pepper. Stir-fry the chicken for about five to seven minutes. Cook it until it turns golden brown and is fully done. Remove the chicken from the pan and set it aside. In the same pan, add the vegetables. Use one sliced bell pepper, one cup of broccoli florets, and one cup of snap peas. Stir-fry these colorful veggies for three to four minutes. They should look bright and stay tender-crisp. Now, return the cooked chicken to the pan with the vegetables. Pour the honey garlic sauce over everything. Gently toss to coat all the ingredients well. Cook this mix for another two to three minutes. This lets the flavors blend nicely. Serve the stir-fry hot over cooked rice or noodles. For a special touch, sprinkle sesame seeds and chopped green onions on top. This makes the dish look great and adds extra flavor. Enjoy your meal! You can find the full recipe above. To get the best flavor in your honey garlic chicken stir-fry, use fresh garlic. Fresh garlic gives a strong taste that enhances the dish. Also, try using high-quality honey. It adds a rich sweetness that balances the garlic. If you want a bit of heat, add red pepper flakes. They add a nice kick without overpowering the dish. Stir-frying is all about high heat and quick cooking. Start with a hot pan or wok. This helps lock in the flavors and keeps the chicken juicy. Use a non-stick pan if you have one. It makes cooking and cleaning easier. Keep your ingredients moving in the pan to avoid burning. This keeps everything cooking evenly and gives you that perfect tender-crisp texture. If you don’t have some ingredients, don’t worry! You can swap out the chicken for tofu or shrimp. Both work well in this dish. For the vegetables, you can use what you have on hand. Carrots, zucchini, or mushrooms all taste great. If you want a lighter version, you can use less honey or a sugar substitute. This way, you still get a tasty meal without all the sugar. For the sauce, low-sodium soy sauce can reduce salt if that’s a concern. Just remember, these swaps might change the flavor a bit, but they can still be delicious! For the complete preparation details, check the Full Recipe. {{image_4}} To make a vegetarian version, swap chicken for tofu or tempeh. Use the same sauce to keep the flavors bold. Slice the tofu into cubes and press it to remove excess water. Stir-fry the tofu until it is golden brown. Then, add your favorite veggies like bell peppers, carrots, and zucchini. This keeps the dish colorful and tasty. You can easily make this dish gluten-free. Simply use tamari instead of soy sauce. Tamari has a similar flavor and is safe for those who need to avoid gluten. Make sure to check all labels on sauces and oils to ensure they are gluten-free. Feel free to get creative with your stir-fry! Here are some ideas: - Add cashews or peanuts for crunch. - Include mushrooms for a rich flavor. - Toss in baby corn for extra texture. - Use bok choy or spinach for more greens. These variations can make your honey garlic chicken stir-fry even more exciting and delicious! For the full recipe, check the details above. To store your honey garlic chicken stir-fry, let it cool first. Place it in an airtight container. This helps keep it fresh and tasty. You can store it in the fridge for about three days. Make sure to label the container with the date. This way, you will know when to eat it by. If you want to keep your stir-fry longer, freezing is a great option. First, let the dish cool completely. Then, transfer it to a freezer-safe container or a heavy-duty freezer bag. Remove as much air as possible to prevent freezer burn. You can freeze it for up to three months. When you’re ready to eat it, simply thaw it in the fridge overnight. To reheat your honey garlic chicken stir-fry, you can use the microwave or the stove. For the microwave, place the stir-fry in a bowl and cover it. Heat it on medium power for about two to three minutes. Stir halfway through to ensure even heating. If using the stove, heat a pan over medium heat. Add a splash of water or oil to prevent sticking. Heat for about five to seven minutes, stirring often, until hot. Enjoy your meal again just as much! Cooking Honey Garlic Chicken Stir-Fry takes about 25 minutes. You’ll spend 10 minutes prepping and 15 minutes cooking. This quick time makes it perfect for busy weeknights. Yes, you can use different proteins. Great options include shrimp, beef, or tofu. Each choice will change the taste, but the honey garlic sauce will still shine. Serve this dish over cooked rice or noodles. You can also add a side of steamed vegetables. This pairing enhances the meal and adds more color to your plate. Absolutely! Honey Garlic Chicken Stir-Fry is great for meal prep. You can cook a larger batch and store it in the fridge. It keeps well for about three to four days. Just reheat it when you're ready to eat. For the best taste, add fresh greens right before serving. Check the Full Recipe for more details. This blog post covered how to make Honey Garlic Chicken Stir-Fry. We explored key ingredients, step-by-step cooking, and tips for flavor. You learned about variations, storage, and answers to common questions. In the end, cooking can be simple and fun. With this dish, you can make tasty meals that everyone will love. Enjoy your cooking journey and feel free to experiment!

Honey Garlic Chicken Stir-Fry Quick and Tasty Recipe

Looking for a quick and tasty meal? This Honey Garlic Chicken Stir-Fry checks all the boxes! You’ll enjoy its sweet

- 1 cup frozen spinach, fully thawed and excess moisture squeezed out - 1 cup canned artichoke hearts, drained and coarsely chopped - 1 cup cream cheese, brought to room temperature for easy mixing - 1/2 cup sour cream, preferably full-fat for creaminess - 1/2 cup mayonnaise, for added richness - 1 cup shredded mozzarella cheese, or a blend of your favorite cheeses - 1/2 cup grated Parmesan cheese, plus extra for garnish if desired - 2 cloves garlic, finely minced for a robust flavor - 1/2 teaspoon onion powder, for depth - 1/2 teaspoon red pepper flakes, optional, for a hint of heat - Salt and freshly ground pepper, to taste Each ingredient serves a purpose. - Spinach adds a fresh taste and a lovely green color. I prefer frozen because it's easy to use. Just thaw and squeeze out moisture. - Artichoke hearts give a tangy flavor and a unique texture. Canned is quick and convenient. - Cream cheese is key for a creamy base. Make sure it's soft for easy mixing. - Sour cream brings richness. Full-fat makes the dip extra creamy and smooth. - Mayonnaise adds a touch of richness. It makes the dip even smoother. - Mozzarella cheese melts beautifully. You can use a mix of cheeses if you like. - Parmesan cheese offers a salty kick. It also adds a nice crust when baked. - Garlic gives great flavor. Fresh is best, but jarred works too. - Onion powder enhances depth. It adds a subtle flavor without being overpowering. - Red pepper flakes bring heat. Use them if you like a bit of spice. - Salt and pepper are essential for taste. Adjust them as you mix. For the best results, use fresh ingredients whenever possible. Fresh spinach can be used if you like. Just make sure to cook it down and squeeze out the water. Quality ingredients make a big difference in flavor. Enjoy making this creamy spinach artichoke dip! For the full recipe, check the section above. Preheating your oven to 350°F (175°C) is important. This step helps cook the dip evenly. A hot oven ensures a nice, bubbly texture. While the oven warms up, prepare your ingredients. Thaw the spinach and squeeze out excess moisture. Drain and chop the artichoke hearts. Having everything ready makes mixing faster and easier. In a large bowl, combine the cream cheese, sour cream, and mayonnaise. Use a hand mixer or spatula to blend these until smooth. This creates a creamy base for your dip. Next, add the minced garlic, onion powder, and red pepper flakes if you want a spicy kick. Mix well to spread the flavor throughout. Now, gently fold in the spinach, artichokes, mozzarella, and Parmesan cheese. Make sure all the ingredients mix well, but don’t overdo it. Taste the mixture and add salt and pepper to your liking. Transfer the creamy mix into a baking dish. Use a spatula to spread it evenly. Place the dish in your preheated oven and bake for about 25-30 minutes. Look for a golden top and bubbling edges. These signs mean your dip is ready. Once baked, let it cool for a moment before serving to avoid burns. Enjoy your delicious Creamy Spinach Artichoke Dip! For the full recipe, check the section above. To boost the taste of your creamy spinach artichoke dip, try adding spices. A pinch of cayenne can bring heat. Fresh herbs like basil or parsley add brightness. For more depth, consider using smoked paprika or Italian seasoning. You can adjust the creaminess too. If you want a richer dip, add more cream cheese or sour cream. For a lighter version, use Greek yogurt instead of mayonnaise. When it's time to serve, think about what goes well with the dip. Crispy tortilla chips are classic. Soft breadsticks or slices of baguette also work. For a fresh crunch, raw veggies like carrots or celery are great choices. Make it pop on the table! Use a nice serving dish. You can sprinkle extra Parmesan on top. A bit of chopped parsley adds color too. This makes the dip more inviting and fun to eat. {{image_4}} You can easily make this dip lighter without losing flavor. One option is using yogurt instead of mayonnaise. This swap cuts calories and adds a nice tang. For a plant-based version, try using vegan cream cheese. It mimics the texture and taste well. You can still enjoy creamy spinach artichoke dip without dairy! To make your dip more exciting, consider adding different cheeses. Feta or goat cheese can give a unique twist. Fresh herbs like basil or dill can add a burst of freshness. You can also mix in other veggies. Chopped bell peppers or mushrooms can enhance the flavor and texture. Want some protein? Adding cooked chicken or bacon bits can turn this dip into a hearty snack. Get creative and make it your own! To keep your creamy spinach artichoke dip fresh, store it in an airtight container. This method prevents moisture loss and keeps flavors intact. Make sure to cool the dip to room temperature before sealing it. Place the container in the fridge if you plan to eat it within three to four days. For longer storage, you can freeze the dip. Use a freezer-safe container and leave some space at the top to allow for expansion. It can last for up to three months in the freezer. When reheating, avoid the microwave if possible. The dip can lose its creamy texture. Instead, use an oven or stovetop. If using the oven, preheat it to 350°F (175°C). Transfer the dip to an oven-safe dish, cover it with foil, and heat for about 15-20 minutes. Stir halfway through to ensure even heating. For stovetop reheating, place the dip in a pan over low heat. Stir often for about 5-10 minutes until it's warm and creamy again. Keep an eye on it to avoid burning. Yes, you can make this dip ahead of time. Prepare it as directed, but do not bake it. Cover it tightly and store it in the fridge. You can keep it for up to two days. When you are ready to bake, just take it out and let it sit for about 30 minutes. Then, bake as directed in the full recipe. If you cannot find artichoke hearts, try using cooked mushrooms or roasted red peppers. Both options add a nice flavor and texture. You can also use cooked spinach or even sun-dried tomatoes for something different. Yes, this dip is vegetarian. It contains no meat or fish. To make it gluten-free, just check your labels on the mayonnaise and other ingredients. Most are gluten-free, but it’s always good to double-check. You can keep the dip in the fridge for about three to four days. Store it in an airtight container to keep it fresh. If you notice any changes in smell or texture, it is best to throw it out. Serve this dip hot and bubbly. It goes well with crispy tortilla chips, fresh baguette slices, or crunchy veggies. For a fun twist, try it with pita chips or even spread it on a sandwich. You can also garnish with extra Parmesan for a nice touch. You learned how to make a delicious Creamy Spinach Artichoke Dip. We covered all the key ingredients, tips for mixing, and baking for great texture. Remember, quality matters—fresh spinach and spices boost flavor. Explore variations for healthier options and new tastes. Store leftovers properly to enjoy later, and reheating tips will keep the dip tasty. With these steps, you're set to impress friends at any gathering. Enjoy your dip, and keep experimenting!

Creamy Spinach Artichoke Dip Tasty and Easy Recipe

Are you ready to impress your friends with a delicious Creamy Spinach Artichoke Dip? This easy recipe combines rich flavors

Older posts
Newer posts
← Previous Page1 … Page70 Page71 Page72 … Page88 Next →

dsad

© 2025 spoonfulsavory • Built with GeneratePress

Our Policies

  • Copyright Policy
  • Cookie Policy
  • GDPR Policy
  • Privacy Policy
  • Disclaimer
  • Terms Of Use

More Information

  • Home
  • About
  • Contact
  • Appetizers
  • Dessert
  • Dinner
  • Drinks
©2025, spoonfulsavory About Back To Top