Skip to content
DisclaimerTerms Of UseGDPR PolicyCookie Policy

spoonfulsavory

  • Home
  • Drinks
  • Appetizers
  • Dinner
  • Dessert
  • About
  • Contact
  • Privacy Policy
DisclaimerTerms Of UseGDPR PolicyCookie Policy

Sarah

- 1 can (15 oz) chickpeas, thoroughly drained and rinsed - 2 tablespoons extra virgin olive oil - 1 teaspoon smoked paprika - 1/2 teaspoon garlic powder - 1/2 teaspoon ground cumin - Sea salt and freshly cracked black pepper, to taste - 1 cup cherry tomatoes, cut in half - 1 medium cucumber, diced - 1/4 medium red onion, finely chopped - 2 cups mixed salad greens - 1 ripe avocado, diced - 2 tablespoons freshly squeezed lemon juice - 2 tablespoons tahini (sesame seed paste) - 1 tablespoon cool water - Fresh parsley, finely chopped (for garnish) Chickpeas are the star of this salad. They add protein and fiber, making it filling. Olive oil gives a rich taste and helps the spices stick to the chickpeas. Smoked paprika, garlic powder, and cumin bring warmth and depth to the dish. The fresh veggies add crunch and color. Cherry tomatoes burst with flavor, while cucumbers provide a refreshing bite. Red onion gives a slight kick, and mixed greens round out the salad with a crisp base. Avocado adds creaminess and healthy fats. The tahini dressing ties everything together with its nutty flavor. Fresh lemon juice brightens the dish, making it zesty. This salad is a perfect blend of flavors and textures. You can easily customize it to suit your taste. For the full recipe, check the section above. Each serving packs around 300 calories. Here's a breakdown of the key nutrients: - Protein: Chickpeas are high in protein, making this salad a great vegetarian option. - Fiber: Both chickpeas and veggies help you feel full and aid digestion. - Healthy Fats: Avocado and olive oil provide good fats that support heart health. Chickpeas also contain vitamins and minerals. They are rich in folate, iron, and magnesium. Together, these ingredients create a nutritious meal that is both tasty and satisfying. - Preheat the oven to 400°F (200°C). - In a bowl, mix the drained chickpeas with olive oil, smoked paprika, garlic powder, and cumin. - Add sea salt and pepper to taste. Toss well to coat the chickpeas. - Spread the seasoned chickpeas out on a baking sheet. - Roast them in the oven for 25-30 minutes until crispy. - Shake the pan halfway through to ensure they cook evenly. - In a large bowl, combine halved cherry tomatoes, diced cucumber, red onion, and mixed greens. - Toss gently to mix everything together. - In a small bowl, whisk tahini with lemon juice and water until smooth. - Once the chickpeas are roasted, let them cool slightly. - Add the crispy chickpeas and diced avocado to the salad. - Drizzle the tahini dressing over the salad and toss gently. - Garnish with fresh parsley before serving. For the full recipe, check out the detailed instructions provided earlier. Enjoy this delightful dish! To get crispy chickpeas, start by drying them well. After draining, pat them dry with a towel. This removes extra moisture. The less water on the chickpeas, the crispier they will get. For seasoning, mix smoked paprika, garlic powder, and cumin. These spices add great flavor. Use sea salt and freshly cracked pepper to taste. Toss the chickpeas until they are fully coated with the spices. This step is key to a tasty crunch. You can try different dressings for your salad. A simple vinaigrette works well. Just mix olive oil, lemon juice, and a pinch of salt. You can also blend tahini with lemon juice and water. This gives a creamy texture. Want a kick? Add some hot sauce or chili flakes. Each dressing can change the salad's flavor. Feel free to mix and match based on what you like! This salad pairs well with proteins like grilled chicken or shrimp. It makes a great side for a barbecue or picnic. You can also serve it as a light lunch. For special occasions, present it on a colorful platter. Add some nuts or seeds for extra crunch. This salad is not just a dish; it’s a way to impress your guests. Enjoy this colorful and nutritious salad as a light lunch or a delicious side dish! {{image_4}} You can change the veggies in your salad. Try using bell peppers, radishes, or carrots. These add crunch and color. You can also swap chickpeas for black beans, kidney beans, or lentils. Each type of bean gives a unique taste and texture. This salad is vegan and gluten-free. For more vegan flair, add nutritional yeast for a cheesy taste. You can also use gluten-free grains like quinoa or brown rice in place of chickpeas. This adds bulk and keeps the salad filling. Spices can change the whole dish! Add curry powder, chili flakes, or fresh herbs like basil or cilantro. Fruits like diced apples or pomegranate seeds can add sweetness. Nuts or seeds, such as sunflower seeds or walnuts, add crunch and healthy fats. For the complete dish, check out the Full Recipe. To keep your crispy chickpea salad fresh, store it in an airtight container. This prevents moisture from making the salad soggy. Place the salad in the fridge right away. For the dressing, store it separately in a small jar. This way, your salad stays crunchy and tasty. If you want to reheat the chickpeas, use an oven or air fryer. Heat them at 350°F (175°C) for about 10 minutes. This keeps them crispy. Avoid microwaving, as it can make them soft and chewy. In the fridge, your salad stays fresh for about 3 days. Look for signs of spoilage like an off smell or wilted greens. If you see these signs, it’s best to toss the salad. Enjoy your crispy chickpea salad while it’s at its best! To make crispy chickpea salad, follow these key steps: - Preheat your oven to 400°F (200°C). - Rinse and drain one can of chickpeas. - Toss chickpeas with olive oil, smoked paprika, garlic powder, cumin, salt, and pepper. - Spread them on a baking sheet and roast for 25-30 minutes. - While the chickpeas roast, mix cherry tomatoes, cucumber, red onion, and salad greens in a bowl. - For the dressing, whisk lemon juice, tahini, and water until smooth. - Once chickpeas are crispy, add them to the salad with diced avocado. - Drizzle the tahini dressing, toss gently, and garnish with parsley. This process makes a crunchy, healthy salad. Yes, you can prepare this salad in advance. For meal prep: - Roast chickpeas ahead of time and store them in an airtight container. - Chop veggies and mix them in a bowl without dressing. - Keep the tahini dressing in a separate container. When ready to eat, combine everything. This keeps the salad fresh and crunchy. If you have allergies or can't find tahini, consider these options: - Use peanut butter for a nutty flavor. - Greek yogurt adds creaminess without nuts. - Sunflower seed butter is a great nut-free choice. These alternatives give you a tasty dressing while keeping it safe for all diets. Yes, this salad is great for meal prep. To make it last longer: - Store crispy chickpeas separately from the salad. - Keep veggies and greens in a sealed container. - Add dressing just before serving to prevent sogginess. Following these tips helps maintain the salad's fresh taste and texture. This blog post covered everything you need to make a delicious crispy chickpea salad. We discussed the key ingredients, gave step-by-step instructions, and shared helpful tips for best results. You learned how to customize flavors and keep the salad fresh for later. Remember, this salad is not only tasty but also packed with nutrients. Try it out and enjoy all its benefits. Happy cooking!

Crispy Chickpea Salad Crunchy and Healthy Delight

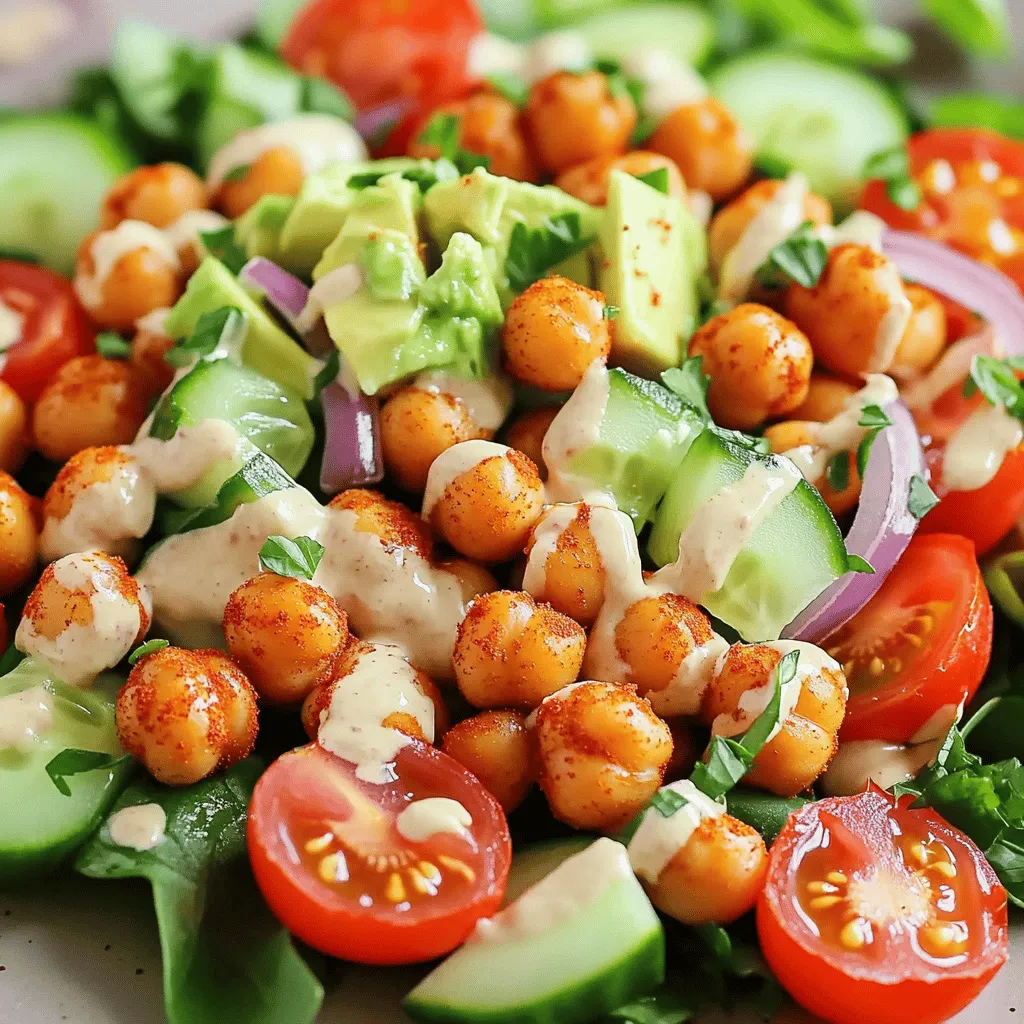
Are you ready for a salad that’s both crunchy and healthy? This Crispy Chickpea Salad packs a flavorful punch with

- Quinoa: This whole grain is gluten-free and packed with protein. It serves as the base for our salad. Use 1 cup of rinsed quinoa for best results. - Vegetables: Fresh vegetables add crunch and color. I use: - 1 cup cherry tomatoes, halved - 1 cucumber, diced - 1 red bell pepper, chopped into bite-sized pieces - 1/2 red onion, finely diced - 1/2 cup Kalamata olives, pitted and sliced - Feta Cheese (Optional): Crumbled feta gives a creamy touch. Use 1/2 cup if you want that salty kick. - Olive Oil: Use 3 tablespoons of extra virgin olive oil. This adds richness and depth. - Lemon Juice: Fresh lemon juice brightens the flavors. Use 2 tablespoons for a nice zing. - Spices: A mix of 1 teaspoon dried oregano, salt, and black pepper brings the dressing to life. These ingredients combine to create a vibrant, flavorful dish. Each bite bursts with freshness. For the full recipe, check out the provided details! 1. Boiling the Broth or Water: Start by pouring the vegetable broth or water into a medium saucepan. Turn the heat to high and wait until it boils. This step is key for cooking the quinoa well. 2. Cooking until Tender: Once the broth boils, add the rinsed quinoa. Turn the heat down to low, cover the saucepan, and let it cook for about 15 minutes. The quinoa should absorb all the liquid and become soft. After cooking, fluff it gently with a fork. Let it cool to room temperature. 1. Mixing Fresh Ingredients: In a large mixing bowl, combine the cooled quinoa with halved cherry tomatoes, diced cucumber, chopped red bell pepper, finely diced red onion, and sliced Kalamata olives. If you like, add crumbled feta cheese too. Mix it gently to combine all the fresh flavors. 2. Combining with Dressing: For the dressing, whisk olive oil, lemon juice, dried oregano, salt, and black pepper in a small bowl. Drizzle this dressing over the salad. Toss everything together gently. Make sure all the ingredients get coated with the dressing. 1. Adding Fresh Herbs: Fold in the chopped fresh parsley for a burst of color and taste. Give the salad one last gentle toss. Taste it and adjust the seasoning if needed with more salt and pepper. 2. Chilling Before Serving: For the best flavor, chill the salad for at least 30 minutes in the fridge. This lets the flavors blend. Serve it cool or at room temperature. This Mediterranean quinoa salad is bright, fresh, and packed with flavor. For detailed cooking instructions, check the Full Recipe. Seasoning Advice To make your Mediterranean quinoa salad shine, focus on seasoning. Start with salt and pepper. These basic flavors enhance the taste of your fresh ingredients. A pinch of salt brings out the sweetness of tomatoes and cucumbers. Always taste as you go. This helps you find the right balance. Best Herbs to Use Herbs add brightness to your dish. Fresh parsley is a must. It gives a fresh, green taste. You can also try mint or basil for a twist. Dried oregano adds depth to your dressing. Use high-quality herbs for the best flavor. Serving Suggestions When serving, think about color and texture. A clear glass bowl shows off the vibrant colors. You can also use a large platter. It invites everyone to dig in. Arrange the salad in layers for a beautiful look. The colorful layers will catch your eye. Garnishing Tips Garnishing makes your dish pop. Add extra parsley on top. This adds a lovely touch of green. Lemon wedges also look great. They give a refreshing hint. You can even sprinkle some extra feta on top for added appeal. Make-Ahead Storage You can prepare this salad ahead of time. It stores well in the fridge. Just wait to add the dressing until you are ready to serve. This keeps the salad crisp and fresh. Best Practices for Freshness Store the salad in an airtight container. This helps keep it fresh for up to three days. If you notice the vegetables getting soft, use them quickly. Freshness is key for the best taste. For the full recipe, check out the details above. {{image_4}} You can enhance your Mediterranean quinoa salad with protein. Here are two great options: - Grilled Chicken Adding grilled chicken gives the salad a hearty touch. It pairs well with the fresh flavors. Simply grill marinated chicken breasts, slice them, and toss them in. - Chickpeas Chickpeas are a great plant-based protein. They add texture and flavor. Just rinse a can of chickpeas and mix them in. They make the salad filling and nutritious. If you're looking for vegan choices, consider these alternatives: - Tofu Options Tofu is a fantastic protein source. You can use firm or extra-firm tofu. Cut it into cubes and sauté until golden. This adds a nice crunch to your salad. - Dairy-Free Cheese Instead of feta cheese, try dairy-free cheese. It still gives a creamy texture. Look for options made from nuts or soy for the best results. Incorporating seasonal ingredients can brighten your salad: - Summer Variations In summer, add fresh corn or ripe avocados. They bring sweetness and creaminess. You can also use fresh basil or mint for an aromatic touch. - Winter Additions For winter, consider roasted butternut squash or Brussels sprouts. They add warmth and depth. Toss in some pomegranate seeds for a pop of color and flavor. Feel free to explore these variations to make your Mediterranean quinoa salad even more exciting. You can find the Full Recipe above for the base salad to get started! - Refrigeration Tips: Store the Mediterranean quinoa salad in an airtight container. This keeps the flavors intact and prevents drying out. It’s best to eat it within three to five days for optimal taste. - Freezing Options: You can freeze leftover salad, but some ingredients may change texture. To freeze, place it in a freezer-safe container. Thaw it in the fridge overnight before eating. - How Long It Lasts: In the fridge, the salad lasts up to five days. If frozen, it can stay good for about a month. Always check for freshness before eating. - Safely Enjoying Leftovers: If you prefer warm quinoa, use the microwave. Heat in short bursts, stirring often, until warm. Avoid heating the lettuce and cucumber as they don’t reheat well. Enjoy your leftovers while they taste fresh! Mediterranean Quinoa Salad is packed with nutrients. One serving has about 250 calories. You will find 8 grams of protein, 10 grams of fat, and 36 grams of carbs. Quinoa gives you protein and fiber. The veggies add vitamins and minerals. Feta cheese adds flavor and calcium. This salad is a healthy choice. Yes, you can easily customize this salad for allergies. If you have a gluten allergy, quinoa is a great choice since it is gluten-free. For nut allergies, skip any nuts you may add. If you are lactose intolerant, leave out the feta cheese. You can also use a dairy-free cheese. This way, everyone can enjoy it! You can keep Mediterranean Quinoa Salad in the fridge for about 3 to 5 days. Store it in an airtight container to keep it fresh. If it has feta cheese, eat it within 3 days for the best taste. Before eating, check for any changes in smell or color. Always trust your senses! This blog post covered how to make a delicious Mediterranean quinoa salad. We explored main ingredients like quinoa, fresh veggies, and optional feta cheese. I shared step-by-step cooking tips and how to assemble the salad with a zesty dressing. I also gave advice on flavor, presentation, and storing leftovers. In conclusion, this salad is healthy and easy to make. You can customize it to your taste and enjoy it fresh or save it for later. Dive into your kitchen and create your perfect version today!

Mediterranean Quinoa Salad Bold and Flavorful Dish

Are you ready to dive into a dish that bursts with flavor? My Mediterranean Quinoa Salad combines fresh ingredients with

- 2 ripe avocados, peeled and pitted - 1/2 cup unsweetened cocoa powder - 1/3 cup maple syrup (substitute with agave nectar for a vegan option) - 1/4 cup almond milk (or any milk of your choice) - 1 teaspoon pure vanilla extract - 1/4 teaspoon sea salt - Pinch of ground cinnamon (optional for extra warmth) - Dark chocolate shavings for garnish (optional) - Fresh berries for garnish (optional) In this recipe, avocado makes a creamy base for the mousse. If you have allergies, you can swap almond milk with oat or soy milk. For a nut-free option, use coconut milk instead. Each serving has about 160 calories. This mousse is rich in healthy fats from the avocados. You also get fiber, iron, and magnesium from the cocoa powder. The maple syrup adds natural sweetness without refined sugars. This dessert is a smart choice for a treat that feels indulgent but is still good for you. Enjoying this mousse gives you a guilt-free dessert that satisfies your sweet tooth. To make this chocolate avocado mousse, start by gathering all your ingredients. You will need: - 2 ripe avocados, peeled and pitted - 1/2 cup unsweetened cocoa powder - 1/3 cup maple syrup (or agave nectar for vegan) - 1/4 cup almond milk (or any milk you prefer) - 1 teaspoon pure vanilla extract - 1/4 teaspoon sea salt - Pinch of ground cinnamon (optional) - Dark chocolate shavings for garnish (optional) - Fresh berries for garnish (optional) Next, place the avocados, cocoa powder, maple syrup, almond milk, vanilla extract, sea salt, and cinnamon in a blender. Blend on high for 1-2 minutes. Stop to scrape the sides to mix well. This step is key for a smooth consistency. If it’s not sweet enough, add more maple syrup and blend again. After blending, spoon the mousse into bowls. Cover them and put them in the fridge. Chilling is vital for the flavors to mix well. It also helps the mousse firm up. Aim for at least 30 minutes to 1 hour of chilling time. When you take it out, the mousse will be cold and rich. Top it with dark chocolate shavings and fresh berries for a nice touch. This simple step makes your dessert look and taste even better. Enjoy your delicious treat! To make sure your mousse is creamy, use ripe avocados. They blend better and give a silky texture. When you blend, do it on high speed for 1-2 minutes. This helps mix everything well. Stop to scrape down the sides of your blender. This way, you avoid lumps. If it feels thick, add a splash of milk. This will help achieve a smoother consistency. Taste your mousse after blending. If it’s not sweet enough, you can add more maple syrup. Start with a little, then blend again. You can use other sweeteners too. Honey, agave nectar, or stevia are great options. Each offers a different flavor. Choose what fits your diet. This way, you can make the mousse just right for you. {{image_4}} To keep your chocolate avocado mousse vegan, swap maple syrup for agave nectar. You can also use almond milk or any plant-based milk you like. For toppings, try coconut whipped cream or chopped nuts. Fresh berries add a nice burst of flavor. For a low-sugar version, replace maple syrup with a sugar-free sweetener like stevia or erythritol. You can also add superfoods like chia seeds or flaxseeds to boost nutrition. They blend well and add fiber without changing the taste much. This mousse is not just a treat; it can be a healthy dessert too! To keep your chocolate avocado mousse fresh, store it in an airtight container. This step helps prevent browning and keeps flavors intact. I recommend using glass containers, as they do not absorb odors. If you use plastic, ensure it is food-safe and BPA-free. Always cover the mousse tightly with plastic wrap or a lid before storage. This keeps moisture out and prevents any unwanted smells from affecting the dessert. In the refrigerator, your mousse lasts about three to four days. After that, it may lose its taste and texture. If you want to store it longer, consider freezing the mousse. It can stay in the freezer for up to a month. Use freezer-safe containers and ensure there's no air trapped inside. To thaw, place it in the fridge overnight. Stir well before serving, as it may separate slightly. For the best results, enjoy your mousse fresh within a few days. For the full recipe, check the section before this one. Chocolate avocado mousse is a creamy dessert made from ripe avocados and cocoa. This dish is popular because it tastes rich and indulgent, yet it is healthy. The avocado provides healthy fats and a smooth texture. You get a creamy dessert that is also good for you! Yes, you can use different types of chocolate. Unsweetened cocoa powder gives a deep chocolate flavor. If you prefer, you can use dark chocolate instead. Just melt the dark chocolate and mix it in. Both options bring unique tastes and textures to your mousse. Absolutely! This mousse fits many diets. It is vegan since it uses plant-based ingredients. It is gluten-free, so those with gluten allergies can enjoy it. If you have nut allergies, you can swap almond milk for oat or soy milk. This dessert caters to many needs. To enhance the chocolate flavor, add a pinch of espresso powder. This small touch boosts the chocolate taste without adding a coffee flavor. You can also fold in melted dark chocolate for a richer treat. Top with whipped coconut cream or more chocolate shavings for extra flair. For the full recipe, check out the section above. You learned how to make chocolate avocado mousse with the ingredients and steps outlined. You can swap ingredients for allergies and still enjoy a tasty treat. I shared tips to get the right texture and adjust sweetness. You even found storage tips to keep leftovers fresh. This dessert is not just healthy; it's also versatile. Try different chocolates or add toppings. Your creativity can make each batch unique. Enjoy making this delicious dish!

Chocolate Avocado Mousse Simple and Decadent Delight

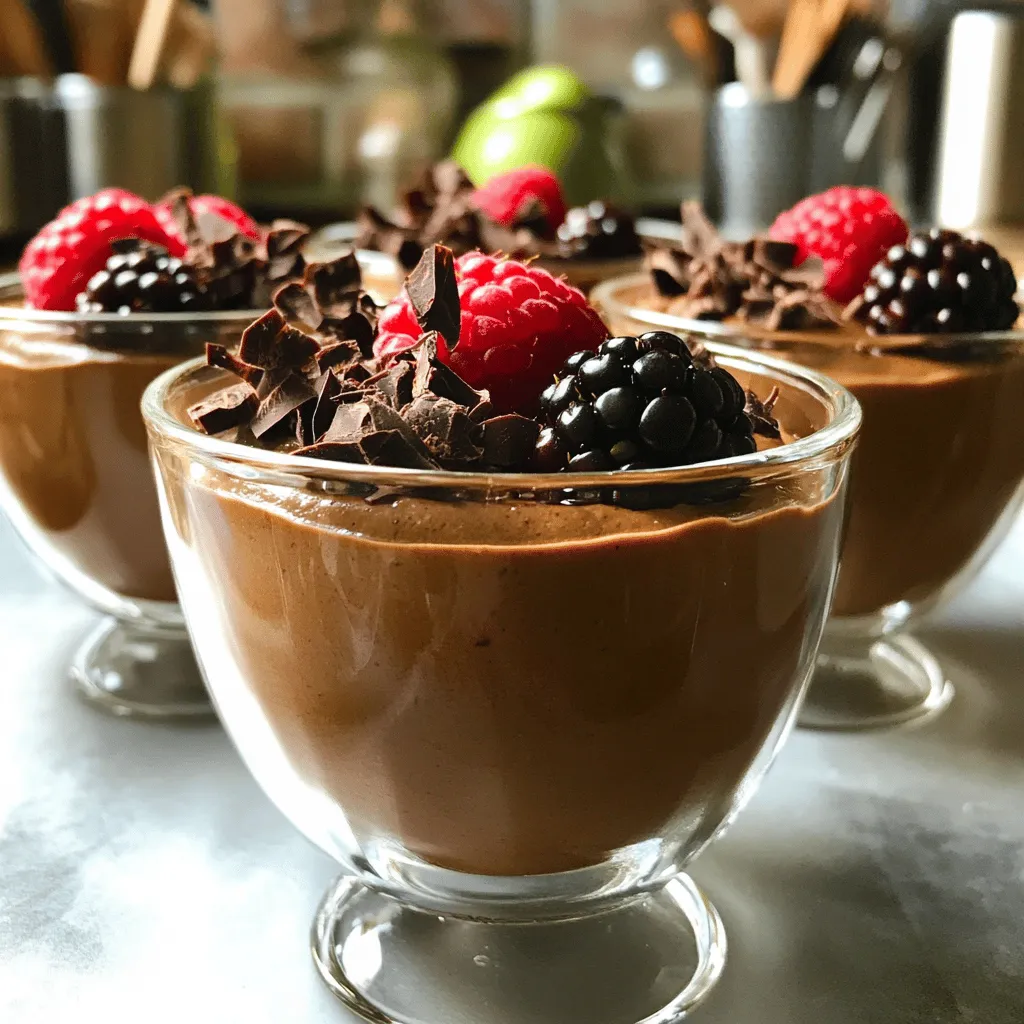
Craving a dessert that feels indulgent but is packed with nutrients? Meet Chocolate Avocado Mousse! This creamy, rich treat not

- 2 medium sweet potatoes, peeled and diced - 1 can black beans, rinsed and drained - 1 tablespoon olive oil - Spices: ground cumin, smoked paprika, garlic powder - Salt and pepper to taste - Tortillas and toppings: corn tortillas, avocado, red cabbage, lime, cilantro Gathering the right ingredients is key for sweet potato black bean tacos. You start with two medium sweet potatoes. Peel and dice them into one-inch cubes for even cooking. The sweet potatoes offer a rich, sweet flavor that balances well with the beans. Next, grab a can of black beans. Rinse and drain these to remove excess sodium and add them to your dish. For cooking, you'll need one tablespoon of olive oil. This helps the sweet potatoes roast to a golden perfection. Now, let’s talk spices. Ground cumin, smoked paprika, and garlic powder create an aromatic base. Salt and pepper will enhance the flavors. Don’t forget the tortillas! You will need small corn tortillas. They wrap around the filling perfectly. For toppings, choose a ripe avocado for creaminess, some finely shredded red cabbage for crunch, and fresh cilantro for a burst of flavor. Finally, add lime wedges to squeeze on top. This adds brightness to each bite. This mix of flavors makes for a colorful and tasty meal. Check out the Full Recipe for detailed instructions on how to prepare these tacos. 1. Preheat the oven to 400°F (200°C). This step sets the stage for the sweet potatoes. 2. Prepare and season the sweet potatoes. Peel and dice your sweet potatoes into 1-inch cubes. Place them in a bowl. Add olive oil, ground cumin, smoked paprika, garlic powder, salt, and pepper. Toss well to coat each piece evenly. 3. Roast the sweet potatoes for 25-30 minutes. Spread the seasoned sweet potatoes on a lined baking sheet. Roast them until they are tender and caramelized, stirring halfway through for even cooking. - Heat black beans in a saucepan with seasoning. Take a can of rinsed black beans and place them in a small saucepan. Heat over medium for about 5 minutes. You can add a pinch of salt or extra cumin for more flavor. - Warm and toast corn tortillas. You can warm the tortillas in a skillet or toast them directly over a gas flame. Do this for about 15-20 seconds on each side until they are soft and slightly toasted. - Layer the roasted sweet potatoes, black beans, and toppings. Take a warm tortilla and place a generous spoonful of roasted sweet potatoes in the center. Add a spoonful of warm black beans on top. Finish with avocado slices, shredded red cabbage, and fresh cilantro. Serve with lime wedges for a tangy kick. For the full recipe and details, check out the [Full Recipe]. - Stir the sweet potatoes halfway through roasting. This helps them cook evenly. - Always use fresh lime juice. It adds a bright, zesty flavor to the tacos. - Serve your tacos on a rustic wooden board. A colorful platter also makes a great display. - Add lime wedges and cilantro sprigs around the tacos. This makes the dish pop. - Pair your tacos with sides like rice or salsa. Guacamole also works well. - For a heartier meal, serve with a side of black beans or corn salad. For the full recipe, check out the Sweet Potato Black Bean Tacos. {{image_4}} You can make these sweet potato black bean tacos even better! Here are some ideas you can try: - Substitute quinoa for black beans for extra protein: Quinoa adds a nice texture and boosts protein. Cook it according to the package instructions, then mix it with the sweet potatoes. - Add spices like chili powder for added heat: If you like spice, chili powder gives a kick. Just add it to the sweet potato mix before roasting. Making these tacos fit your diet is easy. Here are some tips: - Vegan modifications: Check all ingredients to ensure they are plant-based. This recipe is naturally vegan, so you are good to go! - Gluten-free options: Use gluten-free tortillas. This way, everyone can enjoy these tacos without worry. Feel free to explore these options and make the recipe your own! For the complete recipe, check out the Full Recipe section. Store leftover sweet potatoes and black beans in separate airtight containers. This keeps each ingredient fresh. If you have extra toppings, like avocado or cabbage, store them too. Each item stays tasty longer when stored properly. To reheat, warm sweet potatoes and black beans on the stovetop or in the microwave. Use low heat on the stove and stir often. In the microwave, heat in short bursts to avoid overcooking. This way, your meal tastes just as good as when you first made it. Refrigerated leftovers last up to three days. For longer storage, freeze the sweet potatoes and beans. They can stay good in the freezer for about three months. When you're ready to eat, thaw them in the fridge overnight before reheating. Each taco has about 200-250 calories. This can vary with toppings. Sweet potatoes and black beans are both nutritious and filling, making this meal satisfying. The avocado adds healthy fats, while the corn tortillas keep it light. Yes, you can prep many parts in advance. Roast the sweet potatoes a day before. Store them in the fridge. You can also cook the black beans ahead. Just warm them when you assemble the tacos. This can save time on busy nights. If you want a different taste, try these options: - Pinto beans - Chickpeas - Lentils - Quinoa These alternatives keep the meal tasty and healthy. Each option adds a unique flavor to your tacos. Feel free to mix and match! For the complete recipe, check out the Full Recipe. This blog post detailed how to prepare delicious sweet potato black bean tacos. We covered the key ingredients needed, preparation steps, and helpful tips for cooking and presentation. We also explored variations and storage methods to keep your leftovers fresh. In the end, these tacos are easy to make and fun to customize. You can enjoy them any time, knowing they’re both tasty and healthy. Now, it’s your turn to try this recipe and impress your friends and family with a great meal!

Sweet Potato Black Bean Tacos Flavorful and Easy Feast

Looking for a quick, tasty meal? You’ll love these Sweet Potato Black Bean Tacos! They are easy to make and

- 1 large head of cauliflower, cut into bite-sized florets - 4 cloves of fresh garlic, finely minced - 1/2 cup freshly grated Parmesan cheese - 3 tablespoons extra virgin olive oil - 1 teaspoon smoked paprika - 1 teaspoon dried oregano - Sea salt and black pepper to taste - Fresh parsley, finely chopped (for garnish) - Red pepper flakes for heat - Lemon juice for added brightness - Other cheese varieties for flavor variations When I prepare Garlic Parmesan Roasted Cauliflower, I always start with fresh ingredients. The key is a large head of cauliflower. I cut it into small florets for even cooking. Fresh garlic brings a strong flavor that enhances the dish. I use four cloves, finely minced, to pack a punch. Next, I reach for Parmesan cheese. I grate it fresh for the best taste and texture. Extra virgin olive oil is my choice for roasting. It adds richness and helps the spices stick to the florets. I also add smoked paprika and dried oregano. Smoked paprika gives a sweet, smoky flavor. Oregano adds that warm, earthy taste we love. Finally, I season with sea salt and black pepper to enhance all the flavors. For a pop of color, I sprinkle fresh parsley on top. If you want to spice things up, consider adding red pepper flakes. A squeeze of lemon juice can brighten the dish. You can also try other cheese types for a twist. These ingredients make this dish simple yet full of flavor. You can find the full recipe above to get started on your own delicious Garlic Parmesan Roasted Cauliflower! - Preheat the oven to 425°F (220°C). - Line a baking sheet with parchment paper. Start by prepping the cauliflower. You want to cut a large head into bite-sized florets. This helps them cook evenly. Make sure to discard any tough stems. The parchment paper on your baking sheet will make cleanup easy. - Combine cauliflower florets and seasonings in a mixing bowl. - Ensure florets are coated evenly. Next, grab a big mixing bowl. Add your cauliflower florets along with 4 cloves of minced garlic, 3 tablespoons of olive oil, 1 teaspoon of smoked paprika, 1 teaspoon of dried oregano, and a pinch of sea salt and black pepper. Mix them well. You want each floret to be coated in the tasty mix. - Spread cauliflower on the baking sheet and roast for 25-30 mins. - Flip the florets halfway for even cooking. Now, spread the seasoned cauliflower on your prepared baking sheet. Make sure they are in a single layer. This ensures they roast well. Place the baking sheet in your preheated oven. Roast the cauliflower for about 25 to 30 minutes. Halfway through, flip the florets to let them brown evenly. They will turn tender and golden. - Sprinkle Parmesan cheese during the last 5 minutes of roasting. - Allow cheese to melt to create a cheesy crust. In the last 5 minutes, take the baking sheet out. Sprinkle 1/2 cup of freshly grated Parmesan cheese over the cauliflower. Return it to the oven. This creates a deliciously cheesy crust. Once done, you will see the cheese melt and bubble. It adds a rich flavor to the dish. Enjoy making this Garlic Parmesan Roasted Cauliflower! Don't forget to check out the Full Recipe for more details. To make the best garlic Parmesan roasted cauliflower, space the florets well on the baking sheet. This lets the hot air flow around them. When they have room, they roast better and get crispy. Use high-quality extra virgin olive oil. It adds flavor and richness to your dish. A good oil makes a big difference. You can marinate the cauliflower before roasting for a deeper taste. Mix the florets with olive oil, garlic, and spices. Let them sit for 15-30 minutes. This helps the flavors soak in. Adjust the seasoning to your liking. If you love spice, add red pepper flakes. For a fresh twist, squeeze some lemon juice on top before serving. Garlic Parmesan roasted cauliflower pairs well with many dishes. Serve it with grilled chicken or fish for a complete meal. It also goes great with a fresh salad. For presentation, use a large platter. Drizzle some extra olive oil on top. A sprinkle of fresh parsley adds color and freshness. Enjoy this dish hot for the best flavor! {{image_4}} You can change the flavor of garlic Parmesan roasted cauliflower easily. Adding fresh herbs like thyme or rosemary gives a new twist. These herbs add a nice touch and extra depth. You can also mix in other veggies. Bell peppers and Brussels sprouts roast well with cauliflower. They add color and taste. Try mixing these veggies for a fun side dish. If you want a vegan option, use nutritional yeast instead of cheese. It gives a cheesy flavor without dairy. This makes the dish plant-based but still tasty. For gluten-free eaters, check your seasonings. Most spices are gluten-free, but always read the labels. You can enjoy this dish without worry. Using seasonal vegetables can make this dish even better. Fresh ingredients taste great and add nutrition. For special occasions, like holidays, you can enhance it too. Add a sprinkle of pomegranate seeds for a festive touch. Or, serve it with a zesty lemon dressing. These ideas make the dish stand out on any table. You can find the full recipe for garlic Parmesan roasted cauliflower to try all these variations. To store Garlic Parmesan Roasted Cauliflower, let it cool first. Place the cooled cauliflower in an airtight container. This keeps it fresh and tasty. Store it in the fridge for up to 3 days. If you want to enjoy it later, follow the freezing tips below. When reheating, aim for the oven or air fryer. This method keeps the cauliflower crispy. Preheat your oven to 350°F (175°C). Place the cauliflower on a baking sheet and heat for about 10-15 minutes. If using an air fryer, cook at 350°F for 5-8 minutes. Avoid the microwave, as it can make the cauliflower soggy. To freeze, place the cooled cauliflower in a freezer-safe bag. Remove excess air to prevent freezer burn. Store for up to 2 months. When ready to eat, let it thaw in the fridge overnight. Reheat using the oven or air fryer to restore the crispy texture. This way, you'll enjoy the full flavor of the dish! Yes, you can use frozen cauliflower. Here are the pros and cons: - Pros: Frozen cauliflower is ready to use. It saves time and is often cheaper. You can keep it longer in your freezer. - Cons: Frozen cauliflower may be softer when cooked. It might not have the same crispness as fresh. Always thaw and drain excess water to avoid a soggy dish. To add some heat, try these ideas: - Mix in red pepper flakes. Start with a pinch and add more for extra spice. - Use spicy garlic powder instead of regular garlic. - Add sliced jalapeños or poblano peppers to the florets for a fresh kick. - Drizzle with hot sauce right before serving for a flavor boost. If you need a cheese substitute, consider these options: - Nutritional yeast works well for a vegan option. It has a cheesy flavor. - Grated pecorino Romano adds a similar taste but is stronger in flavor. - For a nutty twist, try crumbled feta or goat cheese. - If you avoid dairy, try using cashew cheese or almond cheese. For the full experience, check out the Full Recipe for Garlic Parmesan Roasted Cauliflower 🧄. You now have all the steps needed to make Garlic Parmesan Roasted Cauliflower. Start with fresh ingredients to enhance the flavor. Don’t shy away from adding your own twist with optional spices or different cheeses. Remember to space the florets on the baking sheet for even roasting. Store leftovers properly, and don’t hesitate to get creative with variations. I hope this dish brings fun to your table and sparks new ideas in your cooking. Enjoy every bite of this tasty treat!

Garlic Parmesan Roasted Cauliflower Flavorful Dish

If you’re looking to elevate your vegetable game, you’ve found the perfect recipe! Garlic Parmesan Roasted Cauliflower is a flavorful

- 2 cans (12.4 oz each) refrigerated cinnamon rolls with icing - 4 large eggs - 1 cup whole milk - 1 teaspoon pure vanilla extract - 1 teaspoon ground cinnamon - 1/2 teaspoon ground nutmeg - 1/2 cup pure maple syrup - 1/2 cup chopped pecans or walnuts (optional) - 1/2 cup raisins (optional) To make cinnamon roll casserole, you need simple and tasty items. The star of this dish is the cinnamon rolls, which give it that classic flavor. Eggs and milk help bind everything together. Vanilla extract adds a warm note, while cinnamon and nutmeg enhance the spice. Maple syrup brings sweetness, and the nuts and raisins add fun textures. Feel free to mix and match the optional ingredients. Chopped pecans or walnuts add crunch, and raisins bring sweetness. If you prefer, you can leave them out. This dish is all about your taste! Check the Full Recipe for exact amounts and steps. Let’s get cooking! 1. Preheat your oven to 350°F (175°C). Grease a 9x13-inch baking dish well. 2. Open the cans of cinnamon rolls. Cut each roll into quarters. 3. In a bowl, whisk together eggs, milk, vanilla, cinnamon, and nutmeg until smooth. 1. Arrange the cinnamon roll pieces evenly in the greased baking dish. 2. Pour the egg mixture over the rolls, ensuring they are well soaked. 3. Drizzle maple syrup over the top. If you want, add chopped nuts and raisins. 1. Place the baking dish in the oven. Bake for 25-30 minutes until golden brown. 2. While it bakes, warm the icing from the rolls in the microwave or hot water. 3. Once baked, let the casserole cool for 5 minutes. Drizzle the icing generously on top. Enjoy the delightful flavors of this cinnamon roll casserole! For a detailed recipe, check the Full Recipe section. To make your cinnamon roll casserole perfect, soak the pieces well. Cut each cinnamon roll into quarters. Then, pour the egg mixture over them. Let it sit for a few minutes. This helps the rolls absorb the egg mixture fully. For baking, set your oven to 350°F (175°C). Bake for 25 to 30 minutes. Keep an eye on it. The top should be golden brown and puffed up. Add toppings to enhance your dish. Warm icing from the rolls is a must. You can also sprinkle nuts or powdered sugar on top. For drinks, serve with coffee or hot chocolate. Fresh fruit on the side adds color and flavor. Try serving it with a dollop of whipped cream for a treat. You can easily modify this recipe. For a dairy-free version, use almond milk and a dairy-free cream. If you need it gluten-free, use gluten-free cinnamon rolls. To make it vegan, replace the eggs with a flaxseed mixture. This is done by mixing 1 tablespoon of flaxseed meal with 2.5 tablespoons of water. Let it sit until it thickens. Reducing the maple syrup gives a lower sugar option. You can create a delicious dish that fits your needs! {{image_4}} If you want to mix things up, try these fun flavors. - Chocolate chip cinnamon roll casserole: Swap some of the cinnamon rolls for chocolate chip ones. The result is a sweet, gooey treat! - Apple pie cinnamon roll casserole: Add diced apples and a sprinkle of cinnamon sugar. This will give a cozy apple pie vibe to your dish. Toppings can take your casserole to the next level. - Alternative frostings and icing options: Instead of the given icing, you can use cream cheese frosting or a vanilla glaze. Both add a rich taste. - Seasonal fruits and nuts for added flavor: Top with fresh berries or sliced bananas. Adding chopped nuts like pecans or walnuts gives a nice crunch. How you serve the casserole can change the vibe. - Individual servings vs. family-style: You can cut it into squares for a family-style meal. Or, bake in muffin cups for individual servings. This makes it easy to grab and go! - Breakfast vs. dessert presentation: Serve it warm for breakfast with coffee. Or, add a scoop of ice cream for a delightful dessert. For more ideas, check out the Full Recipe. To keep your cinnamon roll casserole fresh, store it in the fridge. Use an airtight container to avoid drying out. It stays good for up to three days. If you want to keep it longer, freezing is a great option. First, let it cool completely. Then, wrap it tightly in plastic wrap and aluminum foil. This helps prevent freezer burn. You can freeze it for up to three months. When you want to enjoy your leftovers, reheating is easy. The best method is using the oven. Preheat your oven to 350°F (175°C). Place the casserole in a baking dish and cover it with foil. Heat for about 15-20 minutes until warm. This keeps the texture nice. If you’re in a hurry, the microwave works too. Heat individual portions for about 30 seconds to 1 minute. Just be sure to check that it's warm all the way through. Enjoy your delicious breakfast treat anytime! How long does it take to bake? It takes about 25 to 30 minutes to bake. You want the top to be golden brown and puffed up. Check for doneness by inserting a toothpick. If it comes out clean, your casserole is ready! Can I substitute ingredients? Yes, you can! If you want to use almond milk instead of whole milk, that works well. You can also swap out eggs for a flaxseed mixture if you're looking for a vegan option. What if my casserole is too soggy? If your casserole is soggy, it might need more baking time. Make sure the egg mixture soaks each roll well, but don’t overdo it. How to fix over-baking? If you over-baked your casserole, it might be dry. Serve it with extra icing or a scoop of ice cream to add moisture back in. How long does this dish stay fresh? This dish stays fresh in the fridge for about 3 to 4 days. Cover it well to keep it moist and tasty. Can I prepare it in advance? You can prepare it the night before! Just mix everything and keep it in the fridge. Bake it in the morning for a warm breakfast treat. Check the Full Recipe for more details! This blog post showed you how to make a delicious cinnamon roll casserole. We covered essential ingredients and step-by-step instructions to help you succeed. You learned tips for perfecting your dish and ideas for variations and dietary needs. Plus, we shared storage tips to keep leftovers fresh. Whether it’s for breakfast or dessert, this casserole is a treat. Enjoy making it for yourself or sharing it with loved ones. Your culinary skills will shine with this easy and tasty recipe.

Cinnamon Roll Casserole Delightful Breakfast Dish

Are you ready to elevate your breakfast game? This Cinnamon Roll Casserole is a warm, gooey delight that combines all

To make easy vegetable fried rice, you need just a few key items: - 2 cups cooked jasmine rice (preferably leftover and chilled) - 1 cup mixed vegetables (like diced carrots, peas, and corn) - 1 bell pepper (any color), diced into bite-sized pieces - 1 small onion, finely chopped - 2 cloves garlic, minced - 2 tablespoons soy sauce (adjust to taste) - 1 tablespoon sesame oil (for a nutty flavor) - 1 tablespoon vegetable oil (for frying) - 2 green onions, sliced thinly for garnish - 2 eggs (optional, for added protein) - Salt and pepper to taste - Sesame seeds for garnish (optional, for crunch) You can mix and match veggies based on what you love. Here are some great combos: - Broccoli and snap peas for a crunchy bite - Zucchini and mushrooms for a rich flavor - Spinach and bell peppers to add color and nutrition - Cauliflower and carrots for a hearty mix Feel free to use what you have on hand. Fresh or frozen veggies both work well. To boost the flavor and health of your dish, consider these add-ins: - Tofu or chicken for protein - Sesame seeds for added crunch - Chili flakes for a spicy kick - Ginger for a fresh zing These options make your fried rice even better. Just add them when you stir-fry! For the full recipe, check the section above. Start with your rice. Use 2 cups of cooked jasmine rice. Chilling it overnight is best. This helps keep it firm. Next, chop your vegetables. You want a mix of diced carrots, peas, and corn. Dice a bell pepper and finely chop a small onion. Mince 2 cloves of garlic. Having everything ready makes cooking quick and easy. Heat a large skillet or wok over medium-high heat. Add 1 tablespoon of vegetable oil. Wait until the oil shimmers. This shows it's hot enough. Toss in the chopped onion and sauté for about 2-3 minutes. Stir until the onion is soft and slightly clear. Next, add the minced garlic and mixed vegetables. Stir-fry this for 3-4 minutes. You want the veggies to be tender but bright in color. Now, add the diced bell pepper. Stir-fry for 2 more minutes. The bell pepper should still have a slight crunch. If using eggs, push the veggie mix to one side of the pan. Crack 2 eggs into the empty side and scramble them. Once cooked, mix them into the veggies. Fold in your chilled rice, breaking apart any clumps. Drizzle 2 tablespoons of soy sauce and 1 tablespoon of sesame oil over the rice. Stir well, so all the rice soaks up the flavors. Finally, season with salt and pepper to your liking. Remove from heat and add sliced green onions on top. Optional: sprinkle sesame seeds for crunch. Enjoy your colorful veggie fried rice! Using leftover rice is key for a great fried rice. Cold rice holds its shape better when you cook it. If you use fresh rice, it might turn mushy. Aim for rice that’s been chilled for at least a few hours. You can even freeze leftover rice for future use. Just make sure to thaw it out before cooking. Choosing fresh vegetables makes a big difference in taste. Look for bright colors and firm textures. For carrots, select ones that are crisp and smooth. Peas should be vibrant green and plump. Bell peppers should be shiny and free of blemishes. Fresh vegetables add crunch and flavor to your dish. You can mix and match based on what you like or have on hand. Seasonings can take your fried rice to the next level. Soy sauce adds saltiness and umami. Sesame oil brings a nutty flavor. For extra zest, consider adding a squeeze of lime. Garlic and onions are essential for a flavorful base. You might also add ginger for a hint of spice. Don’t forget to taste as you go, adjusting the seasonings to suit your palate. For more details, check the Full Recipe. {{image_4}} You can easily make this dish vegetarian or vegan. For vegetarian fried rice, simply add eggs. They provide protein and richness. If you want a vegan version, skip the eggs. Use tofu instead for a great protein boost. Tofu absorbs flavors well when cooked. You can also add more vegetables like spinach or mushrooms to keep it hearty and satisfying. If you need a gluten-free option, choose tamari instead of soy sauce. Tamari has a similar taste but is made without wheat. Also, ensure your vegetable broth, if used, is gluten-free. Quinoa can replace rice if you want a twist. Quinoa adds a nutty flavor and extra protein. Adding protein can make your fried rice more filling. Tofu is a great plant-based choice. Just cube it and stir-fry until golden. Chicken is another option; cook it before adding the vegetables. Shrimp cooks quickly, so add it after the veggies. Make sure to adjust the cooking time to keep everything tender and flavorful. For the full recipe, check out the section above. Enjoy experimenting with these variations! To keep leftover fried rice fresh, transfer it to an airtight container. Make sure it cools to room temperature first. This helps prevent moisture buildup, which can lead to sogginess. Store it in the fridge for up to three days. If you see any discoloration or an odd smell, it's best to toss it. When reheating fried rice, your goal is to bring back its original texture. Start by adding a splash of water or broth to your skillet. Heat it over medium heat, stirring often. This keeps the rice moist and fluffy. If you use a microwave, cover the bowl with a damp paper towel. Heat in short bursts to avoid overcooking. Freezing fried rice is a great way to save it for later. To do this, spread the rice in a single layer on a baking sheet. Freeze for about an hour until firm. Then, transfer it to a freezer-safe bag or container. It can last up to three months in the freezer. When you're ready to eat, thaw it in the fridge overnight before reheating. Enjoy your colorful veggie fried rice anytime! For the full recipe, check out the details above. No, it’s best to use cooked rice. Fresh rice is too moist. It clumps together and won’t fry well. Leftover rice has dried a bit in the fridge. This makes it perfect for frying. Jasmine rice is my favorite. It has a nice aroma and fluffy texture. Long-grain rice works well too. Avoid sticky rice like sushi rice. It can make your fried rice mushy. You can use other sauces for taste. Try teriyaki or coconut aminos. They add flavor without soy. You can also use salt and pepper to season. For a twist, add lemon juice or vinegar. Start with mild spice like black pepper. For heat, add red pepper flakes. You can also use sriracha or chili sauce. Adjust the spice to fit your taste. This way, everyone can enjoy the dish. You now know how to make easy vegetable fried rice. Start with the right ingredients and use fresh veggies. Follow the steps and cooking tips to get the best flavor. Remember to store leftover fried rice properly and reheat it well. You can also explore variations like gluten-free or protein options. Use this guide to create delicious meals with simple steps. Enjoy your cooking and make fried rice your way!

Easy Vegetable Fried Rice Quick and Flavorful Recipe

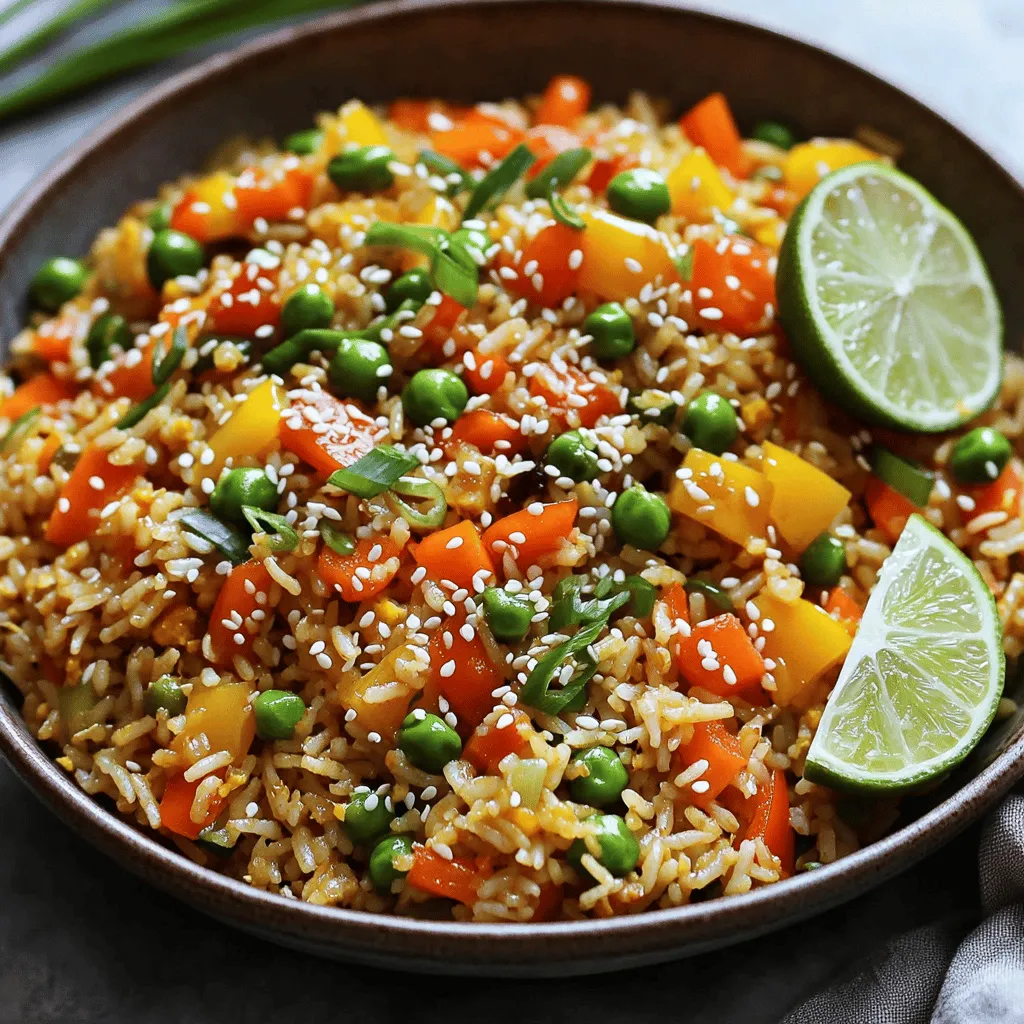
Looking for a quick and tasty meal? My Easy Vegetable Fried Rice recipe is just what you need! In just

- 2 ripe avocados - 4 slices of hearty whole-grain bread - 4 large eggs - 1 tablespoon apple cider vinegar - 1 teaspoon red pepper flakes - 1 tablespoon freshly squeezed lemon juice - Sea salt and freshly cracked black pepper to taste - A handful of fresh microgreens or peppery arugula for garnish - Extra virgin olive oil for drizzling Gathering fresh ingredients makes all the difference. I love using ripe avocados because they provide a rich, creamy base. Look for avocados that yield slightly when you press them. Whole-grain bread adds a nice texture and heartiness. The eggs must be large for poaching. They will give you the perfect runny yolk. Apple cider vinegar plays a key role as it helps the egg whites hold their shape. Don't forget the red pepper flakes! They add a delightful kick to the dish. When choosing your garnish, microgreens or arugula add a fresh touch. Lastly, a drizzle of extra virgin olive oil boosts the flavor and richness. Each ingredient plays a role in creating a delicious avocado toast with poached egg. For the full recipe, check out the details above. To toast your bread to perfection, start with hearty whole-grain slices. Place them in a toaster and select your desired crispiness. If you prefer, use a skillet. Heat the skillet over medium heat and add the bread. Flip the slices occasionally until they turn golden brown. Both methods work well, so choose what suits you best. Next, let’s prepare the avocado mixture. Take two ripe avocados and cut them in half. Remove the pit and scoop the flesh into a bowl. Use a fork to mash it. Aim for a creamy yet slightly chunky texture. To enhance the flavor, mix in one tablespoon of freshly squeezed lemon juice, one teaspoon of red pepper flakes, and a pinch of sea salt and black pepper. Taste it and adjust the seasoning as needed. Now, let’s focus on poaching the eggs. Fill a medium saucepan with about three inches of water. Bring the water to a gentle simmer over medium heat. Add one tablespoon of apple cider vinegar to help the egg whites firm up. Crack an egg into a small bowl, then gently slide it into the water. Repeat this for the other eggs. Poach them for about 3-4 minutes for a runny yolk. If you want firmer yolks, cook them a bit longer. Use a slotted spoon to remove the eggs, and place them on a paper towel to drain. Finally, it’s time to assemble your avocado toast. Spread a generous layer of the mashed avocado on each slice of toasted bread. Make sure to cover it fully. Top each slice with a poached egg. For a finishing touch, sprinkle a bit more salt and cracked pepper on top. Drizzle extra virgin olive oil for added flavor. To make it look nice, garnish with fresh microgreens or arugula. Enjoy your delicious avocado toast with poached egg! For the full recipe, check out the details above. To get the perfect yolk, timing is key. For a runny yolk, poach the eggs for about 3-4 minutes. If you like your yolks firmer, add one more minute. Keep an eye on them; the simmering water helps cook evenly. The vinegar helps the egg whites stay together, so do not skip it! You can elevate your dish with a few simple spices and toppings. Try adding a pinch of smoked paprika for depth. A sprinkle of feta cheese adds creaminess and tang. If you like heat, add more red pepper flakes. Microgreens or arugula give a fresh, peppery bite that complements the rich avocado. You can save time by preparing some parts in advance. You can mash the avocado and store it in the fridge for up to a day. Just add lemon juice to keep it fresh. Toast the bread ahead, too. When you are ready to eat, just reheat the toast and poach your eggs. This way, you can enjoy your avocado toast quickly! {{image_4}} You can change your avocado toast with fun toppings. Try adding feta cheese for a salty kick. Cherry tomatoes add sweetness and color, making your dish look great. Smoked salmon brings a rich flavor that pairs well with the creamy avocado. Each topping gives a new taste to this classic dish. Want to make your avocado toast vegan? Simply skip the egg! You can replace it with sliced radishes or a sprinkle of nutritional yeast. For a gluten-free option, choose gluten-free bread. There are many tasty ways to enjoy this dish while meeting your dietary needs. Explore flavors from around the globe. Add za'atar spice for Middle Eastern flair. Try sriracha for a spicy kick inspired by Asian cuisines. You can also sprinkle dukkah, an Egyptian nut and spice mix, for a crunchy twist. Each variation turns your avocado toast into a new dish worth savoring. To store leftover avocado toast, separate the components. Keep the bread and avocado mix apart. Place the bread in an airtight bag. This keeps it from getting soggy. Store the avocado mix in a bowl with plastic wrap. Press the wrap down on the mix to reduce air exposure. You can enjoy the toast for up to a day this way. When you're ready to eat your toast, reheat the bread. You can use a toaster or a skillet. Toast it lightly to regain crispness. Avoid the microwave, as it can make the bread chewy. If you have leftover poached eggs, warm them gently in hot water for a few minutes. This way, they stay soft and tasty. Avocados stay fresh for about 2-3 days if ripe. Store them in the fridge to slow browning. Whole-grain bread lasts about a week at room temperature. If you want it to last longer, freeze the slices. Just remember to separate them with parchment paper before freezing. This way, you can take out one slice at a time. To keep your avocado fresh, use these easy tips: - Store in the fridge: Once cut, wrap the avocado tightly in plastic wrap. This limits air exposure. - Use lemon juice: Squeeze some lemon juice on the flesh. The acid slows browning. - Keep the pit: If you have half an avocado, leave the pit in the other half. It can help reduce browning. These methods help keep your avocado looking tasty and fresh longer. If you want to skip eggs, here are some tasty options: - Tofu: Silken tofu can mimic the texture of a poached egg. Just warm it and add spices. - Chickpeas: Mash chickpeas with a bit of olive oil and spices for a protein boost. - Avocado: You can add extra avocado on top. It adds creaminess and flavor. These substitutes keep your dish tasty and filling without eggs. Yes, you can use frozen avocados! Here are some tips: - Thaw first: Place the frozen avocado in the fridge overnight or use warm water to thaw quicker. - Texture change: Frozen avocados may be softer. They still work well on toast. - Flavor: You might lose some freshness, but adding lemon juice helps brighten the taste. Using frozen avocados is a good backup when fresh ones are not available. This blog post shared a delicious avocado toast recipe with tips and variations. You learned how to toast bread, mash avocados, and poach eggs perfectly. We also addressed storage and reheating to maintain quality. Remember, cooking is all about fun and experimenting. Try different toppings and flavors to make this dish your own. Enjoy your tasty creations and share them with friends!

Delicious Avocado Toast with Poached Egg Recipe

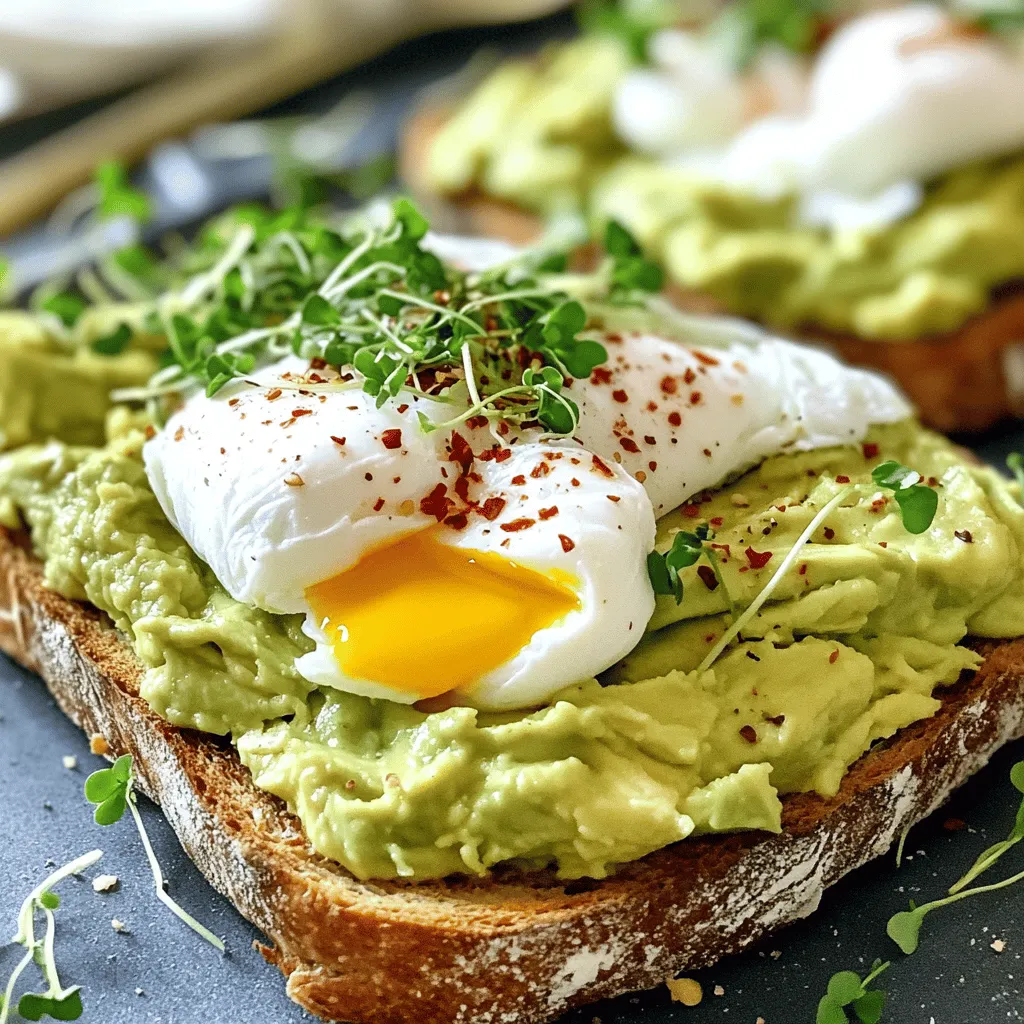
Looking for a tasty breakfast that’s both simple and satisfying? You’ve found it! My Delicious Avocado Toast with Poached Egg

To make coconut lime chicken, I use these main ingredients: - 4 boneless, skinless chicken breasts - 1 can (13.5 oz) coconut milk - 2 tablespoons freshly squeezed lime juice - Zest of 1 lime (about 1 tablespoon) - 3 cloves garlic, finely minced - 1 tablespoon fresh ginger, freshly grated - 1 teaspoon ground coriander - 1 teaspoon ground cumin - 1 teaspoon sea salt - ½ teaspoon freshly ground black pepper - 2 tablespoons extra virgin olive oil These ingredients blend well, creating a bright and tasty dish. The coconut milk adds creaminess, while lime juice gives a fresh zing. Garlic and ginger add warmth and depth to the flavor. I like to serve coconut lime chicken with some fun garnishes and sides. Consider these options: - Fresh cilantro leaves for garnish - Lime wedges for serving - Coconut rice for a tropical twist - Cucumber salad for a refreshing crunch These garnishes and sides enhance the meal and make it pop on the plate. They also add more layers of flavor. If you don't have some ingredients, here are some easy swaps you can make: - Use chicken thighs instead of breasts for a juicier bite. - Swap lime juice with lemon juice if needed. - Coconut cream can replace coconut milk for a richer taste. - You can use garlic powder and ginger powder if fresh isn’t on hand. These substitutions keep the recipe flexible and fun. You can still enjoy great flavor with what you have at home. For the complete method, check the Full Recipe. To start, gather your ingredients. You will need coconut milk, lime juice, lime zest, minced garlic, grated ginger, ground coriander, ground cumin, sea salt, and black pepper. In a large bowl, mix these items well. Whisk until everything blends smoothly. This will be your marinade. It will give the chicken great flavor. Next, take your boneless, skinless chicken breasts. Place them into the bowl with the marinade. Make sure each piece is coated well. Cover the bowl with plastic wrap. Place it in the fridge for at least 30 minutes. For the best taste, let it marinate for up to 4 hours. This time allows the chicken to soak in all those yummy flavors. Before you grill, preheat your grill or grill pan. Set it to medium-high heat about 10 minutes ahead of time. Once hot, brush the grill with olive oil. This helps prevent the chicken from sticking. After marinating, take the chicken out of the bowl. Let the extra marinade drip off. Place the chicken on the grill. Cook it for about 6-7 minutes on each side. Check the chicken with a meat thermometer. It should reach 165°F (75°C). You want it nice and golden brown. For the sauce, take the reserved marinade and pour it into a small saucepan. Bring it to a gentle boil over medium heat and then simmer for about 5 minutes. This will help thicken the sauce and enhance the flavor. After grilling, let the chicken rest for a few minutes. This keeps it juicy. Slice it into strips, drizzle with the sauce, and garnish with fresh cilantro. Enjoy your meal! You can find the Full Recipe for more details. To grill chicken perfectly, start with even thickness. Pound the breasts to make them uniform. This helps them cook evenly. Always preheat your grill. Aim for medium-high heat, around 400°F (200°C). Oil the grill grates to prevent sticking. Grill each side for 6-7 minutes. Use a meat thermometer to check for 165°F (75°C). Let the chicken rest after cooking. This keeps it juicy and tender. The marinade for Coconut Lime Chicken is key. You can boost its taste by adding fresh herbs. Try adding chopped mint or basil for a fresh twist. A dash of chili flakes can add a nice kick. If you like a sweeter profile, add a teaspoon of honey. Let the chicken marinate for at least 30 minutes, but longer is better. Up to 4 hours allows flavors to soak in deep. Presentation matters when serving Coconut Lime Chicken. Slice the chicken into strips for a beautiful look. Drizzle the thickened sauce over the top for shine. Garnish with fresh cilantro leaves for color. Serve on a vibrant platter to catch the eye. Pair with lime wedges for a zesty touch. Add coconut rice or a fresh salad for a complete meal. This dish not only tastes great but looks stunning too! {{image_4}} To add some heat, mix in red pepper flakes or chopped jalapeños. These additions give the dish a spicy kick. Start with half a teaspoon of red pepper flakes. Taste and adjust as you go. This way, you can control the heat to your liking. You can also make this dish in the oven. After marinating the chicken, preheat the oven to 400°F (200°C). Place the chicken in a baking dish and pour the marinade over it. Bake for 25-30 minutes. Make sure the chicken reaches 165°F (75°C) inside. This method keeps it juicy and tender. For a plant-based option, use tofu or tempeh. Press the tofu to remove excess water. Then, cut it into cubes or slices. Marinate as you would the chicken. Grill or bake until golden brown. This way, you still enjoy the great flavors of coconut and lime. You can also serve it over quinoa or rice for a complete meal. You can find the Full Recipe for more detailed steps. After you enjoy your Coconut Lime Chicken, store leftovers right away. Place the chicken in an airtight container. This keeps it fresh and safe. Make sure to cool it to room temperature first. You can store it in the fridge for up to three days. If you want to keep it longer, consider freezing it. When you’re ready to enjoy the leftovers, reheating is easy. You can use the oven or microwave. For the oven, preheat it to 350°F (175°C). Place the chicken in a baking dish and cover it with foil. Heat for about 15-20 minutes until warm. In the microwave, heat on medium power for 2-3 minutes. Check it often to avoid overcooking. If you want to freeze Coconut Lime Chicken, it’s simple. Wrap it tightly in plastic wrap, then place it in a freezer bag. Remove as much air as you can. This helps prevent freezer burn. You can freeze it for up to three months. When you’re ready to eat, thaw it overnight in the fridge. Then, reheat as described above. Enjoy the fresh flavors later with ease! To make Coconut Lime Chicken gluten-free, ensure all your ingredients are gluten-free. Use gluten-free soy sauce if you want to add a salty flavor. The coconut milk and spices are naturally gluten-free, so they work well. Always check the labels on your ingredients to confirm. This way, everyone can enjoy this tasty dish! Yes, you can use chicken thighs instead of breasts. Thighs have more fat, which makes them juicy. They also have a rich flavor that pairs well with the coconut and lime. Just adjust the cooking time since thighs may take a bit longer to cook through. Aim for an internal temperature of 165°F (75°C) to ensure they are safe to eat. Coconut Lime Chicken goes well with many sides. Here are some great options: - Coconut rice for a tropical vibe - Fresh cucumber salad for crunch - Grilled vegetables for color - Quinoa for a healthy boost - A light mango salsa for sweetness These pairings will enhance your meal and make it feel special. For the full recipe, check out the earlier sections! This blog post covered the essentials for making Coconut Lime Chicken. We explored main ingredients, side dishes, and tasty variations. I shared tips for marinating, grilling, and storing your chicken. You can easily adapt recipes for gluten-free or vegetarian diets. Enjoying Coconut Lime Chicken is simple and fun. Remember, with the right ingredients and steps, your dish will shine at any meal. Keep experimenting with flavors to find your perfect taste. Now, let’s get cooking!

Coconut Lime Chicken Flavorful and Simple Recipe

Looking for a tasty dish that feels like a mini vacation? You’ve found it! This Coconut Lime Chicken recipe is

To make this delicious chocolate chip cookie dough dip, you need a few simple ingredients. Each one brings a special taste or texture. This dip is perfect for sharing. Here is what you need for the dip: - 1 cup all-purpose flour, toasted - ½ cup brown sugar, packed - ½ cup granulated sugar - 1 cup cream cheese, softened to room temperature - ½ cup unsalted butter, softened to room temperature - 1 teaspoon pure vanilla extract - ½ cup mini chocolate chips - ¼ cup chopped nuts (optional, walnuts or pecans work well) - ½ teaspoon salt - Assorted dippers (such as graham crackers, pretzels, or crisp apple slices) You can swap some ingredients if needed. Here are a few ideas: - Use coconut flour for a gluten-free option. - Replace cream cheese with Greek yogurt for a lighter dip. - Use maple syrup instead of brown sugar for a different sweetness. - If you don’t have mini chocolate chips, regular ones work too. These easy swaps keep your dip tasty and fun! Start by preheating your oven to 350°F (175°C). Then, take 1 cup of all-purpose flour and spread it evenly on a baking sheet. Bake it for 5 to 7 minutes. Stir the flour occasionally. You want it to look lightly golden and smell nutty. Once done, remove it from the oven and let it cool completely. This step is key. It helps get rid of any raw flour taste. In a large bowl, add 1 cup of softened cream cheese and ½ cup of softened unsalted butter. Use an electric mixer on medium speed. Beat them together until the mix is creamy and smooth. This gives a good base for your dip. Next, add the sugars. Mix in ½ cup of packed brown sugar and ½ cup of granulated sugar. Keep mixing until it looks fluffy. Finally, add 1 teaspoon of pure vanilla extract. Blend it all together until creamy. Now, it's time to add the flour. Use a spatula or wooden spoon to gently fold in the cooled toasted flour. Don't forget to add ½ teaspoon of salt too. Stir until you have no dry flecks left. This ensures a smooth texture. Next, fold in ½ cup of mini chocolate chips. If you like nuts, add ¼ cup of chopped walnuts or pecans. Be gentle while folding. You want to keep the creamy texture. After this, transfer your cookie dough dip into a nice serving bowl. Cover it with plastic wrap and chill it in the fridge for at least 30 minutes. This helps the flavors mix well and makes it easier to scoop. Before serving, give it a quick stir. Pair it with graham crackers, salty pretzels, or crisp apple slices for a fun treat. For the full recipe, check out the details above. To get a smooth and creamy dip, start with room temperature ingredients. Softened cream cheese and butter blend better. Use an electric mixer for the best results. Mix until the mixture looks fluffy and is free of lumps. Be gentle when folding in the flour and chocolate chips. This step keeps your dip light and creamy. Toasting flour removes raw taste. Preheat your oven to 350°F (175°C). Spread the flour in a thin layer on a baking sheet. Bake for 5-7 minutes, stirring once. Look for a light golden color and a nutty smell. Let it cool completely before using. This step is key to a great flavor in your dip. Serve your chocolate chip cookie dough dip with fun dippers. Some great options include graham crackers, salty pretzels, and crisp apple slices. The sweet dip pairs well with salty snacks. For a twist, try using vanilla wafers or fresh strawberries. This variety makes it fun for everyone! Enjoy your dip fresh from the fridge for the best taste. {{image_4}} You can change the taste of your cookie dough dip easily. Try adding peanut butter for a nutty twist. Use ½ cup of smooth peanut butter in place of some butter. Another fun option is Nutella. Replace the mini chocolate chips with ½ cup of Nutella. Both options make the dip rich and tasty. If you need gluten-free choices, swap the all-purpose flour for a gluten-free blend. Many brands offer great gluten-free flours that work well in this recipe. Just make sure to toast the gluten-free flour the same way to keep the flavor nice. With these swaps, everyone can enjoy this dip. The dippers can change your experience too! Besides graham crackers, you can use pretzels for a salty crunch. Crisp apple slices add a fresh flavor that pairs well. You can also try vanilla wafers or even cookies for double cookie fun. Each dipper brings a new taste to your chocolate chip cookie dough dip. To keep your chocolate chip cookie dough dip fresh, store it in the fridge. Use an airtight container to prevent it from absorbing other smells. It’s best to eat the dip within five days. When you’re ready to enjoy it, just take it out and give it a quick stir. You can freeze this dip to enjoy later. Just scoop it into a freezer-safe container. Make sure to leave some space at the top because it will expand. You can freeze it for up to three months. When you want to enjoy it again, let it thaw in the fridge overnight. If your dip has thickened in the fridge, don’t worry! Just use a hand mixer to whip it back to a creamy state. You can also add a splash of milk or cream to help revive it. Avoid heating it in the microwave, as this may change its texture. Enjoy your dip with your favorite snacks right away! Yes, this cookie dough dip is safe to eat. We use toasted flour, which removes harmful bacteria. This key step makes it safe for everyone. The other ingredients, like cream cheese and butter, are also safe to eat in this form. So, scoop it up without worry! Absolutely! You can make this dip a day ahead. Just store it in the fridge until you are ready to serve. Chilling it overnight can even enhance the flavors. If you make it early, just give it a quick stir before serving. You have many fun options for dippers! Here are some of my favorites: - Graham crackers - Salted pretzels - Crisp apple slices - Vanilla wafers - Fresh strawberries Each of these adds a nice crunch or sweetness. You can even mix and match for a fun platter. The dip’s creamy texture pairs well with all of them. Enjoy exploring your favorites! We covered a lot about making cookie dough dip. First, we discussed the key ingredients, then went through easy steps to make it. I shared tips for a creamy texture and ideas for flavors. We also talked about how to store your dip and answered common questions. Remember, this recipe is fun and flexible. You can tweak it to fit your taste. Enjoy making this treat and share it with friends!

Chocolate Chip Cookie Dough Dip Irresistible Treat

If you love cookie dough, you’ll adore this Chocolate Chip Cookie Dough Dip. It’s creamy, sweet, and packed with flavor.

Older posts
Newer posts
← Previous Page1 … Page77 Page78 Page79 … Page88 Next →

dsad

© 2025 spoonfulsavory • Built with GeneratePress

Our Policies

  • Copyright Policy
  • Cookie Policy
  • GDPR Policy
  • Privacy Policy
  • Disclaimer
  • Terms Of Use

More Information

  • Home
  • About
  • Contact
  • Appetizers
  • Dessert
  • Dinner
  • Drinks
©2025, spoonfulsavory About Back To Top