Honey Garlic Chicken Stir Fry Quick and Flavorful Meal
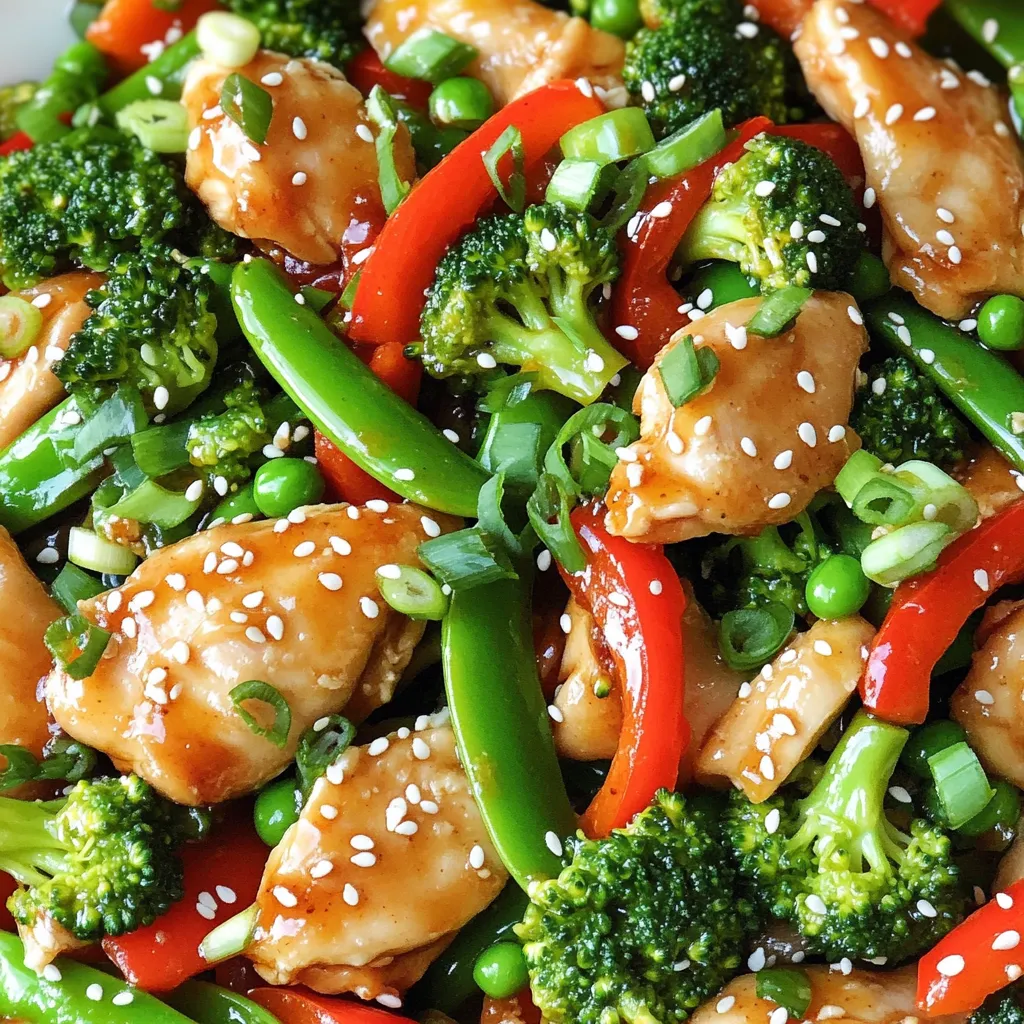
Looking for a quick and tasty meal? Honey Garlic Chicken Stir Fry is a winner! With juicy chicken thighs, sweet
Looking for a quick and tasty meal? Honey Garlic Chicken Stir Fry is a winner! With juicy chicken thighs, sweet
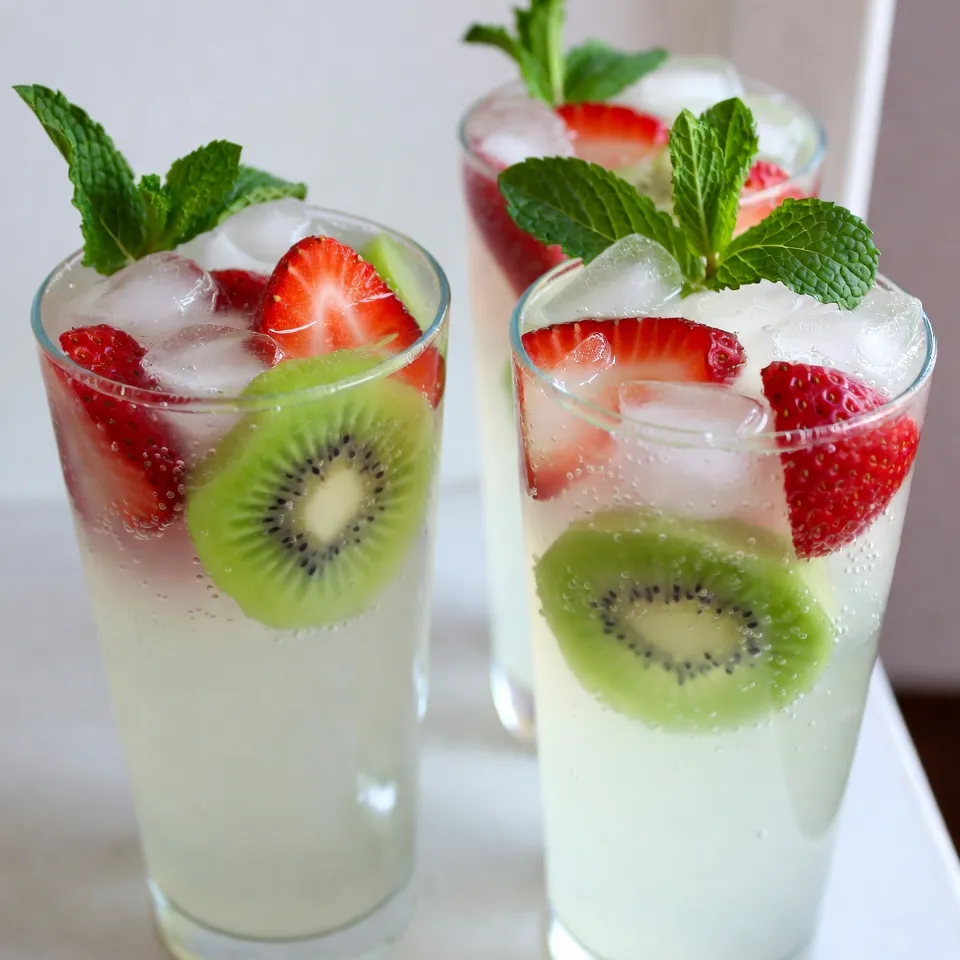
Summer calls for cool drinks, and Strawberry Kiwi Limeade is the perfect choice! This vibrant, fruity refreshment bursts with flavor
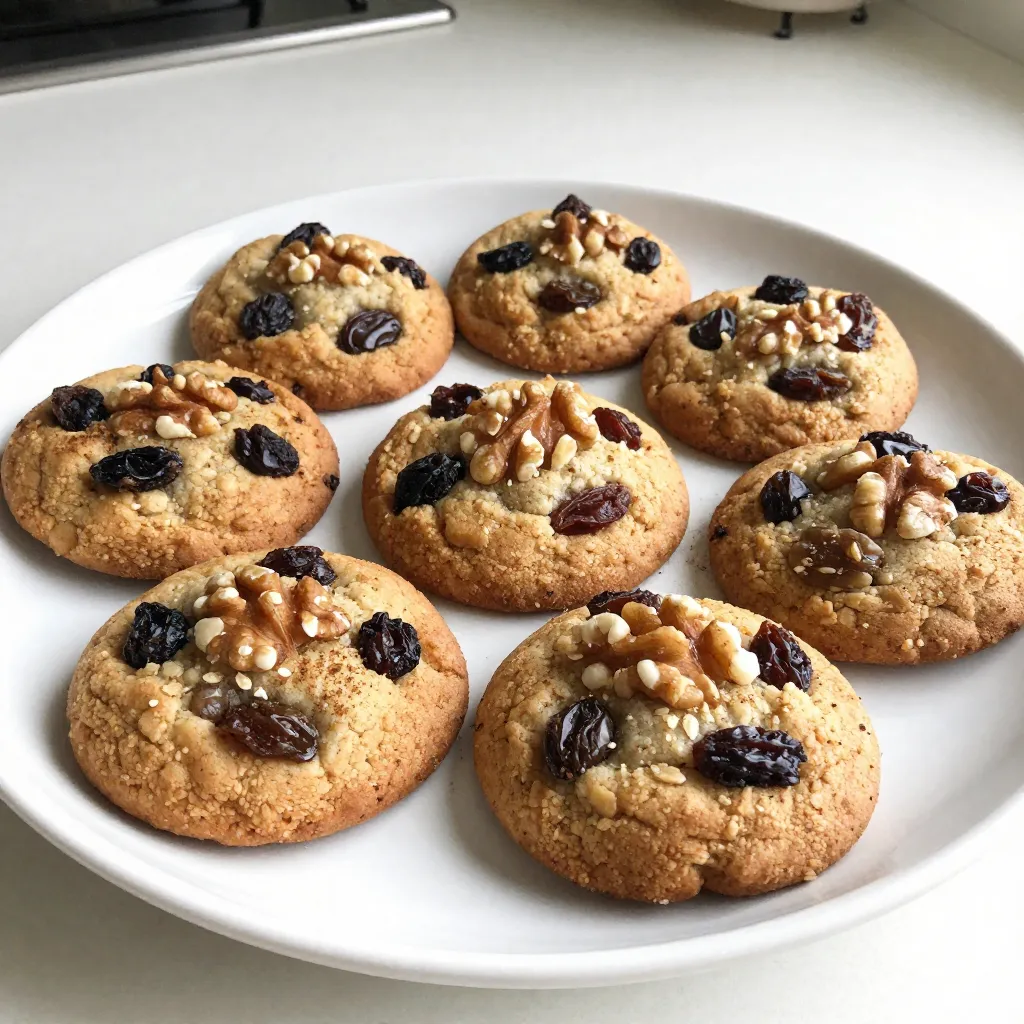
Looking for a tasty and easy breakfast option? Let’s make Oatmeal Raisin Breakfast Cookies! They’re perfect for busy mornings and

Craving a sweet treat that packs a protein punch? You’re in the right place! This High-Protein Chocolate Peanut Butter Mug

Start your morning right with my delicious Apple Cinnamon Crumble Muffins! These muffins burst with cozy flavors that make breakfast
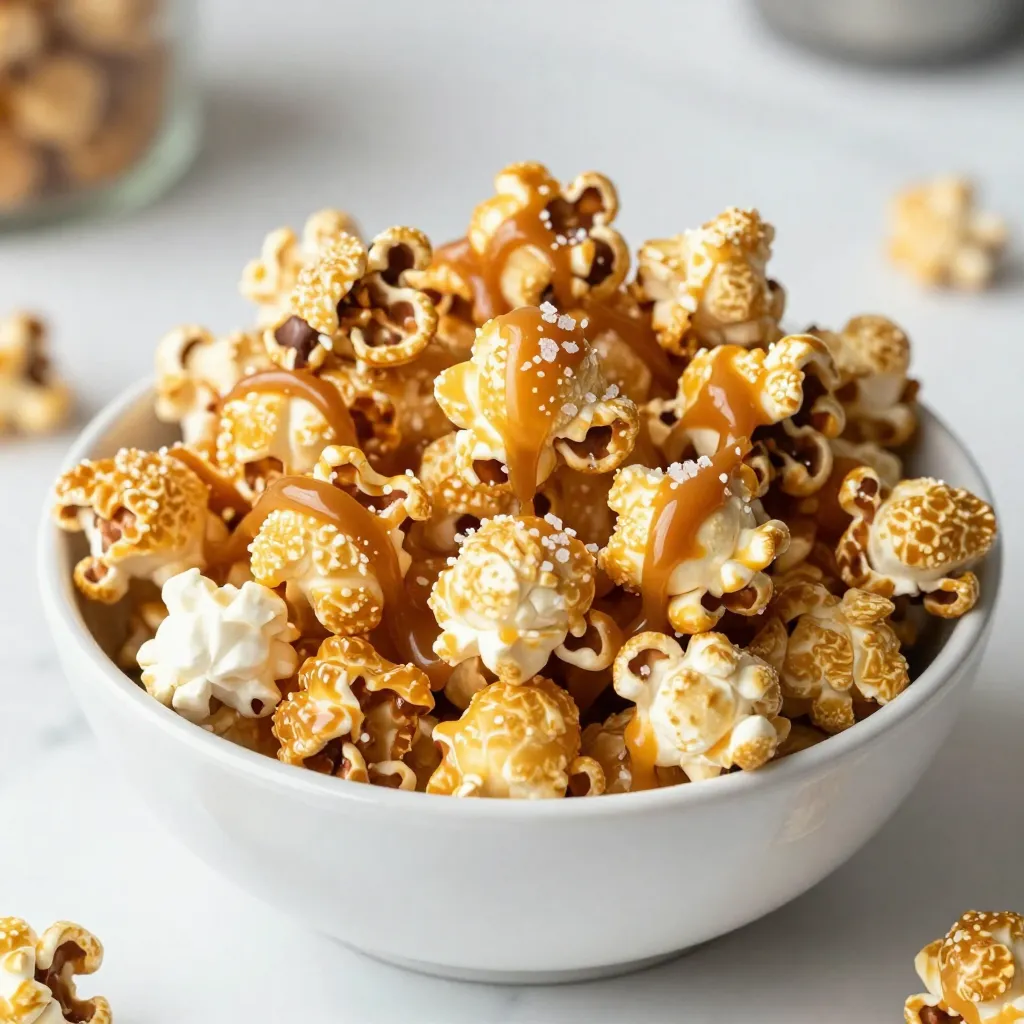
If you love sweet treats, you’re in for a real delight with Chocolate Caramel Popcorn! This snack is a perfect

If you crave a warm, fluffy treat, you’ll love my Cheddar Herb Drop Biscuits! These cheesy, savory delights are easy
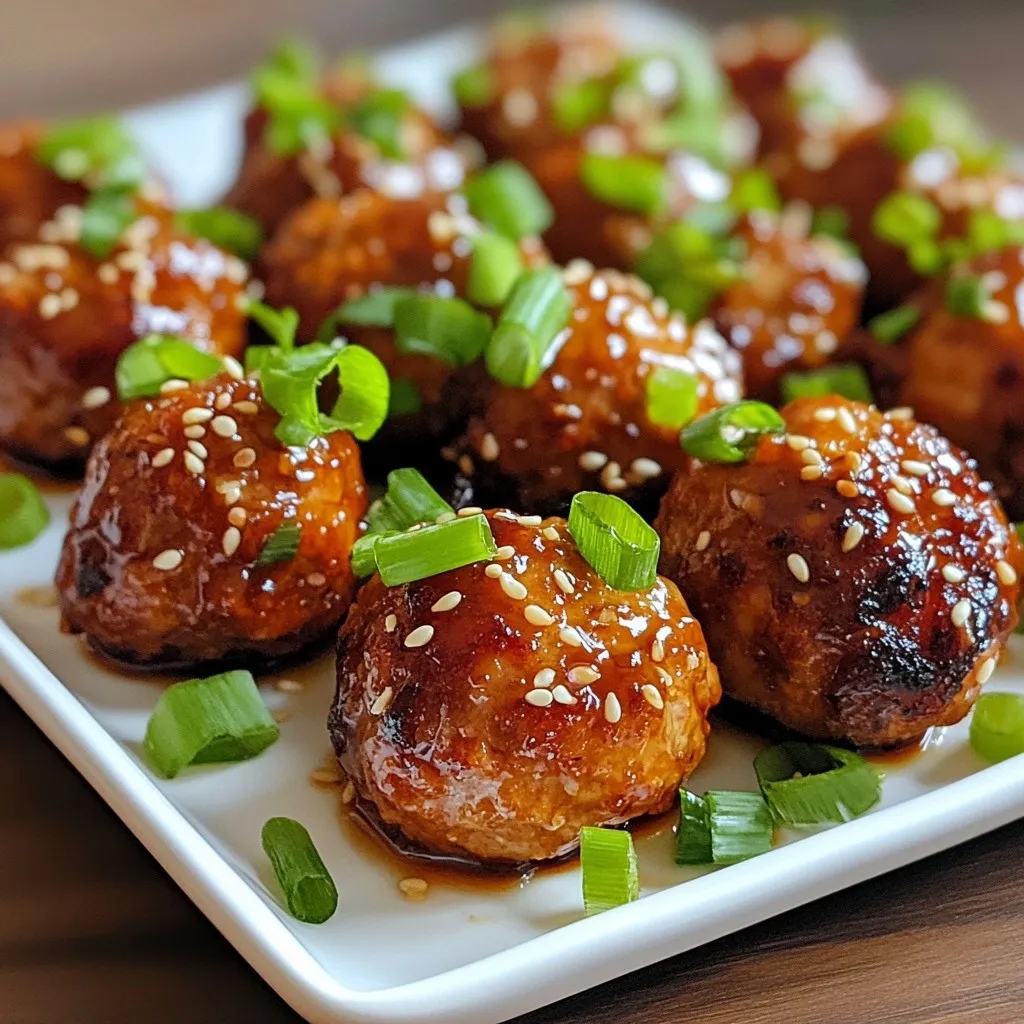
Are you ready to savor a dish that will delight your taste buds? Honey Garlic Glazed Chicken Meatballs combine sweet,
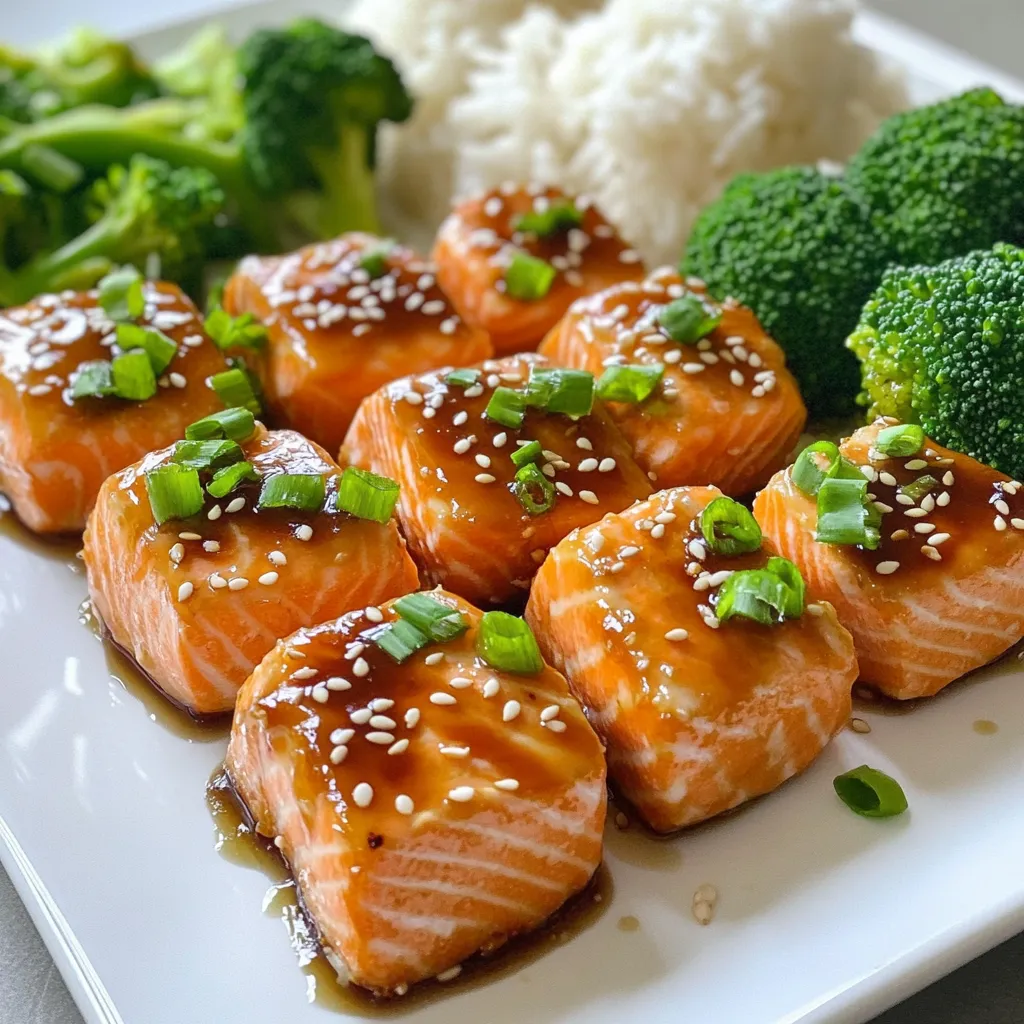
Looking for a quick and tasty meal? These Air Fryer Teriyaki Salmon Bites are simple and delicious! With just a
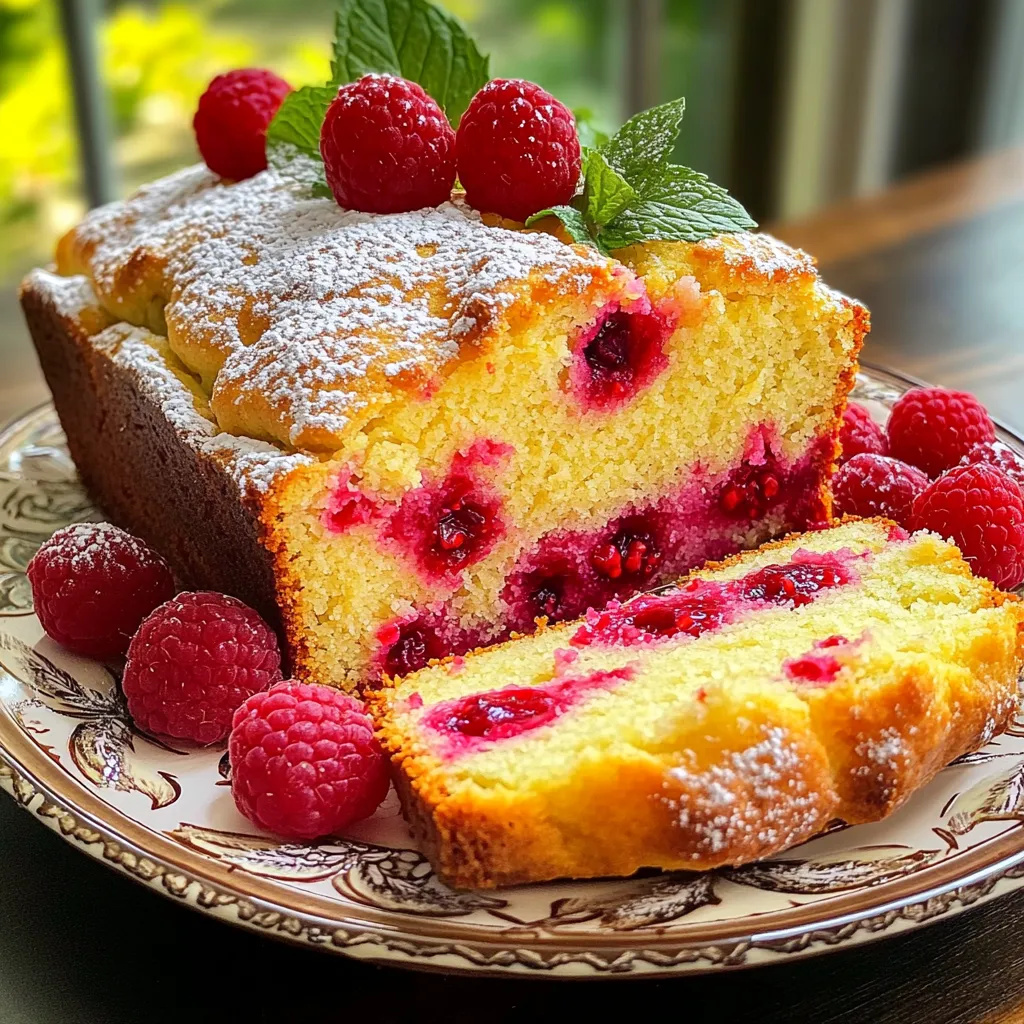
Are you ready to enjoy a delightful treat that’s easy to make? This Lemon Raspberry Yogurt Loaf is a perfect
