Skip to content
DisclaimerTerms Of UseGDPR PolicyCookie Policy

spoonfulsavory

  • Home
  • Drinks
  • Appetizers
  • Dinner
  • Dessert
  • About
  • Contact
  • Privacy Policy
DisclaimerTerms Of UseGDPR PolicyCookie Policy

Sarah

- 4 boneless, skinless chicken breasts - 2 cups of sliced mushrooms (cremini or button varieties work beautifully) - 4 cloves of garlic, finely minced - 1 cup of heavy cream - 1 cup of chicken broth (homemade or low-sodium) - 2 tablespoons of extra virgin olive oil - 1 tablespoon of unsalted butter - 1 teaspoon of fresh or dried thyme - 1 teaspoon of smoked paprika (for depth of flavor) - Salt and freshly cracked black pepper to taste - Freshly chopped parsley for garnish This recipe makes use of fresh and rich ingredients. The chicken breasts serve as a great base. I love using cremini or button mushrooms as they add a nice earthiness. Fresh garlic is key for that punchy flavor. Heavy cream and chicken broth combine to make a dreamy sauce. The olive oil and butter bring richness to the pan. Thyme gives a hint of herbiness. Smoked paprika adds warmth and depth. Salt and pepper balance the dish perfectly. To finish, a sprinkle of parsley adds freshness and color. It makes the dish look pretty and bright. Each ingredient plays a role in the flavor. Together, they create a comforting meal that feels gourmet. {{ingredient_image_2}} - Preheating the Skillet Start by preheating a large skillet over medium heat. This step is key. Heat makes sure the chicken cooks evenly. Add 2 tablespoons of olive oil and 1 tablespoon of unsalted butter. Wait until they shimmer and melt. - Seasoning the Chicken Breasts While the skillet is warming, season the chicken breasts. Use 4 boneless, skinless chicken breasts. Sprinkle salt, freshly cracked black pepper, and 1 teaspoon of smoked paprika on both sides. Make sure each piece has a good coat. This helps to build great flavor. - Searing the Chicken Carefully place the chicken breasts in the hot skillet. Cook for about 5 to 7 minutes on each side. Look for a golden brown color. This shows they are cooking well. - Ensuring Proper Cook Time Use a meat thermometer. Check for an internal temperature of 165°F (75°C). Once cooked, remove the chicken. Place it on a plate and cover it with foil to keep warm. - Sautéing Mushrooms In the same skillet, add 2 cups of sliced mushrooms. Stir them around and sauté for 3 to 4 minutes. You want them tender and golden. They will release their juices, adding flavor. - Adding Garlic and Broth Next, add 4 cloves of finely minced garlic. Sauté for an extra minute. This step adds a lovely aroma. Then pour in 1 cup of chicken broth. Use a wooden spoon to scrape any tasty bits from the bottom. - Incorporating Cream and Thyme Bring the mixture to a gentle simmer. Lower the heat and stir in 1 cup of heavy cream and 1 teaspoon of thyme. Let this simmer for about 2 to 3 minutes. The sauce will thicken nicely. - Combining Chicken and Sauce Return the cooked chicken to the skillet. Make sure each piece is well coated in the creamy sauce. Let everything simmer together for another 3 to 4 minutes. This helps the flavors blend beautifully. To get a great sear, heat your skillet well. A hot skillet helps brown the chicken nicely. Use medium heat to avoid burning. Season your chicken well. Use salt, pepper, and smoked paprika. This gives your chicken a punch of flavor. You can add herbs like rosemary or parsley for extra taste. Thyme works well, but try new herbs too. A squeeze of lemon juice can balance the dish. It adds brightness and cuts through the creaminess. Just a bit of acidity can make the flavors pop. Serve the chicken on a white plate for contrast. Spoon extra creamy mushroom sauce over the top. This enhances the visual appeal. You can pair it with buttered noodles or steamed veggies. They add color and make the meal complete. Pro Tips Use Fresh Ingredients: Fresh garlic and high-quality mushrooms can elevate the flavor of your dish significantly. Always opt for fresh produce when possible for the best taste. Adjust the Creaminess: If you prefer a lighter sauce, you can substitute half of the heavy cream with milk or a non-dairy alternative while still maintaining great flavor. Perfectly Cooked Chicken: Use a meat thermometer to ensure your chicken breasts reach an internal temperature of 165°F (75°C) for juicy and safe-to-eat results. Make it Your Own: Feel free to add other herbs or spices, such as rosemary or oregano, to customize the dish according to your taste preferences. {{image_4}} You can change the protein in this dish. Instead of chicken, try turkey or tofu. Tofu absorbs flavors well and is a great plant-based option. Use firm tofu to keep its shape. Turkey provides a lean alternative that cooks similarly to chicken. Switching mushrooms also adds variety. Cremini and button mushrooms are great, but you can try shiitake or portobello. These mushrooms add unique tastes to the dish. Adding white wine can elevate the sauce. Just pour in a splash after cooking the mushrooms. The wine adds a nice depth. Mustard is another flavorful option. A teaspoon of Dijon mustard can give a tangy twist. Herbs can also change the flavor. Instead of thyme, try basil or oregano. Both herbs work well and bring their own unique tastes. Experiment with fresh or dried herbs to see what you like best. For gluten-free needs, use a gluten-free broth. Most store-bought broths are gluten-free but check the label. You can also thicken the sauce with cornstarch instead of flour. If you need a dairy-free option, use coconut cream or almond milk. These alternatives keep the sauce creamy and delicious. For a low-calorie version, use skinless chicken thighs and light cream. This option lowers calories without losing flavor. - Proper Storage Containers: Use airtight containers to keep your food fresh. Glass containers work well, but plastic ones are fine too. Make sure to cool the chicken before sealing it. - Shelf Life Recommendations: Store your creamy garlic mushroom chicken in the fridge for up to 3-4 days. This keeps the dish safe and tasty for later meals. - How to Freeze Creamy Garlic Mushroom Chicken: Allow the dish to cool completely. Then, place it in a freezer-safe container. Make sure to leave some space at the top, as the food will expand when frozen. - Thawing and Reheating Tips: To thaw, move the chicken from the freezer to the fridge overnight. Reheat it on the stove over low heat. Add a splash of broth or cream to keep it creamy. - Food Safety Best Practices: Always wash your hands before cooking. Keep raw chicken separate from other foods. Cook the chicken to an internal temperature of 165°F (75°C). - How to Tell if Leftovers are Still Good: Check for signs like off smells or changes in color. If it looks or smells funny, it’s better to toss it out. When in doubt, throw it out! Yes, you can use frozen chicken breasts. Just remember to thaw them first. Thawing allows for even cooking. If you cook from frozen, extend the cooking time. Check the internal temperature. It should reach 165°F (75°C) for safety. Always ensure the chicken is cooked through. Yes, you can substitute heavy cream. Here are some great alternatives: - Half-and-half for a lighter option. - Coconut milk for a dairy-free choice. - Greek yogurt for a tangy taste. - Cashew cream for a nut-based option. Each option gives a different taste and texture. Adjust your seasonings to match. You can serve creamy garlic mushroom chicken with: - Buttered noodles for a cozy touch. - Steamed vegetables for a healthy side. - Rice to soak up the sauce. - Mashed potatoes for a creamy delight. These sides balance the meal and enhance flavors. Enjoy mixing and matching your favorites! This blog post covered everything you need to make creamy garlic mushroom chicken. We explored main ingredients like chicken breasts and mushrooms, cooked step-by-step, and shared helpful tips. Variations cater to different diets, and proper storage keeps your leftovers fresh. In the end, enjoy the rich flavors and easy steps. You can impress anyone with this dish! Whether you’re cooking for family or friends, this meal will surely please. Happy cooking!

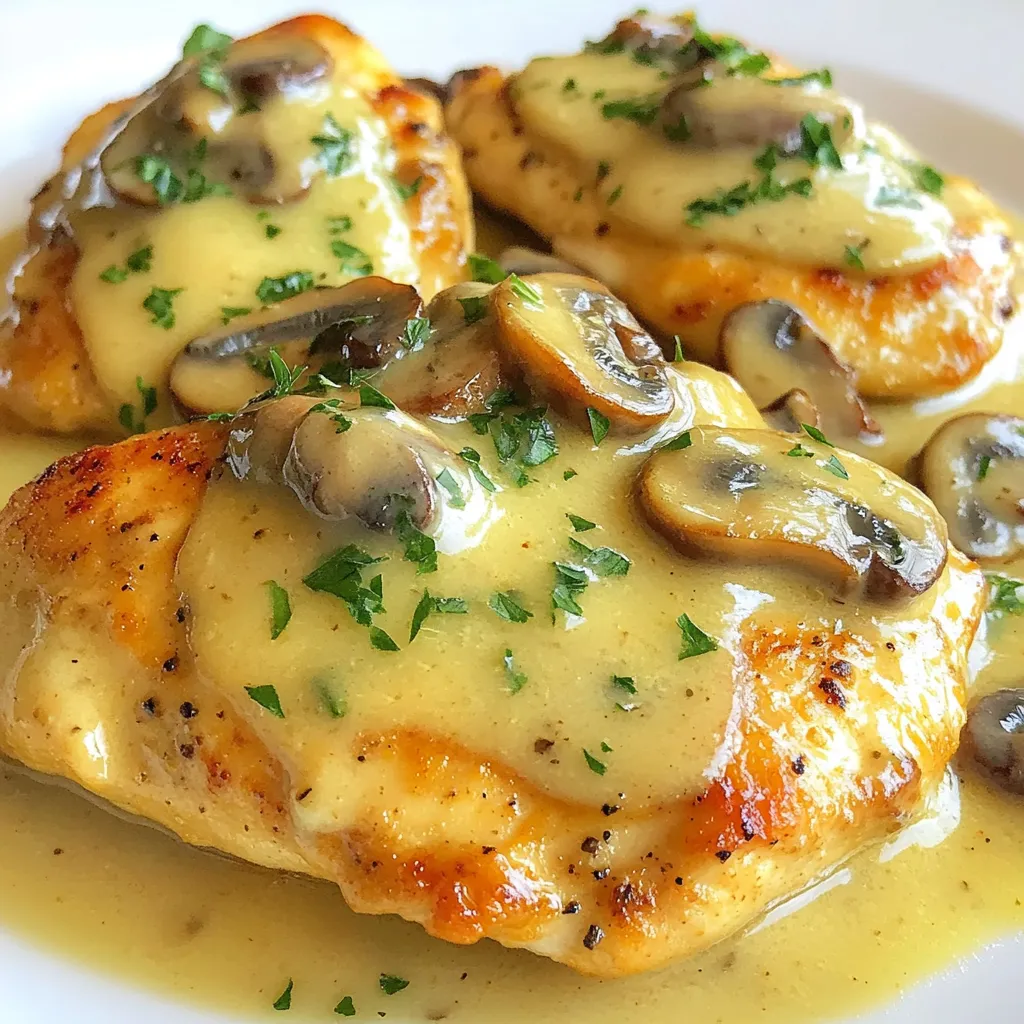
Creamy Garlic Mushroom Chicken Savory and Simple Meal

If you crave a meal that’s both quick and bursting with flavor, you’re in the right place! Creamy Garlic Mushroom

- 2 boneless, skinless chicken breasts, thinly sliced - 2 tablespoons Cajun seasoning - 1 tablespoon olive oil - 1 cup heavy cream - 2 cups chicken broth - 12 ounces fettuccine pasta - 1 cup cherry tomatoes, halved - 1 cup fresh spinach - 1/2 cup grated Parmesan cheese - 2 cloves garlic, minced - Salt and freshly ground black pepper, to taste - Chopped fresh parsley, for garnish This recipe serves four people. It’s perfect for a family dinner or a cozy meal with friends. Each serving is rich and creamy, making it a filling option. You can swap out the chicken for shrimp or tofu if you prefer. For a lighter dish, use half-and-half instead of heavy cream. You can also choose whole wheat pasta for a healthier option. If you don’t have Cajun seasoning, a mix of paprika, cayenne, and garlic powder works well. Fresh spinach can be replaced with kale or arugula for a different flavor. {{ingredient_image_2}} Start by slicing the chicken breasts thinly. Place them in a bowl. Then, add the Cajun seasoning. Make sure every piece is coated well. This step brings out the flavor in the chicken. Set it aside while you prepare to cook. Heat olive oil in a large skillet over medium-high heat. Wait until the oil shimmers. Carefully add the seasoned chicken to the skillet. Cook it for about 4 to 5 minutes. You want it to be browned and cooked through. Check the chicken; it should not be pink inside. Once done, transfer it to a plate and set it aside. In the same skillet, lower the heat to medium. Add the minced garlic and sauté for 30 seconds. You want it to smell nice but not burn. Next, pour in the chicken broth and bring it to a gentle simmer. Gradually stir in the heavy cream. Let it bubble softly for a few minutes. This helps blend all the flavors together. To make the sauce creamy, start with the right heat. Use medium heat when adding the chicken broth. If it's too hot, the cream can curdle. Gradually stir in the heavy cream to blend it well. This slow addition helps keep the sauce smooth. You can also mix in the Parmesan cheese at the end. This adds richness and flavor. Make sure to stir until the cheese melts completely. Cooking pasta well is key to this dish. Use a large pot with plenty of water. Salt the water before adding the fettuccine. This step enhances the pasta’s flavor. Cook the pasta until it’s al dente, about 8-10 minutes. Stir it occasionally to prevent sticking. Reserve a cup of pasta water before draining. This starchy water can help adjust the sauce's thickness later. If your sauce feels too thick, add a little pasta water to loosen it. Cajun seasoning is the star here, but you can boost flavors easily. Add a squeeze of lemon juice for brightness. Fresh herbs like basil or thyme can also enhance the dish. Don’t forget to taste as you cook! Adjust salt and pepper to your liking. If you want more heat, try adding a pinch of cayenne pepper or red pepper flakes. Enjoy experimenting to find your perfect balance! Pro Tips Season Generously: Make sure to coat the chicken thoroughly with Cajun seasoning for maximum flavor. The seasoning will enhance the dish and give it that authentic Cajun kick. Don’t Overcook the Pasta: Keep a close eye on the fettuccine while it cooks. Overcooked pasta can become mushy, so aim for al dente for the best texture. Use Fresh Ingredients: Whenever possible, opt for fresh spinach and ripe cherry tomatoes. Fresh ingredients will elevate the dish’s flavor and overall presentation. Adjust Creaminess: If you prefer a creamier sauce, feel free to add more heavy cream or Parmesan cheese. Adjust to your taste for the perfect creamy consistency. {{image_4}} Sometimes, you may want to switch up the protein. Shrimp works great in this dish. Just sauté the shrimp in the same oil until pink. Tofu is another option if you prefer plant-based. Use firm tofu and cube it. Sauté it until golden for a nice texture. Both options will soak up the Cajun flavors well. If you like it hot, add extra Cajun seasoning. You can also toss in some red pepper flakes. For a milder taste, reduce the seasoning or skip it in the sauce. Remember, you can always add spice later. Taste as you go, and find your perfect heat level. To make this dish vegetarian, simply remove the chicken. Replace it with more veggies like bell peppers or mushrooms. For a vegan twist, swap the heavy cream with coconut milk or cashew cream. Use nutritional yeast instead of Parmesan cheese. You still get a creamy texture and rich flavor with these changes. To store leftovers, wait for the pasta to cool. Place it in an airtight container. Make sure it seals well to keep the flavors fresh. You can keep it in the fridge for up to three days. If you want to save it longer, consider freezing it. When you want to reheat, use a skillet. Add a splash of chicken broth or water to keep it moist. Heat on low until warmed through. You can also use the microwave. Just cover it and heat in short bursts, stirring in between. To freeze, let the pasta cool completely. Store it in a freezer-safe container. Label it with the date, so you remember when you made it. It can last up to three months in the freezer. When ready to enjoy, thaw it in the fridge overnight before reheating. Yes, you can. While I love fettuccine in this dish, you can try penne, rotini, or linguine. Each pasta brings a unique texture and shape. Just adjust the cooking time based on the type of pasta you choose. If you want a lighter option, try using half-and-half or whole milk mixed with a bit of flour. You can also use coconut cream for a dairy-free option. Each substitute will change the flavor slightly, but they still work well. To reduce the spice, cut back on the Cajun seasoning. You can also add more cream or use a little sugar to balance the heat. Adding more tomatoes and spinach can help cool the dish down too. Adjust until it suits your taste! This blog post covered everything you need for creamy Cajun chicken pasta. We explored ingredients, cooked the chicken, and made a tasty sauce. You learned useful tips for flavor and cooking your pasta just right. I shared fun variations like shrimp and vegan options, plus storage advice. My final thought: this dish is flexible and fun! You can make it your own. Enjoy cooking and sharing your creamy pasta with friends and family!

Creamy Cajun Chicken Pasta Flavorful Dinner Delight

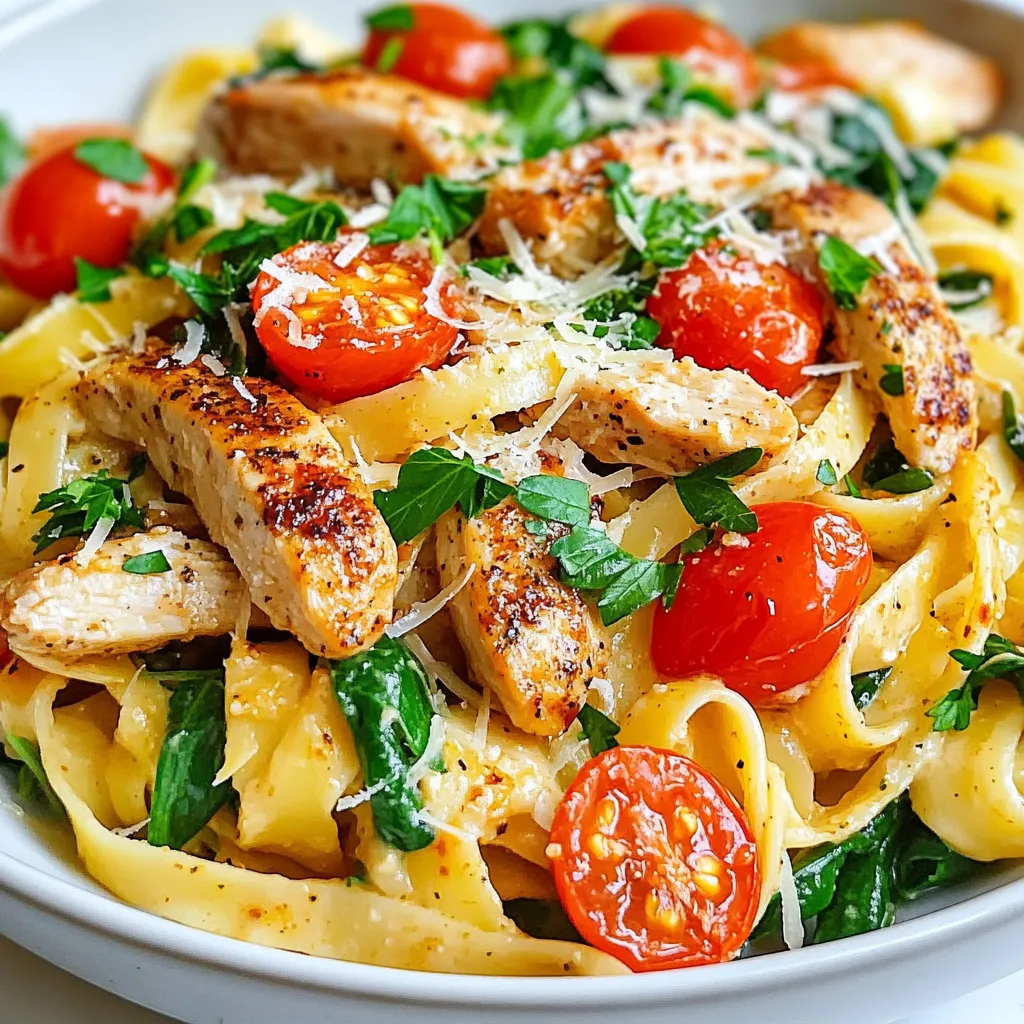
Get ready to spice up your dinner routine with Creamy Cajun Chicken Pasta! This dish combines rich flavors and simple

- 1 pound large shrimp, peeled and deveined - 4 cloves garlic, finely minced - 1/4 cup unsalted butter - 1/4 cup high-quality olive oil - Zest and juice of 1 large lemon - 1/2 teaspoon red pepper flakes - Salt and freshly cracked black pepper to taste - 8 ounces linguine or spaghetti - Fresh parsley, finely chopped for garnish - Lemon slices, for garnish Each ingredient plays a key role in Lemon Garlic Shrimp Scampi. The shrimp provide protein and a sweet flavor. Garlic adds a strong, savory taste that enhances the dish. Butter and olive oil create a rich sauce that binds all flavors together. Lemon zest and juice add brightness and acidity, cutting through the richness. Red pepper flakes bring heat, while salt and pepper boost all the flavors. The pasta serves as a base, soaking up the sauce. To ensure the best results, use large shrimp for a meaty bite. Mince the garlic finely to release its oils. When cooking, don't let the garlic brown, or it will taste bitter. Cooking the shrimp until they turn pink keeps them tender and juicy. If you need alternatives, here are some ideas: - Shrimp: Try scallops or chicken for a different protein. - Butter: Use vegan butter or olive oil for a dairy-free option. - Lemon: Lime juice works well if you want a different citrus twist. - Pasta: Whole wheat or gluten-free pasta can replace regular pasta. - Fresh parsley: Basil or cilantro can be used for a fresh garnish. These substitutions can help customize the dish to fit your taste or dietary needs. {{ingredient_image_2}} Start by filling a large pot with water. Add some salt and bring it to a boil. This step helps flavor the pasta. Once boiling, add 8 ounces of linguine or spaghetti. Cook it according to the package directions until it’s al dente, which means it’s firm but not hard. Before you drain the pasta, save 1 cup of the cooking water. This water will help make the sauce later. After saving the water, drain the pasta and set it aside. In a large skillet, pour in 1/4 cup of unsalted butter and 1/4 cup of olive oil. Heat the skillet over medium heat. As the butter melts, add 4 cloves of finely minced garlic. Stir it gently for about 1 minute. You want the garlic to smell nice but not turn brown. Browning can make it bitter. Once the garlic is fragrant, it’s time to add the shrimp. Increase the heat to medium-high. Add 1 pound of large shrimp to the skillet. Season them with 1/2 teaspoon of red pepper flakes, salt, and freshly cracked black pepper. Cook the shrimp for about 2-3 minutes on each side. They should turn pink and opaque. After cooking, add the zest and juice of 1 large lemon to the skillet. Stir everything together. If the sauce looks thick, gradually mix in some reserved pasta water until it’s silky. Finally, toss in the drained pasta and mix it all well. Taste your dish and adjust the salt and pepper if needed. When making Lemon Garlic Shrimp Scampi, avoid these common slip-ups: - Overcooking shrimp: Shrimp cooks fast. Cook only until they turn pink and opaque. - Burning garlic: Garlic should smell sweet, not bitter. Sauté it on medium heat. - Not reserving pasta water: Always save some pasta water. It helps create a silky sauce. - Skipping seasoning: Don’t forget salt and pepper. These enhance the dish's bright flavors. To get the right texture in your shrimp scampi, follow these tips: - Use fresh shrimp: Fresh shrimp has a better flavor and texture than frozen. - Cook pasta al dente: This keeps pasta firm and helps it hold the sauce. - Add pasta to the sauce: Mix the drained pasta with the shrimp and sauce for even coating. - Adjust sauce thickness: If the sauce is too thick, add reserved pasta water until it’s just right. Making your dish look great is easy with these ideas: - Use shallow bowls: They showcase the colorful shrimp and sauce beautifully. - Garnish well: Fresh parsley adds color and freshness. Lemon slices make it pop. - Sprinkle red pepper flakes: This adds a nice visual touch and hints at spice. - Serve hot: Enjoy it right away for the best flavor and texture. Pro Tips Use Fresh Shrimp: Always opt for the freshest shrimp available, as this will enhance the flavor and texture of your dish. If possible, buy shrimp that is still in the shell and peel it yourself for maximum freshness. Mind the Garlic: To prevent the garlic from burning and turning bitter, ensure you sauté it over medium heat and watch it closely. Garlic should become fragrant, not brown. Adjust the Spice: Feel free to customize the heat level by adjusting the amount of red pepper flakes. Start with a smaller amount and add more if you prefer a spicier kick. Pasta Water is Your Friend: The reserved pasta water is a great tool for achieving the perfect sauce consistency. Add it gradually to ensure your sauce remains silky and doesn’t become too watery. {{image_4}} If you want to switch it up, try using chicken or scallops. Chicken breast works well; just cut it into bite-sized pieces. Cook it the same way as shrimp. For scallops, cook them until golden brown. They add a sweet, buttery taste. You can even go for a plant-based option, like tofu or tempeh. Use firm varieties and press them to remove excess moisture. This keeps them from getting soggy in the pan. Adding veggies boosts the dish's nutrition and flavor. Consider spinach, cherry tomatoes, or bell peppers. Spinach wilts quickly, so add it at the end. Cherry tomatoes burst with sweetness; toss them in when you add the shrimp. Bell peppers add crunch and color; slice them thin and sauté them first. These additions make the dish more colorful and healthy. You can mix and match to find your favorite combo. For those who love spice, kick up the heat! Start with more red pepper flakes. A whole teaspoon gives a nice kick. You can also add sliced jalapeños or fresh chili peppers. If you want a smoky flavor, toss in some smoked paprika. Adjust the spice to your taste. Just remember, you can always add more, but you can't take it out once it's in! To keep your leftover shrimp scampi fresh, store it in an airtight container. Make sure to place it in the fridge. It will stay tasty for about two days. Always let the dish cool down before sealing it. This way, it won't trap steam and make your shrimp soggy. When it's time to enjoy your leftovers, reheating is key. I recommend using a skillet for the best results. Heat it on medium-low. Add a splash of water or broth to help steam the shrimp. This keeps them juicy and flavorful. Stir the dish gently until it's warm. You can also use the microwave if you're in a hurry. Just heat it in short bursts, stirring in between. If you want to save shrimp scampi for later, freezing works well. Put the dish in a freezer-safe container. It can last for up to three months. Just make sure to label the container with the date. To eat, thaw it in the fridge overnight. Then reheat as mentioned above. This way, you can enjoy that zesty lemon flavor anytime! For shrimp scampi, I recommend using linguine or spaghetti. Both of these pastas hold the sauce well. They have a nice bite and pair well with shrimp. If you prefer a gluten-free option, try rice noodles or gluten-free pasta. Just cook them according to the package directions. Yes, you can make shrimp scampi ahead of time, but it’s best to cook the pasta fresh. Cook the shrimp and sauce, then store them in the fridge. When you are ready to eat, reheat the shrimp mixture. Cook the pasta right before serving to keep it al dente. To avoid overcooking shrimp, watch the color closely. Cook them until they turn pink and opaque. This usually takes about 2-3 minutes per side. If you see them curling tightly, they are done. If you cook them too long, they become rubbery. Always use medium-high heat for best results. You now have all the info needed to make a great Lemon Garlic Shrimp Scampi. We covered the key ingredients and their roles. You learned how to cook pasta just right and prepare shrimp for great taste. Remember the tips to avoid common mistakes and make it look nice on a plate. You can try variations for different flavors too. Finally, proper storage helps keep your dish fresh. Enjoy cooking and sharing this tasty meal with friends and family!

Lemon Garlic Shrimp Scampi Simple and Flavorful Dish

If you’re craving a dish that bursts with flavor yet is easy to make, you’re in the right place! My

- 2 cups cooked chicken breast, shredded - 4 cups mixed salad greens (romaine, spinach, and arugula) - 1 cup cherry tomatoes, halved - 1 cup corn kernels (fresh, canned, or frozen) - 1 red bell pepper, diced - ½ cup shredded cheddar cheese - ½ cup thick BBQ sauce - ½ cup ranch dressing - ¼ cup green onions, thinly sliced - Salt and pepper to taste - Optional: Crunchy tortilla strips You can try adding other veggies like cucumbers or carrots for extra crunch. Avocado adds creaminess and healthy fats. If you like spice, consider jalapeños or a spicy ranch. Nuts like pecans or walnuts can add a nice crunch too. For BBQ sauce, I love Sweet Baby Ray's for its great balance of sweet and smoky. For ranch dressing, Hidden Valley is a classic choice. However, if you want a fresh taste, try making your own ranch at home! It's simple and so tasty. {{ingredient_image_2}} Start with 2 cups of cooked chicken breast. Shred the chicken into bite-sized pieces. Place the shredded chicken in a large bowl. Pour ½ cup of BBQ sauce over it. Mix well until all the chicken is coated. Let it sit for a few minutes. This helps the chicken soak up the BBQ flavor. Grab another large bowl for the salad base. Add 4 cups of mixed salad greens. I like to use romaine, spinach, and arugula for color. This mix makes the salad look pretty and taste fresh. Lay the greens flat at the bottom. This creates a nice foundation for the toppings. Now, it’s time to add the fun stuff! Scatter 1 cup of halved cherry tomatoes over the greens. Next, sprinkle 1 cup of corn kernels. You can use fresh, canned, or frozen corn—whatever you have. Then, add 1 diced red bell pepper for a crunch. Toss in half of the ¼ cup of sliced green onions. They add a nice zing! Now, carefully place the BBQ chicken mixture on top. Drizzle ½ cup of ranch dressing over everything. Toss gently to mix. Be careful not to crush the greens. Finish with ½ cup of shredded cheddar cheese. Sprinkle the rest of the green onions on top. Add salt and pepper to taste. If you want extra crunch, top with tortilla strips right before serving! To shred chicken well, start with warm cooked chicken. Use two forks to pull apart the chicken. Hold one fork steady and use the other to pull the meat. This method gives you nice, thin pieces. You can also use a stand mixer with a paddle attachment. Just mix on low speed for about 30 seconds. This will save time and effort! Layering your salad makes it look pretty and tasty. Start with the greens at the bottom. This keeps them fresh and crisp. Next, add your veggies like tomatoes and corn. Make sure to spread them out evenly. Then, place the BBQ chicken on top. This keeps the chicken moist and flavorful. Finish with cheese and dressings on top. This way, every bite has a mix of flavors. Serve your BBQ Ranch Chicken Salad in large, shallow bowls. This lets everyone see the colorful layers. For added crunch, top with tortilla strips just before serving. Pair it with a cold drink like lemonade or iced tea. If you want more sides, try garlic bread or fruit salad. These pairings make the meal more fun and delicious! Pro Tips Marinate for More Flavor: Allow the chicken to sit in the BBQ sauce for at least 30 minutes before assembling the salad to enhance the flavor profile. Use Fresh Ingredients: Opt for fresh produce whenever possible to ensure your salad is bursting with flavor and nutrients. Cheese Variations: Experiment with different types of cheese, such as feta or pepper jack, for a unique twist on this salad. Keep Tortilla Strips Crispy: Add the tortilla strips just before serving to maintain their crunch and texture. {{image_4}} You can switch out chicken for other proteins. Try grilled shrimp for a seafood twist. Shredded pork adds a rich flavor. If you like beef, use steak strips. Each protein brings its own unique taste to the salad. To make this salad vegetarian, replace chicken with black beans or chickpeas. These options add protein and fiber. For a vegan version, use a plant-based ranch dressing. You can also add cubes of avocado for creaminess. Change ingredients with the seasons for fresh flavors. In spring, add asparagus or snap peas. In summer, toss in diced mango or avocado. Fall calls for roasted squash or apples. In winter, use hearty greens like kale or roasted root veggies. Each swap makes the salad unique and exciting. To store your BBQ Ranch Chicken Salad leftovers, place them in an airtight container. This keeps the salad fresh and safe to eat. Make sure to store it in the fridge. Use the salad within three days for the best taste. When reheating chicken, do it gently. Place the chicken in a microwave-safe dish. Cover it with a damp paper towel to keep it moist. Heat on medium power in short bursts, checking often. Aim for an internal temperature of 165°F. This ensures it's safe and tasty. To keep salad ingredients fresh, store components separately. Keep the greens in a dry container. Place tomatoes, corn, and peppers in separate bags. Wait to add dressing until you’re ready to eat. This prevents sogginess. If you want to keep crunchy tortilla strips, store them in a separate bag. Enjoy that crunch when you're ready to serve! Yes, you can make this salad ahead of time. Just mix the chicken and BBQ sauce first. Keep the salad greens and veggies separate. When ready to serve, combine everything. This keeps the greens fresh and crisp. I recommend using cooked chicken breast. Shredded chicken breast works best for this salad. You can grill, bake, or even use a rotisserie chicken. It adds great flavor and saves time. To make this salad gluten-free, choose gluten-free BBQ sauce and ranch dressing. Check the labels to ensure they contain no gluten. You can also skip the tortilla strips or find gluten-free options. Absolutely! Homemade ranch dressing adds a personal touch. Use your favorite herbs and spices for flavor. It makes the salad even more special and tailored to your taste. BBQ Ranch Chicken Salad is easy and fun to make. We covered the best ingredients, steps to prepare, and how to customize your dish. I shared tips for storing leftovers and serving ideas. You can mix and match to suit your tastes. Remember, the key is to use fresh ingredients for the best flavor. Enjoy your salad any day of the week!

BBQ Ranch Chicken Salad Quick and Tasty Recipe

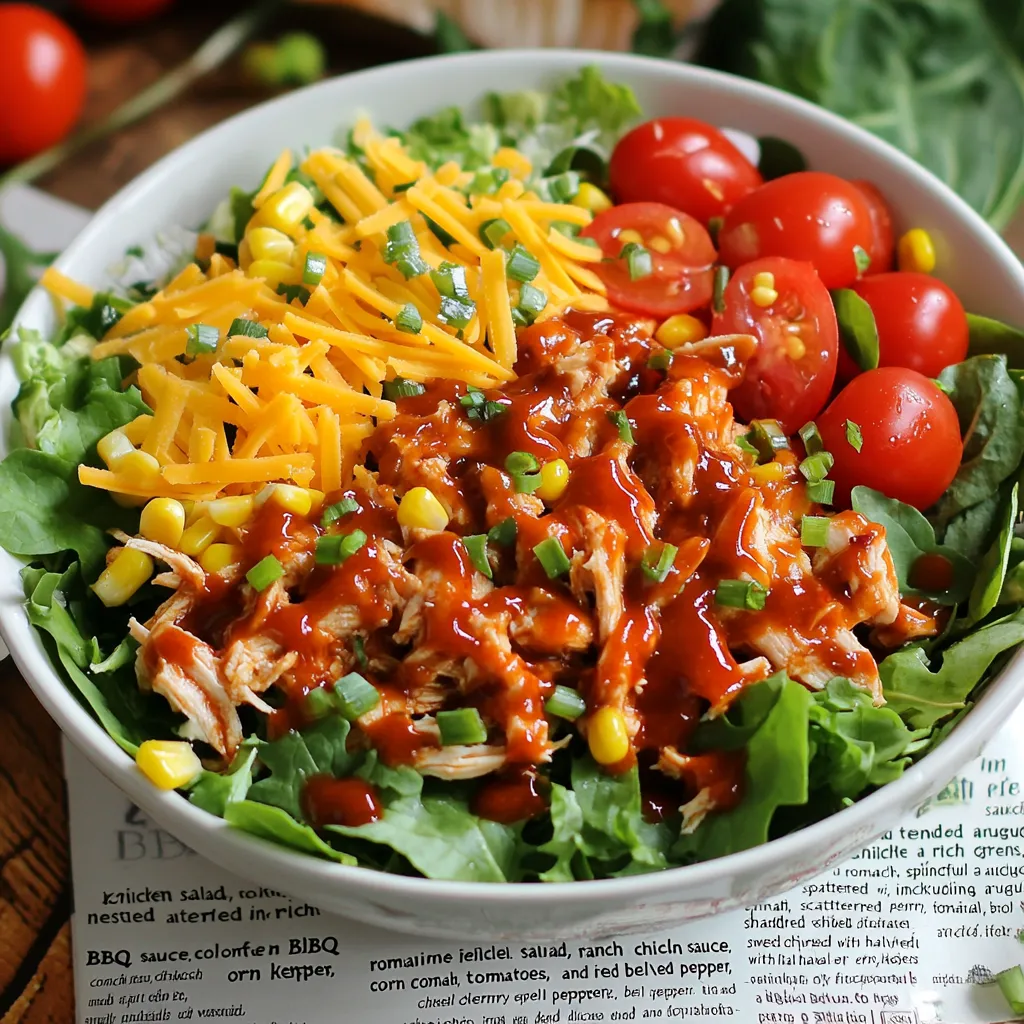
Are you ready to spice up your meal prep? My BBQ Ranch Chicken Salad recipe is quick, tasty, and packed

- 2 cups cooked jasmine rice - 1 pound chicken breast, diced into bite-sized pieces - 1 cup fresh broccoli florets - 1 cup bell peppers, diced (mix red, yellow, and green) - 1 cup shredded carrots - 1/2 cup green onions, sliced, plus extra for garnish - 1 cup shredded mozzarella cheese - 1/2 cup teriyaki sauce - 1 teaspoon sesame oil - 1 tablespoon low-sodium soy sauce - Salt and black pepper, to taste - Sesame seeds, for garnish Using fresh, high-quality ingredients makes a big difference. Fresh chicken tastes better than frozen. Crisp vegetables give a nice crunch. Good teriyaki sauce enhances all flavors. Always choose ingredients you trust and enjoy. You can swap jasmine rice for brown rice or quinoa for a healthier option. For chicken, try tofu or shrimp for a twist. If you don’t have broccoli, use snap peas or green beans. You can replace mozzarella with cheddar or a dairy-free cheese. Soy sauce can be replaced with coconut aminos for a gluten-free option. {{ingredient_image_2}} Making Teriyaki Chicken Rice Casserole is simple and fun. You will need to gather all your ingredients and prepare them first. This dish takes about 15 minutes to prep and 25 minutes to cook. You will love the mix of flavors and how easy it is to make. 1. Preheat your oven to 375°F (190°C). This step helps the casserole cook evenly. 2. In a large skillet, heat 1 teaspoon of sesame oil over medium heat. Add 1 pound of diced chicken breast with a sprinkle of salt and pepper. Cook for 6-8 minutes, stirring often, until the chicken turns golden brown. 3. Next, add 1 cup of broccoli florets, 1 cup of diced bell peppers, and 1 cup of shredded carrots to the skillet. Stir for 4-5 minutes until the veggies get soft but still have a little crunch. 4. Now, mix in 2 cups of cooked jasmine rice, 1/2 cup of teriyaki sauce, and 1 tablespoon of low-sodium soy sauce. Stir well to coat everything evenly with sauce and heat through. 5. Carefully pour the chicken and rice mix into a greased 9x13 inch casserole dish. Spread it out to make an even layer. 6. Top with 1 cup of shredded mozzarella cheese, covering the whole surface. 7. Bake in the oven for 20-25 minutes. You want the cheese to be melted, bubbly, and golden brown. 8. After baking, let the casserole sit for 5 minutes. Garnish with sliced green onions and sesame seeds before serving. - Use a meat thermometer to check the chicken. It should reach 165°F to be safe. - Keep stirring the chicken to avoid burning. This helps it cook evenly. - If you like your veggies crunchier, cook them for less time. - Add more teriyaki sauce if you want a stronger flavor. - For a fun twist, serve with pickled ginger on the side. To boost flavor, add fresh herbs like cilantro or basil. A squeeze of lime can brighten the dish. You can also increase the amount of teriyaki sauce for a bolder taste. A splash of rice vinegar adds a nice tang. Let the dish rest after baking for better flavor melding. For juicy chicken, start with a hot skillet. Use sesame oil, as it adds a lovely nutty taste. Cook the chicken until golden brown. This helps lock in moisture. Don't overcrowd the pan; this ensures even cooking. Allow the chicken to rest briefly before mixing it with other ingredients. Cook vegetables just until tender. This keeps them crisp and bright. Start with harder veggies like carrots, then add softer ones like bell peppers. Stir frequently to prevent burning. Keep an eye on the time; it should take 4-5 minutes for perfect texture. Remember, you want them to complement the chicken and rice, not become mushy. Pro Tips Marinate for More Flavor: For an extra burst of flavor, marinate the diced chicken in teriyaki sauce for at least 30 minutes before cooking. This will infuse the chicken with a delicious taste and make it even more tender. Use Fresh Ingredients: Opt for fresh vegetables whenever possible to enhance the overall flavor and texture of the casserole. Fresh broccoli, bell peppers, and carrots will give a vibrant color and crunch that frozen options may lack. Customize Your Veggies: Feel free to mix and match vegetables based on your preference or what you have on hand. Snap peas, zucchini, or even baby corn can be great additions to this dish! Check for Doneness: Make sure to keep an eye on the casserole while it bakes. Oven temperatures can vary, so check for that golden, bubbly cheese around the 20-minute mark to avoid overcooking. {{image_4}} You can switch up the chicken in this casserole. Use diced turkey or firm tofu for a tasty change. Shrimp also works well. Just cook shrimp until pink, then mix it in. For a heartier option, try beef or pork chunks. Each protein adds unique flavor. Feel free to get creative with veggies. Snap peas or zucchini give a fresh crunch. You can use spinach for a healthy twist. Cauliflower and asparagus are great choices, too. Mix and match to suit your taste. Each veggie adds color and nutrition. If you need gluten-free, choose tamari instead of soy sauce. You can also find gluten-free teriyaki sauce at stores. For low-sodium, look for reduced-sodium soy sauce. Always check labels for hidden sodium. These swaps keep your dish healthy without losing flavor. Store any leftover Teriyaki Chicken Rice Casserole in an airtight container. Let it cool down first. This helps keep the flavors fresh. You can place it in the fridge for up to four days. Keep an eye on it for any signs of spoilage. Reheat the casserole in the oven for the best results. Preheat your oven to 350°F (175°C). Cover the dish with foil to keep it moist. Heat for about 15-20 minutes or until it's hot throughout. You can also use the microwave. Place a portion in a microwave-safe bowl and cover it. Heat for 2-3 minutes, checking and stirring halfway through. To freeze the casserole, first, let it cool completely. Then, place it in a freezer-safe container. You can also wrap it tightly in plastic wrap and foil. This keeps it protected from freezer burn. It can last up to three months in the freezer. When you're ready to eat, thaw it in the fridge overnight before reheating. Yes, you can make this casserole ahead. Prepare the dish up to the baking step. Cover it tightly and store it in the fridge for up to 24 hours. When ready to bake, just pop it in the oven. You may need to add a few extra minutes to the cooking time. This casserole pairs well with many sides. Consider serving it with a fresh green salad. You can also serve steamed edamame or a side of pickled ginger for extra flavor. If you want more carbs, try some warm bread or rolls. Yes, you can easily make this dish vegetarian. Substitute the chicken with tofu or tempeh for protein. Use a plant-based teriyaki sauce and add more vegetables like mushrooms or zucchini. This way, you keep the flavor while making it suitable for vegetarians. We covered the key ingredients needed for the Teriyaki Chicken Rice Casserole. We discussed the importance of using good-quality ingredients and shared possible substitutes. I also outlined step-by-step instructions and offered helpful tips to ensure success. You learned about variations for different diets and how to store leftovers safely. In summary, cooking is about creativity and enjoyment. Feel confident experimenting with flavors and techniques to make this dish your own.

Teriyaki Chicken Rice Casserole Flavorful Family Dish

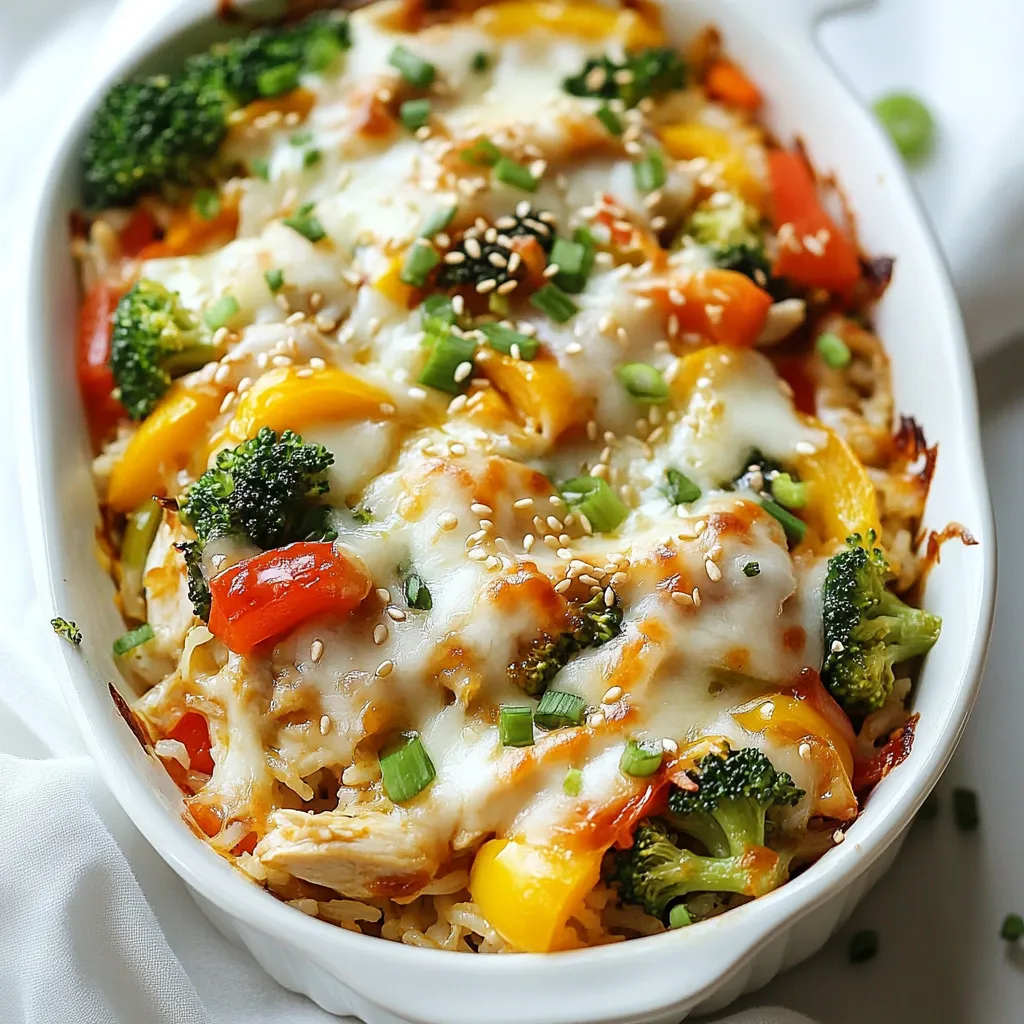
Welcome to the world of Teriyaki Chicken Rice Casserole, a dish that delights every family member! I’ll guide you through

- 4 boneless, skinless chicken breasts - 8 oz fresh mushrooms, sliced - 4 cloves garlic, finely minced - 1/2 cup unsalted butter, divided - 1 teaspoon dried thyme - 1 teaspoon dried oregano - Salt and pepper, to taste - 1 tablespoon fresh parsley, chopped - 2 tablespoons fresh lemon juice - Tips on choosing quality ingredients: - Choose chicken that is pink and firm. - Look for mushrooms that are smooth and dry. - Select fresh garlic that is firm and has no sprouting. - Use unsalted butter for better control over salt levels. - Fresh herbs should be vibrant and fragrant. Using quality ingredients makes this dish shine. It enhances the taste and brings out rich flavors. Fresh herbs and quality chicken create a great base for this meal. Always trust your senses when picking out ingredients. {{ingredient_image_2}} To start, season both sides of the chicken breasts. Use salt, pepper, dried thyme, and oregano. This mix packs a punch of flavor. Be sure to cover every inch. An even coating makes a big difference in taste. Heat a large skillet over medium-high heat. Melt 2 tablespoons of butter until it bubbles. Carefully add the seasoned chicken. Cook each side for 5-7 minutes. Look for a golden brown crust. The chicken should reach 165°F or 74°C. Once it's ready, take the chicken out and set it on a plate. In the same skillet, add the rest of the butter. Let it melt before adding the sliced mushrooms. Sauté for 4-5 minutes. Stir occasionally until the mushrooms turn golden and tender. Then, add the minced garlic. Stir for 1-2 minutes. Be careful not to burn the garlic; it can turn bitter quickly. Return the chicken to the skillet. Spoon the mushroom and garlic mix over the top. Drizzle fresh lemon juice on everything. Let it cook for another 2-3 minutes. This helps the flavors blend well. Once done, sprinkle with fresh parsley for color. Serve it warm with rice or veggies for a tasty meal. - Adjusting cooking times: The thickness of the chicken affects cooking time. Thicker pieces will take longer. Aim for about 7-8 minutes per side for thicker breasts. Always check for a nice golden crust. - Using a meat thermometer: This tool is key for perfect chicken. Insert it into the thickest part of the chicken. It should read 165°F (74°C) when done. This ensures your chicken is safe to eat and juicy. - Ideas for plating: Place the chicken on a warm plate. Spoon the mushrooms and sauce over the top. This makes the dish look rich and inviting. The colors pop against the white chicken. - Garnishing suggestions: Fresh parsley adds a nice touch. Sprinkle it on top right before serving. A lemon wedge on the side brightens the dish and adds a splash of color. - Additional spices or herbs: Try adding a pinch of red pepper flakes for heat. Fresh thyme or rosemary can also add depth to the flavor. These herbs work well with the garlic and butter. - Suggestions for sauces or toppings: Consider a creamy sauce made with sour cream or a splash of white wine. These can make the dish even richer. A drizzle of balsamic reduction can also add a sweet, tangy balance. Pro Tips Use Fresh Ingredients: Fresh herbs and mushrooms will enhance the flavor profile of your dish, making it more aromatic and delicious. Don’t Overcrowd the Pan: Ensure the chicken and mushrooms have enough space to brown properly; overcrowding will cause steaming instead of searing. Rest the Chicken: Allow the chicken to rest for a few minutes after cooking to let the juices redistribute, resulting in a juicier bite. Experiment with Flavors: Feel free to add a splash of white wine or a sprinkle of red pepper flakes for an extra kick of flavor. {{image_4}} For a lighter option, try using olive oil instead of butter. This swap cuts down on fat while adding healthy fats. You can also use skinless chicken thighs for more flavor with less fat. If you want to go even lighter, try using vegetable broth to sauté the mushrooms. This change keeps the dish moist without extra calories. Instead of butter, you could also use a low-fat spread. You can easily adapt this recipe for different proteins. Pork chops work well in place of chicken. Season them the same way and cook until they reach 145°F. Tofu is another great choice for a meatless meal. Use firm tofu, and press it to remove excess water. Cut it into slices and follow the same steps to cook it. Both options let you enjoy the same rich flavors. To change the flavor of this dish, use different herbs. Basil or rosemary can bring a fresh twist. You could also try adding balsamic vinegar for a sweet and tangy kick. If you love heat, a pinch of red pepper flakes can spice things up. For a richer taste, drizzle with soy sauce or teriyaki sauce. Each option adds a unique twist that keeps the meal exciting. To store cooked chicken, let it cool down. Place it in an airtight container. You can use glass or plastic containers. Make sure to keep the mushrooms with the chicken for great flavor. Store it in the fridge for up to three days. To reheat without drying out, use low heat. You can warm it on the stove with a splash of water. If using a microwave, cover it with a damp paper towel. Heat for 1-2 minutes at medium power. For the oven, preheat to 350°F (175°C) and bake for 15-20 minutes. To freeze leftovers, wrap the chicken tightly in plastic wrap. Then, place it in a freezer bag. Make sure to remove as much air as possible. You can freeze it for up to three months. To thaw, move it to the fridge overnight before reheating. You can pair this dish with many sides. Here are some tasty options: - Fluffy rice absorbs the sauce. - Steamed vegetables add color and crunch. - Mashed potatoes provide a creamy base. - A fresh salad balances the flavors. - Garlic bread adds a nice touch. These sides make your meal more filling and enjoyable. Yes, you can prep this dish ahead of time. Here are some easy tips: - Season the chicken and store it in the fridge for up to 24 hours. - Cook the chicken and mushrooms, then store them separately. - When ready to eat, just reheat in a pan. This way, you save time on busy days. You can use dried herbs, but fresh herbs have a bolder taste. Here’s how they compare: - Fresh herbs add brightness to your dish. - Dried herbs are more concentrated in flavor. - Use one-third the amount of dried herbs as fresh. Both options work, but fresh gives a nice pop! This blog post shared a tasty recipe for Garlic Butter Mushroom Chicken. You learned about key ingredients like chicken, mushrooms, garlic, and seasonings. We covered cooking tips to get that perfect golden crust and ways to boost flavor with fresh lemon juice. Variations and storage tips help you enjoy this meal later. Remember, you can switch proteins or use healthier options. With these details, you can cook a rich dish that impresses. Enjoy experimenting and serving it with your favorite sides for an amazing meal!

Garlic Butter Mushroom Chicken Flavorful and Simple Meal

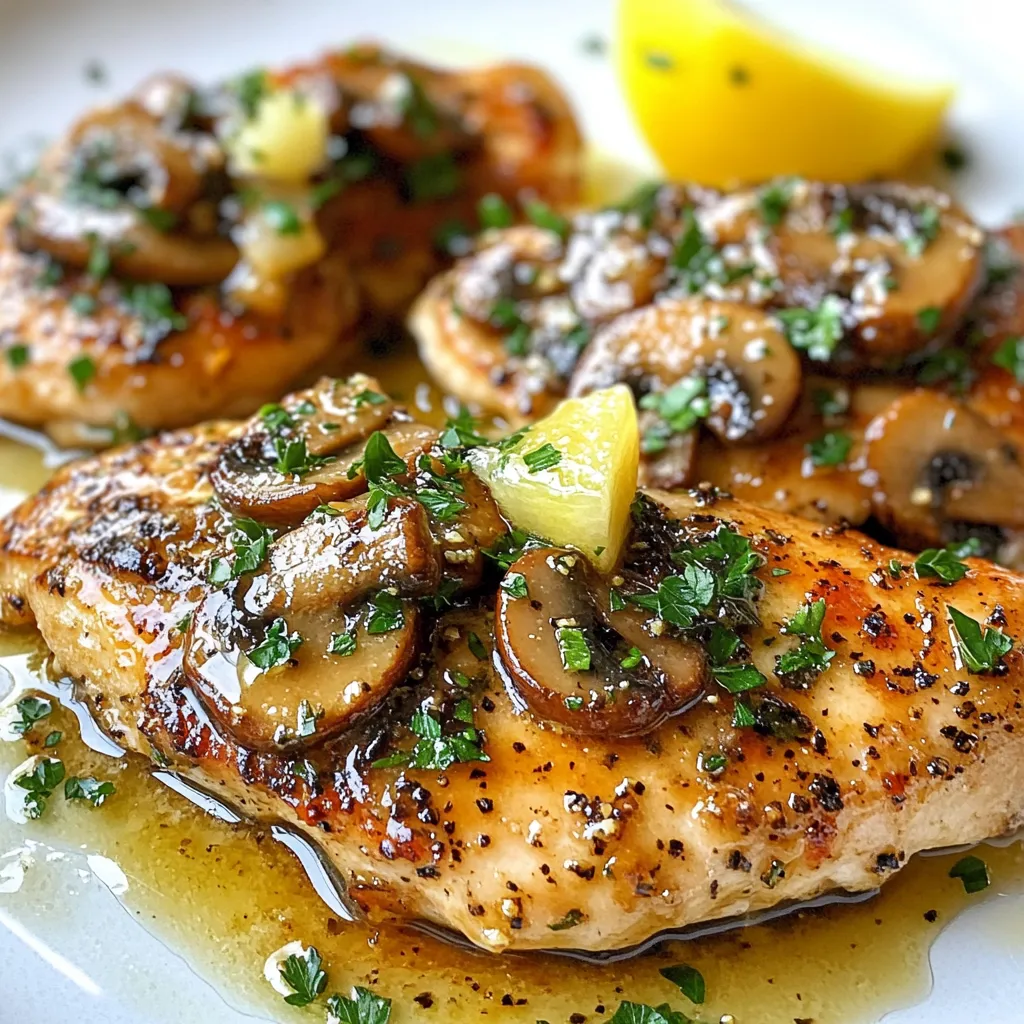
Looking for a quick and tasty dinner idea? Garlic Butter Mushroom Chicken is your answer! This simple dish combines tender

- 4 succulent lobster tails - 1/2 cup unsalted butter, at room temperature - 5 cloves of fresh garlic, finely minced - 2 tablespoons fresh parsley, finely chopped - 1 tablespoon freshly squeezed lemon juice - 1 teaspoon smoked paprika - Salt and freshly ground black pepper to taste - Lemon wedges for serving Fresh ingredients make a big difference in taste. Fresh lobster tails have a sweet, tender meat that is hard to beat. The garlic should be fresh, too. It gives a strong, bold flavor. Fresh parsley adds brightness and color. Using fresh lemon juice enhances the dish with a zesty kick. Always choose high-quality ingredients for the best results. They will take your garlic butter lobster tails from good to great! If you can't find fresh lobster tails, you can use frozen ones. Just make sure to thaw them properly before cooking. Instead of unsalted butter, you can use salted butter, but cut back on added salt. If you need a garlic substitute, garlic powder works, but it won't be as strong or fresh. For smoked paprika, regular paprika can be used, but you will lose some depth of flavor. Feel free to get creative with your ingredients while keeping the spirit of the dish! {{ingredient_image_2}} Start by preheating your oven to 425°F (220°C). This makes sure it's hot when you need it. Next, take kitchen scissors and cut through the hard shell of each lobster tail. Begin at the wider end and move towards the tail. Be careful not to cut into the meat. You want the lobster to stay intact. After you cut the shell, gently pull it apart with your fingers. This helps loosen the meat and lifts it above the shell. Doing this gives you a beautiful presentation and helps the lobster cook evenly. Now, let’s make the garlic butter. In a small saucepan, melt 1/2 cup of unsalted butter over medium-low heat. Once the butter is melted, add 5 cloves of finely minced garlic. Sauté the garlic for about 1-2 minutes until it smells great. Be careful not to let it brown. Burnt garlic tastes bitter. Once the garlic is fragrant, remove the pan from heat. Stir in 2 tablespoons of finely chopped parsley, 1 tablespoon of lemon juice, and 1 teaspoon of smoked paprika. Add a pinch of salt and freshly ground black pepper. Mix everything well to combine all the flavors. With the lobster tails prepped and the garlic butter ready, it’s time to assemble. Use a brush to apply the garlic butter mixture generously over each lobster tail. Make sure to get some into the crevices for extra flavor. Don’t hold back—this is where the magic happens! Arrange the lobster tails on a baking sheet. Space them out nicely and drizzle any extra garlic butter on top. Place the baking sheet in your preheated oven. Bake for about 12-15 minutes. The lobster meat should turn opaque and reach an internal temperature of 145°F (63°C). To get a nice golden brown finish, switch your oven to broil for the last 2-3 minutes. Keep a close eye on them. You want them beautifully browned, not burnt. Once they are done, take the lobster tails out of the oven and let them rest for a few minutes. This resting time helps the flavors come together and keeps the lobster juicy. To cut lobster tails well, use sharp kitchen scissors. Start from the wide end of the shell. Cut carefully down the center, stopping before you reach the meat. This keeps the lobster intact. Gently pull the shell apart. Lift the meat slightly for a nice look. Cook lobster tails until the meat is opaque. This usually takes about 12-15 minutes at 425°F (220°C). Use a meat thermometer to check for an internal temperature of 145°F (63°C). For a golden finish, broil for an extra 2-3 minutes. Keep an eye on them so they don’t burn. You can add more flavor by using spices. Try cayenne pepper for heat or lemon zest for brightness. Fresh herbs, like thyme or dill, can also add freshness. Don't skip the smoked paprika; it gives depth. Mix these with the garlic butter for a tasty twist. Pro Tips Use Fresh Ingredients: Always opt for fresh lobster tails and quality garlic for the best flavor. Fresh ingredients enhance the overall taste of your dish significantly. Perfect Butter Melting: Melt the butter slowly over medium-low heat to prevent it from burning. This ensures a rich, smooth garlic butter that complements the lobster perfectly. Monitor Cooking Time: Every oven is different, so keep an eye on the lobster tails as they cook. Remove them from the oven once they are opaque to avoid overcooking. Rest Before Serving: Allow the lobster tails to rest for a few minutes after baking. This helps the juices redistribute, making for a more succulent and flavorful bite. {{image_4}} Grilling lobster tails adds a smoky flavor. To make grilled garlic butter lobster tails, follow the same prep steps. After cutting the shell, brush the garlic butter mix on the meat. Preheat your grill to medium-high heat. Place the lobster tails on the grill, meat side down. Grill for about 5-7 minutes. Flip and grill for another 5-7 minutes, until the meat is opaque. This method gives a nice char and adds depth. For a twist, try a creamy garlic sauce. Start with the same garlic butter base. After melting the butter, add 1/2 cup of heavy cream. Stir it well over low heat until combined. Brush this creamy garlic mix onto the lobster tails. Bake or grill as usual. The sauce adds richness and a smooth texture that pairs perfectly with the lobster. You can elevate your lobster tails with cheese or other toppings. Try adding shredded Parmesan or mozzarella on top of the lobster before baking. The cheese will melt and create a delicious crust. You can also sprinkle breadcrumbs mixed with garlic and herbs for extra crunch. Just remember to keep an eye on it while baking to avoid burning. These toppings can bring new flavors to your dish and make it even more special. To keep leftover lobster tails fresh, first let them cool. Place them in an airtight container. You can store them in the fridge for up to two days. Make sure the tails are covered well to keep out air. This helps maintain their flavor and texture. When you are ready to enjoy leftover lobster tails, reheating is key. Preheat your oven to 350°F (175°C). Place the lobster tails on a baking sheet. Cover them with foil to keep them moist. Heat for about 10-15 minutes or until warm. This method keeps the meat juicy and tasty. Avoid the microwave, as it can make the lobster tough. Yes, you can freeze lobster tails! This is a great way to enjoy them later. First, wrap each tail tightly in plastic wrap. Then, place them in a freezer bag or airtight container. Label the bag with the date. You can freeze them for up to three months. When ready to cook, thaw them in the fridge overnight before reheating or cooking. You should cook lobster tails for 12 to 15 minutes at 425°F (220°C). The time may vary based on tail size. Ensure they are opaque and firm. Check the color and texture. Cooked lobster meat turns white and opaque. It should feel firm to the touch. You can also use a meat thermometer; it should read 145°F (63°C). Yes, you can use frozen lobster tails! Just thaw them fully before cooking. Place them in the fridge overnight or in cold water for quicker results. Thawing ensures even cooking and great flavor. In this post, we explored fresh ingredients for lobster tails and how to prepare them. Fresh ingredients lead to better flavor. I shared steps for prepping, baking, and broiling lobster tails. Tips helped you cut, cook, and enhance taste. I also gave you ideas for variations and how to store leftovers. Remember, practice makes perfect. Enjoy your cooking journey!

Garlic Butter Lobster Tails Savory and Simple Recipe

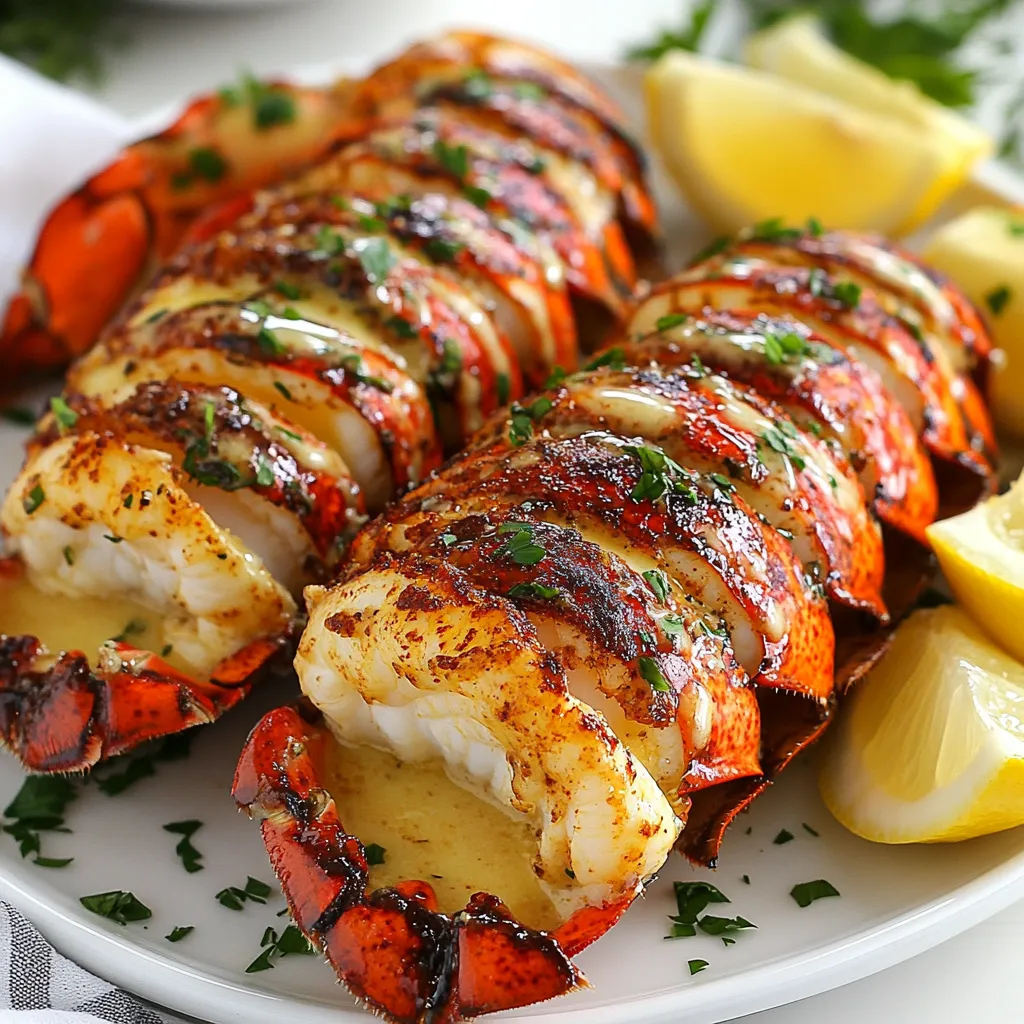
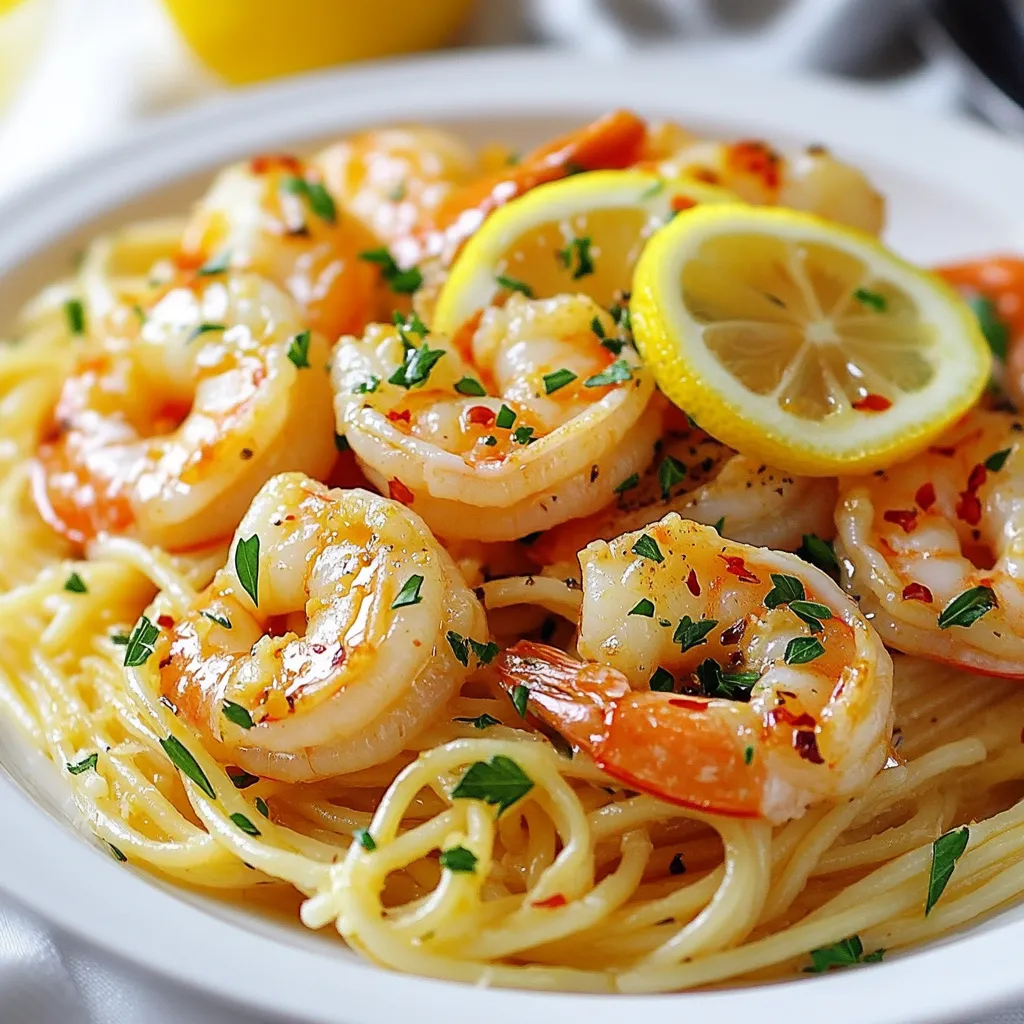
If you crave a dish that impresses without stress, you’ve found it! My Garlic Butter Lobster Tails recipe is both

- 1.5 lbs boneless, skinless chicken breasts - 1/4 cup honey - 1/4 cup freshly squeezed lime juice - 1 red bell pepper - 1 green bell pepper - 1 large red onion - 2 tablespoons extra virgin olive oil - 3 cloves garlic, finely minced - 1 teaspoon ground cumin - 1/2 teaspoon smoked paprika - Salt and freshly cracked black pepper, to taste - You can use wooden or metal skewers. - Soak wooden skewers in water for 30 minutes before grilling. This keeps them from burning. {{ingredient_image_2}} To start, grab a large mixing bowl. In it, whisk together the honey, lime juice, olive oil, minced garlic, ground cumin, smoked paprika, salt, and pepper. Mix until smooth. This marinade is key. It adds flavor and helps tenderize the chicken. Letting the marinade sit for a bit allows the flavors to blend. I recommend letting it rest for about 10 minutes. Take your cubed chicken pieces and add them to the bowl. Make sure each piece is coated well in the marinade. This step is crucial for great taste. Cover the bowl with plastic wrap or a lid. Place it in the fridge. For the best flavor, marinate for at least 30 minutes. If you have time, letting it sit for up to 2 hours works wonders. While the chicken marinates, preheat your grill or grill pan over medium-high heat. It should be nice and hot when you're ready to cook. Now, assemble your kebabs. Start by taking a skewer and threading on a piece of chicken. Then add a piece of red pepper, followed by a piece of green pepper, and a wedge of onion. Repeat this pattern. It makes the kebabs colorful and fun! Once your grill is hot, place the kebabs on it. Cook them for about 10 to 12 minutes. Turn them often to ensure even cooking. This helps achieve those beautiful grill marks. You want the chicken to reach an internal temperature of 165°F (75°C). Use a meat thermometer for accuracy. After removing the kebabs from the grill, let them rest for about 5 minutes. This step is important. It allows the juices to redistribute, making the meat juicy and tender. For serving, arrange the kebabs on a large platter. Garnish with lime wedges and fresh cilantro for a bright look. A cool yogurt dip or tzatziki pairs nicely, too! To get the best grill marks, preheat your grill to medium-high heat. Place the kebabs on the grill and don’t move them for a few minutes. This helps create those lovely marks. Turn the kebabs every few minutes for even cooking. To ensure chicken is fully cooked, check its internal temperature. Use a meat thermometer to make sure it reaches 165°F (75°C). This keeps the chicken safe and juicy. Marination is key to great flavor. The honey and lime juice work together to tenderize the chicken. This makes it juicy and full of taste. Marinate for at least 30 minutes, but for the best flavor, try overnight. You can use a zip-lock bag to make it easy. Arranging kebabs nicely can impress your guests. Place them on a large platter, with lime wedges and fresh cilantro on the side. This adds color and freshness. For an extra touch, serve with a cool yogurt dip or tzatziki. It pairs well and adds a nice contrast to the sweet and tangy chicken. Pro Tips Marinate Longer for More Flavor: For the best flavor, marinate the chicken for at least 2 hours, or even overnight if possible. This allows the spices and the honey-lime mixture to penetrate the meat deeply. Skewer for Easy Grilling: When threading the kebabs, alternate chicken pieces with vegetables to ensure even cooking and a vibrant presentation. This also helps the veggies to soak up the marinade flavors. Check for Doneness: Always use a meat thermometer to check that the chicken reaches an internal temperature of 165°F (75°C). This ensures the chicken is fully cooked and safe to eat. Rest Before Serving: Allow the kebabs to rest for about 5 minutes after grilling. This helps to redistribute the juices, resulting in a juicier and more flavorful chicken. {{image_4}} You can switch the chicken with shrimp or tofu. Shrimp cooks quickly and adds a nice flavor. Tofu absorbs the marinade well, making it tasty for vegetarians. For veggies, try zucchini, cherry tomatoes, or mushrooms. Each brings a unique twist to the dish. Feel free to mix and match your favorites for a fun kebab experience! Want to spice things up? Add chili powder for heat. It gives a nice kick without overpowering the dish. You can also try different marinades. Teriyaki sauce adds a sweet and savory touch. Soy sauce with ginger and garlic offers a great alternative too. Experiment with herbs like cilantro or basil for bright flavors. These small changes can make a big difference! Grilling is fun, but you can bake the kebabs in the oven too. Set your oven to 400°F (200°C) and cook for about 20 minutes. Broiling is another option for indoor cooking. Place the kebabs under the broiler for 10-12 minutes, turning halfway through. Each method offers a unique flavor and texture. Choose what works best for you! To keep your honey lime chicken kebabs fresh, store them properly. First, let them cool down to room temperature. Then, place the kebabs in an airtight container. This keeps moisture in and prevents odors from other foods. You can also wrap them tightly in plastic wrap. Refrigerate your leftovers right away. They will stay good for about 3 to 4 days. When reheating, you have two options: microwave or oven. The microwave is quick but can dry out the chicken. If you use it, heat in short bursts and check often. The oven is a better choice for juicy kebabs. Preheat it to 350°F (175°C). Place the kebabs on a baking sheet, cover them with foil, and heat for about 10 minutes. This helps keep them moist and flavorful. If you want to store kebabs for longer, freezing is great. Wrap each kebab in plastic wrap, then place them in a freezer bag. Be sure to remove as much air as possible. This helps avoid freezer burn. When you’re ready to eat them, take the kebabs out of the freezer and thaw overnight in the fridge. Reheat them using the oven method for the best taste. I suggest marinating the chicken for at least 30 minutes. For deeper flavor, let it sit for up to 2 hours. The longer the chicken marinates, the more the flavors blend. Honey and lime add a sweet and tangy taste that really enhances the chicken. Yes, you can use other meats! Shrimp, pork, or even tofu work great. Each option brings its own unique taste. Just adjust the marination time. Shrimp needs less time, while pork may need longer. Try serving the kebabs with rice, quinoa, or a fresh salad. Grilled vegetables also complement the flavors well. You could also add a cool yogurt dip or tzatziki for extra zest. To check if the chicken is ready, use a meat thermometer. The internal temperature should reach 165°F (75°C). If you don’t have a thermometer, cut into a piece. The meat should be opaque and juices should run clear. Yes, you can prepare the kebabs ahead. Marinate the chicken and assemble the kebabs. Store them in the fridge for up to 24 hours before grilling. This saves time and lets the flavors develop even more. This guide covered everything from ingredients to methods for perfect honey lime chicken kebabs. Preparing your marinade, marinating the chicken, and grilling with care led to delicious results. Remember, the right marinade makes a big difference in flavor. You can also play around with ingredients for fun variations. Store your leftovers wisely for tasty meals later. Enjoy these kebabs with your favorite sides, knowing you’ve mastered a great dish!

Honey Lime Chicken Kebabs Flavorful Grilling Delight

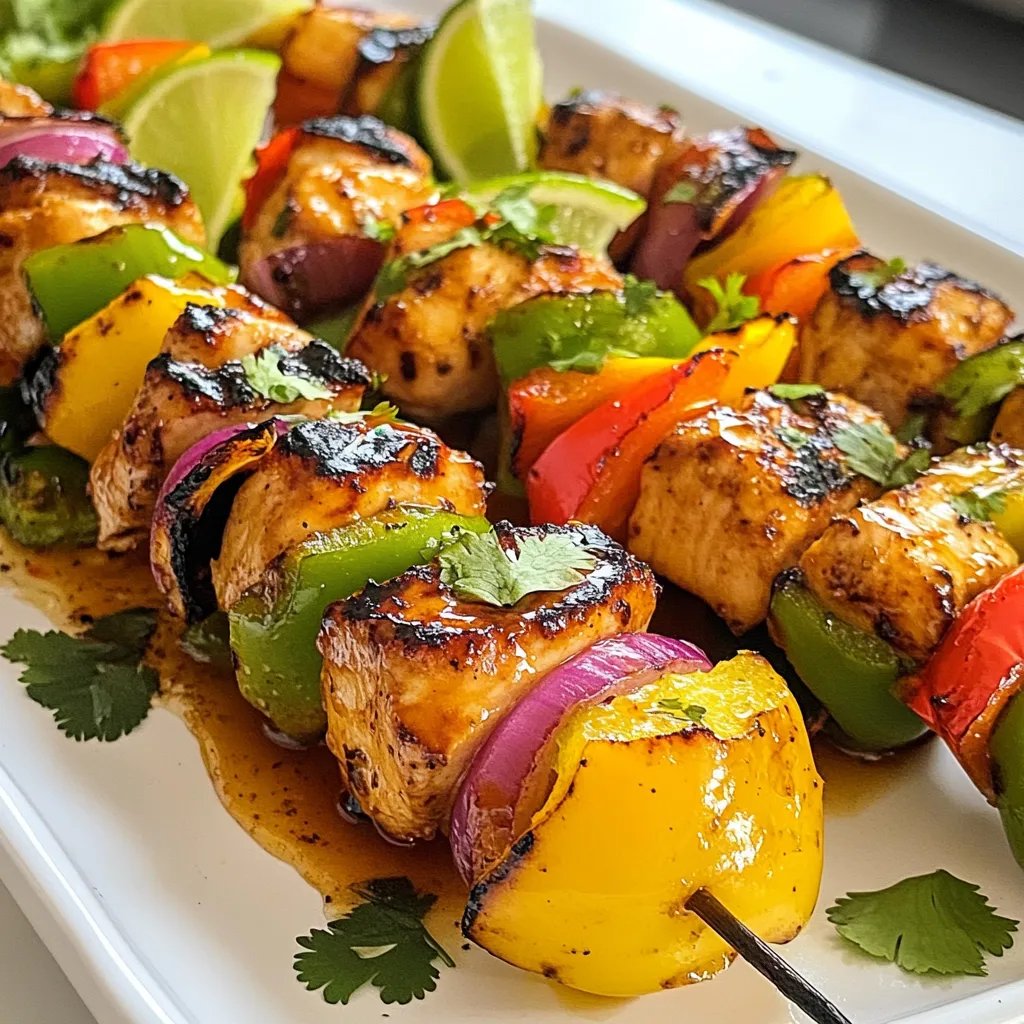
Looking to impress at your next cookout? Dive into the delicious world of Honey Lime Chicken Kebabs! This dish combines

- 2 cups cooked chicken, shredded - 1/2 cup basil pesto - 1 cup shredded mozzarella cheese - 1/2 cup sun-dried tomatoes, finely chopped - 1 small red onion, finely chopped - 1 tablespoon olive oil - 1 loaf of crusty Italian bread - Salt and freshly ground black pepper to taste The main ingredients in pesto chicken stuffed bread come together for a tasty meal. The cooked chicken provides protein, while the basil pesto adds a fresh, herbal flavor. The mozzarella cheese melts beautifully and gives that gooey texture we all love. Sun-dried tomatoes add a sweet, tangy punch, and red onion brings a mild crunch. Olive oil helps blend all these flavors and adds richness. Don't forget the salt and pepper to enhance the taste. - Fresh basil leaves for garnish - Extra pesto for drizzling Garnishes can make your dish look even more inviting. Fresh basil leaves add color and a burst of flavor. Drizzling extra pesto on top can elevate the dish, making it look restaurant-quality. - Use rotisserie chicken if you're short on time. - Swap mozzarella for provolone or cheddar cheese. - Replace sun-dried tomatoes with roasted red peppers or olives. - Use whole-wheat bread for a healthier option. If you don’t have an ingredient, you can easily swap it out. Rotisserie chicken works great and saves time. Different cheeses can change the taste while keeping it delicious. You can also use roasted red peppers or olives instead of sun-dried tomatoes for a new twist. Whole-wheat bread gives a healthier choice without losing flavor. {{ingredient_image_2}} First, preheat your oven to 375°F (190°C). In a large bowl, mix 2 cups of shredded chicken and 1/2 cup of basil pesto. Add 1 cup of shredded mozzarella cheese, 1/2 cup of finely chopped sun-dried tomatoes, and 1 small red onion, finely chopped. Drizzle in 1 tablespoon of olive oil. Season with salt and black pepper. Use a spatula to blend everything well. Make sure the chicken gets a nice coat of pesto. Now grab your loaf of crusty Italian bread. Slice it lengthwise down the center. This creates a top half and a bottom half. Carefully scoop out some soft bread from both halves. Leave enough crust to hold the filling. This makes sure the bread won’t break when you fill it. Spoon the chicken and pesto mixture into the hollowed-out bread. Pack the filling tightly to fill every space. Place both halves on a baking sheet and wrap them in aluminum foil. This keeps the crust from burning. Bake for 25-30 minutes. The bread will turn golden and crispy, and the filling will become hot. Once it’s done, take it out of the oven and let it cool for a few minutes. Slice the stuffed bread and garnish with fresh basil leaves. Enjoy your tasty creation! To get the best texture for your pesto chicken stuffed bread, focus on the bread. Use a crusty Italian loaf. This gives a nice crunch outside and a soft, warm inside. Hollow it out carefully. Leave enough bread on the sides to support your filling. When you bake, wrap the loaf in foil. This keeps it moist and prevents burning. Bake until golden. This way, the filling gets hot and bubbly while the crust stays perfect. A few simple tools make this recipe easier. First, grab a sharp knife for slicing the bread. A large mixing bowl helps combine all your filling ingredients. Use a spatula or wooden spoon to mix well. A baking sheet is essential for placing the stuffed bread in the oven. Lastly, aluminum foil helps protect the crust while baking. These tools help you create a tasty dish with less fuss. If you have leftovers, store them right to keep them fresh. Wrap the stuffed bread tightly in plastic wrap or foil. This keeps it from drying out in the fridge. You can also place it in an airtight container. Enjoy your leftovers within three days for the best taste. Reheat in the oven at 350°F (175°C) for about 10-15 minutes. This revives the crisp crust and warms the filling nicely. Pro Tips Use Fresh Ingredients: For the best flavor, opt for fresh basil pesto and high-quality sun-dried tomatoes. Fresh ingredients will elevate the taste of your stuffed bread. Customize Your Fillings: Feel free to add other ingredients such as spinach, grilled vegetables, or different cheeses to suit your taste preferences. Keep It Warm: If you're serving this dish at a gathering, keep the stuffed bread warm in the oven at a low temperature until ready to serve. Pairing Suggestions: Serve your stuffed bread with a light salad or a side of marinara sauce for dipping to complement the flavors of the dish. {{image_4}} You can make this dish vegetarian by swapping chicken for vegetables. Use roasted bell peppers, zucchini, or mushrooms. These veggies add a nice flavor. Mix them with basil pesto and cheese. This change keeps the dish hearty and tasty. Cheese makes this bread special. While mozzarella is great, try other choices. Cheddar adds sharpness. Feta gives a tangy kick. Goat cheese provides creaminess. Mix different cheeses to find your favorite blend. It’s fun to experiment with flavors. Want to spice things up? Add herbs and spices for more taste. A pinch of red pepper flakes gives heat. Dried oregano or thyme adds earthiness. Fresh herbs, like parsley, can brighten the dish. Tailor the seasonings to your liking for a unique twist. Each serving of Pesto Chicken Stuffed Bread has about 400 calories. This can vary based on the bread you choose. The chicken and cheese add a nice amount of calories too. This dish is a great source of protein. One serving has around 30 grams of protein. The fiber content is about 3 grams per serving, thanks to the bread and tomatoes. Both protein and fiber help keep you full longer. - Chicken: This lean meat is rich in protein. It helps build muscles and keeps your body strong. - Pesto: Made from basil, pesto is full of antioxidants. Basil can help reduce stress and support heart health. - Mozzarella: This cheese provides calcium, which is good for bones and teeth. - Sun-dried tomatoes: These are packed with vitamins A and C. They also contain lycopene, which is great for heart health. - Red onion: This adds flavor and has anti-inflammatory properties. It can also help with digestion. Yes, you can choose different breads. A French baguette adds a nice crunch. Brioche gives a soft, sweet touch. Whole grain bread is a healthy swap too. Just make sure it can hold the filling well. You can keep leftovers in the fridge for up to three days. Store them in an airtight container. To reheat, wrap in foil and bake at 350°F (175°C) for about 10 minutes. This keeps the bread crispy and the filling warm. This dish pairs well with a fresh salad. A light Caesar or mixed greens works great. You can also serve it with roasted veggies for a hearty side. A simple dipping sauce, like balsamic glaze, adds a nice touch too. This blog covered the key ingredients for Pesto Chicken Stuffed Bread and how to prepare it. We also looked at tips for texture and storage, plus tasty variations and health facts. With these steps, you can make a dish that is both fun and satisfying. Enjoy experimenting with flavors and ingredients. A delicious meal awaits!

Pesto Chicken Stuffed Bread Flavorful Dinner Choice

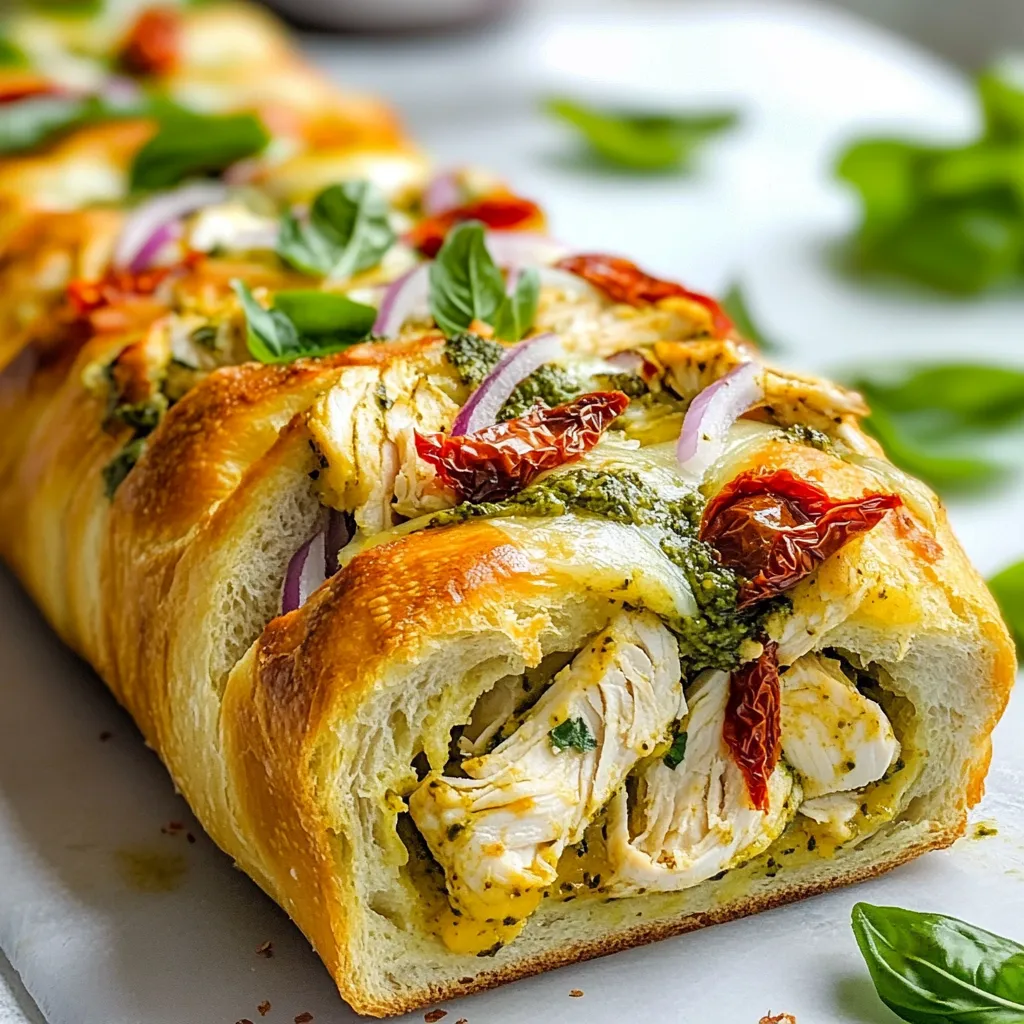
Looking for a tasty meal that stands out? Pesto Chicken Stuffed Bread is your answer! It combines juicy chicken with

- 1 ½ cups all-purpose flour - ½ cup granulated sugar - ¼ cup packed brown sugar - 1 tablespoon baking powder - ½ teaspoon ground nutmeg - ½ teaspoon ground cinnamon - ½ teaspoon salt - 1 large egg - 1 cup whole milk - ¼ cup unsalted butter, melted - 1 teaspoon vanilla extract - ½ cup maple syrup (for glazing) - 1 cup powdered sugar (for glazing) Gathering the right ingredients is key for your Maple Glazed Donut Muffins. Start with the dry ingredients. You need all-purpose flour for texture and structure. Granulated and brown sugars add sweetness and depth. Baking powder gives your muffins that lovely rise. Ground nutmeg and cinnamon bring warmth and spice, while salt balances the flavors. Next, let’s move to the wet ingredients. A large egg helps bind everything together. Whole milk keeps the muffins moist and fluffy. Melted unsalted butter adds richness, while vanilla extract brings a lovely aroma. For the glaze, we use maple syrup and powdered sugar. This will create a sweet, sticky topping that is hard to resist. Make sure to measure everything carefully. This will help your muffins turn out perfect every time. {{ingredient_image_2}} First, preheat your oven to 350°F (175°C). This step is key for even baking. Next, prepare your muffin tin. You can grease it with non-stick spray or use muffin liners. This makes it easy to take out the muffins later. In a big bowl, add the following dry ingredients: - 1 ½ cups all-purpose flour - ½ cup granulated sugar - ¼ cup packed brown sugar - 1 tablespoon baking powder - ½ teaspoon ground nutmeg - ½ teaspoon ground cinnamon - ½ teaspoon salt Whisk these ingredients well. This helps to mix them evenly. Getting this right makes sure every muffin tastes great. Now, take another bowl. Crack one large egg into it. Add 1 cup whole milk, ¼ cup melted unsalted butter, and 1 teaspoon vanilla extract. Whisk these together until the mix is smooth. This step adds flavor and moisture to the muffins. Carefully pour the wet mix into the dry mix. Use a spatula or wooden spoon to stir. Only mix until you see no dry flour. Over-mixing can make the muffins tough instead of light and fluffy. Use a spoon or ladle to fill each muffin cup about ¾ full with batter. This helps them bake evenly. Place the muffin tin in the oven. Bake for 18-20 minutes. A toothpick should come out clean when done. While the muffins bake, make the maple glaze. In a small bowl, whisk together ½ cup maple syrup and 1 cup powdered sugar. Keep whisking until it is smooth and lump-free. After baking, let the muffins cool in the tin for about 5 minutes. Then, move them to a wire rack. While they are still warm, dip the tops into the maple glaze. Let any extra glaze drip back into the bowl. For a sweet twist, sprinkle a mix of cinnamon and sugar on top while the glaze is still wet. To make your muffins light, focus on mixing. Start with fresh ingredients. When you mix dry and wet items, do it gently. Over-mixing leads to dense muffins. Just mix until you see no dry flour. This keeps air in the batter. To keep your muffins fresh, store them in an airtight container. They stay good for up to three days at room temperature. If you want them to last longer, freeze them. Wrap each muffin in plastic wrap. Place them in a freezer bag or container. They will keep for about three months. Pair your maple glazed donut muffins with coffee or tea. The warm flavors match perfectly. For a fun twist, serve them with fresh fruit or berries. This adds color and freshness to your plate. You can even drizzle leftover glaze on top for extra sweetness. Pro Tips Use Fresh Ingredients: For the best flavor, ensure your baking powder is fresh and your spices are not past their prime. Don’t Overmix: Mix the batter until just combined to keep the muffins light and fluffy. Overmixing can lead to dense muffins. Cool Before Glazing: Allow the muffins to cool slightly before dipping in the glaze to prevent it from melting off. Experiment with Flavors: Feel free to add chocolate chips or nuts to the batter for an extra flavor twist! {{image_4}} You can easily add flavors to your maple glazed donut muffins. Mix in some nuts for a crunch. Chopped walnuts or pecans work well. You can also add chocolate chips for sweetness. Dark or milk chocolate both taste great. Try adding ½ cup of your choice to the batter before baking. This makes each bite even more exciting! While maple glaze is delicious, you can try different glazes. A chocolate glaze brings a rich taste. To make it, melt ½ cup of chocolate chips with a little cream. For a vanilla glaze, mix 1 cup of powdered sugar with 2 tablespoons of milk and a splash of vanilla. Each glaze gives a unique twist to the muffins. If you need to make these muffins gluten-free, swap the all-purpose flour with a gluten-free blend. Ensure it has a good binding agent. For a vegan version, replace the egg with a flax egg. Mix 1 tablespoon of flaxseed meal with 2.5 tablespoons of water. Let it sit until it thickens. Use almond or oat milk instead of whole milk. These adjustments keep your muffins tasty for everyone! Maple glazed donut muffins taste best when fresh. You can store them at room temperature. They will stay good for about 2-3 days. To keep them fresh, place muffins in an airtight container. You can also use a zip-top bag. Make sure to remove as much air as possible. This helps prevent them from getting dry. If you live in a hot or humid place, store them in the fridge. This keeps them fresh a bit longer. Freezing is a great way to save leftover muffins. To freeze them, first let them cool completely. Then, wrap each muffin in plastic wrap. After that, place them in a freezer bag. Label the bag with the date. Muffins can last up to 3 months in the freezer. When you want to eat one, take it out and let it thaw at room temperature. You can also warm it in the microwave for 10-15 seconds. Enjoy the sweet taste again! To make your muffins moist, add a bit of sour cream or yogurt. These ingredients boost moisture and add creaminess. You can also try using buttermilk instead of whole milk. It makes the muffins tender and rich. Lastly, be sure not to over-bake them. Overbaking dries them out. Yes, you can make these muffins ahead of time. Bake them and let them cool completely. Then, store them in an airtight container. You can keep them at room temperature for up to two days. For longer storage, freeze them. Just thaw at room temperature when ready to enjoy. If you don’t have maple syrup, you can use honey or agave nectar. Both options will provide sweetness. You could also use a simple glaze made of powdered sugar and milk. Just mix them until smooth for a quick substitute. These muffins last about two days at room temperature. If you store them in the fridge, they last about a week. For best results, keep them in an airtight container. If frozen, they can last up to three months. Just remember to thaw them before serving. In this blog post, I discussed how to make light and fluffy muffins. We covered essential dry and wet ingredients and included step-by-step baking instructions. I shared tips to keep your muffins fresh and tasty while offering fun variations and storage tips. In my final thoughts, remember that baking is about joy and creativity. Experiment with flavors and techniques to make these muffins your own. Enjoy the tasty results and share them with friends!

Maple Glazed Donut Muffins Tasty and Simple Recipe

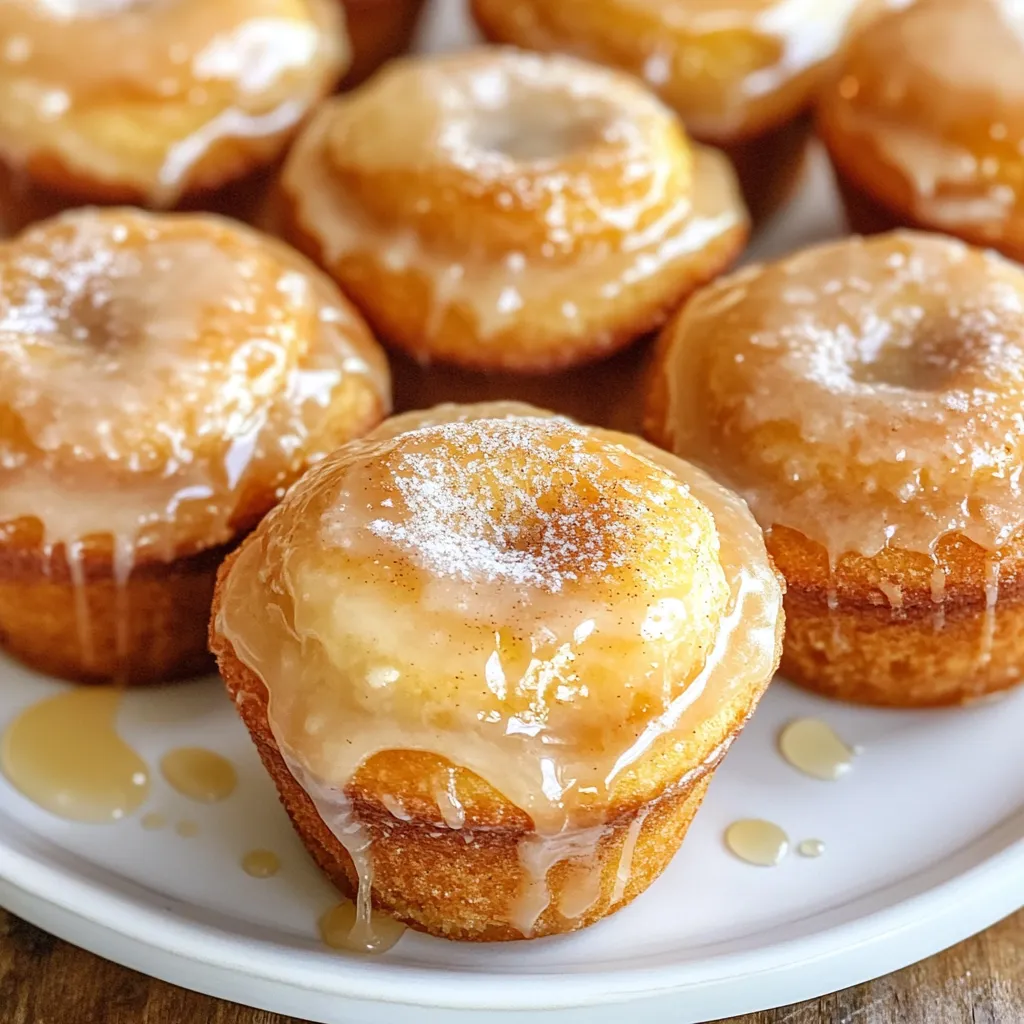
If you love sweet treats, you’ll adore these Maple Glazed Donut Muffins. They are soft, sweet, and topped with a

Older posts
Newer posts
← Previous Page1 … Page86 Page87 Page88 Next →

dsad

© 2025 spoonfulsavory • Built with GeneratePress

Our Policies

  • Copyright Policy
  • Cookie Policy
  • GDPR Policy
  • Privacy Policy
  • Disclaimer
  • Terms Of Use

More Information

  • Home
  • About
  • Contact
  • Appetizers
  • Dessert
  • Dinner
  • Drinks
©2025, spoonfulsavory About Back To Top