Skip to content
DisclaimerTerms Of UseGDPR PolicyCookie Policy

spoonfulsavory

  • Home
  • Drinks
  • Appetizers
  • Dinner
  • Dessert
  • About
  • Contact
  • Privacy Policy
DisclaimerTerms Of UseGDPR PolicyCookie Policy

Sarah

- 2 cups all-purpose flour - 1/3 cup granulated sugar - 1/2 cup buttermilk - 1 large egg - 1/4 cup unsalted butter, melted - 1 cup powdered sugar - 2 tablespoons pure maple syrup - 1-3 tablespoons milk - Ground cinnamon - Ground nutmeg When making maple glazed donut holes, start with these key ingredients. The all-purpose flour gives structure, while the sugar adds sweetness. Buttermilk makes the donut holes tender. The egg binds the mix together, and melted butter adds richness. For the glaze, use powdered sugar for sweetness and pure maple syrup for that signature flavor. You can adjust the milk to get your preferred glaze thickness. Optional spices like ground cinnamon and nutmeg can enhance the flavor. They add warmth and depth to the donut holes. Using these ingredients, you create a delightful treat that’s perfect for any occasion. {{ingredient_image_2}} 1. Preheat the oven and grease the pan: Set your oven to 350°F (175°C). Grease a mini muffin or donut hole pan well. This step prevents sticking and helps the donut holes pop out easily. 2. Mix dry and wet ingredients separately: In a large bowl, whisk together the dry ingredients. Combine 2 cups of all-purpose flour, 1/3 cup of granulated sugar, 2 teaspoons of baking powder, 1/2 teaspoon of baking soda, 1/2 teaspoon of salt, 1/2 teaspoon of ground cinnamon, and 1/4 teaspoon of ground nutmeg. In another bowl, mix the wet ingredients. Whisk together 1/2 cup of buttermilk, 1 large egg, 1/4 cup of melted unsalted butter, and 1 teaspoon of vanilla extract. 1. Gently combine wet and dry mixtures: Pour the wet ingredients into the dry ingredients. Stir slowly with a spatula or wooden spoon. Mix until just combined. Be careful not to overmix; the batter should be thick and fluffy. 2. Fill the donut hole pan: Use a spoon to fill each cavity in the donut hole pan. Fill them about two-thirds full. This allows space for the batter to rise while baking. 1. Bake and prepare the glaze: Place the pan in the oven. Bake for 10-12 minutes. The tops should be golden brown. You can check doneness with a toothpick; it should come out clean. While they bake, prepare the glaze. In a small bowl, mix 1 cup of powdered sugar and 2 tablespoons of pure maple syrup. Gradually add 1-3 tablespoons of milk until the mixture is smooth and pourable. 2. Cool, dip, and serve: Once baked, let the donut holes cool for about 5 minutes. Carefully remove them from the pan and place them on a wire rack. Dip each warm donut hole into the maple glaze. Allow excess glaze to drip off. Let them sit for a few minutes to set before serving. Enjoy! To make the best glaze, start with the right milk amount. Use 1 tablespoon for a thicker glaze. Add 3 tablespoons for a thinner glaze. Adjust until you find the right texture. When dipping, make sure your donut holes are still warm. This helps the glaze stick well. Dip them halfway in the glaze for a nice look. Let the excess drip off before placing them on a wire rack. To avoid overmixing, stir just until the wet and dry ingredients blend. A few lumps are okay. This keeps your donut holes soft and fluffy. Check doneness by inserting a toothpick. If it comes out clean, they are ready. Also, look for a golden brown top. This shows they are baked just right. Arrange your glazed donut holes on a pretty platter. This makes them more inviting. For a touch of elegance, dust them with powdered sugar. A drizzle of extra maple syrup adds flair. Add a fresh sprig of mint on top. This adds color and freshness. It makes your treat look even better! Pro Tips Use Fresh Spices: Ensure your ground cinnamon and nutmeg are fresh for the best flavor. Old spices can lose potency and affect the overall taste of your donut holes. Check Doneness Early: Since ovens can vary, check your donut holes a minute or two before the suggested baking time to prevent overbaking. Cool Completely Before Glazing: Allow your donut holes to cool for a few minutes before glazing to ensure the glaze adheres properly and doesn’t melt off. Experiment with Toppings: Feel free to add toppings such as chopped nuts, shredded coconut, or sprinkles after glazing for added texture and flavor. {{image_4}} You can easily adapt this recipe for different diets. For vegan maple glazed donut holes, replace the egg with a flax egg. Mix one tablespoon of ground flaxseed with three tablespoons of water. Let it sit for five minutes until it thickens. Use almond milk or oat milk in place of buttermilk. For the butter, use coconut oil or vegan butter. If you need gluten-free options, swap the all-purpose flour for a gluten-free blend. Ensure it has a binding agent, like xanthan gum, to help with texture. The taste and texture will still be delightful! You can make these donut holes even more fun! Try adding chocolate chips to the batter. Just fold in about half a cup before you fill the pan. This will give each bite a sweet surprise. Another great idea is to incorporate fruit purees. You can use banana, apple, or even pumpkin. Just replace some of the buttermilk with the puree. This adds flavor and moisture, making the donut holes extra yummy. These donut holes pair perfectly with coffee or tea. The warm glaze and soft dough make each bite a treat. For special occasions, serve them on a beautiful platter. You can even sprinkle some extra powdered sugar on top for a fancy touch. These donut holes are great for breakfast, brunch, or dessert. They also work well for parties or family gatherings. Everyone will love the sweet maple flavor! To keep your donut holes fresh, store them in an airtight container. Place a paper towel at the bottom to absorb extra moisture. This helps keep them soft. You can refrigerate them for up to five days. If you want to save them longer, freezing is a great option. For freezing, wrap each donut hole in plastic wrap. Then, place them in a freezer bag. They can last up to three months in the freezer. When you are ready to enjoy them, just thaw them in the fridge overnight. To reheat your donut holes, the oven is best. Preheat the oven to 350°F (175°C). Place the donut holes on a baking sheet. Heat them for about 5-7 minutes. This keeps them warm and helps regain their fluffy texture. You can also microwave them. Heat each donut hole for about 10-15 seconds. This method is quicker, but the texture may not be as good as the oven. Homemade donut holes taste great for about five days when stored properly. Store-bought donut holes can last about a week. The key is to check for any signs of mold or dryness. Always trust your senses. If they smell off or feel hard, it's best to toss them. Enjoy your fresh, tasty donut holes! To make these donut holes, start by gathering your key ingredients. You’ll need: - 2 cups all-purpose flour - 1/3 cup granulated sugar - 2 teaspoons baking powder - 1/2 teaspoon baking soda - 1/2 teaspoon salt - 1/2 teaspoon ground cinnamon - 1/4 teaspoon ground nutmeg - 1/2 cup buttermilk - 1 large egg - 1/4 cup unsalted butter, melted - 1 teaspoon vanilla extract Basic steps include: 1. Preheat your oven to 350°F (175°C). Grease your mini muffin or donut hole pan. 2. In a bowl, mix all the dry ingredients well. 3. In another bowl, whisk the wet ingredients until smooth. 4. Combine the mixtures gently without overmixing. 5. Fill the pan about two-thirds full with batter. 6. Bake for 10-12 minutes until golden brown. 7. Prepare the maple glaze with powdered sugar, maple syrup, and milk. 8. Dip warm donut holes in the glaze, let excess drip off. This recipe gives you about 24 delightful treats! Yes, you can prepare these donut holes ahead of time. Here are some tips for easy prep and storage: - Baking Ahead: Bake the donut holes and let them cool completely. - Storage: Place them in an airtight container. They stay fresh for about 2 days at room temperature. - Freezing: For longer storage, freeze them in a single layer. Once frozen, transfer to a bag. They can last up to a month. - Re-glazing: When ready to eat, thaw and re-glaze them for the best taste. If you don't have buttermilk, there are easy alternatives. Here are some substitutes and their ratios: - Milk and Vinegar: Mix 1/2 cup of milk with 1/2 tablespoon of white vinegar. Let it sit for 5 minutes. - Milk and Yogurt: Use 1/2 cup of plain yogurt thinned with a little milk. - Milk and Lemon Juice: Combine 1/2 cup of milk with 1/2 tablespoon of lemon juice. These options mimic buttermilk's tangy flavor and acidity, perfect for your donut holes! You learned how to make maple glazed donut holes. We covered ingredients, steps, and tips to perfect them. Remember to mix well but not too much. Try different flavors and presentation ideas to impress. Store them correctly to keep them fresh. Enjoy these donut holes with your favorite drink. Now it's time for you to create and share your delicious treats. Happy baking!

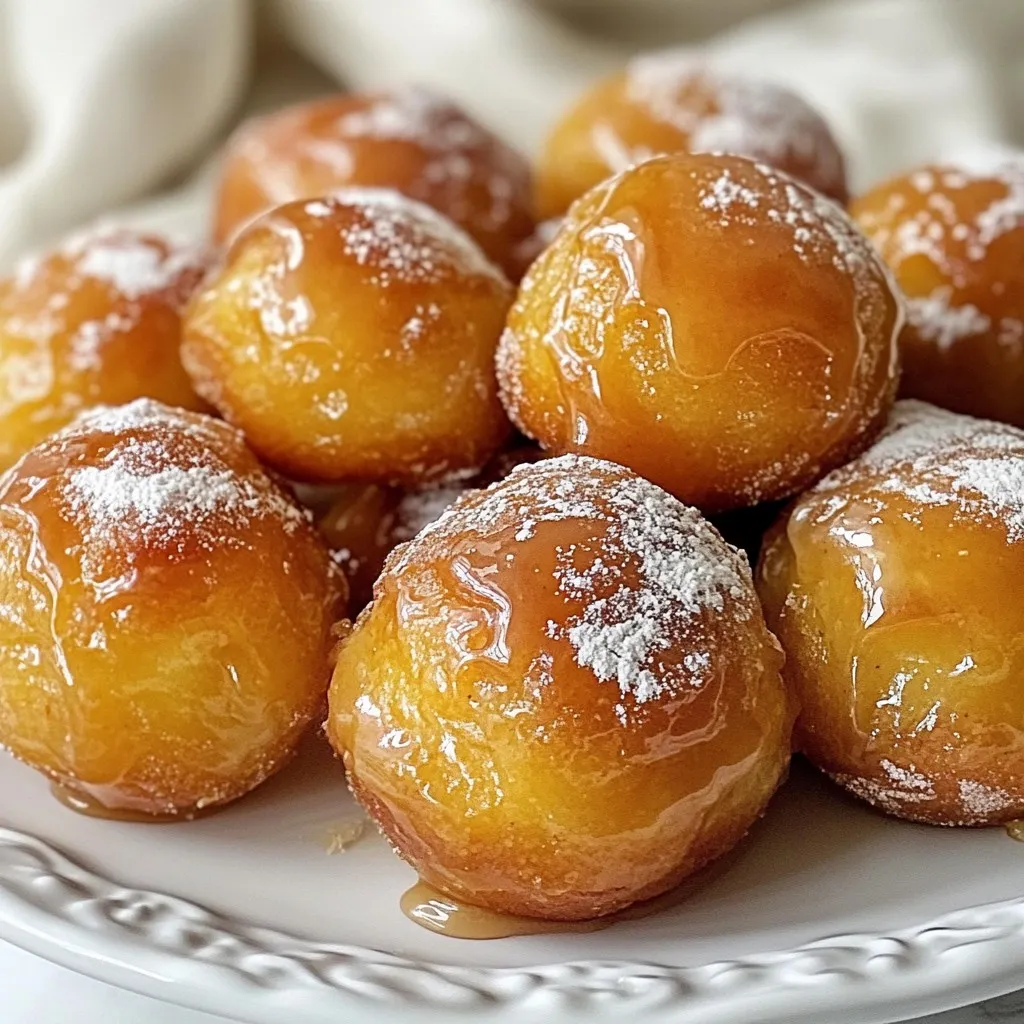
Maple Glazed Donut Holes Delightful Treat Recipe

Craving a sweet treat that’s easy to make? Look no further than my Maple Glazed Donut Holes! These delightful bites

To make Air Fryer Garlic Butter Mushrooms, you will need: - 500g mushrooms (button or cremini), cleaned and halved - 4 tablespoons unsalted butter, melted - 4 cloves garlic, minced - 1 tablespoon fresh parsley, finely chopped - 1 teaspoon dried thyme - ½ teaspoon smoked paprika - Salt and fresh ground black pepper to taste These ingredients create a rich and tasty flavor. The mushrooms soak up the garlic butter, making each bite delicious. You can elevate your dish with these optional ingredients: - A squeeze of lemon juice - Red pepper flakes for heat - Fresh herbs like basil or thyme Adding a squeeze of lemon juice brightens the dish. Red pepper flakes give it a spicy kick. Fresh herbs add a nice touch too. Here are the tools you need for this recipe: - A mixing bowl - An air fryer - A spatula or spoon for mixing - A serving dish Having these tools ready makes cooking easy and fun. The air fryer ensures your mushrooms cook evenly and quickly. First, get a mixing bowl. Pour in 4 tablespoons of melted butter. Add 4 cloves of minced garlic. Next, toss in 1 tablespoon of finely chopped parsley. Then, add 1 teaspoon of dried thyme. Now, sprinkle in ½ teaspoon of smoked paprika. Finally, add salt and pepper to taste. Stir everything well. This will create a flavorful garlic butter marinade. Take 500 grams of cleaned and halved mushrooms. Add them to the bowl with the garlic butter. Gently toss the mushrooms in the marinade. Make sure each piece is coated well. Let them sit for a few minutes. This allows the mushrooms to soak up all the tasty flavors. Preheat your air fryer to 180°C (350°F) for about 5 minutes. This step is key for even cooking. Place the marinated mushrooms in the air fryer basket. Make sure they are in a single layer. Avoid overcrowding the basket for best results. If needed, cook in batches. Air fry the mushrooms for 10 to 12 minutes. Shake the basket halfway through. This helps them cook evenly. When done, the mushrooms should be golden and tender. Carefully take them out and drizzle any leftover garlic butter on top. Garnish with more parsley and serve with lemon wedges if you like. Enjoy your dish! To get the best flavor from your mushrooms, use fresh ingredients. Start with unsalted butter and real garlic. Mix these well with parsley, thyme, and smoked paprika. Let the mushrooms soak for a few minutes in the marinade. This helps them absorb all those tasty flavors. A longer soak makes each bite more delicious. When you cook mushrooms in an air fryer, less is more. Always place mushrooms in a single layer. If you pile them up, they won’t cook evenly. Instead, work in batches if needed. This way, every mushroom gets the right amount of heat. You will achieve a better texture and taste. To get that lovely golden color, preheat your air fryer first. Set it to 180°C (350°F) for about five minutes. When cooking, shake the basket halfway through. This helps the mushrooms brown evenly. Keep an eye on them, as cooking times can vary. Aim for 10-12 minutes for the best results. {{image_4}} You can use many types of mushrooms for this dish. Button and cremini mushrooms are great choices. They have a mild flavor and cook well in the air fryer. Other tasty options include shiitake, portobello, and oyster mushrooms. Each kind adds its unique taste. Shiitake mushrooms bring a rich, earthy flavor. Portobello mushrooms are meaty and filling. Oyster mushrooms have a soft texture and are sweet. Feel free to mix different types for more depth and fun! Spices can take your mushrooms to the next level. Adding a pinch of red pepper flakes gives a nice kick. You can also try Italian herbs like oregano or basil for a fresh taste. If you like smokiness, use smoked paprika. A dash of cumin can add warmth. Experimenting with spices is a fun way to make this dish your own. Just remember to start small and taste as you go. This way, you can find the perfect balance. Serving your garlic butter mushrooms can be fun and creative. You can place them on a bed of rice or pasta for a hearty meal. They also pair well with grilled chicken or steak. For a light option, serve them over a fresh salad. Adding a sprinkle of grated Parmesan cheese makes it extra special. You could also top with crispy fried onions for a crunch. Don’t forget the lemon wedges! They add a bright zing that enhances the dish's flavors. To keep your garlic butter mushrooms fresh, let them cool first. Place them in a clean, airtight container. Store them in the fridge for up to three days. This method helps maintain their taste and texture. To reheat the mushrooms, use your air fryer. Set it to 160°C (320°F). Heat for about 5 minutes. This will warm them up without making them soggy. You can also use a microwave, but they may lose some crispness. If you want to freeze the mushrooms, first cool them completely. Place them in a freezer-safe bag. Remove as much air as possible before sealing. They can last up to two months in the freezer. When ready to eat, thaw them in the fridge overnight and reheat. Yes, you can use other fats. Olive oil works well and adds a nice flavor. Coconut oil is another option. It gives a slight sweetness. Just keep the same amount as the butter. You may also consider using vegan butter for a dairy-free option. Cook the mushrooms for 10 to 12 minutes. This timing works best at 180°C (350°F). Shake the basket halfway through for even cooking. The mushrooms will turn golden and tender. If you have larger mushrooms, you might need a minute or two more. Yes, there are several adjustments. For a vegan version, swap the butter for olive oil or vegan butter. If you're low in carbs, this recipe is already friendly. Just avoid adding bread or high-carb toppings. For gluten-free needs, ensure all ingredients meet that standard. In this post, I covered how to make Air Fryer Garlic Butter Mushrooms. First, I shared the key ingredients and tools you need. Then, I broke down the steps for marinating and air frying the mushrooms. I also offered tips to ensure perfect results and discussed variations and storage options. These mushrooms make a tasty side dish or snack. I hope you enjoy making them as much as I do!

Air Fryer Garlic Butter Mushrooms Simple and Tasty Dish

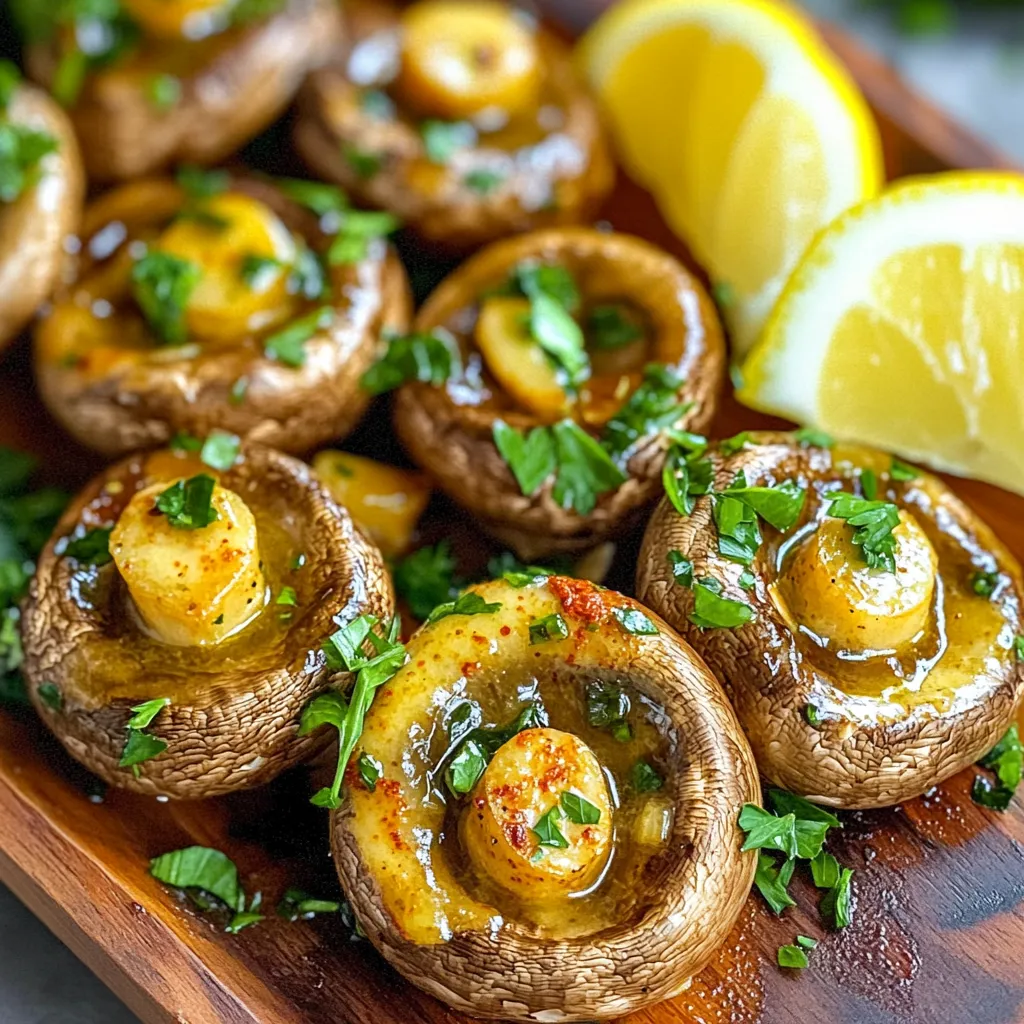
Looking for a simple and tasty side dish? Air Fryer Garlic Butter Mushrooms are a game-changer! They’re quick to make

- 1 lb Brussels sprouts, trimmed and halved - 1/4 cup extra virgin olive oil - 3 tablespoons pure maple syrup - 1 tablespoon Dijon mustard - 1 tablespoon apple cider vinegar - Freshly ground salt and pepper, to taste - 1/2 cup dried cranberries - 1/2 cup pecans, coarsely chopped - 1/4 cup feta cheese, crumbled (optional) - Fresh parsley, chopped, for garnish Alternatives for Brussels sprouts: You can use green beans or broccoli. Both will give a nice crunch. Substitutes for maple syrup: Honey or agave nectar work well. They add sweetness without losing flavor. Other types of nuts to use: Try walnuts or almonds for a different twist. Both add a rich taste and texture. 1. Start by preheating your oven to 400°F (200°C). This heat helps the Brussels sprouts roast well. 2. Take 1 pound of Brussels sprouts and trim their ends. Cut each one in half. 3. In a large bowl, toss the halved sprouts with 1/4 cup of extra virgin olive oil. 4. Season them with freshly ground salt and pepper. Make sure they are well coated. 1. Spread the seasoned Brussels sprouts in a single layer on a baking sheet. 2. Place the baking sheet in the oven and roast for 20-25 minutes. 3. Flip the sprouts halfway through for even roasting. Look for a nice golden brown color. 1. While the sprouts roast, mix your dressing. In a small bowl, whisk together 3 tablespoons of pure maple syrup, 1 tablespoon of Dijon mustard, and 1 tablespoon of apple cider vinegar. 2. Add a pinch of salt and pepper. Whisk until the dressing is well combined and smooth. 1. Once the Brussels sprouts are roasted, remove them from the oven and let them cool for 5 minutes. 2. In a large salad bowl, combine the warm sprouts with the maple Dijon dressing. Toss gently to coat all the sprouts. 3. Add 1/2 cup of dried cranberries and 1/2 cup of coarsely chopped pecans. Toss again to mix everything together. 4. If you like, sprinkle 1/4 cup of crumbled feta cheese on top for extra flavor. 5. Finish by garnishing with freshly chopped parsley for a bright touch. To get crispy roasted Brussels sprouts, start by cutting them in half. This helps them cook evenly. Toss them with olive oil and season well with salt and pepper. Spread them on a baking sheet in a single layer. This allows each sprout to roast nicely. Roast them at 400°F (200°C) for 20 to 25 minutes. Flip them halfway through for even browning. Add the dried cranberries and pecans after the sprouts cool for about 5 minutes. This keeps them fresh and crunchy. For an elegant presentation, serve the salad in a large bowl or on individual plates. Drizzle a little extra maple syrup on top before serving. This adds a nice touch. Pair this salad with grilled chicken or salmon for a complete meal. It also goes well with any holiday spread. To store leftovers, place the salad in an airtight container. Keep it in the fridge for up to three days. The flavors will blend nicely over time, but the sprouts may lose some crunch. If you want to keep them crisp, store the dressing separately. Mix it with the salad right before eating. {{image_4}} For a vegan version of the salad, simply skip the feta cheese. You can also use a plant-based yogurt for creaminess. This keeps your salad tasty and plant-friendly. For low-carb options, swap out the dried cranberries for unsweetened coconut flakes or sunflower seeds. This change reduces the sugar and keeps the crunch. You can add seasonal vegetables to your salad for a fresh twist. Try using roasted butternut squash or sweet potatoes during fall. In spring, consider adding peas or asparagus for vibrant color. If you want to experiment with different dressings, a balsamic vinaigrette or tahini dressing works well. These alternatives bring new flavors to your dish. Adding fresh herbs can really boost the flavor. Try tossing in some thyme or rosemary for an earthy aroma. Cilantro also brightens the taste with its fresh notes. For spices that complement the salad, consider a pinch of smoked paprika or cayenne pepper. These spices add warmth and depth, enhancing the overall flavor profile of your dish. Each serving of Maple Dijon Brussels Sprout Salad has around 250 calories. This salad is a great choice for a light meal. It packs a balanced macronutrient punch. Each serving contains roughly 30 grams of carbs, 15 grams of fats, and 5 grams of protein. The carbs mainly come from the Brussels sprouts and cranberries. The fats are healthy, coming from the olive oil and pecans. Brussels sprouts are nutrient-dense. They are high in vitamins C and K. These vitamins help support your immune system and promote healthy bones. They also have fiber, which aids digestion and keeps you feeling full. Using olive oil in this salad is a smart choice. It contains healthy fats that can lower bad cholesterol. Olive oil also has antioxidants, which help fight inflammation. Together, these ingredients boost overall health and wellness. A good serving size for this salad is about one cup. This amount allows you to enjoy the flavors without overdoing it. This salad fits well into a balanced diet. It combines healthy fats, fiber, and natural sweetness. You can serve it as a main dish or a side. It pairs well with grilled chicken or fish. Enjoying this salad can help you meet your daily veggie goals! Can I make Maple Dijon Brussels Sprout Salad ahead of time? Yes, you can make this salad ahead of time. Prepare the salad without dressing. Store it in the fridge for up to 24 hours. When ready to serve, toss it with the dressing. This will keep the sprouts crisp. Is this salad suitable for meal prep? Absolutely! This salad works well for meal prep. Just pack the salad components separately. Keep dressing in a small container. This way, your salad stays fresh and tasty throughout the week. What are the best alternatives to feta cheese? If you want to skip feta cheese, try goat cheese or a vegan cheese. Both give creaminess. You can also use avocado for a rich, smooth texture. How long can I store the salad in the fridge? You can store the salad in the fridge for about 2-3 days. Keep it in an airtight container. If dressed, the sprouts may get soggy. So, add dressing just before eating. Can I freeze the salad? Freezing this salad is not recommended. The texture of Brussels sprouts and other ingredients changes when frozen. It's best to enjoy it fresh. Can I use frozen Brussels sprouts? You can use frozen Brussels sprouts, but fresh ones taste better. Frozen sprouts may lack crunch. If using frozen, thaw and drain them well before cooking. What's the best type of maple syrup to use? I recommend using pure maple syrup. It has a rich flavor and depth. Avoid imitation syrup, as it lacks the same quality and taste. This blog covers how to make a tasty Maple Dijon Brussels Sprout Salad. We discussed key ingredients, preparation steps, and tips for perfecting the dish. You learned about ingredient substitutes and variations to suit your needs. This salad is not only delicious but also packed with nutrients. Remember, enjoy experimenting with flavors to make it your own. Prepare, serve, and relish this healthy dish at your next meal!

Maple Dijon Brussels Sprout Salad Fresh and Flavorful

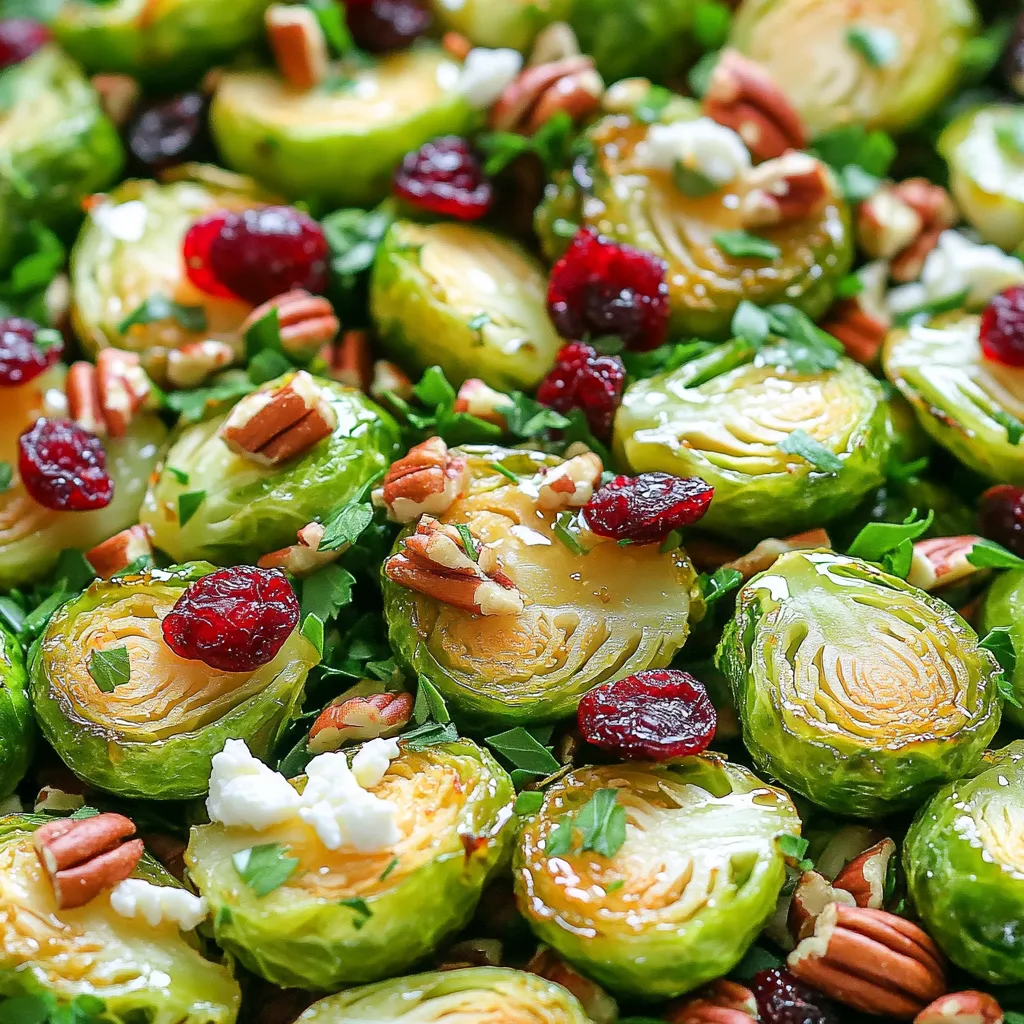
Are you ready to elevate your salad game? The Maple Dijon Brussels Sprout Salad is a perfect mix of sweet

To make a tasty sheet pan garlic butter gnocchi, you'll need the following ingredients: - 1 pound gnocchi (store-bought or homemade) - 4 tablespoons unsalted butter - 5 cloves garlic, finely minced - 1 cup cherry tomatoes, halved - 1 cup fresh spinach, roughly chopped - 1 teaspoon dried Italian herbs (a mix of oregano, basil, and thyme) - Salt and freshly ground black pepper to taste - Freshly grated Parmesan cheese for serving - Fresh basil leaves for garnish Each ingredient plays a key role in creating that rich flavor. The gnocchi serves as a soft and chewy base. Garlic brings a bold taste, while butter adds creaminess. Cherry tomatoes provide sweetness, and spinach adds color and nutrition. The Italian herbs give your dish a warm aroma. Salt and pepper balance everything out. Finally, Parmesan cheese adds a salty kick, and fresh basil gives a fragrant finish. Make sure to gather these items before you start cooking. Enjoy the process of preparing this delightful meal! {{ingredient_image_2}} First, set your oven to 425°F (220°C). This high heat helps the gnocchi turn golden and crispy. Line a large sheet pan with parchment paper. This makes for easy cleanup and helps cook evenly. Next, grab a small saucepan. Melt 4 tablespoons of unsalted butter over medium heat. Once the butter melts, add 5 cloves of finely minced garlic. Sauté the garlic for 1-2 minutes. You want it fragrant but not burnt. Once done, remove it from heat and set it aside. Now, take your prepared sheet pan. Spread 1 pound of gnocchi evenly across it. Add 1 cup of halved cherry tomatoes and 1 cup of roughly chopped fresh spinach. Make sure everything has space. This helps each piece cook well. Drizzle the garlic butter over the gnocchi and veggies. Toss everything gently using your hands or a spatula. Make sure every piece is coated in that rich butter. Sprinkle 1 teaspoon of dried Italian herbs, salt, and freshly ground black pepper on top. Spread the ingredients into an even layer. Place the sheet pan in the oven. Bake for about 20 minutes. The gnocchi should be golden, and the tomatoes will blister. After baking, stir the dish gently to mix the flavors. Let it cool for a minute before serving. Top with freshly grated Parmesan cheese and garnish with fresh basil leaves. Enjoy it hot for the best taste! For the best gnocchi, start with fresh, high-quality ingredients. Use store-bought gnocchi for ease or make your own for a fun twist. When cooking, boil gnocchi in salted water until they float. This means they are done. After boiling, dry them off gently to help them crisp up in the oven. When you bake them, space them out well on the sheet pan. This helps them become golden and crispy. Toss them with the garlic butter evenly, ensuring each piece gets coated. This step is key for flavor. If you want to switch things up, try using olive oil instead of butter. Olive oil gives a nice, rich flavor and is a bit lighter. You can also use garlic-infused oil for extra garlic taste without the bits. For a vegan option, try a plant-based butter. It works well and keeps the dish creamy. For added flavor, mix in herbs like rosemary or thyme into your butter or oil. You can also use crushed red pepper for a bit of spice! Garnishing adds a nice touch to your dish. Fresh basil leaves bring a bright flavor that really lifts the dish. For a bit of zest, sprinkle some lemon zest on top right before serving. It adds freshness. Don't forget the Parmesan cheese! Freshly grated cheese is best. It melts beautifully and gives a savory finish. For an extra touch, drizzle a little more melted butter on top just before serving for that rich, buttery experience. Pro Tips Use Fresh Ingredients: Fresh spinach and ripe cherry tomatoes will enhance the flavor and texture of your dish, making it more vibrant and delicious. Customize Your Herbs: Feel free to experiment with fresh herbs like basil or parsley instead of dried Italian herbs for a more pronounced flavor profile. Perfecting Gnocchi Texture: For extra crispy gnocchi, consider pan-frying them briefly in the butter before baking to achieve a delightful golden crust. Serving Suggestions: Pair this dish with a light salad or crusty bread to create a well-rounded meal that balances flavors and textures. {{image_4}} You can add many vegetables to your sheet pan meal. Try bell peppers for sweetness. Zucchini adds a nice crunch. Broccoli is also a great choice. Just chop them up and mix them in. You want to keep the cooking time in mind. Cut vegetables thinly to cook well in the oven. This way, you get a colorful and tasty dish. Adding protein makes this dish even heartier. Cooked chicken or sausage pairs well with gnocchi. Shrimp is another tasty option. Just toss it in with the other ingredients. If you want a meat-free option, try chickpeas. They add flavor and nutrition. Make sure to adjust cooking times if you use raw meat. If you need a gluten-free option, look for gluten-free gnocchi. Many brands offer this now. You can also make your own with gluten-free flour. Just follow the same steps for cooking. You won’t miss out on taste or texture. This dish can easily fit into a gluten-free diet. Enjoy every bite without worry! After you enjoy your meal, store the leftovers in an airtight container. Let the dish cool completely before sealing it up. This helps keep the gnocchi fresh. Place the container in the fridge. It will stay good for about three days. To reheat, you can use the oven or a microwave. If using the oven, preheat it to 350°F (175°C). Spread the gnocchi on a baking sheet and heat for about 10 minutes. This helps keep them crispy. For the microwave, heat in 30-second bursts until warm. Stir between heating to get even warmth. To freeze, let the dish cool completely. Place it in a freezer-safe container. You can also use freezer bags. Make sure to remove as much air as possible. Label the bag with the date. It can stay in the freezer for about two months. When ready to eat, thaw it overnight in the fridge before reheating. Yes, you can use homemade gnocchi. It can add a fresh touch to your dish. Just make sure your gnocchi is cooked properly. If you make it from scratch, follow a reliable recipe to ensure the right texture. Homemade gnocchi may need a bit more time in the oven to crisp up, so keep an eye on it. You can easily use other greens instead of spinach. Kale or Swiss chard works well. If you want something different, try arugula for a spicy kick. You can even use frozen spinach if fresh isn't available. Just make sure to thaw and drain it well before adding it to your dish. To achieve crispy gnocchi, spread them out evenly on the sheet pan. Do not overcrowd them. The hot oven will help them brown nicely. Drizzling enough garlic butter also helps. Bake at 425°F until golden brown, about 20 minutes. Stir halfway through for even cooking. Yes, you can prep some parts in advance. You can cook the garlic butter and chop the veggies ahead. Just store them in the fridge. When you’re ready to bake, toss everything together and pop it in the oven. It’s a great way to save time on busy days. This blog post covered a simple and tasty recipe for baked gnocchi. We shared a list of easy-to-find ingredients, step-by-step instructions, and helpful tips for cooking. I also discussed fun variations, storage options, and answered common questions. Try this dish to impress your family or friends. Cooking can be fun and easy with the right steps. Enjoy your meal, and don’t forget to experiment!

Sheet Pan Garlic Butter Gnocchi Flavorful One-Pan Meal

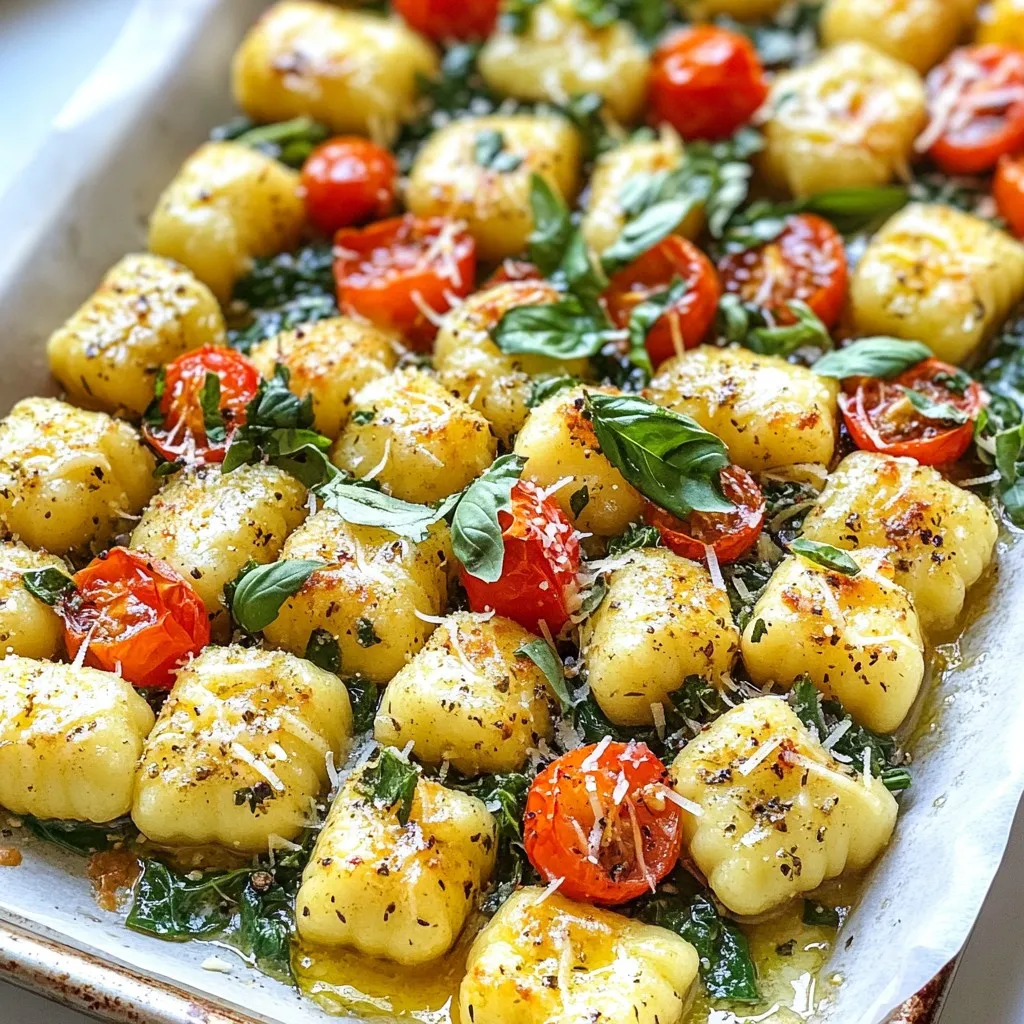
Looking for a quick and tasty dinner? This Sheet Pan Garlic Butter Gnocchi is just what you need! With simple

When making Sheet Pan Lemon Dill Salmon and Green Beans, you need fresh and simple ingredients. Here’s what you will need: - 4 salmon fillets (about 6 ounces each) - 1 pound fresh green beans, trimmed and washed - 2 medium lemons (1 lemon sliced into rounds and 1 lemon juiced) - 3 tablespoons extra virgin olive oil - 2 teaspoons dried dill weed (or 1 tablespoon fresh dill, finely chopped) - 3 cloves garlic, minced - Salt and freshly ground black pepper to taste - Optional: 1 teaspoon red pepper flakes for an extra kick These ingredients come together to create a bright and zesty dish. Salmon brings rich flavor and healthy fats. Fresh green beans add crunch and color. The lemon juice gives a fresh zing. Dill adds a nice herbal note. Garlic enhances the taste and aroma. This recipe is simple yet flavorful. You can find these items at any grocery store. Use fresh ingredients for the best taste. If you want a little heat, add red pepper flakes. This dish is great for family meals or dinner parties. Enjoy cooking! - Start by preheating your oven to 400°F (200°C). - Line a large baking sheet with parchment paper. This makes cleanup easy. - In a medium bowl, mix together 3 tablespoons olive oil and juice from 1 lemon. - Add 3 minced garlic cloves, 2 teaspoons dried dill, salt, and pepper. - If you like heat, toss in 1 teaspoon red pepper flakes. - Whisk the mixture until it blends well. - Place 4 salmon fillets, skin-side down, on one side of the sheet pan. - On the other side, spread out 1 pound of trimmed green beans. - Drizzle half of the lemon-dill mixture over the salmon. - Pour the rest of the marinade over the green beans. Toss them gently to coat. - Top each salmon fillet with lemon slices for extra flavor. - Slide the sheet pan into your preheated oven and bake for 15 to 20 minutes. - Keep a close eye on the salmon; it should be flaky and tender. - The green beans should look bright and be tender-crisp when done. - Once cooked, take the pan out and let it cool for a few minutes. Achieving flaky salmon To get flaky salmon, do not overcook it. Bake it until it is tender and just opaque. The internal temperature should reach 145°F (63°C). Use a fork to check if it flakes easily. This method helps keep the fish juicy and soft. Perfectly crisp green beans For green beans that are crisp, do not overcrowd the pan. Spread them out evenly. This allows hot air to circulate around each bean. Bake them until they are bright green and tender but still have a slight snap. Presentation ideas Serve the salmon and green beans on a large, colorful platter. This makes the dish look inviting. Layer the salmon on one side and the green beans on the other. The vibrant colors make it pop. Garnishing for added flavor Garnish with fresh dill and lemon wedges. This adds a splash of color and extra taste. A sprinkle of red pepper flakes also adds a nice touch. It gives a little heat and makes it look fancy. Time-saving prep strategies To save time, wash and trim the green beans ahead. You can do this earlier in the day or even the night before. This means less work when you are ready to cook. Using one pan for easy cleanup Using one sheet pan makes cleanup a breeze. Line it with parchment paper before cooking. This prevents sticking and makes for quick washing. After you enjoy your meal, just toss the paper, and your pan stays clean! {{image_4}} You can switch proteins if you want. Chicken works well instead of salmon. For a plant-based option, use tofu. Just make sure to adjust the cooking time. You can also try seasonal veggies. In the fall, use Brussels sprouts. In the summer, cherry tomatoes add color. You can mix and match based on what you have on hand. Want to spice things up? Add fresh herbs like parsley or basil. Thyme or rosemary can also add a nice touch. Try different marinades too. A soy sauce mix can give a nice twist. You can even add honey for sweetness. You can grill your salmon instead of baking it. Grilling gives a smoky flavor. Just keep an eye on it, as it cooks faster. Broiling is another great option. It cooks from the top down, giving a nice crispy skin. This way, you get a different texture that many love. Store leftovers in the fridge. Use airtight containers to keep them fresh. Make sure to cool the salmon and green beans before sealing. This helps to maintain flavor and texture. Enjoy within three days for the best taste. For reheating, use the oven or a skillet. Set your oven to 350°F (175°C). Place the salmon and green beans in the oven for about 10 minutes. If using a skillet, heat on medium-low for five minutes. Add a splash of water to keep moisture. Avoid using the microwave; it can dry out the dish. You can freeze cooked salmon. Wrap it tightly in plastic wrap, then place it in a freezer bag. It can last for up to three months. For green beans, blanch them first. Cool and drain them, then freeze in bags. This keeps their bright color and crispness. Salmon should reach an internal temperature of 145°F (63°C). This ensures it is safe to eat and still moist. Use a meat thermometer to check the thickest part of the fillet. This method gives you perfect salmon every time. Cooked salmon lasts about 3 to 4 days in the fridge. Make sure to store it in an airtight container. This keeps it fresh and safe to eat. If you have leftovers, enjoy them quickly for the best taste. Yes, you can prep this dish ahead of time. You can marinate the salmon and green beans and store them in the fridge for up to 2 hours. This enhances the flavors. Just remember to cook them fresh for the best texture. This meal pairs well with rice or quinoa for a filling side. You can also serve it with a simple green salad for a light touch. Garlic bread adds a nice crunch and flavor. Enjoy exploring options that match your taste! To sum up, this guide shows you how to make a tasty salmon dish with green beans. We covered the ingredients you need, how to prepare and bake the meal, and tips for the best results. You can also try variations and learn how to store leftovers. Remember, cooking doesn’t have to be hard. With a little prep, you can enjoy a healthy and delicious meal. So, get started, have fun, and enjoy your cooking journey!

Sheet Pan Lemon Dill Salmon Green Beans Delight

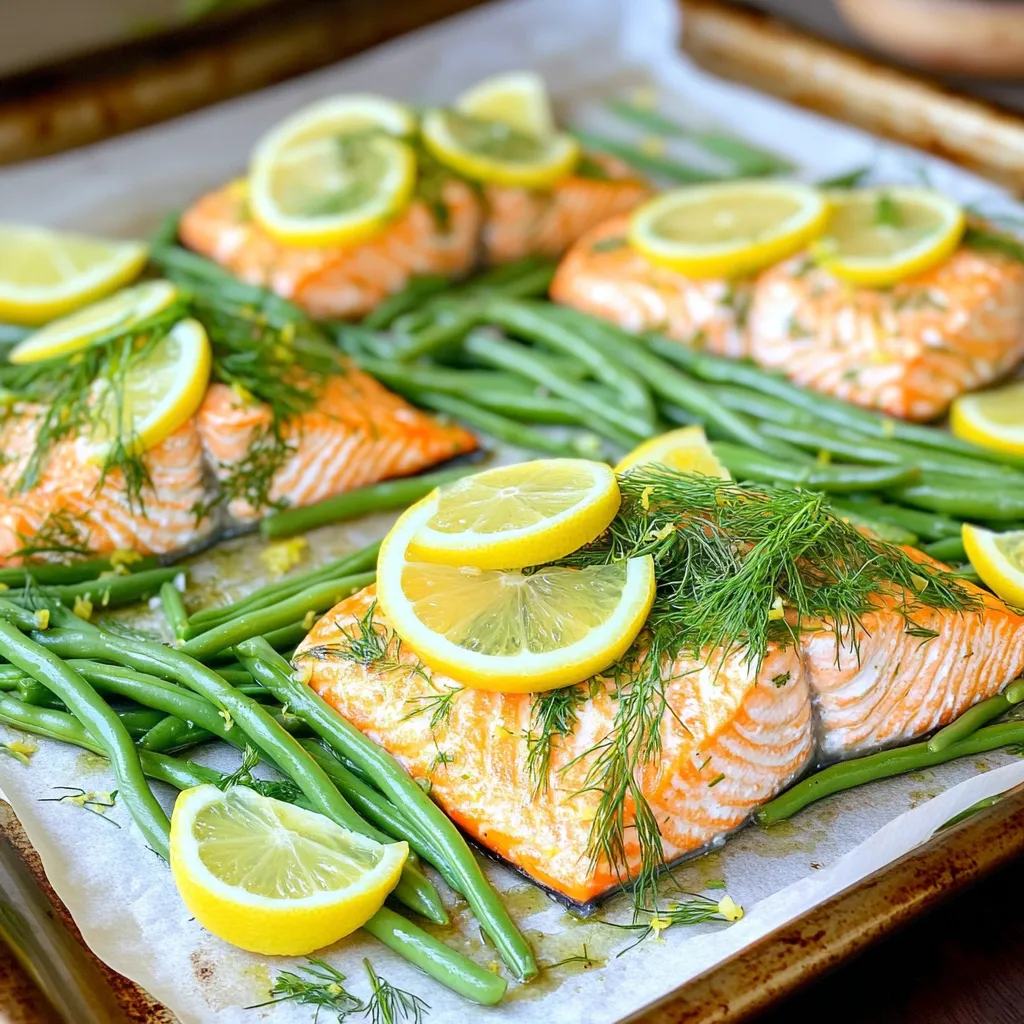
Looking for a healthy and tasty meal? Sheet Pan Lemon Dill Salmon Green Beans Delight is your answer! This dish

- 2 ripe avocados - 1 cup panko breadcrumbs - 1 teaspoon garlic powder - 1 teaspoon smoked paprika - ½ teaspoon salt - ½ teaspoon black pepper - 1 tablespoon extra virgin olive oil - 8 small corn tortillas - 1 cup shredded red cabbage - ½ cup fresh cilantro, chopped - 1 lime, cut into wedges - Hot sauce (optional) To make these crispy avocado tacos, you need fresh ingredients. The avocados should be ripe but firm. This ensures they mash well but hold their shape. Panko breadcrumbs give a light, crispy texture. Garlic powder and smoked paprika add depth of flavor. Salt and black pepper enhance the taste. Extra virgin olive oil helps the coating stick. Corn tortillas are the perfect vessel for these flavors. Red cabbage adds crunch and color. Fresh cilantro brightens the dish. Lime wedges provide a zesty touch. Finally, hot sauce can kick up the heat if you like. Gather these ingredients before you start. It makes cooking easier and more fun. Each item plays a role in making your tacos delicious and satisfying. Enjoy the process of preparing and cooking. Start by slicing the avocados in half. Carefully remove the pits with a spoon. Next, scoop out the flesh gently. Cut each half into ¾-inch wedges. This size helps them stay crisp when cooked. In a mixing bowl, combine the panko breadcrumbs, garlic powder, smoked paprika, salt, and black pepper. Mix these dry ingredients well. Then, drizzle the olive oil over the mixture. Stir until the breadcrumbs feel slightly moist and well-coated. Take one avocado wedge and dip it into the panko mix. Press the crumbs onto the avocado to help them stick. Repeat this step for every wedge until they are all breaded. This adds crunch and flavor. Arrange the coated slices in a single layer in the air fryer basket. Preheat your air fryer to 375°F (190°C). Cook the slices for 8 to 10 minutes. Halfway through, shake the basket gently. This ensures even browning and a crispy texture. While the avocado cooks, heat a dry skillet over medium heat. Place each corn tortilla in the skillet for about 30 seconds on each side. This warms them and makes them flexible for folding. Once your avocado slices are golden and crispy, it's time to build your tacos! Place 2 to 3 avocado wedges on each warm tortilla. Top with a handful of shredded red cabbage and a sprinkle of fresh cilantro. This adds color and flavor. To get that perfect crunch, panko breadcrumbs are key. They add air and texture unlike regular breadcrumbs. The lightness of panko helps the avocado stay crispy. Adjust your cooking time and temperature for best results. Preheat your air fryer to 375°F (190°C). Cook for 8-10 minutes, shaking the basket halfway. This helps the avocado slices brown evenly. To boost the flavor, try adding spices. A pinch of chili powder gives a nice kick. You can also sprinkle some cumin for warmth. For toppings, shredded red cabbage and fresh cilantro are great choices. They add color and freshness. You can also drizzle hot sauce for a spicy twist! Make your tacos look amazing on the plate. Arrange them in a circle for a fun display. Add lime wedges for color and zest. For extra flair, garnish with cilantro sprigs. This makes your dish pop and looks inviting. Remember, we eat with our eyes first! {{image_4}} You can change up the toppings to make your tacos more exciting. Here are some ideas: - Vegetables: Try adding sliced radishes, diced tomatoes, or cucumber for crunch. These fresh veggies brighten the tacos. - Greens: Spinach or arugula can give a nice peppery kick. Just toss them in before serving. - Avocado Prep: Instead of slices, mash the avocado with lime juice. This adds a creamy texture that pairs well with crunchy toppings. To switch up the flavor, you can add different spices or herbs: - Spices: Instead of smoked paprika, use chili powder or cumin for a warmer taste. A dash of cayenne can add heat. - Herbs: Fresh basil or dill can bring a unique twist to each bite. Just sprinkle some on before serving. If you want a vegan or gluten-free option, swap panko for crushed cornflakes or gluten-free breadcrumbs. They give a similar crunch without the gluten. These tacos taste great with sides and drinks. Here are my favorites: - Sides: Serve with a fresh salad or corn on the cob. You can also try a side of black beans for extra protein. - Drinks: A cold margarita or sparkling water with lime pairs well. For a non-alcoholic option, try a refreshing iced tea. These pairings enhance the flavors and make your meal feel complete. Enjoy experimenting with these ideas! To keep your crispy avocado slices fresh, place them in an airtight container. Use parchment paper to separate the layers. This prevents them from getting soggy. For the tortillas, wrap them in foil or place them in a sealed bag. This helps keep them soft and pliable. To reheat, use the air fryer again. Set it to 350°F (175°C) for about 5 minutes. This keeps the texture crispy. Avoid using a microwave, as it can make the avocado mushy. You can freeze crispy avocado slices, but they may lose some texture. For best results, freeze them in a single layer on a baking sheet first. Once frozen, transfer them to a freezer bag. For thawing, place them in the fridge overnight before reheating. This way, they stay as tasty as possible. Yes, you can prep the tacos in advance. Slice the avocados and coat them with panko. Store the coated avocado in a sealed container in the fridge. When ready to cook, just pop them into the air fryer. This method saves time and keeps the avocado fresh. The best temperature for cooking avocados in an air fryer is 375°F (190°C). This heat helps achieve a crispy outer layer while keeping the inside creamy. Preheating your air fryer is key for even cooking. Yes, you can use crushed cornflakes or almond flour for a gluten-free option. Both options provide a nice crunch. If you want a low-carb choice, try crushed pork rinds. They add a unique flavor and crispness. To prevent browning, squeeze fresh lime juice on the avocado immediately after cutting. The acid helps slow oxidation. You can also store cut avocado in an airtight container with some water on top. This keeps it fresh longer. A ripe avocado feels slightly soft when you gently squeeze it. Look for a dark green color, but avoid any that are too mushy. You can also check the stem. If it comes off easily and shows green underneath, it’s ripe and ready to use. These crispy avocado tacos pack great flavor and texture. You learned how to prepare avocados, make a flavorful coating, and achieve that perfect crunch in the air fryer. We shared tips for variety in toppings, storage, and reheating. I hope you feel inspired to try these easy tacos. Enjoy them as a fun meal or a snack. The balance of taste and freshness makes them a winner. Dive in, get creative with flavors, and make them your own!

Air Fryer Crispy Avocado Tacos Delicious and Simple

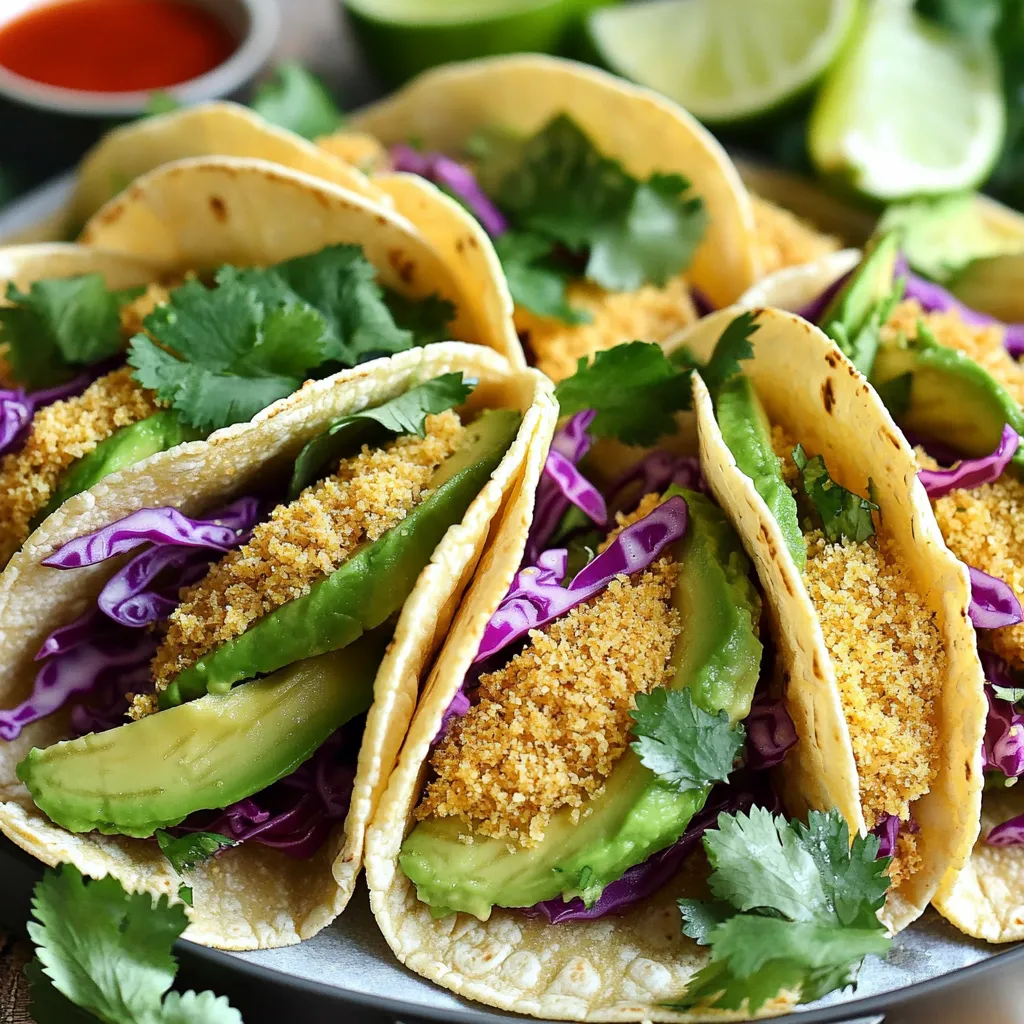
If you’re craving a tasty, healthy meal, look no further! My Air Fryer Crispy Avocado Tacos are a game-changer. You’ll

To make delicious garlic butter Parmesan smashed potatoes, gather these fresh ingredients: - 2 pounds baby Yukon gold potatoes - 4 tablespoons unsalted butter - 4 garlic cloves, minced - ½ cup freshly grated Parmesan cheese - 2 tablespoons fresh parsley, finely chopped - Salt and freshly ground pepper to taste - 1 teaspoon smoked paprika (optional) - Olive oil for a finishing drizzle These ingredients work together to create a dish full of flavor and texture. The baby Yukon gold potatoes are creamy and hold their shape well when smashed. Unsalted butter gives a rich base for the garlic and Parmesan. Fresh garlic adds depth, while Parmesan cheese brings a savory kick. Don't forget the parsley! It adds a pop of green and fresh flavor. You can skip the smoked paprika if you want a milder taste, but it does give an extra layer of flavor. Lastly, a drizzle of olive oil before serving adds a nice finish. With these simple ingredients, you will create a comforting side dish that is sure to impress! {{ingredient_image_2}} Start by taking 2 pounds of baby Yukon gold potatoes. Place them in a large pot. Cover them with cold water and add a pinch of salt. Bring the pot to a rolling boil. Let the potatoes cook for 15 to 20 minutes. They should be tender when pierced with a fork. This step is key to softening the potatoes for smashing. While the potatoes boil, melt 4 tablespoons of unsalted butter in a small saucepan over low heat. Once the butter is melted, add 4 minced garlic cloves. Stir the garlic for about 2 to 3 minutes. You want the garlic to smell great but not brown. Browned garlic can taste bitter, and we want sweet flavor here. After boiling, drain the potatoes well. Place them on a baking sheet lined with parchment paper. Use a fork or potato masher to smash each potato gently. You want them flattened but still whole. This creates a larger surface area for flavor. Drizzle the garlic butter over the smashed potatoes. Make sure each potato is well coated. Next, sprinkle ½ cup of freshly grated Parmesan cheese on top. Add salt, ground pepper, and 1 teaspoon of smoked paprika if you like. This gives the potatoes a nice flavor boost. Now, preheat your oven to 425°F (220°C). Once the oven is hot, put the baking sheet in. Roast the potatoes for about 20 to 25 minutes. You want the edges to turn crispy and the cheese to melt and brown. The smell will fill the kitchen and make you hungry! To make great garlic butter, start with unsalted butter. Melt it slowly over low heat. This keeps the flavor fresh. Add minced garlic and stir for 2-3 minutes. You want the garlic to smell good, not brown. Brown garlic can taste bitter. If you like extra flavor, you can add herbs like thyme or rosemary. Crispy potatoes are a must! After boiling, smash the potatoes gently. Leave them intact but flat. This gives more surface area to crisp up. Drizzle the garlic butter on top and add Parmesan cheese. Bake them at 425°F (220°C) for 20-25 minutes. You want golden edges and melted cheese. A little olive oil at the end can boost the crispiness even more. Feel free to mix up the seasonings. Smoked paprika adds a nice touch. You can also use garlic powder for extra flavor. If you love heat, add some red pepper flakes. Fresh herbs like chives or dill work well too. Experiment with these options to find your favorite blend! Pro Tips Choose the Right Potatoes: Baby Yukon gold potatoes are ideal for this recipe due to their creamy texture and buttery flavor, but feel free to experiment with other varieties like red potatoes for a different taste. Don't Overcook: Keep an eye on the potatoes while boiling; overcooked potatoes can become waterlogged, making them less crispy when roasted. Enhance Flavor with Herbs: Besides parsley, consider adding fresh thyme or rosemary to the garlic butter for an additional layer of flavor that complements the Parmesan beautifully. Perfect Crispy Finish: For extra crispiness, broil the potatoes for the last 2-3 minutes of baking, but watch them closely to prevent burning. {{image_4}} You can easily boost the cheese flavor! Try adding different cheeses like cheddar or feta. Mixing in cream cheese will make them extra creamy. Just sprinkle the cheese on top before baking. It melts beautifully and adds a rich taste. You can also fold in shredded cheese for a gooey inside. If you like heat, add some chili flakes to the garlic butter. This will give your potatoes a spicy kick. You can also swap the regular garlic with roasted garlic for a sweeter flavor. If you want more spice, try adding some diced jalapeños. Just be careful with the amount; you want a nice balance. Herbs can elevate the flavors of your smashed potatoes. Fresh thyme or rosemary adds a lovely aroma. Just chop them finely and mix them into the garlic butter. Basil or chives also work well. Adding herbs not only enhances flavor, but they also add color to your dish. Don't hesitate to get creative with your herb choices! You can store leftover garlic butter Parmesan smashed potatoes in an airtight container. Keep them in the fridge for up to three days. Make sure they cool down before sealing. This helps to keep their texture and flavor intact. To reheat, you can use an oven or a microwave. For the oven: Preheat it to 350°F (175°C). Place the potatoes on a baking sheet and warm them for about 10-15 minutes. This method helps retain their crispiness. If you use a microwave, heat them for 1-2 minutes. Check that they are hot all the way through. You can freeze these smashed potatoes, but they may lose some texture. Allow them to cool completely before freezing. Place them in a freezer-safe container or bag. They can stay fresh for up to three months. When ready to eat, thaw them in the fridge overnight before reheating. Yes, you can use other potatoes. I love baby red or russet potatoes. They both have great flavors and textures. Just remember to adjust cooking times. If you use larger potatoes, you may need to boil them longer. To make garlic butter parmesan smashed potatoes dairy-free, use a dairy-free butter. You can find many good options at stores. For cheese, try a dairy-free Parmesan or nutritional yeast. This adds a nice flavor without the dairy. These potatoes pair well with many dishes. Try serving them with grilled chicken or steak. They also go great with roasted vegetables or fish. You can even add a fresh salad for a complete meal. Enjoy! In this post, we explored making garlic butter Parmesan smashed potatoes. We covered the ingredients needed and the steps to cook them. I shared tips to get that crispy texture and ideas for fun variations. Don't forget storage tips to keep your leftovers fresh. These potatoes offer a tasty side that can fit any meal. Enjoy the process of making them your own!

Garlic Butter Parmesan Smashed Potatoes Delight

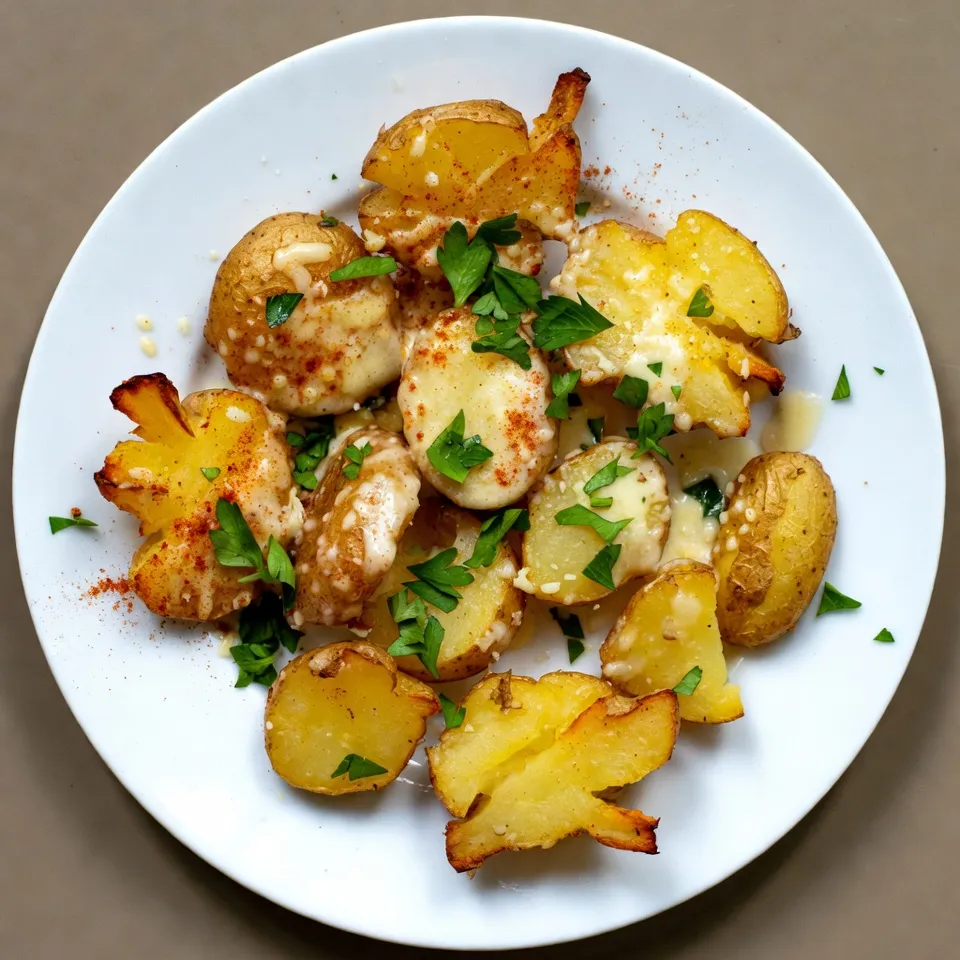
Get ready to elevate your dinner game with my Garlic Butter Parmesan Smashed Potatoes! These creamy, crispy potatoes burst with

- 2 cups rolled oats - 1 cup almond butter (or substitute with peanut butter) - 1/2 cup honey (or use maple syrup for a vegan alternative) These main ingredients form the base of our bars. Rolled oats give them a hearty texture and keep you full. Almond butter is creamy and rich. You can swap it for peanut butter if you prefer that flavor. Honey adds sweetness and helps bind everything together. If you want a vegan option, maple syrup works just as well. - 1/2 cup chopped nuts (such as almonds, walnuts, or pecans) - 1/4 cup chia seeds (optional) - 1/2 cup mini chocolate chips Optional add-ins let you customize your bars. Chopped nuts add crunch and healthy fats. You can use any nuts you love. Chia seeds are great for extra nutrients. Mini chocolate chips make the bars even more delicious. You can add as many as you like. - 1 teaspoon vanilla extract - A pinch of salt Flavor enhancers are key to making your bars pop. Vanilla extract adds depth and warmth. A little salt balances the sweetness and brings out flavors. Don’t skip these ingredients; they make a big difference. - Prepare and line the baking dish: Start by taking an 8x8 inch baking dish. Line it with parchment paper, letting some paper hang over the sides. This helps lift the bars out later. - Mix the wet ingredients: In a small saucepan, combine 1 cup of almond butter and 1/2 cup of honey (or maple syrup). Heat it on low, stirring until it melts and becomes smooth. Once smooth, take it off the heat and mix in 1 teaspoon of vanilla extract and a pinch of salt. - Combine dry ingredients: In a large bowl, mix 2 cups of rolled oats, 1/2 cup of chopped nuts, and 1/4 cup of chia seeds if you like. - Fold in chocolate chips: Gently fold in 1/2 cup of mini chocolate chips. This way, they spread evenly without melting too much. - Transfer mixture to the pan: Pour the mixture into your lined baking dish. Use a spatula or your hands to press it down firmly. This helps the bars stick together. - Chill and cut into bars: Put the dish in the fridge for at least 1 hour. Once firm, lift the granola out using the parchment paper. Place it on a cutting board and cut it into bars or squares. - Store the bars in an airtight container. - Keep them in a cool, dry place. - For longer storage, use the fridge. - To prevent chewiness, avoid high humidity when storing. - Swap honey for agave nectar as a sweetener. - Use sunflower seed butter for a nut-free option. - Substitute oats with puffed rice for a lighter texture. - Add dried fruits like cranberries or raisins for extra sweetness. - Serve bars on a colorful plate for a fun look. - Drizzle melted chocolate over the top for extra flair. - Pair these bars with fresh fruit or yogurt. - Enjoy them with a glass of milk for a tasty snack. {{image_4}} You can easily change the flavor of your granola bars. Adding dried fruits like cranberries or apricots gives a sweet touch. You can also mix in spices like cinnamon or nutmeg for warmth. If you want nut-free bars, simply skip the nuts. Instead, you can add more seeds or coconut flakes. This keeps the crunch while making it safe for those with nut allergies. If you need gluten-free options, use certified gluten-free oats. They will keep your bars tasty and safe. For vegan or paleo diets, switch honey with maple syrup. Almond butter can also be replaced with sunflower seed butter. These swaps keep the bars delicious and adaptable to your needs. Try using seasonal ingredients to give your bars a twist. In fall, add pumpkin spice for a cozy flavor. During winter, top your bars with dark chocolate or crushed peppermint for a festive vibe. You can even add colorful sprinkles for birthdays or special events. These small changes can make your no-bake chocolate chip granola bars exciting all year long. To keep your no-bake chocolate chip granola bars fresh, store them in airtight containers. This helps prevent them from drying out. Ziplock bags are also a good option, but they may not keep the bars as fresh. The best shelf life for these bars is about one week at room temperature. If you want them to last longer, consider freezing. To freeze your granola bars, first cut them into individual pieces. Wrap each bar in plastic wrap or foil. Place the wrapped bars in a freezer-safe container or bag. This method keeps them fresh for about three months. When you are ready to eat them, take out the bars and let them defrost in the fridge. For the best texture, avoid microwaving them to defrost. You can tell if your bars have gone bad by checking for any off smells or changes in texture. If they feel overly hard or crumbly, it’s a sign they may not be good. Stale bars can still be used in fun ways! Try crumbling them over yogurt or ice cream for a tasty dessert. Yes, you can! If you want to skip nuts, use sunflower seed butter instead of almond butter. It gives a similar texture and flavor. You can also try soy nut butter as another nut-free option. Both work well in keeping the bars tasty and chewy. Just remember to check labels to ensure no nuts are in your products. To keep your granola bars from being too sticky, make sure to measure your honey or syrup carefully. Too much can cause stickiness. Another tip is to chill the mixture longer before cutting. Pressing the mix down firmly in the pan helps too. If they still stick, try lightly dusting the knife with a bit of flour or cooking spray. You can use quick oats, but the texture will change. Quick oats are finer and can make the bars softer. Rolled oats give a chewier bite, which I prefer. If you use quick oats, watch the cooking time. They tend to absorb moisture quicker, so you may need less liquid in your mix. You learned how to make no-bake chocolate chip granola bars with simple ingredients. We covered main ingredients, optional add-ins, and tasty variations. Customizing these bars ensures they fit your taste and dietary needs. Storing them correctly will keep them fresh, too. Enjoy these bars as snacks or dessert. They are easy to make and fun to share. You can create many flavors to keep things exciting. Get creative with your choices and have fun in the kitchen!

No-Bake Chocolate Chip Granola Bars Easy Recipe

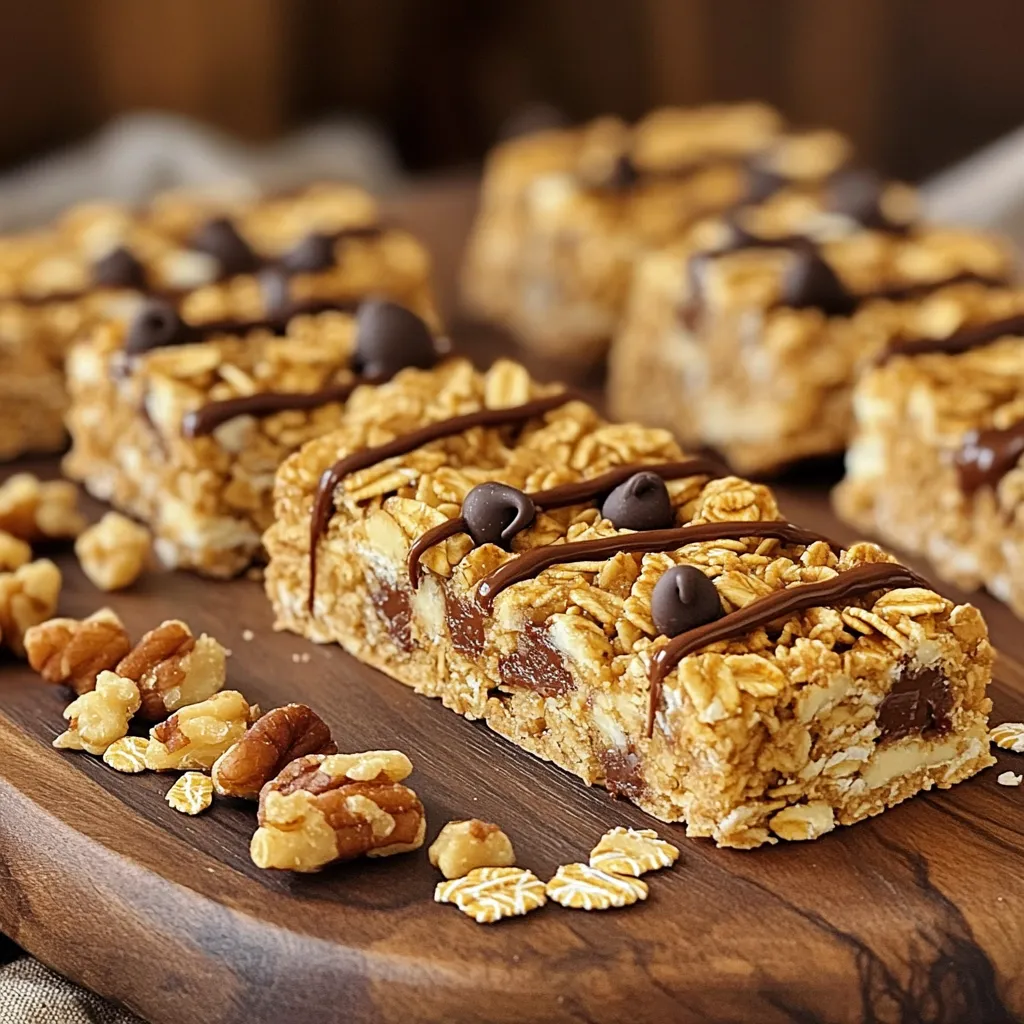
Looking for a quick and easy snack? These No-Bake Chocolate Chip Granola Bars are perfect for you! Packed with wholesome

- 4 medium zucchini - 3 tablespoons high-quality olive oil - 4 cloves fresh garlic - 1/2 teaspoon red pepper flakes - 1/2 cup freshly grated Parmesan cheese - Sea salt and black pepper - Fresh parsley for garnish - Lemon wedges for serving For Minute Garlic Parmesan Zucchini Noodles, fresh ingredients shine. Use medium zucchini for the best texture. Spiralizing gives you those fun, noodle-like strands. If you don’t have a spiralizer, a vegetable peeler or knife does the trick, too. High-quality olive oil is key. It brings rich flavor and helps cook the garlic perfectly. Speaking of garlic, fresh cloves are a must. They add an amazing aroma and taste. Red pepper flakes add a nice kick. They are optional, so you can leave them out if you prefer less heat. Freshly grated Parmesan cheese gives a cheesy, creamy finish. Make sure it's fresh for the best melt. Sea salt and black pepper enhance every bite. They bring out the flavors of the zucchini and garlic. Fresh parsley adds color and a pop of freshness. Finally, lemon wedges are great for squeezing on top just before eating. They brighten the dish and balance the richness of the cheese. To start, spiralize the zucchini using a spiralizer. It’s simple and fun! Just place the zucchini in the spiralizer and turn the handle. You’ll get long, noodle-like strands, known as zoodles. If you don’t have a spiralizer, no worries. Use a vegetable peeler to make thin ribbons. You can also slice the zucchini into thin strips with a knife. Set the zoodles aside for now. Next, heat the olive oil in a large skillet. Set the heat to medium. Wait until the oil shimmers but does not smoke. This means it’s hot enough. Now, add the minced garlic. If you like a little heat, toss in the red pepper flakes too. Sauté this mixture for about one minute. Stir often to keep the garlic from burning. You want it fragrant and golden, not browned. Once the garlic is ready, add the spiralized zucchini to the skillet. Toss it gently in the garlic oil. Cook for about two to three minutes. You want the zoodles tender but still a little crunchy. This gives them great texture. After that, season with sea salt and freshly cracked black pepper. Remove the skillet from heat. Gradually stir in the freshly grated Parmesan cheese. Mix until it melts slightly from the warmth of the zoodles. Finally, transfer your zoodles to plates. Garnish with chopped fresh parsley for color. Serve with lemon wedges for a zesty kick. Squeeze the lemon over your dish right before eating for a burst of flavor! To get great zoodles, cook them just right. Aim for a tender yet crunchy bite. Overcooking makes them soggy. Stir them gently in the hot oil. You only need about 2-3 minutes of cooking. If they start to release too much water, remove them from heat quickly. This keeps your zoodles crisp. Adding more spices can make your dish pop. Try a pinch of Italian seasoning or a dash of onion powder. Fresh herbs like basil or thyme also work well. The type of Parmesan you choose matters too. Aged Parmesan gives a stronger flavor. Use freshly grated cheese for the best melt and taste. Garnishing with fresh parsley adds a nice touch. The green color brightens up your dish. Serve with lemon wedges on the side for a zesty kick. When serving, squeeze lemon juice over the zoodles. This brightens the flavors and balances the richness of the cheese. {{image_4}} You can easily change up the flavor of your zoodles. Adding vegetables like cherry tomatoes brings sweetness. Spinach adds a nice green touch and a bit of iron. You can also add protein. Grilled chicken gives a hearty bite. Shrimp adds a light, tasty option. These add-ins make your dish more fun and filling. Want to mix it up? Try using different cheeses. Feta or goat cheese can give a tangy kick. You can also experiment with oils. Instead of olive oil, try avocado oil for a different taste. Each oil brings its own unique flavor. This keeps your dish exciting and fresh. If you're looking for a vegan or dairy-free meal, you're in luck! Use nutritional yeast instead of Parmesan cheese. It gives a cheesy flavor without dairy. For oil, swap out olive oil with coconut oil. This adds a hint of sweetness. These swaps keep your zoodles tasty and accessible for everyone. To keep your zoodles fresh, place them in an airtight container. Make sure they are cool before sealing. Store in the fridge for up to three days. After that, they may lose flavor and texture. Freezing can help if you have extra zoodles. Start by blanching them in boiling water for one minute. This step keeps their color and crunch. After blanching, cool them in ice water. Drain well and pack them in freezer bags. Try to remove as much air as possible. They can last up to three months in the freezer. To use frozen zoodles, thaw them in the fridge overnight. You can also microwave them on low for a few minutes. Avoid refreezing once they have thawed. When you want to enjoy your zoodles again, heat them gently. Use a skillet over medium heat. Add a splash of olive oil to prevent sticking. Stir them for about two to three minutes. This method helps keep their texture. You can also microwave them for 30 seconds to a minute. If you use the microwave, check often to avoid overcooking. Enjoy your meal hot and fresh! If you do not have a spiralizer, don’t worry! You can still make zoodles. Use a vegetable peeler to create thin, flat ribbons of zucchini. You can also use a sharp knife to cut the zucchini into thin strips. Both methods work well and give you a fun noodle shape. Yes, you can eat raw zucchini noodles! They are low in calories and full of vitamins. Raw zoodles keep their crunch and fresh taste. You can serve them with dips or salads. A squeeze of lemon juice can add nice flavor too! Garlic Parmesan zucchini noodles pair well with many dishes. Here are some ideas: - Grilled chicken for protein. - Shrimp sautéed in garlic for a seafood twist. - A light salad for added crunch. - Crusty bread to soak up extra sauce. These pairings make your meal balanced and tasty! You’ve learned how to make delicious garlic Parmesan zucchini noodles using fresh ingredients. From spiralizing the zucchini to cooking zoodles just right, each step is key. I shared tips to enhance flavor and variations to keep it exciting. Don’t forget how to store your leftovers or reheat them for next time. Keep exploring and enjoying this healthy dish. It’s simple, tasty, and full of fresh flavors. Try making it your way, and share your favorite tips!

Minute Garlic Parmesan Zucchini Noodles Flavor Boost

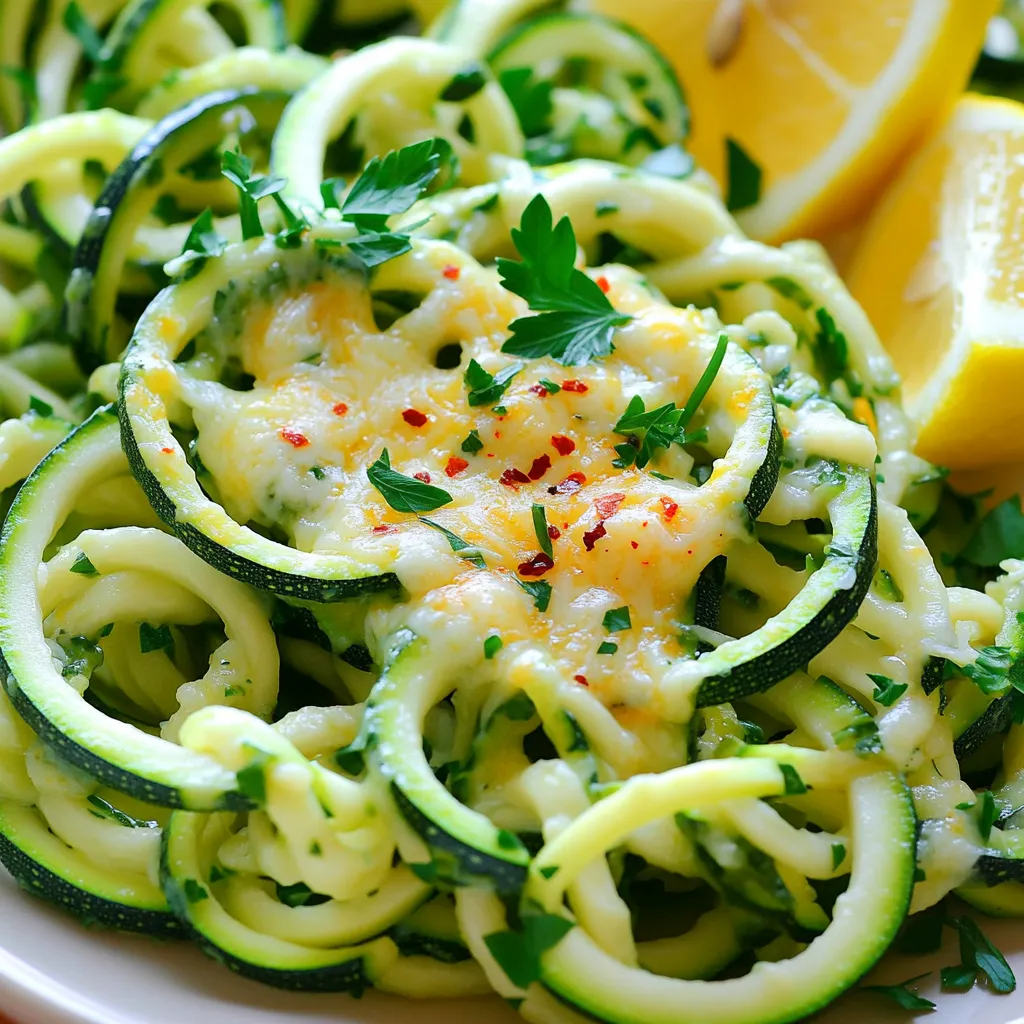
If you’re craving a quick, tasty meal, these Minute Garlic Parmesan Zucchini Noodles are perfect! With fresh zucchini, vibrant garlic,

- 4 boneless, skinless chicken breasts - 1 ripe mango, pureed until smooth - 1/4 cup freshly squeezed lime juice - 2 tablespoons honey - 1 tablespoon extra-virgin olive oil - 2 cloves of garlic, finely minced - 1 teaspoon ground cumin - 1/2 teaspoon chili powder - Salt and freshly cracked black pepper to taste - Fresh cilantro, chopped (for vibrant garnish) Gather these simple ingredients to make a delightful meal. The chicken breasts are the star. They are tender and juicy. The ripe mango adds sweetness. Lime juice gives it a tangy taste. Honey adds a hint of caramel. Extra-virgin olive oil keeps the chicken moist. For seasoning, garlic packs a punch. Ground cumin brings warmth. Chili powder adds just a bit of heat. Adjust the salt and pepper to your liking. This mix makes the chicken flavorful and bright. Don’t forget the garnish! Fresh cilantro adds color and fresh flavor. It makes the dish pop on the plate. With these ingredients, you can create a delicious and easy meal that everyone will love. {{ingredient_image_2}} To make the marinade, start by mixing the following ingredients in a medium bowl: - 1 ripe mango, pureed until smooth - 1/4 cup freshly squeezed lime juice - 2 tablespoons honey - 1 tablespoon extra-virgin olive oil - 2 cloves of garlic, finely minced - 1 teaspoon ground cumin - 1/2 teaspoon chili powder - Salt and freshly cracked black pepper to taste Whisk these together until smooth. The mango gives a sweet taste, and the lime adds zest. This mix is key for flavor. Next, take 4 boneless, skinless chicken breasts and place them in a large resealable bag. Pour the marinade over the chicken. Make sure each piece is well-coated. Seal the bag tightly. You can also use a shallow glass dish. Refrigerate the chicken for at least 1 hour. For best results, let it sit for up to 4 hours. This time helps the chicken absorb all the flavors. When you’re ready to cook, preheat your grill to medium-high heat, around 375°F to 400°F. Remove the chicken from the marinade. Let any excess drip off. Discard the leftover marinade for safety. Place the chicken on the grill. Cook for 6 to 7 minutes on each side. Use a meat thermometer to ensure it reaches an internal temperature of 165°F. The chicken should have nice grill marks and look golden. Once cooked, let the chicken rest for about 5 minutes on a cutting board. This step keeps the juices in the chicken, making it moist. After resting, slice the chicken into strips. Add freshly chopped cilantro on top for a burst of flavor and color. To get the best flavor, marinate the chicken for at least 1 hour. If you have time, let it sit for up to 4 hours. This extra time helps the chicken absorb the mango and lime flavors. For more taste, consider adding a splash of soy sauce or a bit of grated ginger. Both can enhance the flavor profile and make it even more delicious. For even cooking, keep the grill at a steady medium-high heat, around 375°F to 400°F. Use a meat thermometer to check the chicken's internal temperature, which should be 165°F. To get those perfect grill marks, place the chicken on the grill and avoid moving it for 6 to 7 minutes on each side. This allows the grill to do its magic. To make your dish pop, slice the grilled chicken and arrange it on a big, colorful platter. Add lime wedges and mango slices around it. This not only looks good but also adds extra flavor. For sides, consider serving jasmine rice or a fresh salad. These options balance the sweetness of the mango and lime and make your meal complete. Pro Tips Marination Time: The longer you marinate the chicken, the more flavorful it will be. Aim for at least 4 hours for the best results. Grill Temperature: Ensure your grill is preheated to the right temperature (375°F to 400°F) to achieve perfect grill marks and a juicy interior. Resting Period: Let the chicken rest for 5 minutes after grilling to allow the juices to redistribute, ensuring a tender bite. Serving Suggestions: Pair the grilled chicken with a fresh salad or serve it with coconut rice for a tropical twist. {{image_4}} You can change the taste of your mango lime grilled chicken by adding spices. Smoked paprika gives a nice smoky flavor. Coriander adds a fresh twist. You can also swap the mango puree with other fruit purees. Pineapple adds sweetness, while papaya offers a creamy texture. Experiment with these options to find your favorite taste! If you want a different way to cook, try oven-baking. Preheat your oven to 400°F (200°C). Place the marinated chicken on a baking sheet. Bake for 20-25 minutes, flipping halfway through. This method keeps the chicken juicy and tender. You can also sauté the chicken in a skillet. Heat a tablespoon of oil over medium heat. Cook the chicken for 6-7 minutes per side, until golden brown. For gluten-free options, check your honey and spices. Most are naturally gluten-free. You can also make this dish low-calorie. Use less honey or substitute with a low-calorie sweetener. If you have allergies, be careful with spices. Always read labels and adjust based on your needs. Make the recipe safe and tasty for everyone! To keep your leftover Mango Lime Grilled Chicken fresh, store it in an airtight container. Make sure it cools down to room temperature first. Place it in the fridge and eat it within three days for the best taste. If you have leftover marinade, discard it. Never reuse marinade that has touched raw chicken. If you want to save some grilled chicken for later, freezing is a good option. Wrap each chicken piece tightly in plastic wrap, then place them in a freezer-safe bag. This prevents freezer burn. You can freeze the chicken for up to three months. For the marinade, you can freeze it before using. Just make sure to thaw it in the fridge overnight before marinating new chicken. To reheat your grilled chicken and keep it moist, use the oven. Preheat it to 350°F (175°C). Place the chicken in a baking dish and cover it with foil. Bake for about 15 minutes. You can also use the microwave, but be careful. Heat it in short bursts, checking often so it doesn’t dry out. Enjoy your flavorful chicken warm! You can marinate the chicken for 1 to 4 hours. One hour gives a nice flavor. If you have time, four hours offers the best taste. The longer marination helps the chicken soak in all the mango and lime goodness. Just remember to not exceed four hours. Beyond that, the chicken can start to become too soft. Yes, you can use this mango lime marinade on other meats. It works well with pork and shrimp. The sweet and tangy flavor enhances these proteins beautifully. If you're using pork, choose tender cuts like pork loin. For shrimp, peel and devein them before marinating. Just adjust the marination time. Shrimp only need about 30 minutes, while pork can go for 2 to 4 hours. Many sides pair nicely with this dish. Here are some popular choices: - Rice: Coconut or jasmine rice adds a nice touch. - Salad: A fresh green salad with lime vinaigrette complements the chicken well. - Vegetables: Grilled veggies like zucchini or bell peppers also work great. - Beans: Black beans or refried beans add a hearty element. - Corn: Corn on the cob or corn salad offers a sweet crunch. Feel free to mix and match! These sides will make your meal colorful and tasty. This blog post outlined how to create a flavorful Mango Lime Grilled Chicken. We covered the key ingredients, simple marinade steps, and grilling techniques. You learned about variations and how to store your leftovers. In conclusion, this dish is both tasty and easy to make. Use the tips for perfect grilling and feel free to get creative. You can enjoy this meal again and again while impressing friends and family. Happy cooking!

Mango Lime Grilled Chicken Delightful and Easy Meal

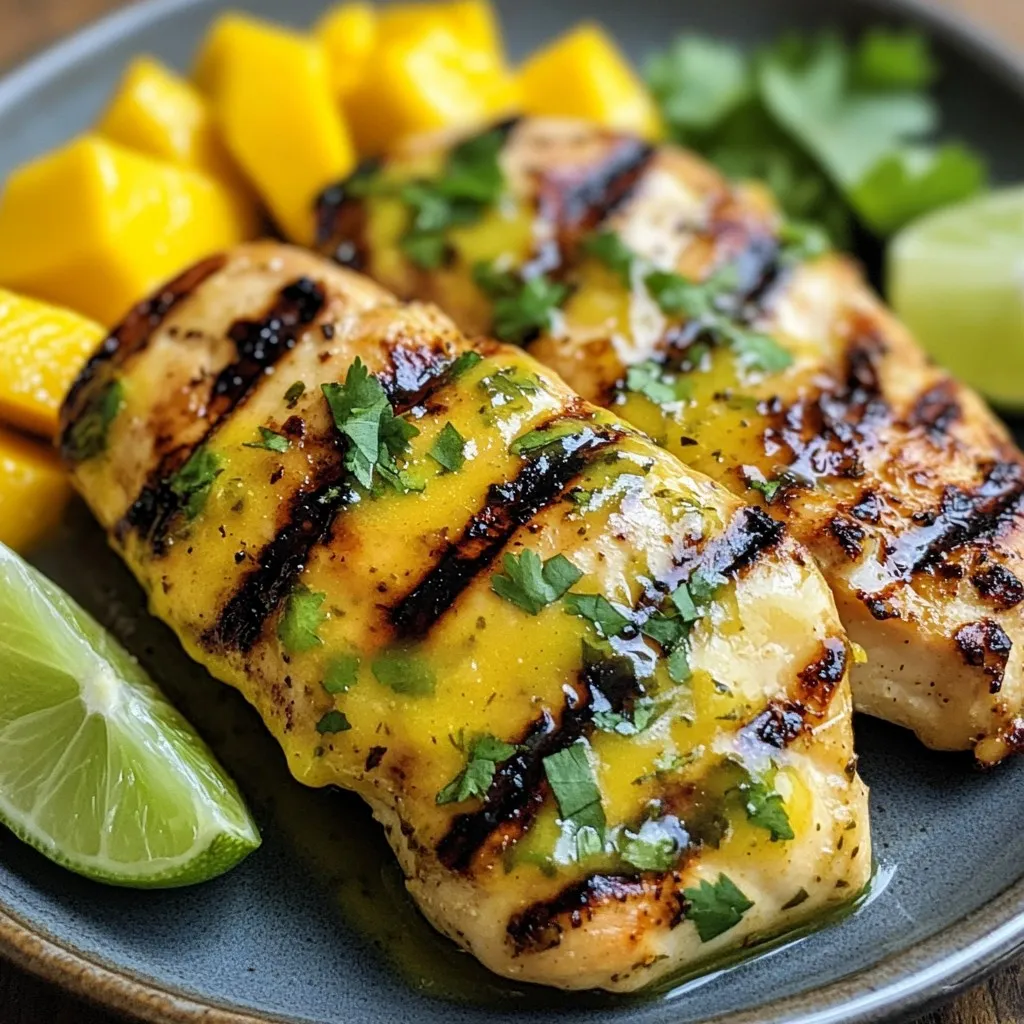
Craving a dish that bursts with tropical flavor? Look no further than this Mango Lime Grilled Chicken. It’s an easy

Older posts
Newer posts
← Previous Page1 … Page8 Page9 Page10 … Page112 Next →

dsad

© 2025 spoonfulsavory • Built with GeneratePress

Our Policies

  • Copyright Policy
  • Cookie Policy
  • GDPR Policy
  • Privacy Policy
  • Disclaimer
  • Terms Of Use

More Information

  • Home
  • About
  • Contact
  • Appetizers
  • Dessert
  • Dinner
  • Drinks
©2025, spoonfulsavory About Back To Top