Skip to content
DisclaimerTerms Of UseGDPR PolicyCookie Policy

spoonfulsavory

  • Home
  • Drinks
  • Appetizers
  • Dinner
  • Dessert
  • About
  • Contact
  • Privacy Policy
DisclaimerTerms Of UseGDPR PolicyCookie Policy

Sarah

To make easy vegetable fried rice, you need just a few key items: - 2 cups cooked jasmine rice (preferably leftover and chilled) - 1 cup mixed vegetables (like diced carrots, peas, and corn) - 1 bell pepper (any color), diced into bite-sized pieces - 1 small onion, finely chopped - 2 cloves garlic, minced - 2 tablespoons soy sauce (adjust to taste) - 1 tablespoon sesame oil (for a nutty flavor) - 1 tablespoon vegetable oil (for frying) - 2 green onions, sliced thinly for garnish - 2 eggs (optional, for added protein) - Salt and pepper to taste - Sesame seeds for garnish (optional, for crunch) You can mix and match veggies based on what you love. Here are some great combos: - Broccoli and snap peas for a crunchy bite - Zucchini and mushrooms for a rich flavor - Spinach and bell peppers to add color and nutrition - Cauliflower and carrots for a hearty mix Feel free to use what you have on hand. Fresh or frozen veggies both work well. To boost the flavor and health of your dish, consider these add-ins: - Tofu or chicken for protein - Sesame seeds for added crunch - Chili flakes for a spicy kick - Ginger for a fresh zing These options make your fried rice even better. Just add them when you stir-fry! For the full recipe, check the section above. Start with your rice. Use 2 cups of cooked jasmine rice. Chilling it overnight is best. This helps keep it firm. Next, chop your vegetables. You want a mix of diced carrots, peas, and corn. Dice a bell pepper and finely chop a small onion. Mince 2 cloves of garlic. Having everything ready makes cooking quick and easy. Heat a large skillet or wok over medium-high heat. Add 1 tablespoon of vegetable oil. Wait until the oil shimmers. This shows it's hot enough. Toss in the chopped onion and sauté for about 2-3 minutes. Stir until the onion is soft and slightly clear. Next, add the minced garlic and mixed vegetables. Stir-fry this for 3-4 minutes. You want the veggies to be tender but bright in color. Now, add the diced bell pepper. Stir-fry for 2 more minutes. The bell pepper should still have a slight crunch. If using eggs, push the veggie mix to one side of the pan. Crack 2 eggs into the empty side and scramble them. Once cooked, mix them into the veggies. Fold in your chilled rice, breaking apart any clumps. Drizzle 2 tablespoons of soy sauce and 1 tablespoon of sesame oil over the rice. Stir well, so all the rice soaks up the flavors. Finally, season with salt and pepper to your liking. Remove from heat and add sliced green onions on top. Optional: sprinkle sesame seeds for crunch. Enjoy your colorful veggie fried rice! Using leftover rice is key for a great fried rice. Cold rice holds its shape better when you cook it. If you use fresh rice, it might turn mushy. Aim for rice that’s been chilled for at least a few hours. You can even freeze leftover rice for future use. Just make sure to thaw it out before cooking. Choosing fresh vegetables makes a big difference in taste. Look for bright colors and firm textures. For carrots, select ones that are crisp and smooth. Peas should be vibrant green and plump. Bell peppers should be shiny and free of blemishes. Fresh vegetables add crunch and flavor to your dish. You can mix and match based on what you like or have on hand. Seasonings can take your fried rice to the next level. Soy sauce adds saltiness and umami. Sesame oil brings a nutty flavor. For extra zest, consider adding a squeeze of lime. Garlic and onions are essential for a flavorful base. You might also add ginger for a hint of spice. Don’t forget to taste as you go, adjusting the seasonings to suit your palate. For more details, check the Full Recipe. {{image_4}} You can easily make this dish vegetarian or vegan. For vegetarian fried rice, simply add eggs. They provide protein and richness. If you want a vegan version, skip the eggs. Use tofu instead for a great protein boost. Tofu absorbs flavors well when cooked. You can also add more vegetables like spinach or mushrooms to keep it hearty and satisfying. If you need a gluten-free option, choose tamari instead of soy sauce. Tamari has a similar taste but is made without wheat. Also, ensure your vegetable broth, if used, is gluten-free. Quinoa can replace rice if you want a twist. Quinoa adds a nutty flavor and extra protein. Adding protein can make your fried rice more filling. Tofu is a great plant-based choice. Just cube it and stir-fry until golden. Chicken is another option; cook it before adding the vegetables. Shrimp cooks quickly, so add it after the veggies. Make sure to adjust the cooking time to keep everything tender and flavorful. For the full recipe, check out the section above. Enjoy experimenting with these variations! To keep leftover fried rice fresh, transfer it to an airtight container. Make sure it cools to room temperature first. This helps prevent moisture buildup, which can lead to sogginess. Store it in the fridge for up to three days. If you see any discoloration or an odd smell, it's best to toss it. When reheating fried rice, your goal is to bring back its original texture. Start by adding a splash of water or broth to your skillet. Heat it over medium heat, stirring often. This keeps the rice moist and fluffy. If you use a microwave, cover the bowl with a damp paper towel. Heat in short bursts to avoid overcooking. Freezing fried rice is a great way to save it for later. To do this, spread the rice in a single layer on a baking sheet. Freeze for about an hour until firm. Then, transfer it to a freezer-safe bag or container. It can last up to three months in the freezer. When you're ready to eat, thaw it in the fridge overnight before reheating. Enjoy your colorful veggie fried rice anytime! For the full recipe, check out the details above. No, it’s best to use cooked rice. Fresh rice is too moist. It clumps together and won’t fry well. Leftover rice has dried a bit in the fridge. This makes it perfect for frying. Jasmine rice is my favorite. It has a nice aroma and fluffy texture. Long-grain rice works well too. Avoid sticky rice like sushi rice. It can make your fried rice mushy. You can use other sauces for taste. Try teriyaki or coconut aminos. They add flavor without soy. You can also use salt and pepper to season. For a twist, add lemon juice or vinegar. Start with mild spice like black pepper. For heat, add red pepper flakes. You can also use sriracha or chili sauce. Adjust the spice to fit your taste. This way, everyone can enjoy the dish. You now know how to make easy vegetable fried rice. Start with the right ingredients and use fresh veggies. Follow the steps and cooking tips to get the best flavor. Remember to store leftover fried rice properly and reheat it well. You can also explore variations like gluten-free or protein options. Use this guide to create delicious meals with simple steps. Enjoy your cooking and make fried rice your way!

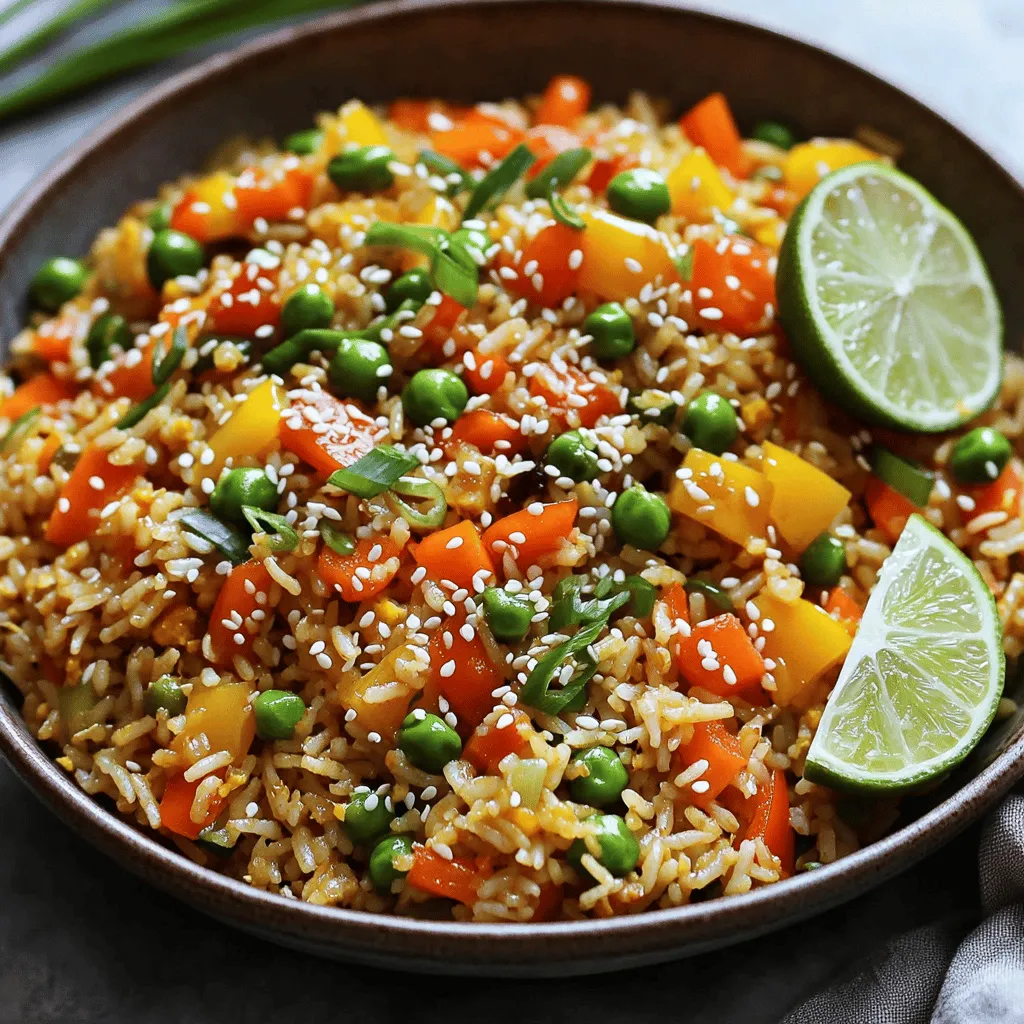
Easy Vegetable Fried Rice Quick and Flavorful Recipe

Looking for a quick and tasty meal? My Easy Vegetable Fried Rice recipe is just what you need! In just

- 2 ripe avocados - 4 slices of hearty whole-grain bread - 4 large eggs - 1 tablespoon apple cider vinegar - 1 teaspoon red pepper flakes - 1 tablespoon freshly squeezed lemon juice - Sea salt and freshly cracked black pepper to taste - A handful of fresh microgreens or peppery arugula for garnish - Extra virgin olive oil for drizzling Gathering fresh ingredients makes all the difference. I love using ripe avocados because they provide a rich, creamy base. Look for avocados that yield slightly when you press them. Whole-grain bread adds a nice texture and heartiness. The eggs must be large for poaching. They will give you the perfect runny yolk. Apple cider vinegar plays a key role as it helps the egg whites hold their shape. Don't forget the red pepper flakes! They add a delightful kick to the dish. When choosing your garnish, microgreens or arugula add a fresh touch. Lastly, a drizzle of extra virgin olive oil boosts the flavor and richness. Each ingredient plays a role in creating a delicious avocado toast with poached egg. For the full recipe, check out the details above. To toast your bread to perfection, start with hearty whole-grain slices. Place them in a toaster and select your desired crispiness. If you prefer, use a skillet. Heat the skillet over medium heat and add the bread. Flip the slices occasionally until they turn golden brown. Both methods work well, so choose what suits you best. Next, let’s prepare the avocado mixture. Take two ripe avocados and cut them in half. Remove the pit and scoop the flesh into a bowl. Use a fork to mash it. Aim for a creamy yet slightly chunky texture. To enhance the flavor, mix in one tablespoon of freshly squeezed lemon juice, one teaspoon of red pepper flakes, and a pinch of sea salt and black pepper. Taste it and adjust the seasoning as needed. Now, let’s focus on poaching the eggs. Fill a medium saucepan with about three inches of water. Bring the water to a gentle simmer over medium heat. Add one tablespoon of apple cider vinegar to help the egg whites firm up. Crack an egg into a small bowl, then gently slide it into the water. Repeat this for the other eggs. Poach them for about 3-4 minutes for a runny yolk. If you want firmer yolks, cook them a bit longer. Use a slotted spoon to remove the eggs, and place them on a paper towel to drain. Finally, it’s time to assemble your avocado toast. Spread a generous layer of the mashed avocado on each slice of toasted bread. Make sure to cover it fully. Top each slice with a poached egg. For a finishing touch, sprinkle a bit more salt and cracked pepper on top. Drizzle extra virgin olive oil for added flavor. To make it look nice, garnish with fresh microgreens or arugula. Enjoy your delicious avocado toast with poached egg! For the full recipe, check out the details above. To get the perfect yolk, timing is key. For a runny yolk, poach the eggs for about 3-4 minutes. If you like your yolks firmer, add one more minute. Keep an eye on them; the simmering water helps cook evenly. The vinegar helps the egg whites stay together, so do not skip it! You can elevate your dish with a few simple spices and toppings. Try adding a pinch of smoked paprika for depth. A sprinkle of feta cheese adds creaminess and tang. If you like heat, add more red pepper flakes. Microgreens or arugula give a fresh, peppery bite that complements the rich avocado. You can save time by preparing some parts in advance. You can mash the avocado and store it in the fridge for up to a day. Just add lemon juice to keep it fresh. Toast the bread ahead, too. When you are ready to eat, just reheat the toast and poach your eggs. This way, you can enjoy your avocado toast quickly! {{image_4}} You can change your avocado toast with fun toppings. Try adding feta cheese for a salty kick. Cherry tomatoes add sweetness and color, making your dish look great. Smoked salmon brings a rich flavor that pairs well with the creamy avocado. Each topping gives a new taste to this classic dish. Want to make your avocado toast vegan? Simply skip the egg! You can replace it with sliced radishes or a sprinkle of nutritional yeast. For a gluten-free option, choose gluten-free bread. There are many tasty ways to enjoy this dish while meeting your dietary needs. Explore flavors from around the globe. Add za'atar spice for Middle Eastern flair. Try sriracha for a spicy kick inspired by Asian cuisines. You can also sprinkle dukkah, an Egyptian nut and spice mix, for a crunchy twist. Each variation turns your avocado toast into a new dish worth savoring. To store leftover avocado toast, separate the components. Keep the bread and avocado mix apart. Place the bread in an airtight bag. This keeps it from getting soggy. Store the avocado mix in a bowl with plastic wrap. Press the wrap down on the mix to reduce air exposure. You can enjoy the toast for up to a day this way. When you're ready to eat your toast, reheat the bread. You can use a toaster or a skillet. Toast it lightly to regain crispness. Avoid the microwave, as it can make the bread chewy. If you have leftover poached eggs, warm them gently in hot water for a few minutes. This way, they stay soft and tasty. Avocados stay fresh for about 2-3 days if ripe. Store them in the fridge to slow browning. Whole-grain bread lasts about a week at room temperature. If you want it to last longer, freeze the slices. Just remember to separate them with parchment paper before freezing. This way, you can take out one slice at a time. To keep your avocado fresh, use these easy tips: - Store in the fridge: Once cut, wrap the avocado tightly in plastic wrap. This limits air exposure. - Use lemon juice: Squeeze some lemon juice on the flesh. The acid slows browning. - Keep the pit: If you have half an avocado, leave the pit in the other half. It can help reduce browning. These methods help keep your avocado looking tasty and fresh longer. If you want to skip eggs, here are some tasty options: - Tofu: Silken tofu can mimic the texture of a poached egg. Just warm it and add spices. - Chickpeas: Mash chickpeas with a bit of olive oil and spices for a protein boost. - Avocado: You can add extra avocado on top. It adds creaminess and flavor. These substitutes keep your dish tasty and filling without eggs. Yes, you can use frozen avocados! Here are some tips: - Thaw first: Place the frozen avocado in the fridge overnight or use warm water to thaw quicker. - Texture change: Frozen avocados may be softer. They still work well on toast. - Flavor: You might lose some freshness, but adding lemon juice helps brighten the taste. Using frozen avocados is a good backup when fresh ones are not available. This blog post shared a delicious avocado toast recipe with tips and variations. You learned how to toast bread, mash avocados, and poach eggs perfectly. We also addressed storage and reheating to maintain quality. Remember, cooking is all about fun and experimenting. Try different toppings and flavors to make this dish your own. Enjoy your tasty creations and share them with friends!

Delicious Avocado Toast with Poached Egg Recipe

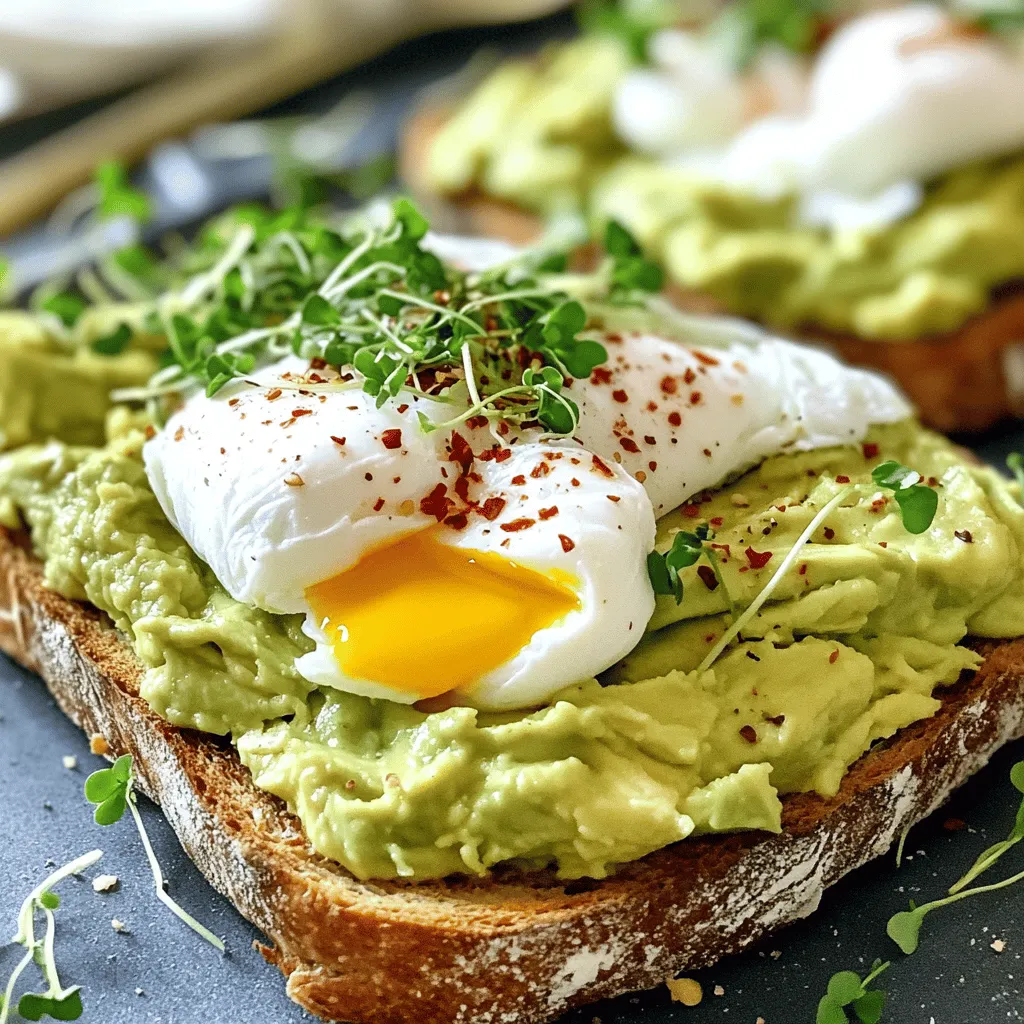
Looking for a tasty breakfast that’s both simple and satisfying? You’ve found it! My Delicious Avocado Toast with Poached Egg

To make coconut lime chicken, I use these main ingredients: - 4 boneless, skinless chicken breasts - 1 can (13.5 oz) coconut milk - 2 tablespoons freshly squeezed lime juice - Zest of 1 lime (about 1 tablespoon) - 3 cloves garlic, finely minced - 1 tablespoon fresh ginger, freshly grated - 1 teaspoon ground coriander - 1 teaspoon ground cumin - 1 teaspoon sea salt - ½ teaspoon freshly ground black pepper - 2 tablespoons extra virgin olive oil These ingredients blend well, creating a bright and tasty dish. The coconut milk adds creaminess, while lime juice gives a fresh zing. Garlic and ginger add warmth and depth to the flavor. I like to serve coconut lime chicken with some fun garnishes and sides. Consider these options: - Fresh cilantro leaves for garnish - Lime wedges for serving - Coconut rice for a tropical twist - Cucumber salad for a refreshing crunch These garnishes and sides enhance the meal and make it pop on the plate. They also add more layers of flavor. If you don't have some ingredients, here are some easy swaps you can make: - Use chicken thighs instead of breasts for a juicier bite. - Swap lime juice with lemon juice if needed. - Coconut cream can replace coconut milk for a richer taste. - You can use garlic powder and ginger powder if fresh isn’t on hand. These substitutions keep the recipe flexible and fun. You can still enjoy great flavor with what you have at home. For the complete method, check the Full Recipe. To start, gather your ingredients. You will need coconut milk, lime juice, lime zest, minced garlic, grated ginger, ground coriander, ground cumin, sea salt, and black pepper. In a large bowl, mix these items well. Whisk until everything blends smoothly. This will be your marinade. It will give the chicken great flavor. Next, take your boneless, skinless chicken breasts. Place them into the bowl with the marinade. Make sure each piece is coated well. Cover the bowl with plastic wrap. Place it in the fridge for at least 30 minutes. For the best taste, let it marinate for up to 4 hours. This time allows the chicken to soak in all those yummy flavors. Before you grill, preheat your grill or grill pan. Set it to medium-high heat about 10 minutes ahead of time. Once hot, brush the grill with olive oil. This helps prevent the chicken from sticking. After marinating, take the chicken out of the bowl. Let the extra marinade drip off. Place the chicken on the grill. Cook it for about 6-7 minutes on each side. Check the chicken with a meat thermometer. It should reach 165°F (75°C). You want it nice and golden brown. For the sauce, take the reserved marinade and pour it into a small saucepan. Bring it to a gentle boil over medium heat and then simmer for about 5 minutes. This will help thicken the sauce and enhance the flavor. After grilling, let the chicken rest for a few minutes. This keeps it juicy. Slice it into strips, drizzle with the sauce, and garnish with fresh cilantro. Enjoy your meal! You can find the Full Recipe for more details. To grill chicken perfectly, start with even thickness. Pound the breasts to make them uniform. This helps them cook evenly. Always preheat your grill. Aim for medium-high heat, around 400°F (200°C). Oil the grill grates to prevent sticking. Grill each side for 6-7 minutes. Use a meat thermometer to check for 165°F (75°C). Let the chicken rest after cooking. This keeps it juicy and tender. The marinade for Coconut Lime Chicken is key. You can boost its taste by adding fresh herbs. Try adding chopped mint or basil for a fresh twist. A dash of chili flakes can add a nice kick. If you like a sweeter profile, add a teaspoon of honey. Let the chicken marinate for at least 30 minutes, but longer is better. Up to 4 hours allows flavors to soak in deep. Presentation matters when serving Coconut Lime Chicken. Slice the chicken into strips for a beautiful look. Drizzle the thickened sauce over the top for shine. Garnish with fresh cilantro leaves for color. Serve on a vibrant platter to catch the eye. Pair with lime wedges for a zesty touch. Add coconut rice or a fresh salad for a complete meal. This dish not only tastes great but looks stunning too! {{image_4}} To add some heat, mix in red pepper flakes or chopped jalapeños. These additions give the dish a spicy kick. Start with half a teaspoon of red pepper flakes. Taste and adjust as you go. This way, you can control the heat to your liking. You can also make this dish in the oven. After marinating the chicken, preheat the oven to 400°F (200°C). Place the chicken in a baking dish and pour the marinade over it. Bake for 25-30 minutes. Make sure the chicken reaches 165°F (75°C) inside. This method keeps it juicy and tender. For a plant-based option, use tofu or tempeh. Press the tofu to remove excess water. Then, cut it into cubes or slices. Marinate as you would the chicken. Grill or bake until golden brown. This way, you still enjoy the great flavors of coconut and lime. You can also serve it over quinoa or rice for a complete meal. You can find the Full Recipe for more detailed steps. After you enjoy your Coconut Lime Chicken, store leftovers right away. Place the chicken in an airtight container. This keeps it fresh and safe. Make sure to cool it to room temperature first. You can store it in the fridge for up to three days. If you want to keep it longer, consider freezing it. When you’re ready to enjoy the leftovers, reheating is easy. You can use the oven or microwave. For the oven, preheat it to 350°F (175°C). Place the chicken in a baking dish and cover it with foil. Heat for about 15-20 minutes until warm. In the microwave, heat on medium power for 2-3 minutes. Check it often to avoid overcooking. If you want to freeze Coconut Lime Chicken, it’s simple. Wrap it tightly in plastic wrap, then place it in a freezer bag. Remove as much air as you can. This helps prevent freezer burn. You can freeze it for up to three months. When you’re ready to eat, thaw it overnight in the fridge. Then, reheat as described above. Enjoy the fresh flavors later with ease! To make Coconut Lime Chicken gluten-free, ensure all your ingredients are gluten-free. Use gluten-free soy sauce if you want to add a salty flavor. The coconut milk and spices are naturally gluten-free, so they work well. Always check the labels on your ingredients to confirm. This way, everyone can enjoy this tasty dish! Yes, you can use chicken thighs instead of breasts. Thighs have more fat, which makes them juicy. They also have a rich flavor that pairs well with the coconut and lime. Just adjust the cooking time since thighs may take a bit longer to cook through. Aim for an internal temperature of 165°F (75°C) to ensure they are safe to eat. Coconut Lime Chicken goes well with many sides. Here are some great options: - Coconut rice for a tropical vibe - Fresh cucumber salad for crunch - Grilled vegetables for color - Quinoa for a healthy boost - A light mango salsa for sweetness These pairings will enhance your meal and make it feel special. For the full recipe, check out the earlier sections! This blog post covered the essentials for making Coconut Lime Chicken. We explored main ingredients, side dishes, and tasty variations. I shared tips for marinating, grilling, and storing your chicken. You can easily adapt recipes for gluten-free or vegetarian diets. Enjoying Coconut Lime Chicken is simple and fun. Remember, with the right ingredients and steps, your dish will shine at any meal. Keep experimenting with flavors to find your perfect taste. Now, let’s get cooking!

Coconut Lime Chicken Flavorful and Simple Recipe

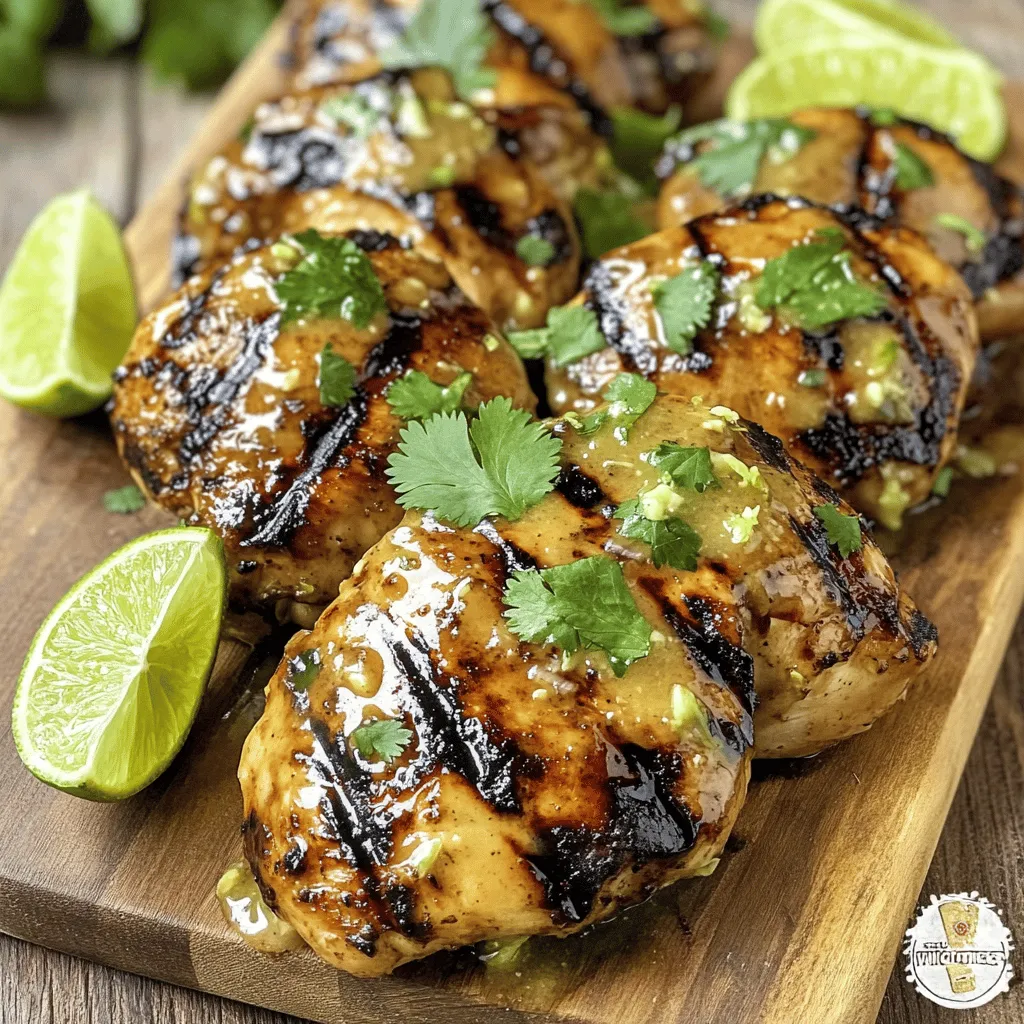
Looking for a tasty dish that feels like a mini vacation? You’ve found it! This Coconut Lime Chicken recipe is

To make this delicious chocolate chip cookie dough dip, you need a few simple ingredients. Each one brings a special taste or texture. This dip is perfect for sharing. Here is what you need for the dip: - 1 cup all-purpose flour, toasted - ½ cup brown sugar, packed - ½ cup granulated sugar - 1 cup cream cheese, softened to room temperature - ½ cup unsalted butter, softened to room temperature - 1 teaspoon pure vanilla extract - ½ cup mini chocolate chips - ¼ cup chopped nuts (optional, walnuts or pecans work well) - ½ teaspoon salt - Assorted dippers (such as graham crackers, pretzels, or crisp apple slices) You can swap some ingredients if needed. Here are a few ideas: - Use coconut flour for a gluten-free option. - Replace cream cheese with Greek yogurt for a lighter dip. - Use maple syrup instead of brown sugar for a different sweetness. - If you don’t have mini chocolate chips, regular ones work too. These easy swaps keep your dip tasty and fun! Start by preheating your oven to 350°F (175°C). Then, take 1 cup of all-purpose flour and spread it evenly on a baking sheet. Bake it for 5 to 7 minutes. Stir the flour occasionally. You want it to look lightly golden and smell nutty. Once done, remove it from the oven and let it cool completely. This step is key. It helps get rid of any raw flour taste. In a large bowl, add 1 cup of softened cream cheese and ½ cup of softened unsalted butter. Use an electric mixer on medium speed. Beat them together until the mix is creamy and smooth. This gives a good base for your dip. Next, add the sugars. Mix in ½ cup of packed brown sugar and ½ cup of granulated sugar. Keep mixing until it looks fluffy. Finally, add 1 teaspoon of pure vanilla extract. Blend it all together until creamy. Now, it's time to add the flour. Use a spatula or wooden spoon to gently fold in the cooled toasted flour. Don't forget to add ½ teaspoon of salt too. Stir until you have no dry flecks left. This ensures a smooth texture. Next, fold in ½ cup of mini chocolate chips. If you like nuts, add ¼ cup of chopped walnuts or pecans. Be gentle while folding. You want to keep the creamy texture. After this, transfer your cookie dough dip into a nice serving bowl. Cover it with plastic wrap and chill it in the fridge for at least 30 minutes. This helps the flavors mix well and makes it easier to scoop. Before serving, give it a quick stir. Pair it with graham crackers, salty pretzels, or crisp apple slices for a fun treat. For the full recipe, check out the details above. To get a smooth and creamy dip, start with room temperature ingredients. Softened cream cheese and butter blend better. Use an electric mixer for the best results. Mix until the mixture looks fluffy and is free of lumps. Be gentle when folding in the flour and chocolate chips. This step keeps your dip light and creamy. Toasting flour removes raw taste. Preheat your oven to 350°F (175°C). Spread the flour in a thin layer on a baking sheet. Bake for 5-7 minutes, stirring once. Look for a light golden color and a nutty smell. Let it cool completely before using. This step is key to a great flavor in your dip. Serve your chocolate chip cookie dough dip with fun dippers. Some great options include graham crackers, salty pretzels, and crisp apple slices. The sweet dip pairs well with salty snacks. For a twist, try using vanilla wafers or fresh strawberries. This variety makes it fun for everyone! Enjoy your dip fresh from the fridge for the best taste. {{image_4}} You can change the taste of your cookie dough dip easily. Try adding peanut butter for a nutty twist. Use ½ cup of smooth peanut butter in place of some butter. Another fun option is Nutella. Replace the mini chocolate chips with ½ cup of Nutella. Both options make the dip rich and tasty. If you need gluten-free choices, swap the all-purpose flour for a gluten-free blend. Many brands offer great gluten-free flours that work well in this recipe. Just make sure to toast the gluten-free flour the same way to keep the flavor nice. With these swaps, everyone can enjoy this dip. The dippers can change your experience too! Besides graham crackers, you can use pretzels for a salty crunch. Crisp apple slices add a fresh flavor that pairs well. You can also try vanilla wafers or even cookies for double cookie fun. Each dipper brings a new taste to your chocolate chip cookie dough dip. To keep your chocolate chip cookie dough dip fresh, store it in the fridge. Use an airtight container to prevent it from absorbing other smells. It’s best to eat the dip within five days. When you’re ready to enjoy it, just take it out and give it a quick stir. You can freeze this dip to enjoy later. Just scoop it into a freezer-safe container. Make sure to leave some space at the top because it will expand. You can freeze it for up to three months. When you want to enjoy it again, let it thaw in the fridge overnight. If your dip has thickened in the fridge, don’t worry! Just use a hand mixer to whip it back to a creamy state. You can also add a splash of milk or cream to help revive it. Avoid heating it in the microwave, as this may change its texture. Enjoy your dip with your favorite snacks right away! Yes, this cookie dough dip is safe to eat. We use toasted flour, which removes harmful bacteria. This key step makes it safe for everyone. The other ingredients, like cream cheese and butter, are also safe to eat in this form. So, scoop it up without worry! Absolutely! You can make this dip a day ahead. Just store it in the fridge until you are ready to serve. Chilling it overnight can even enhance the flavors. If you make it early, just give it a quick stir before serving. You have many fun options for dippers! Here are some of my favorites: - Graham crackers - Salted pretzels - Crisp apple slices - Vanilla wafers - Fresh strawberries Each of these adds a nice crunch or sweetness. You can even mix and match for a fun platter. The dip’s creamy texture pairs well with all of them. Enjoy exploring your favorites! We covered a lot about making cookie dough dip. First, we discussed the key ingredients, then went through easy steps to make it. I shared tips for a creamy texture and ideas for flavors. We also talked about how to store your dip and answered common questions. Remember, this recipe is fun and flexible. You can tweak it to fit your taste. Enjoy making this treat and share it with friends!

Chocolate Chip Cookie Dough Dip Irresistible Treat

If you love cookie dough, you’ll adore this Chocolate Chip Cookie Dough Dip. It’s creamy, sweet, and packed with flavor.

- Chicken broth - Vegetables (onion, carrots, celery) - Seasonings (thyme, rosemary) To make classic chicken noodle soup, you need a few key ingredients. Chicken broth provides a rich base. It adds depth and flavor. Fresh vegetables like onion, carrots, and celery add color and nutrition. Each brings its unique taste to the soup. Thyme and rosemary are the perfect seasonings. They bring warmth and earthiness to every spoonful. - Fresh spinach - Garnishing options (parsley) You can add fresh spinach for a burst of green. It also adds vitamins. If you want to make your soup look pretty, use parsley as a garnish. It adds a nice pop of color. - Large pot - Stirring utensils For this recipe, you need a large pot. It holds all the ingredients as they cook together. A good stirring utensil is also important. This will help mix everything without damaging your pot. For the complete recipe, check out the Full Recipe section. - Sautéing the vegetables: Start by heating 1 tablespoon of olive oil in a large pot over medium heat. Once the oil is warm, add the diced onion, sliced carrots, and sliced celery. Sauté these veggies for about 5 minutes. Stir them often until they soften and the onion turns clear. - Adding garlic: After the vegetables are ready, stir in 3 minced garlic cloves. Cook for about 1 minute until the garlic smells great. Be careful not to let it brown, as that can change the flavor. - Incorporating broth and chicken: Pour in 8 cups of low-sodium chicken broth. Bring the mixture to a roll. Once it boils, reduce the heat to low. Add 2 cups of shredded chicken and season with 1 teaspoon of dried thyme and 1 teaspoon of dried rosemary. Don’t forget to add salt and pepper to taste! - Simmering and adding egg noodles: Stir well to mix all the ingredients. Let the soup simmer for about 10 to 12 minutes. This is when the egg noodles will cook. Stir occasionally to make sure nothing sticks to the bottom. - Adding spinach and adjusting seasoning: If you want to add some color and nutrition, stir in 1 cup of fresh spinach. Let it cook for an extra 2 to 3 minutes. Taste the soup and adjust the salt and pepper if needed. - Serving suggestions: Ladle the hot soup into bowls. For a nice finish, sprinkle some fresh parsley on top. This adds flavor and makes the dish look pretty. Enjoy your warm, comforting bowl of chicken noodle soup! Check the Full Recipe for more details. Using fresh herbs makes a big difference. Fresh thyme and rosemary give a bright taste. They also add more aroma to your soup. Dried herbs can work too, but use less. About a third of the amount is a good start. To boost umami flavor, add a splash of soy sauce or a spoon of miso. You can also use a bit of nutritional yeast for a deep, savory taste. These small changes can make your soup feel richer and more satisfying. You can switch the chicken for other proteins. Turkey or even tofu work well. Both options give a unique flavor to the dish. If you want a lighter soup, you can use fish. For those who need gluten-free options, use rice noodles or quinoa instead of egg noodles. Both choices make your soup tasty and keep it gluten-free. Using rotisserie chicken is a game-changer. It cuts down cooking time and adds depth to the flavor. Just shred the chicken and add it to the pot. You can also prep ahead. Chop your veggies the night before. Store them in the fridge to save time. This way, you can throw everything in the pot quickly. For more details, check out the Full Recipe. {{image_4}} To make creamy chicken noodle soup, add cream or milk. You can use heavy cream, half-and-half, or whole milk. Start with one cup and then adjust if needed. This change makes the soup rich and smooth. You may want to cut back on chicken broth slightly to keep the flavor balanced. It’s all about finding the right mix that works for you. For a vegetable chicken noodle soup, add more veggies. Think peas, corn, or green beans. You can also add kale or zucchini for extra nutrition. If you want a vegetarian version, replace chicken with cooked beans or lentils. Use vegetable broth instead of chicken broth, and keep the rest of the recipe the same. This makes a hearty dish that everyone can enjoy. If you like heat, try a spicy chicken noodle soup. You can add spices like red pepper flakes or cayenne pepper. A splash of hot sauce can also do the trick. Start small, then taste and add more until it’s just right for you. This change transforms the flavor profile and gives your soup an exciting kick. After making your chicken noodle soup, let it cool before storage. Use an airtight container to keep it fresh. Aim to refrigerate the soup within two hours of cooking. This helps prevent bacteria growth. For best taste, eat the leftovers within three to four days. If you want to save it for longer, freeze the soup. Portion it into freezer-safe bags or containers. Leave some space at the top for expansion when freezing. Your chicken noodle soup can last for up to three months in the freezer. When you’re ready to enjoy your leftovers, reheating is key. Use a pot on the stove for even heat. Slowly warm the soup over medium heat. Stir it often to keep it from sticking. This helps maintain the soup's great flavor and texture. If you use the microwave, heat it in short intervals. Stir the soup between intervals to prevent hot spots. Be careful with the noodles; overcooking them can make them mushy. Aim to heat just until warm, not boiling. In the fridge, your chicken noodle soup lasts three to four days. Keep an eye on its smell and color. If you notice any off smell or change in color, it’s best to throw it away. Signs of spoilage include a sour smell or mold. Always trust your senses. When in doubt, toss it out! Enjoy your healing comfort chicken noodle soup, and remember to check the Full Recipe for a delightful experience! Using rotisserie chicken is great for flavor and time. It’s tender and seasoned well. Raw chicken takes longer to cook but allows for more control over the taste. If you use raw chicken, add it to the pot early and let it cook fully before shredding. This method makes a rich broth from the bones, enhancing the soup's flavor. Yes, frozen vegetables can work well in your soup. They save time and are often pre-cut. However, they may lack some crunch and fresh taste. If you choose frozen, add them in the last few minutes of cooking. This way, they will warm up without overcooking. Fresh veggies bring a nice texture, but frozen can be a quick option. To thicken your soup, you can mash some of the noodles or add a little cornstarch mixed with water. Another option is to let it simmer longer to reduce the liquid. You can also add a small amount of cream for a richer texture. Just remember, thickening should not overpower the broth's flavor. Yes, chicken noodle soup is generally healthy. It can provide protein from the chicken and vitamins from the veggies. The broth is hydrating, and homemade soup has fewer additives than store-bought. Using low-sodium broth can reduce sodium intake. This recipe is balanced, making it a nourishing choice. Absolutely! To make it in a slow cooker, add all your ingredients, including raw chicken, to the pot. Cook on low for 6-8 hours or high for 3-4 hours. After cooking, shred the chicken and add the noodles for the last 30 minutes. This method lets the flavors blend nicely and is perfect for busy days. For the full recipe, check out Healing Comfort Chicken Noodle Soup. This blog post covered how to make chicken noodle soup from start to finish. We explored key ingredients like chicken broth and fresh veggies. I shared tips for flavor, customizations, and quick prep methods. You can create different variations, like creamy or spicy soups, to suit your taste. Always store and reheat your soup properly for best results. Remember, homemade chicken noodle soup is not just a meal; it’s comfort in a bowl. Enjoy your cooking journey!

Classic Chicken Noodle Soup Flavorful Comfort Dish

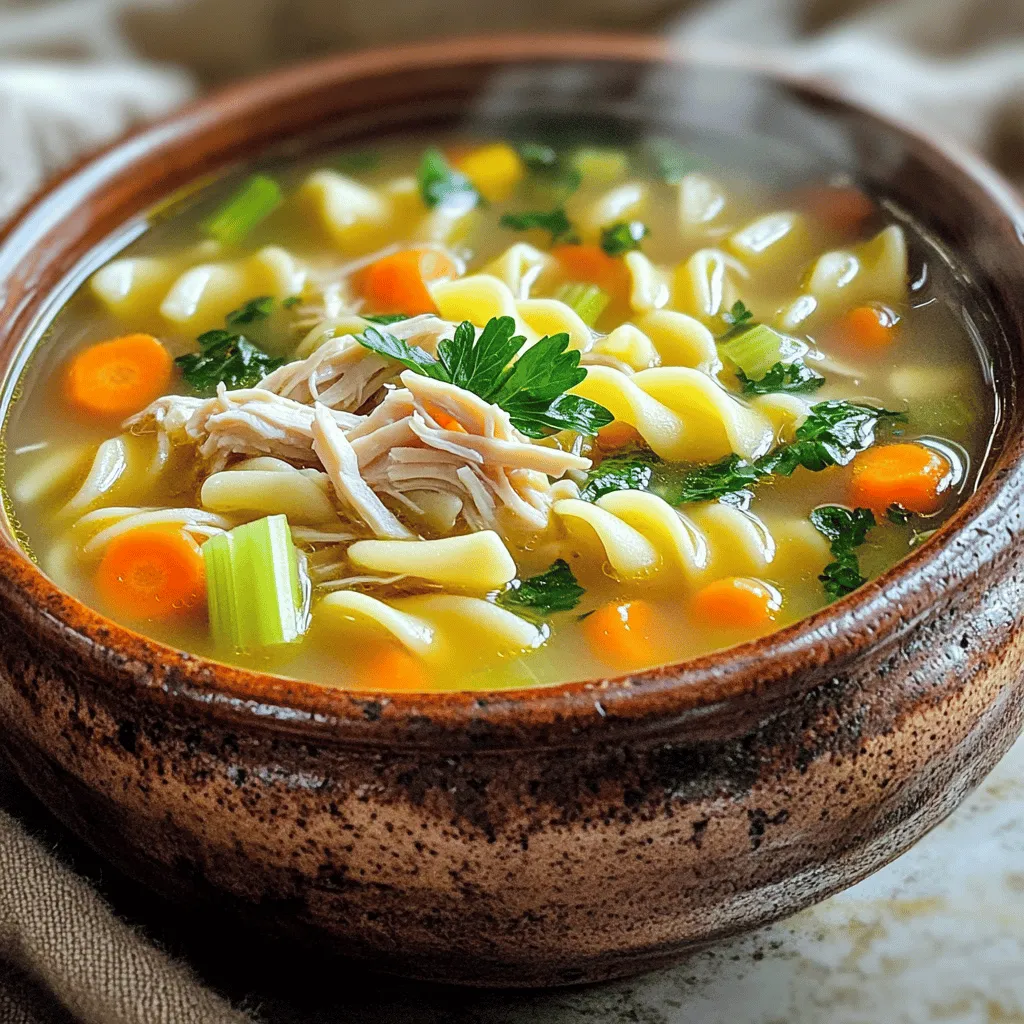
If you’re craving a warm hug in a bowl, you’ve come to the right place! Classic Chicken Noodle Soup is

- 1 block (14 oz) firm tofu, pressed and cubed - 2 tablespoons cornstarch - 3 tablespoons vegetable oil, divided - 1 bell pepper (red or yellow), sliced into strips - 2 cups broccoli florets, washed and trimmed - 1 cup sugar snap peas, ends trimmed - 3 green onions, chopped (both white and green parts) - 2 cloves garlic, minced - 1 tablespoon fresh ginger, grated - 2 tablespoons soy sauce - 1 tablespoon hoisin sauce - 1 teaspoon sesame oil - Salt and pepper, to taste - Cooked rice or quinoa, for serving - Sesame seeds, for garnish Crispy tofu stir-fry needs the right mix of ingredients. First, you want firm tofu. Firm tofu holds its shape well when cooked. Press it to remove extra water. This step is key for crispy tofu. Next, cornstarch gives the tofu that crunchy coat. The oil you use is also important. Vegetable oil works great because it has a high smoke point. For vegetables, I love using bell peppers, broccoli, and sugar snap peas. They add color and crunch. Green onions give a fresh taste. Garlic and ginger add a nice kick. For sauces, soy sauce and hoisin sauce bring rich flavor. Sesame oil adds a nutty note. Adjust salt and pepper to your taste. Serve the stir-fry over warm rice or quinoa. Finish it off with sesame seeds for a pleasing look and extra crunch. Check out the Full Recipe for detailed steps and tips! - First, press the tofu to eliminate excess moisture. Wrap the tofu block in a clean kitchen towel and place a heavy object on top. Let it press for about 15 minutes. This step helps it absorb flavors better. - Next, cube the tofu into 1-inch pieces. In a medium bowl, toss the cubes with cornstarch. This coating gives the tofu a nice, crispy texture when cooked. - Heat 2 tablespoons of vegetable oil in a large skillet over medium-high heat. - Once hot, add the coated tofu in a single layer. Cook for 3-4 minutes without moving them. This allows one side to get golden brown and crispy. - After that, flip the tofu to crisp the other side for another 3-4 minutes. Remove the tofu and let it drain on a plate lined with paper towels. - In the same skillet, add 1 tablespoon of vegetable oil. When it shimmers, add the sliced bell pepper, broccoli florets, and sugar snap peas. - Stir-fry the veggies for about 5 minutes. You want them vibrant and tender-crisp. They should still look bright and fresh. - Now, return the crispy tofu to the skillet with the vegetables. Pour in the soy sauce, hoisin sauce, and sesame oil. - Stir everything together gently. Make sure the tofu and veggies are coated with the sauce. Cook for another 2-3 minutes to heat everything through and combine the flavors. - Taste your stir-fry. Adjust the seasoning with salt and pepper if needed. - Before serving, sprinkle chopped green onions over the dish for a fresh touch. - Serve the crispy tofu stir-fry over warm cooked rice or quinoa for a filling meal. - Finish with a sprinkle of sesame seeds for added texture and a delightful finish. This dish is colorful, tasty, and perfect for a quick weeknight dinner. For the complete details, check out the Full Recipe. To get crispy tofu, pressing is key. Pressing removes extra moisture. This helps the tofu absorb flavors. Wrap the tofu in a clean towel. Place a heavy object on top. Let it sit for about 15 minutes. For frying, use oils with high smoke points. Vegetable oil is a great choice. Canola or peanut oil also work well. These oils help achieve that perfect golden crust. Add spices to boost the flavor of your stir-fry. Try ground cumin or smoked paprika. They add warmth and depth. Fresh herbs like basil or cilantro can brighten the dish. Fresh ingredients often taste better than dried. Use fresh garlic and ginger for a strong kick. Use a large skillet or wok for stir-frying. A wide surface helps food cook evenly. Make sure the pan is hot before adding oil. This prevents sticking and helps with browning. Control the heat for best results. Start at medium-high to sear the tofu. Then lower the heat when adding veggies. Cook them quickly to keep them crisp. This balance gives you a vibrant, tasty dish. For more tips, check out the Full Recipe for Crispy Tofu Stir-Fry. {{image_4}} You can swap tofu for other proteins in this stir-fry. Tempeh is a great choice. It has a nutty taste and absorbs flavors well. Seitan works too, if you want a chewy texture. If you prefer meat, shrimp or chicken can make tasty options. Just cook them until they are done. This way, you can enjoy different flavors every time. Feel free to mix and match vegetables. Carrots, snap peas, and bell peppers are all good choices. You can also add mushrooms or zucchini for extra flavor. Seasonal veggies work best, so check what’s fresh at your local market. Using local produce can make your dish even tastier. You can make your own stir-fry sauce at home. A simple mix of soy sauce and honey adds great sweetness. Try adding rice vinegar for tang. For a spicy kick, add some chili sauce or sriracha. Each twist will change the taste of your dish, keeping it exciting. For a full recipe, check out the [Full Recipe]. To store leftover crispy tofu stir-fry, cool it down first. Place it in a clean, airtight container. This will keep it fresh. Store it in the fridge for up to three days. Make sure the temperature stays below 40°F (4°C) for safety. Reheating crispy tofu can be tricky. To keep it crispy, use a stovetop skillet rather than a microwave. Heat the skillet on medium heat. Add a splash of oil, then add the stir-fry. Stir gently for a few minutes. This method helps the tofu stay crunchy. If you must use a microwave, heat it in short bursts. Stir in between to avoid sogginess. You can freeze crispy tofu stir-fry, but it may change texture. To freeze, first, cool the dish completely. Place it in a freezer-safe container. Make sure to leave some space for expansion. When ready to eat, thaw it in the fridge overnight. To reheat, use the stovetop method for best results. The best tofu for stir-fry is firm or extra-firm tofu. Firm tofu holds its shape well. It absorbs flavors but stays together during cooking. Extra-firm tofu is even denser, making it crispier when cooked. If you prefer a crunchier texture, choose extra-firm tofu. Yes, you can use frozen vegetables. They are convenient and save prep time. However, they may release extra water, affecting texture. To avoid this, stir-fry them longer to evaporate the moisture. Fresh vegetables offer better crunch and flavor, but frozen is a great option too. To make this recipe gluten-free, use gluten-free soy sauce. You can also find gluten-free hoisin sauce at stores. Check the labels to ensure they meet gluten-free standards. This way, you can enjoy the tasty stir-fry without worry. Crispy tofu lasts for about 3-5 days in the fridge. Store it in an airtight container. Look for signs of spoilage, like a sour smell or slimy texture. If it smells off or looks strange, it’s best to toss it. Yes, you can make oil-free crispy tofu stir-fry. Use a non-stick pan or a well-seasoned cast-iron skillet. Instead of oil, use vegetable broth or water to sauté vegetables. Note that the tofu may not get as crispy without oil, but it will still taste great. You can find the full recipe for Crispy Tofu Stir-Fry in the Full Recipe section. It includes a complete list of ingredients and step-by-step instructions. This will help you create a delicious meal with ease. This blog post covered the basics of making a delicious crispy tofu stir-fry. You learned about essential ingredients, step-by-step instructions, and helpful tips. Cooking tofu until golden helps create a great texture and flavor. With endless variations available, you can customize your stir-fry to fit your tastes. Whether you're using seasonal veggies or alternative proteins, the process remains simple. Enjoy experimenting and creating a dish that suits you perfectly! Happy cooking!

Crispy Tofu Stir-Fry Flavorful and Easy Weeknight Meal

Looking for a quick, delicious weeknight meal? Try my Crispy Tofu Stir-Fry! With fresh veggies and a savory sauce, you

The Loaded Sweet Potato Skins recipe is a fun and tasty treat. You can make it easily at home. I love how they mix sweet and savory flavors. These skins are crispy, creamy, and full of color. The prep time is about 15 minutes. You will bake the sweet potatoes for 45-50 minutes. After that, you will bake them again for 15-20 minutes. Overall, the total time is about 1 hour and 15 minutes. This recipe makes enough for 4 people. You can easily share them at a party or enjoy them with family. Each serving has good nutrients. Sweet potatoes are rich in vitamins. They have fiber, which is good for digestion. Adding black beans and corn boosts the protein. Each serving has about: - Calories: 320 - Protein: 10g - Carbohydrates: 50g - Fats: 12g For more details, check out the Full Recipe. You will find all the steps and tips you need. Enjoy cooking! To make loaded sweet potato skins, gather these items: - 4 medium sweet potatoes - 1 cup shredded sharp cheddar cheese - ½ cup cooked black beans (drained and rinsed) - ½ cup corn kernels (fresh or frozen) - ¼ cup green onions, thinly sliced - 1 avocado, diced - ½ teaspoon smoked paprika - ½ teaspoon garlic powder - Salt and pepper to taste - Olive oil for brushing - Sour cream or Greek yogurt for serving (optional) - Fresh cilantro for garnish (optional) You can swap ingredients easily. If you want a different cheese, use Monterey Jack or pepper jack cheese. For a plant-based option, try vegan cheese. If black beans aren’t your favorite, use kidney beans or pinto beans. Instead of corn, you can add diced bell peppers or zucchini. If you don’t have green onions, regular onions work too. When choosing sweet potatoes, look for firm ones without soft spots. The skin should be smooth and free of blemishes. Choose medium-sized sweet potatoes for even cooking. If you see different colors, like purple or white, try them! They add unique flavors to your dish. Always check for freshness; they should feel heavy for their size. First, preheat your oven to 400°F (200°C). This step gets the oven ready for baking. Next, rinse the sweet potatoes under cold water. This removes dirt and makes them clean. Use a fork to poke holes in each potato. The holes let steam escape while baking. Place the sweet potatoes on a baking sheet. Brush them lightly with olive oil and sprinkle salt over them. Bake for about 45-50 minutes. They should feel soft when you poke them with a fork. After baking, let the sweet potatoes cool for a few minutes. Lower the oven heat to 375°F (190°C). Cut each sweet potato in half lengthwise. Use a spoon to scoop out some flesh, leaving about a ¼-inch border. In a bowl, mix the scooped sweet potato with black beans, corn, smoked paprika, garlic powder, and half of the cheese. Add a pinch of salt and pepper for taste. Stir until everything is well combined. Fill each sweet potato skin with the mixture. Make sure to pack it in well. Top the skins with the remaining cheddar cheese. Return them to the oven and bake for another 15-20 minutes. The cheese should melt and bubble nicely. Once done, take them out and add diced avocado, green onions, and fresh cilantro on top. Serve warm and enjoy with sour cream or Greek yogurt on the side. This adds a creamy touch to each bite. For extra crunch, sprinkle some crushed tortilla chips before serving. {{image_4}} To cook sweet potatoes just right, choose medium-sized ones. Look for smooth skin with no bruises. Start by washing them well to remove dirt. Poke holes in each potato with a fork. This helps steam escape during baking. Bake them at 400°F (200°C) for 45-50 minutes. They should feel soft when you poke them with a fork. Let them cool a bit before cutting. Loaded sweet potato skins are a fun dish to share. Serve them warm on a large plate. For a nice touch, add some crushed tortilla chips on top. This gives a great crunch. You can also serve them with a side of sour cream or Greek yogurt. Use fresh cilantro for a pop of color and flavor. These small details make your dish look and taste even better. To make your loaded sweet potato skins even tastier, try adding spices. A pinch of cayenne pepper boosts the heat. You can mix in cooked bacon bits for a savory bite. Consider adding some lime juice for a zesty kick. Experiment with different cheeses too! Feta or pepper jack can change the flavor profile. These enhancements take your dish from good to amazing. For the full recipe, check the details above. You can make loaded sweet potato skins meat-free. Use black beans, corn, and cheese for a great taste. Add diced peppers or mushrooms for extra flavor. You can also add spinach or kale for a healthy twist. These toppings give the dish a colorful and tasty boost. You can enjoy them while still being vegetarian. If you love heat, try spicy loaded sweet potato skins. Add diced jalapeños or crushed red pepper flakes to the filling. You can mix in some spicy cheese, like pepper jack. For an extra kick, drizzle with hot sauce before serving. This variation will please anyone who loves spicy food. Feel free to get creative with your toppings. Try diced tomatoes or olives for a fresh taste. You can add a dollop of guacamole for creaminess. For a crunchy texture, sprinkle some crushed tortilla chips on top. Fresh herbs like cilantro or parsley can also add a nice touch. The options are endless, and you can find your favorite combination. For the full recipe, check out Loaded Sweet Potato Skins. Enjoy experimenting with these variations! Yes, you can prep Loaded Sweet Potato Skins in advance. Bake the sweet potatoes and scoop them out. Store the skins in the fridge for up to two days. When you're ready to eat, fill them with the mixture and bake. This saves you time and still gives great taste. To store leftovers, let the sweet potato skins cool completely. Place them in an airtight container. They will stay fresh for about three days in the fridge. When you want to eat them, reheat in the oven for the best texture. This way, they stay crispy and delicious. You can use regular potatoes, but the taste will change. Sweet potatoes add a nice sweetness that regular potatoes lack. If you prefer, use Russet or Yukon Gold potatoes. Just remember to adjust the cooking time, as they may bake differently. For the full recipe, check out the details above! Loaded sweet potato skins are a fun dish to make. You learned about the prep and cook time, servings, and the nutrition they offer. I shared tips on ingredients and how to choose great sweet potatoes. The step-by-step guide showed how to prepare, mix, and bake them perfectly. We explored tasty variations and answered common questions. Enjoying these skins is simple and rewarding. Whether you stick to the basics or try new twists, there's a loaded sweet potato skin for everyone. Dive in, have fun, and enjoy your meal!

Loaded Sweet Potato Skins Simple and Delicious Treat

Are you ready for a tasty twist on a classic snack? Loaded sweet potato skins are easy to make and

When making Lemon Dill Grilled Salmon, you need fresh and simple ingredients. Here’s what to gather: - Salmon fillets (4, 6 oz each) - Fresh dill (3 tablespoons, finely chopped) - Lemons (2: 1 for juice, 1 for slices) - Extra virgin olive oil (3 tablespoons) - Garlic cloves (2, finely minced) - Salt and black pepper (to taste) - Optional garnishes (lemon wedges) These ingredients blend well to create a bright and tasty dish. The salmon is rich and flaky, while the lemon and dill add freshness. Fresh dill gives a unique taste that brightens the whole meal. When you pick your salmon, look for fillets that are firm and moist. The lemons should smell fresh and bright, ready to add zest to your dish. For the best results, use high-quality olive oil. It enhances the flavors and makes the dish feel special. Minced garlic adds depth, making the marinade fragrant. You can use more or less salt and pepper based on your taste. This Lemon Dill Grilled Salmon is simple yet impressive. Explore the [Full Recipe] for detailed steps to cook this delightful dish! First, make the marinade. In a small bowl, combine: - 3 tablespoons extra virgin olive oil - Juice of 1 lemon - 2 finely minced garlic cloves - 3 tablespoons fresh dill, finely chopped - Salt and freshly ground black pepper, to taste Whisk everything together until well-blended. This mix is key to a flavorful salmon. Next, take 4 salmon fillets and place them skin-side down in a shallow dish. Pour the marinade over the fillets. Make sure each piece is coated well. Cover it or seal it in a bag. Refrigerate for at least 30 minutes. This lets the flavors soak in. Now, it’s time to heat the grill. Preheat it to medium-high heat, around 400°F (200°C). This high heat is crucial for getting that nice char on the salmon. After marinating, take the salmon out of the fridge. Let any extra marinade drip off. Discard the leftover marinade safely. Gently place the salmon fillets, skin-side down, on the grill grates. Close the lid and grill for about 5-7 minutes. The time will vary based on how thick your fillets are. Then, using a spatula, flip the salmon over and grill it for 4-6 more minutes. It’s done when the salmon flakes easily with a fork. For a fun twist, add lemon slices to the grill in the last minute. Charring them adds great flavor for garnish. Once cooked, take the salmon off the grill. Let it rest for a couple of minutes on a plate. This helps the juices stay in the fish. Serve the grilled salmon with charred lemon slices and a sprinkle of fresh dill. You can add lemon wedges on the side for an extra burst of flavor. Enjoy this simple and tasty dish! For the complete guide, check out the Full Recipe. Grilling salmon can be easy if you know a few key points. The time it takes to cook your salmon depends on two main factors: thickness and grill type. Thicker fillets take longer to cook, while thinner ones cook faster. A regular gas grill heats evenly, while a charcoal grill may have hot spots. Always check the salmon at the thickest part. Aim for 145°F for safe eating. This ensures your fish is juicy and tender. Want to kick up the flavor? You can add more herbs or spices to the marinade. Try fresh parsley, thyme, or even a pinch of red pepper flakes for some heat. Garlic powder or onion powder can add depth too. Mix and match to find your favorite combination. Just remember, keep it simple. You want the lemon and dill to shine through. How you serve your salmon matters. A pretty plate makes a meal feel special. Arrange the salmon fillets on a colorful platter. Place the charred lemon slices on top. Add extra sprigs of dill around the plate for a pop of green. This not only looks good but also enhances the flavor. Making food look great can make it taste even better. For the complete guide, check the Full Recipe. {{image_4}} You can switch up the flavors in your lemon dill grilled salmon with some fun twists. - Honey mustard variation: Mix in two tablespoons of honey mustard for a sweet and tangy kick. This adds a nice glaze to the salmon. - Spicy sriracha twist: If you want heat, stir in a tablespoon of sriracha. It gives a bold flavor and pairs well with the citrus. Not everyone has a grill, and that's okay! You can still enjoy this dish in other ways. - Oven baking instructions: Preheat your oven to 400°F (200°C). Place the marinated salmon on a baking sheet lined with parchment paper. Bake for about 12-15 minutes, or until the salmon flakes easily. - Pan-searing options: Heat a non-stick skillet over medium-high heat. Cook the salmon skin-side down for about 6 minutes. Flip and cook for another 4-5 minutes until done. You’ll want to pair your grilled salmon with something fresh and tasty. - Ideal side dishes: Salads with mixed greens and cherry tomatoes work great. Roasted vegetables, like asparagus or carrots, also make a perfect match. These sides add color and nutrition to your meal. For the full recipe, check out [Full Recipe]. To store your leftover Lemon Dill Grilled Salmon, place it in an airtight container. This keeps the fish fresh and tasty. You can also wrap it tightly in plastic wrap. If you want to freeze it, wrap each fillet in foil before placing it in a freezer bag. This extra layer prevents freezer burn while keeping the flavor intact. When reheating salmon, your goal is to keep it moist and flavorful. The best way is to use an oven. Preheat it to 275°F (135°C). Place the salmon on a baking sheet and cover it with foil. Heat it for about 15 minutes or until warm. You can also use a microwave. Just heat it in short bursts, so it doesn’t dry out. Lemon Dill Grilled Salmon stays fresh in the fridge for about 3 days. If frozen, it can last up to 3 months. Be sure to check for any off smells or changes in texture before eating. Always trust your senses; if it seems off, it’s better to throw it out. For the full recipe, check the earlier sections. You can tell if salmon is done by checking a few signs. First, look for flakiness. The salmon should gently pull apart with a fork. Second, check the internal temperature. It should reach 145°F (63°C). When it's fully cooked, the flesh will turn from translucent to opaque. Yes, you can use frozen salmon. Just make sure to thaw it before cooking. The best way is to put it in the fridge overnight. If you're short on time, you can place it in cold water for about an hour. After thawing, marinate it as usual. This helps to keep the flavors locked in. If you don't have dill, there are good substitutes. You can use parsley for a fresh taste. Thyme and tarragon also work well with salmon. Each herb brings its own flavor, so feel free to experiment. Just remember to adjust the amount to suit your taste. In this post, we covered key steps for grilling delicious salmon. We explored the ingredients, marinating, and grilling tips to ensure a perfect meal. I also shared creative variations and storage methods for leftovers. Remember, grilling salmon is fun and easy. You can impress your family or guests with these simple techniques. Enjoy experimenting with flavors and serving ideas. With these tips, you’ll create tasty dishes every time. Happy cooking!

Lemon Dill Grilled Salmon Simple and Tasty Recipe

If you’re craving a simple and delicious dish, this Lemon Dill Grilled Salmon recipe is for you! With fresh ingredients

- 4 lobster tails - 1/2 cup unsalted butter (1 stick) - 4 cloves garlic, finely minced - 1 tablespoon fresh lemon juice - 1 teaspoon smoked paprika - 1 teaspoon sea salt - 1/2 teaspoon freshly ground black pepper - 1 tablespoon fresh parsley, finely chopped (for garnish) - Lemon wedges (for serving) You can swap unsalted butter with olive oil if you're looking for a lighter option. For a quick fix, garlic powder works well instead of fresh garlic. Fresh herbs like dill or chives can add a nice twist, too. To make these lobster tails, you need kitchen shears to split them open. A baking dish holds the tails while they cook. A small saucepan helps to melt the butter and mix the flavors. If you want to dive deeper into the process, check out the Full Recipe for more detailed steps. 1. Preheating the oven: First, set your oven to 425°F (220°C). This heat is perfect for cooking lobster. Make sure the rack is in the center for even heat. 2. Splitting the tails: Next, grab some kitchen shears. Carefully cut the lobster tails in half lengthwise. Cut through the shell, but don’t cut all the way through the meat. 3. Positioning the meat: Gently pull the lobster meat out and place it on top of the shell. This step helps the meat soak up the flavors while baking and looks great on the plate. 1. Melting the butter: In a small saucepan, add your unsalted butter. Heat it over medium heat. Stir it occasionally until it fully melts. 2. Sautéing the garlic: Once the butter melts, add your minced garlic. Sauté for 1-2 minutes. Keep an eye on it to avoid burning. Burnt garlic can taste bitter. 3. Combining the ingredients: Now, stir in fresh lemon juice, smoked paprika, sea salt, and black pepper. Let it bubble gently for about a minute. This helps blend all the flavors. 1. Arranging the tails in the dish: Place the prepared lobster tails in a baking dish. Ensure they sit evenly for even cooking. 2. Brushing with garlic butter: Grab a brush and coat each lobster tail with the garlic butter mixture. Make sure to cover the meat well for the best flavor. 3. Cooking times and temperature checks: Bake your lobster tails for 12-15 minutes. They are done when the meat turns opaque. Check that the internal temperature hits 140°F (60°C) for a perfect texture. This simple process leads to delicious garlic butter lobster tails. For the full recipe, check out the complete instructions. To make sure your lobster tails are just right, monitor the internal temperature. Use a meat thermometer and aim for 140°F (60°C). This ensures the meat cooks perfectly and stays tender. Even cooking is key. When you prepare the tails, split them lengthwise and pull the meat up slightly. This helps them cook evenly and soak up that garlic butter flavor. You can add extra spices and herbs to make your dish stand out. Try adding chili flakes for a little kick or fresh thyme for a different taste. If you want to elevate the flavor, consider marinating the lobster tails. A quick soak in olive oil, lemon juice, and your chosen herbs can add depth before cooking. Garnishing with parsley adds a fresh touch to your dish. It not only looks good but also brings brightness to the rich flavors of garlic butter. When serving, place the lobster tails on a large platter. Arrange lemon wedges around them. This not only looks nice but also gives a zesty boost when your guests squeeze the lemons over the tails. You can drizzle any leftover garlic butter on top for a glossy finish. {{image_4}} You can easily switch up the taste of garlic butter lobster tails. Here are two great ideas: - Adding chili flakes for heat: If you like spice, add a pinch of chili flakes to your garlic butter. This simple step gives a nice kick. You’ll enjoy the balance of heat and buttery flavor. - Incorporating white wine into the butter sauce: For a touch of luxury, mix in a splash of white wine. This adds depth and richness. Just let the wine simmer with the butter and garlic. The taste will wow your guests. Cooking lobster tails can be fun and creative. Here are some methods you can try: - Grilling vs. baking: Grilling adds a smoky flavor to lobster tails. Just brush them with garlic butter and place them on the grill. Baking is easier and allows for even cooking. Both ways are delicious; it’s up to your taste! - Broiling for a crispy finish: Broiling is a great way to get a crispy top. After baking, switch the oven to broil for a few minutes. Watch closely to prevent burning. The lobster meat will have a lovely golden color. There are ways to make garlic butter lobster tails fit different diets. Here are some options: - Low-carb options: This dish is already low in carbs! Pair it with veggies like asparagus or zucchini noodles. You can enjoy a filling meal without the carbs. - Shellfish allergy considerations: If you have a shellfish allergy, consider using shrimp or chicken. Both can soak up the garlic butter well. Just adjust cooking times as needed. For the full recipe, check out the detailed steps on how to prepare these delicious lobster tails. After enjoying your garlic butter lobster tails, store leftovers in the fridge. Place them in an airtight container. This keeps them fresh and tasty. You can keep cooked lobster tails in the fridge for up to three days. After that, the quality may drop. To reheat lobster tails, the oven is best. Preheat it to 350°F (175°C). Place lobster tails in a baking dish. Cover with foil to keep moisture in. Heat for about 10 minutes. The meat will warm up without drying out. You can also use a microwave. Just place the lobster tails on a plate. Cover them with a damp paper towel. Heat for 1-2 minutes on low power. Check often to avoid overcooking. If you want to keep lobster tails longer, you can freeze them. First, wrap each tail tightly in plastic wrap. Then, place them in a freezer bag. This helps prevent freezer burn. Properly stored, they can last up to three months in the freezer. When you're ready to use them, thaw the lobster tails safely. The best method is to place them in the fridge overnight. If you're short on time, you can submerge them in cold water for about an hour. Avoid using hot water, as it can cook the lobster. For the full recipe, check the "Garlic Butter Lobster Tails" section above. You can tell when lobster tails are fully cooked by checking the color. The meat should change from translucent to opaque. It should also be firm to the touch. The ideal internal temperature is 140°F (60°C). Use a meat thermometer for precision. Yes, you can use frozen lobster tails. Just make sure to thaw them first. The best way to thaw is in the fridge overnight. You can also place them in cold water for about 30 minutes. This helps keep the meat tender. You can serve garlic butter lobster tails with several sides. Here are some great options: - Garlic bread - Steamed vegetables - Rice or quinoa - A fresh salad - Mashed potatoes These sides complement the rich flavors of the lobster. To avoid overcooking lobster, keep an eye on the cooking time. Bake lobster tails for 12-15 minutes. Check for that opaque color. You can also use a meat thermometer. Remove them from the oven right when they reach 140°F (60°C). Yes, you can reheat lobster tails without losing flavor. The best way is to use the oven. Preheat it to 350°F (175°C) and place the tails in a baking dish. Add a little butter on top. Cover with foil and heat for about 10 minutes. For the complete Garlic Butter Lobster Tails recipe, check out the [Full Recipe]. It has all the steps and tips you need for a successful dish. In summary, we discussed how to make delicious garlic butter lobster tails. You learned about the essential ingredients, special tools, and step-by-step cooking methods. I shared tips for perfect cooking and ways to enhance flavors. We also explored variations, storage tips, and answered common questions. Enjoy creating this tasty dish and impressing your guests! Your culinary skills will shine with these easy steps.

Garlic Butter Lobster Tails Flavorful and Simple Meal

Are you ready to impress your friends and family with a delicious seafood dish? Garlic butter lobster tails are simple

- 1 medium butternut squash, peeled, seeded, and diced (approximately 4 cups) This is the star of the soup. Look for a squash that feels heavy for its size. Choose one with a smooth, firm skin and no soft spots. - 1 tablespoon coconut oil This oil adds a nice flavor. Try to pick organic coconut oil for the best taste. - 1 medium onion, finely chopped A good onion gives depth to the soup. Look for onions that are firm and have shiny skin. - 3 cloves of garlic, minced Fresh garlic adds zing. Choose garlic bulbs that are tight and plump. - 1 tablespoon fresh ginger, grated Ginger brings warmth and spice. Look for fresh ginger that is smooth and firm. - 1 tablespoon red curry paste (adjust for desired spice level) This adds heat and flavor. Find a brand you like; taste it first! - 1 can (400ml) coconut milk Creamy and rich, coconut milk makes the soup smooth. Check the can for quality and make sure it has no added sugars. - 4 cups vegetable broth Use homemade or store-bought broth. Look for low-sodium options for better flavor control. - 1 tablespoon brown sugar (or maple syrup for a sweeter alternative) This balances the flavors. Feel free to adjust the sweetness to your taste. - Salt and black pepper, to taste Essential for seasoning. Use fresh ground pepper for the best flavor. - Juice of 1 fresh lime Lime juice brightens the soup. Choose limes that feel heavy and have smooth skin. - Fresh cilantro, for garnish Adds a fresh touch. Look for bright green leaves without yellowing. - Toasted pumpkin seeds, for garnish They add crunch. You can buy them pre-toasted or toast them yourself for the best flavor. - Always choose seasonal produce for the best flavor. - Look for organic options when possible to enhance quality. - Smell your spices to ensure freshness before purchase. - Use olive oil instead of coconut oil for a different flavor. - Substitute butternut squash with sweet potatoes for a sweet twist. - Ensure vegetable broth is gluten-free if needed. - For a nut-free option, skip the pumpkin seeds or use sunflower seeds. Feel free to check out the Full Recipe for more guidance on making this delicious Coconut Curry Butternut Squash Soup. 1. Sauté Aromatics: Start by heating coconut oil in a large pot over medium heat. Add the finely chopped onion. Sauté for about five minutes. The onion should become soft and see-through. Next, add the minced garlic and grated ginger. Cook for one to two more minutes. This step fills your kitchen with a warm, inviting smell. 2. Incorporating Squash and Curry Paste: Now, stir in the red curry paste. This will add a rich flavor to the soup. Let it cook for one minute to bloom the spices. After that, add the diced butternut squash. Make sure to mix well so each piece gets coated in the spicy goodness. 3. Simmering with Coconut Milk: Pour in the vegetable broth and coconut milk. Turn up the heat until the soup begins to boil gently. Once it boils, lower the heat and cover the pot. Let it simmer for about 20 to 25 minutes. You want the squash to be tender enough to pierce easily with a fork. 1. Tips for Using an Immersion Blender: After simmering, remove the pot from the heat. If you have an immersion blender, use it to puree the soup right in the pot. This saves time and makes cleanup easier. If using a countertop blender, let the soup cool slightly before blending in batches. 2. Adjusting Consistency and Seasoning: Once blended, return the soup to low heat. Stir in the brown sugar and fresh lime juice. This will balance the flavors perfectly. Season with salt and black pepper to taste. If it seems too thick, add a little more broth or water. 3. Importance of Taste Testing: Taste your soup before serving. Adjust any flavors as needed. This is key to making the soup truly yours. A quick taste can make a big difference, ensuring your Coconut Curry Butternut Squash Soup has that perfect blend of flavors. For the complete details on ingredients and preparation, check the [Full Recipe]. To make your Coconut Curry Butternut Squash Soup even better, focus on fresh herbs and spices. Fresh herbs, like cilantro, add vibrant flavor. You can sprinkle them on top just before serving for a burst of freshness. Spices should be fresh too. Ground spices lose their strength over time. Always check the date on your spice jars. Lime juice is key in this recipe. It brightens the soup and balances the rich coconut milk. Start with half a lime and taste. If you want more zing, add more lime juice. The right lime balance can change the soup from good to great. Adjusting the spice level is simple. If you like it hot, use more red curry paste. For a milder flavor, use less. Remember to taste as you go, so you get your perfect heat level. This soup pairs well with several side dishes. Warm naan or crusty bread works great. You can also serve it with a simple salad. The crunch of fresh veggies offers a nice contrast to the creamy soup. For garnishing, consider fresh cilantro and toasted pumpkin seeds. They add color and texture. You could also drizzle a bit of coconut milk for a pretty swirl. A sprinkle of chili flakes can give a pop of color and extra heat. Serve the soup warm, not hot. This way, you can enjoy all the flavors. If you let it cool slightly, it will taste better. Enjoy it straight from the pot, or ladle it into bowls for a cozy meal. For the full recipe, check out the link above! {{image_4}} You can make this soup vegan by using vegetable broth and coconut milk. Both options are naturally dairy-free. To ensure it's gluten-free, check that your curry paste is free from gluten. To add crunch, consider using different toppings. Instead of pumpkin seeds, try crushed nuts like cashews or almonds. You can also add crispy chickpeas for extra texture. Fresh herbs like basil or mint can brighten the dish. You can change the flavor by adding different vegetables. Carrots or sweet potatoes work well with butternut squash. They add sweetness and depth. Try adding a handful of spinach or kale for a green boost. Experiment with different curry pastes. Green curry paste offers a fresh, herbaceous flavor. Yellow curry paste gives a milder taste. Adjust the amount based on your spice preference. Each paste brings a unique twist to your soup. Check out the Full Recipe for more details on making this savory delight. To keep your Coconut Curry Butternut Squash Soup fresh, use airtight containers. Glass containers work well, allowing you to see the soup inside. Make sure the soup cools down to room temperature before sealing. When it comes to refrigeration, store leftover soup in the fridge for up to five days. If you want to keep it longer, freezing is a great option. Pour the soup into freezer-safe bags or containers. Leave some space at the top, as the soup will expand when frozen. This method can preserve the soup for up to three months. When you are ready to enjoy the soup again, reheating is easy. Pour the soup into a pot over low to medium heat. Stir it often to help it heat evenly. If the soup seems thick, add a splash of water or more vegetable broth. You can also reheat the soup in the microwave. Use a microwave-safe bowl and cover it loosely with a lid or microwave-safe wrap. Heat in short bursts, stirring in between, until it's hot. This method allows you to maintain the creamy texture and rich flavors, making sure each bite is as delightful as the first. Can I use frozen butternut squash? Yes, you can use frozen butternut squash. It saves time and is very convenient. Just make sure it is thawed before cooking. This will help it blend well with the other flavors. Is this soup recipe adaptable for a slow cooker? Absolutely! You can make this soup in a slow cooker. Just sauté the aromatics first, then add them to the slow cooker with the other ingredients. Cook on low for 4-6 hours. This allows the flavors to meld beautifully. How long will the soup keep in the fridge? The soup will keep for about 4-5 days in the fridge. Store it in an airtight container. If you want to keep it longer, consider freezing it for up to 3 months. What can I serve with Coconut Curry Butternut Squash Soup? This soup pairs well with warm naan or crusty bread. A simple salad also complements it nicely. You could add a slice of lime on the side for a fresh touch. Can I make this recipe spicier? Yes, you can increase the spice! Add more red curry paste or some chili flakes. Start with a little and taste as you go until it reaches your desired heat level. How can I add protein to the soup? To add protein, consider mixing in cooked chickpeas or shredded chicken. Tofu is also a great choice for a vegan option. Add it during the last few minutes of cooking to warm through. For the full recipe, check out the details above! This blog post covered the essentials for making Coconut Curry Butternut Squash Soup. You learned about the important ingredients, preparation steps, and tips to enhance flavor. We discussed variations to fit different diets and how to store leftovers properly. Enjoy experimenting with this recipe. You can adjust flavors and textures to make it yours. With the right balance, this soup can be a comforting dish any time of the year. Happy cooking!

Coconut Curry Butternut Squash Soup Savory Delight

Welcome to a warm bowl of bliss! This Coconut Curry Butternut Squash Soup is perfect for chilly days. With creamy

Older posts
Newer posts
← Previous Page1 … Page9 Page10 Page11 … Page17 Next →

dsad

© 2025 spoonfulsavory • Built with GeneratePress

Our Policies

  • Copyright Policy
  • Cookie Policy
  • GDPR Policy
  • Privacy Policy
  • Disclaimer
  • Terms Of Use

More Information

  • Home
  • About
  • Contact
  • Appetizers
  • Dessert
  • Dinner
  • Drinks
©2025, spoonfulsavory About Back To Top