Skip to content
DisclaimerTerms Of UseGDPR PolicyCookie Policy

spoonfulsavory

  • Home
  • Drinks
  • Appetizers
  • Dinner
  • Dessert
  • About
  • Contact
  • Privacy Policy
DisclaimerTerms Of UseGDPR PolicyCookie Policy

Sarah

- 6 large eggs - 3 tablespoons mayonnaise - 1 tablespoon Greek yogurt - 2 tablespoons hot sauce (such as Frank's RedHot) - 1 teaspoon Dijon mustard - 1/4 teaspoon garlic powder - Salt and freshly cracked black pepper, to taste - 2 tablespoons crumbled blue cheese (plus additional for garnish) - Chopped green onions for garnish - Optional: crunchy celery sticks for serving Buffalo deviled eggs start with simple, tasty ingredients. The eggs give a rich base, while mayonnaise and Greek yogurt add creaminess. Hot sauce brings heat, and Dijon mustard offers a tangy kick. Garlic powder enhances flavor without being overpowering. Season your filling with salt and pepper to taste. The blue cheese adds a bold flavor that pairs perfectly with the hot sauce. Chopped green onions add a fresh touch and vibrant color. For a fun twist, serve the eggs with crunchy celery sticks for dipping. For the full recipe, check out the details in the earlier section. Enjoy these flavorful bites at your next gathering! To start, you need to boil and cool the eggs. Place six large eggs in a saucepan. Cover them with cold water, making sure the water is about an inch above the eggs. Bring the water to a rolling boil over medium-high heat. Once it boils, cover the pot and remove it from the heat. Let the eggs sit in the hot water for 12 to 15 minutes. After the time is up, cool the eggs quickly. Transfer them to a bowl filled with ice water. This stops the cooking process and helps with peeling. Let them cool for about five minutes. Once cooled, gently tap each egg on a hard surface. Peel them under running water for easier removal of the shell. Slice each egg in half lengthwise. Next, scoop out the yolks from the egg whites. Place all yolks in a mixing bowl. Add the remaining ingredients to this bowl: three tablespoons of mayonnaise, one tablespoon of Greek yogurt, two tablespoons of hot sauce, one teaspoon of Dijon mustard, and a quarter teaspoon of garlic powder. Season with salt and freshly cracked black pepper to taste. Using a fork, mash the yolk mixture until it is smooth and creamy. Once the mixture is well combined, gently fold in two tablespoons of crumbled blue cheese. Mix until just combined. This adds a rich flavor to your filling. Now it's time to fill the egg whites. Use a piping bag or a small spoon to fill each egg white half with the yolk mixture. Aim for a generous amount, creating a lovely mound on top of each half. For a beautiful presentation, garnish the filled eggs. Sprinkle additional crumbled blue cheese and chopped green onions over the top. This not only adds flavor but also makes the dish look appealing. For an extra treat, serve the Buffalo deviled eggs with crunchy celery sticks on the side. To cook hard-boiled eggs just right, start with cold water. Place the eggs in a pot and cover them with water. Make sure the water is about an inch above the eggs. Bring the water to a rolling boil. When it boils, cover the pot and take it off the heat. Let the eggs sit for 12 to 15 minutes. This time gives you a creamy yolk without the green ring. Once the time is up, cool the eggs quickly. Transfer them to a bowl filled with ice water. Let them rest for about 5 minutes. This step stops the cooking and makes peeling easier. Buffalo deviled eggs shine with the right hot sauce. If you want more heat, add an extra tablespoon of hot sauce. You can also adjust the flavor by adding more garlic powder or a squeeze of lemon. These small tweaks can change the taste quite a bit. Think about adding other seasonings too. A pinch of smoked paprika or cayenne pepper can give a fun twist. These flavors mix well with the creamy filling of the eggs. How you present Buffalo deviled eggs can impress your guests. Use a nice platter to arrange the eggs. You can place celery sticks around the eggs for a colorful touch. For garnishing, sprinkle extra blue cheese and chopped green onions on top. This adds flavor and looks great. You can also drizzle a little more hot sauce for a splash of color. These simple ideas make your deviled eggs stand out. For more detailed steps, check out the Full Recipe. {{image_4}} To make your Buffalo deviled eggs even spicier, add more hot sauce. This gives them a bold kick. You can also add a pinch of cayenne pepper or chopped jalapeños for extra heat. These little tweaks can take your dish from mild to wild! If you’re not a fan of blue cheese, try feta or cheddar instead. Both cheeses work well and add great flavor. For those with dairy allergies, use non-dairy cream cheese or mashed avocado. These substitutes keep the creamy texture while catering to dietary needs. Buffalo deviled eggs shine as a party snack. Pair them with crunchy veggies like celery or carrots. They also go great with chips or crackers. This makes them perfect finger food for gatherings. Place them on a platter for guests to grab easily. Your guests will love these tasty bites! For a complete guide on making these delicious treats, check out the Full Recipe. To keep your Buffalo deviled eggs fresh, store them in the fridge. Place them in an airtight container. This keeps the eggs from drying out. They will taste best if eaten within 2-3 days. If you need to cover them, use plastic wrap. Make sure the wrap is tight to stop air from getting in. You can freeze deviled eggs, but they may lose some texture. If you have leftovers, scoop out the yolk filling and freeze it separately. This way, the egg whites will stay intact. When you're ready to eat, defrost the filling in the fridge overnight. Use the egg whites within a week for best taste. Generally, you do not need to reheat deviled eggs. They taste best cold. If you do want to warm them, use a low heat setting in the oven. Place them in a dish and cover with foil. Heat for about 10 minutes. This helps keep their taste and texture. Enjoy your flavorful Buffalo deviled eggs straight from the fridge or at room temperature. For the full recipe, check the earlier sections! To peel hard-boiled eggs easily, start with fresh eggs. After boiling, cool the eggs in ice water. This helps the shell loosen. Gently tap the egg on a hard surface. Then, roll it to crack the shell all over. Peel under running water to wash away small bits. This method helps make peeling smooth and simple. Yes, you can make Buffalo deviled eggs ahead of time. Prepare the eggs and filling, then store them separately. Keep the egg whites in one container. Place the yolk mixture in another. When you are ready to serve, fill the whites just before eating. This keeps everything fresh and tasty. To adjust the spice in Buffalo deviled eggs, change the amount of hot sauce. For less heat, use one tablespoon of hot sauce. For more spice, add extra hot sauce or use a spicier brand. You can also mix in diced jalapeños or add cayenne pepper to the yolk mix for extra kick. These deviled eggs are simple yet packed with flavor. We covered key ingredients, step-by-step prep, and tasty variations. You learned handy tips for cooking and serving. Remember, the right garnishes make a big difference! Experiment with flavors that fit your taste. Make them ahead for parties or keep them for snacks. With these tricks, your deviled eggs will impress everyone. Enjoy creating your perfect dish!

Buffalo Deviled Eggs Flavorful Appetizer Recipe

Are you ready to spice up your next gathering? Buffalo Deviled Eggs are a zesty twist on a classic appetizer.
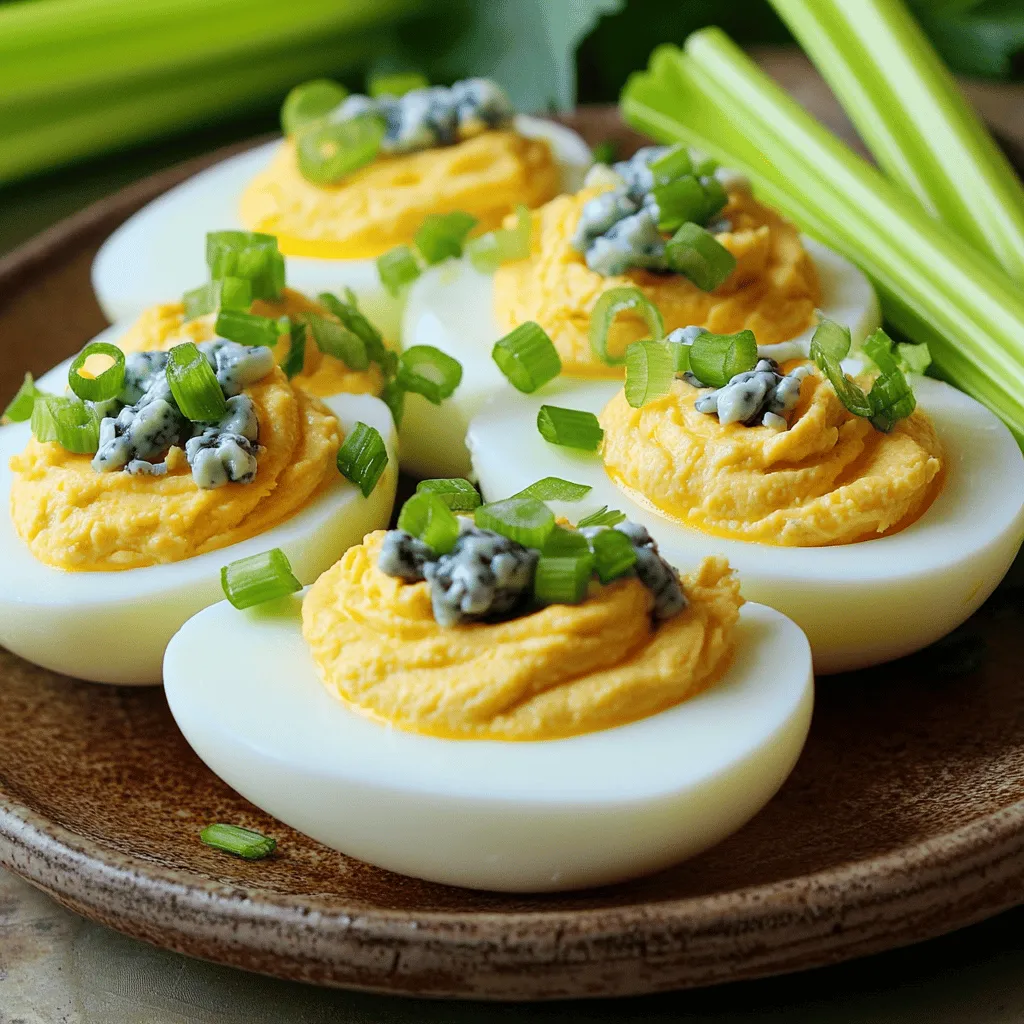
- 6 large eggs - 2 tablespoons mayonnaise - 1 teaspoon Dijon mustard - 1 teaspoon apple cider vinegar - Salt and pepper to taste - 2 tablespoons finely chopped chives - 2 tablespoons finely chopped red onion - 1 tablespoon Everything Bagel seasoning - Optional: cucumber or tomato slices for garnish You can swap mayonnaise for Greek yogurt for a lighter twist. Use yellow mustard if you don’t have Dijon. Apple cider vinegar can be replaced with lemon juice for a zesty kick. For a milder taste, try green onions instead of red onion. If you can't find Everything Bagel seasoning, make your own with sesame seeds, poppy seeds, garlic powder, and onion powder. Fresh eggs are key for great deviled eggs. Look for eggs with clean, uncracked shells. Check the sell-by date on the carton. If you can, buy local eggs or those labeled organic. You can also do the water test: place an egg in a bowl of water. Fresh eggs sink. If it floats, it's best to toss it. Fresh eggs will give you better flavor and texture in your Everything Bagel Deviled Eggs. To make perfect hard-boiled eggs, start by boiling water in a pot. Add the eggs gently. Cook them for about 10-12 minutes. This time gives you a firm yolk. After cooking, cool the eggs quickly to make peeling easy. Place them in an ice bath for 5-10 minutes. This stops the cooking and cools them down fast. Once the eggs cool, tap them on a hard surface to crack the shell. Peel the eggs under running water for ease. Cut each egg in half, lengthwise. Gently remove the yolks and place them in a bowl. Add mayonnaise, Dijon mustard, apple cider vinegar, salt, and pepper. Mash and mix until smooth. Stir in chopped chives, red onion, and half of the Everything Bagel seasoning for flavor. Now, it’s time to fill the egg whites! Use a spoon or a piping bag to put the yolk mixture into each egg white half. Make them look nice and full. After filling, sprinkle the rest of the Everything Bagel seasoning on top. This adds extra taste and visual appeal. If you want, garnish with cucumber or tomato slices for freshness. Enjoy your Everything Bagel Deviled Eggs! For the complete recipe, check out [Full Recipe]. To make these eggs shine, I suggest using homemade mayo. It tastes fresh and creamy. Store-bought mayo can work, but it may lack depth. If you have time, whip up a quick batch. Just blend egg yolks, oil, and a dash of lemon juice. This will add a special touch. Make your deviled eggs stand out! Arrange them on a colorful plate. Add fresh veggies around them for a pop of color. You can sprinkle extra Everything Bagel seasoning on top for flair. Use chopped chives to add a nice green touch. Garnishing with cucumber or tomato slices can give a fresh bite. Avoid overcooking your eggs. This can lead to a green ring around the yolk. Chill the eggs in ice water right after boiling. This makes peeling easier and helps keep them tender. Don’t rush mixing the filling. A smooth texture is key for a great taste. Lastly, be careful with seasoning. Taste as you go to ensure the right flavor balance. {{image_4}} You can easily change the taste of your Everything Bagel Deviled Eggs. Add spices like smoked paprika or cayenne for a kick. Fresh herbs, like dill or parsley, can brighten the flavor. Experiment with different mustards too. Each change can make your dish special. For a vegetarian version, skip the eggs and try chickpeas instead. Mash canned chickpeas with the same mix of mayo and spices. For a vegan option, use vegan mayo and chickpeas. This keeps the creamy texture while making it plant-based. Everyone can enjoy this dish. Pair your deviled eggs with fresh veggies like carrots or celery. They taste great with a light salad too. Enjoy them with drinks like sparkling water or a light beer. These pairings make your dish even more fun. You can find the Full Recipe to try these ideas! To keep your Everything Bagel Deviled Eggs fresh, store them in the fridge. Place them in an airtight container. This helps prevent them from drying out or absorbing other smells. Try to eat them within two days for the best taste. If you have extra filling, store it separately. This way, you can keep the egg whites intact until you're ready to serve. Can you freeze deviled eggs? I don't recommend it. Freezing changes the texture of the eggs. The filling can become watery and grainy after thawing. If you must freeze, try to freeze only the egg yolk mixture. When you are ready to use it, thaw it in the fridge overnight and mix it again before filling the egg whites. Deviled eggs last about 2 to 3 days in the fridge. After that, they may lose flavor and freshness. Always check for any off smell or changes in color before eating. For the best taste, enjoy them within the first couple of days. Everything Bagel seasoning is a mix of flavors. It has sesame seeds, poppy seeds, dried garlic, dried onion, and salt. This blend gives your dish a savory and crunchy taste. You can find it at stores or make your own. Just mix those ingredients in a bowl. It adds great depth to deviled eggs! You can make deviled eggs up to two days ahead of time. Just store them in the fridge. Keep them covered with plastic wrap or in an airtight container. This helps keep them fresh. However, it's best to fill them right before serving. This keeps the egg whites from getting soggy. Yes, you can use other mustards! Yellow mustard gives a milder taste. Spicy brown mustard adds a kick. Honey mustard can make it sweeter. Choose what you like best. Each type of mustard brings its own flavor. Experiment and find your favorite mix! Everything Bagel Deviled Eggs offer a fun twist on a classic snack. You learned how to choose fresh eggs, boil them, and mix a tasty filling. Simple tips helped you avoid common mistakes and enhance flavor. You can explore variations to suit your taste or needs. Remember, these eggs chill well and make great leftovers. Whether for a party or a snack, they impress every time. Enjoy your new skills and share this delicious recipe!

Everything Bagel Deviled Eggs Flavorful and Simple Dish

Looking for a tasty twist on a classic? These Everything Bagel Deviled Eggs are both flavorful and super simple to

- 1 cup semi-sweet chocolate chips - 1 cup milk chocolate chips - ½ cup unsweetened cocoa powder - ½ cup caramel sauce, divided - 1 cup mini marshmallows - 1 teaspoon flaky sea salt - Optional: ½ teaspoon pure vanilla extract - Optional: Additional caramel sauce for drizzling Gather these ingredients to make your salted caramel hot chocolate bombs. You will need two types of chocolate chips for a rich taste. The semi-sweet and milk chocolate chips blend well together. The cocoa powder adds depth, while the caramel sauce gives that sweet twist. Mini marshmallows create a fun texture. The flaky sea salt balances the sweetness, adding a delicious touch. If you want more flavor, vanilla extract can enhance the taste. You can even drizzle more caramel on top for added sweetness. With this list ready, you can dive into creating these irresistible treats. Don’t forget to check the [Full Recipe] for detailed steps. Enjoy the process of making these delightful bombs! - Combine 1 cup of semi-sweet chocolate chips and 1 cup of milk chocolate chips in a microwave-safe bowl. - Microwave in 30-second intervals, stirring after each until smooth. - Use a spoon or brush to coat the inside of silicone sphere molds with the melted chocolate. - Make sure to cover all surfaces evenly. - Place the coated molds in the freezer for about 10 minutes to let the chocolate harden. - In a bowl, mix ½ cup of unsweetened cocoa powder, ½ cup of caramel sauce, 1 cup of mini marshmallows, and 1 teaspoon of flaky sea salt. - If you like, add ½ teaspoon of pure vanilla extract for extra flavor. - Stir well until everything is combined. - Once the chocolate shells are firm, flex the molds to gently remove them. - Fill half of the shells with your cocoa and marshmallow mix. - Drizzle more caramel sauce on top for added sweetness. - Heat a non-stick skillet over low heat. - Place an empty chocolate shell on the skillet for a few seconds to soften the edge. - Quickly press this shell onto a filled half to seal the bomb. - Repeat this until all bombs are sealed. - Drizzle extra caramel over the tops of the bombs and sprinkle a bit more flaky sea salt for garnish. - You can package them in clear bags tied with ribbons or serve them right away. To enjoy, drop a hot chocolate bomb into a mug and pour hot milk over it. Watch as it bursts open to reveal a delicious mix of cocoa, marshmallows, and caramel. For more details, check the Full Recipe. To get a thick and even layer of chocolate, use a spoon or brush. Start with a generous amount and spread it evenly in the mold. Make sure the layer is not too thin, or it may break. Chill the molds for about 10 minutes to let the chocolate harden. This step is crucial. If you skip it, your bombs might lose shape when you remove them. You can mix up the fillings for fun. Try adding peppermint extract for a minty kick. You can also use different chocolates like dark or white. Seasonal spices like cinnamon or nutmeg add warmth in the fall. Get creative! Each bomb can have a unique flavor that fits your mood or the season. To keep your hot chocolate bombs fresh, store them in a cool, dry place. The ideal temperature is below 75°F. Use an airtight container to keep out moisture. For longer storage, you can freeze them. Just make sure to wrap them well to avoid freezer burn. When you want one, let it thaw before using. This keeps the taste and texture just right. {{image_4}} You can easily change the taste of your salted caramel hot chocolate bombs. One fun way is to add peppermint extract. Just a few drops give a fresh, minty twist. This works great around the holidays. Another option is to use dark chocolate instead of semi-sweet. Dark chocolate gives a richer flavor and pairs well with the sweet caramel. The choice is yours, and both options are delicious. Want to make it vegan-friendly? You can swap the chocolate chips for dairy-free ones. Use almond milk instead of regular milk. This way, everyone can enjoy these tasty treats. For gluten-free options, make sure your cocoa powder and caramel sauce are gluten-free. Most brands are, but it’s always best to check the label. Making these adjustments lets everyone indulge without worry. Toppings can add fun and flair to your hot chocolate bombs. You can sprinkle crushed candies or colorful sprinkles on top. This adds a pop of color and crunch. Consider drizzling options beyond caramel. Try white chocolate or dark chocolate for a nice touch. These extra steps make your bombs even more special. For the full recipe, check out the Salted Caramel Hot Chocolate Bombs section. Enjoy customizing your treats! To keep your salted caramel hot chocolate bombs fresh, store them in a cool place. A pantry or cupboard away from heat works well. Make sure they are in an airtight container. This keeps moisture and air out, which can ruin their taste and fun texture. For best results, use a glass jar or a plastic container with a tight lid. Avoid metal containers, as they can trap heat and moisture. You want to keep your treats safe and ready for cozy moments. For extended freshness, you can freeze your hot chocolate bombs. Place them in a single layer on a baking tray. After they freeze solid, transfer them to a freezer bag. Make sure to label the bag with the date. They can last up to three months in the freezer. When you're ready to enjoy one, take it out and let it thaw at room temperature for about 30 minutes. This helps keep the chocolate smooth and tasty. Once thawed, it’s time to make your hot chocolate experience magical! You can follow the Full Recipe to enjoy this delightful treat. Salted caramel hot chocolate bombs are fun treats that explode with flavor. They are made from chocolate spheres filled with cocoa, marshmallows, and caramel. When you pour hot milk over them, they melt and reveal their sweet contents. Each bomb combines rich chocolate, creamy caramel, and a hint of salt. This mix creates a perfect balance of sweet and salty. Yes, you can find pre-made salted caramel hot chocolate bombs at many stores. Look for brands that use high-quality chocolate and real ingredients. Check local bakeries, gourmet shops, or online retailers. Always read reviews to find the best options. This way, you can enjoy these treats without the hassle of making them at home. Hot chocolate bombs can last for about two to four weeks when stored properly. Keep them in a cool, dry place in an airtight container. Avoid moisture, as it can ruin the chocolate. For longer storage, you can freeze them. Just remember to wrap them well to keep them fresh. Yes, you can use different types of milk when serving hot chocolate bombs. Full-fat milk gives a rich taste, while almond or oat milk offers a lighter option. You can even use coconut milk for a fun twist. Experiment with what you like best, and enjoy your unique flavor combinations. Using a hot chocolate bomb is simple and fun. Start by placing the bomb in a mug. Then, heat your milk until it’s steaming. Pour the hot milk over the bomb and watch as it bursts open. Stir the mixture well to combine the chocolate, cocoa, and marshmallows. Enjoy your delicious drink! This blog post shares how to make delicious Salted Caramel Hot Chocolate Bombs. We covered all the steps, from melting chocolate to serving. You can even customize your bombs with different flavors or toppings. Remember, proper storage will keep them fresh. These treats are fun to make and enjoy. Whether for yourself or as a gift, they are a sweet delight. Try making them and impress your friends and family with your tasty creation. You'll love how easy they are to prepare!

Salted Caramel Hot Chocolate Bombs Irresistible Treats

Warm your heart and delight your taste buds with Salted Caramel Hot Chocolate Bombs! These tasty treats combine sweet and

Gathering the right ingredients is key to making the best Peppermint Mocha Brownies. Here’s what you need: - 1 cup unsalted butter, melted - 1 ½ cups granulated sugar - 1 cup brown sugar, packed firmly - 4 large eggs, at room temperature - 1 teaspoon vanilla extract - 1 teaspoon peppermint extract - 1 cup all-purpose flour - 1 cup unsweetened cocoa powder - 1 teaspoon baking powder - ½ teaspoon salt - 2 teaspoons instant coffee granules - 1 cup semi-sweet chocolate chips - Crushed peppermint candies for garnish Each ingredient plays a role. The butter adds richness. Granulated and brown sugars provide sweetness and moisture. Eggs bind everything together while adding fluffiness. The extracts bring that festive flavor. The cocoa powder gives the brownies a deep chocolate taste. Instant coffee enhances the mocha notes and balances the sweetness. Baking powder helps them rise, while salt rounds out the flavors. Finally, the chocolate chips create gooey pockets of chocolate, and crushed peppermint candies provide a festive crunch. Using these ingredients, you’ll create brownies that are rich and full of flavor. For the complete process, check the Full Recipe. 1. Preheat the oven and prepare the baking pan. Set your oven to 350°F (175°C). Grab a 9x13 inch baking pan. Lightly grease it or line it with parchment paper. Make sure the paper hangs over the sides for easy lifting later. 2. Mix wet ingredients and incorporate eggs. In a large bowl, add 1 cup of melted unsalted butter, 1 ½ cups of granulated sugar, and 1 cup of packed brown sugar. Whisk these until smooth, about 2-3 minutes. Now, add 4 large eggs one by one. Whisk after each egg until fully mixed. Stir in 1 teaspoon of vanilla extract and 1 teaspoon of peppermint extract. 3. Combine and fold dry ingredients into wet mix. Take another bowl and whisk together 1 cup of all-purpose flour, 1 cup of unsweetened cocoa powder, 1 teaspoon of baking powder, ½ teaspoon of salt, and 2 teaspoons of instant coffee granules. Slowly fold this dry mix into the wet ingredients. Stir gently until just combined. Be careful not to overmix; this helps keep the texture nice. 4. Add chocolate chips and mix gently. Now, fold in 1 cup of semi-sweet chocolate chips. Make sure they spread evenly throughout the batter. 1. Pour and spread batter in the pan. Carefully pour the brownie batter into your prepared pan. Use a spatula to spread it out evenly. 2. Bake time and doneness check. Place the pan in the oven and bake for 25-30 minutes. To check if they are done, insert a toothpick into the center. It should come out with a few moist crumbs, not wet batter. 3. Cooling and cutting instructions. Once baked, take the brownies out of the oven and let them cool in the pan on a wire rack for about 10-15 minutes. After they cool slightly, lift them out with the parchment overhang. Transfer them to a cutting board. Cut into squares and sprinkle with crushed peppermint candies for that festive touch. For the full recipe, refer back to the beginning! - Avoid overmixing the batter: When making your brownies, stir just until all the dry ingredients blend in. Overmixing can make them tough. You want a fudgy texture, not a cake-like one. - Check your oven temperature: Ovens can vary. Use an oven thermometer to ensure your brownies bake at the right heat. A too-hot oven can ruin your brownies, making them dry. - Serving suggestions: For a fun and festive touch, serve the brownies on a colorful plate. Cut them into neat squares and arrange them in a pyramid shape. This makes them look even more tempting. - Garnishing ideas: Top the brownies with crushed peppermint candies for crunch and color. A light dusting of powdered sugar adds a nice touch too. You can even drizzle some melted chocolate over the top for extra flair. For the complete recipe, check out the Full Recipe link! {{image_4}} You can easily change the flavor of your peppermint mocha brownies. One fun way is to add different extracts. Try using almond extract for a nutty twist. Vanilla extract also works well if you want a classic taste. You can also experiment with chocolate types. Instead of semi-sweet chocolate chips, use dark chocolate for a rich flavor. If you prefer something sweeter, try milk chocolate. White chocolate chips can add a creamy touch. Mixing different types of chocolate can create a unique taste. If you need gluten-free brownies, swap regular flour for almond flour. This change keeps the brownies moist and adds a nice nutty flavor. For a vegan version, substitute eggs with flaxseed meal or apple sauce. Use a plant-based butter instead of regular butter. These tweaks keep the brownies delicious while meeting dietary needs. When you make these changes, the brownies still taste great. You can enjoy peppermint mocha brownies that fit your lifestyle and preferences! For the complete recipe, check out the Full Recipe section! To keep your brownies fresh, store them in an airtight container. You can place parchment paper between layers to prevent sticking. If you want them at room temperature, they will last about 3-4 days. If you prefer, you can refrigerate them for up to a week. Just know that cold brownies may be firmer and less rich in flavor. To freeze your brownies, first let them cool completely. Then, wrap them tightly in plastic wrap. Place them in an airtight container or a freezer bag for extra protection. They will stay fresh for about 2-3 months in the freezer. When you're ready to enjoy, thaw the brownies in the fridge overnight. For a warm treat, you can microwave them for a few seconds. Serve them with a scoop of ice cream or a drizzle of chocolate sauce for a delicious twist. Enjoy your Peppermint Mocha Brownies any time! How do I make Peppermint Mocha Brownies from scratch? To make Peppermint Mocha Brownies from scratch, start by melting butter. Mix the melted butter with granulated and brown sugars until smooth. Add eggs, vanilla, and peppermint extract, mixing well. In another bowl, combine flour, cocoa, baking powder, salt, and coffee granules. Fold the dry mix into the wet mix, then add chocolate chips. Pour the batter into a greased pan and bake at 350°F for 25-30 minutes. You can find the complete steps in the Full Recipe. Can I use other types of chocolate chips? Yes, you can use other types of chocolate chips. Dark chocolate chips add depth. Milk chocolate chips make it sweeter. White chocolate chips offer a creamy twist. Feel free to mix different types for more flavor. How long do the brownies stay fresh? The brownies stay fresh for about five days at room temperature. Keep them in an airtight container. If you want them to last longer, store them in the fridge for up to a week. What can I substitute for peppermint extract? You can use mint extract as a substitute. It has a strong flavor, so use less. Vanilla extract also works if you want a milder taste. Almond extract can add a nice twist too. Can I make these brownies in advance? Yes, you can make Peppermint Mocha Brownies in advance. They taste even better the next day. Just store them in an airtight container after they cool. What can I serve with Peppermint Mocha Brownies? Serve these brownies with a scoop of vanilla ice cream. Whipped cream or hot chocolate pairs well too. You could also enjoy them with a warm cup of coffee or tea for a cozy treat. You learned how to make Peppermint Mocha Brownies with simple steps. We covered ingredients, baking, and storage tips. Feel free to try different flavors or dietary changes. These brownies are versatile and fun to make. Remember to enjoy the process, and don't worry about making them perfect. With the right care, they can delight your family and friends. Happy baking!

Peppermint Mocha Brownies Irresistible Holiday Treat

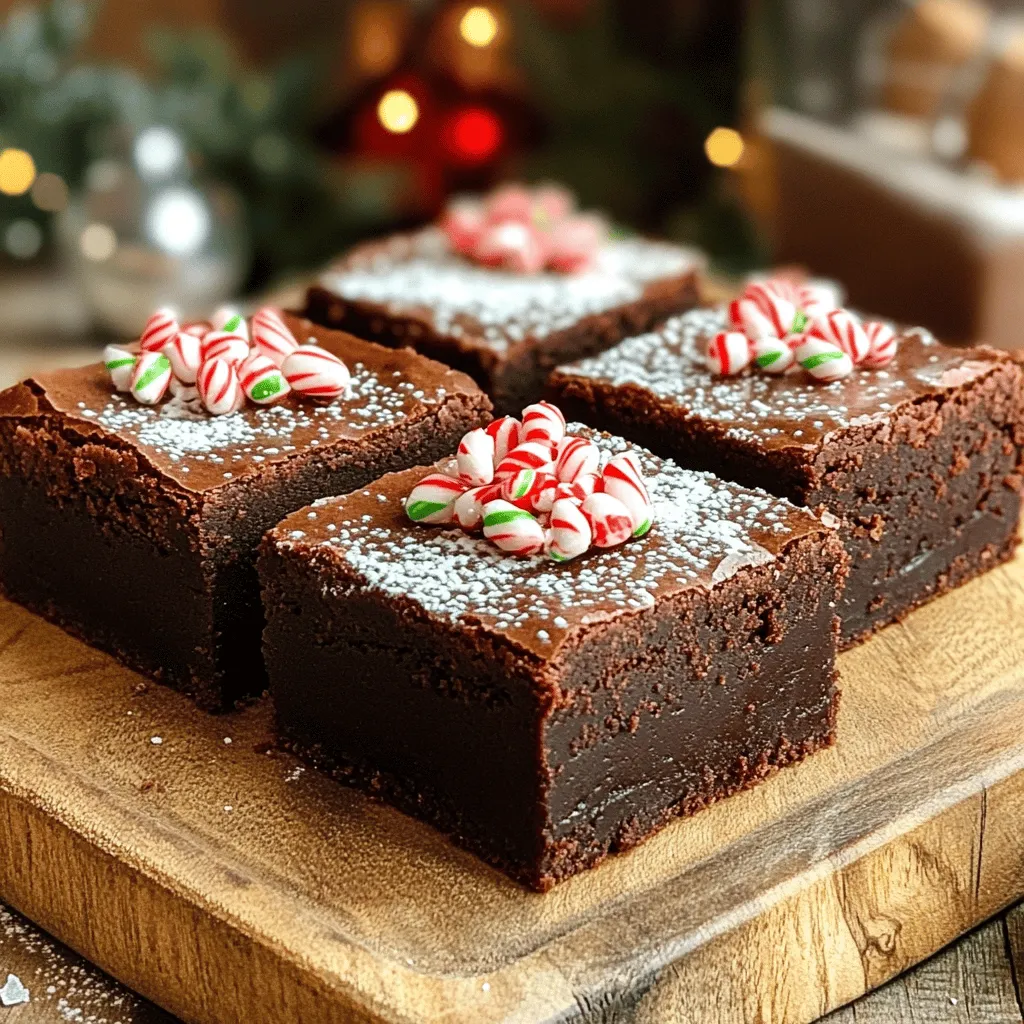
Get ready to impress your friends and family with these Peppermint Mocha Brownies! This irresistible holiday treat combines rich chocolate,

To make hot chocolate bombs, you need some simple ingredients. These tasty treats are fun to make and even better to enjoy. Here is the list of ingredients you'll need: - 1 cup milk chocolate chips - 1/2 cup white chocolate chips - 1/2 cup cocoa powder - 1/2 cup mini marshmallows - 1/4 cup crushed peppermint candy (optional) - Silicone mold (preferably sphere-shaped) Each ingredient adds a special touch. The milk chocolate gives a rich taste. The white chocolate adds sweetness and creaminess. Cocoa powder provides that classic hot chocolate flavor. Mini marshmallows make it fluffy and fun. If you like mint, crushed peppermint gives a festive twist. Finally, a silicone mold lets you shape the bombs easily. These ingredients mix to create a delightful experience. You can find them at most grocery stores. Get ready to have fun and make your own hot chocolate bombs! For the complete process, check out the Full Recipe. First, you need to melt the chocolate. Take 1 cup of milk chocolate chips and put them in a microwave-safe bowl. Heat them in the microwave in 30-second bursts. Stir the chocolate well after each round. Keep heating until the chocolate becomes smooth. It should look shiny and silky. Once your milk chocolate is melted, it’s time to make the shells. Take a silicone mold and scoop about 1 tablespoon of melted chocolate into each cavity. Use the back of a spoon to spread the chocolate up the sides. Make sure the layer is thick at the edges, so the shells are strong. After that, put the mold in the fridge. Let the chocolate harden for about 15-20 minutes. The shells should be solid when you take them out. Now, it's time to fill the chocolate shells. Take half of the hardened chocolate spheres and add 1 tablespoon of cocoa powder to each. Then, add a handful of mini marshmallows. If you like, sprinkle crushed peppermint candy on top for a nice twist. Each bomb should be packed with tasty treats. This makes the hot chocolate more fun and flavorful. To seal the bombs, warm a plate in the microwave for a few seconds. It should be warm but not hot. Take one empty chocolate half and press it onto the plate for just a moment. This warms the edge. Next, place this half on top of one filled half. Gently press them together to seal. Make sure they are tightly secured. Let the Hot Chocolate Bombs cool at room temperature. Once cooled, store them in an airtight container until you want to enjoy them. When ready to indulge, drop one bomb into a mug. Pour steaming hot milk over it. Watch as it melts into a rich and creamy drink. Stir well to mix everything! For the Full Recipe, refer back to the ingredients and instructions provided. To make great hot chocolate bombs, perfect melting is key. Use a microwave-safe bowl for your chocolate chips. Heat them in small bursts of 30 seconds. Stir well between each burst. This helps avoid burning. A smooth chocolate mix is what you want. You can also use a double boiler if you prefer. Just make sure the water doesn't touch the chocolate. This method gives you more control. Chocolate is delicate. To avoid breakage, handle it gently. When you remove the shells from the mold, take your time. If they feel too soft, chill them a bit longer. Use a warm plate to seal the halves. This softens the edges just enough. Press them together softly. If they crack, you can melt a bit of chocolate to fix them. Serving your hot chocolate bombs can be fun and creative. Use clear mugs to show off the melting action. Pour in hot milk over the bomb and watch it work. Add whipped cream on top for a treat. A sprinkle of crushed peppermint adds a nice touch. For a fun twist, try adding flavored syrups or even a dash of cinnamon. Enjoy your hot chocolate bombs with friends or family for a cozy night in. For the complete process, check out the Full Recipe. {{image_4}} Hot chocolate bombs are fun to customize! You can make them with many flavors. Here are a few ideas to try: - Seasonal Flavors: - Pumpkin Spice: Use pumpkin spice mix in the cocoa powder. This gives a warm, fall taste. - S'mores: Add crushed graham crackers and a bit of chocolate for a campfire treat. - Alternative Fillings: - Nutella: Fill the bomb with a spoonful of Nutella for a creamy surprise. - Caramel: A drizzle of caramel adds a sweet twist when the bomb melts. These options make every sip special. You can change the taste based on the season or your mood. Making hot chocolate bombs vegan is easy! Use dairy-free chocolate chips. Here’s how: - Substitute milk chocolate chips with dark chocolate chips. - Use almond milk, oat milk, or any other plant-based milk for the hot drink. These changes keep the treat rich and tasty without dairy. Enjoy your hot chocolate without any worry! For a complete guide on how to make these delicious treats, check out the Full Recipe. To keep your hot chocolate bombs fresh, store them in an airtight container. Place a piece of parchment paper between layers to avoid sticking. This method protects them from moisture and keeps them tasty. Hot chocolate bombs last about two weeks at room temperature. If you keep them in a cool, dark place, they stay fresh longer. Avoid storing them in a warm or sunny spot. Heat can melt the chocolate or ruin the filling. You can freeze hot chocolate bombs for up to three months. Wrap each bomb in plastic wrap or foil to protect it. Place them in a freezer-safe bag or container. When ready to enjoy, thaw them in the fridge for a few hours before using. This keeps the chocolate intact. For the full recipe, check out the instructions above. Hot chocolate bombs are fun treats filled with cocoa, marshmallows, and flavors. They are spheres made of chocolate that melt when hot milk is poured over them. This creates a cozy and delicious drink. You can watch the magic unfold as the bomb opens up, releasing all the tasty fillings. You can make hot chocolate bombs without a mold by using balloons. Inflate small balloons and coat them with melted chocolate. Let the chocolate harden. Once set, pop the balloon and remove it. Fill the chocolate shell with cocoa and marshmallows. This method gives you a fun shape, and it works well! Yes, you can buy hot chocolate bombs at many stores, especially during winter. Look for them in shops that sell sweets or online. They come in different flavors and designs. Buying them is a quick way to enjoy this treat without making them yourself. You can use any milk you like for hot chocolate. Whole milk will make it rich and creamy. Almond milk or oat milk works well for a dairy-free option. If you want a lighter drink, try using skim milk. Choose what you enjoy most for the best flavor! This blog shared how to make hot chocolate bombs using simple ingredients and steps. You'll learn to melt chocolate, create shells, and fill them with tasty treats. Remember the tips for perfecting your technique to avoid breaks. You can customize with fun flavors like pumpkin spice or make vegan options. Store them well for the best taste. Enjoy warming up with your delicious homemade treats. Hot chocolate bombs are a fun way to enjoy a cozy drink. Now you’re all set to make your own!

Hot Chocolate Bombs Easy and Fun Treat Ideas

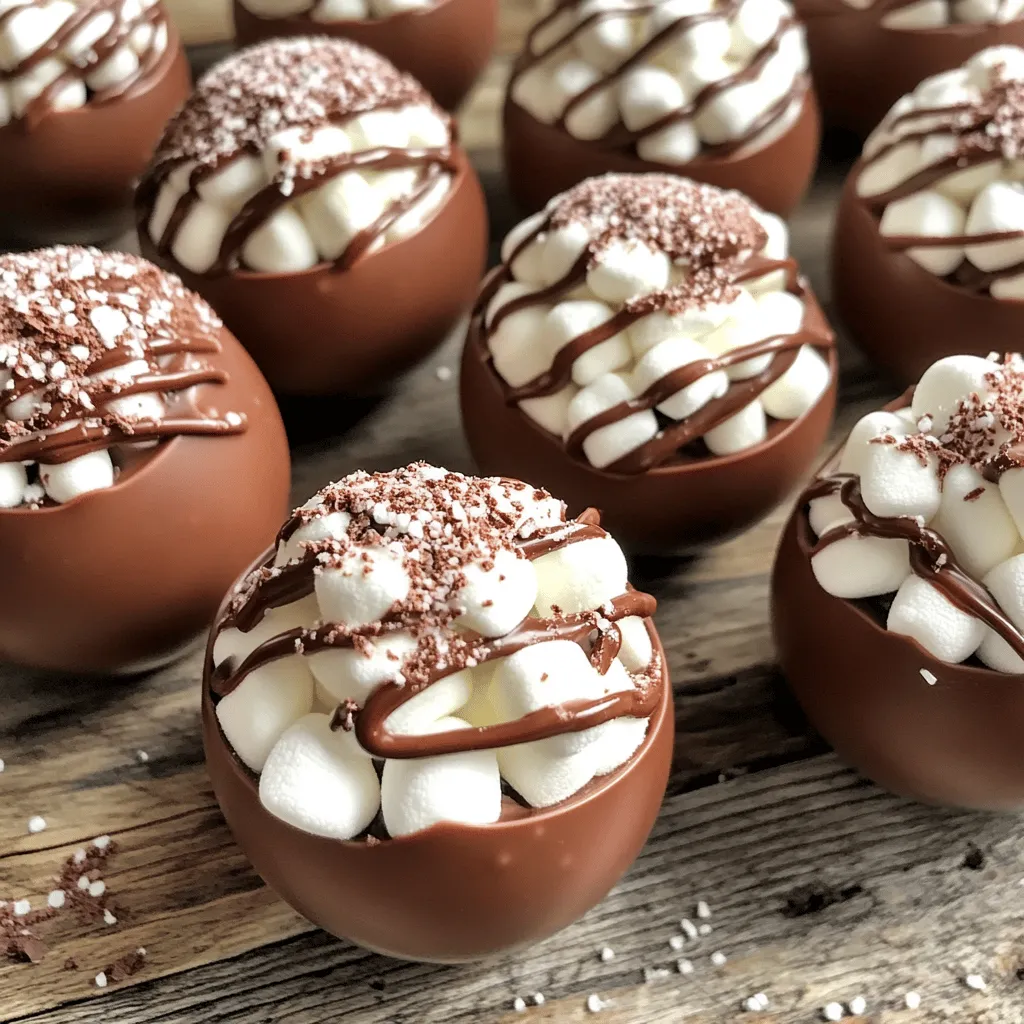
Hot chocolate bombs are the perfect fun treat for any chocolate lover! These little spheres explode with flavor when you

To make Gingerbread Latte Cupcakes, gather these key items: - 1 ½ cups all-purpose flour - 1 teaspoon baking powder - 1 teaspoon baking soda - ½ teaspoon salt - 2 teaspoons ground ginger - 2 teaspoons ground cinnamon - ½ teaspoon ground nutmeg - ½ cup unsalted butter, softened - 1 cup packed brown sugar - 2 large eggs, at room temperature - 1 teaspoon pure vanilla extract - ½ cup buttermilk, at room temperature - ½ cup brewed coffee, cooled For extra flavor, add a pinch of ground cloves or a splash of whiskey. You will need some tools to bake these cupcakes: - Muffin pan - Cupcake liners - Mixing bowls - Electric mixer - Measuring cups and spoons - Whisk I recommend using a non-stick muffin pan. It helps the cupcakes release easily. Choose festive cupcake liners to add charm. First, preheat your oven to 350°F (175°C). This step is key for even baking. While it heats up, prepare your muffin pan. Line it with cupcake liners to avoid sticking. This small step makes cleanup easy. Next, gather your dry ingredients. In a medium bowl, mix these items: - 1 ½ cups all-purpose flour - 1 teaspoon baking powder - 1 teaspoon baking soda - ½ teaspoon salt - 2 teaspoons ground ginger - 2 teaspoons ground cinnamon - ½ teaspoon ground nutmeg Whisk them together until they are well blended. Set this bowl aside for later. Now, let's move on to the wet ingredients. In a large bowl, use an electric mixer to cream the softened butter and brown sugar. Mix on medium speed for about 2-3 minutes. You want this mixture to look light and fluffy. Add the eggs one at a time. Mix well after each egg. Then, stir in the pure vanilla extract until it is fully combined. This creates a rich base for your cupcakes. Gradually add the dry ingredients to the wet mixture. Alternate with the buttermilk. Start and end with the dry ingredients. Mix just until everything comes together. It’s crucial not to overmix. A few lumps are okay. Overmixing can make cupcakes tough. Now, gently fold in the cooled brewed coffee into your batter. This gives your cupcakes that gingerbread latte flavor. Using a spoon or a cookie scoop, fill each cupcake liner about two-thirds full with batter. This allows room for rise without overflowing. Place the muffin pan in your preheated oven. Bake for 18-20 minutes. To check for doneness, insert a toothpick into the center of a cupcake. If it comes out clean, they are ready. Once baked, let the cupcakes cool in the pan for 5 minutes. After that, transfer them to a wire rack. Allow them to cool completely before you frost them. For the full recipe, see above. To make your Gingerbread Latte Cupcakes perfect, focus on texture and flavor. Use room temperature butter and eggs for a smooth batter. Make sure to measure flour correctly by spooning it into your cup and leveling it off. Overmixing can lead to dense cupcakes, so mix just until combined. Common mistakes include not preheating your oven or filling cupcake liners too much. Always check your oven temperature with an oven thermometer for accuracy. If your cupcakes sink, they may have been underbaked or overmixed. The best frosting for these cupcakes is cream cheese frosting. It pairs well with the spice of gingerbread. To achieve a smooth finish, make sure the butter is softened but not melted. Beat the butter and cream cheese until fluffy, then gradually add powdered sugar. For a festive touch, mix in a pinch of cinnamon or nutmeg. When frosting, use a spatula or piping bag for an even layer. Crushed gingerbread cookies on top add both flavor and fun! You can boost the flavor of your cupcakes by adding extras. A splash of molasses deepens the taste. For more coffee flavor, use espresso powder or a bit of coffee extract. If you want to try something different, swap out the spices. Cardamom or allspice can add a unique twist. You can even use pumpkin spice for a seasonal spin. Experiment and find your perfect blend! For the full recipe, check out the details above. {{image_4}} To make vegan Gingerbread Latte Cupcakes, you can replace the eggs and butter. Use flaxseed meal mixed with water as an egg substitute. For the butter, coconut oil works well. You can also use almond milk instead of buttermilk. For gluten-free options, swap the all-purpose flour with a gluten-free blend. Make sure it includes xanthan gum for structure. This simple change keeps your cupcakes soft and fluffy, just like the original. You can play with spices to enhance the flavor. Try adding cloves or allspice for a deeper taste. A hint of orange zest can also brighten the gingerbread flavor. Mixing flavors is another fun option. Pair gingerbread with chocolate or caramel. For a coffee twist, use espresso powder in the batter. These combinations can take your cupcakes to a new level. Get creative with how you serve your Gingerbread Latte Cupcakes. Try placing them on a wooden board with festive decorations. You can even use small holiday-themed cupcake toppers. For drinks, coffee or spiced apple cider pairs perfectly with the cupcakes. Hot cocoa is another great choice. These pairings will enhance the cozy vibe of your festive treats. For the full recipe, check out the Gingerbread Latte Cupcakes section. To keep your Gingerbread Latte Cupcakes fresh, store them in an airtight container. This helps lock in moisture. Place the cupcakes at room temperature for up to three days. For longer storage, wrap them tightly in plastic wrap. This method prevents freezer burn. You can freeze the cupcakes for up to three months. Thaw them in the fridge before serving for the best taste. These cupcakes stay fresh for about three days at room temperature. You can extend their life by freezing them. If you see any mold or off-smells, discard the cupcakes. Signs that they have gone bad include a dry texture or an unusual taste. Trust your senses. When in doubt, throw them out to avoid any risk. What can I substitute for buttermilk in this recipe? You can use regular milk mixed with lemon juice or vinegar. Just add one tablespoon of acid to a cup of milk. Let it sit for five minutes. This will give you a similar tangy flavor. Can I use fresh ginger instead of ground ginger? Yes, you can use fresh ginger. Grate about one tablespoon of fresh ginger for each teaspoon of ground ginger. Fresh ginger adds a bright, zesty kick to your cupcakes. Why did my cupcakes sink in the middle? Cupcakes may sink due to overmixing the batter or not enough leavening agents. Make sure to mix just until combined. Check if your baking soda and powder are fresh, as old leaveners can affect rise. What to do if my cupcakes are too dry? If your cupcakes are dry, try using a bit more buttermilk or coffee next time. You can also add a tablespoon of oil for extra moisture. Don't overbake them; check for doneness a few minutes early. Can I make this recipe ahead of time? Yes, you can prepare the batter and store it in the fridge for up to two days. Just let it come to room temperature before baking. You can also bake the cupcakes a day ahead and store them. How can I adapt this recipe for mini cupcakes? To make mini cupcakes, fill the liners about halfway full. Bake them for 12-15 minutes, checking for doneness with a toothpick. Mini cupcakes are perfect for parties and easy to share. For the complete recipe, refer to the Full Recipe section. The Gingerbread Latte Cupcakes combine rich flavors with simple techniques. We've covered key ingredients, baking supplies, and preparation steps. I shared tips to avoid common mistakes and suggestions for frosting and serving. You can even explore dietary and flavor variations to suit your taste. Remember to store them properly to keep them fresh. With these insights, you're ready to bake a delightful treat that everyone will love. Enjoy the process and happy baking!

Gingerbread Latte Cupcakes Festive and Flavorful Treat

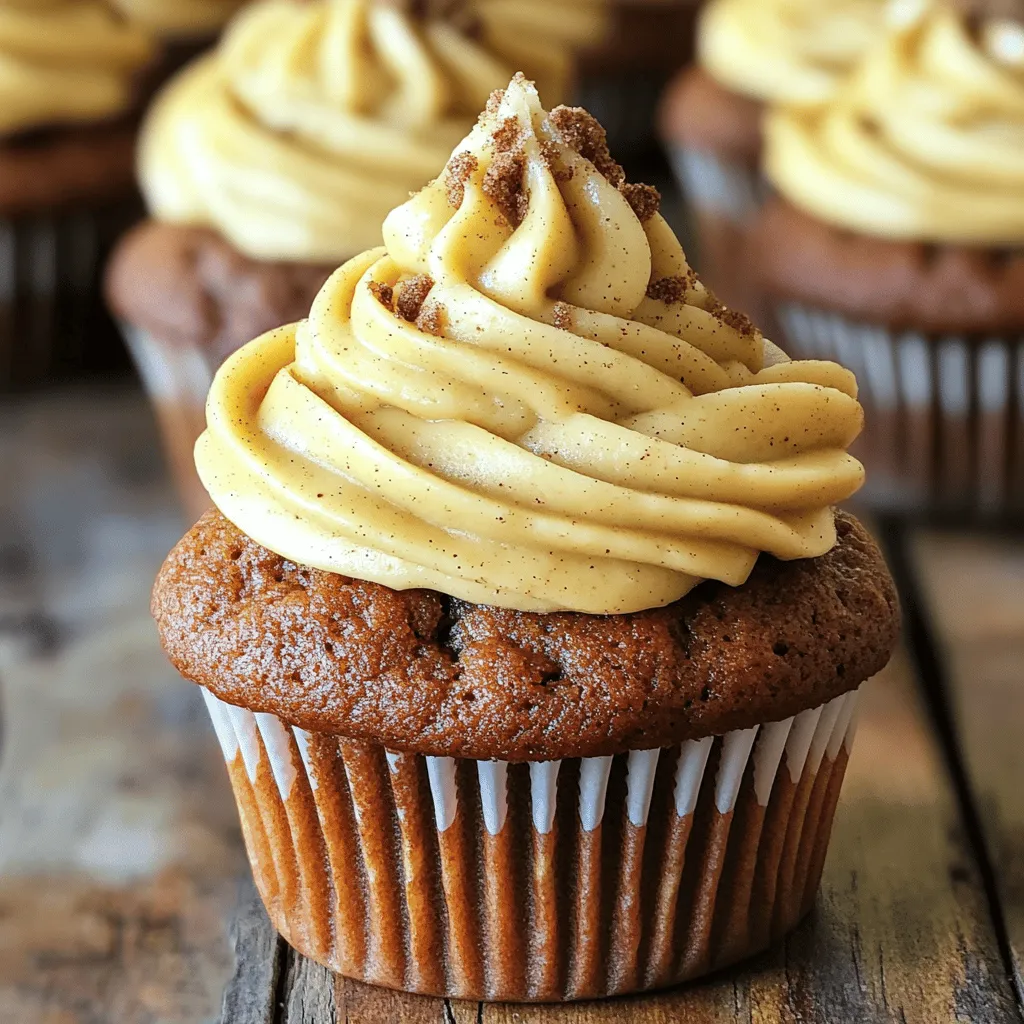
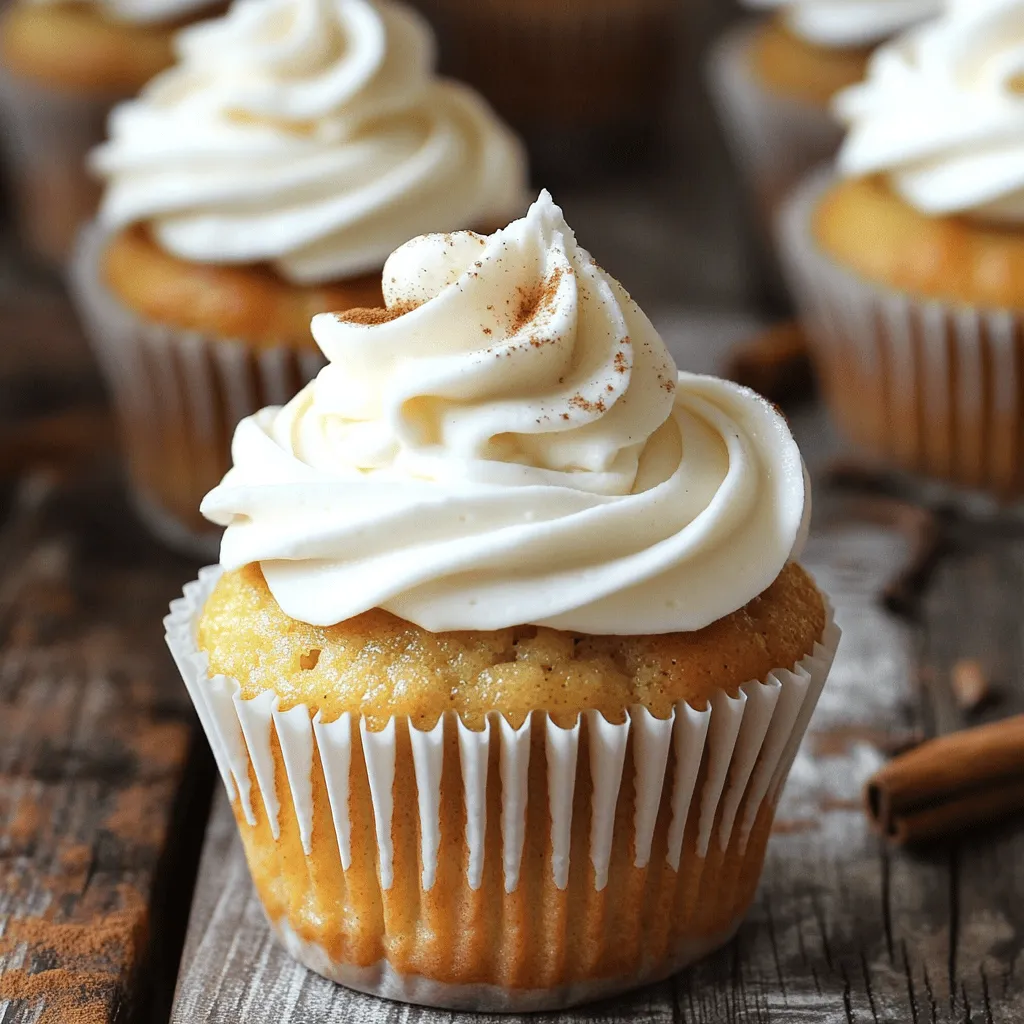
Dreaming of the perfect festive treat? Look no further! My Gingerbread Latte Cupcakes combine warm spices and rich coffee flavor

Chai latte cupcakes are a delightful treat that combines warm spices and sweet flavors. Here’s what you need to make them: - 1 ½ cups all-purpose flour - 1 teaspoon baking powder - ½ teaspoon baking soda - ¼ teaspoon salt - 1 tablespoon chai spice mix (a blend of cinnamon, ginger, cardamom, and cloves) - ½ cup unsalted butter, softened to room temperature - 1 cup granulated sugar - 2 large eggs, at room temperature - 1 teaspoon vanilla extract - ½ cup buttermilk (or substitute with milk mixed with 1 teaspoon vinegar) - ¾ cup strong brewed chai tea, cooled to room temperature - ½ cup heavy cream (for frosting) - 1 ½ cups powdered sugar (for frosting) - A pinch of chai spice mix (for garnish) These ingredients create a perfect balance of flavors. The chai spice mix gives the cupcakes a warm, cozy taste. The brewed chai tea adds depth to the batter. For the frosting, heavy cream and powdered sugar create a light and fluffy topping that complements the cupcakes. You can find the full recipe linked in this section. 1. Preheat your oven to 350°F (175°C). This will help bake the cupcakes evenly. 2. Get your cupcake pan ready by lining it with paper cupcake liners. This makes for easy cleanup later. 3. In a medium bowl, mix 1 ½ cups of all-purpose flour, 1 teaspoon of baking powder, ½ teaspoon of baking soda, ¼ teaspoon of salt, and 1 tablespoon of chai spice mix. Whisk these dry ingredients together thoroughly and set the bowl aside. 4. In a large bowl, take ½ cup of softened butter and 1 cup of granulated sugar. Use an electric mixer to cream these together until fluffy. This should take about 3-4 minutes. 1. Add 2 large eggs to the butter-sugar mix one at a time. Make sure to mix well after each egg. 2. Stir in 1 teaspoon of vanilla extract until it is well combined. 3. Gradually add the flour mixture to the wet ingredients. Do this in parts, alternating with ½ cup of buttermilk. Start and finish with the flour mixture. Mix until everything is just combined; avoid overmixing at this stage. 4. Slowly pour in ¾ cup of cooled brewed chai tea into the batter. Gently fold it in until it is fully mixed and smooth. 1. Carefully fill each cupcake liner about two-thirds full with the chai batter. This gives them room to rise without overflowing. 2. Place the cupcake pan in the oven and bake for 18-20 minutes. To check if they are done, insert a toothpick into the center of a cupcake. It should come out clean when they are ready. 3. Once baked, take the cupcakes out of the oven. Let them cool completely on a wire rack before you frost them. For the complete list of ingredients and instructions, check the Full Recipe. To make the best chai latte cupcakes, use room temperature ingredients. When your butter and eggs are at room temp, they mix better. This helps create a smooth batter. It also makes your cupcakes rise evenly. Next, avoid overmixing the batter. Mix just until combined. If you mix too much, your cupcakes may turn out dense. You want them light and fluffy. For a stable whipped cream, start with cold heavy cream. Use a clean bowl and beaters. Whip slowly at first, then increase the speed. Add powdered sugar gradually for sweetness. This helps the cream hold its shape. When decorating your chai latte cupcakes, get creative! Use a piping bag for fun designs. You can also top them with a sprinkle of chai spice mix. This adds flavor and looks beautiful. Try using edible flowers or chocolate shavings for extra flair. For the full recipe, check out the details above and enjoy your baking! {{image_4}} You can make your chai latte cupcakes even more exciting. Try adding chocolate or espresso. These will give the cupcakes a richer taste. Just mix in ¼ cup of cocoa powder or 1 tablespoon of instant espresso powder with the dry ingredients. This small change can transform the flavor and make it more decadent. You can also play with frosting flavors. Instead of the classic whipped cream, try adding flavors like caramel or maple. To do this, simply mix a tablespoon of your chosen flavor into the whipped cream before frosting. This adds a nice twist and makes each bite unique. If you need to make gluten-free cupcakes, use almond or coconut flour. Replace all-purpose flour with 1 cup of either flour. Adjust the baking powder to 1 ½ teaspoons for the best rise. These flours will keep your cupcakes moist and light. For a vegan version, substitute eggs with flax eggs. Mix 1 tablespoon of flaxseed meal with 2.5 tablespoons of water for each egg. Use almond milk or soy milk instead of buttermilk. This way, you can enjoy delicious chai latte cupcakes without any animal products. For the frosting, use coconut cream instead of heavy cream. Chill a can of coconut milk overnight. Scoop out the solid part and whip it until fluffy. Your cupcakes will still look and taste great, even with these changes. You can find the full recipe above to guide you through these fun variations. To keep your uneaten cupcakes fresh, store them in an airtight container. This will help keep them soft and moist. You can leave them at room temperature for up to two days. If you want to keep them longer, refrigerate them. Just remember to let them come back to room temperature before serving. Freezing is also a great option. Wrap each cupcake in plastic wrap, then place them in a freezer-safe bag. This helps prevent freezer burn. You can freeze the cupcakes for up to three months. When you are ready to eat them, take them out and let them thaw overnight in the fridge. At room temperature, your chai latte cupcakes will last about two days. They will stay fresh if you store them well. In the fridge, they can last about a week. The cool air helps keep them from drying out. If you freeze them, they will stay tasty for three months. Just be sure to check for any signs of freezer burn before enjoying them. What makes chai latte cupcakes special? Chai latte cupcakes stand out because they blend warm spices with rich flavors. The chai spice mix gives them a unique taste. Each bite feels cozy, like a hug in cupcake form. They are perfect for any occasion. Can I make these cupcakes ahead of time? Yes, you can make these cupcakes ahead of time. Bake the cupcakes and let them cool. Store them in an airtight container for up to three days. Frost them just before serving for the best taste. Where can I find chai spice mix? You can find chai spice mix in many grocery stores. Look in the spice aisle or the tea section. You can also make your own mix at home with cinnamon, ginger, cardamom, and cloves. How can I adjust the sweetness of the cupcakes? You can adjust the sweetness by changing the sugar amount. Use less sugar for a less sweet cupcake. You can also try adding honey or maple syrup for a different flavor. Essential tools for making chai latte cupcakes - Mixing bowls - Electric mixer - Whisk - Cupcake pan - Cupcake liners - Toothpick (for testing doneness) - Piping bag (for frosting) Substitutes for ingredients you may not have on hand - Use almond flour instead of all-purpose flour for a gluten-free version. - If you don’t have buttermilk, mix regular milk with a teaspoon of vinegar. - If you lack heavy cream, try using coconut cream for frosting. Best ways to serve chai latte cupcakes Serve these cupcakes with a dollop of whipped cream on top. You can also sprinkle extra chai spice mix for added flavor. They look stunning when plated nicely or served on a cake stand. Ideal beverages to pair with these cupcakes Pair chai latte cupcakes with a warm cup of chai tea. Coffee or spiced apple cider also complements their flavors well. These drinks enhance the cozy vibe of the cupcakes, making them a delightful treat. In this post, we explored how to make delicious chai latte cupcakes, from ingredients to storage tips. Remember, using room temperature components and not overmixing keeps your cupcakes fluffy. There are many ways to customize these treats with flavors and dietary options. Storing them properly ensures you can enjoy them longer. With the right tools and techniques, you can create a delightful dessert that everyone will love. Dive into your baking adventure and enjoy the warm, spicy flavors of chai in every bite!

Chai Latte Cupcakes Delightful and Easy Recipe

Love chai lattes? You’re in for a treat! These Chai Latte Cupcakes are easy to make and bursting with flavor.

For the best apple cider cupcakes, you need fresh and simple ingredients. Here’s what you’ll need: - 1 ½ cups all-purpose flour - 1 teaspoon baking powder - ½ teaspoon baking soda - ½ teaspoon salt - 1 teaspoon ground cinnamon - ½ teaspoon ground nutmeg - ½ cup unsalted butter, softened - 1 cup granulated sugar - 2 large eggs - 1 teaspoon pure vanilla extract - 1 cup fresh apple cider - 1 cup finely diced apples (I recommend Granny Smith or Honeycrisp for a tart kick) - Optional: Warm caramel sauce for drizzling Each ingredient plays a key role. The flour gives structure, while the baking powder and baking soda ensure a light texture. The spices add warmth, and the apples bring moisture and flavor. You can use fresh apple cider for a rich taste that makes these cupcakes special. If you want a sweet finish, drizzle warm caramel sauce on top. For the full recipe, including steps to bring these cupcakes to life, check out the recipe section! - Preheat your oven to 350°F (175°C). - Prepare the cupcake tin by lining it with paper liners. This makes it easy to take out the cupcakes later. - In a medium bowl, combine the dry ingredients. This includes all-purpose flour, baking powder, baking soda, salt, cinnamon, and nutmeg. Whisk them together well. - In a larger bowl, cream the softened butter and sugar. Use an electric mixer on medium speed. Mix for about 3-5 minutes. This helps make your cupcakes soft and fluffy. - Add the eggs to the butter-sugar mix, one by one. Mix well after each egg. Then, add in the vanilla extract for more flavor. - Gradually mix the dry ingredients with the wet ingredients. Add the fresh apple cider too. Start and end with the dry mix. Mix until everything is just combined. Don’t overmix, or the cupcakes may turn out tough. - Gently fold in the finely diced apples using a spatula. You want them evenly spread throughout the batter. - Fill each cupcake liner with batter, about 2/3 full. This gives them room to rise while baking. - Bake the cupcakes in your preheated oven for 18-20 minutes. They are ready when a toothpick comes out clean, with a few moist crumbs being fine. - After baking, let them cool in the tin for about 5 minutes. Then, move the cupcakes to a wire rack to cool completely. - For a sweet touch, drizzle warm caramel sauce on top once they are cool. This adds a nice flavor that pairs well with the cupcakes. For detailed measurements and additional information, refer to the Full Recipe. To make cupcakes moist, use room temperature ingredients. Cold butter and eggs can create a dense batter. Let them sit out for about 30 minutes before mixing. When you mix the batter, do it gently. Overmixing can make the cupcakes tough. Aim for just combined when adding dry ingredients. Spices can elevate your cupcakes. Besides cinnamon and nutmeg, try adding a pinch of allspice or ginger for warmth. You can also mix in some vanilla bean for a richer flavor. For toppings, consider warm caramel sauce for a sweet touch. Chopped nuts or a sprinkle of cinnamon adds crunch and flavor. If you want something creamy, try cream cheese frosting. It pairs well with apple cider. For the full recipe, check the section above. {{image_4}} You can enhance your apple cider cupcakes with different frostings. - Cream cheese frosting: This rich frosting adds a tangy flavor. Mix 8 ounces of cream cheese with ½ cup of softened butter. Add 4 cups of powdered sugar and 1 teaspoon of vanilla extract. Beat until smooth. Spread or pipe it on the cooled cupcakes. - Maple buttercream: For a sweet twist, try maple buttercream. Beat ½ cup of softened butter. Gradually add 2 cups of powdered sugar. Mix in ¼ cup of maple syrup and a pinch of salt. This combination brings a warm, cozy flavor to your cupcakes. You can also make easy swaps for dietary needs. - Gluten-free options: To make these cupcakes gluten-free, use a 1-to-1 gluten-free flour blend. This will keep the texture light and fluffy. Make sure the blend includes xanthan gum for the best results. - Alternative sweeteners: If you want a healthier option, consider using honey or maple syrup instead of granulated sugar. Use about ¾ cup of honey or 1 cup of maple syrup. You may need to reduce the liquid in the recipe slightly to balance it out. These variations and swaps let you personalize the cupcakes to fit your taste or dietary needs. Check out the Full Recipe for more details on making these delicious treats! To keep your apple cider cupcakes fresh, store them in an airtight container. This helps prevent them from drying out. Place a piece of wax paper between layers if stacking them. Keep the container at room temperature for up to three days. If you want them to last longer, consider refrigerating them. Just remember to bring them back to room temperature before serving for the best taste. You can freeze these cupcakes for later enjoyment. First, let the cupcakes cool completely. Wrap each cupcake tightly in plastic wrap. Then, place them in a freezer bag or container. They can last up to three months in the freezer. To enjoy, simply take them out and let them thaw at room temperature. If you want a warm treat, you can microwave them for a few seconds. Enjoy your fresh apple cider cupcakes anytime! For the complete recipe, check the Full Recipe. Yes, you can make these cupcakes ahead of time. To do this, bake the cupcakes and let them cool completely. Once cooled, store them in an airtight container at room temperature for up to three days. If you want them fresh for a special event, you can freeze them. Wrap each cupcake in plastic wrap and place them in a freezer bag. They can last up to three months in the freezer. Just remember to thaw them at room temperature before serving. The best apples for these cupcakes are Granny Smith and Honeycrisp. Granny Smith apples add a nice tartness that balances the sweetness of the cake. Honeycrisp apples bring a sweet and crisp bite that enhances the flavor. You can also use other varieties like Fuji or Braeburn if you prefer. Always choose fresh apples for the best taste. Yes, you can use store-bought apple cider. It saves time and still tastes good. However, make sure to choose a cider that is pure and has no added sugars or flavors. This will keep the flavor authentic and fresh. Fresh cider gives the best taste, but store-bought works well too. These apple cider cupcakes are fun to make and taste great. We covered the key ingredients, step-by-step baking instructions, and tips for perfect cupcakes. You learned how to enhance flavors and swap ingredients based on your needs. Proper storage helps keep them fresh for later. Overall, these cupcakes are easy to make and a joy to eat. Enjoy baking them and sharing these tasty treats with others!

Apple Cider Cupcakes Delicious Fall Treat Recipe

Fall is the perfect time for cozy treats, and these Apple Cider Cupcakes are a must-try! You’ll love the warm

- 2 cups all-purpose flour - 1/2 cup packed brown sugar - 1 tablespoon baking powder - 1/2 teaspoon baking soda - 1/2 teaspoon fine sea salt - 1 teaspoon ground cinnamon - 1/2 teaspoon ground ginger - 1/4 teaspoon ground nutmeg - 1/2 cup unsalted butter, cold and cut into small cubes - 1/2 cup canned pumpkin puree - 1/4 cup heavy cream - 1 large egg, lightly beaten - 1 teaspoon vanilla extract - 1 cup powdered sugar (for glaze) - 2 tablespoons pure maple syrup Gathering the right ingredients is key to making these delicious maple glazed pumpkin scones. You will need basic items like flour and sugar. The pumpkin puree gives the scones a warm flavor and moist texture. The spices, like cinnamon and nutmeg, add that cozy fall feeling. - Mixing bowls - Whisk or fork - Pastry cutter (optional) - Knife or biscuit cutter - Baking sheet - Parchment paper You will need a few tools to make this recipe easy. Mixing bowls help combine the dry and wet ingredients. A whisk or fork mixes them well. A baking sheet lined with parchment paper keeps the scones from sticking. Each scone has about 200 calories. They contain about 10 grams of fat and 28 grams of carbs. These scones are a tasty treat but should be enjoyed in moderation. For a full breakdown, check the [Full Recipe]. Using fresh ingredients makes a big difference. When you bake, you want everything to taste great. Enjoy the process and have fun in the kitchen! - Preheat oven to 400°F (200°C) - Line the baking sheet with parchment paper First, you need to get the oven hot. Preheating is key for the best texture. While it heats, prepare your baking sheet. Parchment paper helps keep the scones from sticking. This simple step makes cleanup easier too. - Combine flour, sugar, baking powder, baking soda, salt, and spices In a big bowl, mix together the dry ingredients. Use a whisk to blend them well. You’ll need flour, brown sugar, baking powder, baking soda, salt, and spices like cinnamon and nutmeg. This mix gives the scones their lovely flavor. The spices bring warmth, perfect for fall. - Blend cold butter into the dry mixture until crumbly Next, it’s time for the butter. Cut cold butter into small cubes. Add it to the dry mix. Use your fingers or a pastry cutter to blend until it looks crumbly. You want little bits of butter to stay. This makes the scones flaky and tender. - Mix pumpkin puree, heavy cream, egg, and vanilla separately Now, grab another bowl. Combine pumpkin puree, heavy cream, an egg, and vanilla extract. This mix adds moisture and flavor. Stir until everything is well blended. The pumpkin gives a lovely color and taste to the scones. - Combine wet and dry ingredients, avoiding overmixing - Shape dough into a disc and cut into wedges Pour the wet mixture into the dry mix. Use a spatula to fold them together. Be gentle; don’t overmix. You want a soft dough, not tough scones. Once combined, turn the dough onto a floured surface. Shape it into a disc about one inch thick. Cut it into wedges for that classic scone look. - Transfer to baking sheet and bake for 15-18 minutes Place the scone wedges on the baking sheet. Make sure there’s space between them. Bake in the preheated oven for 15-18 minutes. Look for a light golden color on top. This means they're done! - Whisk powdered sugar and maple syrup together While the scones bake, let’s make the glaze. In a small bowl, whisk together powdered sugar and pure maple syrup. Mix until it’s smooth. This glaze adds sweetness and that lovely maple flavor. - Drizzle glaze over scones once cooled Once the scones are out of the oven, let them cool on a wire rack. When they are cool but still warm, drizzle the maple glaze over the top. This adds a sweet finish, making each bite a delight. You can find the full recipe for more detailed steps! To get the best texture, you must avoid overmixing the dough. When making scones, mix just until the dry and wet ingredients blend. Overmixing makes scones tough. You want them light and fluffy. Gently fold the mixture with a spatula. This keeps air in the dough, making your scones tender and soft. You can add even more flavor to your scones! Try mixing in chocolate chips or nuts for a tasty twist. Chopped pecans or walnuts give a nice crunch. If you love spice, add more cinnamon or a hint of cardamom. This can give your scones a unique taste that surprises everyone. Don't be shy to experiment with different ingredients! For the best experience, serve your scones with warm drinks. Coffee or tea pairs perfectly with the sweet glaze. A pumpkin spice latte or a chai tea can enhance the fall vibe. You can also enjoy them with a dollop of whipped cream. This makes for a cozy treat on a chilly morning. Set the scene with a lovely plate and a sprinkle of cinnamon for a touch of charm. {{image_4}} You can customize your scones by adding more spices. Try using cloves or allspice for extra warmth. You can even add flavored extracts like almond or orange. These small changes can create a whole new flavor profile. I like to play with these to find my favorite mix. If you want gluten-free scones, swap regular flour for a gluten-free blend. Look for blends that include rice flour, almond flour, or oat flour. These will help keep the texture light and fluffy. Just remember, using a gluten-free mix can change how the scones rise. To make vegan scones, replace the butter with coconut oil or vegan butter. Use a flax egg by mixing one tablespoon of flaxseed meal with three tablespoons of water. Let it sit until it thickens. Instead of heavy cream, you can use almond milk or coconut cream. These swaps keep the scones delicious and friendly for everyone! For the full recipe, check out the detailed instructions above. To keep your scones fresh, store them in an airtight container. This will prevent them from drying out. If you want to keep them for a few days, place a paper towel inside. This helps absorb moisture. Keep the container at room temperature, away from direct sunlight. The scones should stay good for about three days. If you want to save scones for later, freezing is a great option. Wrap each scone in plastic wrap. Then place them in a freezer-safe bag or container. Make sure to remove any air from the bag to prevent freezer burn. The scones can last up to three months in the freezer. When you're ready to eat, let them thaw in the fridge overnight. To enjoy your scones warm, you can reheat them in several ways. For a quick option, use the microwave for about 15-20 seconds. If you want a crispier texture, use the oven. Preheat it to 350°F (175°C) and heat the scones for about 10 minutes. This will bring back their fresh-baked feel. For the best taste, drizzle some extra maple glaze on top after reheating. Maple glazed pumpkin scones stay fresh for about 2 to 3 days. Keep them in an airtight container. This way, they won't dry out. If you want them to last longer, you can freeze them. Just wrap each scone well in plastic wrap before freezing. Yes, you can make these scones ahead of time. Prepare the dough and shape it into wedges. Then, wrap the scones in plastic wrap and chill them in the fridge. Bake them the next morning for fresh scones. This saves time and gives you hot scones for breakfast. If you don't have pumpkin puree, you can use sweet potato puree. Mashed butternut squash also works well. Both options give a similar flavor and texture. You can even use applesauce for a sweeter take on the scones. Yes, you can use other syrups for the glaze. Honey or agave syrup can be great alternatives. They both add sweetness, but the flavor will change a bit. If you want a richer taste, try using caramel sauce instead. Absolutely! Adding nuts like chopped pecans or walnuts gives a nice crunch. You can also mix in chocolate chips for sweetness. Just be careful not to add too much. Adding too many mix-ins can change the scone's texture. It's best to keep it balanced for the perfect bite. Making these pumpkin scones is fun and rewarding. You combine simple ingredients, bake them, and enjoy a tasty treat. Remember to handle the dough gently to keep it light and tender. Whether you stick to the main recipe or play with flavors, you’ll create something delicious. Follow the tips for storage and variations for the best results. I hope you try this recipe and enjoy it as much as I do!

Maple Glazed Pumpkin Scones Perfect for Fall Mornings

Fall mornings call for a special treat, and these maple glazed pumpkin scones fit the bill perfectly. With their warm

- 1 cup unsalted butter - 1 cup packed brown sugar - ½ cup granulated sugar - 2 large eggs - 1 cup pumpkin puree - 1 teaspoon pure vanilla extract - 2 cups all-purpose flour - 1 teaspoon baking powder - ½ teaspoon baking soda - ½ teaspoon salt - 1 teaspoon ground cinnamon - ½ teaspoon ground nutmeg - ½ teaspoon ground ginger - 1 cup white chocolate chips (or chopped walnuts for a nutty twist) You need each of these ingredients to create the perfect blondies. The unsalted butter gives a rich flavor. Brown sugar adds moisture and depth. Eggs provide structure, while pumpkin puree keeps the blondies soft and moist. You can swap some ingredients. If you want a dairy-free version, use plant-based butter. For a healthier option, try coconut sugar instead of brown and granulated sugars. You can also use whole wheat flour for a nuttier taste. Finally, for those who love nuts, replace white chocolate chips with walnuts. Each option changes the flavor and texture, making your blondies unique. Check the full recipe for detailed steps on how to combine these ingredients for a delightful treat. 1. Preheat your oven to 350°F (175°C). Grab an 8x8-inch baking dish. Lightly grease it and line the bottom with parchment paper. This will help you easily lift the blondies out later. 2. Melt and brown the butter. In a medium saucepan, add 1 cup of unsalted butter. Heat it on medium. Swirl the pan often to ensure even cooking. After about 5 to 7 minutes, the butter will turn golden brown. You will smell a rich, nutty aroma. Remove it from heat and let it cool slightly. 3. Mix the wet and dry ingredients. In a large bowl, combine the warm brown butter with 1 cup of packed brown sugar and ½ cup of granulated sugar. Stir until the sugars blend well with the butter. Next, add 2 large eggs, one at a time, mixing well after each. Then, pour in 1 cup of pumpkin puree and 1 teaspoon of pure vanilla extract. Whisk until it is smooth and creamy. In another bowl, whisk together 2 cups of all-purpose flour, 1 teaspoon of baking powder, ½ teaspoon of baking soda, ½ teaspoon of salt, 1 teaspoon of ground cinnamon, ½ teaspoon of ground nutmeg, and ½ teaspoon of ground ginger. Carefully add the dry mix into the wet mix. Stir gently until just combined. Be careful not to overmix. Lastly, fold in 1 cup of white chocolate chips or chopped walnuts. Make sure they spread throughout the batter. 4. Pour the batter into your prepared baking dish. Use a spatula to spread it evenly across the bottom. 5. Bake in the preheated oven for 25 to 30 minutes. To check if they are done, insert a toothpick into the center. It should come out clean or with a few moist crumbs. 6. Cool the blondies. Once baked, let them cool in the pan on a wire rack for at least 15 minutes. After that, gently lift them out using the parchment paper. 7. Serve and enjoy! Cut the blondies into squares. For a fun touch, dust them lightly with powdered sugar and sprinkle some cinnamon on top. They taste great warm or with a scoop of vanilla ice cream. To make great brown butter, start with unsalted butter. Use a light-colored pan. This helps you see the color change as it cooks. Keep the heat on medium. Stir it every now and then. Look for a nutty aroma; this means you are close. The butter should turn a golden brown color. This takes about 5 to 7 minutes. If it smells burnt, you need to start over. One common mistake is overmixing the batter. Mix just until you see no dry flour. Overmixing makes blondies dense and tough. Another error is not checking for doneness. Use a toothpick to test. It should come out clean or with a few moist crumbs. If it is too wet, the blondies need more time. You can add extra spices like cloves or allspice for depth. A splash of maple extract also adds warmth. When serving, pair these blondies with vanilla ice cream. A dollop of whipped cream also works great. You can even drizzle caramel sauce on top for a treat. For a nutty twist, try serving with chopped walnuts. These simple changes will make your blondies even more special. Check the Full Recipe for more ideas! {{image_4}} You can make your blondies more fun with mix-ins. I love using white chocolate chips for a sweet touch. They melt slightly, adding creaminess to each bite. Alternatively, you can use chopped walnuts for a nutty crunch. Walnuts add texture and a nice contrast to the soft blondies. If you want to be adventurous, consider dried fruits. Chopped cranberries or golden raisins can add a tart flavor. You can even use dark chocolate chips for a richer taste. The options are endless, so feel free to get creative! For those needing gluten-free options, try using gluten-free flour. It often works just as well as regular flour. I recommend a blend that includes almond flour or oat flour for the best results. This keeps the blondies soft and moist. If you’re looking to make these blondies vegan, swap the eggs for flax eggs. Mix one tablespoon of ground flaxseed with three tablespoons of water and let it sit for five minutes. It works as a great binder, just like eggs. Also, use a plant-based butter to keep that rich flavor. You can change the spices to match your taste. Instead of just cinnamon, consider adding chai spice for a warm, cozy flavor. It adds depth and warmth to the pumpkin. Another option is to play with sugars. Using all brown sugar gives a deeper caramel flavor. Mixing in some coconut sugar can also add a unique taste. Each type of sugar affects the end result, so choose what you love most! For the complete recipe, check out the [Full Recipe]. To keep your brown butter pumpkin blondies fresh, store them in an airtight container. This helps lock in moisture and flavor. You can place a piece of bread in the container to keep them soft. A glass or plastic container works best for this. Avoid metal containers, as they can alter the taste. You can freeze these blondies for later enjoyment. Wrap each blondie tightly in plastic wrap. Then, place them in a freezer-safe bag. This prevents freezer burn and keeps them tasty. They can stay frozen for up to three months. When you're ready to enjoy them, thaw overnight in the fridge or at room temperature for a few hours. To reheat, place the blondies in the microwave for 10-15 seconds. This warms them without making them tough. You can also use the oven. Preheat it to 350°F (175°C) and warm the blondies for about 5 minutes. For extra flavor, top them with a scoop of vanilla ice cream or a drizzle of caramel sauce. Enjoy your warm, gooey treat! Store your blondies in an airtight container. Keep them at room temperature for up to five days. If you want them to last longer, place them in the fridge. They can stay fresh for about a week that way. To warm them up, just pop them in the microwave for a few seconds. This makes them soft and gooey again. Yes, you can use fresh pumpkin. First, cook the pumpkin until it is soft. Then, mash it well to get a smooth texture. Fresh pumpkin has a different taste and moisture level than canned. Be sure to adjust the amount of flour if the batter seems too wet. This way, your blondies will still bake perfectly. To make your blondies chewier, try adding more brown sugar. Brown sugar has more moisture than white sugar. You can also reduce the amount of flour slightly. Another tip is to bake them for a shorter time. This will keep them soft and chewy. Enjoy your delicious, chewy blondies! For the full recipe, check the earlier sections. Brown Butter Pumpkin Blondies are easy to make and super tasty. You learned the best ingredients, steps, and tips for baking them just right. You can even try fun variations and store them well for later. Enjoying blondies can be fun and creative, so don’t be afraid to experiment. Making these treats can bring joy to any gathering or snack time. Happy baking, and may your blondies always be perfect!

Irresistible Brown Butter Pumpkin Blondies Easy Recipe

Get ready for a sweet treat that will make your fall cozy and delightful! These Irresistible Brown Butter Pumpkin Blondies

Older posts
Newer posts
← Previous Page1 Page2 Page3 Page4 … Page71 Next →

dsad

© 2025 spoonfulsavory • Built with GeneratePress

Our Policies

  • Copyright Policy
  • Cookie Policy
  • GDPR Policy
  • Privacy Policy
  • Disclaimer
  • Terms Of Use

More Information

  • Home
  • About
  • Contact
  • Appetizers
  • Dessert
  • Dinner
  • Drinks
©2025, spoonfulsavory About Back To Top