Skip to content
DisclaimerTerms Of UseGDPR PolicyCookie Policy

spoonfulsavory

  • Home
  • Drinks
  • Appetizers
  • Dinner
  • Dessert
  • About
  • Contact
  • Privacy Policy
DisclaimerTerms Of UseGDPR PolicyCookie Policy

Sarah

To make these maple cinnamon apple donuts, you need the following: - 1 ½ cups all-purpose flour - 1 cup apple cider - ½ cup granulated sugar - ¼ cup pure maple syrup - 1 large apple (preferably Honeycrisp or Fuji), grated - 1 teaspoon baking powder - ½ teaspoon baking soda - 1 teaspoon ground cinnamon - ¼ teaspoon ground nutmeg - ½ teaspoon salt - 1 large egg, at room temperature - ¼ cup unsalted butter, melted and slightly cooled - For coating: ½ cup granulated sugar blended with 2 teaspoons ground cinnamon Fresh ingredients matter a lot when making donuts. They enhance flavor and texture. For example, using a fresh apple adds crispness and sweetness. The apple cider gives a rich, fruity taste. Fresh spices, like cinnamon and nutmeg, boost the aroma too. Always choose the best and freshest items you can find. This ensures that your donuts taste amazing and delightful. You can make some swaps if needed. If you do not have apple cider, try using unsweetened applesauce. It will keep the donuts moist. For the sugar, you can use brown sugar for a deeper flavor. If you want a dairy-free option, replace the butter with coconut oil. You can also try gluten-free flour if you need a gluten-free donut. These changes keep the recipe fun and accessible for everyone. To make these maple cinnamon apple donuts, start by preheating your oven to 350°F (175°C). Grab your donut pan and spray it lightly with non-stick cooking spray. This helps prevent sticking. Next, in a large bowl, whisk together 1 ½ cups of all-purpose flour, 1 teaspoon of baking powder, ½ teaspoon of baking soda, 1 teaspoon of ground cinnamon, ¼ teaspoon of ground nutmeg, and ½ teaspoon of salt. Make sure there are no lumps in this mix. In a separate medium bowl, mix together 1 cup of apple cider, ¼ cup of pure maple syrup, ¼ cup of melted butter, 1 large egg, and 1 grated large apple. Whisk everything until well blended. Pour this wet mixture into the dry ingredients. Gently stir with a spatula until just combined. Remember, it's okay if there are a few lumps; don’t overmix or your donuts might be dense. Use a spoon or piping bag to fill each donut mold about ¾ full with batter. This ensures even baking. Bake your donuts for 10 to 12 minutes. To check if they are done, insert a toothpick into the center. It should come out clean. The donuts should spring back lightly when touched. After baking, let the donuts cool in the pan for 5 minutes. Then, transfer them to a wire rack to cool completely. To ensure your donuts turn out perfectly, avoid overmixing the batter. This keeps them light and fluffy. Also, make sure your oven is fully preheated. An uneven oven can lead to uneven baking. When you check for doneness, be quick to avoid losing heat. Using a donut pan is easy and fun! Make sure to spray it well with non-stick spray. If you don’t have a piping bag, a zip-top bag with a corner cut off works well. Fill each mold carefully to avoid spills. After baking, let the donuts cool but don’t wait too long before rolling them in the cinnamon-sugar mix. This mix sticks best to warm donuts. For the full recipe, check out the earlier sections. Enjoy your baking! When you mix your batter, start with dry and wet ingredients in separate bowls. This way, you avoid lumps. Whisk the dry ingredients until they are smooth. For the wet mix, combine apple cider, maple syrup, and egg well. When you pour wet into dry, stir gently. Mix only until you see no dry flour. This keeps your donuts light and fluffy. The perfect donut is soft and moist. To get this texture, do not overmix your batter. A few lumps are okay; they help keep the donuts airy. Make sure your baking powder and baking soda are fresh. These leaveners help your donuts rise. Baking them at the right temperature is key too. Keep an eye on them as they bake to avoid overcooking. Common mistakes can ruin your donuts. Here are a few tips to avoid them: - Overmixing: This makes donuts dense. Mix just until combined. - Wrong oven temperature: Always preheat your oven. Use an oven thermometer if needed. - Filling molds too much: Fill each mold only ¾ full. This allows room for rising. - Not cooling: Let your donuts cool in the pan briefly, then on a rack. This keeps them from getting soggy. Following these tips ensures you create delicious Maple Cinnamon Apple Donuts that everyone will love! For the complete recipe, check out the Full Recipe. {{image_4}} You can make these donuts gluten-free. Use a gluten-free flour blend instead of all-purpose flour. Look for one that works well in baking. This blend usually has a mix of rice flour, tapioca starch, and potato starch. The texture will still be soft and light. Just follow the same steps in the Full Recipe. Want a vegan twist? You can replace the egg with a flaxseed meal. Mix one tablespoon of flaxseed with three tablespoons of water. Let it sit for five minutes until it thickens. Use a plant-based butter instead of regular butter. Swap the milk with almond, soy, or oat milk for a creamy touch. The flavors will stay rich and delicious. Get creative with toppings! After rolling your donuts in cinnamon-sugar, try adding different flavors. A drizzle of melted dark chocolate can add a rich taste. Chopped nuts like pecans or walnuts give a nice crunch. You can also sprinkle some shredded coconut for a tropical twist. For a fruity kick, top them with apple slices or dried cranberries. The options are endless, so have fun experimenting! To keep your maple cinnamon apple donuts fresh, store them in an airtight container. Place parchment paper between layers to avoid sticking. Keep them at room temperature for up to three days. If you want them to last longer, consider freezing. Freezing is a great option if you have extra donuts. First, let them cool completely. Then, wrap each donut tightly in plastic wrap. Place the wrapped donuts in a freezer-safe bag or container. They can last for up to three months. When you are ready to eat, just take out what you need! To enjoy your donuts warm, reheat them in the oven. Preheat the oven to 350°F (175°C). Place the donuts on a baking sheet for 5-7 minutes. This method keeps them soft and tasty. You can also use a microwave for quick heating. Just warm them for about 10-15 seconds. Enjoy your delicious donuts just like fresh from the oven! For a full recipe, check out the full recipe. You can make donuts without a donut pan by using a muffin tin. Just pour the batter into the muffin cups. Fill them about halfway. Bake as you would for donuts. They will not have the classic donut shape but will taste just as good! Yes, you can use brown sugar in place of granulated sugar. Brown sugar adds a rich, caramel taste to your donuts. It may change the color slightly, but the flavor will be delicious. Just use the same amount as the recipe calls for. For this recipe, Honeycrisp or Fuji apples work best. They are sweet and have a nice crunch. You can also use Granny Smith apples for a tart flavor. Choose fresh apples for the best taste in your donuts. Use the grated apple to add moisture and flavor to your treats. For the full recipe, check out the complete list of ingredients and instructions. We covered a lot about making delicious donuts. Fresh ingredients matter, as they enhance flavor. You learned step-by-step instructions for perfect baking. I shared tips to avoid common mistakes and achieve the right texture. Variations like gluten-free and vegan options let you be creative. Storing and reheating properly keeps your donuts fresh. Enjoy your baking journey with these insights, and remember, practice makes perfect!

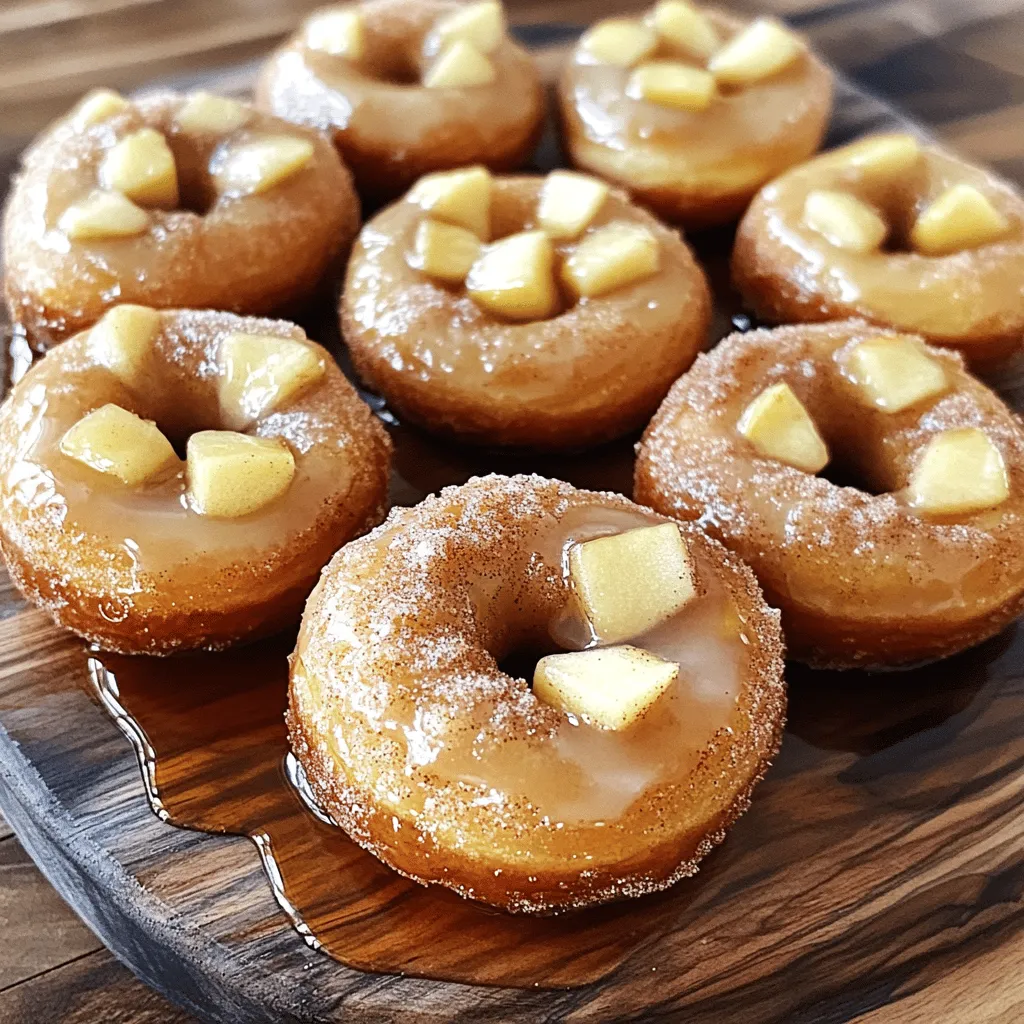
Maple Cinnamon Apple Donuts Irresistible Fall Treat

Fall is here, and nothing says cozy like Maple Cinnamon Apple Donuts. Imagine warm, soft donuts infused with apple and

- 1 cup all-purpose flour - 1 tablespoon baking powder - 1/2 teaspoon baking soda - 1/2 teaspoon ground cinnamon - 1/4 teaspoon ground nutmeg - 1/4 teaspoon ground ginger - 1/4 teaspoon salt - 1 cup milk (dairy or plant-based) - 1/2 cup canned pumpkin puree - 1 large egg - 2 tablespoons granulated sugar - 1 teaspoon pure vanilla extract - 4 ounces cream cheese, softened to room temperature - 2 tablespoons pure maple syrup (plus additional for serving) - Butter or oil for greasing the skillet - Additional maple syrup for serving When making these pancakes, use fresh and high-quality ingredients. For the dry ingredients, combine flour, baking powder, baking soda, spices, and salt in a bowl. The spices add warmth and flavor, making the pancakes special. For the wet ingredients, mix milk, pumpkin puree, egg, sugar, vanilla, and cream cheese. The cream cheese adds a creamy texture. You can use an electric mixer or a whisk to blend until smooth. Grease your skillet with butter or oil to prevent sticking. This recipe yields about eight pancakes, perfect for serving four people. For the full recipe, check the details above! Start by gathering your dry ingredients. In a large bowl, add: - 1 cup all-purpose flour - 1 tablespoon baking powder - 1/2 teaspoon baking soda - 1/2 teaspoon ground cinnamon - 1/4 teaspoon ground nutmeg - 1/4 teaspoon ground ginger - 1/4 teaspoon salt Whisk these ingredients together. This helps to combine them well. Make sure there are no lumps left. A smooth mix means fluffy pancakes. Now, let’s move on to the wet ingredients. In another bowl, mix: - 1 cup milk (dairy or plant-based) - 1/2 cup canned pumpkin puree - 1 large egg - 2 tablespoons granulated sugar - 1 teaspoon pure vanilla extract - 4 ounces cream cheese, softened Blend these until smooth. A hand mixer works great here. Cream cheese adds a rich taste. It makes the pancakes creamy and soft. Next, we combine our mixtures. Gently pour the wet mix into the dry ingredients. Use a spatula to fold them together. Be careful not to over-mix. It’s okay if you see a few lumps. This keeps the pancakes light and airy. Preheat your skillet over medium heat. Lightly coat it with butter or oil. Once it’s hot, pour about 1/4 cup of batter for each pancake. Cook until bubbles form on top. This usually takes about 3-4 minutes. When they look ready, flip the pancakes. Cook for another 2-3 minutes until golden brown. Adjust heat if needed to prevent burning. To keep pancakes warm, stack them on a plate. Cover them with a clean kitchen towel. This helps retain heat while you cook the rest. Serve them warm, drizzled with pure maple syrup. Enjoy! For the Full Recipe, check out the details above. To make fluffy pancakes, start with room temperature ingredients. Cold milk or eggs can make the batter lumpy. Mix the wet ingredients first. Use an electric mixer or a whisk to blend them well. When you combine dry and wet ingredients, stir gently. You want small lumps to remain. This keeps your pancakes light and airy. These pancakes shine with great sides. Fresh fruits like bananas, strawberries, or blueberries pair well. You can also add a dollop of whipped cream on top. For a creative twist, try adding some chopped nuts or a drizzle of chocolate sauce. You can never go wrong with a sprinkle of cinnamon or a touch of maple syrup. One big mistake is over-mixing the batter. This makes pancakes tough instead of fluffy. Keep an eye on the cooking temperature too. If it's too high, the outside cooks too fast. You want a nice golden color, so adjust the heat as needed. Remember, patience makes great pancakes! {{image_4}} To make these pancakes even better, you can add chocolate chips or incorporate nuts. - Adding chocolate chips: Mix in about 1/2 cup of chocolate chips to the batter. The sweetness of the chocolate pairs well with the pumpkin. You can use dark, milk, or even white chocolate. Each type gives a different taste. - Incorporating nuts: You can also add 1/4 cup of chopped nuts. Walnuts or pecans work great. They add crunch and extra flavor to each bite. These pancakes can fit many diets with a few changes. You can easily make them gluten-free or vegan. - Gluten-free options: Use a gluten-free flour blend in place of all-purpose flour. Most blends work well in this recipe. Just follow the package instructions for the best results. - Vegan replacements: For a vegan version, swap the egg with 1/4 cup of applesauce. Use plant-based milk and cream cheese too. This keeps the pancakes moist and tasty. Pumpkin cream cheese pancakes are perfect for any season. You can change them up with holiday themes or different spices. - Holiday-themed variations: For a festive touch, add some cranberry or pecan topping. This gives a fun twist for Thanksgiving or Christmas. - Using different spices: Besides cinnamon, nutmeg, and ginger, try adding cardamom or allspice. These will give a unique flavor that surprises your taste buds. By exploring these variations, you can enjoy pumpkin cream cheese pancakes in many fun ways! Check out the Full Recipe for further instructions and tips. To keep your pumpkin cream cheese pancakes fresh, store them in the fridge. Place them in an airtight container. They stay good for about three days. When you want to eat them, just reheat. The microwave works well for this. Heat them for about 20-30 seconds. They will taste almost like fresh. If you want to save pancakes for later, freezing is the best option. After cooking, let them cool down completely. Then, stack them with parchment paper in between. This helps prevent sticking. Place the stack in a freezer bag. They can last up to two months in the freezer. To reheat frozen pancakes, take them out of the freezer. You can microwave them for about a minute. If you want them crisp, use a skillet. Heat them for 2-3 minutes on medium heat. This way, they will taste almost like the first time! For the full recipe, check out the instructions above. Yes, you can make these pancakes ahead. To prep, cook the pancakes fully, then let them cool. Place them in a single layer on a plate. Cover with plastic wrap or a clean towel. You can store them in the fridge for up to three days. For longer storage, freeze them. Layer parchment paper between pancakes to prevent sticking. This way, you can enjoy them later. Store leftover pancakes in the fridge. Place them in an airtight container. Separate layers with wax paper to keep them fresh. You can also wrap them tightly in plastic wrap. For longer storage, freeze the pancakes. Use freezer bags and remove as much air as possible. To reheat, just pop them in the toaster or microwave. Yes, you can use fresh pumpkin. To prepare fresh pumpkin, first, cut it in half. Remove the seeds and stringy parts. Roast the pumpkin in the oven until soft. This usually takes about 45 minutes at 400°F (200°C). Then, scoop out the flesh and mash it until smooth. Fresh pumpkin may taste brighter, but it has more moisture. Adjust the liquid in your recipe if needed. If you need a substitute for cream cheese, try mascarpone or Greek yogurt. These options give a similar creamy texture. You could also use cottage cheese, blended until smooth. Each substitute changes the flavor slightly. Mascarpone is richer, while Greek yogurt adds a tang. Choose one based on your taste preference and what you have on hand. To make gluten-free pancakes, use a gluten-free flour blend. Look for a mix that contains rice flour or almond flour. You can also try oat flour or buckwheat flour. These alternatives give your pancakes a nice texture. Make sure the blend includes xanthan gum for binding. Follow the full recipe, swapping the flour as needed. Enjoy your gluten-free pumpkin pancakes! You learned how to create tasty pumpkin pancakes with easy steps and helpful tips. We covered the right ingredients, mixing techniques, and cooking methods for perfect results. Remember, avoid over-mixing to keep your pancakes fluffy. With storage tips and fun variations, you can enjoy these pancakes any time. Keep experimenting with flavors and toppings to make them your own. Enjoy your delicious creations, and share them with friends and family for a fun meal. Happy cooking!

Pumpkin Cream Cheese Pancakes Fluffy and Delicious Meal

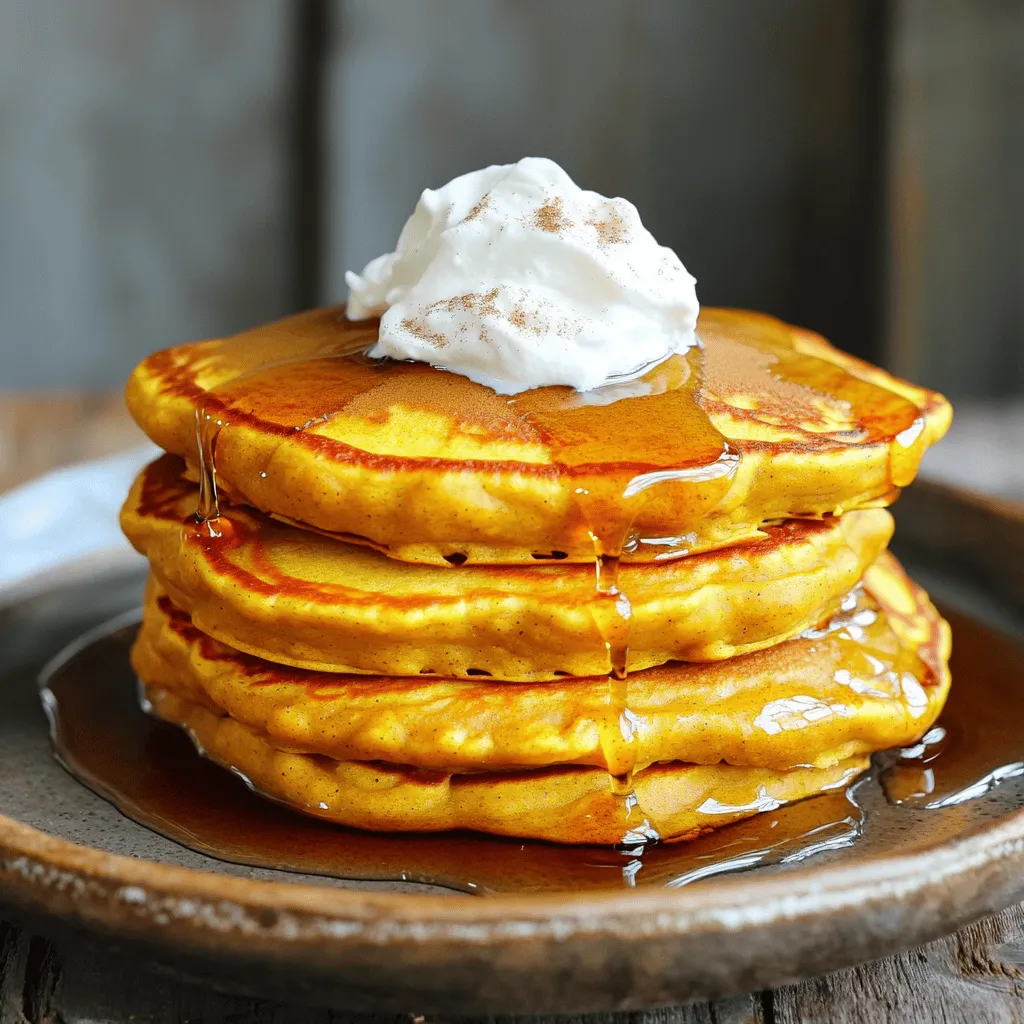
Get ready to savor the taste of fall with my Pumpkin Cream Cheese Pancakes! Fluffy, delicious, and packed with seasonal

- 1 lb ground chicken - 1/2 cup breadcrumbs - 1/4 cup grated Parmesan cheese The main ingredients form the base of our sweet chili chicken meatballs. Ground chicken keeps them light and tender. Breadcrumbs help bind the mixture together. Parmesan cheese adds a rich flavor that you will love. - 1/4 cup green onions, finely chopped - 2 cloves garlic, minced - 1/2 teaspoon ground ginger Next, we have flavor enhancers. Green onions bring a fresh taste. Garlic adds depth, while ground ginger gives a warm kick. These ingredients elevate the meatballs, making them more exciting. - 1/2 cup sweet chili sauce - 1 tablespoon soy sauce - 1 tablespoon sesame oil - Toasted sesame seeds, for garnish - Fresh cilantro leaves, for garnish Finally, we need sauces and garnishes. Sweet chili sauce creates a sticky glaze that is sweet and spicy. Soy sauce adds umami, and sesame oil gives a nutty flavor. Garnish with toasted sesame seeds and fresh cilantro for a finishing touch. This combination makes the dish pop on your plate and your palate. For the full recipe, check out the Full Recipe section. - Preheat the oven to 400°F (200°C). - Prepare the baking tray with parchment paper. Start by preheating your oven. This step is key for even cooking. Use parchment paper on your tray to stop sticking. This will make cleanup a breeze. - Combine all ingredients in a large mixing bowl. - Ensure even distribution of the mixture. In a large mixing bowl, add all your ingredients. This includes ground chicken, breadcrumbs, and the other tasty bits. Use your hands or a spatula to mix. Make sure everything blends well. You want every bite to have the same great flavor. - Roll meatballs and arrange on the baking tray. - Bake for 20-25 minutes, prepare glaze during baking. Once mixed, take some of the meat mixture in your hands. Roll it into small balls, about one inch across. Place them on the baking tray with space in between. Now, pop the tray into the oven. Bake for 20-25 minutes. They should turn golden brown and be fully cooked. While they bake, you can prepare the glaze. For the glaze, combine sweet chili sauce, soy sauce, and sesame oil in a saucepan. Heat it gently and stir until warm. After baking, toss the meatballs in the glaze. Use a large bowl to coat them well. This step gives each meatball that sweet and spicy kick. You can find the complete details in the Full Recipe. To make your sweet chili chicken meatballs truly shine, keep a few tips in mind: - Moisture Retention: Adding breadcrumbs helps keep the meatballs moist. Use fresh breadcrumbs for a better texture. A bit of grated Parmesan also adds moisture and flavor. - Even Sizing: Aim for meatballs about 1 inch in diameter. This helps them cook evenly. You can use a small ice cream scoop for quick and uniform sizing. The glaze is key to making these meatballs pop with flavor. Here’s how to get it just right: - Glaze Consistency: The sweet chili sauce should be thick but pourable. If it’s too thick, add a little water or soy sauce to thin it out. If too thin, simmer it longer to thicken. - Timing for Coating: Coat the meatballs right after baking. This keeps them warm and allows the glaze to stick. Toss them gently to cover every side in that delicious sauce. Try these tips, and watch your sweet chili chicken meatballs become a hit! For the full recipe, check out the [Full Recipe]. {{image_4}} You can switch out the ground chicken for other proteins. Turkey works well and keeps it light. If you prefer beef, that’s a great option too. For a plant-based choice, try using lentils or chickpeas. When it comes to breadcrumbs, you can find gluten-free options. Look for rice or almond flour crumbs. They give a nice texture and keep your meatballs delicious. Want some heat? Add chili flakes to the meatball mix. This gives a spicy kick that some may love. You can also spice up the glaze with chili flakes for extra flavor. Herbs can change the taste too! Try adding fresh basil or cilantro in the glaze. These herbs bring freshness and depth to your meatballs. Experiment with flavors to find your favorite mix. For the full recipe, check out the details above! To keep your sweet chili chicken meatballs fresh, store leftovers in an airtight container. This helps avoid moisture loss and keeps them tasty. Place a piece of parchment paper between layers if you stack them. They stay good in the fridge for up to three days. If you want to save some for later, freezing is simple. First, let the meatballs cool completely. Next, arrange them on a baking sheet without touching. Freeze until solid, then transfer them to a freezer bag. You can also freeze the sweet chili glaze in a separate container. To reheat frozen meatballs, take them out and thaw in the fridge overnight. Then, bake them at 350°F (175°C) for about 15-20 minutes until heated through. For the glaze, heat it in a saucepan over low heat, stirring until it's warm. Enjoy your meal anytime with these easy steps! For the full recipe, check out the details above. How to make Sweet Chili Chicken Meatballs from scratch? To make Sweet Chili Chicken Meatballs from scratch, gather your ingredients. You will need ground chicken, breadcrumbs, Parmesan cheese, green onions, an egg, garlic, ginger, and spices. Mix these in a bowl until combined. Roll the mixture into small meatballs. Bake them in a preheated oven at 400°F (200°C) for about 20-25 minutes. While they bake, prepare the sweet chili glaze by heating sweet chili sauce, soy sauce, and sesame oil in a saucepan. Once the meatballs are done, coat them in the glaze for a tasty finish. For the full recipe, check out the details above. What can I serve with Sweet Chili Chicken Meatballs? Sweet Chili Chicken Meatballs go well with many sides. Try serving them with jasmine rice or sticky rice for a classic touch. You can also serve them alongside a fresh salad to balance the flavors. If you want a crunchy bite, pair them with crispy vegetables or spring rolls. For a fun twist, serve the meatballs in slider form with mini buns. Can I prepare the sweet chili glaze in advance? Yes, you can make the sweet chili glaze ahead of time. Store it in an airtight container in the fridge for up to a week. When you are ready to use it, simply warm it on the stove or in the microwave before coating your meatballs. This saves you time on busy cooking days. Can these meatballs be cooked in an air fryer? Absolutely! Cooking Sweet Chili Chicken Meatballs in an air fryer is a great option. Preheat your air fryer to 375°F (190°C). Place the meatballs in a single layer in the basket, making sure they don’t touch. Cook for about 10-12 minutes, shaking the basket halfway. This method gives you a crispy outer layer while keeping the inside juicy. What are some good dipping sauces for meatballs? There are many tasty dipping sauces for meatballs. Some popular choices include marinara sauce, ranch dressing, or a spicy sriracha mayo. You can also use a simple soy sauce mixed with lime juice for a tangy twist. Feel free to get creative and mix flavors that you enjoy! In this post, we explored a tasty recipe for Sweet Chili Chicken Meatballs. We covered the main ingredients like ground chicken and breadcrumbs, along with flavor enhancers such as garlic and ginger. You learned step-by-step instructions for preparation, baking, and glazing. I shared valuable tips for perfecting your meatballs and ideas for variations. Proper storage methods help maintain freshness. Now, get cooking and enjoy your delicious meatballs! You have the tools to make this a hit.

Sweet Chili Chicken Meatballs Flavorful and Easy Recipe

Get ready to savor the juicy explosion of flavors in my Sweet Chili Chicken Meatballs! This easy recipe blends tender

To make crispy Parmesan potatoes, gather these simple items: - 1.5 lbs baby potatoes, halved - 3 tablespoons extra virgin olive oil - 1 cup finely grated Parmesan cheese - 2 cloves garlic, minced - 1 teaspoon dried oregano - 1 teaspoon sweet paprika - Sea salt and freshly cracked black pepper to taste - Fresh parsley, chopped (for garnish) Each ingredient plays a key role in creating a flavorful dish. The baby potatoes give a tender bite, while olive oil adds richness. Parmesan cheese brings a sharp, nutty taste. Garlic, oregano, and paprika enhance the overall flavor. The sea salt and pepper balance everything perfectly. When you gather your ingredients, aim for fresh and high-quality items. This will make a big difference in flavor and texture. Using fresh parsley as a garnish not only adds color, but it also brightens the dish. For the full recipe, it's essential to follow the instructions closely. This ensures your crispy Parmesan potatoes turn out perfectly every time. First, set your oven to 425°F (220°C). This high heat helps create that perfect crispy texture. For easy cleanup, line a baking sheet with parchment paper. It keeps the potatoes from sticking and makes washing up a breeze. Take 1.5 lbs of baby potatoes and cut them in half. Place them in a large mixing bowl. Drizzle in 3 tablespoons of extra virgin olive oil. Add 2 cloves of minced garlic, 1 teaspoon of dried oregano, and 1 teaspoon of sweet paprika. Sprinkle in sea salt and freshly cracked black pepper to taste. Toss everything together. Make sure each potato is coated in the tasty oil and spices. Now, grab 1 cup of finely grated Parmesan cheese. Sprinkle it over the potatoes. Toss them again so every half gets a cheesy layer. This step makes a big difference in flavor. Place the potatoes cut side down on the prepared baking sheet. Arrange them in a single layer. This helps them cook evenly and get crispy. Bake them in your preheated oven for about 25-30 minutes. Keep an eye on them. You want them golden brown and crunchy on the outside. Once baked, take the potatoes out of the oven. Let them rest for about 5 minutes. This waiting time makes them even crispier. Just before serving, sprinkle some chopped fresh parsley on top. It adds a nice touch and bright color. For the complete method, check the Full Recipe. Enjoy your culinary creation! To get crispy Parmesan potatoes, choose smaller baby potatoes. Their size cooks evenly. When cutting them, always halve them. Place the cut side down on the baking sheet. This step helps them crisp up better. Preheat your oven to 425°F (220°C) for the best results. Higher heat cooks the potatoes quickly, giving that golden crust. Finally, let them rest for a few minutes after baking. This step lets them stay crispy longer. For a flavor boost, add fresh herbs. Rosemary or thyme pairs well with potatoes. Swap out the sweet paprika for smoked paprika for a deeper flavor. You can also mix in some grated cheese before baking. Try using aged Gouda or cheddar for a twist. If you like heat, sprinkle in a pinch of cayenne pepper. These simple changes can take your dish to new heights. Serve your crispy Parmesan potatoes warm. They pair nicely with grilled chicken or roasted veggies. For a fun twist, add a dipping sauce. Sour cream or a garlic aioli works great. You can also toss them into a salad for extra crunch. Place them in a bowl or on a nice platter for a lovely presentation. A sprinkle of parsley adds color and freshness, making your dish pop. Enjoy them right away for the best taste! {{image_4}} You can switch the Parmesan for other cheeses. Cheddar gives a sharp taste. Mozzarella adds a creamy touch. Feta brings a salty burst. Experiment with cheese to find your favorite mix. Each cheese adds a new flavor to your crispy potatoes. You can change the herbs to suit your taste. Try rosemary for a piney flavor. Basil offers a sweet, fresh twist. Thyme adds depth and earthiness. Use fresh herbs for a brighter taste or dried for more strength. These herbs can make your dish even more delightful. Adjust the spice to match your heat preference. Add cayenne pepper for a kick. Use chili powder for a smoky flavor. Just a pinch can change the whole dish. Tailor the spice level to keep everyone happy. Enjoy your crispy potatoes just the way you like! To keep your crispy Parmesan potatoes fresh, let them cool first. Place them in an airtight container. Store the container in the fridge. They stay good for about three days. If you want to save them longer, consider freezing. To reheat, I recommend using the oven. Preheat it to 350°F (175°C). Spread the potatoes on a baking sheet. Bake for about 10-15 minutes. This way, they regain some of their crispiness. You can also use an air fryer for a quicker option. Set it to 350°F (175°C) and cook for about 5-7 minutes. If you plan to freeze the potatoes, do it right after cooking. Allow them to cool down first. Then, spread them on a baking sheet in a single layer. Freeze until solid, about one hour. Once frozen, transfer them to a freezer bag. They can last up to three months in the freezer. When ready to eat, reheating directly from frozen works well. Just add a few extra minutes to the cooking time. For the best results, follow the Full Recipe for timing and temperature details. Crispy Parmesan potatoes stay fresh for about 3 to 4 days in the fridge. To keep them tasty, store them in an airtight container. They may lose some crispiness over time, but they still taste great. Yes, you can easily make this recipe gluten-free. Parmesan cheese is typically gluten-free, so that’s a plus. Just double-check the labels on your ingredients. Ensure your olive oil and spices are also gluten-free. You can pair crispy Parmesan potatoes with many dishes. They go well with grilled chicken, steak, or fish. You can also serve them with a fresh salad for a lighter meal. For more ideas, check out the Full Recipe. This blog post covered how to make crispy Parmesan potatoes. We discussed essential ingredients like baby potatoes and garlic. You learned step-by-step instructions for preparation and baking. I shared tips to maximize crispiness and flavor. We explored variations with different cheeses and herbs. Finally, I provided storage and reheating tips. In conclusion, you'll enjoy creating this delicious dish. Try different flavors to make it your own!

Crispy Parmesan Potatoes Delightfully Golden Dish

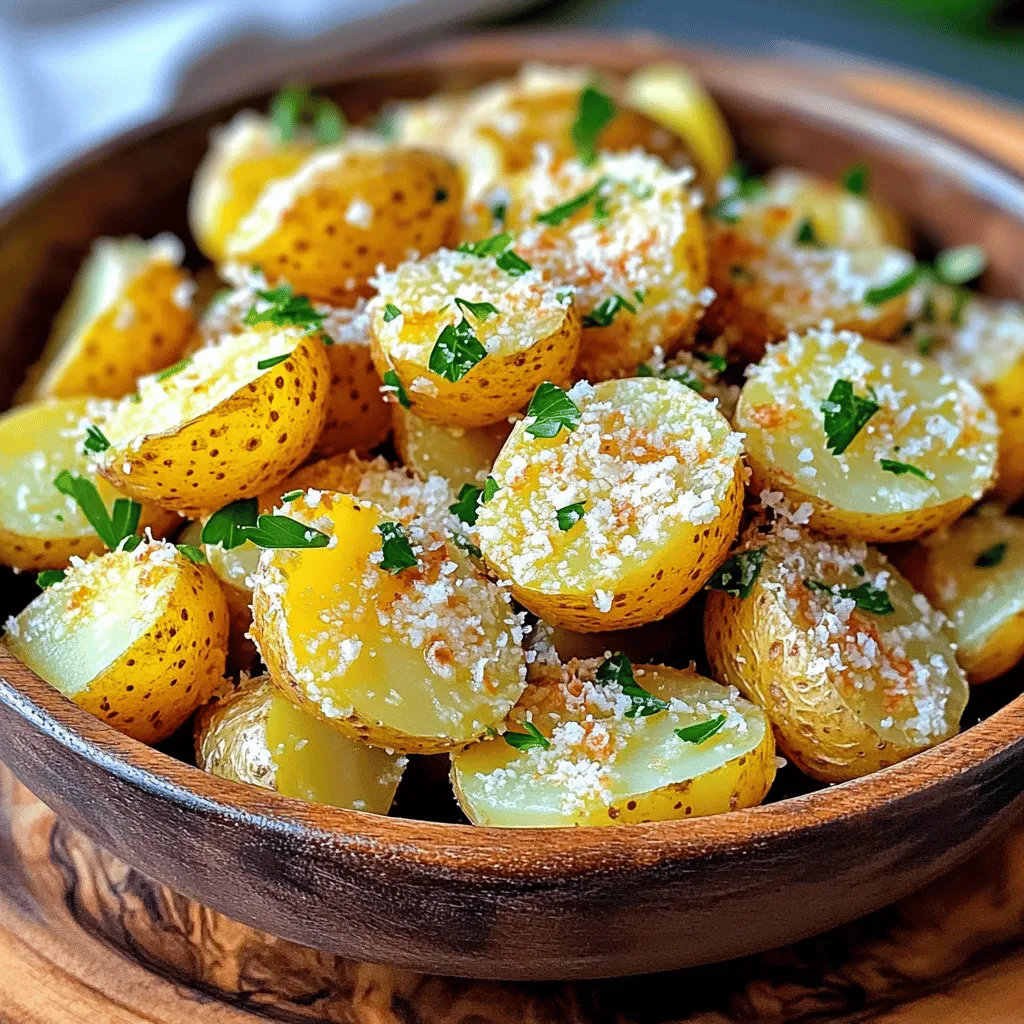
Crispy Parmesan potatoes are the ultimate comfort food that everyone loves. In this post, I’ll share a simple recipe that

- 3 ripe bananas, well mashed - 1/3 cup unsalted butter, melted - 1 teaspoon pure vanilla extract - 1 teaspoon baking soda - A pinch of fine salt - 1/2 cup packed brown sugar - 1 large egg, lightly beaten - 1 cup all-purpose flour - 1/2 cup Nutella (plus additional for swirling) Using fresh ingredients makes a big difference in flavor. I always choose ripe bananas for this recipe. They should be spotted and soft. The natural sugars in ripe bananas add sweetness. Next, we use unsalted butter. It gives a rich taste without extra salt. Melting it helps it mix smoothly. Pure vanilla extract adds a warm, sweet scent. It lifts the overall flavor of the bread. Baking soda is essential; it helps the bread rise. A pinch of fine salt balances the sweetness and enhances the flavors. Brown sugar adds moisture and a deeper taste than white sugar. We need one large egg to bind everything. It helps the bread hold its shape. All-purpose flour is our base. It gives structure to the bread. Finally, Nutella is the star! It adds a creamy and rich cocoa flavor. You can use more for swirling if you like. This recipe is about balance and joy in every bite. For the full recipe, you can check the section above. Prepping the Oven and Pan - Preheat the oven to 350°F (175°C). - Grease a 9x5 inch loaf pan. Start by setting your oven to the right temperature. This step is key for even baking. Greasing the pan helps the bread come out easily after baking. You can use butter or cooking spray for this. Mixing Ingredients - Combine bananas and butter. - Add vanilla and egg, mix thoroughly. Next, mash the ripe bananas in a medium bowl. Mix in the melted butter until smooth. You want a creamy texture. Once that’s done, stir in the vanilla extract and the beaten egg. This adds flavor and moisture to your bread. Finalizing the Batter - Add baking soda and salt. - Mix in brown sugar and flour. - Swirl Nutella into batter. Now, sprinkle the baking soda and salt over your banana mix. This will help your bread rise. Then, add the brown sugar and flour. Stir gently until combined. Be careful not to over-mix. Finally, take half of the batter and pour it into your greased pan. Drizzle half of the Nutella over it. Use a butter knife to swirl the Nutella through the batter for that delicious marbled effect. Pour in the rest of the batter and repeat with the remaining Nutella. For the full recipe, check the detailed instructions above. - Avoid over-mixing the batter. Mix just until the flour disappears. Too much mixing makes the bread tough. - You can tell the bread is done when a toothpick comes out clean. The top should be golden brown. - Try adding nuts or chocolate chips for extra flavor. Cinnamon or nutmeg can also add warmth. - Use overripe bananas for the best sweetness. They should be spotty and soft to mash easily. - For serving, slice the bread with a sharp knife. This keeps the slices neat. - Consider drizzling extra Nutella on the slices. You can also top with fresh banana slices or powdered sugar for a lovely look. {{image_4}} You can make this banana bread nut-free easily. Try using alternative spreads like sunflower seed butter or almond butter. These options still give a creamy texture. When you switch spreads, reduce the sugar slightly. Some spreads are sweeter than Nutella. Want to make your banana bread more fun? Add nuts or chocolate chips to the batter. Walnuts or pecans add a nice crunch. Chocolate chips melt and create pockets of gooey goodness. You can also add spices like cinnamon or nutmeg. A sprinkle of these spices gives a warm, cozy flavor. This banana bread shines at breakfast. Pair it with a side of fresh fruit or yogurt. It also makes a great snack. Enjoy it with coffee or tea in the afternoon. For a treat, add a scoop of ice cream on top. This makes it a delightful dessert! To keep your Nutella swirl banana bread fresh, store it in an airtight container. This helps lock in moisture and flavor. You can also wrap it tightly in plastic wrap. Place it in a cool, dry spot, away from sunlight. It stays fresh for about 3 to 4 days at room temperature. If you want to keep it longer, consider refrigerating it. In the fridge, it can last up to a week. If you want to save your banana bread for later, freezing works great. First, let the bread cool completely. Then, slice it into pieces. Wrap each slice in plastic wrap tightly. Place the wrapped slices in a heavy-duty freezer bag. Label the bag with the date. Your banana bread can stay fresh in the freezer for up to 3 months. When you are ready to enjoy it, just thaw it at room temperature. To reheat your banana bread, avoid the microwave. It can dry out the bread. Instead, use the oven. Preheat it to 350°F (175°C). Place the slice on a baking sheet. Heat it for about 10 minutes. This keeps the bread soft and moist. You can also warm it in a toaster oven if you prefer. Enjoy it warm with a drizzle of Nutella for extra flavor. Nutella Swirl Banana Bread is a moist and sweet treat. It combines ripe bananas with rich Nutella. The bread has a soft texture with swirls of chocolate hazelnut goodness. Each bite offers a yummy mix of banana flavor and chocolate. This recipe is simple to make and perfect for breakfast or dessert. Yes, you can use frozen bananas! Just thaw them first. They will become very soft, which is perfect for mashing. Make sure to drain any excess liquid after thawing. This will help keep the bread from becoming too wet. Fresh bananas work great too, but frozen adds a nice sweetness. To check if your bread is done, insert a toothpick into the center. If it comes out clean or with a few moist crumbs, it's ready. Look for a golden-brown top and a slight spring when pressed. Let it cool in the pan for ten minutes before moving it to a rack. This helps it set and makes slicing easier. For the full recipe, check the earlier section. This blog post covered how to make delicious Nutella Swirl Banana Bread. We looked at the key ingredients and step-by-step instructions. I shared tips for the best texture and flavor, along with variations to try. Storing your banana bread properly ensures it stays fresh. Remember, baking is fun! Don’t shy away from experimenting with flavors. You now have the tools to whip up this tasty treat anytime. Enjoy your baking journey!

Nutella Swirl Banana Bread Delightful and Simple Recipe

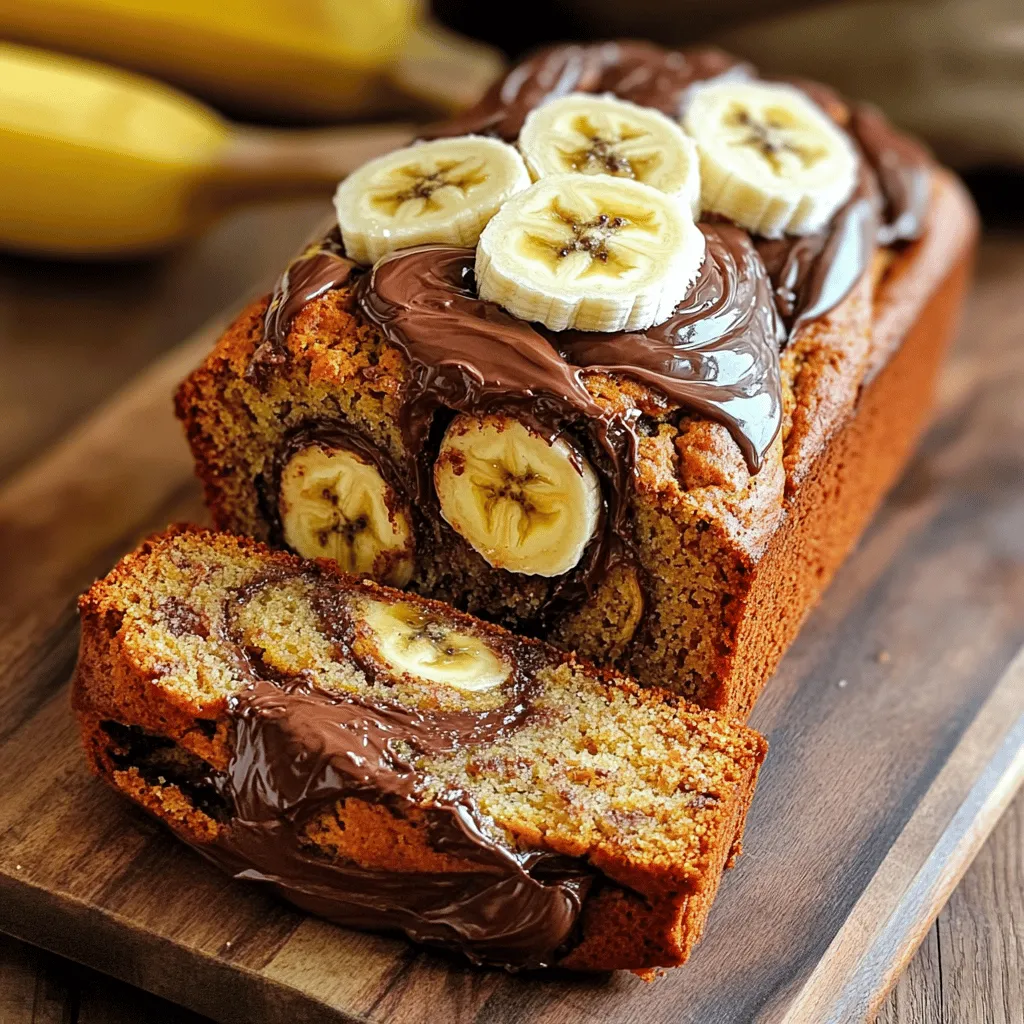
If you’re looking to elevate your banana bread game, you’re in the right place! This Nutella Swirl Banana Bread is

To make Pumpkin Spice Marshmallow Treats, you need a few simple ingredients. Here’s what you will need: - 4 cups rice cereal - 3 cups mini marshmallows - 3 tablespoons unsalted butter - 1 teaspoon pumpkin pie spice - 1 teaspoon vanilla extract - 1/4 cup canned pumpkin puree - Pinch of salt - 1/2 cup white chocolate chips (optional) - 1/4 cup crushed graham crackers (for topping) Each ingredient plays a key role in creating these tasty treats. The rice cereal forms the base, giving it a nice crunch. The mini marshmallows add sweetness and a chewy texture. Unsalted butter helps everything stick together without making it too salty. Pumpkin pie spice gives these treats that cozy, fall flavor. The vanilla extract enhances the overall taste, while canned pumpkin puree adds moisture and a hint of pumpkin flavor. A pinch of salt balances the sweetness. If you choose to add white chocolate chips, they bring a creamy element. Finally, crushed graham crackers on top give a crunchy finish. For the complete recipe with instructions, check out the Full Recipe. Enjoy making these delightful treats! Start by gathering all your ingredients. You will need: - 4 cups rice cereal - 3 cups mini marshmallows - 3 tablespoons unsalted butter - 1 teaspoon pumpkin pie spice - 1 teaspoon vanilla extract - 1/4 cup canned pumpkin puree - Pinch of salt - 1/2 cup white chocolate chips (optional) - 1/4 cup crushed graham crackers (for topping) Next, prep your workspace. Clear your counter and gather your tools. You will need a large saucepan, a spatula, and a 9x13-inch baking dish. Now, it’s time to melt the butter and marshmallows. In a large saucepan, melt the unsalted butter over low heat. Stir gently to keep it from browning. Once the butter melts, add the mini marshmallows. Keep stirring until they melt completely into a smooth mixture. After the marshmallows melt, it’s time to add the spices and pumpkin. Stir in the pumpkin pie spice, vanilla extract, and canned pumpkin puree. Don’t forget the pinch of salt! Mix well until everything blends and smells amazing. Now, let’s fold in the rice cereal. Remove the saucepan from the heat. Carefully add the rice cereal to the marshmallow mixture. Mix gently, ensuring every piece gets coated in the marshmallow goodness. If you want to add white chocolate chips, do it now. Gently fold them in, being careful not to let them melt too much. Next, transfer the mixture to your greased baking dish. Use a spatula or your lightly greased hands to press it down evenly. Finally, sprinkle the crushed graham crackers on top. This adds a nice crunch. Let the treats cool completely for about 30 minutes. After they cool, cut them into squares or bars. Enjoy your Pumpkin Spice Marshmallow Treats! For the full recipe, refer to the earlier section. To melt marshmallows well, use low heat. This helps prevent burning. Stir often to keep them from sticking. The goal is a smooth, creamy mix. If you see any lumps, keep stirring. You want it silky, not clumpy. For even coating of cereal, mix gently. Fold the rice cereal into the marshmallow mix. This ensures every piece gets covered. When pressing into the dish, use a spatula or your hands. Grease them lightly to avoid sticking. Press firmly but don't squash the treats. Make your treats pop with festive stacking. Stack them in a pyramid on a plate. This adds height and fun. For gifts, wrap each treat in clear cellophane. Tie with a colorful ribbon for a lovely touch. These ideas make your treats shine! {{image_4}} You can change the flavor of your Pumpkin Spice Marshmallow Treats by adding fun ingredients. - Chocolate or Peanut Butter: Stir in some chocolate chips or creamy peanut butter. These add a rich taste and make the treats even more delicious. If you use peanut butter, it pairs perfectly with the pumpkin flavor. - Nuts or Dried Fruits: You can also mix in chopped nuts or dried fruits like cranberries. Nuts add crunch, while fruits bring a sweet bite. This gives your treats a new twist and boosts their nutrition. You can play with the shape of your treats too. - Bars vs. Cookies: The classic version is bars. But you can make them into cookies for a fun twist. Use a cookie scoop, and shape the mixture into rounds. - Treat Pops or Bites: If you want something cute, you can form small bites or pops. Just roll the mixture into small balls and place them on sticks. This makes them great for parties or school events. The best part? You can adapt these treats for any season! - Halloween-themed Treats: For Halloween, add some orange and black sprinkles. You can also shape them into pumpkins or ghosts for a spooky look. - Thanksgiving-inspired Variations: For Thanksgiving, add a drizzle of caramel on top. You can also sprinkle cinnamon or nutmeg for extra fall flavor. These changes make your treats festive and fun for any gathering. Try these variations to keep your Pumpkin Spice Marshmallow Treats exciting and new! To keep your pumpkin spice marshmallow treats fresh, store them in an airtight container. This helps lock in moisture and flavor. Use a container that fits the size of the treats. If you stack them, place parchment paper between layers. Your treats can stay fresh for up to a week at room temperature. If you want to save some treats for later, freezing is a great option. First, cut the treats into squares. Then, wrap each piece in plastic wrap. Place the wrapped treats in a freezer-safe bag or container. They can last in the freezer for up to three months. When you are ready to eat them, take out your treats and let them thaw at room temperature for about 30 minutes. Check your treats before eating. If they feel hard or dry, they may not taste good. Also, look for any strange smells or mold. If you see any signs of spoilage, it’s best to toss them out. Enjoy your sweet treats while they are fresh! Pumpkin pie spice is a mix of warm spices. It usually includes cinnamon, nutmeg, ginger, and allspice. These spices bring out the cozy flavors of fall. You can find this spice blend in stores or make your own at home. Just mix equal parts of the spices mentioned above. Yes, you can use regular marshmallows! Just cut them into smaller pieces. This way, they will melt evenly. You might need to adjust the cooking time a bit. Keep stirring until they melt completely. To make gluten-free Pumpkin Spice Marshmallow Treats, use gluten-free rice cereal. Many brands offer gluten-free options. Always check labels to ensure safety. This way, everyone can enjoy these tasty treats! To make vegan treats, use vegan marshmallows. They are available in many stores. Replace the butter with coconut oil or vegan butter. These swaps will keep your treats dairy-free and still delicious. Enjoy every bite without worry! This recipe for Pumpkin Spice Marshmallow Treats is fun and easy. You'll start by melting butter and mini marshmallows in a pan. Once they mix into a smooth blend, you add pumpkin puree, pumpkin pie spice, and vanilla extract. This gives the treats their warm, cozy flavor. Next, you fold in the rice cereal until every piece gets coated in the sticky mixture. If you want, add white chocolate chips for extra sweetness. Then, press this mix into a greased baking dish and sprinkle crushed graham crackers on top. After letting them cool, cut them into squares. This recipe takes about 40 minutes from start to finish. It serves 12 to 16 people. You can find the full recipe above. Enjoy making these tasty treats! In this post, we explored how to make delicious Pumpkin Spice Marshmallow Treats. We covered key ingredients, from rice cereal to mini marshmallows. You learned the step-by-step cooking process and got tips for perfecting your treats. Different variations can add fun twists. Remember to store your treats properly to keep them fresh. With everything shared, you're ready to create tasty, seasonal snacks. Enjoy sharing these simple and fun treats with family and friends!

Pumpkin Spice Marshmallow Treats Delightful and Easy

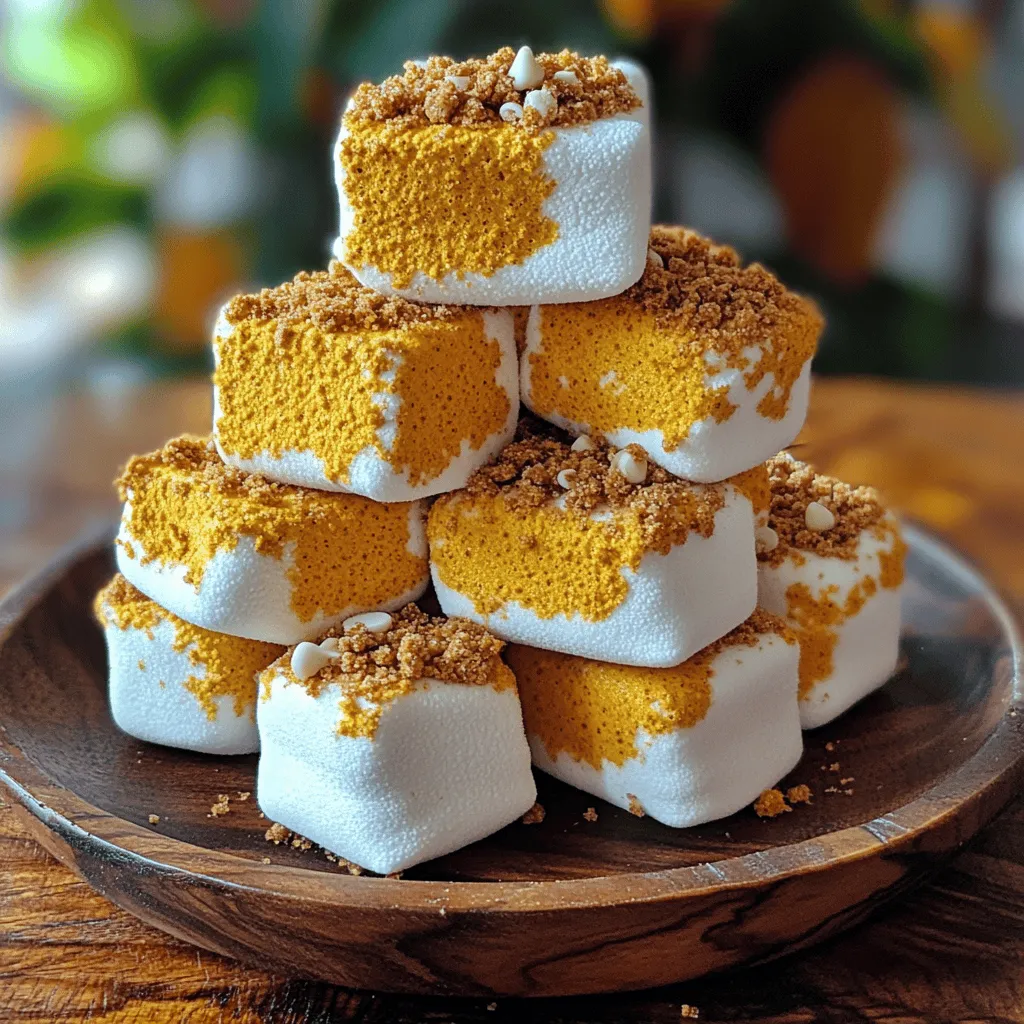
Fall is here, and that means one thing: pumpkin spice! I’ll show you how to make delicious Pumpkin Spice Marshmallow

To create Cheesy Buffalo Chicken Taquitos, you need the following ingredients: - 2 cups cooked chicken, shredded - 1/2 cup buffalo sauce - 1 cup shredded cheddar cheese - 1/2 cup cream cheese, softened to room temperature - 1/2 cup green onions, finely chopped - 8 small flour tortillas - 1 cup vegetable oil (for frying) - Salt and freshly ground black pepper to taste - Optional: sour cream, for serving These ingredients are key to making your taquitos rich and flavorful. Use cooked chicken for ease. Shredded rotisserie chicken works great here. The buffalo sauce gives that perfect kick. Cream cheese adds creaminess while cheddar gives that cheesy goodness. Don't forget fresh green onions for a nice crunch and flavor boost. Choosing small flour tortillas helps hold all that goodness inside. A bit of oil is essential for frying. It helps achieve that crispy texture we love. You can serve the taquitos with a side of sour cream for extra flavor. Check out the Full Recipe for all the details on preparation and cooking. To start, grab a large bowl. Combine the shredded chicken, buffalo sauce, and both cheeses. Mix them until smooth and creamy. It's important to taste the filling. Add salt and pepper to make it just right. This step ensures every bite is packed with flavor. Next, you need to soften the tortillas. Warm them in a skillet over low heat for about 30 seconds on each side. You can also use a microwave. Just wrap them in a damp paper towel and heat for 15 seconds. This makes rolling much easier. Now, it's time to fill the tortillas. Lay one on a flat surface. Scoop 2-3 tablespoons of the creamy chicken mixture onto one end. Roll the tortilla tightly around the filling. Tuck in the sides as you roll. If they seem loose, use a toothpick to hold them together. In a large skillet, pour in the vegetable oil. Heat it over medium heat until it shimmers. This should take about 3-5 minutes. When it's ready, gently place the taquitos seam-side down in the oil. Fry for 3-4 minutes on each side until they are golden brown and crispy. Avoid overcrowding the skillet to ensure even cooking. Once they are crispy, use tongs to remove the taquitos from the oil. Place them on a plate lined with paper towels. This helps drain any extra oil. Serve them hot with a side of sour cream for dipping. Enjoy the crunchy, cheesy goodness of your Cheesy Buffalo Chicken Taquitos! For more details, check the Full Recipe. Using cooked rotisserie chicken makes things easy. It saves time and adds flavor. I like to mix in extra spices, like garlic powder or onion powder. Fresh herbs, such as cilantro or parsley, also boost the taste. Keep a close eye on the oil temperature. It should be hot but not smoking. A good test is to drop in a small piece of tortilla. If it sizzles, the oil is ready. Avoid overcrowding the skillet. Fry in batches to ensure even cooking. For a beautiful display, use a colorful platter. Arrange the taquitos in a circle or fan shape. Sprinkle extra green onions on top for contrast. Drizzle buffalo sauce over the taquitos for flair. Serve with a bowl of sour cream, garnished with paprika for color. This makes every bite appealing and tasty. For the full recipe, check the section above. {{image_4}} You can switch out the chicken for ground beef or turkey. These meats mix well with buffalo sauce too. Just cook them in a pan, then follow the same steps as the chicken. If you want a vegetarian option, try black beans. They add great texture and flavor. Mash them a bit, then blend with the cream cheese and spices. Buffalo sauce is a classic choice, but don't stop there! You can use honey garlic sauce for a sweet twist. BBQ sauce gives a smoky flavor that many love. Ranch-style sauces can add a creamy touch. Mix and match to find your favorite! These taquitos shine with sides and dips. Serve them with fresh veggies like carrot and celery sticks. A cool dip, like ranch or blue cheese, works great too. You can even create a taquito platter with different sauces for dipping. This makes sharing fun! Check out the Full Recipe to get started on these tasty Cheesy Buffalo Chicken Taquitos! To keep your cheesy buffalo chicken taquitos fresh, store leftovers in the fridge. Place them in an airtight container. They can last up to three days. If you want to save them longer, consider freezing. You can freeze taquitos both before and after frying. To freeze before frying, lay them on a baking sheet. Make sure they are not touching. Freeze them for about 30 minutes. Then, transfer them to a freezer bag. For frozen taquitos after frying, let them cool first. Place them in an airtight container or bag. They will stay good for about two months. To reheat taquitos, use an oven for the best texture. Preheat your oven to 375°F (190°C). Place the taquitos on a baking sheet. Heat them for 10-15 minutes until they are hot and crispy. You can also use an air fryer for quicker reheating. Cook at 350°F (175°C) for about 5-7 minutes. Enjoy your taquitos like they are fresh! For more details, check the Full Recipe. Yes, you can make these taquitos ahead of time. Prepare the filling and fill the tortillas. Then, store them in the fridge for up to 24 hours before frying. This way, you save time when you want to serve them. Just remember to fry them fresh for that crispy texture! If you don’t have buffalo sauce, you can use hot sauce or BBQ sauce. You can also mix hot sauce with melted butter for a similar taste. Adjust the amount to get the heat you like. This keeps your taquitos flavorful even without buffalo sauce. To get crispy taquitos, make sure the oil is hot enough before adding your taquitos. Heat the oil until it shimmers but isn’t smoking. Fry them in small batches to avoid lowering the oil temperature. This will help achieve that perfect golden-brown outside. Yes, you can bake the taquitos! Preheat your oven to 400°F (200°C). Arrange the taquitos on a baking sheet and brush them lightly with oil. Bake for about 15-20 minutes until they are golden and crispy. This is a healthier option without sacrificing flavor. To serve leftovers, store them in an airtight container in the fridge. Reheat them in the oven for the best texture. Place them on a baking sheet and warm them at 350°F (175°C) for about 10-15 minutes. This way, they stay crispy and tasty. For the full recipe, check out the detailed instructions above! These cheesy buffalo chicken taquitos are a tasty treat that’s simple to make. We started with easy ingredients and followed clear steps to create a yummy dish. I shared tips for a perfect filling and ways to fry them right. You learned about fun variations to try and how to store extras. Enjoy experimenting with flavors and serving ideas. Whether as a snack or main dish, these taquitos will impress everyone. Keep this recipe handy for your next gathering or family meal!

Cheesy Buffalo Chicken Taquitos Crispy and Delicious

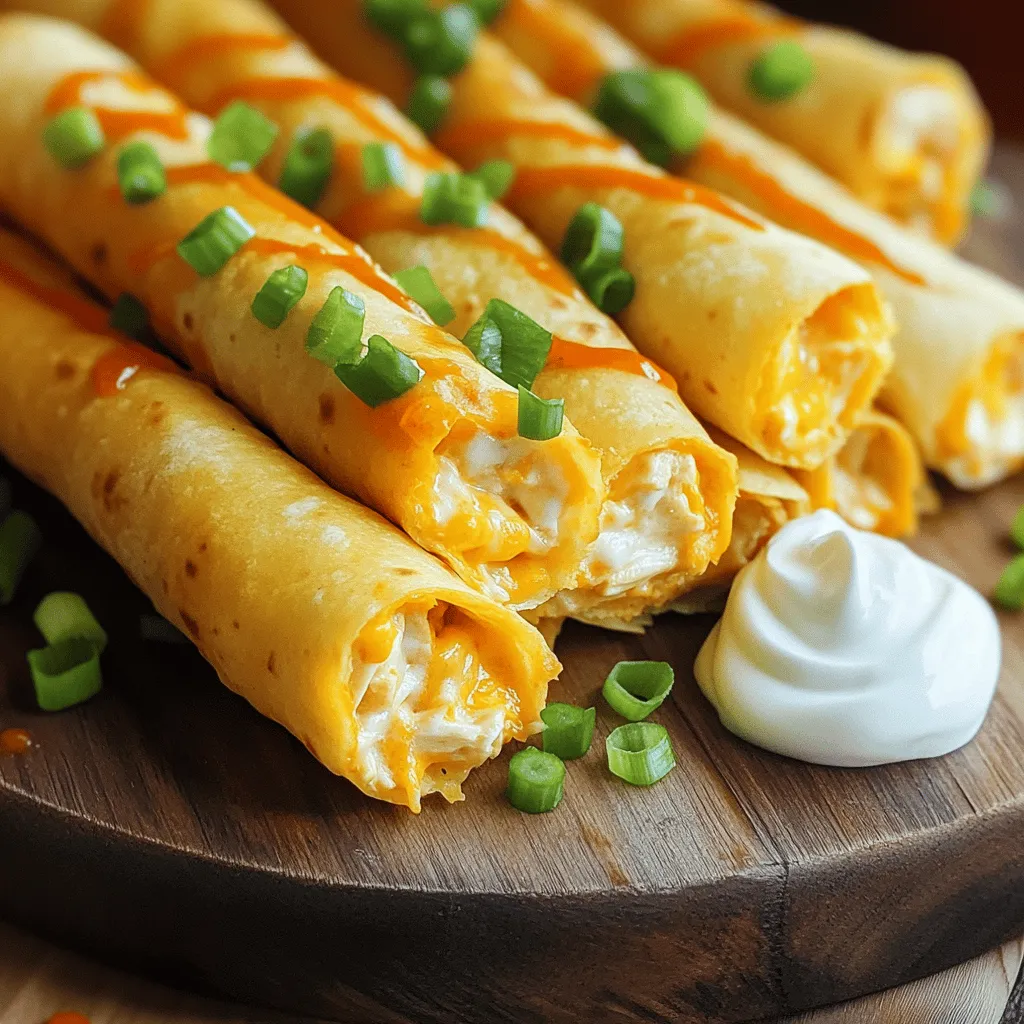
Are you ready to spice up your snack game? My Cheesy Buffalo Chicken Taquitos are crispy, delicious, and super easy

- 2 large apples (e.g., Granny Smith or Honeycrisp) - 1 cup fresh caramel sauce (store-bought or homemade) - 1/4 teaspoon fine sea salt (plus more for garnish) - 1/2 teaspoon pure vanilla extract - 1/2 cup cream cheese (softened) - 1/4 cup powdered sugar - 1/2 teaspoon ground cinnamon (optional) Gathering the right ingredients is key to making this salted caramel apple dip. Start with two large apples. I love using Granny Smith for their tartness or Honeycrisp for their sweet crunch. Slice them into wedges for easy dipping. Next, you need one cup of caramel sauce. You can use store-bought caramel when you're short on time. If you prefer, make homemade caramel for a richer flavor. You will also need fine sea salt. Just a pinch, about 1/4 teaspoon, adds depth to the sweet caramel. Plus, save some for garnish. The dip’s creaminess comes from 1/2 cup of softened cream cheese. This will blend well with the sugar and flavors. To sweeten the dip, include 1/4 cup of powdered sugar. For extra flavor, add 1/2 teaspoon of pure vanilla extract. If you want a warm touch, consider adding 1/2 teaspoon of ground cinnamon. This step is optional but can enhance the dip's richness. Now that you have everything, you are ready to create this tasty treat. You can find the full recipe above to ensure you don’t miss a step! - Combine cream cheese and powdered sugar. - Mix until smooth and creamy. Start with a medium bowl. Place the softened cream cheese in it. Add the powdered sugar next. Use a hand mixer or a whisk to blend. You want a nice, smooth texture. This will be the base of your dip. - Add vanilla extract and ground cinnamon. - Blend until fully integrated. Now, it’s time to add flavor. Pour in the vanilla extract. If you like, sprinkle in the ground cinnamon. Mix again until everything is well combined. This adds a warm, sweet note to the dip. - Mix caramel sauce with fine sea salt. - Ensure salt is dissolved in the caramel. In a separate bowl, take the caramel sauce. Stir in the fine sea salt. This step is key for that perfect salted flavor. Make sure the salt dissolves completely. You don’t want any grainy bits in your dip. - Gently fold caramel into cream cheese. - Maintain airiness during mixing. Next, take half of the salted caramel. Carefully fold it into the cream cheese mix. Use a spatula for this step. Be gentle so you keep the airiness. This makes the dip light and fluffy. - Spoon mixture into serving dish. - Drizzle with remaining caramel and create swirls. Spoon the creamy mixture into a serving dish. Spread it evenly for a smooth layer. Now, drizzle the rest of the salted caramel on top. Use a skewer or spoon to make pretty swirls. This adds a nice touch to the presentation. - Sprinkle sea salt on top. - Arrange apple slices around the dip. To finish, sprinkle a pinch of fine sea salt over the top. It enhances the flavor and looks great. Now, arrange apple slices around the bowl. This makes it easy for everyone to dip and enjoy. For the full recipe, check out the details above. For the best dipping experience, choose crisp apples. I recommend two varieties: - Granny Smith: These apples are tart and crunchy. They balance the sweet caramel well. - Honeycrisp: These offer a sweet flavor and a juicy bite. They add a nice contrast to the dip. Both options provide a great texture and flavor. Feel free to mix and match! You can use homemade or store-bought caramel. Homemade caramel sauce tastes rich and fresh. It allows you to control the flavor and thickness. If you’re short on time, store-bought caramel is a good choice too. - Homemade Caramel: This takes time but the taste is worth it. Just follow a simple recipe to ensure a creamy texture. - Store-bought Caramel: Look for high-quality brands. Check the ingredient list for fewer additives and a more natural taste. Presentation is key to impress your guests. Serve the dip in a decorative bowl. This draws attention to your beautiful creation. - Arrange apple slices around the bowl. This makes it easy for everyone to grab a slice. - Drizzle extra caramel on top. A light sprinkle of sea salt adds a final touch. This enhances both flavor and visual appeal. Serve this at parties or gatherings. Your guests will love this sweet and salty treat! For more ideas, check out related recipes. {{image_4}} You can easily change the flavor of your salted caramel apple dip. Try adding spices like nutmeg or allspice. These spices give your dip a warm and cozy taste. If you're a chocolate lover, consider mixing in chocolate chips or a drizzle of melted chocolate. This twist adds a rich flavor that pairs perfectly with the apples. Want a lighter version? Swap cream cheese for Greek yogurt. This change keeps the dip creamy but cuts calories. Also, look for low-sugar caramel sauces. These options let you enjoy the sweet flavor without all the sugar. Your taste buds will thank you! Seasonal fruits make great toppings. In fall, try adding chopped pears or figs. For summer, fresh berries are amazing. You can also sprinkle crushed nuts on top for crunch. Chocolate flakes add a nice touch too. These garnishes make your dip not only tasty but also beautiful! For the full recipe, check out the details above. To keep your salted caramel apple dip fresh, store it in an airtight container. Place it in the fridge right after serving. This helps to prevent any spoilage. The dip will stay good for about three days. Always check for any changes in smell or texture before eating. A simple rule is: when in doubt, throw it out. Most of the time, you don’t need to reheat this dip. It tastes great cold! But if you want it warm, use the microwave. Heat it in short bursts of 10-15 seconds. Stir in between to ensure even warmth. Be careful not to overheat it. You want it warm but not hot. If you have leftover ingredients, get creative! You can use extra apples for a pie or a crisp. Leftover caramel can drizzle on ice cream or pancakes. If you have cream cheese left, mix it into a savory dip. Don’t waste those tasty ingredients! You can also add the remaining powdered sugar to your morning coffee for a sweet boost. Yes, you can use store-bought caramel sauce. It saves time and is very easy. Just choose a good brand to get a rich flavor. Homemade caramel is great, too, but it takes longer to make. Both options work in this salted caramel apple dip. The dip lasts about three to four days in the fridge. Make sure to cover it well. This keeps it fresh and tasty. Over time, the dip may separate a little. Just stir it before serving. Yes, you can make this dip ahead of time. Mix the dip and store it in the fridge. Just add the apple slices when you are ready to serve. This saves you time during busy gatherings. You can serve many snacks with this dip. Besides apple slices, try pretzels, graham crackers, or even sliced pears. All these dippers add fun flavors. You can also use cookies for a sweet treat. Get creative with what you have! This post shows you how to make a tasty salted caramel apple dip. We covered the key ingredients, step-by-step instructions, and some useful tips. You can customize it with spices or make it healthier too. Storing leftovers is easy, and it's great for gatherings. Enjoy creating this delicious dip to impress friends and family!

Salted Caramel Apple Dip Irresistible and Easy Recipe

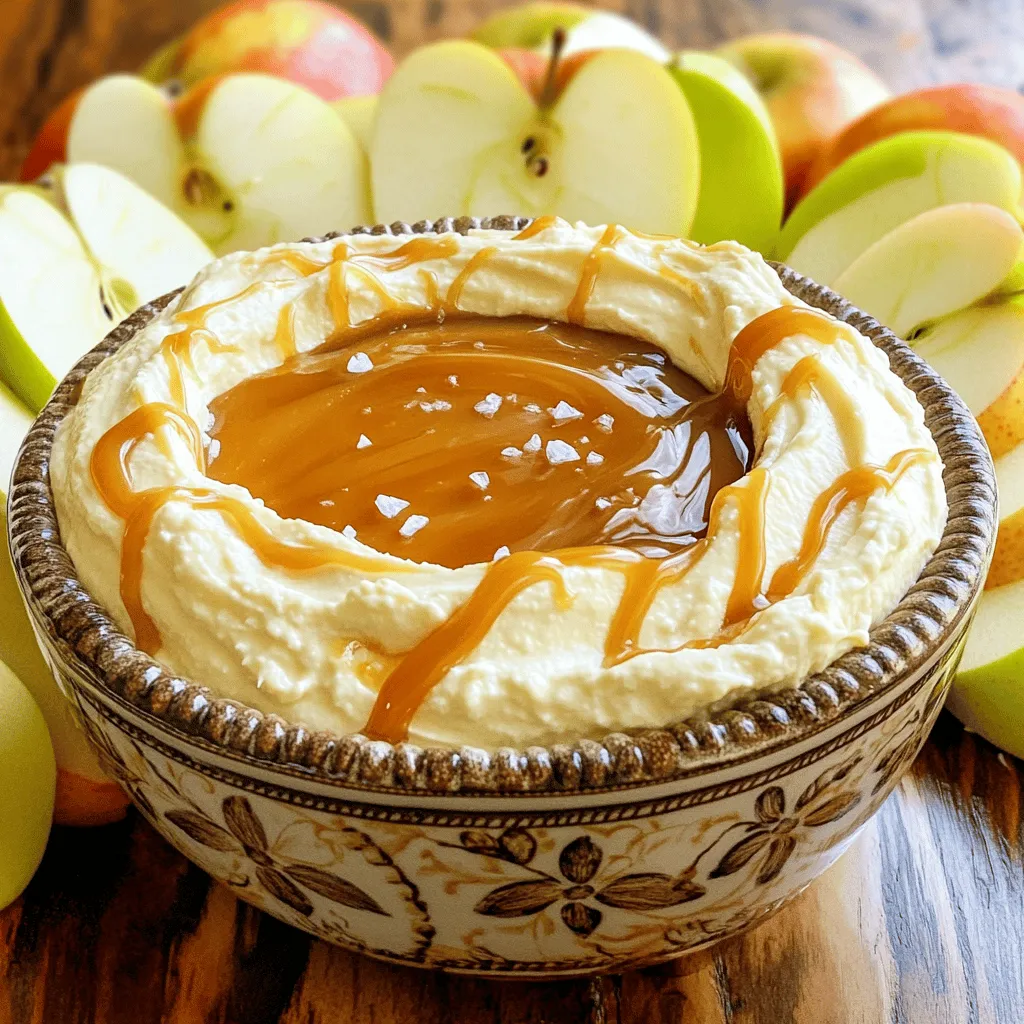
Looking for a fun and tasty snack? This Salted Caramel Apple Dip is your answer! With just a few simple

For my Pumpkin Chocolate Chip Blondies, I use simple and tasty ingredients. Here’s what you need: - 1 cup pumpkin puree - 1 cup packed brown sugar - 1/2 cup granulated sugar - 1/2 cup unsalted butter, melted - 2 large eggs at room temperature - 1 teaspoon pure vanilla extract - 1 1/2 cups all-purpose flour - 1 teaspoon baking powder - 1 teaspoon baking soda - 1 teaspoon ground cinnamon - 1/2 teaspoon ground nutmeg - 1/4 teaspoon salt - 1 cup semi-sweet chocolate chips The pumpkin puree gives these blondies a rich flavor and moist texture. The brown sugar adds a deep sweetness, while the granulated sugar balances it out. Melting the butter makes mixing easy. Eggs help bind everything together. The flour, baking powder, and baking soda create the right rise. The spices, cinnamon and nutmeg, bring warmth and that cozy fall vibe. Finally, the chocolate chips provide little bursts of sweetness. You can find the full recipe in this article for more detailed steps. Enjoy making these blondies! To make Pumpkin Chocolate Chip Blondies, follow these steps closely. Each step builds toward that sweet, rich treat. - Preheat oven to 350°F (175°C). - Prepare an 8x8-inch baking pan by greasing it lightly. Line it with parchment paper, leaving some overhang. This helps lift the blondies out later. - In a large mixing bowl, combine the melted butter, brown sugar, and granulated sugar. Stir until smooth and well blended. - Next, add the pumpkin puree, eggs, and vanilla extract to the sugar mixture. Mix until smooth with no lumps. - In a medium bowl, whisk together the flour, baking powder, baking soda, ground cinnamon, ground nutmeg, and salt. Ensure they are well mixed. - Gradually add the dry mix to the wet ingredients. Stir gently until just combined. Avoid overmixing to keep blondies light and airy. - Finally, fold in the chocolate chips evenly with a spatula. - Transfer the batter to your prepared baking pan. Use a spatula to spread it evenly. - Bake in the oven for 25-30 minutes. They’re ready when a toothpick comes out clean, with a few moist crumbs. - Let the blondies cool in the pan for about 10 minutes. Use the parchment overhang to lift them out onto a wire rack. Let them cool completely before cutting into squares. Following these steps will help you create delicious Pumpkin Chocolate Chip Blondies that everyone will love. For the complete recipe, refer to the [Full Recipe]. To get the best blondies, avoid overmixing the batter. Mix just until combined. This helps keep them light and soft. After baking, allow proper cooling time. Let them cool for at least 10 minutes in the pan. This makes cutting easier and keeps them from falling apart. If you don't have pumpkin puree, you can use applesauce or mashed banana. Both add moisture and flavor. For sugar substitutes, try coconut sugar or a sugar blend. These options can lower calories while keeping sweetness. For a lovely finish, serve the blondies with a dusting of powdered sugar. This simple step makes them look fancy. You can also pair them with ice cream. A scoop of vanilla or caramel ice cream adds a creamy touch. This makes for a perfect dessert experience. For the full recipe, see earlier sections. {{image_4}} You can add nuts or dried fruits to the batter. Pecans or walnuts bring a nice crunch. Dried cranberries or apricots add a sweet twist. Feel free to mix and match! Using different types of chocolate can change the game. Try dark chocolate for a rich taste. White chocolate adds a sweetness that balances the pumpkin. For a gluten-free option, swap all-purpose flour for almond flour. This keeps the blondies moist and soft. You can also try coconut flour, but adjust the liquid in the recipe. If you want a vegan version, replace the eggs with flax eggs or applesauce. Use plant-based butter instead of dairy butter. For the chocolate chips, look for dairy-free options. During the holidays, you can make Christmas spice blondies. Add ginger, cloves, and allspice for a festive flavor. For Thanksgiving, consider adding chopped pecans and a swirl of cream cheese. This adds a creamy texture and more flavor to your blondies. Check the Full Recipe for all the details on making these delicious treats! To keep your Pumpkin Chocolate Chip Blondies fresh, store them in an airtight container. You can keep them at room temperature for up to three days. Just make sure they stay away from heat and sunlight. If you want them to last longer, refrigerate them. This can extend their freshness for about a week. You can freeze these blondies for up to three months. First, cut the blondies into squares. Wrap each piece tightly in plastic wrap. Then, place them in a freezer-safe bag. When you want to enjoy a blondie, take it out of the freezer. Let it thaw in the fridge overnight for the best results. For optimal freshness, eat your blondies within a week if stored in the fridge. Watch for signs of spoilage, like a dry texture or a strange smell. If the blondies look hard or have mold, it’s best to toss them. Enjoy your sweet treat while it’s still delightful! For the full recipe, check out the complete details. What is the best way to cut blondies? Cutting blondies can be easy with the right tools. Use a sharp knife for clean edges. First, let the blondies cool completely. Then, lift them out by the parchment. Cut into squares for perfect pieces. Wipe the knife with a damp cloth between cuts. This keeps each piece neat and tidy. Can I use fresh pumpkin instead of canned? Yes, you can use fresh pumpkin! Just cook and puree the pumpkin until smooth. Use the same amount as canned, which is one cup. Fresh pumpkin can add a rich, natural flavor. It may also have a bit more moisture, so keep an eye on the bake time. Why are my blondies too dense? Dense blondies can happen for a few reasons. Overmixing the batter is a big one. When you mix too much, you add air and gluten. This can lead to a heavy texture. Make sure to mix gently until just combined. Also, check your baking powder and soda for freshness. How can I make blondies more moist? To keep blondies moist, try a few tips. Adding an extra egg can help create a softer texture. You can also reduce the flour slightly. Another option is to add a splash of milk or cream. Be careful not to overbake, as that dries them out too. Caloric content per serving Each blondie has about 180 calories. This can vary based on the exact ingredients used. The chocolate chips add some extra calories, but they also add joy! Health benefits of pumpkin in desserts Pumpkin is a great addition to desserts. It is low in calories and high in fiber. It contains vitamins A and C, which are good for your skin and eyes. Using pumpkin can boost the nutrition of your treats without losing taste. Enjoy your blondies while feeling good about your choice! This post shared a simple recipe for pumpkin chocolate chip blondies. You learned about the ingredients, prep steps, and baking instructions. Remember, the right mixing and cooling will give you the best texture. Don’t shy away from experimenting with flavors or dietary swaps. Store them well for lasting taste. Enjoy every bite and share your creations with friends. These blondies can be a sweet treat anytime. Happy baking!

Pumpkin Chocolate Chip Blondies Irresistibly Sweet Treat

Get ready to indulge in a delightfully sweet treat! These Pumpkin Chocolate Chip Blondies combine rich pumpkin flavor with melty

To make crispy honey garlic tofu, gather these key ingredients: - 1 block (14 oz) firm tofu, pressed and drained - 1/3 cup cornstarch - 2 tablespoons vegetable oil - 3 tablespoons honey - 2 tablespoons low-sodium soy sauce - 2 cloves garlic, finely minced - 1 tablespoon fresh ginger, grated - 1 tablespoon sesame oil Each item plays a role in creating the dish's flavor and texture. The tofu provides a great base. Cornstarch gives it that crispy texture. Honey and soy sauce create a sweet and savory balance. Garlic and ginger add depth and zest, while sesame oil gives a nutty finish. To elevate your dish, consider these garnishes and serving ideas: - 2 green onions, thinly sliced (for garnish) - Sesame seeds (for garnish) - Cooked jasmine rice (for serving) These toppings not only enhance the look but also bring fresh flavors. The green onions add a sharp bite. Sesame seeds offer crunch and nutty taste. Serving over jasmine rice makes the meal hearty and filling. If you need substitutes, here are some options: - Swap firm tofu with extra-firm tofu for more texture. - Use maple syrup or agave nectar instead of honey for a vegan option. - Replace soy sauce with tamari for a gluten-free choice. These alternatives keep the dish delicious while adjusting to your needs. Each swap keeps the spirit of the recipe while allowing for different dietary preferences. For the full recipe, check out the detailed instructions above. To start, you need to prepare the tofu. Take one block of firm tofu, about 14 ounces. Slice the tofu into 1-inch cubes. Next, press the cubes gently with paper towels. This step is key. Removing moisture helps the tofu crisp up nicely. Now, let’s cook the tofu. First, coat each cube in cornstarch. This will give the tofu that crunchy exterior you want. Heat 2 tablespoons of vegetable oil in a large non-stick skillet over medium-high heat. Once the oil shimmers, add tofu cubes in a single layer. Make sure not to overcrowd the pan. Fry for about 3-4 minutes on each side. You want them golden brown and crispy. When done, place the tofu on a paper towel-lined plate to absorb extra oil. Let’s make the sauce now. Lower the heat to medium in the same skillet. Add 2 cloves of minced garlic and 1 tablespoon of grated ginger. Sauté for about 30 seconds, just until the garlic smells good. Next, pour in 3 tablespoons of honey and 2 tablespoons of low-sodium soy sauce. Stir well and let it simmer for 2-3 minutes. This helps the flavors blend. After it thickens slightly, return the crispy tofu to the skillet. Toss it well in the sauce to coat. Drizzle in 1 tablespoon of sesame oil for extra flavor. Heat for one more minute. Now, your tofu is ready to serve! To get your tofu super crispy, start by pressing it well. Use a heavy object to remove excess water. Cut the tofu into small cubes, about 1 inch thick. The smaller the pieces, the crispier they get. Pat them dry with paper towels. Dust each piece with cornstarch to create a crunchy shell. When frying, avoid crowding the pan. Cook in batches if needed. This keeps the heat high and ensures an even cook. The honey garlic sauce is key to this dish. You can add a splash of rice vinegar for tang. A dash of chili flakes gives it a nice kick. For a deeper flavor, try adding a bit of hoisin sauce. Don't forget to taste as you mix. Adjust the honey and soy sauce to suit your taste. Fresh herbs like cilantro can also brighten the dish. Presentation makes your meal shine. Serve the crispy honey garlic tofu over a bed of fluffy jasmine rice. This adds a nice contrast to the crispy tofu. Top with thin slices of green onion and a sprinkle of sesame seeds. For extra charm, place a lemon wedge on the side. This adds color and a fresh taste. A beautiful dish makes every bite more enjoyable. For the full recipe, check out the details shared above. {{image_4}} You can make this dish even better by adding vegetables. For a colorful mix, try bell peppers, broccoli, or snap peas. These veggies boost nutrition and add crunch. Cut them into bite-sized pieces. You can stir-fry them in the same skillet before adding the tofu. This way, they soak up the honey garlic sauce too. If you want a fresh touch, add spinach just before serving. It wilts quickly and gives a bright flavor. You can change the taste by using different sauces. If you want a tangy kick, add rice vinegar or lime juice to the honey garlic sauce. For a spicy flavor, mix in some sriracha or chili paste. You can also try teriyaki sauce for a sweet and savory twist. Just replace the honey and soy sauce with teriyaki. This gives a fun new spin to the classic dish. If you like heat, there are many ways to spice things up. Adding red pepper flakes is an easy choice. A pinch goes a long way, so start small. You can also use fresh chili peppers. Slice them thin and add them while cooking the garlic and ginger. For a smoky flavor, try smoked paprika. Just sprinkle a little in the sauce. Each option brings a new level of excitement to your crispy honey garlic tofu. To store leftover crispy honey garlic tofu, place it in an airtight container. Keep it in the fridge if you plan to eat it within a few days. Make sure the tofu cools down before sealing the container. This helps keep the texture as crispy as possible. To reheat your tofu while keeping it crispy, use the oven or an air fryer. Preheat the oven to 375°F (190°C). Spread the tofu on a baking sheet and heat for about 10-15 minutes. If you use an air fryer, set it to 350°F (175°C) and cook for about 5-7 minutes. Avoid the microwave, as it makes the tofu soft and soggy. You can freeze crispy honey garlic tofu if you want to save it for later. First, let the tofu cool completely. Place it in a freezer-safe bag or container. Try to remove as much air as possible to prevent freezer burn. When you're ready to eat, thaw the tofu in the fridge overnight. For the best results, reheat it in the oven or air fryer after thawing. For the full recipe, check the instructions above. Yes, you can use soft or silken tofu. However, they won’t be as crispy. Firm tofu works best for this recipe. It holds its shape and gets nice and crunchy. If you want a softer texture, try using silken tofu in a different dish, like a smoothie or dessert. This recipe is almost vegan. To make it fully vegan, substitute honey with maple syrup or agave nectar. Both options add sweetness without any animal products. This keeps the dish delicious and plant-based. I suggest serving crispy honey garlic tofu over cooked jasmine rice. The rice soaks up the sauce and balances the flavors. You can also add steamed broccoli or snap peas for extra veggies. A side salad with a light dressing pairs well too. Crispy honey garlic tofu is simple to make and full of flavor. We explored the key ingredients, tips for crispiness, and tasty variations. Remember to try different sauces and veggies for fun twists. Store leftovers well to keep them fresh. This dish is not just for dinner, but also perfect for lunch. Enjoy crafting your own version and impressing your friends with this dish!

Crispy Honey Garlic Tofu Easy and Flavorful Delight

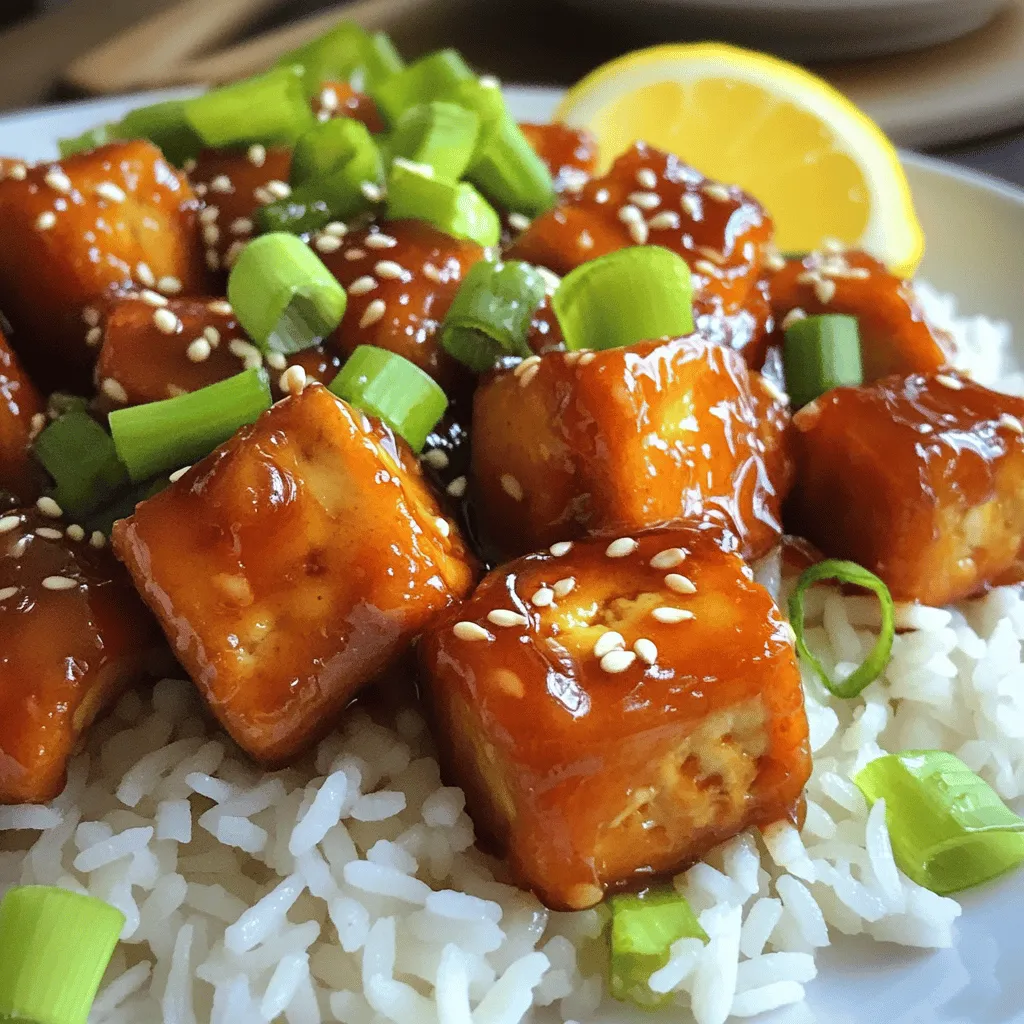
Are you ready to elevate your dinner game? My Crispy Honey Garlic Tofu is not just easy; it’s packed with

Older posts
Newer posts
← Previous Page1 … Page3 Page4 Page5 … Page71 Next →

dsad

© 2025 spoonfulsavory • Built with GeneratePress

Our Policies

  • Copyright Policy
  • Cookie Policy
  • GDPR Policy
  • Privacy Policy
  • Disclaimer
  • Terms Of Use

More Information

  • Home
  • About
  • Contact
  • Appetizers
  • Dessert
  • Dinner
  • Drinks
©2025, spoonfulsavory About Back To Top