Skip to content
DisclaimerTerms Of UseGDPR PolicyCookie Policy

spoonfulsavory

  • Home
  • Drinks
  • Appetizers
  • Dinner
  • Dessert
  • About
  • Contact
  • Privacy Policy
DisclaimerTerms Of UseGDPR PolicyCookie Policy

Sarah

To make your Pumpkin Spice Energy Bites, you will need a few simple items. Here’s a quick list for you: - 1 cup rolled oats - 1/2 cup almond butter (or substitute with peanut butter) - 1/2 cup canned pumpkin puree - 1/4 cup honey or maple syrup - 1 teaspoon pure vanilla extract - 2 teaspoons pumpkin pie spice - 1/4 teaspoon sea salt - 1/4 cup mini chocolate chips (optional) - 1/4 cup chopped pecans or walnuts (optional) These ingredients come together to create a tasty, healthy snack. The oats provide fiber, while the pumpkin adds moisture and flavor. Almond butter gives healthy fats and protein, making these bites filling. The pumpkin pie spice will give you that warm, cozy taste. You can choose to add mini chocolate chips for sweetness or nuts for crunch. Feel free to mix and match based on your taste! For the full recipe, check out the complete guide on how to prepare these bites. Start by mixing the base ingredients. In a large bowl, add: - 1 cup rolled oats - 1/2 cup almond butter (or substitute with peanut butter) - 1/2 cup canned pumpkin puree Mix these until they blend well and form a sticky mixture. Next, add sweeteners and spices. Include: - 1/4 cup honey or maple syrup - 1 teaspoon pure vanilla extract - 2 teaspoons pumpkin pie spice - 1/4 teaspoon sea salt Stir these in vigorously. You want the mixture to be thick and sticky. Now, let’s incorporate optional ingredients. If you like, fold in: - 1/4 cup mini chocolate chips - 1/4 cup chopped pecans or walnuts These add great flavor and crunch! Now, it’s time to roll the mixture into balls. Use clean hands to scoop about 1 tablespoon of the mix. Roll this into a ball shape. Repeat this step until you shape all the mixture into bites. Next, arrange them on a tray. Use parchment paper to line the tray. Space them apart for easy handling later. To cool the energy bites, refrigerate them for firmness. Place the tray in the fridge for at least 30 minutes. This helps them set up nicely. After they are firm, transfer the energy bites to an airtight container. Store them in the fridge for fresh snacks later. Enjoy your tasty Pumpkin Spice Energy Bites! For more details, check out the Full Recipe. To get the best pumpkin spice energy bites, you want the right texture. Start with rolled oats. They add chewiness and heartiness. If the mix feels too dry, add a bit more almond butter or pumpkin puree. For sweetness, taste as you mix. You can use honey or maple syrup. Adjust it to your liking. You can also add some fun flavors. For a chocolatey twist, fold in mini chocolate chips. If you like crunch, toss in chopped pecans or walnuts. These optional add-ins make your bites unique. Serve these energy bites in a fun way. Place them on a colorful plate to grab attention. They work well as a snack or a quick breakfast. You can also pair them with drinks. A warm cup of tea or coffee complements the pumpkin spice flavor nicely. For extra fun, try serving them at parties. Guests will love their tasty and healthy qualities. {{image_4}} You can change the flavor of your pumpkin spice energy bites easily. - Using different nut butters: Almond butter gives a nice taste, but you can use peanut butter too. Sunflower seed butter works well for nut-free options. Each nut butter adds a unique flavor and texture. - Adding dried fruits or seeds: You can mix in dried cranberries, raisins, or chopped dates for a sweet twist. Pumpkin seeds or sunflower seeds add a nice crunch and extra nutrition. These small changes can make your bites fun and new! Pumpkin spice energy bites are great for any time of the year. You can modify them for seasons or special events. - Fall: Stick with the classic pumpkin spice flavor for a cozy feel. - Winter: Add some peppermint extract for a festive touch. - Spring/Summer: Use fresh fruits like berries or coconut to brighten the flavor. These twists keep your snacks exciting and suit any mood! For the full recipe, check out the details above. Store your pumpkin spice energy bites in an airtight container. This keeps them fresh and tasty. You can use glass jars or plastic containers with tight lids. They will stay good for about one week in the fridge. However, they will taste best if you eat them fresh. If you want to store them longer, freezing is great. To freeze, place the energy bites in a single layer on a tray. Once they freeze, transfer them to a freezer bag. This helps prevent them from sticking together. They will last for up to three months in the freezer. When you're ready to eat them, take out how many you want. Let them thaw at room temperature for about 15 minutes. For the best texture, you can also warm them in the microwave for a few seconds. Enjoy your tasty snack anytime! How to make them vegan? You can make pumpkin spice energy bites vegan by swapping honey for maple syrup. Also, use almond butter or any other plant-based nut butter. These changes keep the bites tasty and plant-friendly. Can I use fresh pumpkin instead of canned? Yes, you can use fresh pumpkin puree. Just cook the pumpkin until soft, then blend it until smooth. This option adds a nice, fresh flavor to your bites. Are they gluten-free? Yes, these energy bites are gluten-free. Just make sure to use certified gluten-free oats. This choice ensures that anyone with gluten sensitivity can enjoy them. Feel free to check out the Full Recipe for step-by-step instructions! Creating pumpkin spice energy bites is easy and fun. We covered the ingredients, preparation steps, and ways to store these treats. You can also change flavors or add mix-ins to suit your taste. These bites are great for a quick snack or a boost of energy. Enjoy them with a drink or share them with friends. Try making them, and discover your favorite version! You’ll love this tasty, healthy treat.

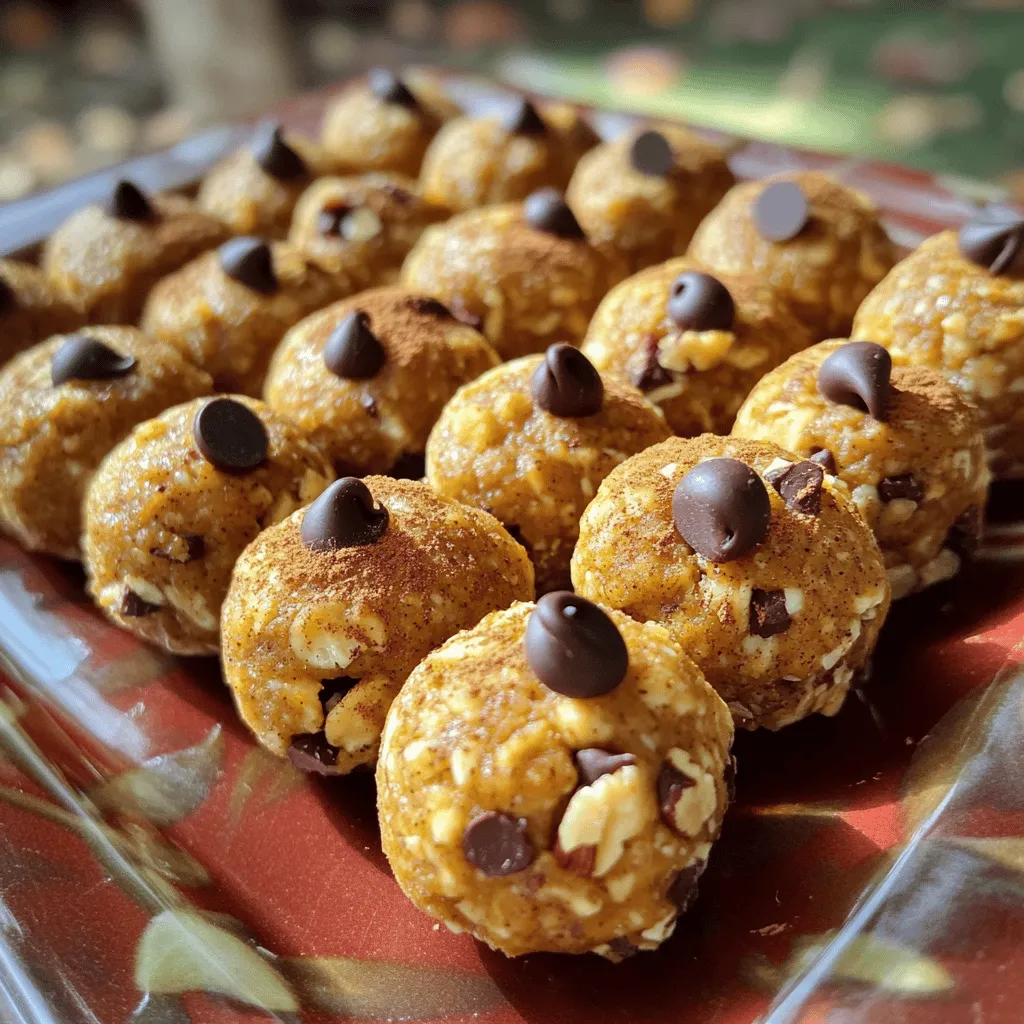
Pumpkin Spice Energy Bites Healthy and Tasty Snack

Get ready to power up your snack game with these Pumpkin Spice Energy Bites! Packed with nutrition and flavor, they’re

When making cinnamon sugar tortilla chips, having the right ingredients is key. Here’s what you need: - 6 flour tortillas - 1/4 cup granulated sugar - 2 tablespoons ground cinnamon - 1/4 cup unsalted butter, melted - Pinch of salt - Optional: 1/2 cup honey or chocolate sauce for dipping These simple ingredients come together to create a tasty treat. The flour tortillas give a soft base, while the cinnamon and sugar add sweetness. The melted butter helps the sugar stick and gives the chips a rich flavor. The pinch of salt balances the sweetness just right! If you want to dip your chips, honey or chocolate sauce makes a great choice. You can find the full recipe in the earlier sections. Enjoy the process of making these delightful chips! - Preheat the oven to 350°F (175°C). - In a bowl, mix sugar, cinnamon, and salt. - Coat each tortilla with melted butter. - Cut the tortillas into triangles. - Sprinkle the cinnamon sugar mix on the tortillas. - Place them on a baking sheet without overlap. - Bake for 10-12 minutes until crispy. I love this step! The sweet scent fills the kitchen as they bake. You might want to flip the chips halfway for even crispiness. When they turn golden brown, they are ready. Enjoy them warm or cool with honey or chocolate sauce for dipping. Don't forget the full recipe for more details! To get the best texture, start with an even butter coating. Use a brush to spread the melted butter on the tortillas. This step is key for making the chips crispy. Also, remember to flip the chips halfway through baking. This ensures both sides get golden and crunchy. For even more flavor, add an extra sprinkle of cinnamon sugar when the chips come out of the oven. This adds a nice touch of sweetness. Using fresh tortillas can also improve the taste. Fresh ones are softer and more flavorful than older tortillas. Get creative with how you serve your chips. You can stack them in a cone-shaped holder for fun. Place them on a colorful plate to make the dish pop. Dipping sauces can also enhance your chips. Try honey or chocolate sauce for a sweet treat. Drizzle the sauce on the side for a nice touch! {{image_4}} You can easily jazz up your cinnamon sugar tortilla chips. One great way is by adding vanilla extract to the melted butter. This simple touch gives a sweet, warm flavor. Just mix in a teaspoon of vanilla before you brush the tortillas. Feel free to experiment with different spices too. You might try nutmeg or cardamom for a unique twist. Each spice adds its own character, and you can create a new favorite! If you want a healthier version, consider using whole wheat tortillas. They add fiber and nutrients while keeping the delicious taste. Just follow the same steps as with regular tortillas. You can also make low-sugar options. Use a sugar substitute like stevia or monk fruit sweetener. This way, you can enjoy the crunch without too much sugar. Seasonal flavors make your snack special. In fall, try adding pumpkin spice to the cinnamon sugar mix. This will give your chips a cozy, festive feel. For chocolate lovers, a chocolate version is a must-try! Simply melt some dark chocolate and drizzle it over the finished chips. This rich flavor pairs perfectly with the cinnamon sugar. These variations keep the fun alive in your kitchen! You can find the full recipe to get started. To keep your cinnamon sugar tortilla chips fresh, store them in an airtight container. I recommend using a zip-top bag or a glass jar. This helps prevent moisture from ruining the crispiness. You can store them at room temperature. They will stay good for about three days. If you want them to last longer, you can freeze them. Just make sure to layer them with parchment paper to avoid sticking. When you're ready to enjoy your chips again, reheating them is key. Use an oven to keep them crispy. Preheat your oven to 350°F (175°C) and place the chips on a baking sheet. Bake them for about 5 minutes. This method revives their crunch. Avoid using a microwave, as it makes them soggy. If you're in a rush, a toaster oven works well, too. After storing, you might want to bring back the flavors. A light sprinkle of cinnamon sugar can do wonders. This simple step refreshes their taste. Pair your chips with dips like honey or chocolate sauce for a sweet treat. You can even try them with fruit salsa for a fun twist. You can use coconut oil, olive oil, or applesauce instead of butter. These options keep the chips tasty while making them dairy-free. If you choose olive oil, use a light flavor to avoid overpowering the cinnamon sugar. Coconut oil gives a nice hint of sweetness. Applesauce is a fun choice for a healthier twist. Just spread your choice evenly on the tortillas before adding the cinnamon sugar mixture. Yes, you can prepare the chips in advance. After baking, let them cool completely. Store them in an airtight container for up to three days. This keeps them fresh and crunchy. If you want to serve them later, reheat them in the oven for a few minutes. This helps restore their crispiness. These chips have a fun mix of flavors but also some sugar. Each serving has about 150 calories. You get 5 grams of fat, mostly from the butter or oil. There are 23 grams of carbs and 1 gram of protein. They are great as a treat, but keep an eye on portion size if you're watching your intake. In this article, we covered how to make delicious cinnamon sugar tortilla chips. You learned the key ingredients and followed easy steps to bake them. We also shared tips for the perfect crunch and fun serving ideas. You can even try different flavors or healthier options. Remember, you can store and reheat these chips to enjoy later. With the right techniques, your snacks can always taste fresh! Experiment and find your perfect twist on this fun recipe. Enjoy your cooking!

Cinnamon Sugar Tortilla Chips Crispy and Delightful Treat

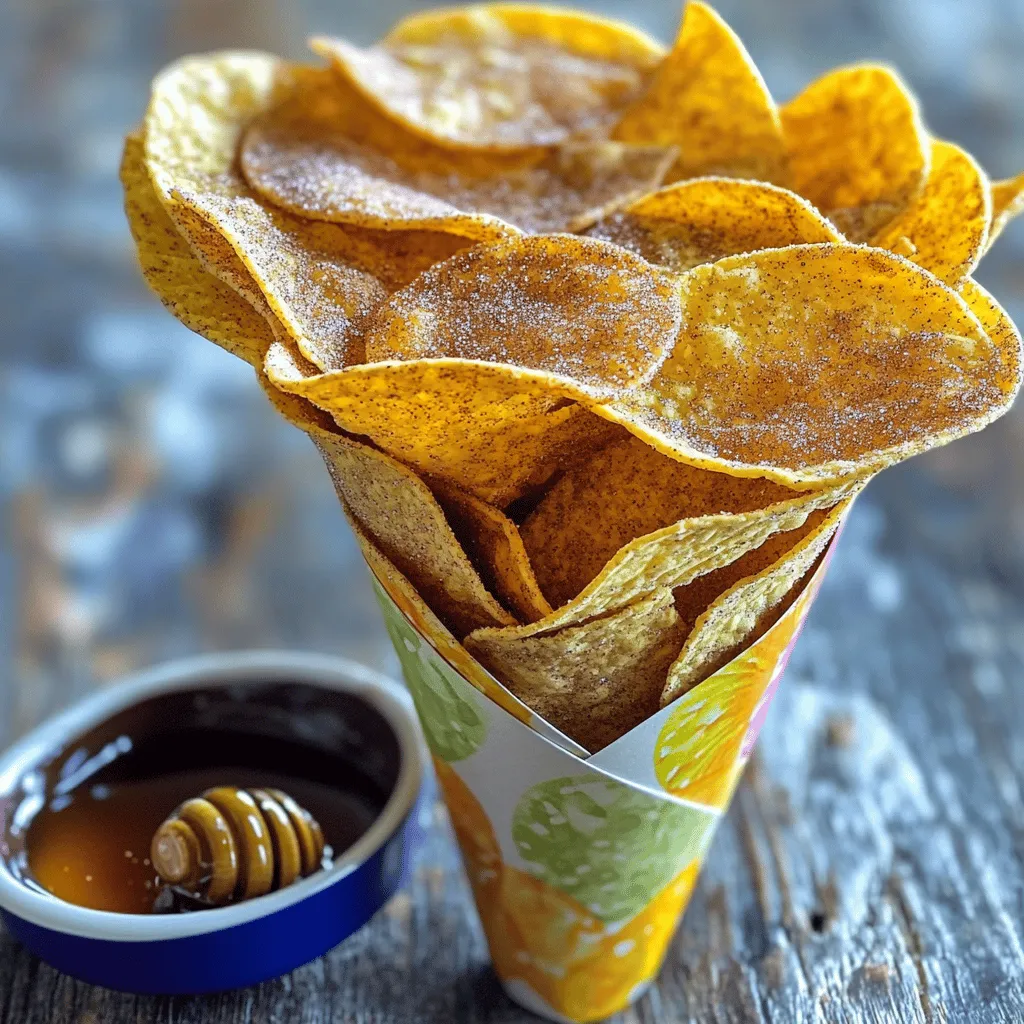
If you’re craving a sweet, crispy treat, you’re in the right place! Cinnamon Sugar Tortilla Chips are easy to make

- 4 large bell peppers (any color) - 1 cup quinoa, rinsed - 2 cups vegetable broth - 1 can (15 oz) black beans, drained and rinsed - 1 cup corn kernels (fresh or frozen) - 1 teaspoon ground cumin - 1 teaspoon smoked paprika - 1/2 teaspoon chili powder - Salt and pepper to taste - 1 medium red onion, diced - 2 cloves garlic, minced - 1 cup diced tomatoes (canned or fresh) - 1 cup shredded cheese (cheddar or blend) - 2 tablespoons olive oil - Fresh cilantro for garnish When you gather these ingredients, you set the stage for a tasty meal. The bell peppers can be any color you like. Each color brings a unique touch. Rinsing the quinoa removes its bitter coating. Using vegetable broth adds depth to the flavor. The black beans and corn give a nice texture. Spices are key! Cumin adds warmth, while smoked paprika offers a subtle smokiness. The chili powder gives a little kick, and salt and pepper round out the flavors. Chop the onion and mince the garlic. These will create a great base for your filling. The diced tomatoes keep everything moist and fresh. Cheese adds creaminess, and olive oil helps everything cook nicely. Finally, cilantro sprinkles on top bring a fresh finish. For the full recipe, be sure to check out the Vibrant Fiesta Stuffed Bell Peppers. This dish is not just easy; it’s also full of flavor! First, you need to preheat your oven to 375°F (190°C). This step is key to getting your stuffed peppers nice and warm. Next, take your large bell peppers and cut off the tops. Make sure to remove the seeds and membranes inside. This helps the peppers cook evenly. Lightly brush the outside of the peppers with olive oil. This gives them a nice flavor and helps them brown. In a medium saucepan, bring 2 cups of vegetable broth to a boil. This broth adds great flavor to the quinoa. Once boiling, add 1 cup of rinsed quinoa. Reduce the heat to low and cover the pot. Let the quinoa simmer for about 15 minutes. After this time, the quinoa should absorb all the liquid. Fluff it gently with a fork and set it aside. This fluffy texture is perfect for your stuffing. In a large skillet, heat 2 tablespoons of olive oil over medium heat. Add 1 diced red onion and sauté it for about 3 to 4 minutes. The onion should turn translucent. Then, add 2 minced garlic cloves. Cook for an extra minute until the garlic smells great. Now it’s time to stir in the filling ingredients. Add 1 can of black beans, 1 cup of corn, 1 cup of diced tomatoes, the cooked quinoa, and your spices: 1 teaspoon of ground cumin, 1 teaspoon of smoked paprika, and 1/2 teaspoon of chili powder. Mix everything well and cook for another 5 to 7 minutes. This step lets the flavors blend together nicely. Now, it's time to fill the bell peppers. Spoon the stuffing mixture into each pepper. Pack it in lightly but evenly. Top each pepper with the remaining shredded cheese. This creates a delicious cheesy crust when baked. Cover the baking dish with aluminum foil. This helps keep the moisture in while baking. Bake the peppers for 25 minutes. After that, uncover them and bake for another 10 to 15 minutes. You’ll know they are done when the peppers are tender and the cheese is bubbly and golden brown. Enjoy your vibrant fiesta stuffed bell peppers! For the full recipe, check the earlier section. When you pick bell peppers, look for bright colors. Choose peppers that feel firm and heavy. Check for smooth skin without wrinkles or blemishes. A fresh pepper has a sweet smell. If you find peppers with a few small spots, that’s fine. Just avoid any with soft spots or large dark areas. These signs can mean the pepper is old. For the stuffing, balance is key. Use both soft and crunchy ingredients. The quinoa gives a nice base, while black beans add creaminess. Corn brings sweetness, and spices add warmth. Mix in diced tomatoes for moisture and flavor. You can add a bit of cheese for richness. Taste as you mix. Adjust salt and pepper to your liking. Make sure the filling is not too wet or dry. A good stuffing holds together but is not packed too tight. You can bake or air fry stuffed peppers, depending on your taste. Baking gives a soft texture, while air frying makes them crisp. If you bake, cover them for the first part to keep moisture. Uncovering helps the cheese brown nicely. For air frying, set the temperature to 360°F (182°C) and cook for about 15-20 minutes. Both methods are tasty and easy to use. Each option will give you delicious stuffed peppers. For the full recipe, check out the guide above. {{image_4}} For a vegetarian or vegan twist, swap the quinoa for brown rice or couscous. Both will fill the peppers well and add a nice texture. Instead of cheese, use nutritional yeast for a cheesy flavor. You can also add mashed avocado on top for creaminess. These small changes keep the dish tasty and satisfying. To make meat-filled peppers, just add ground meat or poultry to the mix. Brown one pound of ground beef, turkey, or chicken in the skillet before adding other ingredients. This adds a hearty flavor and protein. Mix the meat with the beans, corn, and spices for a rich filling. For a spicy kick, add chopped jalapeños or red pepper flakes to the filling. You can also mix in a teaspoon of hot sauce for extra heat. If you enjoy smoky flavors, try smoked paprika too. These spicy twists make the dish exciting and full of flavor. For more details, check the Full Recipe. To keep your stuffed bell peppers fresh, store them in the fridge. Place the peppers in an airtight container. They will stay good for up to four days. If you want to save them longer, freezing is a great option. Wrap each stuffed pepper tightly in plastic wrap. Then, put them in a freezer-safe bag. They can last up to three months in the freezer. When you're ready to eat, just thaw them overnight in the fridge. To reheat stuffed bell peppers, the oven is best. Preheat it to 350°F (175°C). Place the peppers on a baking sheet and cover them with foil. Heat for about 20 minutes. This keeps them moist. You can also use a microwave for quick reheating. Place a pepper on a microwave-safe plate and cover it. Heat for 2 to 3 minutes, checking halfway. Avoid overcooking, as it can make the peppers mushy. Enjoy your meal with the same great taste! You can add many tasty toppings to your stuffed bell peppers. Here are a few great options: - Avocado slices for creaminess - Sour cream to add a tangy flavor - Fresh salsa for a zesty kick - Chopped green onions for crunch - A drizzle of hot sauce for heat These toppings can make your dish even more fun and tasty. Yes, you can easily make stuffed peppers ahead of time. This is great for meal prep. Here’s how: 1. Prepare and stuff the peppers. 2. Cover them tightly and store in the fridge. 3. Bake them the next day or even a few days later. This way, you save time and still enjoy a delicious meal. To tell if your stuffed peppers are perfectly cooked, look for these signs: - The peppers should be tender and easy to pierce with a fork. - The cheese on top should be melted and golden brown. - The filling should be hot all the way through. When you see these signs, your stuffed bell peppers are ready to enjoy! Stuffed bell peppers are a delicious, versatile dish. You learned the key ingredients, like quinoa and black beans. I shared easy steps for preparation and cooking. Plus, I gave you tips for choosing and stuffing peppers. Remember, you can adapt this recipe to fit your taste. Whether you prefer vegetarian, vegan, or meat options, these peppers can please anyone. With simple storage tips, you can enjoy leftovers too. Now, it’s time to gather your ingredients and enjoy your cooking adventure!

Stuffed Bell Peppers Flavorful and Easy Recipe

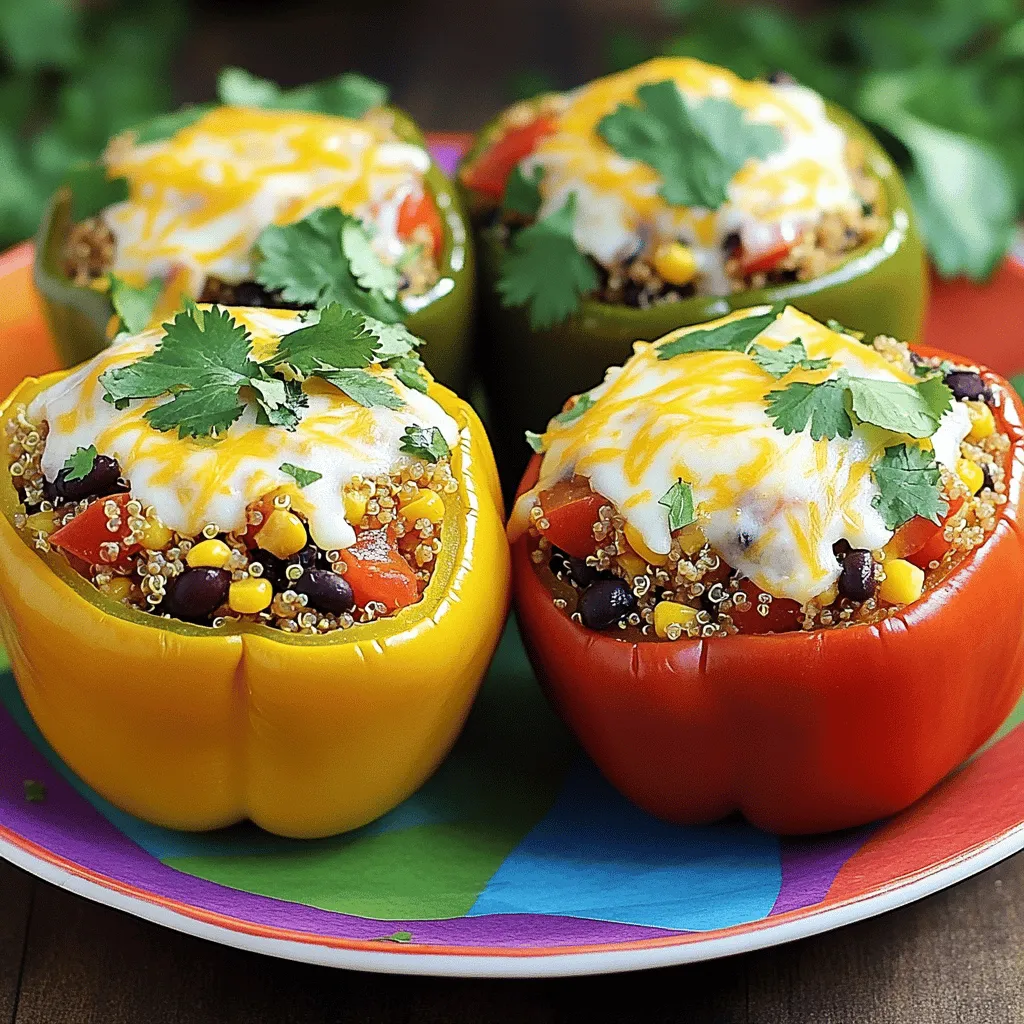
Stuffed bell peppers are a tasty and fun dish to make. Whether you’re feeding your family or hosting friends, this
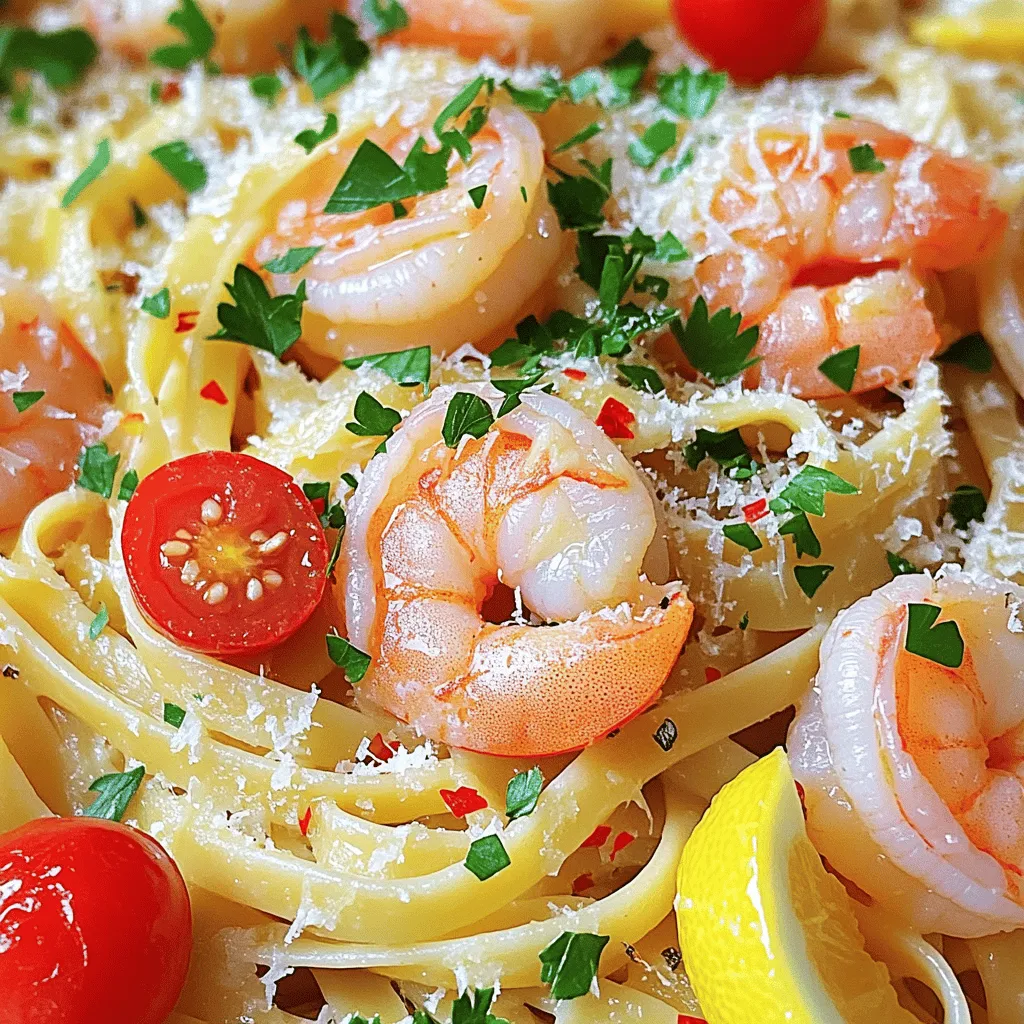
To make a vibrant Mediterranean quinoa salad, gather these key ingredients: - 1 cup quinoa, thoroughly rinsed - 2 cups water or vegetable broth - 1 cup cherry tomatoes, halved - 1 cucumber, diced - 1 red bell pepper, diced - 1/2 red onion, finely chopped - 1/2 cup kalamata olives, pitted and sliced - 1/2 cup feta cheese, crumbled - 1/4 cup fresh parsley, finely chopped - 1/4 cup extra virgin olive oil - 2 tablespoons freshly squeezed lemon juice - 1 teaspoon dried oregano - Salt and freshly ground pepper to taste Fresh produce is the heart of this salad. The cherry tomatoes add a burst of sweetness. Crunchy cucumber gives a refreshing bite. The red bell pepper brings color and a sweet crunch. Using a finely chopped red onion adds a zesty kick without overpowering the dish. Each ingredient plays a role in creating a balanced flavor profile. You can customize this salad to fit your taste. Consider adding: - Avocado for creaminess - Chickpeas for extra protein - Spinach or arugula for more greens - Artichoke hearts for a unique twist Feel free to mix and match these options to make your Mediterranean quinoa salad truly yours! For the complete recipe, check [Full Recipe]. To start, take a medium saucepan. Add 2 cups of water or vegetable broth. Bring it to a rolling boil over medium-high heat. Once it boils, add 1 cup of rinsed quinoa and a pinch of salt. Cover the pot and lower the heat. Let it simmer for about 15 minutes. The quinoa will absorb all the liquid and become fluffy. After cooking, remove it from heat. Let it cool for a few minutes. Fluff it gently with a fork. While your quinoa cools, grab a large mixing bowl. Add the following fresh ingredients: - 1 cup cherry tomatoes, halved - 1 cucumber, diced - 1 red bell pepper, diced - 1/2 red onion, finely chopped - 1/2 cup kalamata olives, pitted and sliced - 1/2 cup feta cheese, crumbled - 1/4 cup fresh parsley, finely chopped Gently toss these ingredients together. This mix will add color and texture to your salad. Now, let’s make the dressing. Take a small bowl and add: - 1/4 cup extra virgin olive oil - 2 tablespoons freshly squeezed lemon juice - 1 teaspoon dried oregano - Salt and freshly ground pepper to taste Whisk all these together until well combined. This dressing will give your salad a bright, zesty flavor. Once the quinoa has cooled, fluff it again with a fork. Add it to the bowl with the salad mixture. Drizzle the dressing over everything. Gently fold all the ingredients together until well mixed. Ensure every piece is coated in the dressing. Taste your salad and adjust the seasoning if needed. You may want more salt, pepper, or lemon juice. Cover the salad with plastic wrap or place it in an airtight container. Chill it in the fridge for at least 30 minutes. This helps the flavors blend well. Enjoy your fresh and healthy Mediterranean quinoa salad! You can find the full recipe under “Mediterranean Quinoa Salad.” To cook quinoa well, rinse it first. Rinsing removes the bitter coating called saponin. Use a 1:2 ratio of quinoa to liquid. For extra flavor, use vegetable broth instead of water. Bring the liquid to a boil, then add the quinoa. Cover the pot and lower the heat. Simmer for about 15 minutes. After cooking, let it sit for 5 minutes. Then fluff the quinoa with a fork. It should be light and airy. To make your salad shine, add fresh herbs. Chopped parsley or mint works wonders. A squeeze of fresh lemon juice brightens the dish. For a spicy kick, include red pepper flakes. A drizzle of balsamic glaze adds a sweet touch. Experiment with different olives for a unique taste. You can also change up the cheese. Try goat cheese or a dairy-free option. These small changes can add big flavor. Serve the Mediterranean quinoa salad cold or at room temperature. It makes a great side dish for grilled meats. For a main course, add protein like chickpeas or chicken. Use a colorful bowl to make it pop. Garnish with lemon wedges or extra herbs. This salad can also be a meal prep star. Store it in airtight containers for easy lunches. For the full recipe, check the details above. {{image_4}} You can make this salad vegetarian or vegan easily. To keep it vegetarian, you simply add feta cheese. If you prefer a vegan option, skip the cheese or use a plant-based alternative. Nutritional yeast is a great choice. It gives a cheesy flavor without any dairy. You can also add avocado for creaminess. You can boost the protein in this salad in many ways. Chickpeas are a great choice. They add texture and flavor. You can also use cooked lentils or black beans. For a meatier option, add grilled chicken or shrimp. These options make the salad more filling and tasty. Using seasonal ingredients can change the flavor of your salad. In spring, add fresh peas or asparagus. In summer, use ripe peaches or watermelon for sweetness. In fall, roasted butternut squash adds warmth. In winter, try roasted beets or Brussels sprouts. They provide color and flavor while keeping it fresh. For the complete recipe, check out the [Full Recipe]. You can store your Mediterranean quinoa salad in the fridge. Use an airtight container to keep it fresh. It stays good for about 3 to 5 days. If you want to enjoy it later, let it cool completely before sealing it. This helps keep the flavors intact. Freezing quinoa salad is not the best option. The vegetables may lose their crunch and become mushy. However, if you want to freeze it, separate the dressing from the salad. Store the salad without dressing in a freezer-safe container for up to a month. When you're ready to eat, thaw it in the fridge overnight. Then, mix in the dressing before serving. If you have leftovers, you can quickly reheat the salad. Use the microwave for about 30 seconds to 1 minute. Stir it well and check if it’s warm enough. If you like it cold, simply take it out of the fridge and enjoy. Remember, adding fresh herbs or a squeeze of lemon can brighten the flavors again. For more details on making this delicious dish, check the Full Recipe. To make this salad gluten-free, use quinoa. Quinoa is naturally gluten-free. Just make sure any added ingredients, like broth or olives, are also gluten-free. Always check labels to be safe. Yes, you can make this salad ahead of time. It tastes great after sitting in the fridge for a few hours. You can even prepare it the day before. Just cover it tightly and store it in the fridge. This salad pairs well with grilled chicken or fish. You can also serve it with pita bread and hummus. For a light meal, enjoy it on its own as a fresh dish. The salad lasts about 3 to 5 days in the fridge. Make sure to keep it in an airtight container. If you see any signs of spoilage, it’s best to throw it away. If you want a substitute for feta cheese, try goat cheese or ricotta. For a dairy-free option, use avocado or a plant-based cheese. These options add creaminess without changing the salad's taste. Check the Full Recipe for more details on preparing this delicious dish! In this blog post, we explored how to make a tasty Mediterranean quinoa salad. We covered the key ingredients, step-by-step cooking instructions, handy tips, and fun variations. You learned how to store the salad for later enjoyment. This dish is versatile and healthy, making it perfect for any meal. Enjoy mixing flavors and ingredients that suit your taste. With these tips, you can create a dish your friends and family will love. Dive into this recipe, and savor every bite!

Mediterranean Quinoa Salad Fresh and Healthy Delight

Looking for a fresh and healthy dish that bursts with flavor? You’re in the right place! My Mediterranean Quinoa Salad

- 2 cups shredded cooked chicken - 1 cup black beans, rinsed and thoroughly drained - 1 cup corn kernels (can be fresh, canned, or frozen) - 1 cup shredded sharp cheddar cheese, divided - 1/2 cup diced red onion - 1 teaspoon ground cumin - 1 teaspoon chili powder - 1/2 teaspoon garlic powder - 8 small flour tortillas - 1 cup enchilada sauce (store-bought or homemade) - 1/4 cup fresh cilantro, chopped (for garnish) - Sour cream (optional, for serving) In this recipe, I use common ingredients that many have at home. The shredded cooked chicken makes this dish easy and quick. You can use rotisserie chicken for more flavor and less work. Black beans add protein and fiber. Corn gives a nice sweetness. For spices, I keep it simple with ground cumin, chili powder, and garlic powder. They add a warm, rich flavor. The enchilada sauce ties everything together, so choose one you love. Flour tortillas are my favorite for rolling. They hold the filling well. Fresh cilantro adds a bright finish, and sour cream can cool the spice. For the full recipe, check out the details above. Enjoy making these tasty enchiladas! - Preheat the oven to 350°F (175°C). - In a large bowl, mix together the filling. Combine 2 cups shredded chicken, 1 cup black beans, 1 cup corn, 3/4 cup cheese, 1/2 cup red onion, 1 teaspoon cumin, 1 teaspoon chili powder, and 1/2 teaspoon garlic powder. Stir well until everything is mixed. - Take a tortilla and add about 1/4 cup of the filling to the center. - Roll the tortilla tightly, keeping the filling inside. - Place each rolled tortilla seam-side down in a greased 9x13 inch baking dish. - Pour 1 cup of enchilada sauce evenly over the tortillas. - Sprinkle the remaining 1/4 cup of cheese on top of the sauce. - Cover the dish with foil. This helps keep the enchiladas moist. - Bake for 20 minutes. After that, take off the foil and bake for another 10 minutes. - Look for the cheese to be melted and bubbly. These steps create a tasty dish that is quick and easy to make. For the full recipe, check the earlier section. Use shredded rotisserie chicken for a quick and tasty option. You can also use grilled chicken. If you want a vegetarian twist, try black beans or refried beans. You can mix in corn to add sweetness. Canned or frozen corn works well in this dish. You can even add diced bell peppers for extra crunch. For a simple enchilada sauce, use tomato sauce, chili powder, and cumin. You can add garlic powder for extra flavor. Cook the sauce on low heat for about 10 minutes. This allows the spices to blend well. A touch of sugar can balance the flavors if the sauce is too tangy. Dress up your enchiladas with fresh cilantro and lime wedges. Add diced avocado or jalapeños for a kick. Serve with a side of rice or beans for a full meal. For drinks, pair with a light beer or a refreshing margarita. This way, you create a fun and tasty dinner setting. {{image_4}} For a tasty vegetarian option, you can swap out the chicken. Use black beans or lentils for protein. You can also add more veggies for a colorful mix. Bell peppers, zucchini, or spinach work great. Just chop them up and throw them in the filling. This way, you still get that delicious, hearty flavor. Want a kick? You can make your enchiladas spicy! Add jalapeños or diced green chilies to the filling. You could also mix in some cayenne pepper or hot sauce. Start with a small amount and taste as you go. This way, you can control the heat to your liking. If you love cheese, this is for you! Use different types of cheese for more flavor. Try Monterey Jack, pepper jack, or even queso fresco. Layer cheese inside the enchiladas and on top for extra cheesiness. This makes each bite rich and gooey. For an even cheesier treat, add a sprinkle of cheese halfway through baking. Try these variations to personalize your Easy Chicken Enchiladas. You can find the Full Recipe earlier for reference! Store your chicken enchiladas in an airtight container. This keeps them fresh. They last up to three days in the fridge. To reheat, just pop them in the microwave or oven. You can freeze enchiladas before or after baking. For freezing before baking, wrap them tightly in plastic wrap. Place them in a freezer bag. They can stay frozen for up to three months. To freeze after baking, let them cool first. Then wrap and freeze. To thaw, move them to the fridge overnight. For reheating, bake at 350°F (175°C) until hot. You can reheat enchiladas in the microwave or oven. If using the microwave, heat in short bursts. If using the oven, cover with foil to keep moist. For the best cheese experience, ensure it is melty. You can add a splash of sauce or a bit of water. This helps keep the cheese soft and gooey. Enjoy your enchiladas with a side of fresh toppings! Bake chicken enchiladas for 30 minutes at 350°F (175°C). Cover with foil for the first 20 minutes. This keeps them moist. Remove the foil for the last 10 minutes. This lets the cheese bubble and brown nicely. Yes, you can prepare enchiladas a day in advance. Assemble them as directed. Then, cover with plastic wrap and refrigerate. Bake them when you are ready to eat. If you want to freeze them, wrap tightly in foil. They can last up to three months in the freezer. Chicken enchiladas pair well with many sides. Consider serving them with: - Mexican rice - Refried beans - A fresh salad - Guacamole - Salsa - Chips These sides add flavor and texture. Enjoy your meal with your favorite drink! For the full recipe, check out the details above. This article covered how to make chicken enchiladas from start to finish. We explored the key ingredients, step-by-step instructions, and useful tips for perfecting your dish. Remember, variations can add fun and flavor to your meal. You can easily make vegetarian options or add extra heat for spice lovers. Lastly, proper storage extends the life of your enchiladas. With these insights, you can create tasty, comforting enchiladas your family will love. Enjoy cooking and have fun with this great meal!

Easy Chicken Enchiladas Flavorful and Quick Recipe

Are you ready to spice up your dinner routine? Look no further! My Easy Chicken Enchiladas recipe is packed with

To make Lemon Garlic Shrimp Pasta, gather these simple ingredients. They bring fresh flavors to your plate. - 12 oz spaghetti or linguine - 1 lb large shrimp, peeled and deveined - 4 tablespoons extra virgin olive oil - 5 cloves garlic, finely minced - 1 teaspoon red pepper flakes - Zest and juice of 2 fresh lemons - 1 cup cherry tomatoes, halved - 1/4 cup fresh parsley, roughly chopped - Salt and freshly ground black pepper to taste - Grated Parmesan cheese for serving (optional) Each ingredient plays a key role. The shrimp adds protein while the garlic brings warmth and depth. Lemon zest and juice add a bright taste, balancing the dish. Cherry tomatoes offer a juicy burst, and parsley adds color and freshness. Using high-quality olive oil enhances the overall flavor. Feel free to adjust the red pepper flakes. If you like it spicy, add more; if not, use less. This recipe is flexible. You can swap ingredients based on what you have. Check the Full Recipe for more details on preparation. How do you boil spaghetti or linguine perfectly? Start by filling a large pot with water. Add a good amount of salt. Bring the water to a rolling boil. Once boiling, add in your spaghetti or linguine. Cook according to the package instructions. You want it to be al dente, which means it should be firm to the bite. How do you reserve pasta water for sauce? Before draining the pasta, take out 1/2 cup of the cooking water. This starchy water helps thicken your sauce later. After reserving the water, drain the pasta and set it aside. What are the heat and preparation tips for the skillet? Use a large skillet for this step. Pour in 4 tablespoons of extra virgin olive oil. Heat the oil over medium heat until it shimmers. This means it’s ready for cooking. How do you cook shrimp without burning garlic? Once the oil is hot, add 5 cloves of finely minced garlic and 1 teaspoon of red pepper flakes. Sauté this mix for about 1-2 minutes. Watch closely! You want the garlic to turn golden, not brown. If it burns, it will taste bitter. How do you add pasta to the shrimp mixture? After the shrimp are cooked, it’s time to combine. Add the drained pasta to the skillet with the shrimp. Toss everything together gently. How do you achieve the right sauce consistency? Gradually add the reserved pasta water to the skillet. This helps to create a light sauce. You want just enough sauce to coat the pasta without making it watery. Stir in the halved cherry tomatoes and mix well. For a full recipe, check the instructions above. Enjoy your meal! To know when your shrimp are cooked, look for three signs: they turn bright pink, they curl slightly, and they become opaque. This usually takes about 2-3 minutes per side. If you want to add heat, you can adjust the spice level by using red pepper flakes. Start with one teaspoon, then taste. If you like more heat, add a bit more. Cooking pasta al dente means it should be firm, not mushy. To achieve this, boil your spaghetti or linguine in salted water. Check the package for cooking times, and taste a piece a minute before the time is up. Always reserve some pasta cooking water before draining. This starchy water helps create a silky sauce. Lemon plays a key role in balancing flavor. Its bright acidity lifts the dish and adds freshness. Use both the zest and juice for the best results. Fresh herbs, like parsley, add another layer of taste. They brighten up the dish and enhance the overall flavor, making it even more delightful. For the full recipe, check out the instructions above. {{image_4}} If you want to switch up the protein, chicken works well. Simply cut boneless chicken breasts into bite-sized pieces. Cook them in the same way as shrimp. Tofu is a great choice for a vegetarian option. Press and cube firm tofu, then sauté it until golden. This gives you a nice texture and flavor. Pair your Lemon Garlic Shrimp Pasta with a fresh salad. A simple green salad with lemon vinaigrette complements the dish perfectly. Garlic bread is another tasty side option. The warm, buttery bread soaks up any leftover sauce. For drinks, a crisp white wine like Sauvignon Blanc enhances the flavors. It balances the lemon's brightness well. Adding seasonal vegetables makes this dish shine. In summer, try zucchini or asparagus. Simply slice them and cook alongside the shrimp. In winter, consider spinach or roasted bell peppers for warmth and color. These veggies add texture and flavor, making the meal even more delightful. This recipe is versatile, adapting to any season with ease. For the full recipe, check out the cooking instructions above. To keep your Lemon Garlic Shrimp Pasta fresh, follow these steps: - Let the pasta cool to room temperature. - Place it in an airtight container. - Store in the fridge for up to three days. Using glass or plastic containers with tight lids works best. This keeps air out and prevents sogginess. When reheating, I want to keep shrimp tender. Here’s how: - Use a skillet over low heat to gently warm it. - Add a splash of olive oil or broth to keep it moist. Avoid the microwave; it can make shrimp rubbery. Stir often to warm evenly without overcooking. Can you freeze Lemon Garlic Shrimp Pasta? Yes, you can! Here’s how: - Cool the pasta completely before freezing. - Place it in a freezer-safe bag or container, removing as much air as possible. To thaw, place it in the fridge overnight. Reheat it gently on the stove, adding a bit of liquid to revive the sauce. This keeps the flavors fresh and delicious! For the full recipe, refer to the section above. How do you know when shrimp are cooked? You can tell shrimp are cooked when they turn bright pink. The flesh should also become opaque. This usually takes about 2-3 minutes per side. Avoid overcooking, as shrimp can become rubbery quickly. Can I use frozen shrimp for this recipe? Yes, you can use frozen shrimp! Just make sure to thaw them before cooking. You can place them in cold water for about 15-20 minutes. This will help them cook evenly and stay tender. How to make Lemon Garlic Shrimp Pasta gluten-free To make this dish gluten-free, simply switch the pasta. Use gluten-free spaghetti or linguine. Check the label to ensure it fits your diet. The flavors will remain just as vibrant! Dairy-free alternatives for the recipe If you want a dairy-free dish, skip the Parmesan cheese. You can also use nutritional yeast for a cheesy flavor without dairy. Fresh herbs will add a nice touch too. Can I prep ingredients ahead of time? Absolutely! You can chop garlic, zest lemons, and prepare shrimp in advance. Store them in the fridge until you're ready to cook. This makes your cooking process faster. Shortcuts for busy weeknights when making the dish Use pre-cooked shrimp to save time. You can find them in most grocery stores. This way, you just need to heat them with the other ingredients. Dinner will be ready in no time! For the full recipe, check out the Lemon Garlic Shrimp Pasta 🦐. This blog post presented a tasty Lemon Garlic Shrimp Pasta recipe. We covered essential ingredients and step-by-step cooking techniques. Tips for perfecting shrimp and pasta ensure a successful meal. You learned about flavor variations and smart storage options. In conclusion, enjoy the balance of flavors and textures. Feel free to adapt the recipe as needed. Cooking should be fun and easy, so get creative and make this dish your own. Keep exploring new tastes, and enjoy your cooking journey!

Lemon Garlic Shrimp Pasta Flavorful Weeknight Meal

If you’re looking for a quick dinner that’s full of flavor, Lemon Garlic Shrimp Pasta is your answer. This dish

To make delicious Raspberry Lemonade Bars, you will need the following ingredients: - 1 cup all-purpose flour - 1/4 cup powdered sugar (plus additional for dusting) - 1/4 cup unsalted butter, softened to room temperature - 1/4 teaspoon salt - 2 large eggs, at room temperature - 1 cup granulated sugar - 1/4 cup fresh lemon juice (approximately the juice of 2 medium lemons) - Zest of 1 lemon (preferably organic) - 1 cup fresh raspberries (or frozen, thawed and excess moisture drained) - 1/2 teaspoon baking powder These ingredients work together to create a sweet and tangy treat. The all-purpose flour forms the base, while the butter adds richness. The eggs help bind everything, and the sugar sweetens the mix. Fresh lemon juice and zest give a bright, zesty flavor. Raspberries add a burst of fruity goodness. Make sure to gather everything in advance. This way, you can enjoy the process without rushing. I recommend using organic lemons to get the best flavor. If you can’t find fresh raspberries, frozen ones work just fine. Just remember to drain them well. For the full recipe, check out the step-by-step guide. Enjoy these bars as a sweet snack or a dessert! First, preheat your oven to 350°F (175°C). This step is key to getting perfect bars. In a medium bowl, mix the all-purpose flour, powdered sugar, softened butter, and salt. Use a fork or pastry cutter to blend them until they look crumbly. Press this mixture evenly into the bottom of an 8x8 inch baking pan. Bake for about 15 minutes, until it turns a light golden color. In a large bowl, whisk together two large eggs and granulated sugar until smooth. Then, add the fresh lemon juice, lemon zest, and baking powder. Mix until everything is fully combined. Gently fold in one cup of fresh raspberries into the egg mixture. Take care not to mash them too much. You want them to stay whole for texture and flavor. Pour the raspberry-lemon filling over the baked crust. Spread it out evenly. Place the pan back in the oven and bake for another 20 to 25 minutes. The filling should be firm to the touch when done. Once baked, take the pan out of the oven. Let it cool on a wire rack for about 30 minutes. After that, move it to the refrigerator for at least 2 hours. This chilling time helps the flavors blend better. When ready, lift the bars out using the parchment paper. Cut them into squares or rectangles. Dust the top with powdered sugar just before serving for a lovely finish. For the complete recipe, check the Full Recipe section. Baking these raspberry lemonade bars is simple and fun. Here are some helpful hints: - Always preheat your oven. This ensures even baking. - Use room temperature eggs for a smooth filling. - Sift your powdered sugar to avoid lumps in the crust. - Press the crust firmly into the pan. This helps it hold together. - Bake until the crust is lightly golden. This adds flavor. A pretty presentation makes these bars even more appealing. Try these ideas: - Use a sharp knife for clean cuts. - Dust the top with powdered sugar for a lovely look. - Arrange bars on a colorful platter. - Add fresh raspberries and lemon slices as garnish. - Consider a light lemon glaze for extra flair. Watch out for these common errors while baking: - Don't skip chilling the bars after baking. It improves texture. - Avoid overmixing the filling. This can make it tough. - Be gentle when folding in raspberries. You want them to stay whole. - Don’t forget to check the bars before the timer goes off. Every oven is different. With these tips, you’ll master raspberry lemonade bars that taste amazing and look great! For the complete recipe, check the full recipe section. {{image_4}} You can enjoy these bars without gluten. Use a gluten-free flour blend instead of all-purpose flour. Look for blends that contain xanthan gum. This helps to mimic the texture of traditional flour. Follow the same steps in the full recipe. The bars will still taste fresh and zesty. If you want a vegan option, you can swap out the eggs. Use 1/4 cup of unsweetened applesauce for each egg. This keeps the bars moist. You can also use a vegan butter substitute instead of regular butter. Make sure to use plant-based sugar for a fully vegan treat. The flavor remains bright and delicious. Feel free to get creative with flavors! You can add a splash of vanilla extract for depth. Try using lime juice instead of lemon juice for a twist. You can also mix in other berries, like blueberries or strawberries. Each change makes the bars unique. Experiment and find your favorite combination! Store your raspberry lemonade bars in an airtight container. Use wax paper to separate layers. This prevents them from sticking together. Keep them in a cool place or the fridge. The cool temperature helps maintain their flavor and texture. These bars stay fresh for about one week when stored correctly. You can enjoy them for days! If you notice any changes in smell or texture, it's best to toss them. Always trust your senses. You can freeze raspberry lemonade bars for future treats. First, cut them into squares. Wrap each piece tightly in plastic wrap. Then, place them in a freezer-safe bag. They can last for up to three months in the freezer. When ready to eat, let them thaw in the fridge overnight. Enjoy the same fresh taste! Yes, you can use frozen raspberries. Just thaw them first. Make sure to drain any extra liquid. This keeps your bars from becoming too soggy. The flavor stays bright and fresh, even with frozen fruit. To reduce the sweetness, cut back on the granulated sugar. You can also use less powdered sugar for dusting. Adding more lemon juice can help balance the flavor. This gives you a tart kick that pairs well with the berries. If you need a substitute for lemon juice, try lime juice. It gives a similar tartness. You can also use vinegar, like apple cider vinegar, for a different twist. Just keep the amount the same as in the recipe. You can tell the bars are done when the filling is set. It should feel firm but not hard when touched. Look for a light golden color around the edges. A toothpick inserted in the center should come out clean or with a few moist crumbs. You learned how to make delicious raspberry lemonade bars today. We covered key ingredients, step-by-step instructions, and helpful tips. You can even try gluten-free or vegan versions. Remember to store them right for lasting taste. Baking can be fun and rewarding! With these easy guidelines, you can impress your friends and family. Enjoy your baking adventure and savor every bite of your tasty creation.

Raspberry Lemonade Bars Fresh and Tasty Dessert Treat

Craving a sweet, tangy treat? These Raspberry Lemonade Bars are your perfect dessert solution! With a buttery crust and a

To create a tasty coconut curry chicken, you need: - 1 lb (450g) chicken breast, cut into bite-sized pieces - 1 can (14 oz) coconut milk - 2 tablespoons red curry paste - 1 medium onion, finely chopped - 3 cloves garlic, minced - 1-inch piece of fresh ginger, grated - 1 red bell pepper, sliced into strips - 1 cup green beans, trimmed and cut in half These fresh ingredients give the dish its rich flavor. The right seasonings make your curry pop. You will need: - 2 tablespoons soy sauce - 1 tablespoon brown sugar - Salt and pepper, to taste These seasonings balance the creaminess of the coconut milk. Garnishes add a fresh touch. Consider these: - Fresh cilantro leaves, for garnish - Lime wedges, for serving The cilantro adds brightness, while lime gives a zesty kick. For the full recipe, check the details above. First, gather your ingredients. Chop all the veggies and measure the spices. For the chicken, cut it into bite-sized pieces. If you want more flavor, you can marinate the chicken. Just add some soy sauce, garlic, and a bit of curry paste. Let it sit for at least 15 minutes. Now, heat a large skillet over medium heat. Add the vegetable oil. Once hot, toss in the chopped onion. Sauté it for about 3 to 4 minutes until it’s soft. Then, add minced garlic and grated ginger. Cook this for 1 to 2 more minutes. You want it to smell great! Next, add the chicken pieces. Season them with salt and pepper. Cook for 5 to 7 minutes. Keep stirring until they turn golden brown. Once the chicken is browned, add the red curry paste. Stir well to coat the chicken. Let it cook for 2 minutes to deepen the flavors. Now, pour in the coconut milk. Add soy sauce and brown sugar. Stir everything together. Then, add the sliced red bell pepper and green beans. Bring this mixture to a gentle simmer. Cook uncovered for 10 to 15 minutes. You want the sauce to thicken and the veggies to be tender. After simmering, taste the curry. Adjust the seasoning with more salt or pepper if needed. Once it's just right, turn off the heat. Serve your coconut curry chicken over rice or quinoa. Top it with fresh cilantro and lime wedges for a burst of flavor. For the full recipe, check the details above! To ensure your chicken is juicy, avoid overcooking it. Cook the chicken just until it turns golden brown. Use a meat thermometer if you have one; the chicken should reach 165°F (75°C). This helps keep it tender. Always stir the chicken frequently while it cooks. This keeps it from sticking and burning. Want to add a twist to your dish? Try adding more spices like turmeric or cumin. These spices boost the flavor and add depth. You can also use homemade curry paste for a fresher taste. However, store-bought curry paste is a great time-saver. Just make sure to choose one that fits your taste. Chopping cilantro is easy. Start by removing the leaves from the stems. Then, stack a few leaves and chop them finely. This adds a fresh touch to your dish. Serve your coconut curry chicken with fluffy rice or quinoa. They soak up the sauce beautifully. Don’t forget to add lime wedges for a zesty kick! For the full recipe, check out Coconut Curry Chicken Delight. {{image_4}} You can change the main protein in coconut curry chicken. Shrimp works well in this dish. Cook the shrimp just until pink, about 3-4 minutes. Tofu is a great plant-based choice. Use firm or extra-firm tofu, cut into cubes. Sauté it until golden brown for added flavor. You can also use chickpeas for a vegan option. They add protein and texture. Just add them to the sauce and simmer until heated through. Adding seasonal vegetables enhances the dish. Try bell peppers, carrots, or zucchini. They add color and nutrients. You can also use frozen veggies. They are easy and quick. Just toss them in during the last 10 minutes of cooking. This keeps them crisp and bright. Choose a mix for variety and flavor. Adjust the spice level to suit your taste. If you like it spicy, add more red curry paste. Start with a teaspoon more and taste as you go. For kids, keep it mild. Reduce the curry paste and add a bit of coconut milk for creaminess. This keeps the dish tasty without too much heat. Check the Full Recipe for all the details. To keep your coconut curry chicken fresh, follow these tips: - Place leftovers in an airtight container. - Store in the fridge within two hours of cooking. - Enjoy your leftovers within three to four days. - If you want to save it longer, freeze it. - Use freezer-safe containers or zip-top bags. - Label the bags with the date for easy tracking. To reheat without losing flavor, try these methods: - Use the microwave for quick reheating. - Place curry in a bowl and cover it. - Heat in short bursts, stirring in between. - For stovetop, use a pan over low heat. - Stir often to prevent sticking and burning. - Add a splash of water or coconut milk if needed. How long can coconut curry chicken last in the fridge? - It lasts three to four days when stored properly. Signs of spoilage include: - A sour smell or off-putting odor. - Changes in color or texture. - Mold or any unusual spots on the surface. When in doubt, throw it out! For the full recipe, check out the recipe section. You can add heat in a few ways. Try using more red curry paste. A pinch of chili flakes also works well. You might like to add fresh sliced chili peppers too. If you enjoy heat, use two tablespoons of curry paste instead of one. Make sure to taste as you go. Adjusting the heat can really make the dish pop! Yes, you can use light coconut milk. It has less fat than regular coconut milk. This means it will taste less creamy. The sauce will be thinner too. If you want a rich flavor, I suggest sticking with the regular variety. Light coconut milk is still good, just a bit different. Coconut Curry Chicken pairs well with many sides. I love serving it over steamed rice or fluffy quinoa. Both absorb the sauce nicely. You could also serve it with naan bread for dipping. A fresh salad or steamed veggies on the side also adds color. To make it gluten-free, use tamari instead of soy sauce. Tamari is a gluten-free sauce that has a similar taste. Always check labels for hidden gluten in other ingredients too. With these swaps, you can enjoy the dish safely. Coconut Curry Chicken has a good balance of nutrients. One serving contains around 400 calories. It has protein from the chicken and healthy fats from coconut milk. You also get fiber from the veggies. Overall, it’s a tasty dish that fits well into a healthy meal plan. Coconut curry chicken is not just a meal; it’s a flavorful experience. You learned about the key ingredients like chicken breast and coconut milk, and essential seasonings that make this dish shine. We explored step-by-step cooking methods, tips for the perfect finish, and creative variations. Remember, with substitutes and side dish ideas, you can make this recipe your own. Whether you’re cooking for yourself or sharing with friends, enjoy every bite. Your kitchen can be a place of joy with this simple yet delicious dish. Happy cooking!

Coconut Curry Chicken Flavorful and Easy Recipe

Are you craving a dish that’s both tasty and simple? Look no further than this Coconut Curry Chicken! With juicy

Mango Avocado Salsa is fresh and colorful. Here’s what you need: - Ripe mango - Ripe avocados - Red onion - Red bell pepper - Jalapeño pepper - Fresh cilantro - Lime juice - Olive oil - Salt and pepper Each ingredient adds its own flavor. The ripe mango gives it sweetness. Ripe avocados add creaminess. Red onion brings a nice crunch. Red bell pepper adds color and sweetness. Jalapeño gives a little kick. Fresh cilantro adds a bright touch. Lime juice adds zing. Olive oil gives it richness. Salt and pepper tie everything together. For the best taste, use fresh ingredients. Choose mangoes that are soft but not squishy. Avocados should also feel soft to the touch. Always taste your salsa before serving. Adjust the salt, pepper, or lime juice as needed. This simple recipe lets you enjoy vibrant flavors. You can find the Full Recipe for Mango Avocado Salsa at the start of this article. First, you need to prepare your ingredients. Start by dicing the mango into bite-sized pieces. Make sure it's ripe for the best flavor. Next, take the avocados and dice them into chunks. They should be soft but not mushy. Then, chop the red onion finely. This adds a nice crunch and flavor. After that, chop the red bell pepper into small pieces. This will add sweetness and color to your salsa. Lastly, mince the jalapeño. Remove the seeds if you want less heat. Now, it's time to mix everything together. In a large bowl, combine the diced mango and avocados. Next, add the chopped onion and bell pepper. Carefully fold in the minced jalapeño, tasting as you go. This way, you can control the spice level. After that, sprinkle in the chopped cilantro. Then, squeeze the juice of two limes into the bowl. Finally, drizzle in a tablespoon of olive oil. Now, you need to adjust the seasoning. Sprinkle salt and freshly ground black pepper to taste. Feel free to adjust the lime juice as well, based on your preference. Once seasoned, let the salsa rest for about ten minutes. This allows the flavors to meld together beautifully. Enjoy your fresh Mango Avocado Salsa! For the full recipe, check the section above. To make the best mango avocado salsa, choose ripe fruits. Look for mangoes that feel slightly soft when pressed. Their skin should have a vibrant color. The smell of a ripe mango is sweet and fruity. For avocados, check if they yield slightly to gentle pressure. A dark green color usually indicates ripeness. Avoid avocados with large dark spots, as they may be overripe. Want a mild salsa? Use less jalapeño. You can remove the seeds for less heat. If you like spice, add more jalapeño or even a dash of cayenne. Taste as you go, so you find the right balance. You can also add diced red chili for an extra kick. For a stunning look, serve the salsa in a colorful bowl. Use a white or bright bowl to make the colors pop. Garnish with extra cilantro leaves on top. Pair the salsa with crispy tortilla chips for a crunchy side. You can also use the salsa as a topping for grilled chicken or fish. This makes for a fun and tasty meal. For the full recipe, check the main section of this article. {{image_4}} Adding different ingredients can take your mango avocado salsa to new heights. You can try incorporating fruits like pineapple or peach. These fruits add a sweet twist and different textures. Pineapple brings a tangy zing, while peach adds a soft sweetness. Both fruits pair well with the creamy avocado and juicy mango. You can also experiment with different herbs. Fresh basil or mint can give a fresh flavor that brightens the dish. Just chop them finely and mix them in. These herbs can change the salsa's taste drastically, making it more unique. For dietary adjustments, making it vegan or gluten-free is easy. The original recipe is already vegan and gluten-free, as it uses fresh fruits and veggies. Just ensure your olive oil is pure if you are concerned about gluten. You can also look for low-sodium alternatives. Use fresh lime juice and herbs instead of salt to enhance flavors. This option keeps the dish flavorful while being heart-healthy. When it comes to serving ideas, this salsa shines with tacos or grilled meats. You can spoon it over chicken, fish, or even steak. It brightens any dish and adds a refreshing burst of flavor. You can also serve it with crunchy tortilla chips for a fun snack or appetizer. Try this full recipe for a delightful experience! Store your Mango Avocado Salsa in an airtight container. This keeps it fresh. You can refrigerate it for up to three days. After that, the ingredients may lose their taste and texture. Make sure to press plastic wrap against the salsa before sealing the container. This reduces air exposure, which can cause browning. To freeze your salsa, ladle it into freezer-safe bags. Remove as much air as possible before sealing them. Label each bag with the date. You can freeze it for up to three months. When you are ready to eat it, thaw the salsa overnight in the fridge. Stir it well before serving. The texture may change, but the flavor remains delicious. Check for signs of spoilage before using your salsa. If it smells off or has a sour odor, do not eat it. Look for discoloration or mold on the surface. If you see any of these signs, it’s best to discard the salsa. A fresh and tasty salsa should look bright and colorful. Trust your senses to determine its freshness. Mango Avocado Salsa lasts about 2 to 3 days in the fridge. To store it well, use an airtight container. This helps keep the flavors fresh. If you see browning on the avocado, just stir it in. It still tastes great! Yes, you can make Mango Avocado Salsa ahead of time! I recommend making it a few hours before your meal. This lets the flavors mix well. If you make it too early, the avocado may brown. To slow this down, add lime juice right before serving. Mango Avocado Salsa pairs well with many dishes. Here are some popular options: - Crispy tortilla chips - Grilled chicken or fish - Tacos and burritos - Salads or rice bowls For the full recipe and more ideas, check out the Full Recipe section! Mango Avocado Salsa is fresh, vibrant, and full of flavor. We discussed the ingredients and how to prepare them. You learned how to mix them and adjust the taste. Remember to choose ripe fruits for the best results. Feel free to get creative with variations and serve it with your favorite dishes. Proper storage helps keep it fresh longer. This salsa is a versatile treat that can fit many meals. Enjoy making this delightful dish!

Mango Avocado Salsa Fresh and Flavorful Delight

Are you ready for a fresh and vibrant dip? This Mango Avocado Salsa is bursting with flavor, perfect for any

- 1 pound shrimp, peeled and deveined - 3 tablespoons extra virgin olive oil - 4 cloves garlic, finely minced - 1 teaspoon red pepper flakes - 1 teaspoon smoked paprika The base of these tacos is the shrimp. I love using fresh, peeled, and deveined shrimp for a quick prep. The olive oil adds richness, while the minced garlic gives a strong, bold flavor. Red pepper flakes add heat, so feel free to adjust the amount based on your spice preference. Smoked paprika brings a deep, savory taste that makes all the difference. - 1 lime, juiced (plus lime wedges for serving) - 1 cup red cabbage, finely shredded - 1 ripe avocado, thinly sliced - Fresh cilantro, chopped, for garnish - ½ cup sour cream - 1 tablespoon chipotle sauce (optional) Toppings elevate your tacos to the next level. I use fresh lime juice for brightness. The red cabbage adds a nice crunch and color. Sliced avocado brings creaminess that pairs well with the spicy shrimp. Fresh cilantro gives a pop of flavor, and sour cream cools down the heat. If you want a little more spice, drizzle on some chipotle sauce. These ingredients work together to create a delightful meal. You can find the exact amounts and steps in the Full Recipe section. First, grab a medium bowl. Combine the shrimp, olive oil, minced garlic, red pepper flakes, smoked paprika, lime juice, salt, and pepper in the bowl. Mix well to coat each shrimp in the flavorful marinade. Let this sit for about 15 minutes. This step allows the shrimp to soak up all those delicious flavors. Next, preheat a large skillet over medium-high heat. Once the skillet is hot, add the marinated shrimp. Cook them for 2-3 minutes on each side. You’ll know they are ready when they turn bright pink and opaque. This quick cooking gives the shrimp a nice, juicy texture. While the shrimp cooks, take some corn tortillas. Warm them in a separate non-stick skillet for about 30 seconds on each side. This makes them soft and easy to fold. Keep the warmed tortillas covered with a clean kitchen towel. This helps keep them warm until you’re ready to serve. Now it’s time to build your tacos! Place a generous amount of spicy garlic shrimp on each tortilla. Top them with a handful of shredded red cabbage and a few slices of fresh avocado. For extra creaminess, drizzle a spoonful of sour cream over the top. If you like it spicy, add chipotle sauce. Finally, sprinkle freshly chopped cilantro on top for a burst of color and flavor. Enjoy your tasty creation! To make the marinade just right, you can adjust the red pepper flakes. If you like it hot, add more! For a milder taste, use less. Letting the shrimp marinate longer brings out richer flavors. If you can, let it sit for 30 minutes or more. Cooking the shrimp is key. Make sure your skillet is hot enough. A hot skillet cooks shrimp quickly and keeps them from steaming. If you crowd the pan, the shrimp won’t cook evenly. Cook in batches for best results. A great way to serve tacos is on colorful plates. Bright colors make the dish pop. Add lime wedges on the side for guests. Extra toppings like chopped cilantro or sliced avocados can make your tacos look even better. Presenting food well makes it taste better! {{image_4}} You can switch up your spicy garlic shrimp tacos in many fun ways. Here are some ideas that I love. - You can use chicken or tofu instead of shrimp. This change gives you a new taste. - Try fish like tilapia. It has a mild flavor and cooks quickly. - Add mango or pineapple salsa for a sweet and fruity twist. This will brighten up your tacos. - You can also try new sauces, like sriracha for heat or tahini for creaminess. - If you need a gluten-free option, use lettuce wraps instead of tortillas. This keeps the meal fresh. - For a vegan option, swap out shrimp with plant-based seafood. It still tastes great! These variations keep your meal exciting and cater to many tastes. - Store cooked shrimp in an airtight container in the fridge for up to 2 days. - Keep tortillas separate to maintain their texture. When I make spicy garlic shrimp tacos, I always have some leftovers. Storing them right keeps them fresh. Place your shrimp in a container that seals tightly to lock in flavor. Store them in the fridge. If you leave them too long, they won’t taste as good. Do not mix your tortillas with the shrimp. They can get soggy and lose their crunch. Keep them in a separate bag or container. This way, when you reheat, you can enjoy the nice texture of warm tortillas. - Reheat shrimp in a skillet over low heat to avoid overcooking. - Warm tortillas quickly in a dry skillet before serving. Reheating shrimp can be tricky. I like to use a skillet set on low heat. This helps the shrimp warm all the way through without cooking them more. If you cook them too long, they can get rubbery, which nobody wants. For the tortillas, just a quick warm-up works. I put them in a dry skillet for about 15 seconds on each side. This makes them soft and easy to fold. After warming, I keep them covered with a towel till I'm ready to serve. Enjoy your tacos just like you made them fresh! Can I make spicy garlic shrimp tacos ahead of time? Yes, you can prepare the shrimp and toppings in advance. Just assemble the tacos right before serving to keep everything fresh and tasty. What can I substitute for sour cream? You can use yogurt, guacamole, or a dairy-free option as great substitutes for sour cream. Each adds its own flavor and texture. Are spicy garlic shrimp tacos kid-friendly? Yes, you can adjust the spice levels to match what kids like. Offer optional toppings so they can customize their tacos. Where can I find the full recipe? Check the "Full Recipe" section for detailed instructions and ingredient amounts. You'll have everything you need to create this delicious meal. Spicy garlic shrimp tacos bring vibrant flavors and fun to any meal. We covered the key ingredients, detailed steps for cooking, and shared helpful tips to make the best tacos. You can switch up the proteins and toppings based on your taste. Don't forget to store leftovers properly for another tasty meal. Enjoy this easy recipe and have fun customizing your tacos. Happy cooking!

Spicy Garlic Shrimp Tacos Flavorful and Quick Meal

If you’re craving a quick and tasty meal, look no further than Spicy Garlic Shrimp Tacos! These tacos pack a

Older posts
Newer posts
← Previous Page1 … Page66 Page67 Page68 … Page71 Next →

dsad

© 2025 spoonfulsavory • Built with GeneratePress

Our Policies

  • Copyright Policy
  • Cookie Policy
  • GDPR Policy
  • Privacy Policy
  • Disclaimer
  • Terms Of Use

More Information

  • Home
  • About
  • Contact
  • Appetizers
  • Dessert
  • Dinner
  • Drinks
©2025, spoonfulsavory About Back To Top