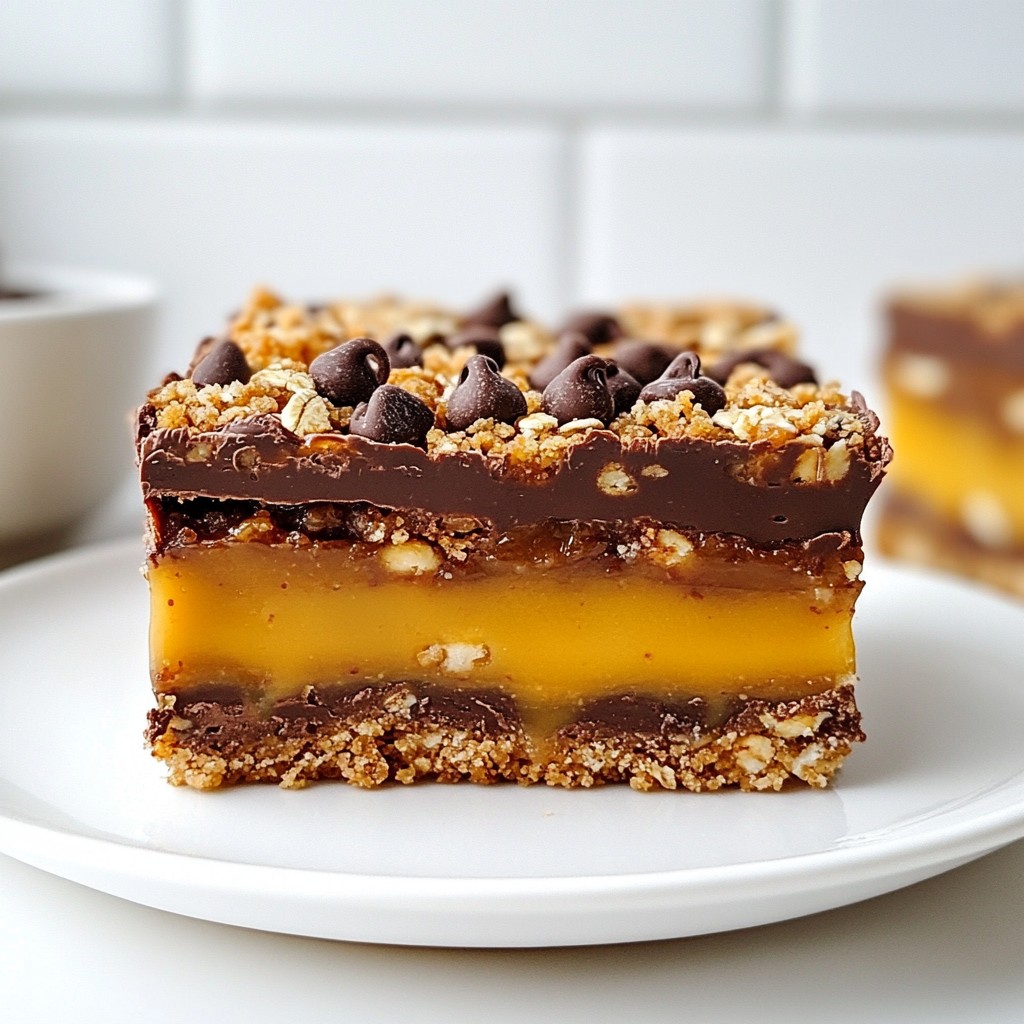
Craving a sweet and chewy treat? Look no further! Chocolate Caramel Oat Bars are simple to make and bursting with flavor. With layers of rich chocolate, gooey caramel, and hearty oats, these bars fit any snack time. I’ll guide you through easy steps and helpful tips to create the perfect batch. Get ready to impress yourself and your friends with this delicious recipe! Let’s dive in!
Why I Love This Recipe
- Deliciously Decadent: These bars combine rich chocolate and smooth caramel, making every bite a heavenly experience.
- Easy to Make: With simple ingredients and straightforward steps, this recipe is perfect for bakers of all skill levels.
- Perfect for Sharing: Cut into squares, these bars are ideal for parties, gatherings, or a sweet treat for friends and family.
- Versatile Treat: Enjoy them warm for a gooey texture or let them cool for a firmer bite, catering to your preference.
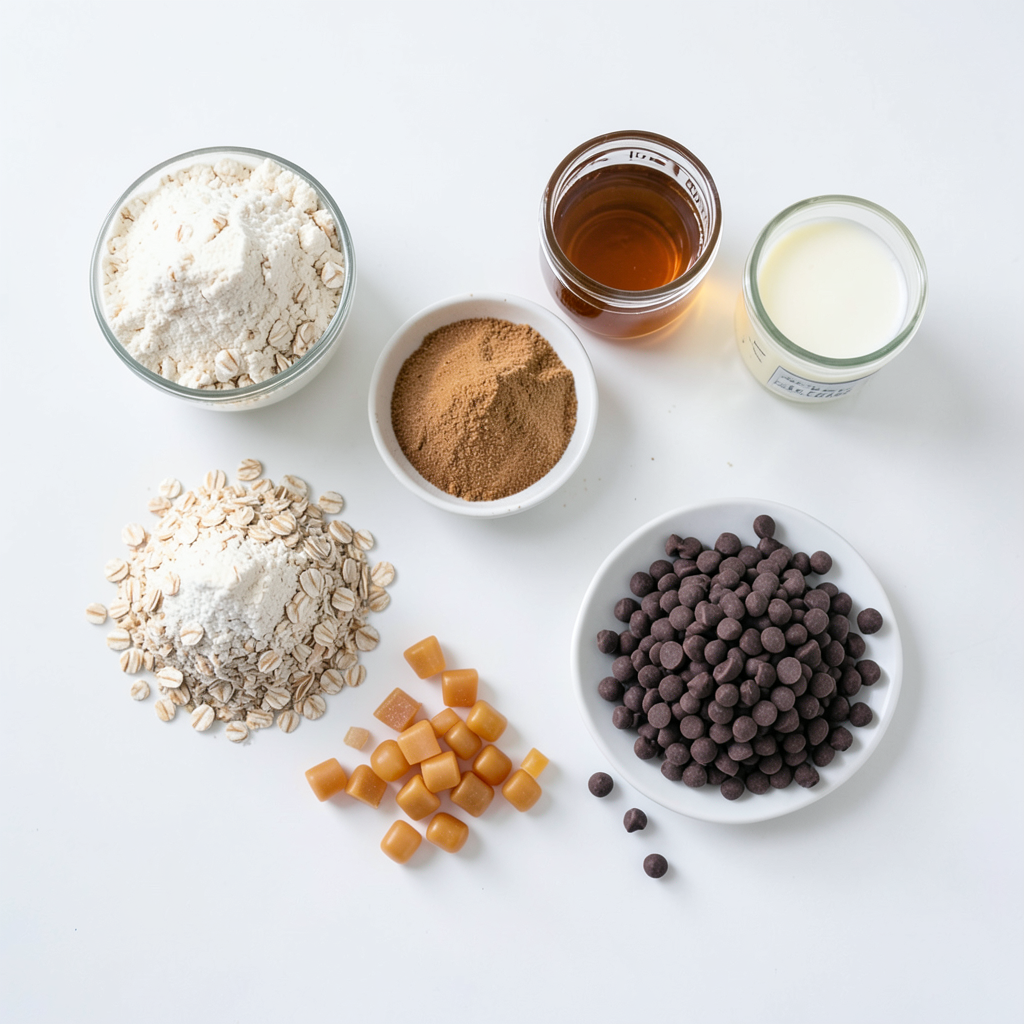
Ingredients
Detailed Ingredient List
- 2 cups rolled oats
- 1 cup almond flour
- 1/2 cup packed brown sugar
- 1/2 cup unsalted butter, softened
- 1/4 cup pure maple syrup
- 1 teaspoon vanilla extract
- 1/2 teaspoon sea salt
- 1 cup semi-sweet chocolate chips
- 1 cup soft caramel candies, chopped
- 1/4 cup milk (or non-dairy milk)
These ingredients make the base and layers of the bars. The rolled oats give a hearty texture. Almond flour adds a nutty flavor and helps bind the mixture. Brown sugar sweetens and adds moisture. Unsalted butter gives richness, while maple syrup adds a natural sweet touch. Vanilla extract enhances the flavor, and sea salt balances the sweetness.
For the layers, semi-sweet chocolate chips bring a rich chocolate taste. Soft caramel candies create a gooey center that melts in your mouth. Finally, milk helps melt the caramel smoothly, making it easy to pour over the crust.
These ingredients combine to make a tasty treat, perfect for any snack or dessert occasion.
Step-by-Step Instructions
Preheat the Oven
Set your oven to 350°F (175°C). Line an 8x8 inch baking pan with parchment paper. Leave some paper hanging over the edges. This helps with easy removal later.
Prepare the Base Mixture
In a large bowl, mix together the rolled oats, almond flour, brown sugar, softened butter, maple syrup, vanilla extract, and sea salt. Use a spatula or your hands. Mix until everything is well combined and crumbly.
Create the Crust Layer
Take about two-thirds of the oat mixture. Press it firmly into the bottom of the lined baking pan. Aim for even thickness. Bake this crust for about 10 minutes. Look for a light golden brown color.
Prepare the Caramel Layer
In a small saucepan, warm the milk over low heat. Add the chopped caramel candies. Stir continuously until the caramel melts and becomes smooth. Pour the melted caramel over the baked oat crust. Spread it evenly for the best taste.
Add the Chocolate and Oat Topping
Distribute the chocolate chips evenly over the caramel layer. Take the remaining oat mixture and crumble it over the chocolate chips. Make sure it covers all the chocolate for a nice look.
Bake the Bars
Put the pan back in the oven. Bake for another 15 to 20 minutes. Check for doneness when the top turns golden brown and the edges bubble. Keep a close eye to avoid over-baking.
Cool and Slice
Once baked, take the pan out of the oven. Let it cool on a wire rack for at least 30 minutes. After cooling, lift the bars from the pan using the parchment paper. Cut into squares or rectangles for serving.
Tips & Tricks
Perfecting the Texture
To get the right crunch in your Chocolate Caramel Oat Bars, focus on the oats. Use rolled oats for a chewy texture. If you like it crunchier, you can add more almond flour. Be careful not to overbake. Keep an eye on the bars. They should be golden brown on top and bubbling at the edges. This will give you a nice balance of soft and crunchy.
Serving Suggestions
For a beautiful presentation, cut the bars into neat squares. Place them on a decorative plate. Drizzle melted chocolate or caramel on top for a fancy touch. A sprinkle of sea salt can enhance the flavors and looks. These bars are perfect with a cup of coffee or tea. The rich chocolate and sweet caramel pair well with hot drinks.
Enhancing Flavor
Want to boost the flavor? Consider adding a dash of cinnamon or nutmeg. These spices can add warmth to the bars. You can also mix in some vanilla extract for a richer taste. If you love coconut, try adding shredded coconut to the oat mixture. This extra step can take your bars to the next level.
Pro Tips
- Use Fresh Ingredients: Always opt for fresh, high-quality ingredients, especially the chocolate and caramel, to enhance the overall flavor of your bars.
- Chill Before Cutting: For cleaner cuts, chill the bars in the refrigerator for about 1 hour before slicing. This will help them set and hold their shape better.
- Customize Your Toppings: Feel free to add nuts, dried fruits, or even a sprinkle of sea salt on top before baking for an extra layer of flavor and texture.
- Storage Tips: Store the bars in an airtight container at room temperature for up to a week or in the fridge for longer freshness. They can also be frozen for up to three months!
Variations
Nut-Free Options
If you need a nut-free option, almond flour can be swapped with oat flour or all-purpose flour. Both will work well in this recipe. Oat flour keeps it gluten-free if you use certified oats. All-purpose flour offers a neutral taste and texture. Just make sure to adjust your liquid slightly if using all-purpose flour since it absorbs moisture differently.
Vegan Version
To make these bars vegan, replace the butter with coconut oil or vegan butter. For milk, use almond milk, soy milk, or any non-dairy milk you enjoy. These swaps will keep the flavor rich and creamy while meeting your dietary needs.
Flavor Add-Ins
You can really mix things up with add-ins. Try adding chopped nuts like walnuts or pecans for crunch. Dried fruits like cranberries or apricots give a nice chewy texture. Spices such as cinnamon or nutmeg can also enhance flavor. Just be sure to balance the sweet caramel with your choices.
Storage Info
Best Practices for Storage
To keep your Chocolate Caramel Oat Bars fresh, place them in an airtight container. You can layer them with parchment paper to prevent sticking. Store them at room temperature for up to three days. If you want to keep them longer, refrigerate them. This will help maintain their texture and flavor.
Freezing Instructions
To freeze the bars, first let them cool completely. Once cooled, cut them into squares or rectangles. Wrap each piece in plastic wrap, then place them in a freezer-safe bag. This way, they won’t stick together. When you're ready to enjoy one, just take it out and let it thaw at room temperature for about 30 minutes. You can also warm them in the microwave for a few seconds.
Shelf Life
These bars stay tasty for about one week at room temperature. If you store them in the fridge, they can last for two weeks. In the freezer, they can be kept for up to three months. Just remember, the longer you store them, the more they may lose their freshness. Enjoy them while they’re at their best!
FAQs
Can I make these Chocolate Caramel Oat Bars gluten-free?
Yes, you can! To make these bars gluten-free, simply replace the almond flour with gluten-free oat flour. You can also use certified gluten-free rolled oats. This swap keeps the texture while making it safe for those with gluten sensitivities.
How do I prevent the bars from being too sticky?
To avoid sticky bars, make sure your oat mixture is well mixed. Use room temperature butter and let the caramel cool slightly before pouring it on the crust. This helps it set better. You can also sprinkle a bit of sea salt on top. It adds flavor and helps with texture.
Can I use dark chocolate chips instead?
Absolutely! Dark chocolate chips will give your bars a richer flavor. They can also add a slight bitterness, which balances the sweetness of the caramel. Just remember that dark chocolate is less sweet, so adjust the brown sugar if needed.
We explored the delicious world of Chocolate Caramel Oat Bars. You learned about essential ingredients like oats, almond flour, and chocolate chips. I shared step-by-step instructions to perfect your bars, with tips to enhance flavor and texture. Consider variations like nut-free and vegan for more options. Remember to store leftovers properly for the best taste. These bars are not just a treat; they’re easy to make and customize. Enjoy creating your own version, and share them with others. Your kitchen will smell amazing, and these bars will surely please everyone!