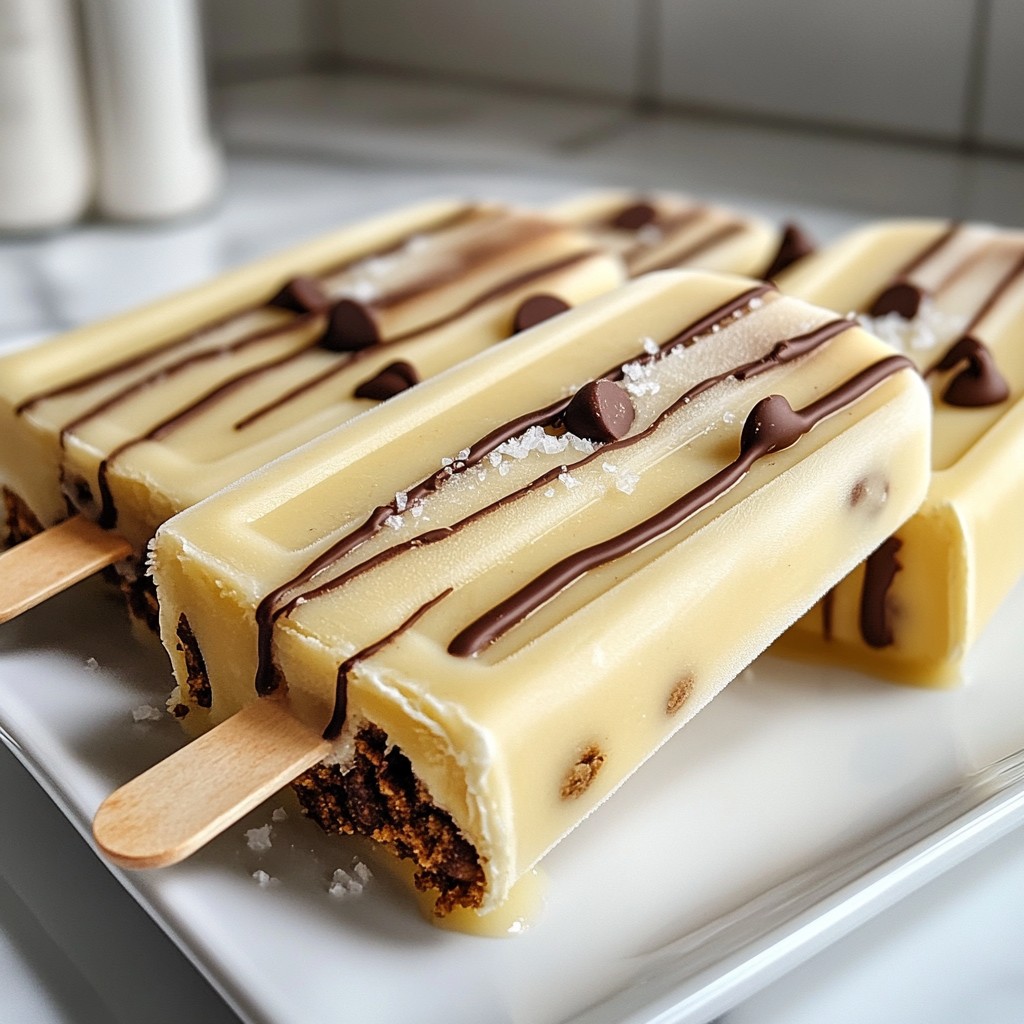
Are you ready to transform your favorite cookie dough into a cool, creamy treat? Chocolate Chip Cookie Dough Popsicles are here to satisfy your sweet tooth this summer! With just a few simple ingredients, you can whip up a delightful dessert that feels like a scoop of ice cream on a stick. Join me as we explore the fun and easy steps to create this tasty treat that everyone will love. Let's dive in!
Why I Love This Recipe
- Deliciously Creamy: The combination of cream cheese and heavy whipping cream creates a rich and smooth texture that melts in your mouth.
- Cookie Dough Goodness: Who can resist the nostalgic flavor of cookie dough? This recipe captures that essence in a fun popsicle form!
- Customizable Treat: Easily adjust the sweetness or add your favorite mix-ins to make these popsicles uniquely yours.
- Perfect for Summer: These popsicles are a refreshing treat for hot days, making them a great option for parties or casual gatherings.
Ingredients
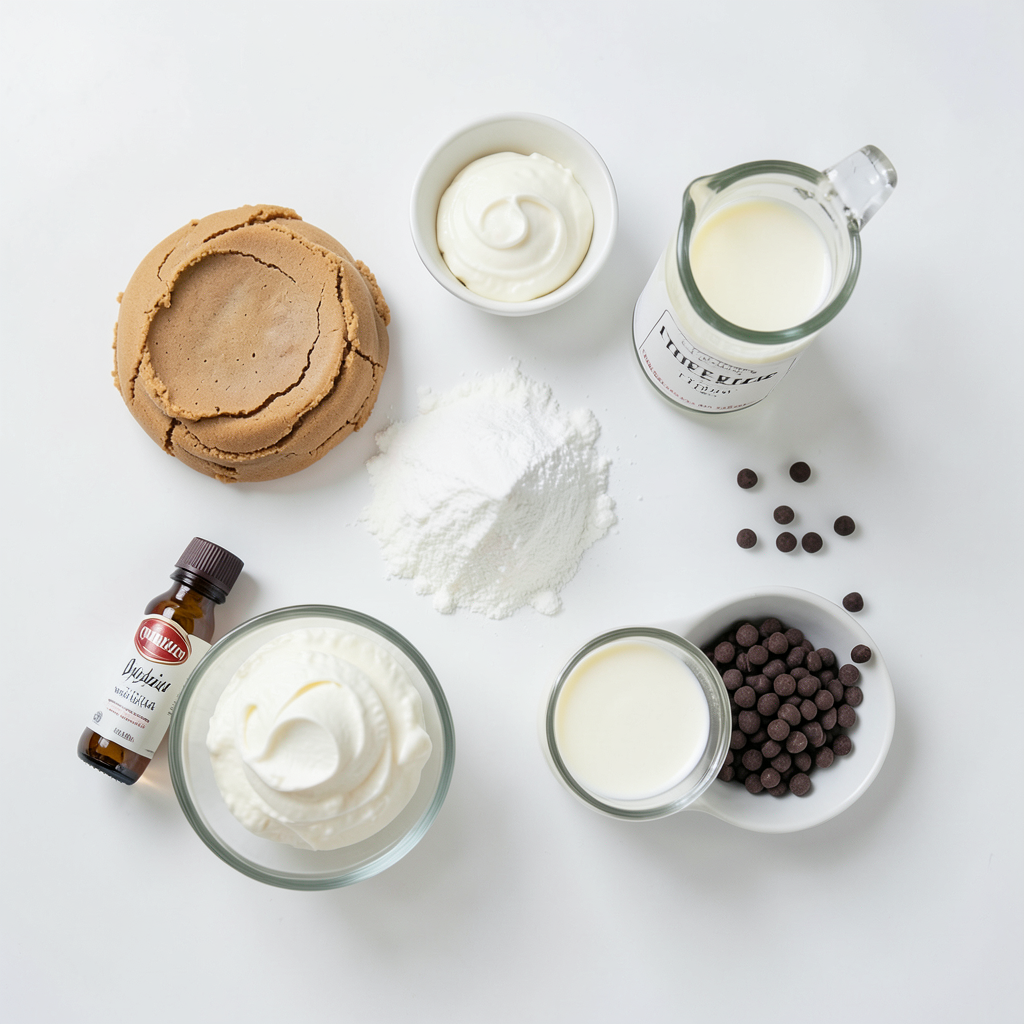
Main Ingredients for Chocolate Chip Cookie Dough Popsicles
- 1 cup cookie dough (store-bought or homemade)
- 1 cup cream cheese
- 1/2 cup powdered sugar
- 1 teaspoon pure vanilla extract
- 1/2 cup heavy whipping cream
- 1/2 cup mini chocolate chips
- 1/4 cup milk (dairy or non-dairy)
The main ingredients for these popsicles blend together perfectly. I use cookie dough that is egg-free, so it's safe to eat. Cream cheese gives a rich, smooth texture. The powdered sugar adds sweetness without being too much. Vanilla extract gives a nice flavor boost. Heavy cream makes the mix creamy, while mini chocolate chips add fun bites of chocolate.
Optional Toppings and Garnishes
- Melted chocolate drizzle
- Sea salt sprinkle
- Fresh mint leaves for garnish
For added flair, I love to drizzle the popsicles with melted chocolate. A sprinkle of sea salt enhances the sweet and salty taste. Fresh mint leaves also make a bright, fresh touch.
Tools Required
- Popsicle molds
- Electric mixer
- Mixing bowls
- Measuring cups and spoons
To make these popsicles, you'll need some basic tools. Popsicle molds help shape the pops. An electric mixer whips the mixture to a smooth consistency. Mixing bowls and measuring cups help keep everything organized.
Step-by-Step Instructions
Mixing the Base
- Start by taking 1 cup of cream cheese and 1/2 cup of powdered sugar.
- In a large bowl, mix them together until smooth and creamy.
- Next, add 1 teaspoon of pure vanilla extract and 1/2 cup of heavy whipping cream.
- Beat this mixture again until it is silky and well blended.
Folding in Cookie Dough
- Now it’s time to add 1 cup of cookie dough. You can use store-bought or homemade.
- Gently fold the cookie dough into the creamy mix.
- Make sure it spreads evenly through the mixture.
- Then, add in 1/2 cup of mini chocolate chips and mix them in lightly.
Pouring and Freezing
- Grab your popsicle molds and start filling them with your mix.
- Leave about 1/4 inch of space at the top for expansion.
- Insert sticks into the molds.
- Place the molds in the freezer for at least 4 to 6 hours.
Removing the Popsicles
- When you are ready to eat, run warm water over the outside of the molds.
- This helps loosen the popsicles.
- Gently pull them out to avoid breaking.
- Serve the popsicles right after you remove them for the best taste.
Tips & Tricks
Achieving the Perfect Consistency
To get a smooth popsicle, adjust the milk. Start with 1/4 cup and add more if needed. If your mixture is thick, this extra splash helps thin it out. I suggest mixing well to avoid lumps. Use an electric mixer and beat until creamy. This way, your popsicles will be silky and tasty.
Ensuring Even Freezing
Let the popsicles freeze for at least 4-6 hours. This time ensures they become solid. For best results, store them in a tight container. This helps prevent freezer burn. If you have leftover popsicles, wrap them well. Using plastic wrap keeps them fresh longer.
Presentation and Serving Suggestions
Serve these popsicles on a bright plate for a fun look. You can drizzle melted chocolate on top. A sprinkle of sea salt adds a nice touch too. Pair them with cold milk or a fruity drink. This makes a perfect treat for a hot day. Enjoy showing off your tasty creations!
Pro Tips
- Use Softened Cream Cheese: Ensure that your cream cheese is at room temperature to create a smooth and lump-free mixture, which is essential for the perfect texture of your popsicles.
- Adjust Consistency with Milk: If your mixture is too thick, gradually add more milk until it reaches your desired pourable consistency. This will ensure that your popsicles freeze evenly and have a creamy texture.
- Don’t Overmix: When folding in the cookie dough and chocolate chips, be gentle. Overmixing can lead to a dense texture instead of the light and creamy popsicle you want.
- Creative Serving Ideas: For a fun presentation, consider rolling the popsicles in crushed nuts or sprinkles before freezing. This adds a delightful crunch and visual appeal to your treats.
Variations
Health-Conscious Alternatives
You can make these popsicles a bit healthier. Try using Greek yogurt instead of cream cheese. Greek yogurt adds protein and a creamy texture. It also cuts down on fat. For those watching sugar, consider low-sugar or sugar-free options. You can use sugar substitutes like stevia or monk fruit. This way, you enjoy the same great taste with fewer calories.
Flavor Variations
Want to change up the flavor? You can add different extracts. Almond extract gives a nice twist. You can also mix in other ingredients. Try nuts for crunch or candies for fun. Mini marshmallows or crushed cookies work well, too. Experimenting with flavors makes each batch unique and exciting.
Seasonal Twists
Seasonal ingredients can add a special touch to your popsicles. In summer, add fresh fruit like strawberries or peaches. This gives a refreshing burst of flavor. When the holidays come, think about festive decorations. Add crushed peppermint or a sprinkle of cinnamon. Seasonal twists keep your treats fresh and fun all year round.
Storage Info
How to Store Popsicles
To keep your Chocolate Chip Cookie Dough Popsicles fresh, store them in a freezer-safe bag or container. Make sure they fit well and do not touch each other. This helps them freeze evenly. You can freeze these popsicles for up to two months, but they taste best within the first month.
Tips for Preventing Freezer Burn
Freezer burn can ruin your popsicles. To prevent this, wrap each popsicle in plastic wrap. Then, place them in a sealed bag. This keeps air out and helps maintain their flavor. Label the bags with the date you made them. This way, you’ll know how long they’ve been in the freezer.
Thawing Instructions
When you want to enjoy a popsicle, you can thaw it gently. Run warm water over the outside of the mold for a few seconds. This helps loosen the popsicle without melting it too much. You want to keep that creamy texture intact. Enjoy your popsicle while it’s still cold and delicious!
FAQs
Can I use store-bought cookie dough?
Yes, you can use store-bought cookie dough. Just make sure it has no eggs. Look for brands that specify "safe to eat raw" on the label. This way, you avoid any risk while enjoying your popsicles.
How long do these popsicles last in the freezer?
These popsicles can last up to two months in the freezer. For best taste, eat them within a month. Always store them in an airtight container to keep them fresh.
Are these popsicles suitable for kids?
Yes, these popsicles are great for kids. The recipe is egg-free, so it is safe for everyone. However, check for allergens. These include dairy, gluten, and chocolate. If your child has allergies, consider using substitutes.
Can I make these dairy-free?
Absolutely! You can use dairy-free cream cheese. Almond milk or coconut milk work well too. These swaps keep the texture smooth and creamy, making your popsicles just as tasty.
You learned how to create yummy chocolate chip cookie dough popsicles. We covered the key ingredients, tools, and step-by-step instructions. You can explore fun variations and storage tips to make these treats last. Remember, you can adjust flavors and toppings to suit your taste. Don’t forget to share your popsicle creations with friends! Enjoy making these sweet treats for yourself or loved ones. They’re perfect for any time of year!