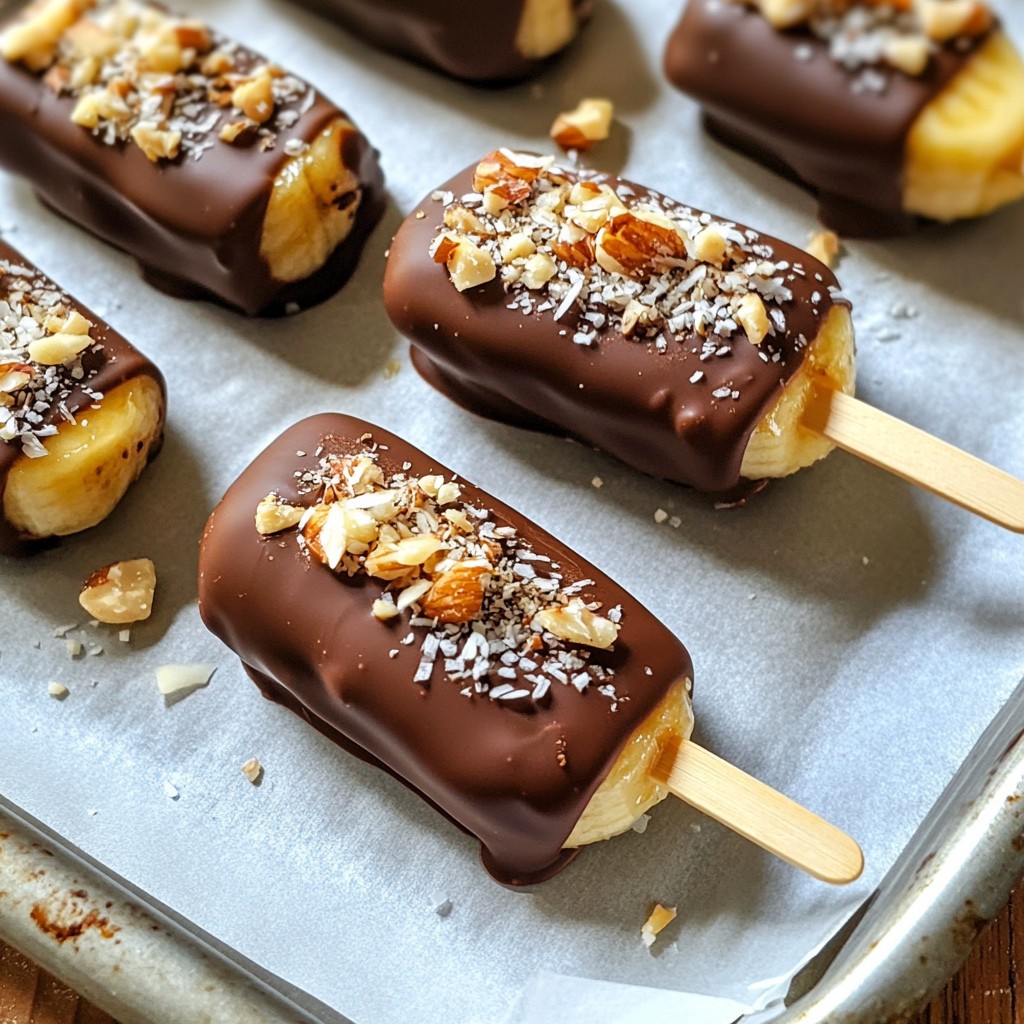
Looking for a fun snack that’s both tasty and easy to make? Chocolate Covered Banana Pops are your answer! In this blog, I’ll guide you through the simple steps to create these delightful treats. With just a few ingredients, you’ll whip up a delicious dessert that’s perfect for any occasion. Let’s dive into the world of chocolatey goodness and fruity flavors! Your taste buds will thank you.
Why I Love This Recipe
- Healthy Indulgence: These chocolate-covered banana pops make for a guilt-free dessert packed with nutrients and natural sweetness.
- Customizable Toppings: You can personalize each pop with your favorite nuts or coconut, allowing for endless flavor combinations.
- Perfect for All Ages: Kids and adults alike will enjoy these fun, tasty treats, making them great for parties or family gatherings.
- Quick and Easy: With minimal prep time and simple ingredients, these pops are a breeze to make, perfect for last-minute cravings.
Ingredients
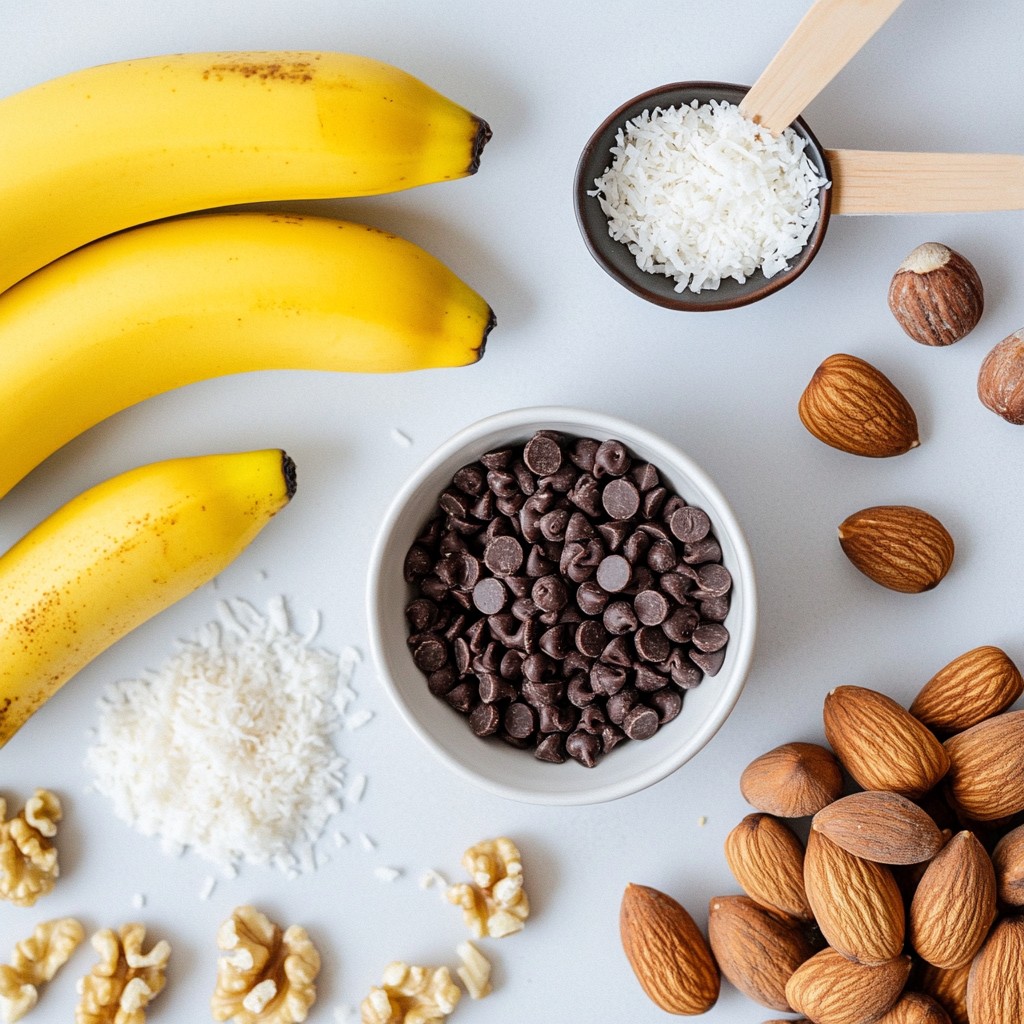
List of Ingredients for Chocolate Covered Banana Pops
- 3 ripe bananas
- 1 cup dark chocolate chips
- 1 tablespoon coconut oil
- 1/2 cup chopped nuts (e.g., almonds, walnuts, or hazelnuts)
- 1/4 cup shredded coconut (unsweetened)
- Wooden popsicle sticks
To make these chocolate-covered banana pops, you need just a few simple ingredients. The bananas give natural sweetness and a creamy texture. Dark chocolate chips bring rich flavor and a lovely sheen. Coconut oil helps the chocolate melt smoothly.
You can choose your favorite nuts for added crunch, like almonds, walnuts, or hazelnuts. Unsweetened shredded coconut adds a chewy touch. For the fun part, wooden popsicle sticks let you enjoy these treats on the go!
Make sure your bananas are ripe. They should have a few brown spots but not be overly soft. This ripeness ensures they taste sweet and delicious. Keep your ingredients ready, and you will create a tasty treat everyone loves.
Step-by-Step Instructions
Preparing the Bananas
- First, peel the bananas carefully.
- Next, cut each banana into halves.
- Then, insert a wooden popsicle stick into the cut end of each half.
This step is fun and easy. You want the sticks to stand up straight. This makes your pops look like real treats!
Freezing the Banana Pops
- Line a baking sheet with parchment paper.
- Place the banana pops on the sheet, making sure they are spaced out.
- Freeze the pops for at least 1 hour.
Freezing makes the bananas firm. This helps the chocolate coat them better later.
Melting the Chocolate Coating
- In a microwave-safe bowl, combine the dark chocolate chips and coconut oil.
- Microwave the mixture in 30-second increments. Stir after each round until smooth.
Watch the chocolate closely. You want it melted but not burned. Stirring helps it melt evenly.
Coating the Banana Pops
- Remove the frozen banana pops from the freezer.
- Dip each pop into the melted chocolate. Let any extra chocolate drip off.
- Roll the pops in chopped nuts or shredded coconut.
This adds great flavor and crunch. You can mix and match toppings for fun.
Final Freezing
- Place the coated pops back on the parchment paper.
- Return them to the freezer for 30 minutes.
This last freeze helps the chocolate set well. Your pops will be ready to enjoy after this!
Tips & Tricks
Best Practices for Melting Chocolate
- Avoid overheating: Heat chocolate slowly. Microwaving it in short bursts works best. Stir after each burst. This keeps it smooth and glossy.
- Alternative melting methods: You can melt chocolate in a double boiler too. Just place a bowl over simmering water. Stir until melted. This method prevents burning.
How to Quickly Freeze Banana Pops
- Tips for effective freezing: Ensure banana pops are spread apart on the baking sheet. This helps them freeze evenly. Keep them in a single layer to avoid sticking together. If you want them ready fast, use a flat tray.
Presentation Ideas
- Serving suggestions for special occasions: Arrange banana pops on a nice platter. Add some colorful fruits or mint leaves for flair. This makes them look festive and fun.
- Wrapping for gifts: Wrap each pop in bright cellophane. Tie with a ribbon for a sweet touch. This makes them a great gift or party favor.
Pro Tips
- Choosing the Right Bananas: Use ripe bananas for the best flavor and creaminess. They should be slightly speckled but not overly brown to ensure a sweet taste without being mushy.
- Melt Chocolate Smoothly: When melting chocolate, make sure to stir it frequently to avoid burning. If using the microwave, heat in short bursts and check often.
- Customization is Key: Feel free to mix and match toppings! Try different nuts, sprinkles, or even drizzle with white chocolate for added flair.
- Storage Tips: Store the banana pops in an airtight container in the freezer. They can last for up to a month, making them a great make-ahead treat!
Variations
Different Chocolate Options
You can change the chocolate for your banana pops. Try milk chocolate for a sweet taste. White chocolate adds a creamy touch. If you want a dairy-free option, use vegan chocolate. Each choice gives a unique flavor.
Unique Toppings
Get creative with your toppings! You can use chopped nuts like almonds, walnuts, or hazelnuts. They add a nice crunch. Sprinkles bring color and fun to your pops. Crushed cookies give a yummy twist. Mix and match for fun combinations!
Flavor Combinations
You can boost the taste of your pops with flavored extracts. A splash of vanilla or almond can add depth. Try adding a pinch of cinnamon for warmth. Each addition makes your pops special and exciting! Explore different flavors to find your favorite.
Storage Info
How to Properly Store Chocolate Covered Banana Pops
To keep your chocolate-covered banana pops fresh, use an airtight container. This helps prevent freezer burn and keeps them tasty. You can stack the pops with parchment paper between layers. This avoids them sticking together. Store them in the freezer for up to two months for best quality.
Thawing Instructions
When you're ready to enjoy a pop, take it out of the freezer. Place it in the fridge for about 30 minutes to thaw. This method is safe and helps maintain the taste. You can also leave it at room temperature for about 10 minutes. This quick method works too! Enjoy your treat once it's soft enough to bite into.
FAQs
Can I use frozen bananas for this recipe?
Yes, you can use frozen bananas. They give a creamy texture. However, the chocolate may not stick as well. Frozen bananas can also be more watery when thawed. This might make your pops less firm. Fresh bananas work best for a nice crunch.
Are chocolate-covered banana pops healthy?
Yes! Chocolate-covered banana pops can be healthy. Bananas are full of vitamins and fiber. Dark chocolate has antioxidants and can be good for your heart. The nuts add healthy fats and some protein. Just watch the sugar in the chocolate. Enjoy these treats in moderation!
How do I make these pops vegan or gluten-free?
To make these pops vegan, use dairy-free chocolate. Many brands offer great options. For gluten-free, check that your nuts and chocolate are gluten-free. You can also skip the nuts if you have allergies. This way, everyone can enjoy a tasty treat!
In this blog post, I shared a simple recipe for chocolate-covered banana pops. You learned about the key ingredients, step-by-step instructions, and tips for making the perfect treats. I also covered variations and storage info to keep your pops fresh.
Chocolate-covered banana pops are fun, tasty, and easy to make. They offer a healthy twist to your snack routine. Enjoy creating these delicious pops for any occasion!