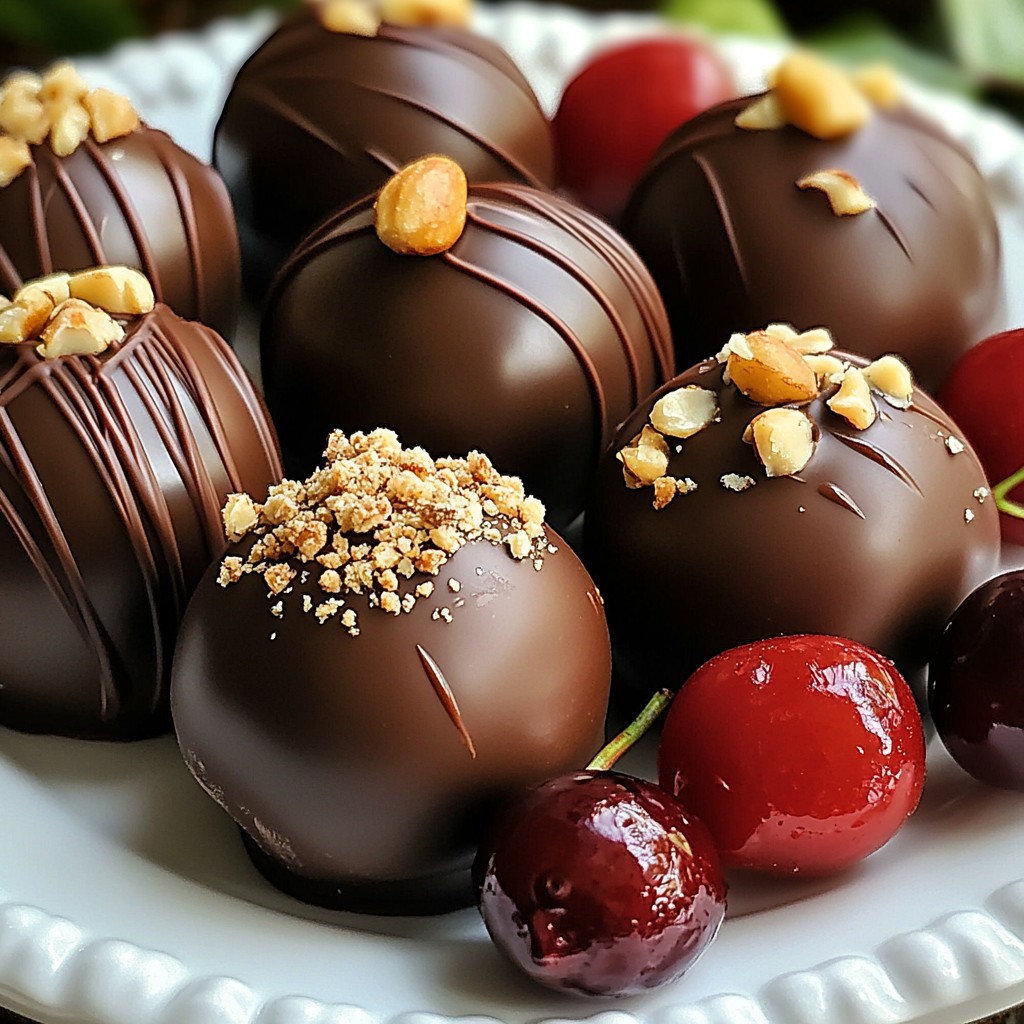
Looking for a sweet treat that combines the rich taste of chocolate with juicy cherries? You're in the right place! My recipe for Chocolate Covered Cherry Truffles is simple, fun, and satisfying. With just a few key ingredients, you can create a delightful dessert that impresses anyone. Get ready to indulge your taste buds and learn how to make these easy truffles at home! Let's dive in!
Why I Love This Recipe
- Decadent Flavor: The combination of rich dark chocolate and fresh cherries creates a luxurious and indulgent treat that melts in your mouth.
- Perfect for Any Occasion: These truffles are ideal for celebrations, holidays, or simply as a delightful homemade gift for loved ones.
- Customizable: You can easily adapt the recipe by adding your favorite nuts or experimenting with different flavor extracts to create your unique twist.
- Simple to Make: Despite their gourmet appearance, these truffles are surprisingly easy to prepare, making them accessible for both novice and experienced cooks.
Ingredients
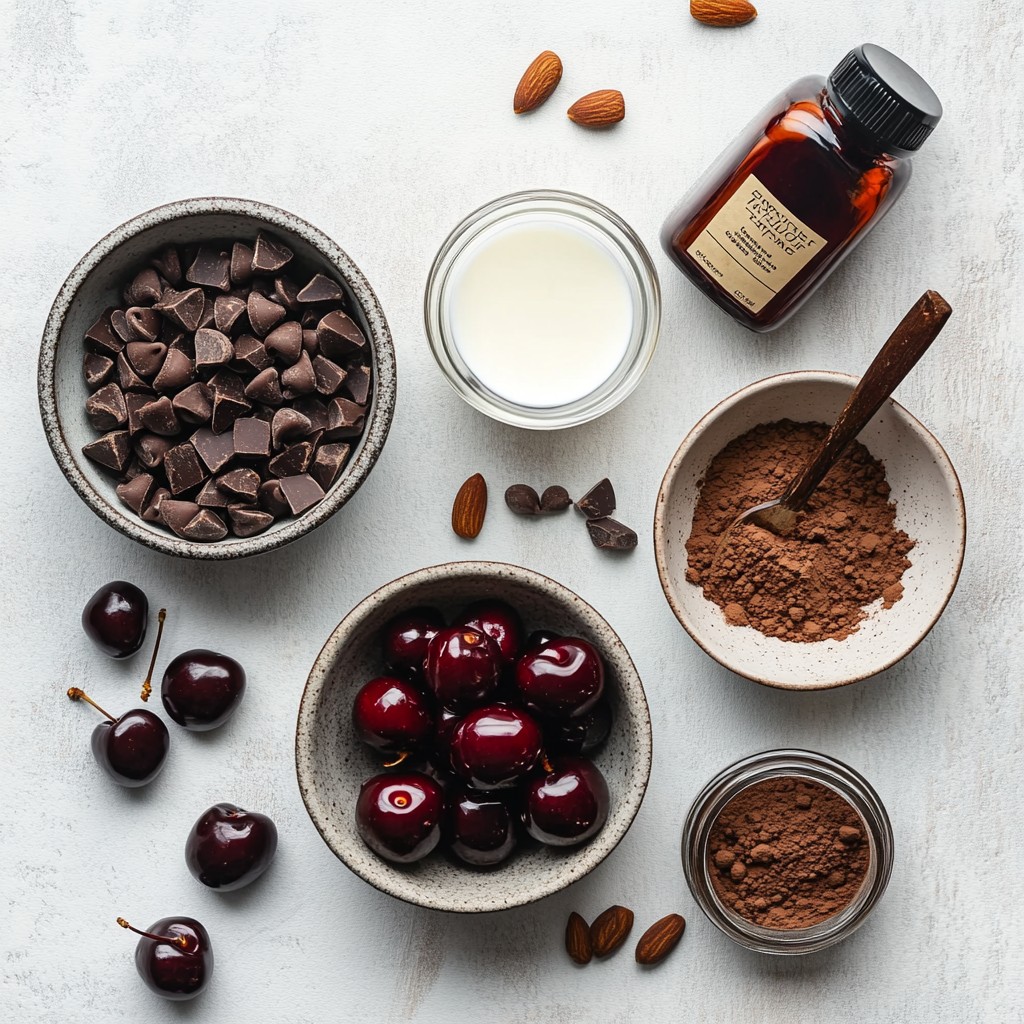
List of Key Ingredients
- 1 cup fresh cherries, pitted
- 1 cup dark chocolate chips
- 1/2 cup heavy cream
- 1/2 teaspoon vanilla extract
- 1 tablespoon cherry extract (optional)
- 1/2 cup crushed nuts (almonds or hazelnuts)
- Cocoa powder for dusting
Ingredient Substitutions
You can use semi-sweet chocolate chips if you prefer a milder taste. For a dairy-free option, try coconut cream instead of heavy cream. This works well and keeps the flavor rich.
Equipment Needed
To make these truffles, you will need:
- Blender or food processor
- Medium saucepan
- Mixing bowl
- Melon baller or your hands for shaping
Using the right tools helps make this treat easy and fun. A blender makes smooth cherry purée, while a saucepan heats the cream just right. Enjoy the simple process of making these delightful truffles!
Step-by-Step Instructions
Preparing the Cherries
First, pit the fresh cherries. You can use a cherry pitter or a knife. Make sure you remove all the pits! Next, place the pitted cherries in a blender or food processor. Blend them until they turn into a smooth purée. Set this aside for later.
Heating and Melting
Now, let’s heat the heavy cream. Pour it into a medium saucepan and set it over medium heat. Stir it often and watch closely. When the cream starts to simmer, remove the pan from the heat. Be careful not to let it boil! Add the dark chocolate chips to the hot cream. Stir until the chocolate melts and the mixture is smooth and glossy.
Combining and Chilling
Next, it’s time to combine the flavors. Gently fold in the cherry purée and the vanilla extract into the chocolate mixture. If you want a stronger cherry taste, add the cherry extract here. Mix until everything is well combined. Transfer the mixture into a mixing bowl and cover it with plastic wrap. Place it in the fridge for about 1 to 2 hours. You want it to firm up nicely.
Once the mixture is set, scoop out small amounts using a melon baller or your hands. Roll them into balls about an inch wide. Now, take each truffle ball and roll it in the crushed nuts. This gives them a nice crunch and flavor. For a classic touch, you can also roll some in cocoa powder. Arrange the truffles on a tray lined with parchment paper. Finally, put the tray back in the fridge for 30 more minutes to let them firm up before serving.
Tips & Tricks
Perfecting the Truffle Texture
To get the right texture, chill the mixture well. After blending, refrigerate the mix for 1 to 2 hours. This helps it firm up. If it’s too soft, your truffles will not hold their shape. A common mistake is not allowing enough time to chill. Keep an eye on the clock!
Enhancing Flavor Profiles
You can boost flavor by using different extracts. Try almond or orange extracts for a twist. Balance the sweetness by adjusting the cherry extract. If you want a stronger cherry taste, use more cherry extract. Just a little can make a big difference!
Presentation Ideas
Serving truffles on a nice plate makes them look fancy. You can add a few whole cherries on top for a pop of color. A drizzle of melted chocolate also adds elegance. Use parchment paper under the truffles to catch any mess. These small touches make your truffles stand out!
Pro Tips
- Use Fresh Cherries: The quality of cherries greatly impacts the flavor of your truffles. Choose ripe and sweet cherries for the best results.
- Chill Thoroughly: Ensure the chocolate mixture is well-chilled before rolling into truffles. This makes handling easier and results in a smoother shape.
- Experiment with Coatings: While crushed nuts add a delightful crunch, try rolling some truffles in shredded coconut or sprinkles for a fun twist.
- Adjust Chocolate Type: For a different flavor profile, consider using milk chocolate or white chocolate in place of dark chocolate, tailoring sweetness to your preference.
Variations
Flavor Varieties
You can make chocolate covered cherry truffles even more fun. Try adding different fruits like raspberries or strawberries. These fruits mix well with chocolate. You can also use extracts like almond or orange for a new twist. Want an adult version? You can incorporate liqueurs like cherry or amaretto. Just a splash will add a rich flavor.
Coating Alternatives
While dark chocolate is classic, you can switch it up. Use white chocolate for a sweet and creamy taste. If you want to try something different, consider rolling your truffles in cocoa powder. This gives a rich, chocolatey finish. Nuts like almonds or hazelnuts add crunch and flavor too. Choose what you like best!
Dietary Variations
Want to keep it vegan? You can swap regular cream for coconut cream. This makes the truffles rich and creamy without any dairy. For those who need gluten-free options, check the labels on your chocolate and extracts. Most are gluten-free. Just ensure all your ingredients are safe for your diet.
Storage Info
Storing Unused Truffles
To keep your truffles fresh, place them in an airtight container. Layer parchment paper between the truffles to avoid sticking. Store the container in the fridge. This keeps the truffles cool and firm. They can last up to two weeks in the fridge.
Freezing Truffles
If you want to save truffles for later, freezing works well. First, place truffles on a baking sheet. Freeze them for about an hour until firm. Then, transfer the truffles to an airtight container. They can last up to three months in the freezer. When you want to enjoy them, thaw the truffles in the fridge overnight. This keeps their flavor and texture intact.
Shelf-Life Considerations
Watch for signs of spoilage. If your truffles smell off or have a strange texture, they may be bad. Also, if the chocolate looks dull or has white spots, it’s time to toss them. To extend freshness, always store the truffles correctly and avoid exposing them to warm air.
FAQs
Can I use frozen cherries?
Yes, you can use frozen cherries. They may change the texture of your truffles. Frozen cherries can be softer and more watery when thawed. This can make it harder to blend into a smooth purée. If you use frozen cherries, press out extra juice before blending. This keeps the flavor strong and the truffles set well.
How do I make truffles firmer?
To make your truffles firmer, adjust the cooling time. After mixing, chill the mixture longer. Aim for at least two hours. You can also chill the truffles after shaping. This helps them keep their round shape. Make sure the fridge is cold enough. A lower temperature speeds up the firming process.
Where can I purchase ready-made chocolate covered cherry truffles?
You can find ready-made truffles at several places. Many grocery stores sell them in the candy aisle. You can also check specialty shops or chocolatier websites. Local artisan chocolatiers often create unique options. Look for small, local shops that focus on quality. These truffles can be more creative and tasty.
You now have a complete guide to making delicious chocolate cherry truffles. You learned about the key ingredients, helpful substitutions, and the tools you'll need. The step-by-step instructions ensure that your truffles are easy to make.
With tips to enhance flavor and storage advice, you're set for success. Whether you want to impress guests or treat yourself, these truffles work for any occasion. Enjoy the process, and remember, every bite is worth the effort. Happy truffle-making!