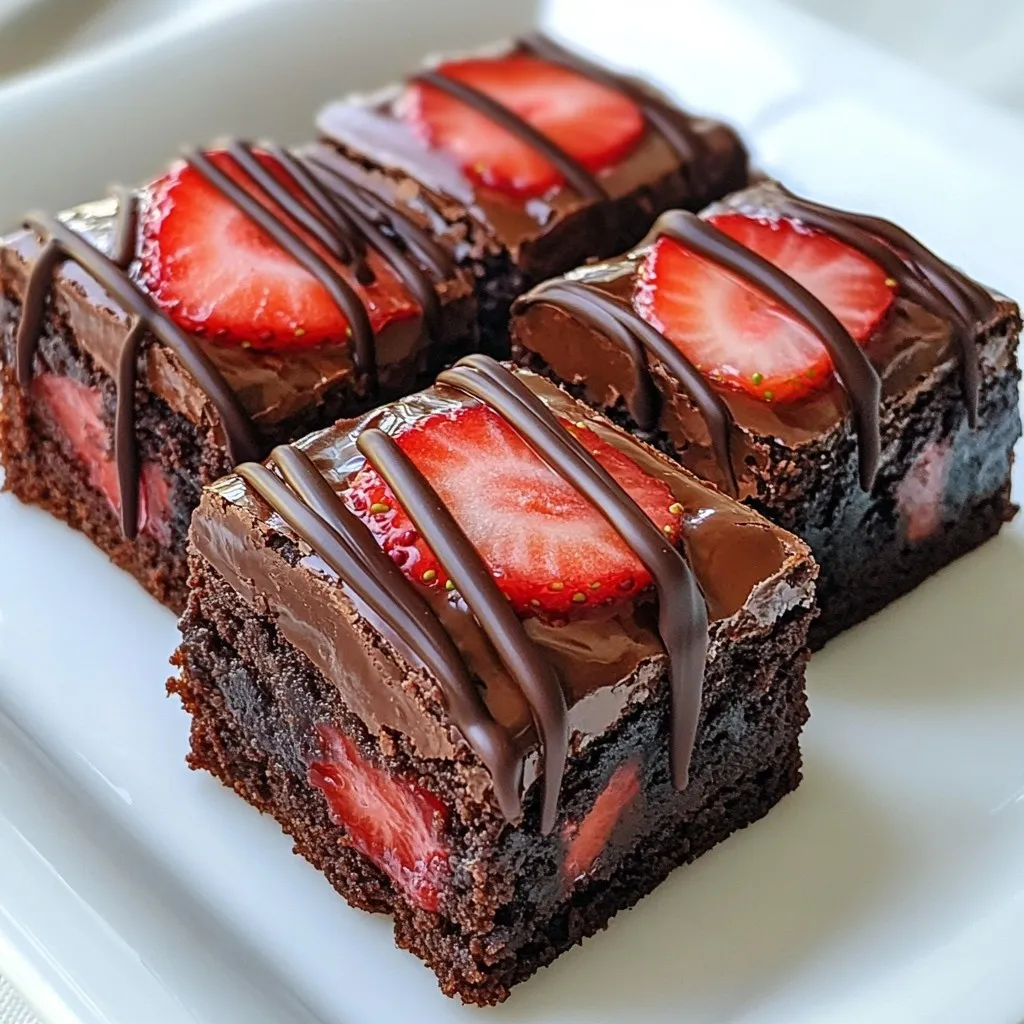
Are you ready to dive into a sweet adventure? In this post, I’ll show you how to make Chocolate Covered Strawberry Brownies that are truly a delight. With layers of rich brownie and fresh strawberries, these treats impress everyone. Plus, I’ll share tips on customizing them to fit your taste. Whether you’re hosting a party or treating yourself, this recipe is sure to satisfy your sweet tooth! Let’s get started!
Why I Love This Recipe
- Decadent Flavor: The rich chocolate brownie base perfectly complements the fresh strawberries, creating a delightful balance of flavors.
- Easy to Make: This recipe is straightforward, making it perfect for both beginner bakers and seasoned pros alike.
- Impressive Presentation: The glossy chocolate coating and vibrant strawberries make these brownies a showstopper for any occasion.
- Versatile Treat: These brownies can be enjoyed warm, at room temperature, or even chilled, adapting to your preference.
Ingredients
Essential Ingredients for Chocolate Covered Strawberry Brownies
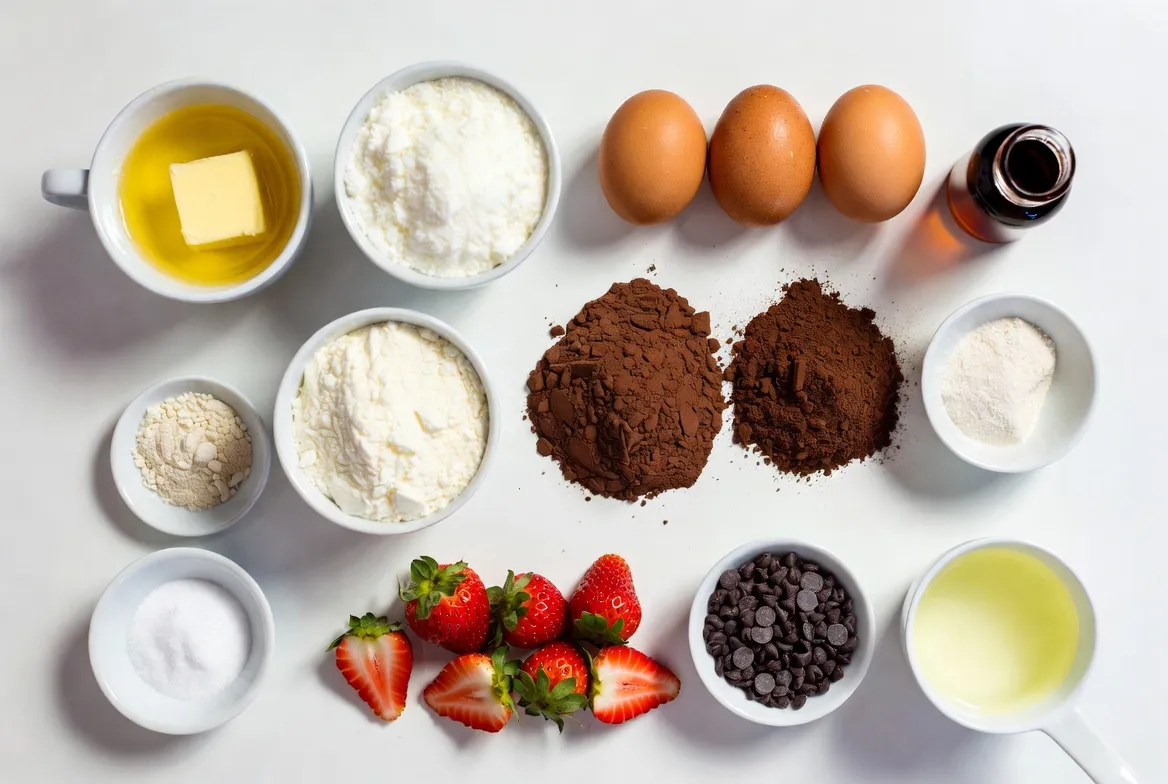
To make these delightful brownies, you need the following key ingredients:
– 1 cup unsalted butter, melted
– 2 cups granulated sugar
– 4 large eggs
– 1 teaspoon vanilla extract
– 1 cup all-purpose flour
– 1 cup cocoa powder
– ½ teaspoon baking powder
– ½ teaspoon salt
– 1 cup fresh strawberries, hulled and halved
– 1 cup semi-sweet chocolate chips
– 1 tablespoon coconut oil (for melting chocolate)
These ingredients come together to create a rich, chocolaty base with juicy strawberries.
Optional Ingredients for Customization
You can personalize your brownies with some fun extras. Here are a few ideas:
– Nuts like walnuts or pecans for added crunch
– A pinch of espresso powder to enhance the chocolate flavor
– Swirls of cream cheese for a tangy twist
– Different types of chocolate chips, like white or dark chocolate
These options let you make each batch unique and tailored to your taste.
Dietary Considerations
If you need to follow a special diet, it’s easy to adapt this recipe. Here are some options:
– For gluten-free brownies, use a gluten-free flour blend instead of all-purpose flour.
– Replace eggs with flaxseed meal mixed with water for a vegan version.
– Choose dairy-free chocolate chips to keep it vegan and dairy-free.
These swaps ensure everyone can enjoy these tasty brownies!
Step-by-Step Instructions
Prepping the Baking Pan and Preheating the Oven
Start by preheating your oven to 350°F (175°C). This sets the stage for baking. Next, take a 9×13 inch baking pan. Grease it lightly with butter or line it with parchment paper. This will help you remove the brownies easily later.
Mixing the Wet Ingredients
In a large mixing bowl, add 1 cup of melted unsalted butter and 2 cups of granulated sugar. Whisk them together until smooth. Then, add 4 large eggs one at a time. Mix well after each egg. Finally, stir in 1 teaspoon of vanilla extract until it blends perfectly.
Combining Dry Ingredients and Folding into Batter
Now it’s time for the dry ingredients. Sift together 1 cup of all-purpose flour, 1 cup of cocoa powder, ½ teaspoon of baking powder, and ½ teaspoon of salt. Carefully sift this mix directly over the wet ingredients. Use a spatula to fold the dry ingredients into the wet mix. Do this gently; overmixing will make your brownies tough.
Layering Strawberries and Adding Final Batter
Pour about half of the brownie batter into the prepared pan. Spread it evenly with a spatula. Take 1 cup of hulled and halved fresh strawberries and place them on top of the batter. Press them down gently. Then, spoon the rest of the brownie batter over the strawberries. Make sure to cover them well.
Baking Instructions and Testing for Doneness
Place your pan in the preheated oven. Bake for 30 to 35 minutes. To check for doneness, insert a toothpick into the center. It should come out with a few moist crumbs, not wet batter. If it’s wet, give it a few more minutes.
Preparing the Chocolate Coating
While the brownies bake, let’s prepare the chocolate coating. In a microwave-safe bowl, combine 1 cup of semi-sweet chocolate chips with 1 tablespoon of coconut oil. Heat them in the microwave in 30-second intervals. Stir after each interval until the chocolate is fully melted and smooth.
Tips & Tricks
Ensuring Perfect Brownie Texture
To get the best brownie texture, mix the wet and dry ingredients carefully. Overmixing can make them tough. When you fold the flour and cocoa into the wet mix, stop once you see no dry flour. This keeps your brownies soft and chewy. Also, check the baking time. Every oven is different. Start checking at 30 minutes to avoid overbaking.
Best Practices for Melting Chocolate
Melting chocolate is easy with a few tips. Use a microwave-safe bowl. Combine the chocolate chips and coconut oil. Heat in short bursts of 30 seconds. Stir after each burst until melted and smooth. This method prevents burning. If you don’t have a microwave, use a double boiler. Just be careful not to let water touch the chocolate.
Decorating Ideas for a Beautiful Presentation
Presentation makes your brownies even more enjoyable. Once the chocolate coating sets, try these ideas:
– Garnish with extra halved strawberries on top.
– Dust with powdered sugar for a sweet touch.
– Add a drizzle of white chocolate for contrast.
– Serve on a decorative plate to impress guests.
These small touches can make your brownies look as good as they taste!
Pro Tips
- Use Room Temperature Ingredients: Ensure your eggs and melted butter are at room temperature for better emulsification and a smoother batter.
- Don’t Overmix the Batter: Gently fold the dry ingredients into the wet ingredients to avoid tough brownies. Stop mixing as soon as there are no dry streaks.
- Cool Completely Before Topping: Allow the brownies to cool fully before adding the chocolate coating to prevent it from melting into the brownies.
- Enhance Chocolate Flavor: Add a pinch of espresso powder to the batter to intensify the chocolate flavor without making the brownies taste like coffee.
Variations
Different Types of Chocolate (milk, dark, white)
You can use many types of chocolate for your brownies. I love semi-sweet chocolate for its balance. Milk chocolate brings a sweeter taste. White chocolate adds a creamy touch. Each type creates a unique flavor. Experiment with your favorites. Mix different chocolates for a fun twist.
Adding Nuts or Other Fruits
Nuts can add crunch and flavor. Try adding walnuts or pecans. They pair well with chocolate and strawberries. You can also use other fruits. Raspberries or blueberries could work great. Just make sure to adjust the amount of sugar if you add more fruit.
Creative Flavor Pairings (e.g., mint, orange zest)
Think beyond the basics! Add mint for a fresh twist. A little mint extract can brighten the flavor. You can also use orange zest for a zesty kick. It adds a lovely citrus note. Explore different spices too, like cinnamon or ginger. Each choice will elevate your brownies.
Storage Info
How to Store Leftover Brownies
To keep your brownies fresh, place leftovers in an airtight container. This helps keep moisture in and air out. You can store them at room temperature for up to three days. For longer freshness, refrigerate them. Just remember to let them come to room temperature before serving.
Freezing Instructions for Long-Term Storage
You can freeze these brownies for later enjoyment. First, cut them into squares. Wrap each square in plastic wrap. Then, place the wrapped brownies in a freezer-safe bag. They can stay in the freezer for up to three months. When you want to eat them, just thaw them in the fridge overnight.
Reheating Tips for Enjoying Leftovers
To enjoy your brownies warm, preheat your oven to 350°F (175°C). Place the brownie squares on a baking sheet. Heat them for about 10 minutes. This warms them up nicely without drying them out. You can also use a microwave. Just heat each square for 15 to 20 seconds, but check to avoid overheating.
FAQs
Can I make these brownies ahead of time?
Yes, you can make these brownies ahead of time. Bake them, let them cool, and store them in an airtight container. They stay fresh in the fridge for about 3 days. If you want to keep them longer, freeze them for up to 3 months. Just thaw in the fridge when you’re ready to enjoy them.
What is the best way to serve Chocolate Covered Strawberry Brownies?
Serve these brownies with flair! Cut them into squares and place them on a nice plate. Add extra halved strawberries for color. A light dusting of powdered sugar can give them a pretty finish. For a fun twist, serve with whipped cream or a scoop of vanilla ice cream.
Can I use frozen strawberries for this recipe?
Using frozen strawberries is fine, but there are some tips. Thaw and drain them first to reduce extra moisture. This step helps keep your brownies from getting soggy. Fresh strawberries are best for flavor and texture, but frozen ones can work in a pinch.
How long do Chocolate Covered Strawberry Brownies last?
Chocolate Covered Strawberry Brownies last about 3 days at room temperature. If you store them in the fridge, they can last up to a week. Just make sure to keep them covered. If you freeze them, they can last for about 3 months. Enjoy them any time you crave a sweet treat!
You learned how to make Chocolate Covered Strawberry Brownies from start to finish. We covered essential and optional ingredients, step-by-step baking instructions, and tips for great results. You can also customize flavors and store leftovers easily.
I hope you feel inspired to create this treat in your kitchen. Enjoy every bite and share with friends and family! Happy bakin