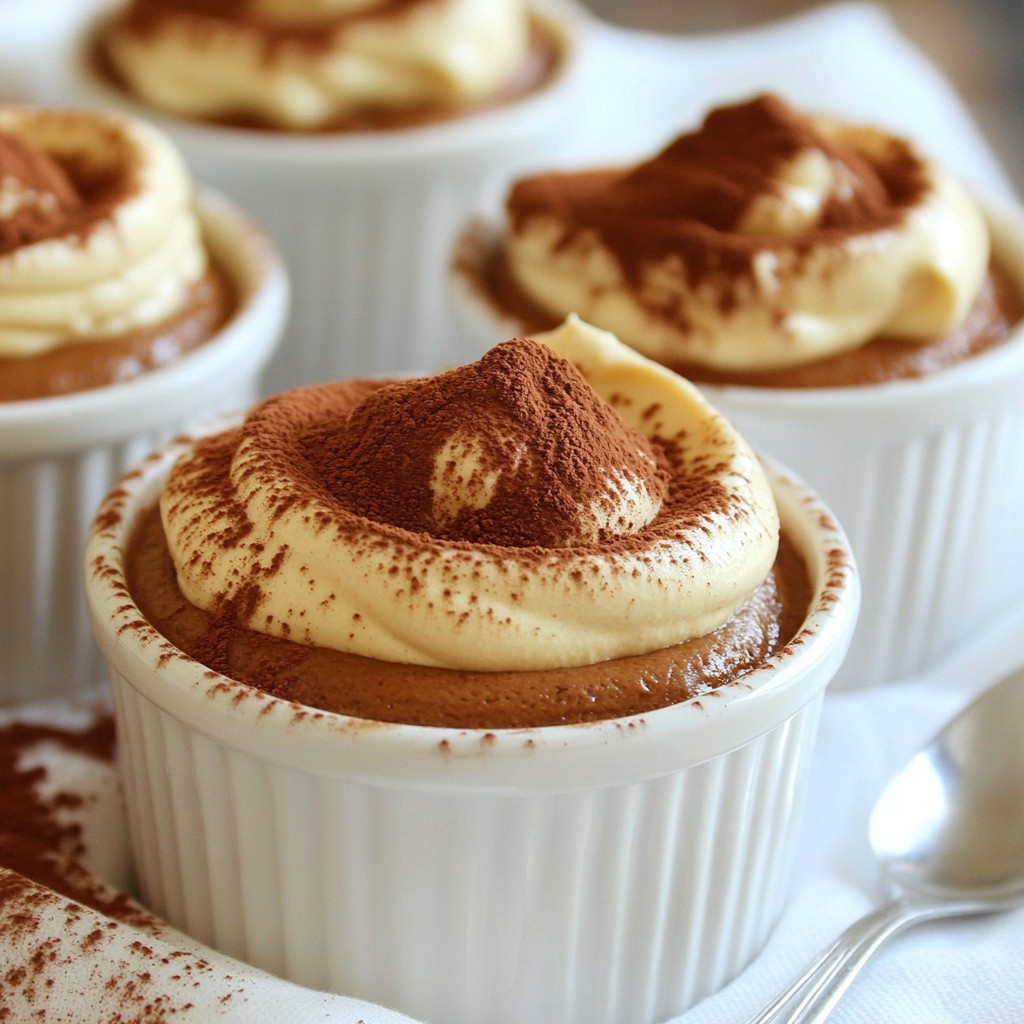
Indulge in the rich, creamy delight of Chocolate Espresso Mousse Cups! This simple treat combines dark chocolate and espresso for a perfect blend of flavors. With just a few easy steps, you can create a dessert that impresses any guest. Whether you're hosting a dinner or treating yourself, this recipe is both satisfying and fun to make. Get ready to dive into this sweet adventure!
Why I Love This Recipe
- Decadent Flavor: The rich combination of dark chocolate and espresso creates an indulgent dessert that satisfies any chocolate lover's cravings.
- Light and Airy Texture: The whipped cream and beaten egg whites give the mousse a fluffy texture that melts in your mouth.
- Easy to Make: With simple ingredients and straightforward steps, this recipe is perfect for both novice and experienced cooks alike.
- Impressive Presentation: Served in individual cups, this dessert looks elegant and is sure to wow your guests at any gathering.
Ingredients
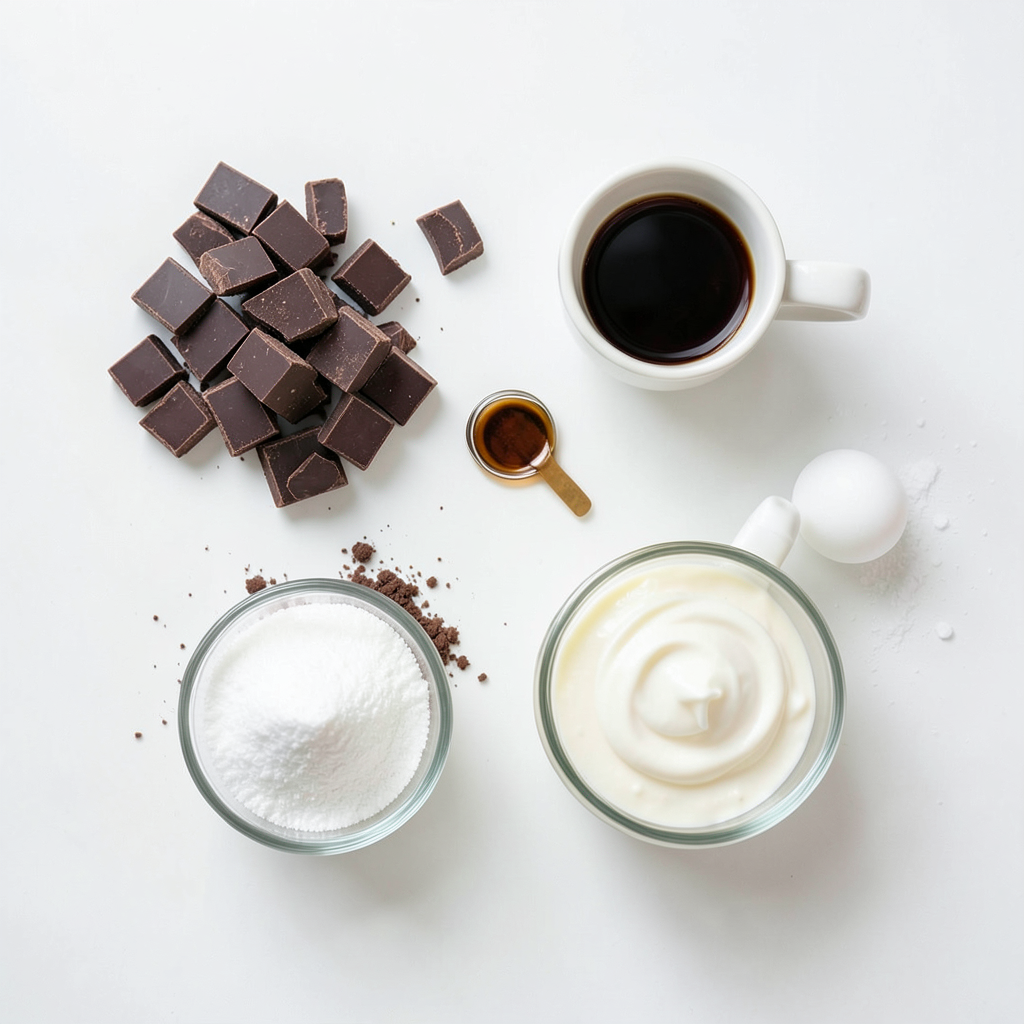
To make the perfect Chocolate Espresso Mousse Cups, gather these key ingredients:
- 4 oz dark chocolate (70% cocoa), finely chopped
- 2 tablespoons espresso coffee, cooled to room temperature
- 2 tablespoons granulated sugar
- 1 teaspoon pure vanilla extract
- 1 cup heavy whipping cream, chilled
- 2 large egg whites, at room temperature
- A pinch of sea salt
- Shaved chocolate or unsweetened cocoa powder for garnish (optional)
These ingredients create a rich, creamy dessert. The dark chocolate gives a bold flavor, while the espresso adds depth. The sugar balances the bitterness, and the vanilla enhances the taste. Heavy cream makes it light and fluffy. Egg whites provide that airy texture we all love. Adding a pinch of sea salt brings out all the flavors. If you want, use shaved chocolate or cocoa powder to make it look fancy.
Having all these ingredients ready will help you enjoy the process. Each one plays an important role in making your mousse a delicious treat.
Step-by-Step Instructions
Melting the Chocolate
Double Boiler Method To melt the dark chocolate, fill a pot with water. Place it on medium heat. Put a bowl on top, ensuring it doesn't touch the water. Add the chocolate to the bowl. Stir gently until it melts completely. This method gives you control and avoids burning.
Microwave Method You can also melt chocolate in the microwave. Place chopped chocolate in a microwave-safe bowl. Heat it in 15-second bursts. Stir after each interval to prevent burning. Once melted, let it cool slightly before mixing in the espresso, sugar, and vanilla.
Whipping the Cream
Achieving Soft Peaks In a cold bowl, pour in the heavy whipping cream. Use an electric mixer on medium speed. Beat until soft peaks form. Stop when the cream holds shapes but is still light. Over-whipping can make the cream grainy, so watch closely.
Preparing the Egg Whites
Importance of Room Temperature For fluffy egg whites, they must be at room temperature. This helps them whip better. Use clean, dry bowls and tools. Beat the egg whites with a pinch of sea salt until stiff peaks form. This can take a few minutes, so be patient.
Folding Techniques
Incorporating Whipped Cream Take one-third of the whipped cream and add it to the cooled chocolate mix. Use a spatula to fold gently. This lightens the mixture without losing air. Be careful to combine without deflating the mousse.
Adding Egg Whites Next, add the remaining whipped cream in two parts. Fold gently again. Lastly, add the beaten egg whites. Use a gentle folding motion until no white streaks are visible. This ensures a light and airy mousse.
Assembly and Chilling
Filling the Cups Use a spoon or a piping bag to fill your cups with the mousse. Aim to fill them three-quarters full. This gives enough room for the mousse to set and allows for garnishing later.
Refrigeration Time Cover the cups with plastic wrap. Chill them in the refrigerator for at least 2 hours. This time allows the mousse to set properly. Enjoy the rich flavors once they are ready!
Tips & Tricks
Perfecting the Mousse Texture
To get the perfect mousse, you need to avoid over-whipping the cream. When you whip heavy cream, stop when you see soft peaks. If you go too far, it will turn grainy, and your mousse won't be light.
When folding in the whipped cream, use a spatula. This helps keep the mousse airy. Gently fold one-third of the cream into the chocolate mix first. Then, add the rest in two parts. This way, you keep that fluffy texture.
Temperature Considerations
Use cold heavy cream for the best results. Cold cream whips better and helps create a light mousse. For the egg whites, make sure they are at room temperature. This allows them to whip up nice and stiff.
If you forget to take them out, no worries! Just place the eggs in warm water for a few minutes.
Serving Suggestions
For a beautiful presentation, use clear cups or glasses. This lets the layers show through. You can fill them about three-quarters full. This leaves room for a garnish.
Right before serving, add shaved chocolate or a dusting of cocoa powder. It adds a nice touch and looks fancy. If you want to impress, serve with berries or a sprig of mint.
Pro Tips
- Use Quality Chocolate: The flavor of your mousse will significantly depend on the quality of the dark chocolate you choose. Opt for high-quality chocolate with at least 70% cocoa for the best results.
- Chill Your Mixing Bowls: For optimal whipping of the cream and egg whites, chill your mixing bowls beforehand. This will help achieve better volume and stability in your mousse.
- Room Temperature Egg Whites: Ensure your egg whites are at room temperature before beating. This will help them whip up more easily and achieve greater volume.
- Don’t Over-Mix: When folding in the whipped cream and egg whites, be gentle. Over-mixing can deflate the airy texture, resulting in a denser mousse.
Variations
Flavor Enhancements
You can add fun flavors to your Chocolate Espresso Mousse Cups. One easy way is by adding liqueurs. A splash of coffee liqueur brings a rich, deep taste. It pairs well with the chocolate and espresso. You can also try flavors like hazelnut or vanilla liqueur for a twist.
Next, consider experimenting with chocolate types. Dark chocolate gives the mousse a bold taste. You can try milk chocolate for a sweeter touch. Each type changes the mousse's flavor and richness. Mix and match to find your favorite!
Dietary Adjustments
If you want a vegan mousse, I have simple swaps for you. Use a vegan chocolate brand, and replace the heavy cream with coconut cream. For egg whites, you can use aquafaba, which is the liquid from canned chickpeas. Whip it until it has stiff peaks, just like egg whites.
For gluten-free options, this recipe is already safe since it doesn’t use flour. Just make sure all your ingredients are certified gluten-free. You can enjoy this treat without worry!
Storage Info
How to Store Mousse Cups
To keep your chocolate espresso mousse cups fresh, place them in the fridge. Use plastic wrap to cover each cup tightly. This will help prevent any odors from the fridge from affecting the mousse. Make sure the mousse is fully set before covering it. This will help keep its rich texture.
Shelf Life
Chocolate espresso mousse cups are best enjoyed within three days. After that, the texture may change. The mousse can still be safe to eat for up to a week, but it may not taste as fresh. For the best flavor and texture, aim to eat them within the first few days. Keep an eye on any changes in look or smell. If anything seems off, it's safer to toss them.
FAQs
Can I use milk chocolate instead of dark chocolate?
Yes, you can use milk chocolate. It will make the mousse sweeter and creamier. However, the rich taste of dark chocolate gives it a deep flavor. If you prefer a milder taste, go for milk chocolate. Just remember, the mousse may lose some of its boldness.
How do I know when the mousse is set?
The mousse is set when it feels firm to the touch. After chilling for at least two hours, check for a slight jiggle when you gently shake the cup. It should hold its shape but still be soft inside. If it’s too wobbly, give it more time in the fridge.
Can I make this recipe ahead of time?
Yes, you can make this mousse up to two days in advance. Just cover the cups tightly with plastic wrap. This way, the flavors will develop even more. It’s a great option for parties or special occasions when you want to save time.
What's the difference between folding and mixing?
Folding is a gentle technique. It helps keep air in the mixture. You use a spatula to lift and turn the mixture over itself. Mixing is more vigorous and can deflate the mousse. It’s best to fold in whipped cream and egg whites to keep the mousse light and airy.
This blog post covered how to make rich chocolate mousse using simple ingredients like dark chocolate, espresso, and cream. You learned the best methods for melting chocolate and whipping cream, plus tips for texture and storage. Perfecting this dessert lets you impress your friends and enjoy every bite. Remember to have fun and experiment with flavors or dietary needs. With practice, you’ll master this dish and serve it with pride. Enjoy your mousse journey!