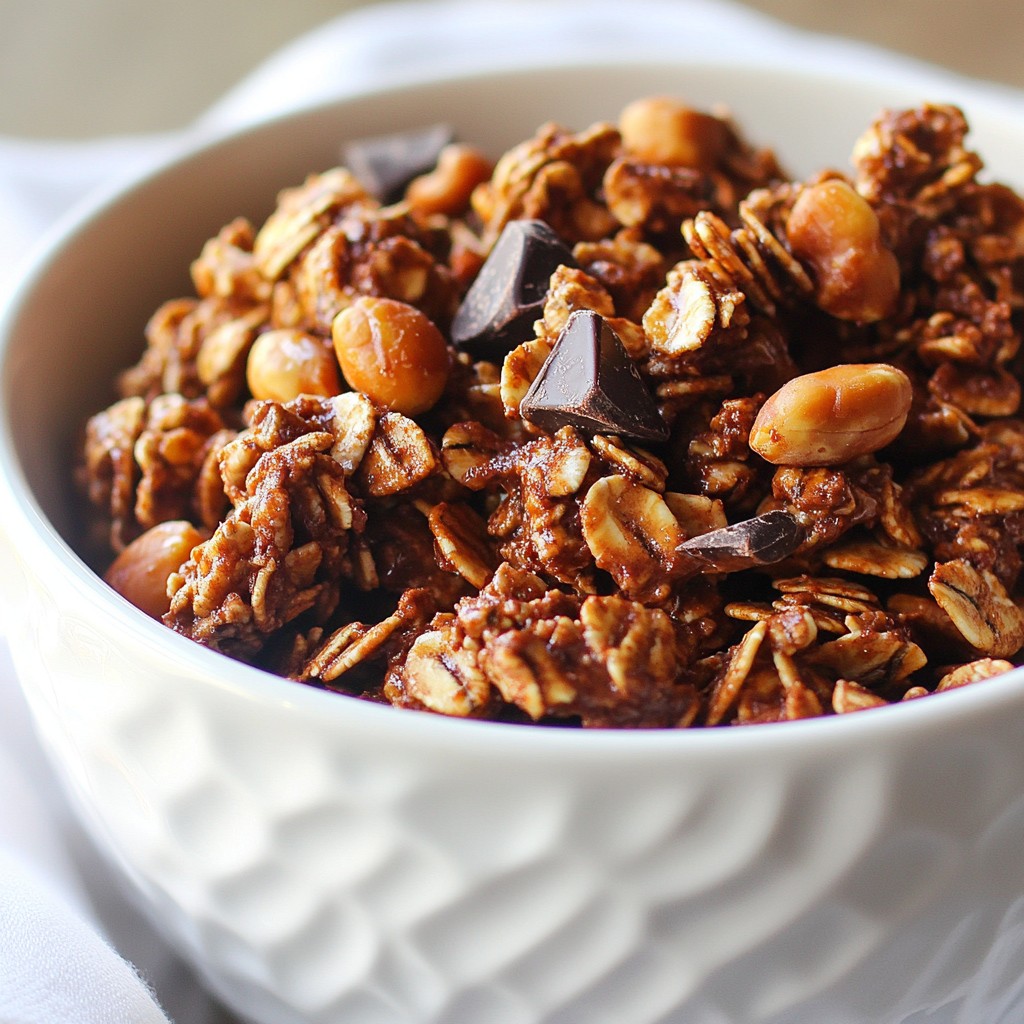
Are you craving a delicious snack that combines chocolate and peanut butter? My Chocolate Peanut Butter Granola recipe is simple and satisfying! With just a few key ingredients like rolled oats, peanuts, and cocoa powder, you can whip up a treat that's perfect for breakfast or an on-the-go snack. Get ready to learn how to make this tasty and nutritious granola that everyone will love!
Why I Love This Recipe
- Delicious Flavor Combination: The rich chocolate and nutty peanut butter create an irresistible taste that satisfies your sweet tooth while providing a healthy kick.
- Easy to Make: This granola comes together quickly with minimal effort, making it a perfect choice for busy mornings or spontaneous snack cravings.
- Customizable: Feel free to adjust the sweetness, add different nuts, or include dried fruits to tailor it to your personal preferences.
- Healthy Snack Option: Packed with whole grains and healthy fats, this granola provides lasting energy without the guilt of processed snacks.
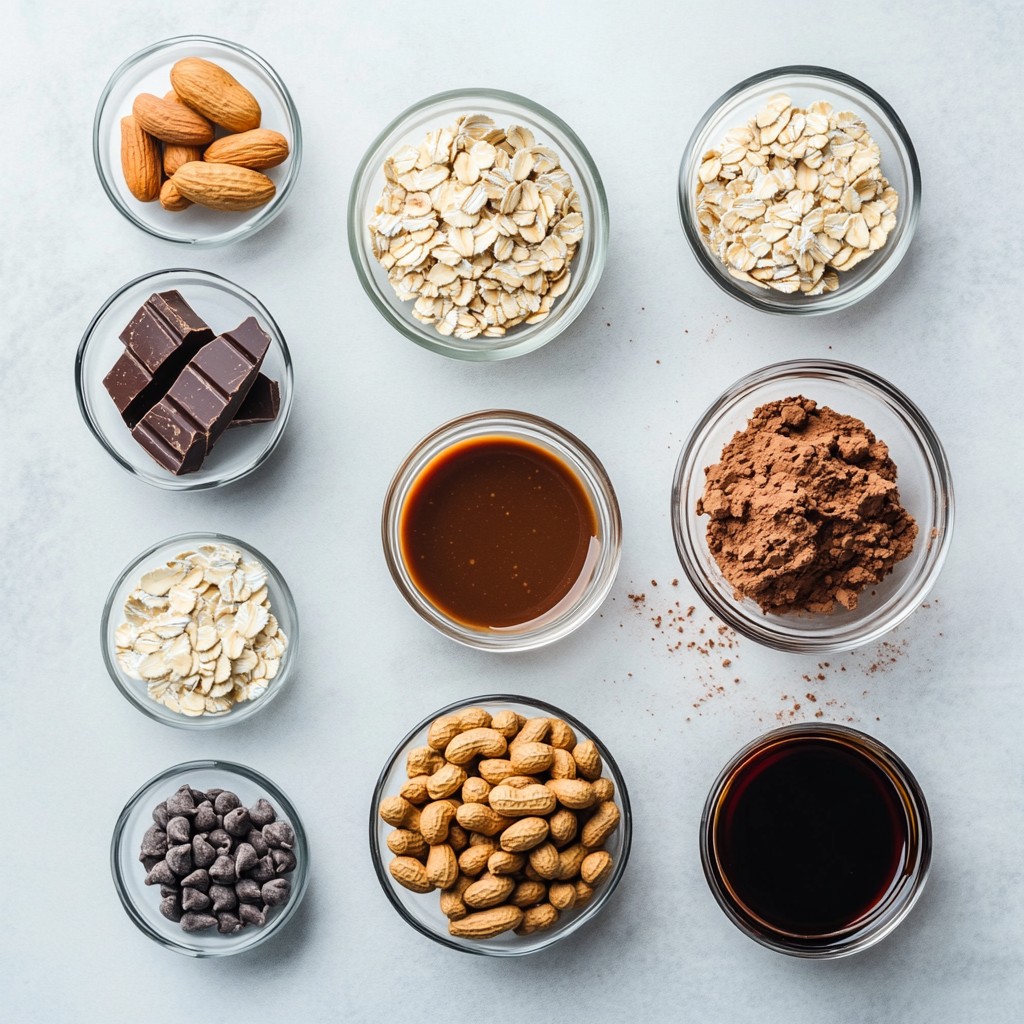
Ingredients
Detailed List of Ingredients
- 2 cups rolled oats
- 1 cup unsalted peanuts, coarsely chopped
- 1/2 cup unsweetened cocoa powder
- 1/2 cup peanut butter (smooth or crunchy)
- 1/2 cup maple syrup or honey
- 1/4 cup coconut oil, melted
- 1/2 teaspoon vanilla extract
- 1/2 teaspoon sea salt
- 1/2 cup dark chocolate chips (optional)
To make chocolate peanut butter granola, gather these fresh ingredients. Rolled oats serve as the base. They provide a chewy texture and heartiness. You can use either smooth or crunchy peanut butter. This choice adds a personal touch. Unsalted peanuts give a nice crunch and nutty flavor. Unsweetened cocoa powder offers a rich chocolate taste without extra sugar.
Maple syrup or honey sweetens the granola. Use what you have on hand. Coconut oil helps to bind the granola and adds healthy fats. Vanilla extract enhances the flavor. A touch of sea salt balances the sweetness. Lastly, dark chocolate chips can make it even more indulgent. Adding them is optional but recommended for chocolate lovers.
These ingredients work together to create a delicious snack or breakfast. Each one plays a vital role in the final taste and texture.
Step-by-Step Instructions
Preparation Steps
- Preheat your oven to 350°F (175°C). Line a large baking sheet with parchment paper.
- In a big bowl, mix the rolled oats, chopped peanuts, cocoa powder, and sea salt. Make sure they blend well.
- In another bowl, whisk the peanut butter, maple syrup (or honey), melted coconut oil, and vanilla extract. Ensure it’s smooth and lump-free.
- Pour the wet mix over the dry mix. Fold gently with a spatula until every oat and peanut is coated.
Baking Process
- Spread the granola mixture evenly on the prepared baking sheet.
- Bake for 20-25 minutes. Stir the granola halfway through to help it brown evenly. It should smell amazing and look golden brown when done.
Cooling and Storage
- Take the granola out of the oven and let it cool on the baking sheet. This helps it get crisp.
- If you want, sprinkle dark chocolate chips over the warm granola. Fold them in gently while it’s still warm.
- Once it’s cool, break the granola into clusters. Store them in an airtight container to keep them fresh.
Tips & Tricks
Ingredient Substitutions
- Alternatives for peanut butter: If you're allergic to peanuts, you can use almond butter or sunflower seed butter. Both give a nice flavor and similar texture.
- Sweetness adjustments: Maple syrup works great, but you can also use honey or agave nectar. Adjust the amount based on your taste. Less sweet? Use less syrup!
Achieving Perfect Texture
- Tips for cluster formation: To get those crunchy clusters, make sure to pack the granola tightly on the baking sheet. This helps it stick together.
- Cooling techniques for crispiness: After baking, let the granola cool completely on the sheet. This step is key for that perfect crunch. Don’t rush it!
Serving Suggestions
- Ideas for pairing with yogurt: Serve your granola with creamy yogurt. Add fresh fruits like berries or bananas for extra flavor.
- On-the-go snack options: Scoop some granola into a small container for a quick snack. It’s great for busy days!
Pro Tips
- Choose Your Sweetness: Adjust the amount of maple syrup or honey based on your taste preference. For a less sweet granola, reduce the sweetener slightly.
- Oven Watch: Keep an eye on your granola while it bakes, as oven temperatures can vary. Stir it halfway through to prevent burning and ensure an even bake.
- Flavor Variations: Experiment with different nuts or seeds in place of peanuts. Almonds, sunflower seeds, or cashews can add unique flavors and textures.
- Storage Savvy: Store your granola in an airtight container at room temperature to maintain its crispness. It can last up to two weeks if stored properly.
Variations
Flavor Additions
You can change the flavor of your granola easily. Try adding different nuts or seeds. Almonds, walnuts, or pumpkin seeds work well. They not only add taste but also give you more crunch. You can also add dried fruits. Raisins, cranberries, or banana chips can boost sweetness and flavor. They are perfect for balancing the rich chocolate and peanut butter.
Dietary Modifications
If you want a vegan option, use maple syrup instead of honey. Maple syrup gives a nice flavor and sweetness. For those who need gluten-free options, choose certified gluten-free oats. This makes the granola safe for everyone to enjoy. These simple swaps keep the taste great while meeting your dietary needs.
Sweetness Levels
You can adjust the sweetness based on your taste. If you like it sweeter, add more maple syrup or honey. For a low-sugar version, try using natural sweeteners like stevia or monk fruit. These options can help you enjoy this treat without too much sugar. Adjusting sweetness makes this recipe flexible for all kinds of diets.
Storage Info
Best Storage Practices
To keep your granola fresh, use airtight containers. Glass jars work well, too. They help avoid moisture and keep your granola crunchy. Homemade granola lasts about one to two weeks stored this way. If you see any signs of moisture, it’s best to toss it.
Freezing Granola
You can freeze granola for longer storage. Start by spreading it out on a baking sheet. Let it cool completely before transferring it to a freezer-safe bag. Squeeze out air before sealing. To enjoy your granola later, take it out and let it thaw at room temperature. This keeps its crunchy texture.
Signs of Spoilage
Check your granola closely. If you see mold or a strange smell, it’s bad. Taste a small piece; if it tastes off, throw it away. To keep granola fresh, store it away from heat and moisture. Use small batches to avoid waste. Keep your granola tasty and safe!
FAQs
Can I use quick oats instead of rolled oats?
Yes, you can use quick oats. Quick oats cook faster and may change the texture. The granola may be less crunchy, but it will still taste great.
How can I make this granola low-sugar?
To make this granola low-sugar, reduce the maple syrup or honey. You can also use a sugar substitute like stevia or monk fruit. Adjust to your taste, but be mindful of the moisture level.
What are some good toppings for chocolate peanut butter granola?
You can try these tasty toppings:
- Fresh berries
- Sliced bananas
- Yogurt
- Milk
- Nuts or seeds
- Dried fruit
These add flavor and texture to your granola.
Can this recipe be doubled or halved?
Yes, you can easily double or halve this recipe. Just adjust the ingredient amounts accordingly. Use a larger or smaller baking sheet as needed for even baking.
Is it possible to make this granola without chocolate?
Absolutely! Skip the cocoa powder if you want a peanut butter granola. You can add more nuts or seeds for extra crunch and flavor.
You now have a simple and tasty granola recipe. We discussed the ingredients, step-by-step instructions, and helpful tips. You can change the recipe to fit your tastes or diet needs. Remember to store your granola properly for the best shelf life. Enjoy it with yogurt or as a quick snack. With this easy guide, you can create a nutritious treat anytime. Your kitchen can now be a granola-making hub!