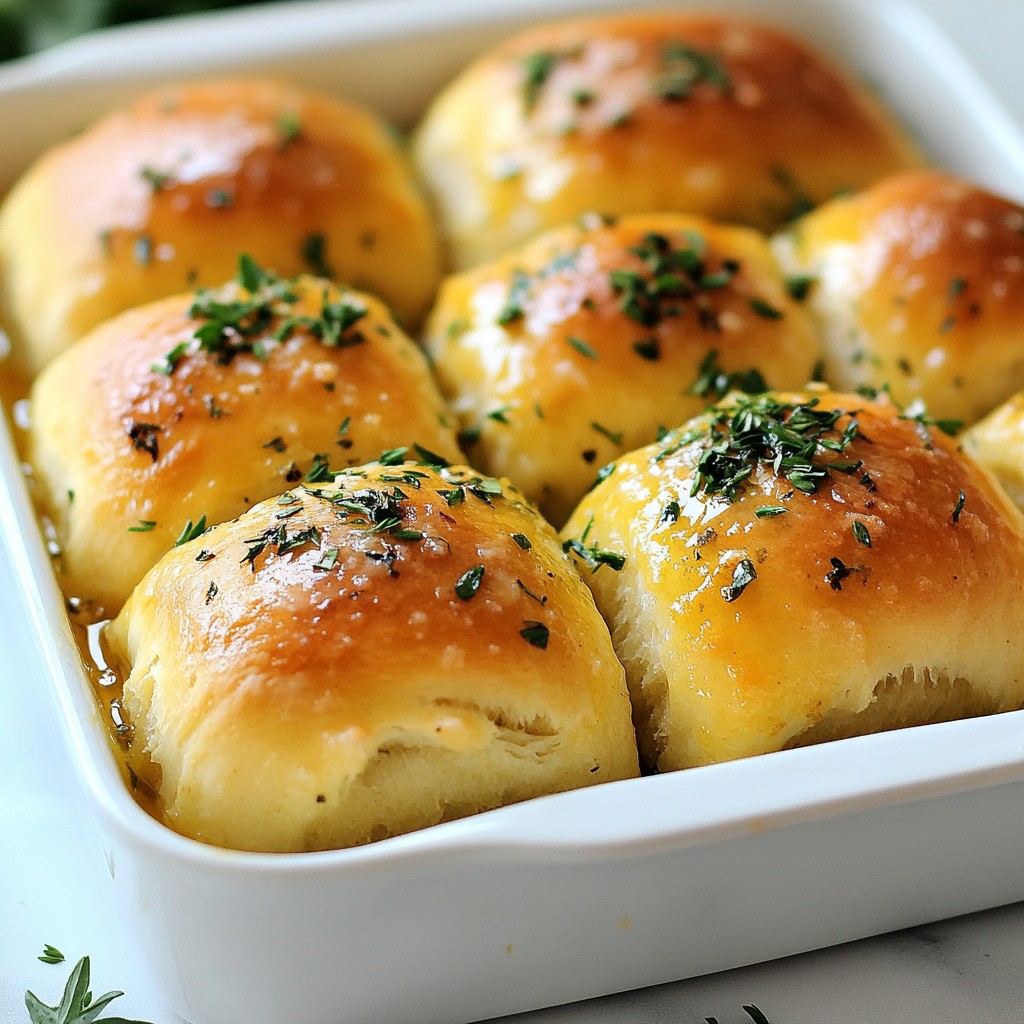
Are you ready to elevate your dinner table with warm, fluffy Garlic Herb Dinner Rolls? This simple and tasty recipe promises to be a crowd-pleaser! With just a handful of ingredients, I'll guide you step-by-step to create rolls that are soft, flavorful, and perfect for any meal. Don't underestimate the power of fresh herbs, as they can turn a basic roll into something special. Let’s get started!
Why I Love This Recipe
- Fresh and Flavorful: The combination of garlic and fresh herbs infuses these dinner rolls with a delightful aroma and taste that elevates any meal.
- Easy to Make: This recipe is straightforward, making it perfect for both beginner bakers and those looking for a quick homemade bread option.
- Perfect for Any Occasion: Whether it's a family dinner, holiday gathering, or a casual get-together, these rolls are a crowd-pleaser.
- Warm and Comforting: There's nothing like the taste of freshly baked bread straight from the oven to create a cozy and inviting atmosphere.
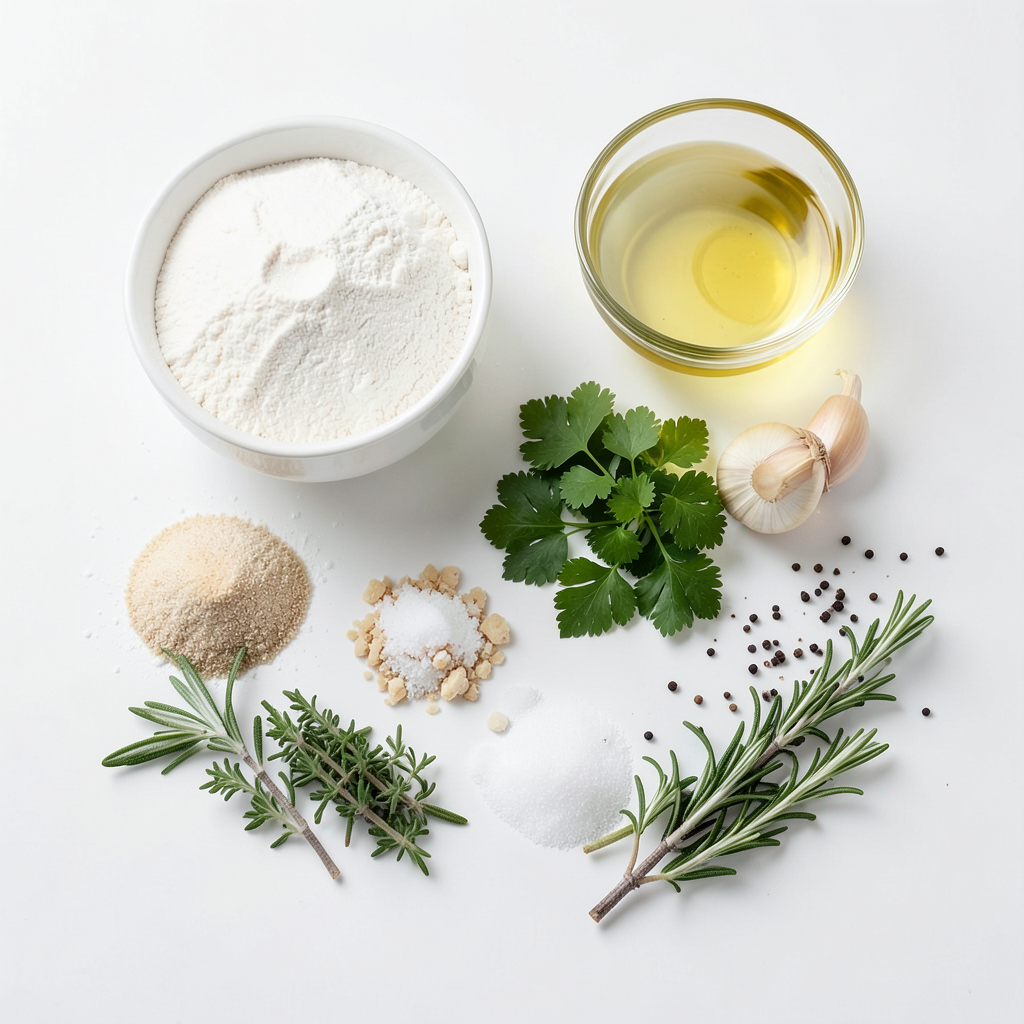
Ingredients
List of Ingredients
- 3 ½ cups all-purpose flour
- 1 packet (2 ¼ teaspoons) instant yeast
- 1 tablespoon granulated sugar
- 1 teaspoon salt
- 1 cup warm water (approximately 110°F)
- 2 tablespoons olive oil, plus extra for brushing
- 4 cloves garlic, finely minced
- 2 tablespoons fresh parsley, finely chopped
- 1 tablespoon fresh rosemary, finely chopped
- 1 tablespoon fresh thyme leaves
- ½ teaspoon freshly ground black pepper
Key Ingredient Insights
Using fresh ingredients makes a big difference. The garlic adds a punch of flavor. Fresh herbs like parsley, rosemary, and thyme brighten the rolls. They create a lovely aroma and enhance taste. Instant yeast speeds up the process. It helps the dough rise quickly, giving you fluffy rolls. Warm water activates the yeast. It is key for a good rise. Olive oil adds moisture and flavor, ensuring soft rolls.
Substitutions for Common Ingredients
Do not have all-purpose flour? You can use bread flour for a chewier texture. If you lack fresh herbs, dried ones work too. Use about one-third of the amount. No instant yeast? Active dry yeast is fine; just proof it first. Out of olive oil? Melted butter or any neutral oil can replace it.
Step-by-Step Instructions
Activating the Yeast
To begin, take a large mixing bowl. Add warm water, granulated sugar, and instant yeast. Stir gently and let it sit for 5 minutes. You will see bubbles and foam. This means your yeast is active and ready.
Mixing the Dough
In another bowl, whisk together all-purpose flour and salt. Gradually add this dry mix to the yeast mixture. Stir until you form a rough dough. This is the base for your rolls.
Kneading Techniques
Next, transfer the dough to a floured surface. Knead the dough for 8 to 10 minutes. You want it smooth and elastic. The dough should feel slightly sticky but not too wet. This step is key for good texture.
Rising Process
Lightly oil a large bowl and place the kneaded dough inside. Cover it with a damp cloth or plastic wrap. Find a warm spot for it to rise. Let it sit for about 1 hour until it doubles in size. This is when the dough gets fluffy.
Shaping the Rolls
Once your dough has risen, gently punch it down. This releases any trapped air. Divide the dough into 12 equal pieces. Shape each piece into a smooth ball. This helps form even rolls that bake well.
Baking the Rolls
Grease a baking dish and place the dough balls close together. Cover them again and let them rise for another 30 minutes. Preheat your oven to 375°F (190°C) during this time. After the second rise, brush the tops with olive oil. Bake for 20 to 25 minutes until golden brown. The rolls should sound hollow when tapped. Enjoy the smell as they bake!
Tips & Tricks
Achieving the Perfect Texture
To get the best rolls, knead the dough well. This makes it soft and airy. Use a light touch when shaping the rolls. Too much pressure can make them dense. Let the dough rise in a warm spot. This helps the yeast work better. Always check the dough. It should be smooth and slightly tacky.
Enhancing Flavor with Extra Herbs
For more flavor, add extra herbs. You can try oregano, basil, or even chives. Fresh herbs give a nice touch. If you love garlic, add more minced cloves. You can also mix in grated cheese for a savory kick. Experimenting helps you find your favorite blend.
Troubleshooting Common Issues
If your rolls are too hard, you might have overbaked them. Keep an eye on the oven time. If they don’t rise, check your yeast. It should be fresh and active. Too much salt can also slow down the yeast. Always mix salt with the flour first. This keeps it away from the yeast until ready to combine.
Pro Tips
- Activate Your Yeast: Ensure your water is at the right temperature, around 110°F, to properly activate the yeast. Too hot can kill it, while too cold will not activate it.
- Kneading Technique: Knead the dough until it is smooth and elastic. This will help develop the gluten, giving your rolls the perfect texture.
- Second Rise Matters: Don't skip the second rise! It allows the rolls to become light and fluffy, improving the final texture and flavor.
- Herb Variations: Feel free to experiment with different herbs according to your preference. Thyme, oregano, or basil can be great substitutes or additions!
Variations
Adding Cheese or Other Herbs
You can take your garlic herb dinner rolls to the next level by adding cheese. Cheddar or mozzarella works great. Just shred the cheese and mix it in with the dough after adding the herbs. For a twist, try adding grated Parmesan on top before baking. This gives your rolls a rich flavor and a nice, crispy crust.
You can also mix in different herbs. Basil or oregano brings a unique taste. You can use dried herbs if fresh ones are not available. Just remember to adjust the amount, as dried herbs are stronger in flavor.
Making Whole Wheat Garlic Herb Rolls
If you want a healthier option, consider using whole wheat flour. Replace half of the all-purpose flour with whole wheat flour. This adds fiber and nutrients to your rolls. The texture will be a bit denser, but they will still taste amazing. Add a bit more water if needed, as whole wheat flour absorbs more moisture.
Infusing Additional Flavors
For more flavor, think about adding roasted garlic. Roasting garlic makes it sweet and creamy. Just mash it up and mix it into the dough. You can also add some sun-dried tomatoes or olives for a Mediterranean twist. These additions can make your rolls exciting and unique!
Feel free to experiment. The kitchen is your playground!
Storage Info
How to Store Leftover Rolls
To keep leftover rolls fresh, place them in an airtight container. This helps lock in moisture. Store them at room temperature for up to three days. If you want to keep them longer, consider freezing them. Avoid storing them in the fridge; it can dry them out.
Reheating Tips for Freshness
When it’s time to enjoy your rolls again, you can easily reheat them. Preheat your oven to 350°F (175°C). Place the rolls on a baking sheet. Cover them with foil to keep them soft. Heat for about 10-15 minutes until warm. You can also microwave them for about 15-20 seconds, but they may get chewy.
Freezing Instructions
To freeze your rolls, allow them to cool completely first. Wrap each roll tightly in plastic wrap. Then, place the wrapped rolls in a freezer-safe bag. They will stay good for up to three months. When ready to eat, thaw them in the fridge overnight. Reheat as needed for that fresh-baked taste.
FAQs
Can I make Garlic Herb Dinner Rolls ahead of time?
Yes, you can prepare the dough ahead of time. After kneading, place it in the fridge. Let it chill for up to 24 hours. When ready to bake, take it out and allow it to rise at room temperature for about an hour. Then, shape and bake as usual. This saves time and still gives you fresh rolls.
What are some good pairings for these dinner rolls?
These rolls pair well with many dishes. Try them with soups, stews, or salads. They also go great with pasta or as a side for grilled meats. You can even serve them with herb butter or olive oil for dipping. The flavor of the rolls enhances any meal.
How can I make these rolls without garlic?
You can skip the garlic if you'd like. For extra flavor, consider adding other herbs. Use more parsley, thyme, or rosemary. You can also add spices like paprika or cumin for a unique twist. The rolls will still be tasty without garlic.
What should I do if my dough doesn’t rise?
If your dough doesn’t rise, check the yeast. Make sure it is fresh and active. The water should be warm, not hot. If your kitchen is cold, try placing the dough in a warmer spot. You can also cover it with a blanket to keep it warm.
Can I use active dry yeast instead of instant yeast?
Yes, you can use active dry yeast. Just use the same amount. However, you need to activate it first. Mix it with warm water and sugar. Let it sit for about 5 to 10 minutes until it bubbles. Then, add it to your dough mixture.
In this blog post, we've covered everything about making Garlic Herb Dinner Rolls. We talked about the key ingredients and offered tips for substitutions. You learned the step-by-step process, from activating yeast to baking the rolls. I shared tips for texture, flavor enhancement, and solutions for common problems. We also explored variations and how to store leftovers. Making these rolls is easy and rewarding. With these insights, you can bake delicious rolls with confidence. Enjoy your kitchen time and share your tasty results!