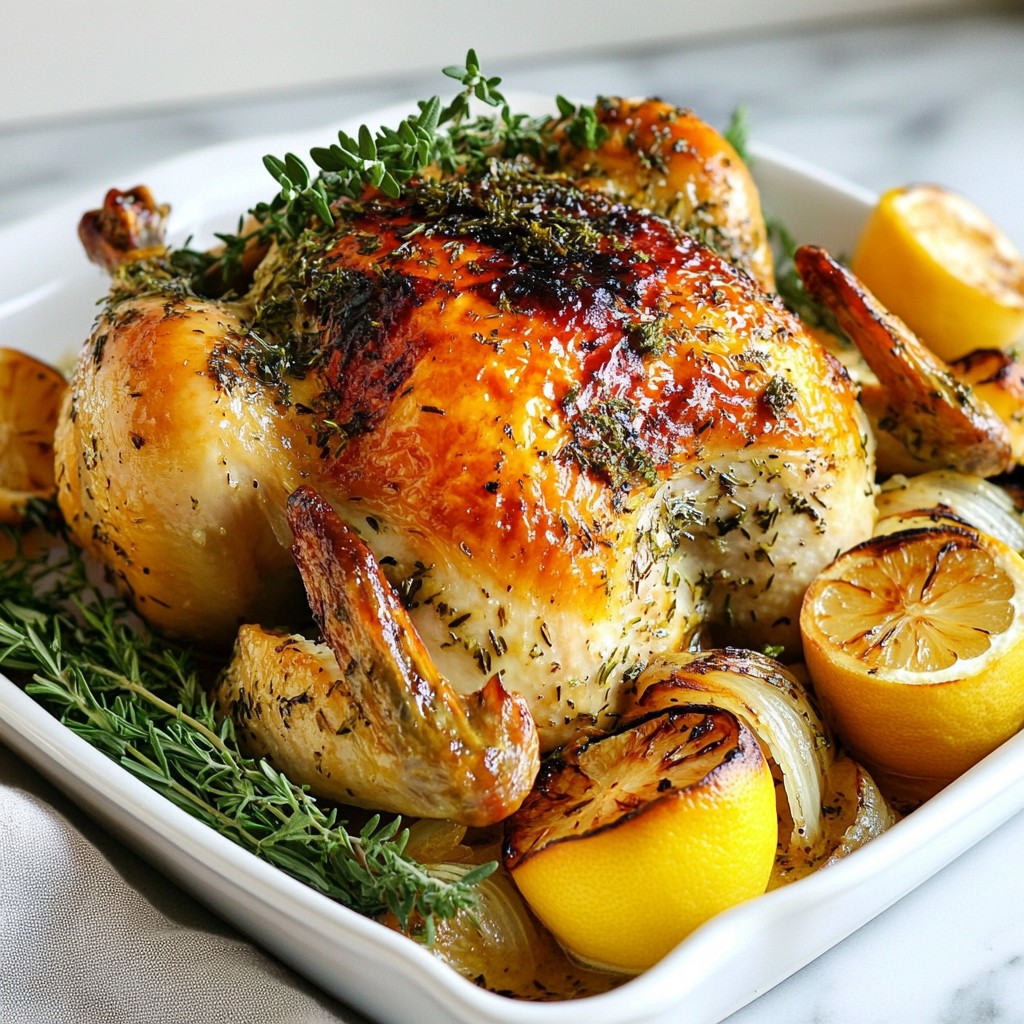
Looking for a delicious way to impress your family at dinner? You’ve found it! My Herb Garlic Butter Roasted Chicken is juicy, flavorful, and easy to make. With a few fresh ingredients and simple steps, you’ll create a dish that’s perfect for any occasion. Let’s dive into the ingredients and get started on your path to roasting greatness!
Why I Love This Recipe
- Flavor Explosion: The combination of garlic, fresh herbs, and lemon creates a mouthwatering flavor profile that makes this chicken unforgettable.
- Simple Preparation: With just a few easy steps, you can prepare a delicious roasted chicken that looks and tastes gourmet.
- Perfectly Juicy: The herb garlic butter ensures that the chicken remains juicy and tender, making every bite a delight.
- Impressive Presentation: Serving this beautifully roasted chicken garnished with fresh herbs and roasted vegetables is sure to impress your guests.
Ingredients
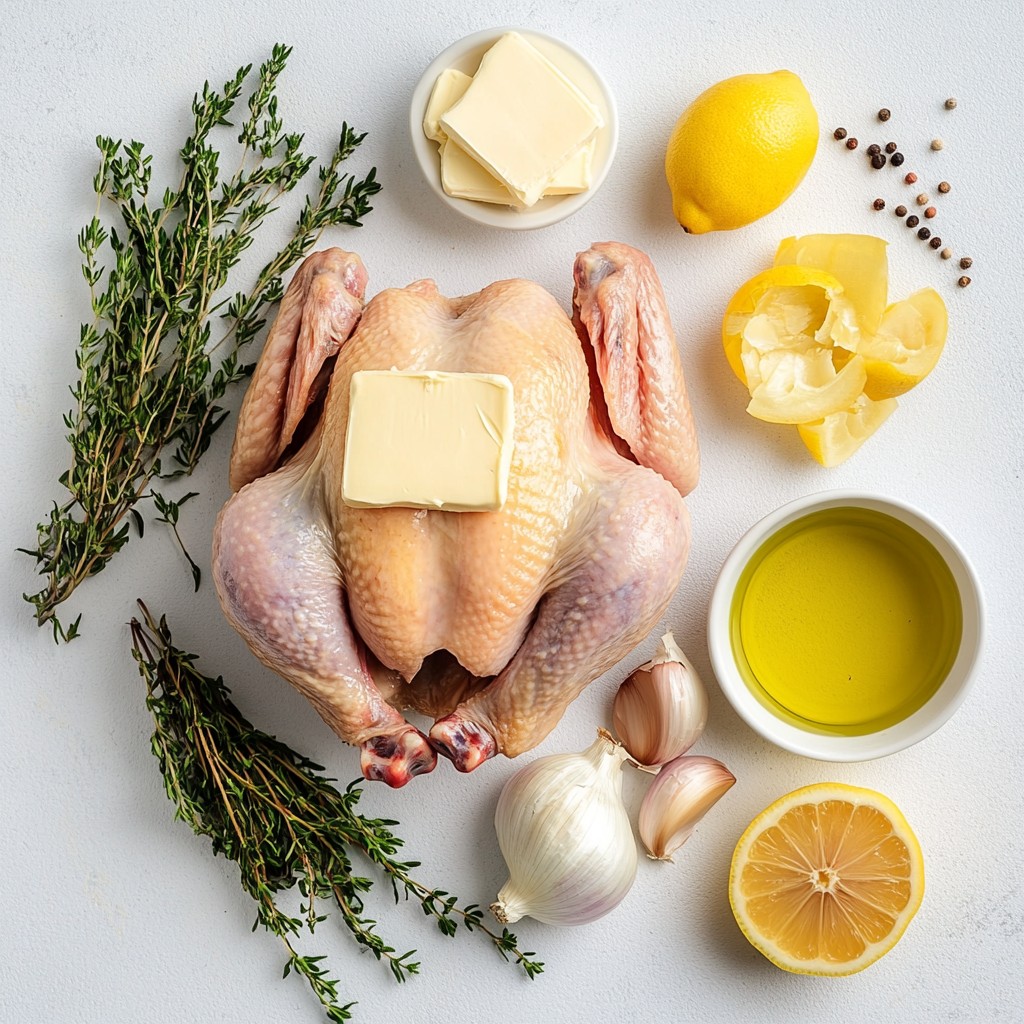
List of ingredients for Herb Garlic Butter Roasted Chicken
- Whole chicken: Use a 4-5 pound whole chicken. This size cooks evenly and stays juicy.
- Butter: You need 1/2 cup of unsalted butter. Make sure it is softened to room temperature. This helps it mix well with herbs.
- Herbs: Use fresh rosemary, thyme, and parsley. Each herb adds a unique taste. Chop them finely to release their flavors.
- Lemon: You will need one lemon. Use the zest and juice for bright flavor. This adds freshness to the dish.
- Onion: A quartered onion will enhance the chicken's flavor. It cooks down and adds sweetness.
Gather these ingredients to create a delightful and flavorful chicken dish.
Step-by-Step Instructions
Preparation steps for roasting the chicken
Preheating the oven First, set your oven to 425°F (220°C). This high heat helps crisp the skin.
Mixing the herb garlic butter In a bowl, blend 1/2 cup of softened butter with 6 minced garlic cloves. Add 2 tablespoons each of chopped rosemary, thyme, and parsley. Stir in the zest and juice of 1 lemon. Don’t forget a pinch of salt and pepper. Mix until smooth.
Preparing the chicken skin Take your whole chicken, about 4-5 pounds. Pat it dry with paper towels. This step is key for a great roast.
Stuffing the chicken cavity Loosen the skin on the chicken breast using your fingers. Be gentle! Spread half of the herb garlic butter under the skin. In the cavity, add quartered onion and lemon. Season with salt and pepper.
Cooking the chicken
Applying the herb garlic butter Rub the remaining herb garlic butter all over the chicken. This adds flavor and moisture.
Seasoning the chicken Drizzle olive oil over the chicken. Sprinkle with salt and pepper for a tasty crust.
Roasting techniques and positioning Place the chicken breast-side up on a roasting rack in a pan. If you don’t have a rack, use crumpled aluminum foil to lift it.
Final steps
Monitoring doneness with a meat thermometer Roast the chicken for about 1 hour and 15 minutes. Check the thickest part of the breast. It should reach 165°F (75°C).
Basting tips Halfway through cooking, baste the chicken with its own juices. This keeps it moist and flavorful.
Resting the chicken post-cooking After roasting, let the chicken rest for 15 minutes. This step helps the juices settle for better flavor.
Tips & Tricks
Achieving crispy skin
To get that perfect crispy skin, start by drying the chicken. Pat it dry with paper towels. This removes moisture and helps the skin crisp up. Next, use the right amount of oil. A light drizzle of olive oil on the skin boosts crispiness.
Enhancing flavor
You can add more flavor with different seasonings. Try smoked paprika or garlic powder for depth. Fresh herbs can also boost taste. After roasting, let the chicken rest for 15 minutes. This step is key for juicy meat. Resting allows the juices to soak back in.
Cooking alternatives
You can cook this chicken in many ways. If you prefer, grill it for a smoky flavor. Roasting in the oven is the classic method for crispy skin. Use a roasting rack for even cooking. If you don’t have one, crumple aluminum foil as a riser. This helps the heat circulate.
Pro Tips
- Resting the Chicken: Allowing the chicken to rest for 15 minutes after roasting lets the juices redistribute, ensuring every bite is juicy and flavorful.
- Flavor Infusion: For an extra burst of flavor, try adding a few cloves of garlic and some fresh herbs to the cavity of the chicken before roasting.
- Check the Temperature: Always use a meat thermometer to check the internal temperature. The chicken is safe to eat when it reaches 165°F (75°C) in the thickest part of the breast.
- Basting for Moisture: Baste the chicken with its own juices halfway through cooking to enhance moisture and flavor, resulting in a beautifully roasted bird.
Variations
Herbs and spices alterations
You can switch up the herbs in this recipe to suit your taste. Try using basil or oregano instead of rosemary. You can also mix in some dill for a fresh twist. If you want more heat, add red pepper flakes or smoked paprika. For a citrusy kick, blend in zest from lime or orange.
Dietary adaptations
If you're looking for low-fat options, use a blend of butter and olive oil. This keeps the rich flavor but cuts down on fat. To make this dish gluten-free, ensure any additional ingredients, like sauces or sides, are gluten-free. This way, everyone can enjoy the meal.
Serving suggestions
Pair your roasted chicken with sides like mashed potatoes or roasted vegetables. A fresh salad can add a crunchy contrast. For sauces, a simple gravy or a homemade herb sauce works great. To impress guests, serve the chicken on a big platter. Garnish it with fresh herbs and the roasted lemon and onion. This makes for a colorful and inviting dish.
Storage Info
Proper cooling and storage techniques
To cool your chicken, let it sit at room temperature for about 30 minutes. This helps it cool down evenly. After that, you can slice it or leave it whole for storage. Place the chicken in an airtight container or wrap it tightly in foil. This keeps the chicken fresh.
Recommended containers for leftovers
Use glass or plastic containers with tight-fitting lids. These containers prevent air from getting in. You can also use resealable plastic bags if you prefer. Just make sure to remove as much air as possible before sealing.
Reheating methods
For reheating, the oven works best. Preheat your oven to 350°F (175°C). Place the chicken in a baking dish and cover it with foil to keep it moist. Heat for about 20-30 minutes until it warms through.
Best practices for reheating to maintain quality
Keep the chicken covered while reheating. This keeps it juicy and prevents drying out. If you want crispy skin, uncover it for the last 5-10 minutes.
Creative ways to use leftovers
You can use leftover chicken in many ways. Shred it for tacos or salads. Add it to soups or stir-fries. This adds flavor and makes meals quick and easy.
Shelf life details
Cooked chicken lasts about 3 to 4 days in the fridge. Store it in the container mentioned earlier. If you want it to last longer, freezing is a great option.
Freezing tips and timeframes
To freeze, wrap the chicken tightly in plastic wrap or foil. Then place it in a freezer-safe bag. It can last up to 4 months in the freezer. When you're ready to eat, just thaw it in the fridge overnight.
FAQs
Common questions about Herb Garlic Butter Roasted Chicken
How long to cook a 4-5 lb chicken? Cook a 4-5 lb chicken for about 1 hour and 15 minutes. Use a meat thermometer to check the internal temperature. It should reach 165°F in the thickest part of the breast for safety.
Can I use frozen chicken for this recipe? It is best to use fresh or thawed chicken. Cooking frozen chicken takes much longer and may not cook evenly. Thaw it in the fridge overnight for the best results.
What should I do if the chicken skin isn’t crispy? If the skin isn't crispy, try drying the chicken well before cooking. Use paper towels to remove moisture. Also, ensure you use enough oil and cook at a high temperature.
Is it necessary to baste the chicken? Basting helps keep the chicken moist and adds flavor. While it's not strictly necessary, doing it halfway through cooking can enhance the taste and juiciness.
What is the best way to carve a roasted chicken? To carve a roasted chicken, let it rest for 15 minutes first. Start by removing the legs and thighs, then slice the breast meat. Use a sharp knife for clean cuts and serve with your favorite sides.
Herb Garlic Butter Roasted Chicken is a simple dish with amazing results. We discussed key ingredients like herbs, lemon, and onion. You learned to prepare, roast, and serve the chicken perfectly. The tips for crispy skin and flavorful options made the recipe versatile. Remember, resting the chicken is key to juicy meat. Store leftovers safely and enjoy tasty reheats. This dish can impress anyone. Try these techniques and make it your own. Happy cooking!