Are you ready to dive into a dish that perfectly balances sweet and tangy flavors? Sweet and Sour Chicken is not just a meal; it’s an experience. In this article, I’ll walk you through the simple ingredients, easy steps, and helpful tips to create this mouthwatering dish. Whether you’re a kitchen novice or a seasoned chef, you will master this crowd-pleaser in no time. Let's get started!
Why I Love This Recipe
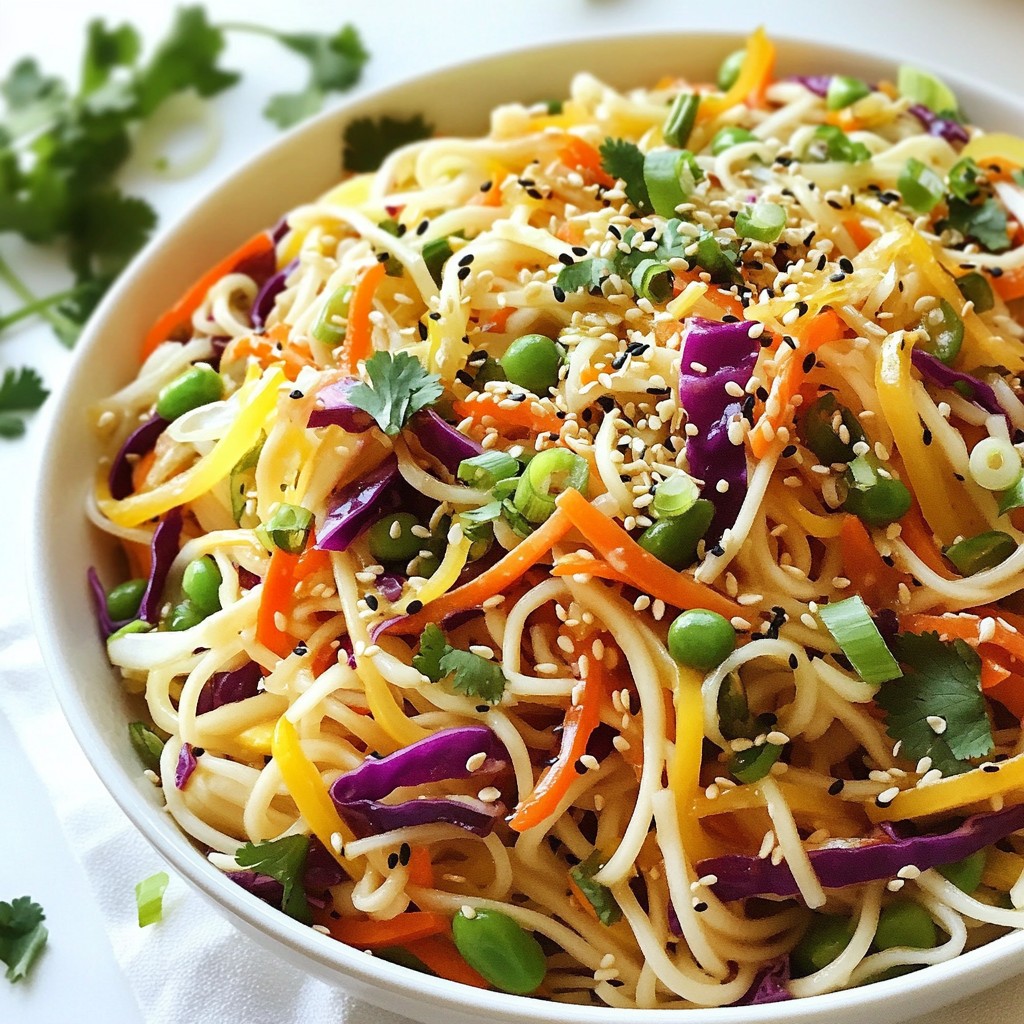
- Delicious Flavor Combination: This recipe perfectly balances the sweetness of pineapple with the tanginess of the sauce, creating a delightful explosion of flavors in every bite.
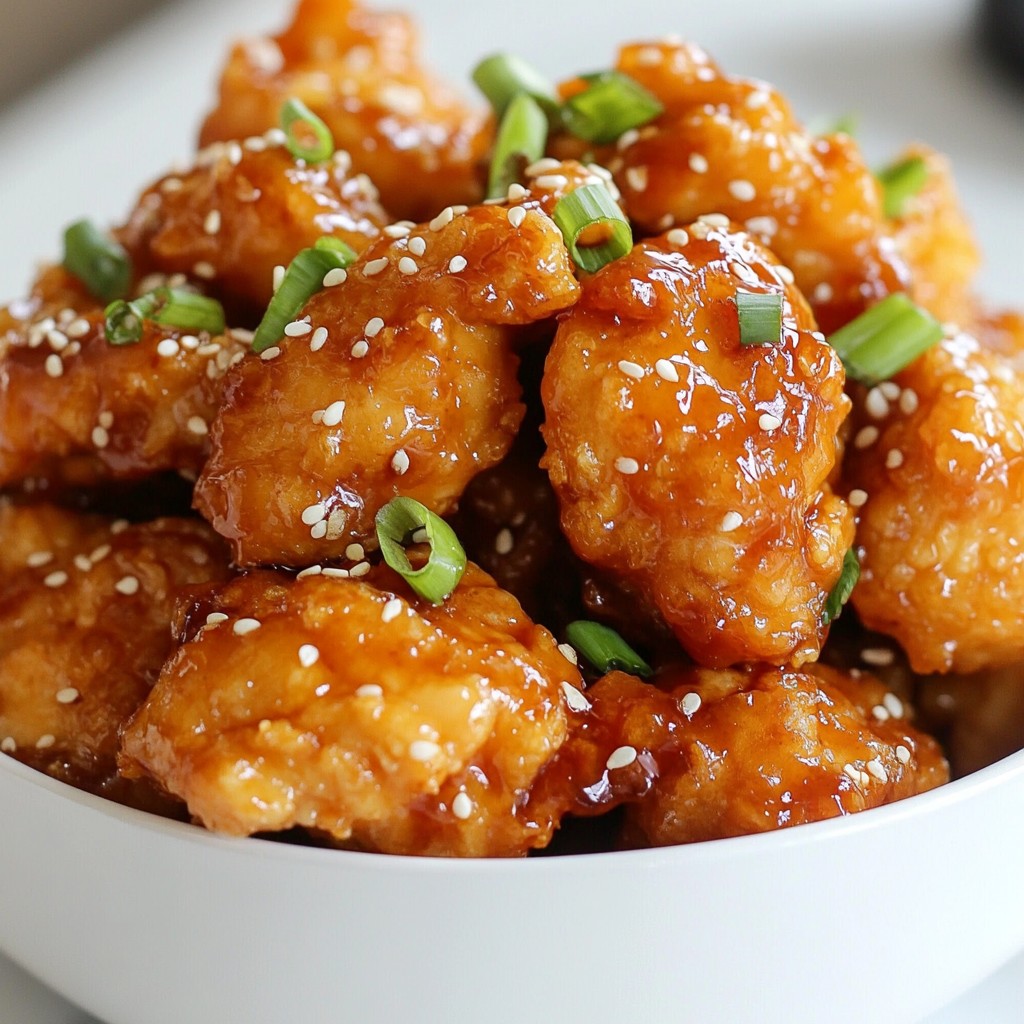
- Crispy Texture: The chicken is coated in a crunchy breadcrumb layer that adds a satisfying texture, making it a hit with both kids and adults alike.
- Quick and Easy: With a total preparation time of just 35 minutes, this dish is perfect for busy weeknight dinners without sacrificing flavor.
- Customizable Ingredients: You can easily modify the vegetables or adjust the level of sweetness in the sauce to suit your taste, making it a versatile dish for everyone.
Ingredients
Main Ingredients
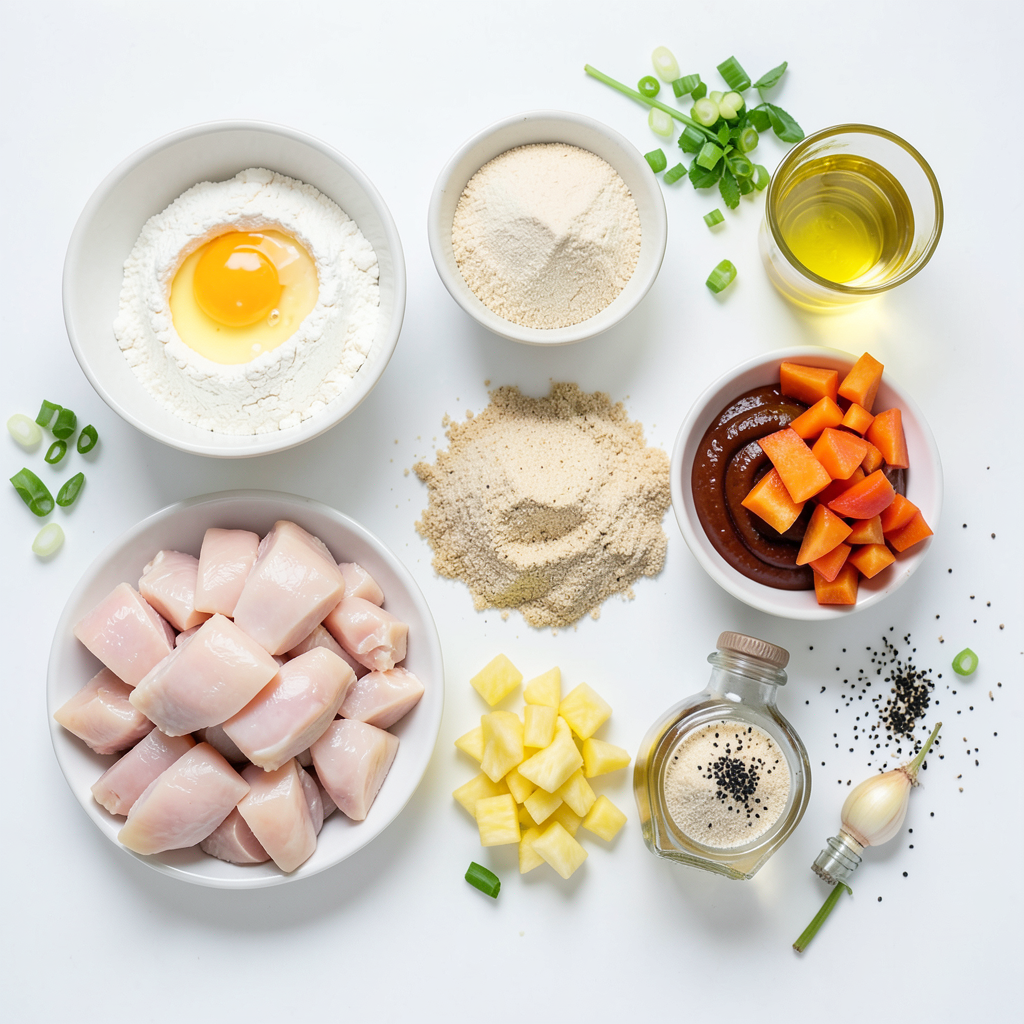
- 1 lb boneless chicken thighs, cut into bite-sized pieces
- 1/2 cup all-purpose flour
- 2 large eggs, beaten
- 1 cup breadcrumbs (panko for extra crunch, if desired)
- 1 tablespoon vegetable oil
- 1 bell pepper (red or green), diced
- 1 cup pineapple chunks (fresh or canned, drained if canned)
Sweet and Sour Sauce Ingredients
- 1/2 cup granulated sugar
- 1/3 cup apple cider vinegar
- 1/4 cup ketchup
- 2 teaspoons soy sauce
- 1 teaspoon garlic powder
Optional Garnishes
- Sesame seeds
- Sliced green onions
This dish starts with tasty chicken thighs. They are juicy and soak up flavors well. Use flour to coat the chicken. The flour helps the eggs and breadcrumbs stick. The eggs add moisture, while the breadcrumbs give a great crunch.
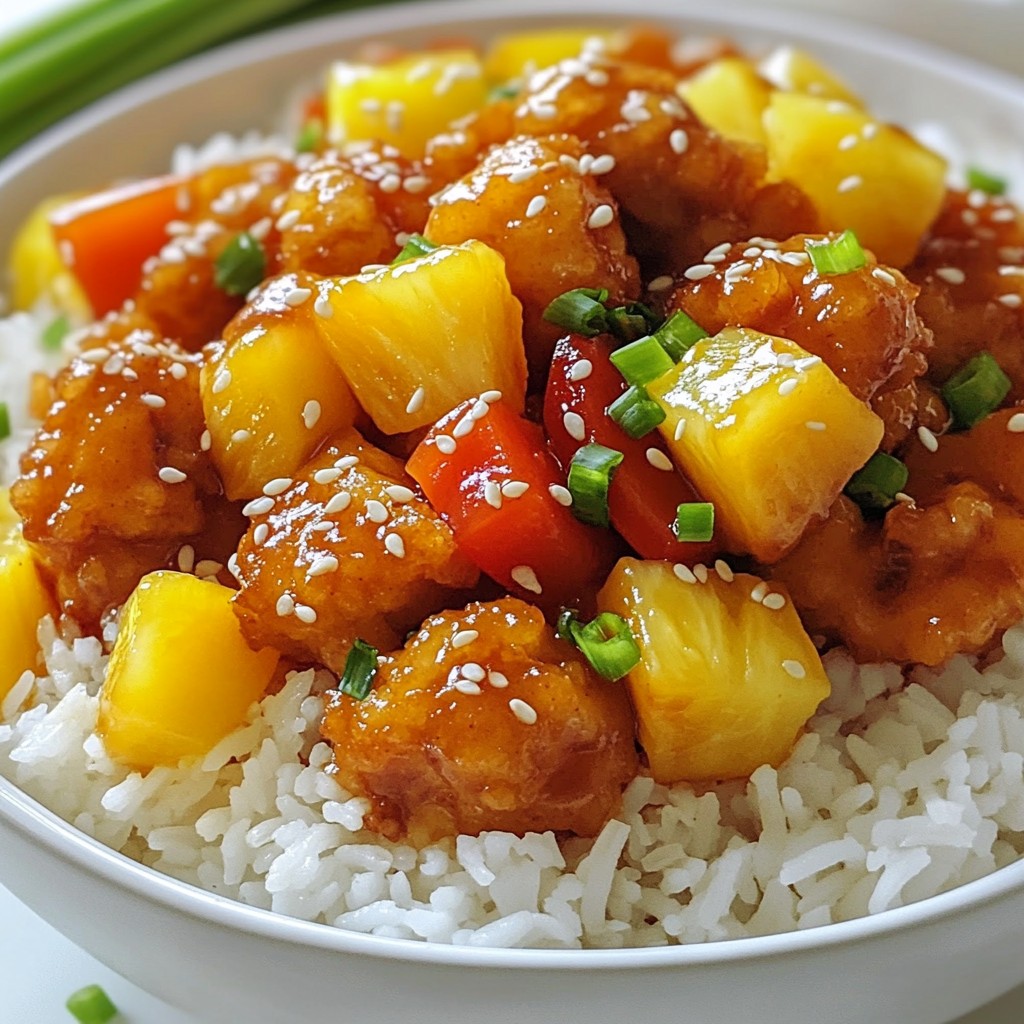
Next, we add colorful veggies. Bell peppers add sweetness and nice color. Pineapple brings a juicy and fresh flavor. They mix well with the sauce.
For the sauce, we use simple ingredients. Granulated sugar gives sweetness. Apple cider vinegar adds tang. Ketchup gives it that classic sweet and sour taste. Soy sauce adds depth, while garlic powder gives a hint of spice.
Finally, consider garnishes. Sesame seeds add crunch and a nutty flavor. Sliced green onions bring freshness and color. These extras make your dish pop!
Step-by-Step Instructions
Preparing the Chicken
- Seasoning chicken pieces: Start by taking your chicken thighs. Cut them into bite-sized pieces. Season each piece with salt and pepper. This step is key for adding flavor. Make sure each piece gets an even coat.
- Setting up the breading station: Next, set up your breading station. Grab three shallow dishes. Put flour in the first dish, beaten eggs in the second, and breadcrumbs in the third. This setup makes it easy to bread the chicken.
Cooking the Chicken
- Bread the chicken pieces: Now, take each seasoned chicken piece. First, dredge it in flour, covering it well. Then, dip it into the eggs. Let any extra egg drip off. Lastly, roll it in breadcrumbs until fully covered. Place the breaded pieces on a plate.
- Frying technique and timings: Heat vegetable oil in a large skillet over medium heat. Wait until the oil shimmers. Carefully add the breaded chicken in a single layer. Do not overcrowd the pan. Cook for 5 to 7 minutes. Turn the pieces occasionally. Look for a golden brown color. Once cooked, transfer them to a paper towel-lined plate to drain excess oil.
Making the Sweet and Sour Sauce
- Combining sauce ingredients: In a separate bowl, whisk together sugar, apple cider vinegar, ketchup, soy sauce, and garlic powder. Mix until smooth. This sauce will give the dish its signature sweet and tangy flavor.
- Simmering the sauce for thickening: Pour the sauce into the skillet with the sautéed bell peppers and pineapple. Stir well. Allow it to simmer gently for 2 to 3 minutes. This thickens the sauce and melds the flavors together.
Tips & Tricks
Achieving Perfect Texture
To get that perfect crunch, use panko breadcrumbs instead of regular ones. Panko adds a lighter, crispier texture. The size and shape of panko create air pockets during frying, which makes your chicken extra crunchy.
Next, pay attention to the oil temperature. Heat the oil until it shimmers. If the oil is too cool, the chicken will absorb too much oil. If it's too hot, the outside may burn before the inside cooks. Aim for medium heat for even frying.
Balancing Sweet and Sour Flavors
The key to sweet and sour chicken lies in balancing the flavors. Adjust the sugar and vinegar ratios to match your taste. If you prefer it sweeter, add more sugar. To make it tangier, increase the vinegar.
You can also add spicy elements. A dash of chili paste or red pepper flakes gives your dish a nice kick. This contrast makes the flavors pop and keeps each bite interesting.
Presentation Tips
For a great presentation, serve your sweet and sour chicken over a fluffy bed of rice. The rice absorbs the flavorful sauce, making every bite delightful.
Garnish your dish with sesame seeds and sliced green onions. These add color and texture, making your meal look irresistible. A well-presented dish not only tastes better but also makes your cooking shine!
Pro Tips
- Marinate for Extra Flavor: Consider marinating the chicken in a mixture of soy sauce, garlic powder, and a bit of vinegar for 30 minutes before cooking. This will enhance the overall flavor profile of the dish.
- Use Fresh Pineapple: If possible, opt for fresh pineapple instead of canned. Fresh pineapple will add a brighter flavor and a firmer texture, elevating the dish's taste.
- Control the Sauce Thickness: If you prefer a thicker sauce, let it simmer a bit longer after adding to the skillet. Keep stirring to prevent it from sticking or burning.
- Experiment with Vegetables: Feel free to add other vegetables such as snap peas or carrots for added color and nutrition. They will complement the sweet and sour flavors beautifully.
Variations
Ingredient Substitutions
You can change the protein in sweet and sour chicken. If you want something different, try tofu or shrimp. Tofu absorbs flavors well, making it tasty. Shrimp cooks quickly and adds a nice touch.
For vegetables, feel free to swap bell peppers. Broccoli, snap peas, or carrots also work great. These veggies add crunch and color. Mix and match to find your favorite combo.
Different Flavor Profiles
Want to spice things up? Add chili sauce for heat. A dash or two can make your dish exciting. You can also add crushed red pepper flakes for more kick.
Consider using different fruits too. Mango, for example, gives a tropical twist. You could even add oranges for a fresh burst. These fruits enhance the sweet and sour balance.
Healthier Version Suggestions
To make a healthier version, try baking instead of frying. Baking cuts down on oil and fat. Simply place the breaded chicken on a baking sheet and cook until golden.
For sweeteners, swap granulated sugar with honey or maple syrup. These options provide a natural sweetness. They also add unique flavors to your sauce. Enjoy a tasty, guilt-free meal!
Storage Info
Refrigeration Guidelines
Store your sweet and sour chicken in an airtight container. This keeps it fresh and tasty. It lasts in the fridge for about 3 to 4 days. Make sure to cool it down fully before putting it away. This prevents condensation from forming.
Freezing Instructions
To freeze sweet and sour chicken, let it cool first. Place it in a freezer-safe container or bag. Be sure to remove as much air as possible. This helps prevent freezer burn. It can last in the freezer for about 2 to 3 months. To thaw, move it to the fridge overnight. You can also thaw it in the microwave if you need it quickly.
Reheating Tips
To avoid sogginess, use the oven or stovetop. Preheat your oven to 350°F (175°C). Spread the chicken on a baking sheet and heat for about 15-20 minutes. If using a skillet, heat over medium heat and stir often. This keeps it crispy. Always check that the chicken is heated all the way through before serving.
FAQs
How can I make Sweet and Sour Chicken spicier?
To make Sweet and Sour Chicken spicier, you can add chili paste or pepper flakes. Start with a small amount to find your perfect heat level. Stir in the chili paste when you mix the sauce. For pepper flakes, sprinkle them over the chicken before serving. You can also toss in sliced jalapeños during cooking for an extra kick.
Can I use other meats for this recipe?
Yes, you can use other meats for this recipe. Pork or beef work well as substitutes. Cut them into bite-sized pieces, just like the chicken. If you use beef, try flank steak or sirloin for tender bites. For pork, use pork tenderloin or boneless chops. Adjust cooking times as needed to ensure everything cooks through.
Is Sweet and Sour Chicken suitable for meal prep?
Sweet and Sour Chicken is great for meal prep. You can cook it in advance and store it for the week. To prep, make the chicken and sauce, then store them separately. This helps keep the chicken crispy. Use airtight containers for best results. It lasts about 3 to 4 days in the fridge.
- Best storage practices:
- Cool the chicken completely before storing.
- Keep sauce in a separate container to avoid sogginess.
- Reheat gently on the stove or in the microwave.
This guide covered how to make sweet and sour chicken from start to finish. I outlined the main ingredients, cooking steps, and tips for the best flavor. Remember to balance your sweet and sour flavors and consider healthier methods, like baking.
Enjoy experimenting with variations and storage tips to make this dish your own. With practice, you will create a dish that your family will love. Happy cooking!