Skip to content
DisclaimerTerms Of UseGDPR PolicyCookie Policy

spoonfulsavory

  • Home
  • Drinks
  • Appetizers
  • Dinner
  • Dessert
  • About
  • Contact
  • Privacy Policy
DisclaimerTerms Of UseGDPR PolicyCookie Policy

NO-ING-IMG

- 2 cups freshly grated zucchini (about 1 medium zucchini) - 1 cup all-purpose flour - 1 cup whole wheat flour - 1 teaspoon baking powder - 1 teaspoon baking soda - 1/2 teaspoon fine sea salt - 1 teaspoon ground cinnamon - 1/2 cup unsweetened cocoa powder - 3/4 cup packed brown sugar - 1/4 cup granulated sugar - 1/2 cup vegetable oil - 2 large eggs, at room temperature - 1 tablespoon pure vanilla extract - 1 cup semi-sweet chocolate chips - 1/2 cup chopped walnuts (optional) You can swap brown sugar for coconut sugar. This change keeps sweetness but adds a hint of caramel. If you need gluten-free options, use almond flour and a gluten-free baking blend. For eggs, try flaxseed meal mixed with water. This works well in most recipes. When choosing zucchini, look for firm ones without soft spots. Fresh zucchini adds moisture and flavor. Always select high-quality chocolate chips. They should be rich and smooth. If possible, choose organic options. These ingredients enhance the taste of your bread. First, you need to prep for baking. Start by grating your zucchini. Aim for about 2 cups, which is roughly one medium zucchini. Next, grab a medium bowl. In this bowl, mix the grated zucchini, eggs, vegetable oil, and vanilla extract. Whisk until smooth. Now, let’s move to the dry ingredients. Take a large bowl and sift together the all-purpose flour, whole wheat flour, baking powder, baking soda, fine sea salt, ground cinnamon, and cocoa powder. Whisk them together until all the dry ingredients blend well. Add the packed brown sugar and granulated sugar to the dry mix. Stir it all with a wooden spoon. This will help to combine the sweeteners evenly. Now, pour the wet zucchini mixture into the dry ingredients. Gently fold them together using a spatula. Be careful not to overmix; it's okay to see some lumps. Then, fold in the semi-sweet chocolate chips and walnuts if you want some crunch. Next, transfer your batter into a greased 9x5-inch loaf pan. Smooth the top with a spatula. For a nice touch, sprinkle a few extra chocolate chips on top. Preheat your oven to 350°F (175°C) while you do this. Bake the bread for 55 to 65 minutes. Check for doneness by inserting a toothpick into the center. If it comes out clean with just a few crumbs, it’s ready! Once baked, let the bread cool in the pan for about 10 minutes. This helps it set. After that, gently transfer it to a wire rack to cool completely. Cooling is key for the best texture and flavor. When you’re ready to slice, use a sharp knife for clean cuts. This bread is best served warm. Enjoy it plain or with a light spread of butter. You can even add a dusting of cocoa powder for a fancy touch! To get that soft, moist texture, moisture is key. Here are some tips: - Grate Zucchini Well: Use a box grater. Grate it finely to release more moisture. - Do Not Squeeze: Avoid squeezing out the moisture. Keep it in for a tender crumb. - Use Oil: A mix of vegetable oil and eggs helps keep the bread moist. This combination gives you a beautiful crumb structure. You want it to feel soft, but still hold together. Flavor is where you can get creative. Here are some ideas: - Spices: Add nutmeg or allspice for a warm touch. Cinnamon is a must for depth. - Nuts: Chopped walnuts or pecans give a great crunch. They pair well with chocolate. - Chocolate Types: Semi-sweet chocolate chips are classic. Dark chocolate adds richness. Mixing these flavors makes each bite exciting. You can even add a splash of orange zest for a bright flavor burst. Avoid these common mistakes for perfect zucchini bread: - Overmixing: Mix gently. Overmixing makes the bread dense and tough. - Wrong Oven Temperature: Always preheat your oven. A hot oven helps the bread rise correctly. - Not Testing for Doneness: Use a toothpick to check. It should come out clean or with a few moist crumbs. Following these tips helps ensure your zucchini bread turns out bakery-style every time. Enjoy baking! {{image_4}} You can change the flavor of your zucchini bread easily. Try adding nuts like walnuts or pecans for a nice crunch. You can also mix in different types of chocolate. Consider using dark chocolate chips or even white chocolate for a sweet twist. Dried fruits like raisins or cranberries add a chewy texture. Spices like nutmeg or ginger can give a warm, cozy flavor. Get creative! Each mix will offer a unique taste experience. If you want to make this recipe vegan, swap the eggs for flax eggs. To make a flax egg, mix one tablespoon of ground flaxseed with three tablespoons of water. Let it sit for five minutes until it thickens. For gluten-free bread, you can use a gluten-free flour blend instead of all-purpose and whole wheat flour. Just make sure it contains xanthan gum for the right texture. Both options keep the bread delicious and moist. You can also bake this zucchini bread as mini loaves or muffins. Adjust the baking time to about 20-25 minutes for mini loaves. For muffins, bake for about 15-20 minutes. Check them with a toothpick to see if they are done. They should come out clean or with a few crumbs. This way, you can enjoy smaller portions that are perfect for sharing or snacking! To keep your chocolate chip zucchini bread fresh, wrap it tightly. Use plastic wrap or aluminum foil. You can also store it in an airtight container. This method helps prevent drying out. Place the bread at room temperature for up to three days. If you want it to last longer, refrigerate it. Just remember, refrigeration can change the texture slightly. Freezing is a great option for long-term storage. First, let the bread cool completely. Then, wrap it tightly in plastic wrap. After that, wrap it again in aluminum foil. This double wrap keeps out air and moisture. You can freeze the bread for up to three months. To thaw, take it out and leave it at room temperature for a few hours. If you want, heat slices in the microwave for a warm treat. At room temperature, chocolate chip zucchini bread stays good for about three days. If you store it in the fridge, it can last up to a week. Just keep it wrapped well to maintain moisture. If you notice any mold or an off smell, do not eat it. Always check for freshness before enjoying your delicious treat! You can tell if your zucchini bread is done by checking with a toothpick. Insert it into the center of the loaf. If it comes out clean or with a few moist crumbs, your bread is ready. The top should also look set and slightly springy to the touch. Yes, you can prepare the batter in advance. Mix the wet and dry ingredients separately and store them in the fridge. Combine them just before baking. This way, you can enjoy fresh zucchini bread whenever you want. You can use melted coconut oil or unsweetened applesauce instead of vegetable oil. Both options keep the bread moist and add unique flavors. If you want a buttery taste, use melted butter as well. A dense zucchini bread often comes from overmixing the batter. When combining the wet and dry ingredients, mix just until combined. Also, using too much zucchini can add extra moisture, making the bread heavy. To keep your zucchini bread fresh, wrap it in plastic wrap or foil. Store it at room temperature for up to three days. For longer storage, place it in the fridge or freezer. In the fridge, it lasts about a week. In the freezer, it stays good for up to three months. This post covered how to make delicious zucchini bread. We explored ingredients, substitutions, tips for selection, and step-by-step baking instructions. I shared ways to enhance flavor and texture, plus how to avoid common mistakes. Don’t forget about the creative variations and proper storage tips we discussed. With these insights, you can bake a perfect loaf every time. Enjoy experimenting with flavors and making this recipe your own. Happy baking!

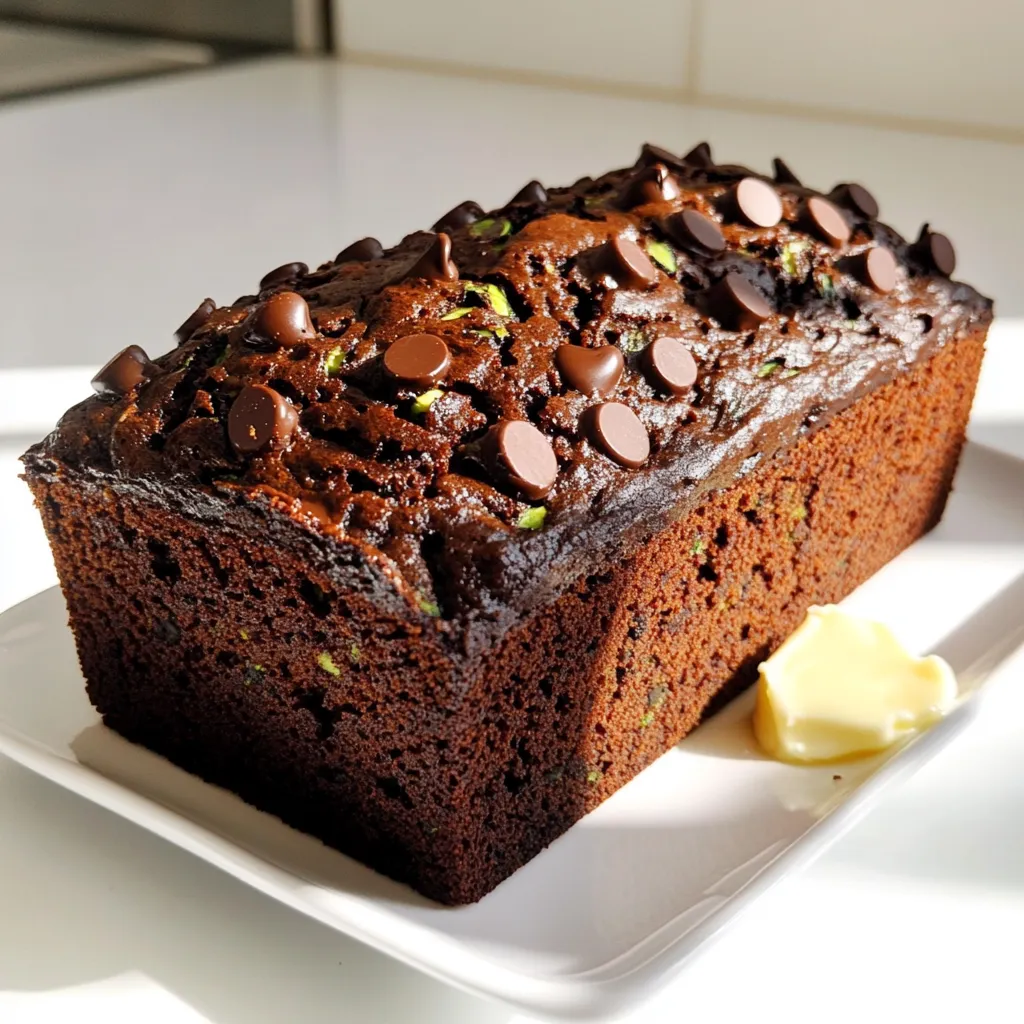
Chocolate Chip Zucchini Bread Bakery-Style Delight

If you crave a sweet and moist treat, my Chocolate Chip Zucchini Bread will not disappoint. This bakery-style delight is

- 1 pound Brussels sprouts - 2 tablespoons extra virgin olive oil - 3 tablespoons raw honey - 1 teaspoon red pepper flakes - 1 tablespoon apple cider vinegar - Salt and pepper - 2 tablespoons freshly chopped parsley - Additional seasonings (e.g., garlic powder) - Parmesan cheese for topping - Nuts for added crunch Brussels sprouts are a great choice for this recipe. You want them fresh and firm. Look for sprouts that are bright green and not too large. The olive oil helps them roast nicely, giving them a great flavor. Raw honey adds a sweet touch. It balances the spice from the red pepper flakes. Adjust the flakes to make it just how you like it. Apple cider vinegar gives a tangy kick. This flavor mix makes these sprouts special. Fresh parsley adds color and a fresh taste at the end. You can add garlic powder for extra flavor. Parmesan cheese is a tasty finish, too. Nuts give a nice crunch if you want some texture. Using these ingredients, you can create a dish that is both comforting and exciting. The balance of sweet and spicy will leave you wanting more. Enjoy experimenting with these flavors! - Preheat the oven to 400°F (200°C). - Prepare the baking sheet with parchment paper. - Trim and halve the Brussels sprouts. - Coat with olive oil, salt, and pepper. To trim Brussels sprouts, cut off the dry ends. Then, slice each sprout in half. This helps them cook evenly. The oil and seasonings add flavor and crispness. Use your hands to mix them well in a bowl. - Arrange Brussels sprouts on the baking sheet. - Roast for 20-25 minutes and flip halfway. When placing the sprouts on the sheet, make sure they are not crowded. This space allows hot air to circulate. Halfway through, flip the sprouts gently. This helps them brown nicely. You want them soft and golden. - Combine honey, red pepper flakes, and apple cider vinegar in a saucepan. In a small saucepan, mix the honey and red pepper flakes. The vinegar adds a nice tang. Heat this over low until warm and mixed well. You want the glaze to smell sweet and spicy. - Glaze the sprouts and roast for an additional 5 minutes. - Garnish and serve. After roasting, transfer the sprouts back to the bowl. Drizzle the hot honey glaze over them. Toss gently to coat. Return them to the oven for five more minutes. This step helps the glaze stick. Once done, sprinkle chopped parsley on top. Serve warm for a tasty dish! To get your Brussels sprouts just right, spread them in a single layer. This helps them cook evenly. If they are too crowded, they will steam instead of roast. Check for doneness after 20 minutes. They should be browned and fork-tender. If you need extra crispiness, give them a little more time. You can control the heat with red pepper flakes. For a milder taste, use less of it. If you like more spice, feel free to add more. You can also swap red pepper flakes for a pinch of cayenne. For a sweet touch, try adding a sprinkle of cinnamon. These Brussels sprouts pair well with many main dishes. Serve them with roasted chicken or steak for a delicious meal. They also go well with grain bowls. For drinks, try a crisp white wine or a light beer. They will enhance the flavors of the dish. {{image_4}} You can easily make this dish vegan. Substitute honey with agave or maple syrup. Both options give a sweet flavor. They also pair well with the spicy notes of red pepper flakes. This change keeps the dish tasty and plant-based. You can add new flavors to this recipe. Try using herbs like thyme or rosemary. They add an earthy taste. You can also sprinkle in garlic powder for extra depth. For brightness, add citrus zest or a splash of lemon juice. This adds a fresh twist to the rich glaze. You don’t have to roast Brussels sprouts every time. You can pan-sear them for a nice crust. Heat oil in a pan and cook until they are browned. Grilling is another fun option. It gives a smoky flavor that adds a unique touch. Just be sure to keep an eye on them to avoid burning. To store your Brussels sprouts, let them cool first. Place them in an airtight container. This keeps them fresh and tasty. Store the container in the fridge. They will stay good for 3 to 5 days. To reheat the Brussels sprouts, use the oven for best results. Preheat it to 350°F (175°C). Spread the sprouts on a baking sheet and heat for about 10 minutes. This method keeps them crispy. You can also use a microwave for quick reheating. Just place them in a microwave-safe dish and cover. Heat in short bursts, checking often. Enjoy them warm for a cozy meal! Yes, you can use frozen Brussels sprouts. Just make sure to thaw them first. Pat them dry with a towel to remove excess moisture. This helps them crisp up while roasting, just like fresh ones. If you don’t have raw honey, you can use maple syrup. For red pepper flakes, try cayenne pepper or chili powder for a different heat. If you lack apple cider vinegar, regular vinegar works too. Yes, this recipe is gluten-free. All the ingredients used are naturally gluten-free. You can enjoy this dish without worry if you are on a gluten-free diet. To thicken the glaze, you can simmer it longer on low heat. This helps the honey reduce and become stickier. You can also add a small amount of cornstarch mixed with water to the glaze for extra thickness. You can prep the Brussels sprouts ahead of time. Cut and coat them with olive oil, salt, and pepper. Store in the fridge for up to a day. Just roast them fresh before serving for the best taste. This blog post explored a tasty roasted Brussels sprouts recipe with a hot honey glaze. You learned about the key ingredients, step-by-step instructions, and helpful tips for perfect results. We also discussed variations, storage, and answered common FAQs. When you try making this dish, feel free to experiment with flavors or cooking methods. Enjoy your delicious creations and impress your family and friends!

Cozy Hot Honey Glazed Brussels Sprouts Simple Recipe

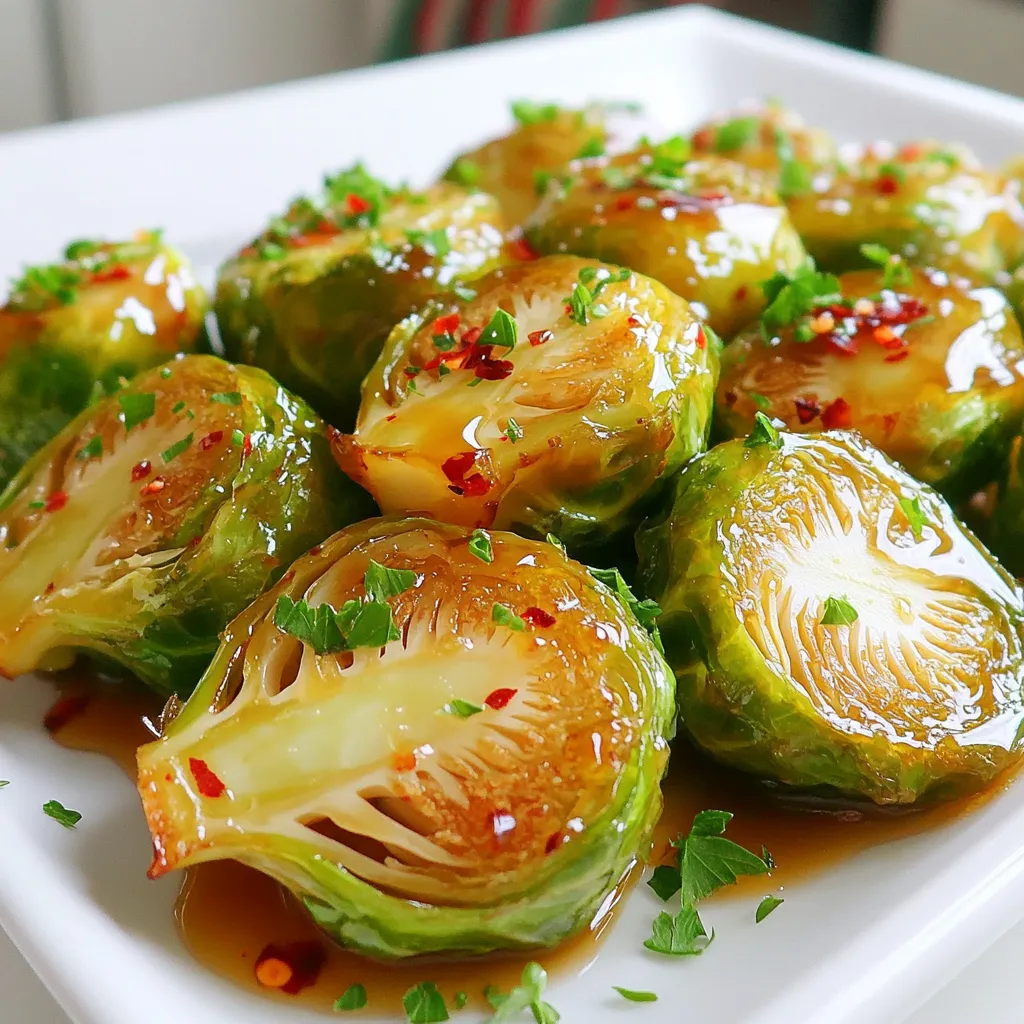
Looking for a delicious way to enjoy Brussels sprouts? You’re in the right place! My Cozy Hot Honey Glazed Brussels

- 1 cup rolled oats - 1/2 cup almond butter - 1/4 cup pure maple syrup - 1/2 cup pumpkin puree - 2 teaspoons pumpkin spice seasoning - 1 teaspoon instant coffee granules These main ingredients create a tasty base for our bites. The oats give a nice texture. Almond butter adds richness, while maple syrup brings sweetness. Pumpkin puree offers moisture and flavor. Pumpkin spice adds warmth, and instant coffee gives a nice kick. - 1/4 cup shredded coconut - 1/4 cup mini chocolate chips These optional add-ins can change the flavor and texture. Shredded coconut adds chewiness. Mini chocolate chips bring a sweet surprise. You can mix and match based on what you like! - Alternative nut butters: You can use peanut butter or cashew butter. - Sweetener options: Honey or agave syrup work well too. - Dairy-free alternatives: Use any nut butter and make sure your chocolate chips are dairy-free. These substitutions help you adjust the recipe. You can fit it to your taste or dietary needs! Start by mixing the base ingredients in a large bowl. Add the rolled oats, almond butter, pure maple syrup, pumpkin puree, pumpkin spice, and instant coffee granules. Use a sturdy spoon to blend everything well. The goal is to get a thick, sticky dough. This texture is key. If you like, fold in shredded coconut and mini chocolate chips for extra flavor. Next, chill the mixture in the refrigerator. Let it sit for about 15 minutes. This step helps firm up the mix, making it easier to shape later. You’ll notice the mixture becomes a bit more solid. This is important for shaping the bites. After chilling, remove the mixture from the fridge. Scoop out about 1 tablespoon of the mix with your hands. Roll each portion into compact balls. Place them on a parchment-lined baking sheet. This makes it easy to take them off later. Chill the bites again for 30 minutes. This second chill helps them hold their shape and texture. To enhance the flavor of your No-Bake Pumpkin Spice Latte Bites, consider adding a touch of vanilla extract. This small addition brings warmth and depth to the bites. You might also try adding a pinch of sea salt. It can balance the sweetness and help the spices shine. Pair these bites with a warm cup of coffee for a cozy treat. They also go well with a scoop of vanilla ice cream for dessert. To ensure your bites stay moist but not too sticky, use the right amount of nut butter. If your mixture seems too dry, add a bit more maple syrup or pumpkin puree. If it’s too sticky, try adding a bit of oats. This keeps your bites firm yet chewy. Always adjust the mixture based on your preference. For a lovely presentation, arrange the bites on a decorative plate. Dust them lightly with extra pumpkin spice for a festive look. You can also place them next to a small cup of warm coffee. This adds a cozy touch and makes your serving more inviting. Use seasonal decorations, like small pumpkins, to create a charming display. {{image_4}} You can change up the flavors in your No-Bake Pumpkin Spice Latte Bites. Try adding chocolate or peanut butter for a new twist. For a chocolate version, use chocolate nut butter. You might also add cocoa powder for a rich taste. If you love peanut butter, switch the almond butter for crunchy or creamy peanut butter. Adjust the seasonal spices to match your mood. If you want a holiday vibe, add nutmeg or cinnamon. You can also try chai spice for a warm, cozy flavor. You can make your bites healthier by lowering the sugar or fat. Use less maple syrup or switch it for a sugar substitute. This keeps the sweetness but cuts calories. You can also use less nut butter. Adding protein or superfoods gives a nutrition boost. Consider adding protein powder or ground flaxseeds. These ingredients help you feel full longer. They also add fiber and healthy fats. If you need gluten-free options, use certified gluten-free oats. This way, everyone can enjoy the bites. You can also swap out regular nut butter for a nut-free version like sunflower seed butter. For a vegan version, ensure the maple syrup is organic. All other ingredients are plant-based, making these bites a great vegan treat! To keep your No-Bake Pumpkin Spice Latte Bites fresh, store them in an airtight container. This prevents moisture from ruining their texture. Place the container in the refrigerator. They will stay good for up to one week. You can freeze these bites for later. Just put them in a freezer-safe container. They will last for about three months in the freezer. When you’re ready to eat them, thaw them in the fridge overnight. To keep the flavors intact, avoid exposing the bites to air. Check for any signs of spoilage, like an off smell or mold. If you notice these signs, it’s best to throw them away. Enjoy your delicious bites while they’re fresh! No-Bake Pumpkin Spice Latte Bites last about one week in the fridge. Store them in an airtight container. If you want them to stay fresh, keep them cold. After a week, they may lose their flavor and texture. Yes, you can make these bites ahead of time. Prepare them a day or two in advance. Just chill them well before serving. This helps the flavors blend nicely. If you make extra, store them in the fridge for later. You can serve these bites with warm coffee or a latte. They pair well with chai tea, too. For snacks, try some fresh fruit or nuts. A bit of whipped cream on the side adds a nice touch. Enjoy mixing and matching! This blog post covered how to make tasty No-Bake Pumpkin Spice Latte Bites. We explored key ingredients, methods for mixing and chilling, and tips for flavor and texture. I shared ways to customize the bites with variations and substitutions to fit your needs. Storing them correctly keeps them fresh longer. These bites are simple and fun to make. Enjoy your time in the kitchen, and share these yummy treats with friends!

No-Bake Pumpkin Spice Latte Bites Delightful Treat

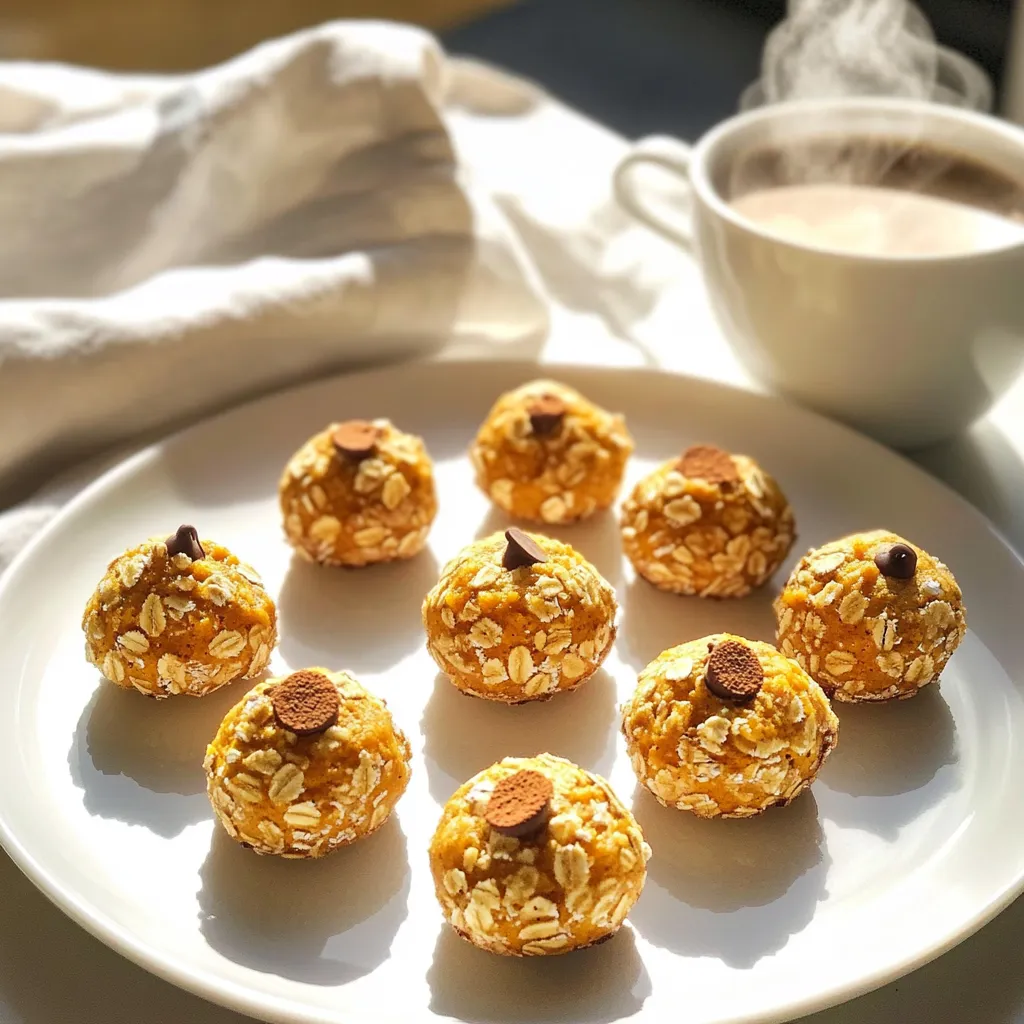
Fall is here, and it’s time to indulge in all things pumpkin! You’ll love these No-Bake Pumpkin Spice Latte Bites.

- 1 cup unsweetened almond milk (or preferred milk alternative) - 1/2 cup canned pumpkin puree - 1 frozen banana (peeled) - 1 tablespoon nut butter (peanut or almond) - 1 teaspoon pumpkin pie spice - 1 tablespoon maple syrup (to taste) - 1 teaspoon pure vanilla extract - 1/2 cup ice cubes - Optional toppings: whipped coconut cream, ground cinnamon To make this Pumpkin Spice Latte Smoothie, gather your ingredients first. Almond milk serves as a creamy base. Pumpkin puree brings that classic autumn flavor. A frozen banana adds natural sweetness and a smooth texture. You can choose between peanut or almond nut butter. This choice gives the smoothie a nutty depth. Pumpkin pie spice is the star, adding warmth and a hint of spice. Maple syrup offers sweetness, which you can adjust to your taste. Vanilla extract enhances all the flavors, making it rich and inviting. Ice cubes help to chill and thicken the smoothie. If you want a treat, don't forget the whipped coconut cream and a sprinkle of ground cinnamon for garnish. Each ingredient plays a role in making this smoothie a delicious, creamy autumn treat. - Pour almond milk into the blender. - Add pumpkin puree, banana, nut butter, pumpkin pie spice, maple syrup, vanilla extract, and ice. - Blend until smooth and creamy. To make your smoothie, start with almond milk. This is the base. Next, add canned pumpkin puree for that rich flavor. The frozen banana adds natural sweetness and creaminess. I like to use nut butter for extra protein. Choose your favorite, either peanut or almond works well. Add the pumpkin pie spice to bring in that autumn flavor. Then, pour in the maple syrup to sweeten it up. Don’t forget the vanilla extract for a nice touch. Lastly, toss in some ice cubes to chill your drink. Blend everything on high speed. If any bits cling to the sides, stop the blender and scrape them down with a spatula. Blend again until it’s all smooth. - Taste the smoothie. - Add more maple syrup if desired. - Blend again briefly to mix. Once you finish blending, take a sip. You might want it sweeter, so add more maple syrup if you like. Blend for just a few seconds to mix in the extra sweetness. This step makes your drink perfect for your taste! - Pour into tall glasses. - Top with whipped coconut cream and ground cinnamon. Now it's time to serve! Pour the creamy smoothie into tall glasses. If you want to be fancy, add a generous dollop of whipped coconut cream on top. Finish by sprinkling ground cinnamon for that lovely aroma. Enjoy your Pumpkin Spice Latte Smoothie right away! To make your smoothie smooth, blend well. Start with the almond milk. Add the pumpkin puree, frozen banana, nut butter, pumpkin pie spice, maple syrup, and ice cubes. Blend on high speed. If some ingredients stick to the sides, stop the blender. Use a spatula to scrape them down. This ensures a creamy drink. If you want sweetness, try other options. Honey and agave are great choices. They add flavor without being too sugary. You can also use less maple syrup if you prefer. Taste your smoothie before serving. Adjust the sweetness to match your taste. Serve your smoothie in tall glasses. This makes it look fancy. You can use a straw or a spoon. It adds a cozy feel to your drink. For a special touch, top with whipped coconut cream. A sprinkle of ground cinnamon on top makes it even better. Enjoy every sip! {{image_4}} For a creamy, dairy-free option, switch almond milk for coconut milk or oat milk. Coconut milk adds a tropical twist. Oat milk gives a smooth texture with a hint of sweetness. Both choices keep your smoothie rich without dairy. To enhance nutrition, mix in protein powder or Greek yogurt. Protein powder adds a health kick without changing the flavor. Greek yogurt makes the smoothie thicker and creamier. This extra protein helps keep you full longer. Feel free to get creative! Add chocolate for a rich taste or a splash of maple extract for an extra sweet touch. These flavors can make your smoothie more exciting and unique. Enjoy the process of discovering your favorite combinations! You can store any leftover smoothie in an airtight container. It will stay fresh for up to 24 hours. Make sure to keep it in the fridge. When you're ready to enjoy it again, give it a good shake or stir. This helps mix the ingredients that may have settled. If you want to save some smoothie for later, freezing is a great option. Pour the smoothie into ice cube trays or small freezer bags. This allows you to freeze portions easily. When you're ready to drink it, just take out what you need. Let it thaw in the fridge overnight or blend it straight from the freezer for a thicker treat. To enjoy a previously frozen smoothie, let it thaw first. You can leave it in the fridge overnight. If you want it cold again, you can blend it with some ice. This brings back the creamy texture. If it's too thick, add a splash of almond milk or water to loosen it up. Pumpkin spice is a mix of warm, sweet spices. It usually includes cinnamon, nutmeg, ginger, and allspice. This blend gives off cozy autumn vibes. You can find it in many fall recipes. It works well in pies, lattes, and smoothies. The spices combine well with pumpkin puree, which adds a creamy texture. Many people love this flavor during the fall season. Yes, you can make this smoothie ahead of time. To meal prep, blend your smoothie as usual. Then, pour it into airtight containers. Store these in the fridge for up to 24 hours. When you're ready to enjoy, just give it a quick stir. If it thickens, add a splash of almond milk to loosen it up. You can also freeze portions for later. Just blend again after thawing, and it will taste fresh. Yes, this smoothie is quite healthy! It has many nutritious ingredients. The pumpkin puree is high in vitamins A and C. It also has fiber, which is great for digestion. The banana adds potassium and natural sweetness. Nut butter gives you healthy fats and protein. Almond milk is low in calories and dairy-free. Maple syrup adds a touch of sweetness but can be adjusted. Overall, this smoothie is a delicious and nutritious treat for any time of day. This blog post guides you through making a tasty pumpkin spice smoothie. You learned about key ingredients, easy steps, and fun variations. You can adjust sweetness and make it your own. Plus, I shared tips for storage and presentation. Enjoy this healthy treat anytime. It’s comforting and packed with flavor. Try this recipe and discover how simple it is to enjoy a cozy drink!

Pumpkin Spice Latte Smoothie Creamy Autumn Treat

Looking for a flavor-packed way to embrace fall? My Pumpkin Spice Latte Smoothie is a creamy, delicious treat you won’t

For No Bake Snickers Protein Bites, gather these items: - 1 cup natural peanut butter - 1/2 cup honey or maple syrup - 2 cups rolled oats - 1/2 cup vanilla protein powder - 1/4 cup unsweetened cocoa powder - 1/4 cup chopped peanuts - 1/2 cup mini chocolate chips - 1/2 cup caramel sauce (store-bought or homemade) - A pinch of salt Each bite packs a good punch of nutrition. A serving (about one bite) has: - Calories: 130 - Protein: 5 grams - Carbs: 16 grams - Fat: 5 grams - Fiber: 2 grams - Sugar: 5 grams These bites are great for a quick snack. They help fuel your day while keeping you satisfied. If you need to switch some ingredients, here are some ideas: - Use almond butter instead of peanut butter for a nut-free option. - Swap honey for agave syrup if you want a vegan choice. - For a gluten-free version, ensure your oats are certified gluten-free. - You can replace mini chocolate chips with dried fruit for a healthier twist. - Caramel sauce can be omitted if you prefer fewer sugars. These swaps keep the flavor while fitting your needs. To start, gather all your ingredients. You will need peanut butter, honey or maple syrup, oats, protein powder, cocoa powder, peanuts, chocolate chips, caramel sauce, and salt. This mix makes delicious protein bites. In a large bowl, add 1 cup of natural peanut butter and 1/2 cup of honey or maple syrup. Stir well until smooth. Next, add 2 cups of rolled oats, 1/2 cup of vanilla protein powder, 1/4 cup of cocoa powder, and a pinch of salt. Mix until there are no dry spots left. Then, fold in 1/4 cup of chopped peanuts and 1/2 cup of mini chocolate chips. This step adds great texture and flavor. With clean hands, scoop about a tablespoon of the mixture. Roll it into a ball and place it on a parchment-lined baking sheet. Repeat until all the mix is shaped. After that, drizzle caramel sauce over each ball for a sweet touch. Chill the baking sheet in the fridge for at least 30 minutes. This helps them firm up. Enjoy your protein bites fresh or store them in the fridge for later. To get the right texture, start with creamy natural peanut butter. If it’s too thick, your bites may be dry. Mix in honey or maple syrup until smooth. This helps bind the oats and protein powder. After mixing, the texture should be slightly sticky but hold its shape. If your mixture is too wet, add a bit more oats or protein powder until you find the perfect balance. You can boost flavor by adding extras. Try vanilla extract for sweetness or cinnamon for warmth. Want a nutty twist? Add chopped almonds or cashews. You can also swap mini chocolate chips for dark chocolate chips for a richer taste. For a chewy texture, fold in dried fruits like raisins or cranberries. These small changes can take your bites from good to great. To wow your guests, present your protein bites nicely. Arrange them on a colorful plate to make them pop. Drizzle extra caramel sauce over the top for a shiny finish. A sprinkle of chopped peanuts adds a nice crunch and visual appeal. If you’re feeling fancy, use cupcake liners for individual servings. These little touches make your healthy treat look gourmet and inviting. {{image_4}} You can easily make these protein bites gluten-free. Use certified gluten-free oats. This keeps the bites safe for anyone with gluten issues. Check the labels on your protein powder too. Some brands have gluten-free options. You can switch up the protein powder. If you want a chocolate flavor, use chocolate protein powder. For a vegan option, choose a plant-based protein. You can also try flavors like peanut butter or cookie dough. Each choice adds its own twist to the bites. Get creative with flavors! You can add cookie dough flavoring for a fun twist. Mint extract can give a fresh taste. Just a drop can transform the bites. You can also mix in flavors like cinnamon or vanilla for variety. The options are endless, so let your taste buds guide you! To keep your No Bake Snickers Protein Bites fresh, store them in an airtight container. Place them in the fridge to maintain their texture and flavor. Make sure to separate layers with parchment paper to avoid sticking. You can freeze these protein bites for longer storage. Just place them in a single layer on a baking sheet. Freeze them for about one hour, then transfer to a freezer-safe bag. They will stay fresh for up to three months. These bites last about one week in the fridge. Check for any signs of spoilage, like an off smell or change in texture. If frozen, let them thaw in the fridge before eating. This way, they stay tasty and ready to enjoy! Yes, you can use any nut butter you like. Almond butter or cashew butter works well. Each will change the taste a bit. Just make sure it is natural and smooth. This keeps the bites creamy and easy to mix. Absolutely! To make this recipe vegan, use maple syrup instead of honey. Also, choose a plant-based protein powder. This keeps your bites tasty and friendly for everyone. These bites can last up to one week in the fridge. Store them in an airtight container. For longer storage, you can freeze them for up to three months. Just thaw them in the fridge before enjoying! This post covered key ingredients and how to make No Bake Snickers Protein Bites. You learned about ingredient swaps, detailed mixing, and tips for great texture. We also explored variations for different diets and how to store these treats properly. Remember, these bites are easy to make and customize. Enjoy experimenting with flavors and ingredients to find your perfect snack. Stay creative and have fun making the best treats that fit your needs!

No Bake Snickers Protein Bites Easy and Healthy Treat

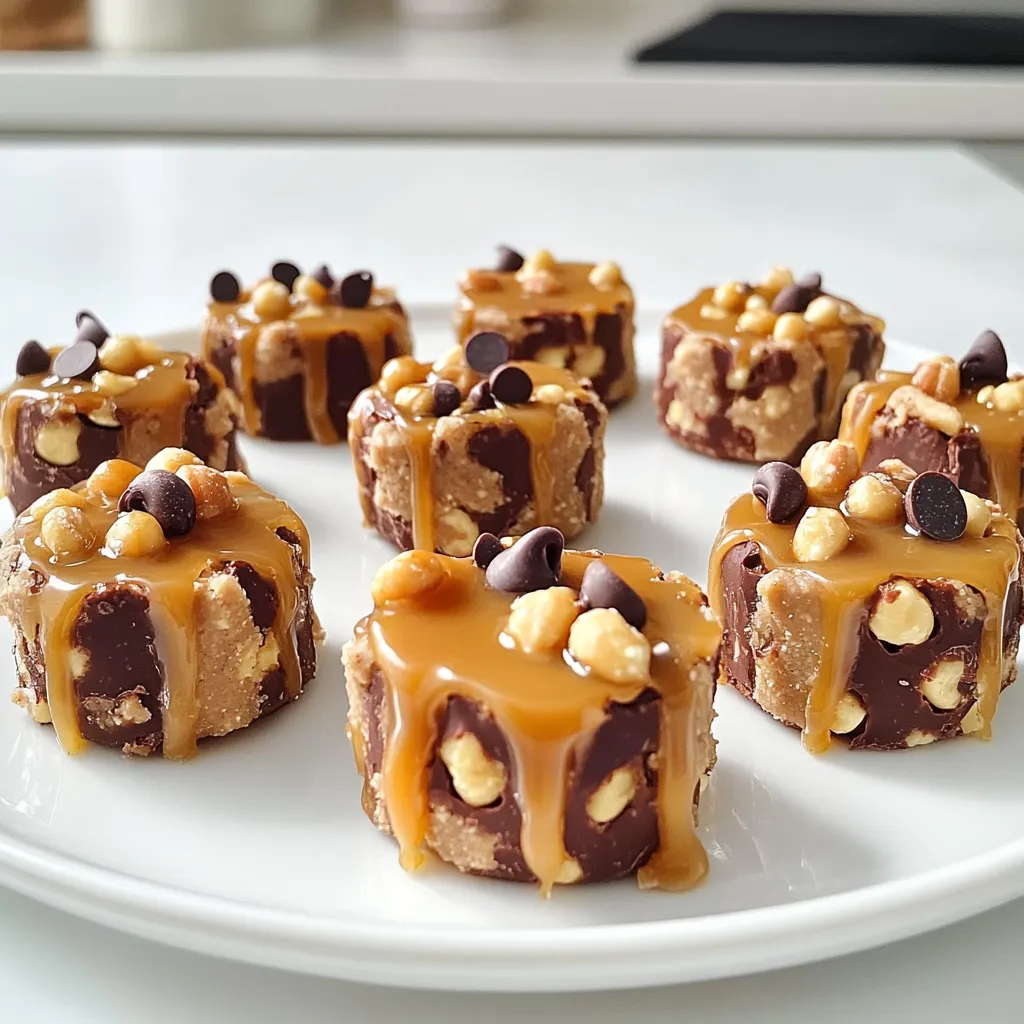
Looking for a tasty snack that packs a protein punch? You’re in the right place! My No Bake Snickers Protein

- 1 cup rolled oats - 2 cups almond milk (or your preferred milk) - 1 ripe banana, thoroughly mashed - 1/4 cup walnuts, coarsely chopped - 2 tablespoons pure maple syrup - 1 teaspoon ground cinnamon - 1/2 teaspoon vanilla extract - A pinch of salt - Sliced bananas - Extra chopped walnuts - Additional maple syrup - Chia seeds For this cozy dish, I love using rolled oats. They cook well and give a nice texture. Almond milk adds creaminess, but feel free to swap it for your favorite milk. A ripe banana is key. It sweetens the oatmeal and adds moisture. Walnuts bring crunch and a nutty flavor. Maple syrup is a must for that sweet touch, while ground cinnamon adds warmth. The vanilla extract enhances the flavors, and a pinch of salt balances everything perfectly. Optional toppings allow you to customize your bowl. Sliced bananas offer extra sweetness. More chopped walnuts add crunch. Drizzling more maple syrup makes it even more indulgent. Chia seeds add a fun texture and boost nutrition. - Combining Oats and Milk In a medium saucepan, place 1 cup of rolled oats. Pour in 2 cups of almond milk. This blend creates a creamy base. - Stirring and Simmering Heat the mixture over medium flame. Stir it gently until it simmers. Keep an eye on it to prevent sticking. - Incorporating Banana and Nuts Once the mixture simmers, stir in 1 ripe, mashed banana and 1/4 cup of coarsely chopped walnuts. These add natural sweetness and crunch. - Adding Sweetness and Spice Next, mix in 2 tablespoons of pure maple syrup and 1 teaspoon of ground cinnamon. Add 1/2 teaspoon of vanilla extract and a pinch of salt. This creates a rich, warm flavor. - Monitoring Thickness Continue cooking for 5 to 7 minutes. Stir occasionally until it thickens. If you like it thicker, cook a little longer. - Allowing to Rest After cooking, take the saucepan off the heat. Let it rest for a minute. This helps the oatmeal thicken even more. Adjusting Cook Time for Thickness To get the best texture, timing is key. I suggest cooking your oatmeal for 5-7 minutes. If you want it thicker, let it cook for a few more minutes. Watch closely as it cooks. The oatmeal will thicken as it simmers. If you prefer a creamier texture, add a bit more milk while cooking. Stirring Techniques Stirring is important for even cooking. Use a wooden spoon to mix the oats well. Make sure to scrape the bottom of the pan. This helps prevent sticking. Stirring also adds air, making the oatmeal fluffier. Serving in Rustic Bowls The way you serve your oatmeal matters. Use rustic, warm bowls to create a cozy feel. This adds charm and makes your dish more inviting. A bowl that holds heat will keep your oatmeal warm longer, which is a plus! Choosing Eye-Catching Toppings Toppings can make your oatmeal pop. I love adding fresh, sliced bananas and extra walnuts. A drizzle of maple syrup adds shine. Consider sprinkling chia seeds for texture and health. Layer these toppings artfully on top. This makes your dish look beautiful and makes it more fun to eat! Overview of Ingredients' Nutritional Value Each ingredient in this oatmeal packs a punch. Rolled oats provide fiber, which helps digestion. Almond milk adds creaminess with fewer calories. Bananas offer potassium and natural sweetness. Walnuts bring healthy fats and protein to your meal. Maple syrup gives a sweet touch without processed sugars. Boosting Protein and Fiber with Toppings You can easily boost the protein and fiber content. Add extra walnuts or chia seeds. They not only add crunch but also help keep you full longer. This oatmeal is not just tasty; it’s also good for your body! {{image_4}} You can use different banana types for fun. Try using plantains. They bring a unique taste. You can also add a second banana. This makes the oatmeal extra sweet and creamy. Mix in berries for a burst of flavor. Blueberries and strawberries work well. Apples add a nice crunch. Chop them small, so they cook well. They also bring a hint of tartness. Switch walnuts for almonds or pecans. Sliced almonds give a nice crunch. Pecans offer a sweeter taste. Both add healthy fat and protein. If you want a nut-free option, try seeds. Sunflower seeds or pumpkin seeds work great. They add texture without nuts. You can also skip nuts altogether and still enjoy tasty oatmeal. Add more spices to change the flavor. Nutmeg or ginger can bring warmth. A bit of cocoa powder makes it chocolatey. Don't be afraid to try new spice blends. You can swap maple syrup for honey or agave. Each sweetener adds a different flavor. Honey is floral, while agave is light. Adjust the sweetness to your liking. To store leftovers, let your oatmeal cool first. Place it in an airtight container. This keeps it fresh. You can store it in the fridge for up to three days. The best way to reheat oatmeal is on the stove. Pour it into a saucepan and add a splash of milk. Heat over low heat, stirring gently. This keeps the oatmeal creamy. You can also use a microwave. Place it in a bowl and cover it. Heat for 30 seconds, then stir. If it’s still thick, add more milk. Enjoy your warm, cozy bowl of oatmeal again! Yes, you can use steel-cut oats, but the cooking time will change. Steel-cut oats take longer to cook, about 20 to 30 minutes. They offer a chewier texture and a nuttier flavor. If you prefer a thicker oatmeal, steel-cut oats are a great choice. However, for a creamier and quicker version, stick with rolled oats. This oatmeal is perfect for meal prep. You can make a larger batch and store it for later. Just divide the oatmeal into containers. It will stay fresh in the fridge for up to four days. When you’re ready to eat, simply reheat it in the microwave. Add a splash of milk for creaminess if needed. You can use any milk you like. Options include oat milk, soy milk, or regular cow's milk. Each type of milk will slightly change the flavor. Almond milk keeps it light, while oat milk adds creaminess. Choose the one that fits your taste best. This blog post covered the main ingredients and step-by-step instructions for making delicious oatmeal. We looked at how to prepare oats, mix in flavors, and cook them just right. Tips on achieving perfect texture and presentation can enhance your dish. We also explored fun variations and storage methods. Oatmeal is a nutritious meal that you can easily customize. Try new toppings, flavors, and techniques to make it your own. Enjoy your simple and healthy oatmeal creation!

Cozy Maple Walnut Banana Bread Oatmeal Delight

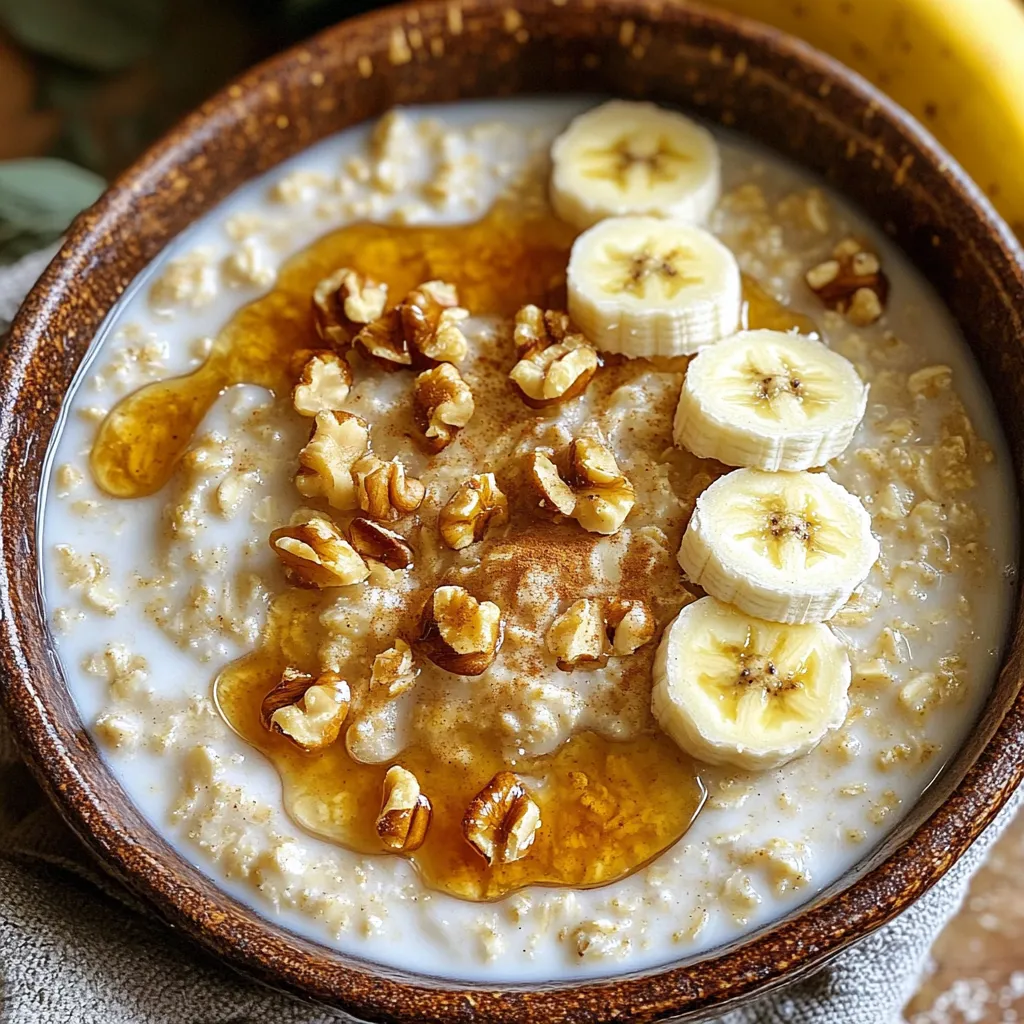
Craving a warm, comforting breakfast? Let me introduce you to my Cozy Maple Walnut Banana Bread Oatmeal Delight! This simple

- 1 cup cottage cheese (low-fat or full-fat) - 1/4 cup Greek yogurt (for extra creaminess) - 2 tablespoons maple syrup (or honey) - 1 teaspoon vanilla extract (for flavor) - 1 teaspoon ground cinnamon (plus extra for garnish) - 1/4 teaspoon ground nutmeg - A pinch of salt (to enhance sweetness) - 2 tablespoons almond flour (or oat flour for thickness) - 1/4 cup chocolate chips (for added sweetness and texture) - Sliced apples - Graham crackers - Pretzels Cottage cheese is the star of this dip. It gives a creamy base and packs in protein. I like to use low-fat or full-fat cottage cheese, based on what I have. Greek yogurt adds creaminess and a bit of tang. Sweetness comes from maple syrup. If you prefer honey, that works too! The flavor shines with vanilla extract, ground cinnamon, nutmeg, and a pinch of salt. These spices create that classic snickerdoodle taste. For those who want a thicker dip, I suggest almond flour or oat flour. They add a nice texture. If you love chocolate, toss in some chocolate chips for extra fun. When it comes to dipping, I love sliced apples for a crunchy bite. Graham crackers are sweet and pair well. Pretzels add saltiness, balancing the dip's sweetness. Enjoy experimenting with these options! 1. Start with a mixing bowl. Add 1 cup of cottage cheese and 1/4 cup of Greek yogurt. 2. Blend them together using a hand mixer or food processor. Blend until the mixture is smooth and creamy. 3. Next, add 2 tablespoons of maple syrup, 1 teaspoon of vanilla extract, 1 teaspoon of ground cinnamon, 1/4 teaspoon of ground nutmeg, and a pinch of salt. 4. Blend again until all the ingredients mix well. The dip should be creamy and well combined. 1. To make the dip thicker, gently fold in 2 tablespoons of almond flour or oat flour. 2. If you like extra sweetness, now is the time to stir in 1/4 cup of chocolate chips. This adds a nice texture and flavor. 1. Spoon the dip into a colorful serving bowl. 2. For a beautiful touch, dust the top with extra ground cinnamon. You can also drizzle a bit of maple syrup on top. 3. Serve the dip right away with sliced apples, graham crackers, or pretzels for dipping. Enjoy! To get the best texture for your dip, blend the cottage cheese and Greek yogurt well. I suggest using a hand mixer or food processor. This makes the dip smooth and creamy. Avoid lumps for the best taste. If you want it thicker, add almond flour or oat flour. You can also use extra yogurt to adjust the thickness. Just blend until you reach your desired creaminess. Feel free to play with the sweetener levels. If you like it sweeter, add more maple syrup or honey. You can also try different sweeteners based on your taste. For extra texture and crunch, think about adding nuts or dried fruits. Chopped pecans or raisins can make this dip even better. Just mix them in gently after blending. Presentation matters! Use colorful bowls to make your dip stand out. A bright bowl looks great on any table. For a fun touch, drizzle a bit of maple syrup on top. You can also sprinkle some extra cinnamon for flair. Arrange your dippers, like sliced apples or graham crackers, around the dip. This creates an inviting look that makes people want to dig in! {{image_4}} You can twist the classic snickerdoodle flavor in fun ways. Try adding nut butter for a rich and nutty taste. You can also mix in some cocoa powder for a chocolatey version. If you want a burst of flavor, use flavored Greek yogurt, like vanilla or cinnamon. This gives your dip a unique twist while keeping it creamy. Change the dip with the seasons. In fall, add pumpkin spice for a cozy flavor. Just mix in a teaspoon of pumpkin spice with your base. For summer, try berry-infused versions. Add fresh berries or a berry puree to the mix. This brightens the dip and adds a fruity touch that’s perfect for warm days. If you're vegan, use plant-based yogurt and cottage cheese. Almond or soy yogurt works well. Just ensure it has a similar texture. For gluten-free modifications, use almond flour or certified gluten-free oat flour. This way, everyone can enjoy this tasty treat without worries. To keep your High-Protein Snickerdoodle Cottage Cheese Dip fresh, store it in the fridge. Use an airtight container to prevent it from drying out. Glass containers work well, as they do not absorb odors. If you plan to use it later, make sure to label the container with the date. This dip stays fresh for about 3 to 5 days in the fridge. Check for signs of spoilage before eating. If you notice any off smells, discoloration, or mold, it's best to toss it. Always trust your senses when it comes to food safety. You can freeze this dip if you want to keep it longer. Use a freezer-safe container, leaving some space at the top for expansion. When you are ready to eat it, thaw it in the fridge overnight. For the best texture, stir it well after thawing. Yes, you can make this dip ahead of time. Just store it in the fridge. Here are some tips: - Mix and chill: Prepare the dip and let it chill for at least an hour. - Cover well: Use plastic wrap or a tight lid to keep it fresh. - Garnish later: Add any garnishes, like cinnamon, just before serving. If you cannot use cottage cheese, here are some good options: - Ricotta cheese: It has a similar texture and mild flavor. - Greek yogurt: This will add creaminess and protein. - Silken tofu: A great vegan option that blends well. Yes, this dip works well for meal prep. Here are best practices for storage: - Portion it out: Use small containers for easy grab-and-go snacks. - Keep it cool: Store in the fridge to maintain freshness. - Enjoy within a week: This dip stays good for about 5 to 7 days. This dip combines healthy ingredients like cottage cheese and Greek yogurt, creating a tasty treat. You can customize it with add-ins or dips like apples and pretzels. Remember to blend well for a smooth texture and feel free to experiment with flavors. This dip is easy to make ahead and perfect for sharing. With the right storage, it stays fresh for days. Enjoy trying different variations and impress your friends with your tasty creations!

High-Protein Snickerdoodle Cottage Cheese Dip Delight

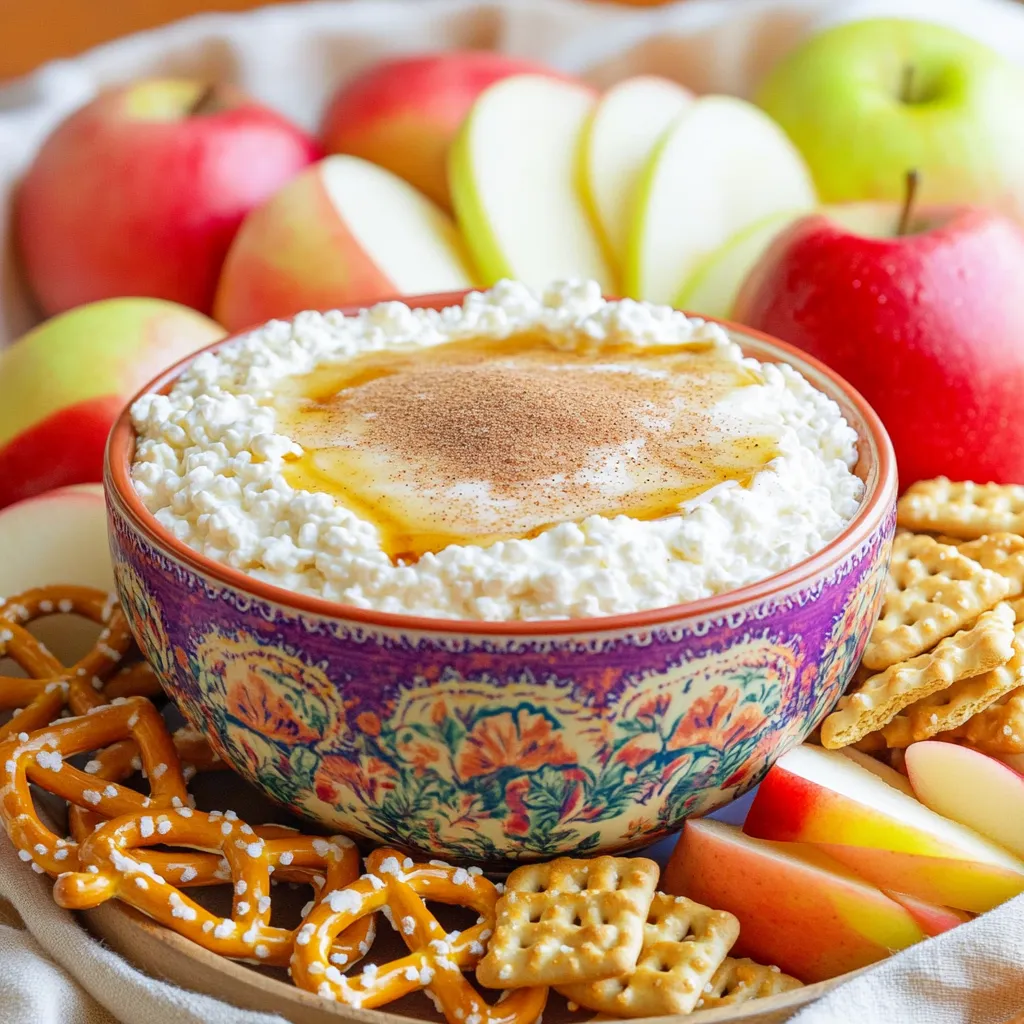
Are you ready to indulge in a guilt-free treat? This High-Protein Snickerdoodle Cottage Cheese Dip is not just tasty; it’s

- 1 cup unsalted butter, melted - 1 cup packed light brown sugar - 1/2 cup granulated sugar - 2 large eggs - 2 teaspoons pure vanilla extract - 2 cups all-purpose flour - 1/2 teaspoon baking powder - 1/4 teaspoon fine salt - 1 cup white chocolate chips - 1 cup dried cranberries The base of these blondies is the unsalted butter. It gives a rich flavor and moist texture. Light brown sugar adds sweetness and a hint of caramel. The granulated sugar balances the sweetness. Eggs help bind the mix and add fluffiness. Pure vanilla extract enhances the overall taste. All-purpose flour is the main dry ingredient. It gives structure to the blondies. Baking powder helps them rise slightly, making them soft. Fine salt boosts all the flavors in the dessert. White chocolate chips melt beautifully, adding creaminess. Dried cranberries provide a tangy contrast that brightens each bite. For butter, I recommend using brands like Land O'Lakes or Challenge. They are high quality and melt well. For sugars, Domino is a reliable choice for both brown and granulated sugar. When it comes to eggs, I prefer large eggs from local farms or organic brands for freshness. For flour, King Arthur Baking Company offers a great all-purpose option. For the white chocolate chips, Ghirardelli or Nestlé Toll House are both excellent. Lastly, for dried cranberries, look for Ocean Spray or a local brand that uses no added sugar. First, gather all your ingredients. You will need butter, sugars, eggs, flour, baking powder, salt, white chocolate chips, and dried cranberries. This recipe is easy to follow and takes about 15 minutes to prep. You will bake the blondies for 25 to 30 minutes. 1. Preheat the Oven: Start by heating your oven to 350°F (175°C). Grease or line a 9x13 inch baking pan with parchment paper for easy removal. 2. Combine Wet Ingredients: In a large bowl, whisk together melted butter, light brown sugar, and granulated sugar. Make sure the mixture is smooth. 3. Add Eggs and Vanilla: Crack in the eggs, one at a time. Whisk well after each egg. Then, stir in pure vanilla extract for added flavor. 4. Mix Dry Ingredients: In another bowl, whisk together flour, baking powder, and salt. Gradually mix this into the wet ingredients. Stir gently until just blended. Avoid overmixing. 5. Fold in Chocolate and Cranberries: Gently fold in the white chocolate chips and dried cranberries. Make sure they are evenly mixed in without breaking them. 6. Transfer to Baking Pan: Pour the batter into the prepared baking pan. Spread it evenly using a spatula. 7. Bake: Place the pan in the oven. Bake for 25-30 minutes. Look for golden edges and use a toothpick to check for doneness. It should have a few moist crumbs. 8. Cool and Cut: Let the blondies cool in the pan for about 10 minutes. Then, transfer them to a wire rack to cool completely. After cooling, slice them into square pieces. - Make sure your oven is fully preheated before baking. - Use a light-colored pan to avoid burning the blondies. - Rotate the pan halfway through baking for even heat distribution. - Check for doneness a couple of minutes early to avoid overbaking. These steps will help you create tasty white chocolate cranberry blondies every time! To keep your blondies soft and chewy, do not overbake them. Check for doneness early. The edges should be golden, but the center can still look a bit undercooked. A toothpick should come out with a few moist crumbs. This means your blondies will stay soft and delicious. Mix your wet and dry ingredients separately first. This helps ensure even blending. When you combine them, stir gently. Overmixing can make the blondies tough. Just mix until you can no longer see dry flour. Then fold in the white chocolate and cranberries carefully. This keeps them intact and evenly spread. Use a 9x13 inch pan for the best results. A light-colored pan helps with even baking. Line it with parchment paper for easy removal. A rubber spatula works great for folding in ingredients. Lastly, a whisk will help you mix the wet ingredients well. Having the right tools makes your baking easier and more fun! {{image_4}} You can change the flavors in your blondies. For a fun twist, use dark chocolate chips instead of white. This gives a rich taste that pairs well with cranberries. You could also swap dried cranberries for dried cherries or apricots. Each fruit adds a new layer of flavor. Try adding a pinch of cinnamon or nutmeg for warmth. These spices can brighten up the overall taste. Adding different ingredients can make your blondies unique. Consider mixing in chopped nuts, like walnuts or pecans. This adds crunch and depth. You can also top the blondies with a drizzle of melted chocolate. Another idea is to sprinkle sea salt on top for a sweet-salty contrast. Experiment with shredded coconut or even mini marshmallows for a fun twist. You can make these blondies gluten-free by using almond flour or a store-bought gluten-free blend. Just be sure to check the packaging for baking instructions. For a vegan version, replace the eggs with flaxseed meal. Mix one tablespoon of flaxseed with three tablespoons of water, let it sit for five minutes, and use it in place of one egg. Use vegan butter or coconut oil to keep the blondies rich and moist. To keep your white chocolate cranberry blondies fresh, store them in an airtight container. Line the container with parchment paper. This will help avoid sticking. Keep it at room temperature for the best taste. If your kitchen is warm, consider refrigerating them. This will help them stay firm and fresh. You can freeze these blondies for later enjoyment. First, let them cool completely. Then, cut them into squares. Wrap each square in plastic wrap. Place the wrapped pieces in a freezer-safe bag. They can last up to three months in the freezer. When you're ready to eat, thaw them in the fridge overnight or at room temperature for a few hours. When stored properly, these blondies last about a week at room temperature. If you keep them in the fridge, they can last up to two weeks. Always check for signs of spoilage, like changes in color or smell. For the best taste, enjoy them within the first few days. Yes, you can swap white chocolate for dark or milk chocolate. Each type brings a unique flavor. Dark chocolate gives a rich taste, while milk chocolate adds sweetness. You can even mix different chocolates for a fun twist. Just remember to adjust the sweetness if needed. To check if the blondies are ready, look for golden edges. Insert a toothpick in the center. If it comes out with a few moist crumbs, they are done. Avoid overbaking, as this can make them dry. Your goal is a soft, chewy texture. Absolutely! You can make blondies a day or two in advance. Just store them in an airtight container at room temperature. For longer storage, you can freeze them. Wrap each blondie in plastic wrap and place them in a freezer bag. They will stay fresh for up to three months. You’ve learned about the key ingredients and how to bake perfect blondies. Each step matters, from mixing to baking. Use tips to keep them moist and flavorful. Explore variations for your taste buds, and don’t worry about storage; I’ve shared the best methods. Remember, blondies can adapt to fit your needs. Follow these insights for great results every time. Enjoy your baking journey and the tasty rewards!

White Chocolate Cranberry Blondies Easy and Tasty Treat

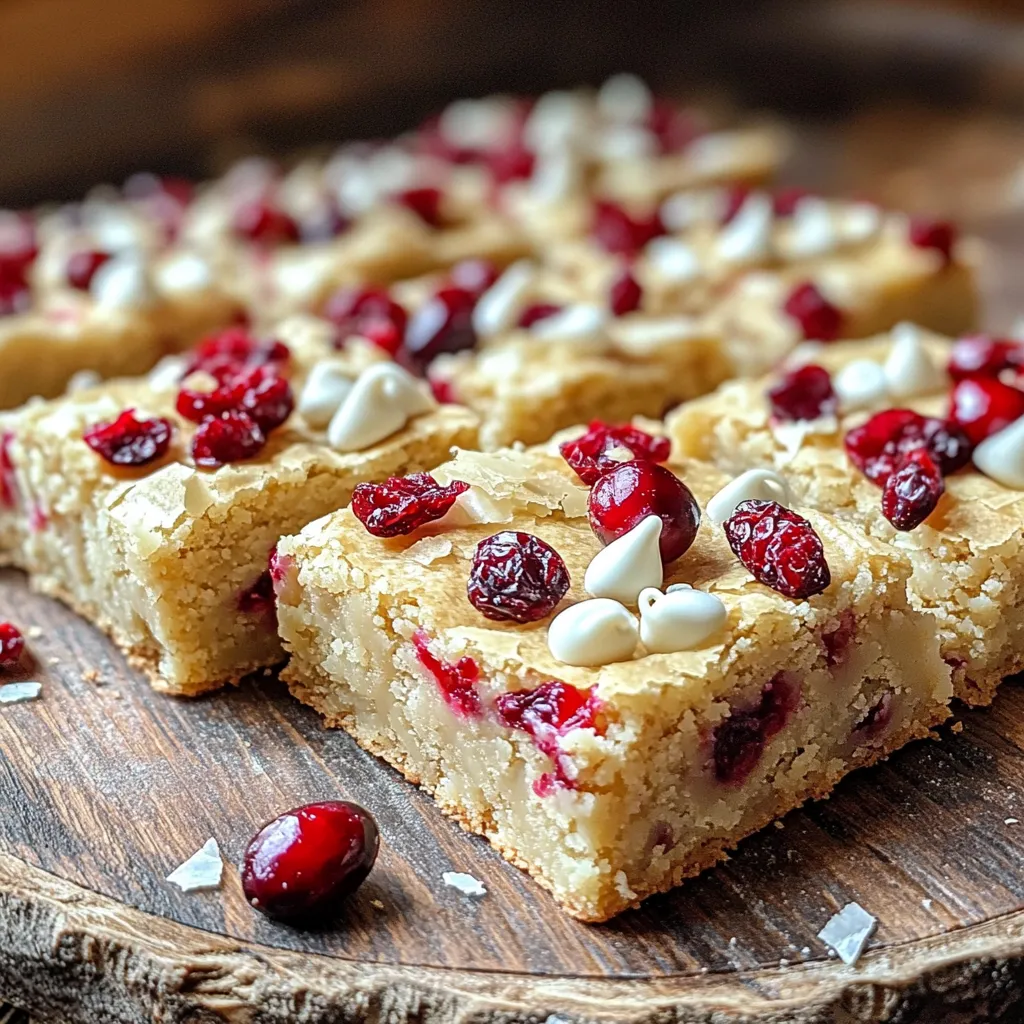
If you’re looking for a sweet treat that’s easy to make, you’ve found it! My White Chocolate Cranberry Blondies are

- 1 lb boneless, skinless chicken thighs, thinly sliced - 2 tablespoons honey - 3 tablespoons soy sauce (low-sodium recommended) - 1 tablespoon minced fresh garlic - 1 tablespoon freshly grated ginger - 1 red bell pepper, cored and sliced into thin strips - 1 cup broccoli florets, rinsed - 1 cup snap peas, rinsed and trimmed These ingredients form the heart of the dish. The chicken thighs give a juicy bite, while honey adds sweetness. The soy sauce brings in umami, and garlic with ginger provide depth. Fresh vegetables add color and crunch. - 2 green onions, finely chopped - A sprinkle of sesame seeds These garnishes lift the dish. Green onions add freshness, while sesame seeds give a nutty touch. They make the dish look appealing and add extra flavor. You can customize this dish! Consider adding extra vegetables like carrots or mushrooms. If you want more protein, try shrimp or tofu. Mixing things up keeps meals exciting and fun. To start, you need to mix the marinade. In a medium bowl, combine 2 tablespoons of honey, 3 tablespoons of soy sauce, 1 tablespoon of minced garlic, and 1 tablespoon of freshly grated ginger. Whisk these ingredients until they blend well. This sweet and savory mixture adds great flavor to the chicken. Next, heat 1 tablespoon of vegetable oil in a large skillet or wok over medium-high heat. Once the oil is hot, add 1 pound of sliced chicken thighs. Season the chicken with salt and pepper to taste. Stir-fry the chicken for 5 to 7 minutes. You want it to turn golden brown and be fully cooked. When done, remove the chicken and place it on a plate. In the same skillet, add another tablespoon of vegetable oil. Toss in the red bell pepper strips, broccoli florets, and snap peas. Stir-fry these vegetables for 3 to 4 minutes. They should be tender yet crisp. You want to keep their bright colors intact for a beautiful dish. Now, return the cooked chicken to the skillet with the sautéed vegetables. Pour the honey garlic marinade over everything. Gently stir to coat the chicken and veggies in the sauce. Cook this mix for an additional 2 to 3 minutes. This allows the sauce to heat up and thicken slightly. Just before you serve, drizzle 1 tablespoon of sesame oil over the stir-fry. Mix it in well. The sesame oil adds a lovely nutty flavor that enhances the dish. For plating, serve the honey garlic chicken stir fry in a large bowl or on individual plates. Garnish with chopped green onions and a sprinkle of sesame seeds for a nice touch. Pair it with jasmine rice or quinoa to soak up the delicious sauce. This makes for a satisfying and complete meal. To make a great stir-fry, follow these tips: - Cut Chicken Thin: Slice chicken thighs into thin strips. This helps them cook fast and evenly. - High Heat: Use medium-high heat to create a nice sear on the chicken. This locks in flavor. - Don’t Crowd the Pan: Cook in batches if needed. Too much food at once makes it steam instead of fry. - Add Ingredients by Cooking Time: Start with chicken, then add harder veggies like broccoli, and finish with softer ones like bell peppers. This keeps everything crisp and fresh. To store leftover stir-fry effectively: - Cool First: Let the stir-fry cool down to room temperature. This stops excess moisture. - Use Airtight Containers: Place the stir-fry in airtight containers. This keeps it fresh for longer. - Refrigerate: Store in the fridge for up to 3 days. - Freeze for Later: If you want to keep it longer, freeze it for up to 3 months. Just thaw it in the fridge before reheating. To take your stir-fry to the next level, consider these flavor boosters: - Add Spice: Try a pinch of red pepper flakes for heat. - Citrus Zest: A little lime or lemon zest brightens the dish. - Different Sauces: Swap soy sauce for teriyaki or hoisin for a new twist. - Fresh Herbs: Add basil or cilantro just before serving for a fresh touch. These tips will help you make the most of your honey garlic chicken stir-fry! {{image_4}} You can easily swap chicken for other proteins. Tofu works great for a vegetarian option. It absorbs flavors well and adds a nice texture. Shrimp is another tasty choice. It cooks fast and pairs well with the honey garlic sauce. If you prefer beef, thinly sliced flank steak is a good fit. Just remember to adjust the cooking time for each protein. Feel free to mix up the vegetables. Carrots add a sweet crunch, while bell peppers bring color. You can also use zucchini or mushrooms for added flavor. Green beans and bok choy are excellent options, too. The key is to choose veggies you love. This dish is customizable, so have fun experimenting! Want to make this dish gluten-free? Use tamari instead of soy sauce. This alternative tastes similar but is safe for those with gluten issues. For a low-carb option, skip the rice or quinoa. Serve it over a bed of leafy greens instead. This keeps it light and healthy. You can enjoy the flavors without the extra carbs. You can store leftover honey garlic chicken stir fry in the fridge for up to three days. Make sure to place it in an airtight container. This keeps the flavors fresh and prevents any smells from other foods from seeping in. To freeze the dish, let it cool completely. Place it in a freezer-safe container or bag. Make sure to remove as much air as possible. Label it with the date, and you can freeze it for up to three months. When you are ready to enjoy it again, simply thaw it in the fridge overnight before reheating. To reheat, you can use the microwave or stove. If you choose the microwave, place the stir fry in a microwave-safe bowl. Cover it loosely and heat in short intervals, stirring in between. This keeps it from drying out. If using the stove, warm it in a skillet over low heat. Stir often until it's heated through. This method helps maintain the texture of the chicken and veggies. You can make this dish in about 30 minutes. It takes 15 minutes to prep the ingredients. Then, you will need 15 minutes to cook. This quick time makes it great for busy nights. Yes, you can prepare this dish ahead of time. Cook the chicken and veggies, then store them in the fridge. You can keep the stir fry fresh for up to three days. Just reheat it when you're ready to eat. This dish goes well with many sides. Here are some ideas: - Cooked jasmine rice - Quinoa - Steamed rice noodles - A simple green salad These options help soak up the tasty sauce. Absolutely! You can portion the stir fry into containers. This way, you have ready meals for the week. When reheating, use the microwave or a skillet. Heat it gently to keep the chicken juicy and the veggies crisp. This blog post covered how to make a tasty Honey Garlic Chicken Stir Fry. We explored essential ingredients, like chicken, fresh veggies, and the right marinade. I shared step-by-step instructions for cooking and tips to perfect your stir-fry. You learned ways to customize the dish with different proteins and vegetables. In closing, this recipe is simple and flexible, perfect for any kitchen. Enjoy exploring new flavors!

Honey Garlic Chicken Stir Fry Quick and Flavorful Meal

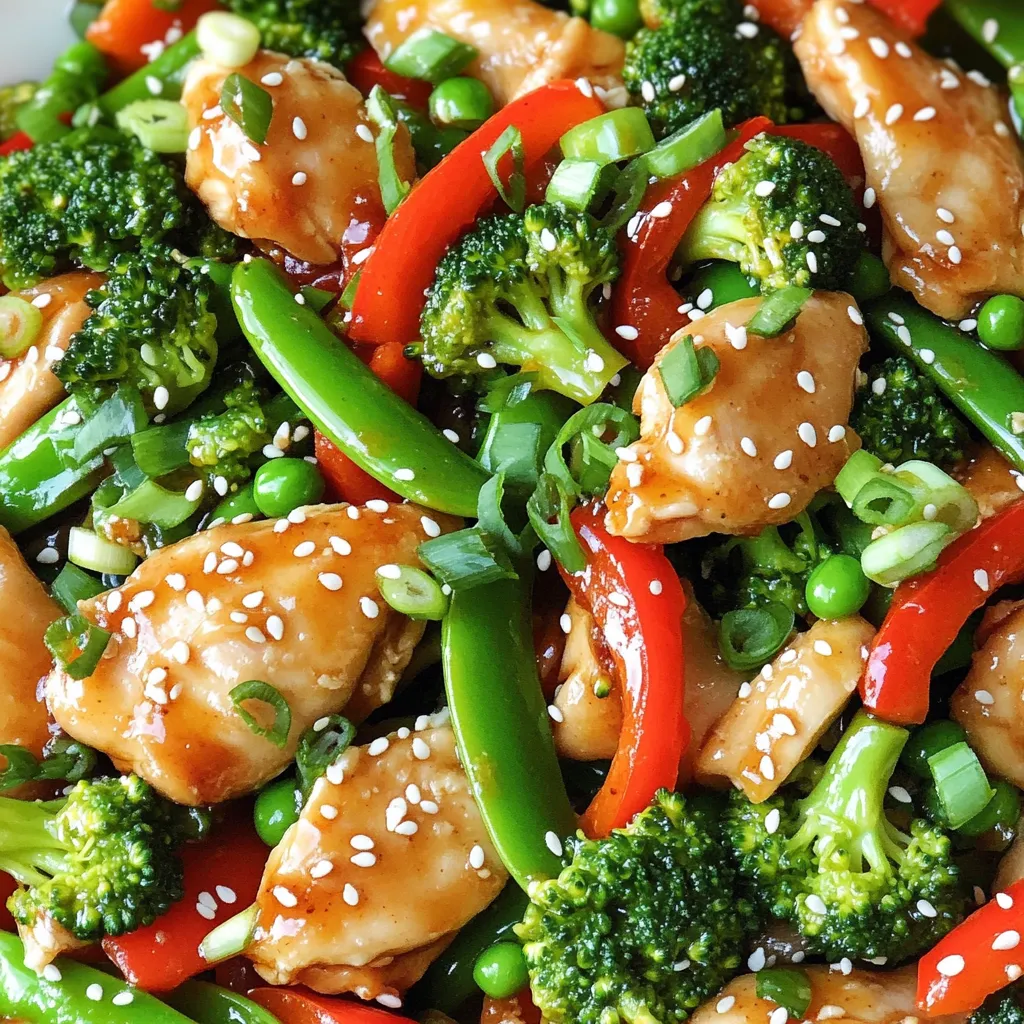
Looking for a quick and tasty meal? Honey Garlic Chicken Stir Fry is a winner! With juicy chicken thighs, sweet

To make these tasty cookies, you need just a few basic ingredients. Here’s what you will need: - 1 cup rolled oats - 1/2 cup whole wheat flour - 1/2 teaspoon baking soda - 1/2 teaspoon ground cinnamon - 1/4 teaspoon salt - 1/4 cup coconut oil, melted - 1/4 cup maple syrup or honey - 1/4 cup unsweetened applesauce - 1 teaspoon vanilla extract - 1/2 cup raisins These ingredients work together to create a chewy cookie with a hearty flavor. The oats provide texture, while the whole wheat flour adds a nutty taste. You can add some fun extras to make the cookies even better. Consider these options: - 1/4 cup chopped walnuts - 1/4 cup dark chocolate chips Adding nuts gives a nice crunch, and chocolate chips add a sweet touch. You can mix and match based on what you like. Using whole ingredients offers great health perks. Whole oats and flour give you fiber, which helps digestion. Coconut oil is a healthier fat option. Maple syrup or honey adds natural sweetness without refined sugar. These ingredients keep the cookies tasty while boosting nutrition. Making these cookies healthier means you can enjoy them without guilt! {{ingredient_image_2}} First, set your oven to 350°F (175°C). This heat will make your cookies soft and chewy. Next, grab a baking sheet and line it with parchment paper. This will help the cookies not stick. In a large bowl, mix the rolled oats, whole wheat flour, baking soda, ground cinnamon, and salt. Stir well to combine all these dry ingredients. This step ensures that every bite has a great taste. In another bowl, whisk together the melted coconut oil, maple syrup (or honey), applesauce, and vanilla extract. Make sure this mixture is smooth and well blended. This adds moisture and flavor to your cookies. Carefully pour the wet mixture into the bowl with the dry mix. Use a spatula or wooden spoon to stir until just combined. Don’t over-mix, as this can change the cookie's texture. Then, fold in the raisins, walnuts, and chocolate chips if you want. This adds extra flavor and crunch. Use a tablespoon or cookie scoop to place dough on the baking sheet. Leave about 2 inches between each scoop. Press down lightly on each dough ball. Bake the cookies for 12-15 minutes. They should be golden brown at the edges. After baking, let them cool for five minutes on the sheet. Then, move them to a wire rack to cool completely. Enjoy your cookies! To get the right cookie texture, follow these steps: - Use rolled oats, not instant oats. They give a chewy texture. - Mix the wet and dry ingredients gently. Over-mixing can make them tough. - Flatten the dough balls slightly before baking. This helps them spread evenly. - Bake until the edges are golden but the center is still soft. This keeps them chewy. To keep your cookies fresh: - Store them in an airtight container. This prevents them from getting hard. - Keep them at room temperature for up to a week. - You can freeze cookies for up to three months. Just wrap them well. - Thaw them at room temperature or microwave for a few seconds. Want to make these cookies even healthier? Try these swaps: - Replace maple syrup with mashed bananas for natural sweetness. - Use almond flour instead of whole wheat flour for a gluten-free option. - Add chia seeds or flaxseeds for extra fiber and omega-3s. - Swap raisins for dried cranberries or apricots for a twist. Pro Tips Use Fresh Ingredients: Always opt for fresh oats and spices to enhance the flavor of your cookies. Fresh ingredients can significantly elevate the taste. Experiment with Mix-ins: Feel free to swap out raisins for other dried fruits like cranberries or apricots. You can also try different nuts or seeds for added texture and nutrition. Monitor Baking Time: Keep an eye on the cookies as they bake to avoid overcooking. They should be golden brown on the edges but still soft in the center for the perfect chewy texture. Storage Tips: Store the cookies in an airtight container at room temperature for up to a week, or freeze them for longer storage. This ensures they stay fresh and delicious! {{image_4}} To make gluten-free oatmeal raisin breakfast cookies, you can swap the whole wheat flour with gluten-free flour. Look for a blend that works well for baking. You can also use certified gluten-free oats to ensure no cross-contamination occurs. This keeps the cookies soft and chewy, just like the original recipe. You can customize your cookies with fun add-ins. Try adding: - 1/4 cup chopped dried cranberries - 1/4 cup shredded coconut - 1/4 cup sunflower seeds - 1/4 cup chopped almonds These ingredients bring new tastes and textures. Mix and match based on what you like. Just remember to keep the total amount of add-ins to about 1 cup to maintain the cookie's shape. To create a vegan version, replace honey with maple syrup. Use a flax egg instead of applesauce. To make a flax egg, mix 1 tablespoon of ground flaxseed with 2.5 tablespoons of water. Let it sit for about 5 minutes until it thickens. This will help bind your cookies without any animal products. One oatmeal raisin breakfast cookie has about 100 calories. Each cookie packs a good mix of carbs, protein, and healthy fats. The rolled oats provide fiber, helping you feel full longer. Here’s a quick look at the calorie breakdown: - Rolled oats: 30 calories - Whole wheat flour: 25 calories - Coconut oil: 60 calories - Maple syrup: 50 calories - Raisins: 25 calories - Walnuts (optional): 20 calories These cookies are not just tasty; they are also good for you. Here’s why: - Rolled oats: Great for heart health and digestion. They lower cholesterol. - Whole wheat flour: Higher in nutrients than white flour. It adds fiber and vitamins. - Coconut oil: Contains healthy fats that can boost energy. - Maple syrup: A natural sweetener with antioxidants. - Raisins: Packed with iron and potassium. They help with energy. - Walnuts (if used): Great for brain health. They have omega-3 fatty acids. Oatmeal raisin breakfast cookies are a better choice than many traditional breakfast items. Here’s how they stack up: - Compared to sugary cereals: These cookies have less sugar and more fiber. - Versus pastries: They contain healthy fats and whole grains. Pastries often have empty calories. - Against pancakes: These cookies are quick to make and easy to grab on the go. Switching to these cookies can make your breakfast healthier without losing taste. They are a fun way to start your day! Yes, you can make these cookies ahead of time. Prepare the dough and scoop it onto the baking sheet. Cover it and store it in the fridge for up to two days. When ready, bake them fresh for a warm treat. Store leftover cookies in an airtight container. They stay fresh at room temperature for up to five days. For longer storage, place them in the fridge or freezer. Just remember to let them cool before sealing. If you don’t like raisins, use dried cranberries, chopped dates, or chocolate chips. You can even try chopped nuts or fresh fruit. These swaps still keep the cookies tasty and fun. Absolutely! These cookies are great for kids. They are healthy and full of oats and fruit. Plus, they are fun to eat. Kids love the sweet taste and chewy texture. If your cookies spread too much, check your oven temperature. If it’s too hot, cookies can flatten. You can also chill the dough before baking. This helps the cookies hold their shape better. In this blog post, we explored how to make oatmeal raisin breakfast cookies. We covered essential and optional ingredients, plus their benefits. The step-by-step guide made it easy to bake these tasty treats. I shared tips for perfect texture and smart storage. You can even customize them with different variations. These cookies offer nutrition and great taste. Enjoy making your own batch! They are simple and fun for everyone.

Oatmeal Raisin Breakfast Cookies Delicious and Easy

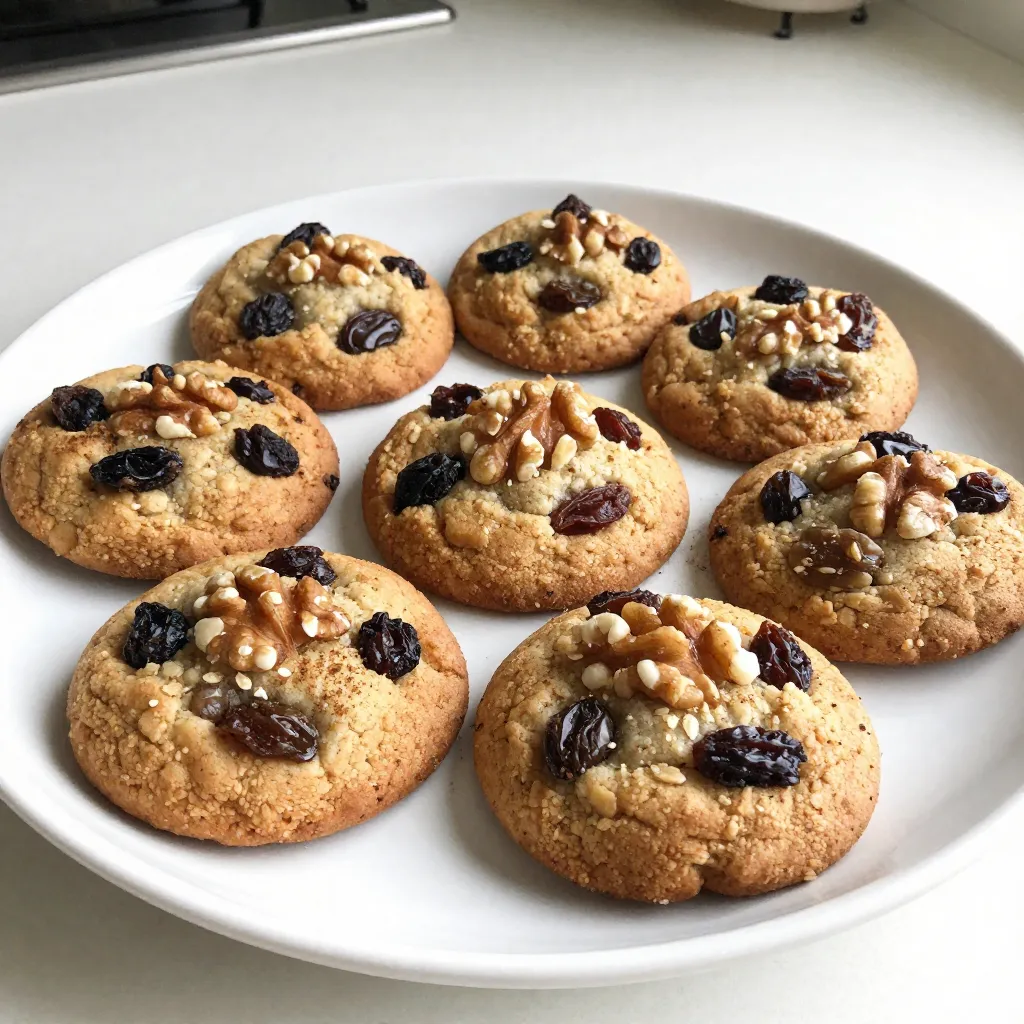
Looking for a tasty and easy breakfast option? Let’s make Oatmeal Raisin Breakfast Cookies! They’re perfect for busy mornings and

Older posts
Newer posts
← Previous Page1 … Page3 Page4 Page5 … Page85 Next →

dsad

© 2026 spoonfulsavory • Built with GeneratePress

Our Policies

  • Copyright Policy
  • Cookie Policy
  • GDPR Policy
  • Privacy Policy
  • Disclaimer
  • Terms Of Use

More Information

  • Home
  • About
  • Contact
  • Appetizers
  • Dessert
  • Dinner
  • Drinks
©2026, spoonfulsavory About Back To Top