. This link will give you all the steps you need to make this tasty dish. Vegetarian stuffed bell peppers are a fun, tasty dish. You learned about the main ingredients, how to prepare them, and some great tips. Using different veggies and spices makes this meal your own. Remember to store leftovers properly so you enjoy them later. Try new toppings and variations for fun flavors. This dish is not just good; it’s flexible. You can change it up to fit your needs! Enjoy cooking and sharing this healthy meal with friends and family.](https://spoonfulsavory.com/wp-content/uploads/2025/04/de3b2d06-2d47-4a7f-9251-075a1c932223.webp)
Vegetarian Stuffed Bell Peppers Flavorful and Filling Dish
Looking for a colorful and satisfying meal? These Vegetarian Stuffed Bell Peppers are both flavorful and filling! Packed with hearty
Looking for a colorful and satisfying meal? These Vegetarian Stuffed Bell Peppers are both flavorful and filling! Packed with hearty
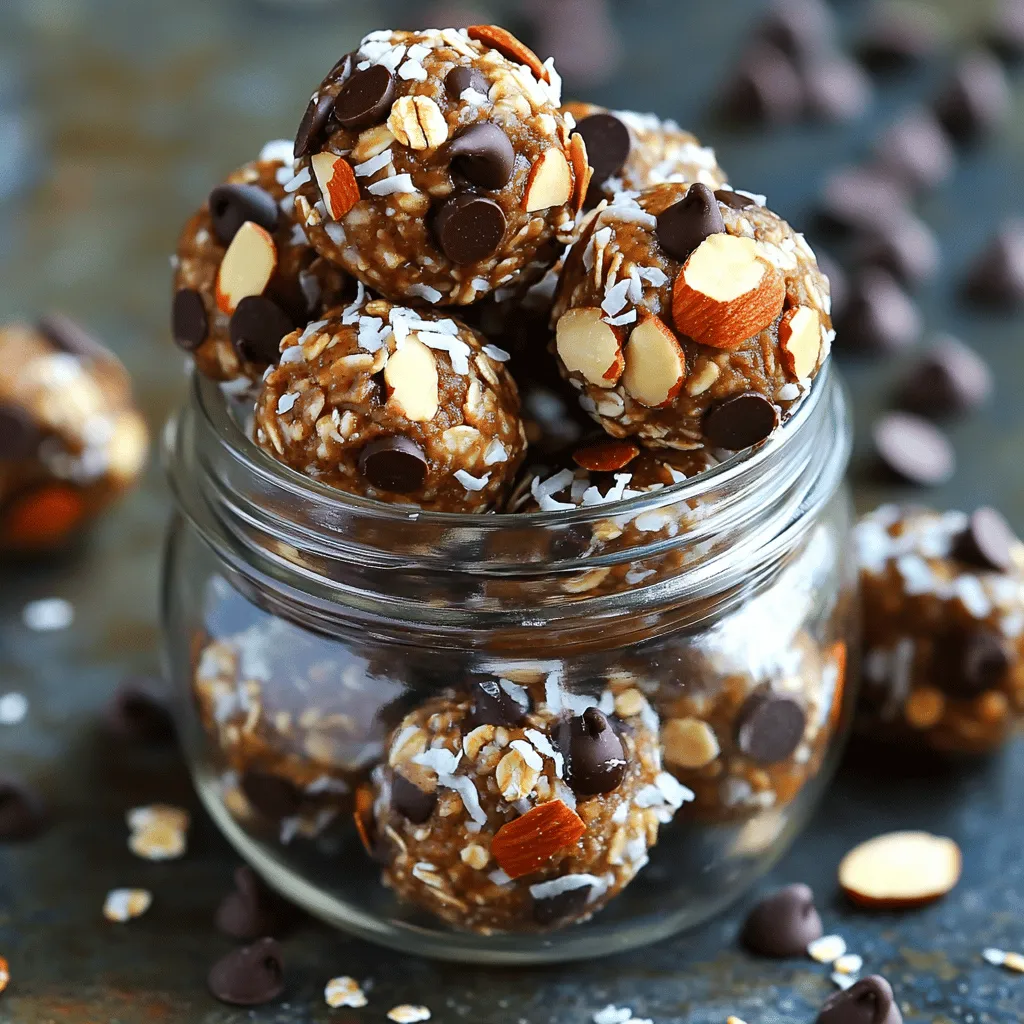
Looking for a tasty snack that fuels your day? Almond Joy Energy Bites are the perfect blend of flavor and

Looking for a cool drink to beat the summer heat? Peach Basil Iced Tea is the perfect choice. This refreshing
![To make Savory Herb Crusty Bread, you'll need a few simple ingredients. Each one adds to the flavor and texture of the bread. - 4 cups all-purpose flour - 2 teaspoons salt - 1 teaspoon sugar - 2 teaspoons instant dry yeast - 1 ½ cups warm water (about 110°F) - 2 tablespoons olive oil - 1 tablespoon dried oregano - 1 tablespoon dried thyme - 1 tablespoon garlic powder - 1 tablespoon rosemary, finely chopped (fresh or dried) - Cornmeal (for dusting) The flour is key for structure. You can use bread flour for a chewier bite. If you want gluten-free bread, try a blend of almond and coconut flour. Herbs are vital for flavor. Dried herbs work well, but fresh herbs like basil or parsley can add a bright taste. Garlic powder gives a savory note. Adding olive oil enriches the bread. It keeps the crust crisp while keeping the inside soft. This combination of ingredients creates a lovely aroma and a delicious crusty bread that you will enjoy. For the full recipe, check out the instructions. 1. Start with a large mixing bowl. Whisk together 4 cups of all-purpose flour, 2 teaspoons of salt, 1 teaspoon of sugar, and 2 teaspoons of instant dry yeast. Add 1 tablespoon each of dried oregano, dried thyme, and garlic powder, plus 1 tablespoon of chopped rosemary. This mix builds the bread's flavor. 2. Make a well in the center of the dry mix. Pour in 1 ½ cups of warm water and 2 tablespoons of olive oil. Use a wooden spoon to mix until a shaggy dough forms. 3. Transfer the dough to a floured surface. Knead it for about 10 minutes. Stop when the dough feels smooth and elastic. If it’s sticky, add a little flour, but not too much. 1. Shape the kneaded dough into a ball. Place it in a greased bowl. Cover it with a damp cloth. Let it rise in a warm spot for 1 to 1.5 hours. It should double in size. 2. After rising, gently punch the dough down to release air. Shape it into a round or oblong loaf. 1. Preheat your oven to 450°F (232°C). Place the shaped dough on a baking sheet lined with parchment paper dusted with cornmeal. Cover it again with a damp cloth. Let it rise for another 30-45 minutes. 2. Once risen, make shallow slashes on the dough's surface with a sharp knife. This allows it to expand. 3. For a crusty texture, place a small oven-safe dish filled with water in the oven while it preheats. 4. Bake the bread for about 25-30 minutes. It should be golden brown and sound hollow when tapped. 5. Cool the bread on a wire rack before slicing. This improves its texture. Follow the [Full Recipe] for more details and tips. To get that perfect crust, steam is key. When you bake, add a small oven-safe dish with water. This creates steam and helps your bread rise. It also makes the crust crispier. Handle your dough gently. When kneading, don’t overwork it. This keeps the air inside, leading to a fluffier loaf. Want to kick up the flavor? Try adding fresh herbs like basil or parsley. Fresh herbs can brighten the taste. Dried herbs are great too, but use about half the amount since they are stronger. Mix and match herbs for your own twist. Pair your bread with herbed olive oil for a tasty dip. You can also serve it with soup or salad. For a lovely presentation, slice the bread and place it on a wooden board. Add some fresh herbs as a garnish. This makes your meal look inviting and delicious. For the full recipe, check out the earlier section on ingredients and instructions. {{image_4}} For a gluten-free version of Savory Herb Crusty Bread, use gluten-free flour blends. Look for blends with xanthan gum, as it helps with texture. You can try almond flour or coconut flour, but these may change the flavor. For rising, add an extra teaspoon of yeast. Let the dough rise longer to get the best texture. To enhance the taste, consider adding cheese. Parmesan or cheddar adds great flavor and texture. You can also add seeds like sesame or sunflower for crunch. Mixing sweet and savory flavors is fun too. Try adding honey or dried fruit to balance the herbs. Mixing herbs can create unique flavors. Good choices include basil, parsley, and dill. These can give your bread a fresh taste. For seasonal herbs, use thyme in winter and fresh basil in summer. Experiment with combinations to find your favorite mix. To keep your savory herb crusty bread fresh, place it in a bread bag or a cloth. This allows air to flow while keeping moisture in. Avoid plastic bags, as they trap moisture and make the crust soft. If you have a bread box, that works well too. It protects from light and keeps the bread at room temperature. When reheating, use an oven for best results. Preheat it to 350°F (175°C). Wrap the bread in foil to keep it warm. Bake for about 10 minutes. If you want to keep the crust crispy, remove the foil for the last few minutes. You can also use a toaster oven for smaller pieces. At room temperature, the bread lasts up to three days. After that, it may dry out. For longer storage, freeze the bread. Slice it first for easy use later. Wrap slices tightly in plastic wrap, then place them in a freezer bag. They can last up to three months in the freezer. When ready to eat, thaw it at room temperature or gently warm it up. What can I substitute for fresh herbs? You can use dried herbs instead of fresh ones. Dried herbs are strong, so use less. A good rule is to use one-third of the amount. For example, if a recipe calls for one tablespoon of fresh herbs, use one teaspoon of dried herbs. How do I know when my bread is fully baked? Check the color and sound of your bread. It should be golden brown. When you tap the bottom, it should sound hollow. You can also use a thermometer; the inside should reach 190°F. Can I make this dough in advance? Yes! You can make the dough ahead of time. After kneading, place it in the fridge. It can stay there for up to 24 hours. Just let it come to room temperature before the second rise. How can I make the bread softer inside? To achieve a soft inside, add a bit of fat, like butter or oil, into the dough. This will help. Also, avoid overbaking. A quick bake keeps the inside tender. Lastly, steam in the oven can also help create a softer crumb. For the full recipe, check the earlier section! This blog covered how to make delicious savory herb crusty bread. You learned about the ingredients, from herbs to flour types. I shared step-by-step instructions, including dough preparation, rising, and baking tips. We also explored ways to enhance flavor, variations for dietary needs, and proper storage. Remember, baking takes practice, so don’t get discouraged. Each loaf teaches you something new. Enjoy making bread that fills your home with warmth and flavor. Happy baking!](https://spoonfulsavory.com/wp-content/uploads/2025/04/9505f708-f87a-4395-8595-8f840ded5a05.webp)
Are you ready to elevate your bread-baking game? This Savory Herb Crusty Bread recipe is simple and packed with flavor.
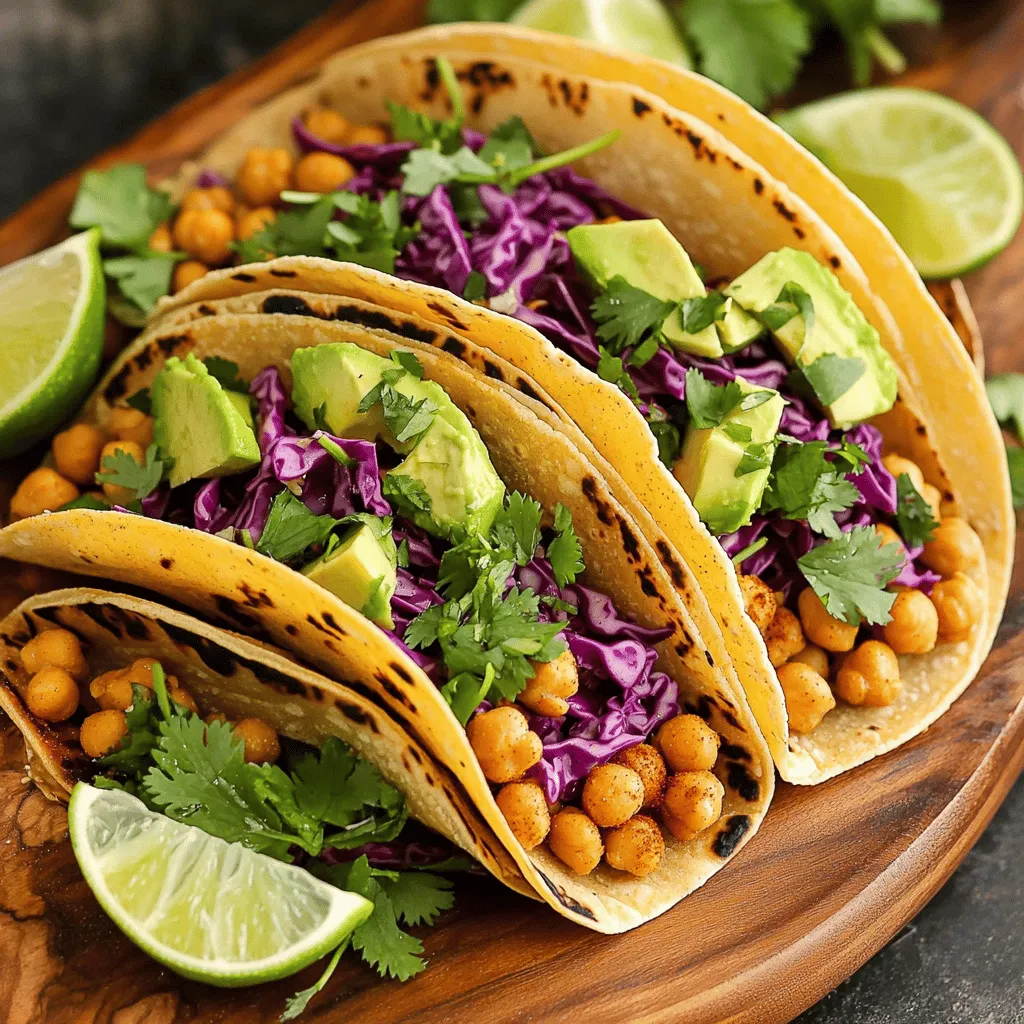
Looking for a fun, healthy meal? Crispy Chickpea Tacos pack tons of flavor and crunch! These easy tacos swap meat

Get ready for a fresh and vibrant dish that packs a spicy punch! This Spicy Thai Zoodle Salad is a
![To make Honey Mustard Chicken Thighs, you will need: - 4 bone-in, skin-on chicken thighs - 1/4 cup honey - 1/4 cup Dijon mustard - 2 tablespoons olive oil - 2 cloves garlic, minced - 1 tablespoon apple cider vinegar - 1 teaspoon dried thyme - 1 teaspoon paprika - Salt and pepper to taste These ingredients mix well to create a glaze that is both sweet and tangy. The chicken thighs are perfect for this dish. Their skin keeps them juicy, and the bones add flavor. You can enhance your dish with: - Fresh parsley, chopped (for serving) - Suggested sides: roasted vegetables or a green salad Fresh parsley adds color and a hint of freshness. Roasted vegetables or a salad make great sides. They balance the rich flavors of the chicken. Each serving of Honey Mustard Chicken Thighs contains about 350 calories. Key nutritional benefits include: - Chicken thighs provide protein and iron. - Honey offers natural sweetness and antioxidants. - Dijon mustard may aid digestion. This meal is both delicious and nutritious, making it a great choice for any dinner. For the full recipe, follow the steps to enjoy this tasty dish. Preheat your oven to 400°F (200°C). This step is key to making the chicken cook evenly. A hot oven helps the skin crisp up nicely. Next, prepare the marinade. In a medium bowl, mix together 1/4 cup honey, 1/4 cup Dijon mustard, and 2 tablespoons of olive oil. Add 2 minced garlic cloves, 1 tablespoon apple cider vinegar, 1 teaspoon dried thyme, and 1 teaspoon paprika. Don’t forget a pinch of salt and pepper. Whisk until it’s well blended and smooth. Now, take a large baking dish and arrange the chicken thighs in it. Place them skin side up. This position helps the skin get that perfect golden brown color. Pour the honey mustard marinade over the chicken. Make sure to coat each piece well. You can use a brush or the back of a spoon to spread it evenly. Place the baking dish in the oven. Bake the chicken for 35 to 40 minutes. You know it’s done when the juices run clear, and the internal temperature hits 165°F (75°C). For extra crispy skin, switch the oven to broil for the last 2-3 minutes. Keep an eye on it to avoid burning. Once cooked, take the chicken out and let it rest for about 5 minutes. This resting time helps keep the meat juicy. Before serving, sprinkle freshly chopped parsley on top for a nice touch. For a full recipe, check out the details above. To make the best honey mustard chicken thighs, you must balance the flavors. The sweet honey pairs well with the tangy Dijon mustard. You want the taste to shine. Add garlic and herbs for extra depth. Marinating time is key for great flavor. Aim for at least 30 minutes. If you have more time, let it sit longer. This will deepen the taste and make your chicken even better. Keeping the chicken juicy is important. Always start with skin-on, bone-in thighs. They stay moist during cooking. Use a meat thermometer to check for doneness. You want the internal temperature to reach 165°F (75°C). This ensures safety and great flavor. For best results, avoid overcrowding the pan. Give each thigh space to cook evenly. This helps get that perfect golden brown color and crisp skin. Plating can elevate your meal. Arrange the chicken thighs on a large platter. Drizzle with pan juices for a glossy look. Fresh parsley adds color and a nice touch. Pair your chicken with sides that complement its flavor. Roasted seasonal vegetables work well. A refreshing green salad also makes a perfect match. These sides balance the dish and add nutrition. For the full recipe, refer to the earlier sections. {{image_4}} You can change the flavors in honey mustard chicken thighs easily. Adding spices or herbs can give your dish a new twist. Try adding cumin, rosemary, or even chili powder for some heat. You can also swap ingredients to meet dietary needs. If you want a lower sugar option, use sugar-free honey. For a vegan alternative, try maple syrup instead of honey. You can cook honey mustard chicken thighs in different ways. Grilling them gives a nice smoky flavor. Just marinate the chicken, then grill it for about 6-8 minutes on each side. Baking is also simple. Just follow the [Full Recipe] for a tasty oven-baked version. If you're short on time, try a slow cooker. Place the marinated chicken in the slow cooker and set it on low for 6-7 hours. This method keeps the chicken juicy and tender. You can serve honey mustard chicken thighs in many ways. Try making wraps by placing the chicken in a tortilla with greens and veggies. This makes a quick lunch. You can also turn it into a salad by slicing the chicken and adding it to mixed greens. If you like meal prep, cook a batch of chicken thighs. Store them in the fridge for quick meals all week. Just reheat and enjoy! To store leftovers from your honey mustard chicken thighs, let them cool first. Place the chicken in an airtight container. This will keep it fresh and tasty. I suggest using glass containers for best results. They help keep moisture in and odors out. If you want to freeze the chicken, wrap each piece in plastic wrap. Then place them in a freezer-safe bag. This helps prevent freezer burn. When you're ready to eat, thaw it overnight in the fridge. Reheat the chicken in the oven at 350°F (175°C) until it's hot. This keeps the chicken juicy and flavorful. In the fridge, your honey mustard chicken will last about 3 to 4 days. Always check for signs of spoilage. Look for off smells, discoloration, or a slimy texture. If you see any of these, it’s best to toss it out. Enjoying your chicken safely is key! How long does it take to cook honey mustard chicken thighs? It takes about 35 to 40 minutes to cook honey mustard chicken thighs in the oven at 400°F. You want them to reach an internal temperature of 165°F to ensure they are safe to eat. I suggest checking the chicken a bit early. This way, you avoid overcooking and drying them out. Can I use boneless chicken thighs instead? Yes, you can use boneless chicken thighs. They will cook faster, usually in about 25 to 30 minutes. Keep an eye on them to prevent dryness. The marinade will still work great, giving you that sweet and tangy flavor. What can I use instead of Dijon mustard? If you don’t have Dijon mustard, try using yellow mustard. It’s milder but still adds a nice flavor. You can also mix honey with a little bit of apple cider vinegar for a sweet and tangy kick. Is there a honey alternative for this recipe? You can use maple syrup as a honey alternative. It will offer a different taste but still keep the dish sweet. Agave nectar is another good option. Just use the same amount as honey to keep the balance right. Can I prepare the marinade in advance? Yes, you can prepare the marinade a day ahead. This helps the flavors meld together better. Just store it in the fridge until you're ready to use it. What should I serve with honey mustard chicken thighs? I recommend serving honey mustard chicken thighs with roasted vegetables or a fresh salad. They pair well with rice or mashed potatoes, too. The sweet and tangy flavor works great with many sides, making it a versatile dish. In this blog post, we explored how to make delicious honey mustard chicken thighs. We covered the key ingredients, cooking steps, and useful tips. Each part helps you create a great meal. You can even adjust flavors to fit your taste. Remember to store leftovers properly for later enjoyment. With this recipe, you can impress family and friends easily. Enjoy this tasty dish and have fun cooking!](https://spoonfulsavory.com/wp-content/uploads/2025/04/e359b5cb-58b6-4898-ab3c-bf22923c6379.webp)
Looking for a juicy and flavorful meal? Honey Mustard Chicken Thighs are the answer! In this blog post, I’ll guide
![- 1 pound large shrimp, peeled and deveined - 4 tablespoons unsalted butter, divided - 4 cloves garlic, minced - 1 cup long-grain white rice - 2 cups chicken or vegetable broth The main ingredients in this dish are simple yet flavorful. Large shrimp make a great base. They cook quickly and absorb the garlic butter flavor well. Unsalted butter adds richness without being too salty. Fresh garlic gives the dish a strong, aromatic kick. Long-grain white rice serves as a perfect side, soaking up all the tasty juices. Using chicken or vegetable broth instead of water adds depth to the rice. - 1 teaspoon dried oregano - 1 teaspoon paprika - Salt and pepper to taste Seasonings elevate this dish from basic to bold. Dried oregano brings a hint of earthiness. Paprika adds a mild warmth and vibrant color. Salt and pepper enhance all the flavors, making each bite pop. Feel free to adjust these to suit your taste. - 2 tablespoons fresh parsley, chopped (plus more for garnish) - Lemon wedges Garnishes are the finishing touch. Fresh parsley adds a bright, herbal note and color contrast. Lemon wedges provide a zesty squeeze that brightens the dish. When you serve your garlic butter shrimp and rice, the garnishes make it look and taste even better. For the full recipe, check [Full Recipe]. - In a medium saucepan, combine 1 cup of long-grain white rice and 2 cups of chicken or vegetable broth. - Bring the mixture to a boil over medium-high heat. - Once boiling, reduce heat to low, cover, and let it simmer for 15-18 minutes. - When the rice is tender, fluff it with a fork. - Mix in half of the chopped parsley, 1 teaspoon of dried oregano, and lemon zest. - Season lightly with salt and pepper to taste and keep warm. - While the rice cooks, pat 1 pound of large shrimp dry with paper towels. - Lightly season the shrimp with salt, black pepper, and paprika. - Make sure they are evenly coated for great flavor. - In a large skillet, melt 2 tablespoons of unsalted butter over medium heat. - Once the butter is melted and bubbly, add 4 cloves of minced garlic. - Sauté the garlic for 1-2 minutes, stirring frequently. - Be careful not to burn the garlic; it should be fragrant and light golden. - Add the seasoned shrimp to the skillet. - Cook the shrimp for about 2-3 minutes on one side until they turn pink. - Flip the shrimp and cook for an additional 2 minutes. - Squeeze fresh lemon juice over the shrimp, stirring gently for flavor. - Let the shrimp cook for another minute to soak up the juice. Now, you have a warm, delicious dish ready to serve! If you want to see the full recipe, check the detailed instructions above. To make the best garlic butter shrimp, focus on two key points. First, avoid overcooking the shrimp. Overcooked shrimp can become tough and chewy. Aim for a cooking time of just 2-3 minutes per side. You want them to turn a lovely pink and be tender. Second, use fresh ingredients. Fresh shrimp and garlic make a big difference in flavor. If you can, buy shrimp that is still on ice. Freshness adds a sweet taste that frozen shrimp can lack. Want to spice things up? Add a pinch of red pepper flakes. This small touch can give the dish a nice kick without overwhelming it. You can also experiment with fresh herbs. Basil, cilantro, or dill can add new layers of flavor. Just chop them finely and mix them in at the end. This way, you keep the fresh taste and bright colors. For a complete meal, pair your garlic butter shrimp with steamed vegetables. Broccoli or green beans go well and add nutrition. A side of crusty bread is also a great choice. It can soak up all that delicious garlic butter sauce. Trust me, you’ll want to clean your plate! For the full recipe, check here: [Full Recipe]. {{image_4}} You can change the rice for this dish. Use jasmine or basmati rice for a fragrant twist. These rice types add a nice flavor and aroma. If you want a low-carb option, try cauliflower rice. It cooks fast and absorbs the garlic butter sauce well. Feel free to add more veggies for nutrition. Spinach or bell peppers work great. They add color and flavor. If you want more taste, throw in some cooked bacon or sausage. These meats give a nice smoky touch to the dish. If you need a gluten-free meal, swap the broth. Use a gluten-free broth to keep it safe. For a dairy-free option, choose dairy-free butter. This keeps the dish creamy without the dairy. These changes make the meal fit many diets. Check out the Full Recipe for more details. Store any leftover garlic butter shrimp and rice in an airtight container. This keeps the dish fresh. It’s best to eat the leftovers within 2-3 days. This way, you can enjoy the flavors at their peak. You can reheat garlic butter shrimp and rice in the microwave or on the stovetop. If using the microwave, place your portion in a bowl and cover it. Heat in short bursts, stirring in between. For stovetop reheating, add a splash of broth to a pan. This helps keep the dish moist. Stir and heat until warm. You can freeze garlic butter shrimp and rice for later. If you want the best quality, freeze the shrimp separately or combined with the rice. Use the dish within 2-3 months for the best taste. Remember to label your containers with the date to keep track. To make Garlic Butter Shrimp and Rice spicier, add red pepper flakes. Start with half a teaspoon. You can add more based on your taste. You can also mix in chopped fresh chili peppers. Another option is to use spicy paprika instead of regular paprika. Yes, you can use frozen shrimp. Run them under cold water for a few minutes. This helps to thaw them quickly. Pat them dry well before seasoning. This step helps the shrimp cook evenly. You can serve Garlic Butter Shrimp and Rice with many sides. Steamed broccoli or green beans are great choices. A fresh salad adds a nice crunch. You could also serve some crusty bread to soak up the sauce. Look for shrimp that turn pink and opaque. They should curl into a C shape. If they remain gray or translucent, they need more time. Cooked shrimp are firm to the touch, not soft. Yes, this recipe is great for meal prep. You can cook the shrimp and rice in advance. Store them in airtight containers in the fridge. Reheat them quickly in the microwave. Adding a splash of broth keeps the rice moist. Check the full recipe for more prep tips. Garlic Butter Shrimp and Rice is a tasty dish anyone can make. You learned about the main ingredients and seasonings that give it flavor. We shared step-by-step cooking tips to help you succeed. You can use different rice or add veggies for extra nutrition. Remember to store leftovers right and reheat them well. Whether for dinner or meal prep, this dish fits any occasion. Enjoy making this simple and delicious meal!](https://spoonfulsavory.com/wp-content/uploads/2025/04/1545843b-a684-466f-9279-40d52b6971b4.webp)
If you’re craving a quick, flavorful dinner, this Garlic Butter Shrimp and Rice recipe is your answer. In just one
. To start, boil a large pot of water. Once the water is bubbling, add the rice noodles. Cook them as the package says, usually 4 to 6 minutes. After they are soft, drain them in a colander. Rinse the noodles under cold water. This stops the cooking and keeps them from sticking together. Set them aside while you work on the next steps. Now, grab a mixing bowl. Add the creamy peanut butter, soy sauce, lime juice, honey or maple syrup, sesame oil, and fresh ginger to it. Use a whisk to mix everything until it is smooth. If the dressing feels too thick, add water. Do this one tablespoon at a time until it reaches the thickness you like. If you want some heat, sprinkle in a pinch of red pepper flakes. In a large mixing bowl, combine the cooled noodles with the fresh veggies. Add the shredded carrots, thinly sliced red bell pepper, julienned cucumber, chopped green onions, finely shredded red cabbage, and chopped cilantro. Drizzle the peanut dressing over this mixture. Use clean hands or tongs to toss everything gently. Make sure all the ingredients are coated in the tasty dressing. Finally, sprinkle the roughly chopped roasted peanuts on top of the salad. Give it one last gentle toss. This helps keep the peanuts crunchy while mixing them in. If you can, let the salad chill in the fridge for 15 minutes. This helps the flavors blend well. You can serve it cold or at room temperature, depending on what you like. How to prevent noodles from sticking To keep your rice noodles from sticking, rinse them well after cooking. Use cold water to stop the cooking. This also cools them down. If you let them sit too long, they can clump. Toss with a little oil if needed. Adjusting dressing for personal taste Feel free to tweak the peanut dressing. If you like it sweeter, add more honey or maple syrup. For a tangy kick, add extra lime juice. Taste as you go to find your favorite balance. Serving ideas for visual appeal Serve the salad in a large, shallow bowl. This shows off the colorful veggies. You can also use clear glass bowls for a fun look. Layering the ingredients can create a striking effect. Garnishing tips with herbs and peanuts Garnish with fresh cilantro leaves for a bright touch. A sprinkle of whole roasted peanuts adds color and crunch. You can even add lime wedges on the side for extra zing. Suggesting marinating time for improved taste Letting the salad sit for at least 15 minutes enhances the flavors. The noodles soak up the dressing. If you have time, chill it longer for an even better taste. Adding spice for those who like heat If you love heat, add red pepper flakes to your dressing. Start with a pinch and adjust to your favorite level. You can also add sliced fresh chili peppers to the salad for extra spice. For the full recipe, check out the detailed instructions. {{image_4}} You can easily add protein to Thai Peanut Noodle Salad. Grilled chicken is a great choice. It brings flavor and heartiness. Simply slice it thin and toss it in. Tofu is another option. It soaks up the dressing well. Just pan-fry or bake it for a nice texture. If you prefer seafood, shrimp is perfect. It cooks quickly and adds a light touch. Just sauté the shrimp in a little oil until pink. Then mix it into the salad for that ocean taste. Feel free to switch up the veggies in your salad. Seasonal vegetables work best. Try adding snap peas for crunch. They give a nice pop to every bite. Broccoli or bell peppers can also add color. Leafy greens are a great addition too. Consider spinach or arugula for a fresh twist. They pair well with the peanut dressing. Just chop them up and toss them in with the other veggies. If you need a vegan option, it’s simple. Use maple syrup in place of honey. This keeps the sweetness and stays plant-based. For gluten-free, look for gluten-free soy sauce. Many brands offer this option today. You can also switch out rice noodles for gluten-free noodles. Just check the package for cooking times. Adjusting these ingredients will let everyone enjoy the meal. Store your Thai peanut noodle salad in an airtight container. Glass or plastic containers work well. It stays fresh for about three to four days in the fridge. Just make sure to keep the dressing separate until you're ready to eat. This keeps the salad crisp and tasty. If you want to refresh leftovers, add a bit of water to the salad. Toss it gently to mix. You can also drizzle on a little extra peanut dressing. Serve it cold or at room temperature. Both ways are delicious! You can freeze Thai peanut noodle salad, but it’s not the best choice. Noodles may become mushy when thawed. If you still want to freeze it, leave out the veggies and dressing. Pack only the noodles in a freezer bag. When ready, thaw in the fridge overnight, then add fresh veggies and dressing. Enjoy it with the full flavor! How long does it take to make Thai Peanut Noodle Salad? Making this salad takes about 30 minutes. You need 15 minutes to prep and cook the noodles and another 15 to mix and chill the ingredients. It’s quick and easy! Can I prepare this salad in advance? Yes, you can! This salad tastes even better if you let it chill for a bit. Make it up to a day in advance. Just keep it in the fridge until you are ready to serve. Can I use other types of noodles? Absolutely! You can swap rice noodles for any noodle you like. Try whole wheat, soba, or even zucchini noodles for a fun twist. Just cook them according to the package instructions. What can I use instead of peanut butter? If you need a substitute for peanut butter, try using almond butter or sunflower seed butter. Both can give you a nice flavor. Just make sure the swap fits your taste and needs. Is this recipe gluten-free? Yes, this recipe can be gluten-free if you use gluten-free soy sauce. Make sure to check all labels to ensure no hidden gluten sneaks in. Can I make it nut-free? Definitely! To make it nut-free, replace peanut butter with sun butter or tahini. You can also skip the peanuts on top. This way, everyone can enjoy the salad! Thai Peanut Noodle Salad is a fresh and tasty meal. You learned which ingredients to use and how to make it. The creamy peanut dressing adds great flavor. You can adjust the recipe to fit your taste or diet. Try different proteins or veggies for fun twists. Store leftovers in the fridge or even freeze some. This salad is a hit for any meal. Enjoy making it your own, and share it with friends!](https://spoonfulsavory.com/wp-content/uploads/2025/04/270ef6c9-25fb-4467-84cb-420118a18df6.webp)
Get ready to dive into a bowl of deliciousness with my Thai Peanut Noodle Salad! This dish is a vibrant
![- 4 boneless, skinless chicken breasts - 1/4 cup olive oil - 3 tablespoons fresh lime juice - 2 tablespoons chili powder - 1 tablespoon garlic powder - 1 teaspoon onion powder - 1 teaspoon smoked paprika - 1 teaspoon ground cumin - 1 teaspoon salt - 1/2 teaspoon black pepper - Zest of 1 lime - Fresh cilantro, finely chopped (for garnish) - Lime wedges (for serving) To make the best chili lime grilled chicken, you need the right ingredients. Start with four boneless, skinless chicken breasts. They cook evenly and stay juicy. Olive oil helps to keep the chicken moist and adds flavor. Fresh lime juice is key for that zesty kick. Use three tablespoons to ensure a bright taste. Chili powder gives the chicken its signature heat. I like to use two tablespoons for a nice spice level. Garlic powder and onion powder add depth and richness. You will need one tablespoon of garlic powder and one teaspoon of onion powder. Smoked paprika lends a subtle smokiness that rounds out the flavor. One teaspoon does the trick. Ground cumin adds earthiness. One teaspoon of this spice balances the other flavors. Don't forget salt and black pepper. They enhance every bite. You’ll need one teaspoon of salt and half a teaspoon of black pepper. Lastly, lime zest brings more lime flavor. Gather one lime for zesting. Garnish the finished dish with finely chopped cilantro for a fresh touch. Lime wedges on the side add a burst of brightness. - Add-ins for flavor enhancement (e.g., cayenne pepper, fresh herbs) - Suggestions for marinades alternatives If you want to change it up, add some optional ingredients. A pinch of cayenne pepper can boost the heat. Fresh herbs like oregano or thyme can add layers of flavor. You can also explore different marinades. Try a yogurt-based marinade for creaminess or a honey-lime mix for sweetness. Check out the Full Recipe for more details on those options! To make the marinade, you need to combine a few key ingredients. Gather these items: - 1/4 cup olive oil - 3 tablespoons fresh lime juice - 2 tablespoons chili powder - 1 tablespoon garlic powder - 1 teaspoon onion powder - 1 teaspoon smoked paprika - 1 teaspoon ground cumin - 1 teaspoon salt - 1/2 teaspoon black pepper - Zest of 1 lime In a medium-sized bowl, whisk all these ingredients together. Mix well until the marinade looks smooth and blended. If you want a stronger flavor, let it sit for a few minutes. This step helps the spices mix better. After you prepare the marinade, it’s time to marinate the chicken. Place the 4 boneless, skinless chicken breasts in a shallow dish or a resealable plastic bag. Pour the marinade over the chicken, making sure all pieces are coated. Seal the bag or cover the dish with plastic wrap. For the best flavor, let the chicken marinate for at least 1 hour. If you have time, marinate it for up to 4 hours. This gives the chicken more time to soak up those tasty flavors. Now, let’s grill the chicken! First, preheat your grill to medium-high heat, around 450°F (230°C). If you're using a grill pan, heat it on the stovetop until it’s hot. When the grill is ready, take the chicken out of the marinade. Let any extra marinade drip off. Place the chicken on the grill. Cook each side for about 6-7 minutes. Check the internal temperature with a meat thermometer. It should reach 165°F (75°C) to be sure it’s safe to eat. Once the chicken is done, remove it from the grill and set it on a plate. Let it rest for about 5 minutes. Resting is important because it helps the juices stay inside, making the chicken juicy and tender. After resting, you can slice the grilled chicken into strips. Garnish it with finely chopped fresh cilantro and serve with lime wedges. This adds a nice touch of zest to your meal. For a great presentation, pair it with colorful grilled veggies or a fresh salad. Enjoy your delicious Chili Lime Grilled Chicken! For the full recipe, refer to the recipe section above. To get perfect grill marks, follow these steps: - Preheat your grill to medium-high heat. - Place the chicken on the grill at a 45-degree angle. - Don't move the chicken for the first few minutes. - After a few minutes, rotate the chicken to create crosshatch marks. Common grilling mistakes include: - Not preheating the grill. - Flipping the chicken too soon. - Using too much marinade; excess can cause flare-ups. If you have dietary preferences, try these swaps: - Use skinless turkey breasts instead of chicken. - Swap the olive oil for avocado oil for a different flavor. - For a low-sodium version, reduce or skip the salt. You can adjust the spice level by: - Adding more chili powder for heat. - Using smoked paprika for a smoky flavor. - Adding a pinch of cayenne for extra kick. To keep your chicken juicy, use these methods: - Reheat in the oven at 350°F for about 10-15 minutes. - Cover the chicken with foil to trap moisture. When using a microwave: - Set it to medium power. - Heat the chicken in short bursts of 30 seconds. - Check for warmth to avoid drying it out. These tips help you enjoy the best chili lime grilled chicken even after reheating! For a detailed guide, refer to the Full Recipe. {{image_4}} You can change the taste of your chili lime grilled chicken by adding new spices or herbs. For a fresh twist, try using fresh cilantro, thyme, or oregano. Each herb brings its own taste. You can also add some cayenne pepper for a spicy kick. Many cultures have their own take on citrus flavors. For a Mexican-inspired version, use orange juice and zest instead of lime. This gives the chicken a sweet and tangy profile. You could also add fresh jalapeños for extra heat. Don’t worry if you don’t have a grill! You can bake the chicken in the oven. Preheat your oven to 400°F (200°C). Place the marinated chicken on a baking sheet. Bake for about 20-25 minutes or until the internal temperature reaches 165°F (75°C). If you prefer using a skillet, heat a bit of oil in a pan over medium heat. Add the marinated chicken and cook for about 6-7 minutes on each side. This method gives you nice sear marks too. Chili lime grilled chicken pairs well with many sides. You can serve it with a light salad, rice, or grilled corn. These sides balance the flavors nicely. For special occasions, slice the chicken into strips and arrange them on a platter. Add lime wedges and a sprinkle of fresh cilantro for a beautiful touch. You can also serve it with colorful grilled vegetables. This not only looks good but also adds more flavor. For the complete cooking details, check out the Full Recipe. To keep your chili lime grilled chicken fresh, store it in airtight containers. Cover it well to avoid drying out. Use glass or plastic containers with tight-fitting lids. This helps keep the chicken moist. You can freeze grilled chicken for later. Wrap it tightly in plastic wrap or foil. Then, place it in a freezer bag. This keeps out air and prevents freezer burn. Chicken can stay fresh in the freezer for up to three months. When you want to use it, thaw it in the fridge overnight. To reheat grilled chicken, use an oven for the best results. Preheat the oven to 350°F (175°C). Place the chicken on a baking tray and cover it with foil to keep it moist. Heat for about 15-20 minutes until warm. You can also use a microwave, but be careful not to overcook it. Enjoy your chicken while keeping its great flavor and texture! For the full recipe, check out [Full Recipe]. You can marinate chicken for at least 1 hour. For the best taste, marinate for up to 4 hours. This time lets the flavors soak in well. If you marinate longer than 4 hours, the chicken may get mushy. Always keep the chicken in the fridge while it marinates. Chili lime grilled chicken pairs well with many sides. Here are some great options: - Grilled corn on the cob - Fresh avocado salad - Cilantro lime rice - Black bean and corn salsa - Chilled beverages like limeade or iced tea These sides will boost the fresh flavors of your meal. Grilling chicken from frozen is not the best choice. It can cook unevenly and take longer to grill. For safe grilling, always thaw chicken first. To thaw, place the chicken in the fridge overnight. If you're short on time, you can use the microwave. Just be careful to cook it right after thawing. The best way to check if chicken is done is by using a meat thermometer. Insert it into the thickest part of the chicken. It should read 165°F (75°C). This temperature ensures the chicken is safe to eat. If you don’t have a thermometer, check that the juices run clear and the meat is no longer pink. In this post, we covered the essential ingredients, preparation, and grilling tips for chili lime grilled chicken. We discussed marinating times, cooking methods, and serving ideas to enhance your dish. You now have the tools to create a flavorful meal. Remember, grilling is as much about safety as it is about taste. By following these steps, you can enjoy juicy, delicious chicken every time. Happy grilling!](https://spoonfulsavory.com/wp-content/uploads/2025/04/e9996cd7-ed44-4edf-8c1e-1d2b3d8d0fcd.webp)
Looking for a quick, zesty dinner idea? Chili Lime Grilled Chicken is your answer! This easy recipe packs a flavor
